#Binary Space Partitioning Window Manager
Explore tagged Tumblr posts
Visit Tumblr Blog
Explore Tumblr blogs with no restrictions, modern design and the best experience.
Last Seen Tumblr Blogs


Fun Fact
12.7% of mobile users access Tumblr.
Text

cli tools for xcode is required to install yabai with homebrew to enable window translucency while writing code or browsing other windows at the same time. I found like 5 different apps for different os versions that do the same thing and think it should just be built in.
0 notes
Text
Price: [price_with_discount] (as of [price_update_date] - Details) [ad_1] Plug-and-Play High-Speed Connectivity Plug-and-play functionality on your PC without the need of an external power supply.Slim design, fit in your palm. The sleek and protective metal finish is available in Black and Blue.High-speed USB 3.0 and 2.0 connectivity SuperSpeed USB that can transfer data at up to 5 Gbit/s (625 MB/s), which is about ten times as fast as the USB 2.0 standard.Multifunction usage, it can be used at extra storage device for computer and PS4/Xbox One.( need to format it on PS4/Xbox one).Usage advice Use it with your ps4 and you can save game data and play movies, music and much more straight from the hard drive ( you can not install PS4 games on to it as do not allow it..) The perfect extra storage solution for your Xbox one just plug it in and you have instant extra storage and can even install games directly to the external hard drive. Please note some games have restrictions on this so check the game first. If you connected a USB drive and Windows doesn’t show up in the file manager, you should first check the Disk Management window. To open Disk Management on Windows 8 or 10, right-click the Start button and select “Disk Management”. On Windows 7, press Windows+R to open the Run dialog, type diskmgmt.msc into it, and press Enter. To create a new partition on your drive, do the following: 1.Right-click on the Unallocated space, and go to New Simple Volume 2. Now set the size of the new volume, and you’re good to go! Note: if you need it for PS3 and smart TV, this external hard drive has to be reformatted in Fat32 file. capacity on the product will be different from the windows output: Capacity on product (Decimal)Windows Output (Binary) 250GB 238GB 320GB 298GB 500 GB 465 GB 1 TB (1,000 GB) 931 GB 2 TB (2,000 GB) 1,862 GB 3 TB (3,000 GB) 2,794 GB ✔ Compatible With: Microsoft Windows 10/ Windows 8.1/ Windows 8/ Windows 7/ Mac OS (★10.6.5 and above)/ Linux/ Xbox/ PS4 - A RELIABLE GAME DRIVE ✔ Improve PC Performance: Powered by USB 3.0 technology, this USB hard drive is much faster than - but still compatible with - USB 2.0 backup drive, allowing for super fast transfer speed at up to 5 Gbit/s ✔ Plug and Play: This external drive is ready to use without external power supply or software installation needed. Ideal extra storage for your computer and game console ✔ What's Included: Portable external hard drive, 19-inch(48.26cm) USB 3.0 hard drive cable, user's manual, 3-Year manufacturer warranty with free technical support service [ad_2]
0 notes
Text
Windows grid window manager
#Windows grid window manager install#
awesomeĪwesome is a free and open-source next-generation tiling manager for X built to be fast and extensible and it is primarily aimed at developers, power users, and anyone who would like to control their graphical environment. Read Also: 10 Best File and Disk Encryption Tools for Linux 4.
#Windows grid window manager install#
The package herbstluftwm is provided by the distribution you are using, just use the package manager to install it as shown. herbstluftwm – Tiling Window Manager for Linux Learn more from our article on herbstluftwm here. workspaces or virtual desktops), a configuration script which runs at startup, exactly one tag per monitor, etc. Herbstluftwm’s main features include tags (i.e. Basically, it works using a layout based on splitting frames into sub-frames which can be further split and filled with windows. Herbstluftwm is a free and open-source configurable manual tiling window manager for x11 using Glib and Xlib. The package bspwm is provided by the distribution you are using, just use the package manager to install it as shown. It is based on binary space partitioning which represents windows as the leaves of a complete binary tree and it handles key binding with a separate utility, sxhkd, which allows for smoother performance and support for other input devices.īspwm’s features include support for multiple windows, partial support for EWMH, automatic mode for automatically setting the position of app tiles, and it is configured and controlled through messages, among others. $ sudo yum install i3 īspwm is a free, lightweight, and open-source Linux tiling manager known for adhering to the Linux philosophy by concentrating on doing one thing and getting it done properly. The package i3 is provided by the distribution you are using, just use the package manager to install it as shown.
0 notes
Text
Download WinHex crack (serial key) latest version L5T№

💾 ►►► DOWNLOAD FILE 🔥🔥🔥 With the help of this powerful application, you can use it as an advanced hex editor. It is the most amazing software for computer forensics and data processing. And also provide you with the best data recovery. However, it is a fantastic hexadecimal editor. Furthermore, it can be used easily. WinHex License Code has a very user-friendly interface. Therefore, thousands of people are using this application. And it is the most suggestive program. And data processing as well as security forensics. Furthermore, it inspects deleted data and corrupts hard drive data. Also, checks file systems, and many more. Moreover, the WinHex Crack disk editor features to support all types of digital data. WinHex Key supports storage devices for example pen drives, Memory cards, compact disks, etc. WinHex Torrent is a versatile editor that supports so many languages. Furthermore, By using WinHex you can manage your files. Moreover, you can create structure-based data. If you are searching for WinHex crack then you are on the right platform. Here, you can download the full version of this superb program. WinHex is a universal hexadecimal editor, particularly helpful in the realm of computer forensics, data recovery, low-level data processing, and IT security. WinHex It is capable of interpreting file types and displaying their contents structurally in a tree view. It can compare files and generate different reports. And it can perform other tasks of particular interest to forensic examiners or law enforcement personnel. Winhex Crack Free Download is an indispensable tool for IT professionals in a wide range of fields ranging from computer forensics to systems administration. WinHex is an advanced disk editor, computer forensics solution, hex editor, binary editor, memory editor, and RAM editor. Winhex Full Version Crack Download Free supplies all basic collections of tools that require normal daily jobs and also the emergency situation for doing various relevant tasks from non-invasive info processing to high-level IT security. This program includes various recovery methods for recovering data and fixing corrupted files according to your wisdom and capability to utilize it. The program may immediately edit the contents of this RAM and another digital memory right. You will find over 20 distinct data types from the application, you may control the partition table as well as the boot industry hard disk. With a simple interface and intuitive user controls, this app performs a variety of tasks. WinHex Crack With License Code Full Download: It supports all sorts of electronic information storage devices such as Floppy discs, memory cards, smart networking, and far more. Easily retrieve your information. Additionally, it may assist you in organizing your own data. This program also includes distinct tools. These instructions are valid for both bit and bit versions. First of all, Click on the green Download button placed on the first part of this page. Scroll the opened page down till you find the Download Links box. This box contains all the available official download links for WinHex. Now, choose your desired setup installer — online, offline, portable …etc and click on its link. Final Step: the download will either start instantly, or you will be directed to the official publisher download page. WinHex removes all sorts of junk files such as obsolete temporary files, cache, cookies, browser history, etc from your computer which may be cluttering up your hard drive space. This not only frees up space on your hard drive but also helps in preventing system crashes and other errors that arise due to over-filled hard drives. The Windows Registry is a database that stores information about how your system operates; it is an essential part of your operating system that holds settings. A built-in scripting language lets you automate workflows by writing scripts. Also supports scripting from the command line. Also supports calling scripts from the command line. Reads partitioning information — even if partitions are formatted or damaged. Data recovery functions allow you to search for lost data files and file fragments by file type; you can also recover entire deleted partitions. Recovering accidentally deleted files or data from corrupt storage media Undeleting partitions Examining hard disks with bad sectors Browsing and analyzing your RAM, including physical memory and virtual memory on disk Searching for text, data types, and Boolean combinations thereof anywhere in a file or disk Editing data structures using templates e. Try WinHex! It supports the recovery of data from hard drives and removable storage media. It enables you to recover lost data from damaged or reformatted NTFS hard drives. It integrates with over third-party tools. System Requirements: Windows 10, Windows 8. Download the from the website Now you may need to unzip and install the file and double-click on the file. Use our Keygen to activate the software. Wait until activation of the software. WinHex License Key:.
1 note
·
View note
Text
Download WinHex crack (license key) latest version EIM+

💾 ►►► DOWNLOAD FILE 🔥🔥🔥 Also for computer forensics specialists, since they need to work on a copy when searching for evidence on the object disk. You can clone directly, or from an image file. Tools Analyze File Wiping confidential files or disks To securely erase a file, use File Manager Delete Irreversibly. For disk wiping, open the disk with the disk editor and use Edit Fill Disk Sectors. WinHex works in accordance with the standard outlined in DoD Also see X-Ways Security. Wiping unused space and slack space File slack can be found in the unused end of the last cluster allocated to a file, which usually contains traces of previously existing files. Slack space - like everything else - is processed by WinHex very fast. You may even tailor the character translation table in WinHex ebcdic. Download a tutorial. You may be surprised to find text deleted long ago in your. Maybe text that you really do not wish to be seen by the person you are going to pass the. Discover what various software programs save in their files. Study unknown file formats and learn how they work. Investigate e. The possibilities are practically unlimited. Here is another important one: Finding interesting values e. Upgrading MP3 jukeboxes and Microsoft Xbox with larger hard drive To upgrade, the new hard disk must be prepared first. This is where you need WinHex. You can also change the name of your Xbox. Manipulating text It is not convenient, but possible to translate practically any software into another language by editing text in the executable files, e. Or you would like to edit text in files of a certain binary type that the native application does not let you modify. If your local laws and the license permit that, edit the compiler's executable file such that it works without problems e. Viewing and manipulating files that usually cannot be edited because they are protected by Windows e. Tools Disk Editor Viewing, editing, and repairing system areas such as the Master Boot Record with its partition table and boot sectors. Tools Disk Editor Access button Hiding data or discovering hidden data WinHex specifically supports access to surplus sectors that are not in use by the operating system because they do not add to an entire cluster or cylinder. You may freely copy from a disk and write the clipboard contents to a disk, without regard to sector boundaries! Unlimited Undo When editing, reverse any of your steps. Only restricted by available disk space. Edit Undo Jump back and forward WinHex keeps a history of your offset jumps, and lets you go back and forward in the chain, like an Internet browser does. The ability to execute scripts other than the supplied sample scripts is limited to owners of a professional license. Scripts can be run from the Start Center or the command line. While a script is executed, you may press Esc to abort. With its wider range of application, scripting supersedes the Routine feature known from previous WinHex versions. Find out more about scripts in the program help. The WinHex API provides a convenient interface for random access to files and disks at the sector level. The provided functions are similar to the scripting commands. Details Data recovery for erroneously deleted files or generally after an experienced loss of data. Can be done manually see undeleting files or automatically. WinHex will do the rest. Via the Access button menu, a recovery mechanism is available for FAT drives which re-creates entire nested directory structures details here. In particular owners of digital cameras quite often encounter problems with their media. WinHex is likely to help with this automated function that makes good use of the existence of file headers characteristic signatures at the beginning of a file. The command Tools Specialist Tools Copy exactly copies the file in its current size, no entire sectors or clusters. Not one byte beyond the end of the file will be copied to the destination disk. Minimize your IT risks. Requires a specialist license. Tools Calculate Hash. Generating pseudo-random data for various e. Edit Fill File and many more specific tasks View:.
1 note
·
View note
Text
Virtualbox 6 32 Bit

On the Processor tab, you can configure settings for the CPU used by the virtual machine. Processor (s): Sets the number of virtual CPU cores the guest OSes can see. Oracle VM VirtualBox supports symmetrical multiprocessing (SMP) and can present up to 32 virtual CPU cores to each virtual machine. For 64-bit Windows guests, ensure that the VM uses the Intel networking device because there is no 64-bit driver support for the AMD PCNet card. See Section 6.1, “Virtual Networking Hardware”. If you use the Create VM wizard of the VirtualBox Manager, Oracle VM VirtualBox automatically uses the correct settings for each selected 64-bit OS.
Oracle VirtualBox is a cross-platform virtualization application. It installs on your existing Intel or AMD-based computers, whether they are running Windows, Mac, Linux or Solaris operating systems. VirtualBox can create and run a 'guest' operating system (virtual machine) in a window of the host operating system. The virtual machine provides a self-contained environment in which to experiment with new software without risking damaging changes to the host operating system.
We will give an instruction with step-by-step screenshots to show how to install VirtualBox with an example of installing Ubuntu OS as a guest machine. We also explain how to share files between the host and guest operating systems.
Downloads
Note the instruction here is based on the latest version of the VirtualBox. If you have already installed an earlier version of VirtualBox, your experience may be different. It is recommended to use the latest version of VirtualBox to avoid issues. The VirtualBox forum is a good place to find a solution if you see any problems.
Go to VirtualBox website here to download the binary for your current operating system. Since our host machine is running on Windows, I'll choose 'x86/amd64' from Windows hosts. When download is finished, run the executable file. Continue with the installation of VirtualBox with the defaults. This will open VirtualBox at the end of the installation.
Create Virtual Machine
Click 'New' button to open a dialog.
Type a name for the new virtual machine. Since I am planning to install Ubuntu 14.04, I'll enter 'ubuntu1404'. Note that VirtualBox automatically changes 'Type' to Linux and 'Version' to 'Ubuntu (64 bit)'. These two options are exactly what we need.
The memory size depends on your host machine memory size. In my case, I have 12GB physical RAM. I like to allocate as much as possible for Ubuntu but leave some for my Windows host machine. I pick 8192 MB for my Ubuntu. Note that VirtualBox will create a swap partition with the same amount space as base memeory you have entered here. So later when you are selecting the size of the virtual hard drive, make sure it is large enough since the hard drive will be splitted into root (/)and swap partitions. The root partition contains by default all your system files, program settings and documents.
Accept the default 'Create a virtual hard drive now' and click 'Create' button.
Continue to accept the default 'VDI' drive file type and click 'Next' button. Rust for mac.
Change the storage type from the default 'Dynamically allocated' to 'Fixed size' to increase performance.
For the virtual hard drive space, the default value is 8GB which is too little for RNA-Seq analysis. I'll pick 100GB since I have plenty of space in my hard disk. You want to choose a good size for your RNA-Seq analysis. If you realize the drive space is not large enough, you'll need to go over these steps again to create another virtual machine.
Click 'Create' button and VirtualBox will generate Ubuntu virtual machine.
Now the virtual machine is created. We are ready to install Ubuntu in this virtual machine. Select your new virtual machine and click 'Settings' button. Click on 'Storage' category and then 'Empty' under Controller:IDE. Click 'CD/DVD' icon on right hand side and select the ubuntu ISO file to mount.
Note that if you have not downloaded 64-bit Ubuntu ISO file, you can check out this page for more information. When downloading Ubuntu ISO file, make sure to selecte 64-bit version. Also make sure the VT-x/Virtualization Technology has been enabled in your computer's BIOS/Basic Input Output System.
Since Tophat program can take an advantage of multiple processors/threads, it is a good idea to specify a large number of processors in virtual machine (default value is 1). You can change this number by clicking on 'System' category. In this case, I change the number of CPUs to 4 since 4 is the largest value shown on the green bar in my case. Now you can click 'OK' button to continue.
VirtualBox may pop up a message about 'Auto capture keyboard' option. Read the message there and check 'Do not show this message again' option before clicking OK.
Install Ubuntu
Back to Oracle VM VirtualBox Manager, click on the new Ubuntu virtual machine and hit 'Start' button. Now you shall see a 'Welcome' screen. Click 'Install Ubuntu' button. Note that the installation process may differ a little bit from version to version. The screenshots here are based on Ubuntu 14.04.1.
Click 'Continue' button.
Make sure 'Erase disk and install Ubuntu' option is selected and click 'Install Now' button.
Ubuntu will ask you a few questions. If the default is good, click 'Continue' button.
In 'Who are you?' dialog, enter your preferred name, username and password. Note that this user will have root/sudo privilege. Click 'Continue' button.
The installation will continue until it is finished.
After installation is complete, click 'Restart Now' button. When you see a screen with a black background saying 'Please remove installation media and close the tray (if any) then press ENTER:', just follow it.
Enter the password you have chosen and press 'Enter'.
The Ubuntu Desktop OS is ready. You may find the desktop screen is too small. Don't worry. You can solve this easily with 'VirtualBox Guest Additions'.
More About VirtualBox
Guest Additions
After the Ubuntu guest machine is installed, you will find the Ubuntu OS screen size is not extendable and you are not able to share folders between the host machine and Ubuntu.
Guest Additions software provide additional capability to a guest virtual machine, including mouse pointer integration, better video support, share folders, share clipboard, et al.
Before we proceed to install Guest Additions, make sure the current user has sudo/root privilege. If the current user does not have sudo/root privilege or it is not sure, run the following terminal command from an account (such as the user created when Ubuntu was first created; see the screenshot of 'Who are you?' above) with root privileges to enable the root privilege for the current user where USERNAME should be replaced by the current user's name.
To install Guest Additions, click Devices > Insert Guest Additions CD images…
Click 'Run' button (next to 'Cancel' button) to start the installation. Note that the version of VBOXADDITIONS should be matched with the one of VirtualBox you have installed.
Installing Guest Additions requires root privilege. Enter user's password (assume the current user has sudo privilege).
When the installation is finished, press Return key to close the terminal window.
Now prepare to restart the system to enable the change. Click 'Shutdown' on the menu and then the 'Restart' button.
After rebooting Ubuntu, you will see the desktop resolution is much better.
Share Folders
Before you can enable shared folders on the host machine, make sure you have installed VirtualBox Guest Additions software on the guest machine.
When Ubuntu guest machine is on, click on Devices > Shared folders settings…
Free planner for mac. Select Machine Folders and hit the add button (plus sign).
Browse to the folder you wish to access from the guest machine. Check Auto-mount and Make Permanent options and click OK button.
Click OK button once more.
Now type 'terminal' in Dash to open a Terminal.
Type the following line in the Terminal to add a user to 'vboxsf' group. This step is necessary in order to use the VB's 'Shared Folder' feature.Replace 'brb' with your account name in Ubuntu.When you are done, restart the Ubuntu guest machine and go to /media/ directory. From Nautilus (file manager in Ubuntu), click Computer > File System > Media folder and inside it you will see a folder beginning with sf_ (the folder name is sf_Downloads in our example). Now you can transfer files between the Ubuntu guest machine and the Windows host machine in Nautilus.
Although Shared Folder system in VirtualBox is a nice feature, using VirtualBox shared folder directly for fastq data, annotation or output directorycan significantly reduce the performance compared to a native (Ubuntu) system or VirtualBox native system.
BRB-SeqTools
After Ubuntu has been successfully installed on VirtualBox, users can be go back to download and use BRB-SeqTools program.
Run Android on your PC
VirtualBox How To
The following are instructions on how to run Android-x86 inside VirtualBox. Note: For optimal performance, make sure you have enabled either VT-x or AMD-V in your host operating system's BIOS. Android-x86 versions tested against Virtualbox versions.
Date TestedVirtualboxHost OSAndroid-x86Result??2.2.4Windows XP??Good??3.0.2Fedora 11??GoodNov. 2 20175.2.0Windows 106.0-r3 32/64 bitGood
Downloading

Download an ISO of Android-x86 from here.
Caution

If you are using Android-x86 for debugging purposes, some binaries (gdb for example) are built for 32-bit architectures and will not support debugging 64-bit binaries such as the Android app host. Download a 32-bit distribution instead.
Create a new VM
If you have not already created a VirtualBox virtual machine for Android-x86 yet, do so as follows:
Click the 'New' button, and name your new virtual machine however you like. Set Type to Linux, and Version to Linux 2.6 / 3.x / 4.x. Note that you should choose the appropriate bit type for the version of Android-x86 that you downloaded.
Specify how much RAM will be allocated to your virtual machine when you run it. Android doesn't specify a bare-minimum requirement for memory, just keep in mind what apps you plan on running. 2GB (2048MB) is a good place to start, and you can change this later if you need to.
Create a new Hard disk image which will act as your machine's storage. The recommended starting size of 8GB is enough. Click through the rest of the options for creating your Hard disk.
Your virtual machine has now been created. It still needs to be initially installed at this point.
Settings
Tested on VirtualBox 64-bit for Windows, version 5.2.0. Android-x86 version 6.0-r3, both 32-bit and 64-bit. Select your machine, then click the Settings button and refer to the below recommended configuration to make sure your settings match.
(System)Recommended: Processor(s) should be set above 1 if you have more than one virtual processor in your host system. Failure to do so means every single app (like Google Chrome) might crush if you try to use it.
(Display):
Optional: Video Memory may be increased beyond the minimum selected automatically. The affects of this are unknown.
Mandatory: Unless guest additions are installed(1), change the default VMSVGA to VBoxVGA.
Optional: Enable 3D Acceleration may be checked. The Linux Guest Additions must (VirtualBox v6.1+) / may (VirtualBox v6.0 and below) need to be installed(2)(1) to get any benefit from this.
Failure to do so means you won't even be able to launch Android-X86 in the first place.(3)
(Storage) Find the first 'Empty' item (this should have an icon of a CD). In the Attributes, click on the CD icon with a small down arrow, and pick 'Choose Optical Virtual Disk File..'. Specify the Android-x86 ISO that you downloaded.
(Audio) Intel HD Audio seems to be natively supported in Android-x86.
(Network) By default, your installation of Android-x86 will be able to automatically connect to the internet. If not, you can try to enable WiFi in Settings/Network & Internet, and connect to showing VirtWifi. If you do not want to connect to the internet in VirtualBox, uncheck Enable Network Adapter under the Adapter 1 tab.
Install
Click the green Start arrow to power-on your virtual machine. You'll be presented with a list of options. Use the arrow keys to pick which one you want, then press Enter once the one you want is selected.
If you don't want to install Android-x86 yet and just want to test it, pick one of the Live CD options (except for Debug mode).
Pick the Installation option if you want your system to be installed to the virtual hard drive.
If you want to use higher resolution, you can edit the boot option by pressing TAB, change vga=788 (800x600) to vga=791 (1024x768) or vga=794 (1280x1024), and press Enter. You can also use vga=ask to see all available modes. But please note Android will only work under 16-bit mode.
Partition
When you are prompted to Choose a partition:
If you upgrade Android-x86 from a previous version, just select the existing partition. Agree to overwrite it when prompted.
If this is a new VM, choose to Create/Modify partitions. Use Bootable but not GPT! This will cause the GRUB installation to fail later.
You may partition your disk however you see fit. If you just want a simple installation, create one partition taking up the entire disk and format it as ext4.
Continue through the installation. You should install GRUB when it prompts you to. You may also leave /system as read and write when prompted. Once the installation is complete, force close/shut down the virtual machine and remove the ISO from the virtual CD drive. Finaly, start Android-x86. If it's a new machine, once loaded you can perform the Android setup to begin using your machine.
Advanced
Custom partitions, SDCard
When booting Android-x86, you may specify which partitions represent the data and sdcard. On the boot menu, select an entry you would like to boot from, press TAB, then add the following as it suits your needs: DATA=sda1 SDCARD=sda2 Press Enter to boot. These options specify user data (your setting, your uploaded applications, ..) go into /dev/sda1, and data saved in sdcard go into /dev/sda2. If you build the ISO from source, you can add these options to bootable/newinstaller/boot/isolinux/isolinux.cfg. Here is a note from David when using fdisk:
Create a new virtual machine with a hard disk.
Launch the Live ISO in Debug mode (I used android-x86-2.2-generic.iso) to get the commend prompt.
'fdisk /dev/sda', then type:
'n' (new partition)
'p' (primary partition)
'1' (1st partition)
'1' (first cylinder)
'xx' (choose the last cylinder, leaving room for a 2nd partition)
'w' (write the partition)
Repeat #3, but call it partition 2, and use the remaining cylinders.
'mdev -s'
'mke2fs -j -L DATA /dev/sda1'
'mke2fs -j -L SDCARD /dev/sda2'
Reboot ('reboot -f')
At the boot menu, choose VESA, then hit TAB and type so that the end of the line reads: 'DATA=sda1 SDCARD=sda2'. (Only need for the generic target images, for VM target images, this is not needed)
After booting (and of course disabling mouse integration via the machine menu), the SD card is read as unformatted, but you can format it by going to Settings > SD card & phone settings > Format SD Card, then Mount SD card.
The SD card should now work!
Note: for the step 7, if you want to format to vfat only, then you can do : Also remember the partition type has to be fat32 (b or c). By using vfat, the step 10 is not needed. DevTools application has a MediaScanner which (re)indexes your SD card for cases where you manually copied media over. This ensures that you see new images and/or music in the apps without having to reboot. If you downloaded it from within android, the application asks the relevant service to index new files.
Playing music
This section describes two ways to upload music files into Android running on a vbox so you can play them by the Music app. Of course, you can save the files to the virtual disk mounted at /sdcard, as described above.
Upload files by adb
Adb is Android Debug Bridge, a tool to debug Android system. If you compile from source, it is located in out/host/linux-x86/bin/adb. Otherwise you can get it from Android SDK. Suppose the network of your vbox is OK, you can upload a file from your host by
ADBHOST=<ip of vbox> out/host/linux-x86/bin/adb push <a music file> /sdcard
You need to know the ip of your vbox. You can get it by Alt-F1 and netcfg. You may also need to reboot Android to see the uploaded files. Of course in this way you have to mount /sdcard to a virtual disk partion.
Download Virtualbox Versi 6 32 Bit
For complex network settings of the VirtualBox VM, you should refer to Debug How To on how to connect adb to the VM.
Upload files by wget
You can also upload files by wget in the debug mode. In the debug mode shell, before entering Android,
# cd /android/sdcard # netcfg eth0 dhcp # wget <url of a music file>
Then type exit to enter Android.
Virtualbox 6 32 Bit Download
Debug with adb
This section describes the way to debug Android with adb via network.
If we want to debug with adb via network, we should ensure the ip of vbox can be accessed by host machine. So we should change the Network Adapter type of vbox to Bridged Adapter. After starting the android-x86, we should follow the above Settings/(Network) section to ensure the network of android-x86 is enabled, and enable USB debugging in Settings/System/Developer Options. Then we can get the device ip from Settings/System/About tablet/IP address. For example, if we see the ip address is 192.168.0.116, then we can use following command to connect android-x86 in vbox from host machine.
Then you can use adb command to debug android-x86 such as get log, and dump system information.
References
^ ab VirtualBox currently has no Guest Additions for Android.
^ VirtualBox v6.1.0 states: 'old style 3D support (with VBoxVGA) has been completely removed'
^ VirtualBox states: 'Note that you must install the Guest Additions on the guest VM to specify the VBoxSVGA or VMSVGA graphics controller.'
0 notes
Text
How To Download Windows On Mac With Bootcamp

How To Download Windows On Mac With Bootcamp Computer
Install Windows 10 Bootcamp Mac
How To Download Windows 10 On Mac Using Bootcamp
To install Windows 10 Drivers on Mac OS, First, download the Bootcamp software from the link above. Now, wait for some minutes, then the Windows will be installed on your Mac computer. Copy the Bootcamp software that you have to download on the first step of this article. Boot Camp Assistant is a multi boot utility integrated with Apple.Mac OS that assists users in installing Microsoft Windows operating systems on Intel-based Macintosh computers. However, there are many procedure out there. But Boot Camp is one of the best, trusted and reliable utility.

How To Download Windows On Mac With Bootcamp Computer
Install Windows on your newer Mac using Boot Camp. Newer Mac computers use a streamlined method to install Windows on your Mac. To find out whether your Mac uses this method, see the Apple Support article Install Windows 10 on your Mac with Boot Camp Assistant.If your Mac is an older model, follow the instructions in Install Windows on your older Mac using Boot Camp instead. After some while, when you want to remove Windows from Mac for some reasons, reboot into macOS and open the Boot Camp Assitant. On there, simply click on Restore. It will delete everything inside Windows specifically everything inside the partition and freeing the space for the Mac so make sure you take a entire backup of the drive beforehand.
Mac os x 10 4 full. download free download - Apple Mac OS X Tiger 10.4.11 Combo Update, Mac OS X Update, R for Mac OS X, and many more programs. Mac os x server 10.4 tiger download. Mac OS X Server 10.4 Tiger - Unlimited Clients OLD VERSION Mac OS X Server v10.4 integrates popular open source software technologies with innovative management tools, for a comprehensive all-in-one solution that's ideal for any corporate and educational institution. Mac OS X Tiger Server is a server-focussed release of Tiger with extra tools and applications added to allow it to provide services to Mac clients. This is a universal binary release of Tiger Server so will work with compatible Macs using both PowerPC and Intel processors. Serial: xsvr-104-000-r-6d7-rj4-psn-bpy-sfx-2fn-2. Download Mac OS X.
How to start up in macOS from Windows
From the notification area on the right side of the Windows taskbar, click to show hidden icons.
Click the Boot Camp icon .
From the menu shown, choose Restart in macOS. If you haven't installed the latest Boot Camp updates, you might get the message ”Could not locate the OS X boot volume.'
Or use Startup Manager as your Mac starts up:
You can also customize the parameters including channel, bit rate, sample rate if you like. Step 2Adjust output profileClick the menu bar of Mac and choose Preferences option. Then you'll be able to select the output format as MP3, AAC, WAV, M4A, M4B or FLAC. Once done, log into Spotify account and find the Spotify track or playlist you want to download to Mac. How to download songs from spotify onto mac. Then simply drag the title to TunesKit program.
Download vpn for windows pc. Copy-trading services imply additional risks to your investment due to nature of such products. If the risks involved seem unclear to you, please apply to an outside specialist for an independent advice. RoboForex Ltd does not target EU/EEA clients.We do not provide financial services to residents of the USA, Canada, Japan and Australia.At RoboForex, we understand that traders should focus all their efforts on trading and not worry about the appropriate level of safety of their capital.
For: Premium Import your local files to the Spotify desktop app (see 'Desktop' instructions above). Add the files to a new playlist in the desktop app: Click New Playlist in the menu on the left.; Give your playlist a name and click CREATE.; Drag and drop your local files into this playlist. Spotify download mac os. Spotify is a digital music service that gives you access to millions of songs. Spotify is all the music you’ll ever need. Skip to content. Spotify Click the install file to finish up. If your download didn't start, try again. Bring your music to mobile and tablet, too. Listening on your phone or tablet is free, easy, and fun.

Restart your Mac from the Start menu in Windows.
Press and hold the Option (or Alt) ⌥ key as your Mac begins to restart.
Select your Mac startup volume (Macintosh HD) in the Startup Manager window, then press Return or click the up arrow:
How to start up in Windows from macOS
Install Windows 10 Bootcamp Mac
Use Startup Manager to choose your Windows (Boot Camp) volume during startup.
Or select your Boot Camp volume in Startup Disk preferences, then restart.
Learn more
If you're having difficulty using VoiceOver or another screen reader to complete these steps, please contact Apple Support.
Learn how to install Windows 10 on your Mac.
How To Download Windows 10 On Mac Using Bootcamp
Installed Windows 10 via bootcamp this morning on my early 2013 15' rmbp. Followed an instructional video on YouTube step-by-step and everything went fine until Windows itself started up. Brought me to the W10 homepage but unlike on the video I was watching, a pop up prompt from Bootcamp never appeared. I am now stuck in Windows 10 and cannot locate a Bootcamp icon anywhere and there is no option to turn on wifi in Windows 10 so I am also stuck without an Internet connection either seeing as I have no Ethernet port on my MacBook. Any help is greatly appreciated.
MacBook Pro with Retina display
I guess sleep mode kills apps and functions?How can I turn off the screen and keep download active? So I just switched to iPhone (7) after using Android forever.One things I am struggling with:I like to set my phone to download my next-day Spotify offline listening content (might take an hour due to slow wifi where I live).On my old phone, I could switch off the screen and download would continue.But with the iPhone, the only way to switch off the screen is to enter sleep mode, either manual switch off or timed. And when it does go into sleep, download stops too. Download stops from mac going to sleep mode.
Posted on
0 notes
Text
Xcode 5 For Mac

On your Mac, choose Apple menu System Preferences, then click Network. In the list on the left, select the network connection service you want to use (such as Wi-Fi or Ethernet), then click Advanced. Click DNS, then click the Add button at the bottom of the DNS Servers list. Enter the IPv4 or IPv6 address for the DNS server. On your Mac, choose Apple menu System Preferences, then click Network. Select the service you use to connect to the internet (such as Ethernet) in the list at the left. Make sure the IP address for the DNS server you want to use is entered correctly in the DNS Server field. Dns settings for mac. On your Mac, choose Apple menu System Preferences, then click Network. In the list at the left, select the network connection service you want to use (such as Wi-Fi or Ethernet), then click Advanced. Click DNS, then click the Add button at the bottom of the DNS Servers list. Enter the IPv4 or IPv6 address for the DNS server.
Xcode 5 For Mac Catalina
Xcode 5 For Mac Os
Xcode 5 For Macbook Pro
Xcode 5 For Mac Versions
With an all-new design that looks great on macOS Big Sur, Xcode 12 has customizable font sizes for the navigator, streamlined code completion, and new document tabs. Xcode 12 builds Universal apps by default to support Mac with Apple Silicon, often without changing a single line of code.
More than you ever wanted to know™ This is not an official Apple website. Please consider donating to help maintain it. Looking for an API? Currently and officially, Xcode is only available through Mac App Store or iTunes, but still Mac users can download xcode without app store and without Apple ID for free. Although, xCode software is only compatible with macOS, but still Windows users can download, install and run PC version of xcode through virtual machine software like VMware.

Designed for macOS Big Sur.


Xcode provides everything developers need to create great applications for Mac, iPhone, and iPad. Xcode has unified user interface design, coding, testing, and debugging all within a single window. Xcode 4.0 drops support for many older systems, including all PowerPC development and software development kits (SDKs) for Mac OS X 10.4 and 10.5, and all iOS SDKs older than 4.3. The deployment target can still be set to produce binaries for those older platforms, but for Mac OS platforms, one is then limited to creating x86 and x86-64 binaries.
Xcode 12 looks great on macOS Big Sur, with a navigator sidebar that goes to the top of the window and clear new toolbar buttons. The navigator defaults to a larger font that’s easier to read, while giving you multiple size choices. New document tabs make it easy to create a working set of files within your workspace.
Document tabs.
The new tab model lets you open a new tab with a double-click, or track the selected file as you click around the navigator. You can re-arrange the document tabs to create a working set of files for your current task, and configure how content is shown within each tab. The navigator tracks the open files within your tabs using strong selection.
Navigator font sizes.
The navigator now tracks the system setting for “Sidebar icon size” used in Finder and Mail. You can also choose a unique font size just for Xcode within Preferences, including the traditional dense information presentation, and up to large fonts and icon targets.
Code completion streamlined.
A new completion UI presents only the information you need, taking up less screen space as you type. And completions are presented much faster, so you can keep coding at maximum speed.
Redesigned organizer.
An all-new design groups all critical information about each of your apps together in one place. Choose any app from any of your teams, then quickly navigate to inspect crash logs, energy reports, and performance metrics, such as battery consumption and launch time of your apps when used by customers.
SwiftUI
SwiftUI offers new features, improved performance, and the power to do even more, all while maintaining a stable API that makes it easy to bring your existing SwiftUI code forward into Xcode 12. A brand new life cycle management API for apps built with SwiftUI lets you write your entire app in SwiftUI and share even more code across all Apple platforms. And a new widget platform built on SwiftUI lets you build widgets that work great on iPad, iPhone, and Mac. Your SwiftUI views can now be shared with other developers, and appear as first-class controls in the Xcode library. And your existing SwiftUI code continues to work, while providing faster performance, better diagnostics, and access to new controls.
Universal app ready.
Xcode 12 is built as a Universal app that runs 100% natively on Intel-based CPUs and Apple Silicon for great performance and a snappy interface.* It also includes a unified macOS SDK that includes all the frameworks, compilers, debuggers, and other tools you need to build apps that run natively on Apple Silicon and the Intel x86_64 CPU.
Updated automatically
When you open your project in Xcode 12, your app is automatically updated to produce release builds and archives as Universal apps. When you build your app, Xcode produces one binary “slice” for Apple Silicon and one for the Intel x86_64 CPU, then wraps them together as a single app bundle to share or submit to the Mac App Store. You can test this at any time by selecting “Any Mac” as the target in the toolbar.

Test multiple architectures.
On the new Mac with Apple Silicon, you can run and debug apps running on either the native architecture or on Intel virtualization by selecting “My Mac (Rosetta)” in the toolbar.
Multiplatform template
New multiplatform app templates set up new projects to easily share code among iOS, iPadOS, and macOS using SwiftUI and the new lifecycle APIs. The project structure encourages sharing code across all platforms, while creating special custom experiences for each platform where it makes sense for your app.
Formatting a flash drive for mac. Formatting your USB flash drive on your Mac device is very easy to do and doesn’t require installing any third party tools or having any complex steps. All you need to do is to open your Mac and insert the USB flash drive n one of the ports. The following steps will help you to. Connecting Flash Drive to MAC. This is the first step that a user will take. Connecting USB to Mac is.
Improved auto-indentation
Swift code is auto-formatted as you type to make common Swift code patterns look much better, including special support for the “guard” command.
StoreKit testing
Xcode 5 For Mac Catalina
New tools in Xcode let you create StoreKit files that describe the various subscription and in-app purchase products your app can offer, and create test scenarios to make sure everything works great for your customers — all locally testable on your Mac.
Get started.
Download Xcode 12 and use these resources to build apps for all Apple platforms.
Use.is a library to access the VMware Virtual Disk (VMDK) format.First, then attach the image as a 'raw disk image' using OS X' builtin. Mac os x vmware image. Vmdkmount image.vmdk /mnt/vmdkimage/hdiutil attach -imagekey diskimage-class=CRawDiskImage -nomount /mnt/vmdkimage/vmdk1The image should then be listed in OS X' Disk Utility application, but in this case partitions won't be automatically mounted because of -nomount. If you are trying to, you might want to look at using; more common formats are handled by OS X'.
Additional Downloads
Get the latest beta and older versions of Xcode. To view downloads, simply sign in with your Apple ID. Apple Developer Program membership is not required.
Beta Versions of Xcode Command Line Tools & Older Versions of Xcode
Videos
See the latest advances in Xcode presented at WWDC and other events.
Help and Support
Xcode 5 For Mac Os
Get step-by-step guidance on how to use Xcode to build, test, and submit apps to the App Store.
Xcode Help Guide Xcode Support Page
API Reference and Sample Code
Xcode 5 For Macbook Pro
Browse the latest documentation including API reference, articles, and sample code.
Discussion Forums
Xcode 5 For Mac Versions
Ask questions and discuss development topics with Apple engineers and other developers.
0 notes
Text
Price: [price_with_discount] (as of [price_update_date] - Details) [ad_1] Plug-and-Play High-Speed Connectivity Plug-and-play functionality on your PC without the need of an external power supply.Slim design, fit in your palm. The sleek and protective metal finish is available in Black and Blue.High-speed USB 3.0 and 2.0 connectivity SuperSpeed USB that can transfer data at up to 5 Gbit/s (625 MB/s), which is about ten times as fast as the USB 2.0 standard.Multifunction usage, it can be used at extra storage device for computer and PS4/Xbox One.( need to format it on PS4/Xbox one).Usage advice Use it with your ps4 and you can save game data and play movies, music and much more straight from the hard drive ( you can not install PS4 games on to it as do not allow it..) The perfect extra storage solution for your Xbox one just plug it in and you have instant extra storage and can even install games directly to the external hard drive. Please note some games have restrictions on this so check the game first. If you connected a USB drive and Windows doesn’t show up in the file manager, you should first check the Disk Management window. To open Disk Management on Windows 8 or 10, right-click the Start button and select “Disk Management”. On Windows 7, press Windows+R to open the Run dialog, type diskmgmt.msc into it, and press Enter. To create a new partition on your drive, do the following: 1.Right-click on the Unallocated space, and go to New Simple Volume 2. Now set the size of the new volume, and you’re good to go! Note: if you need it for PS3 and smart TV, this external hard drive has to be reformatted in Fat32 file. capacity on the product will be different from the windows output: Capacity on product (Decimal)Windows Output (Binary) 250GB 238GB 320GB 298GB 500 GB 465 GB 1 TB (1,000 GB) 931 GB 2 TB (2,000 GB) 1,862 GB 3 TB (3,000 GB) 2,794 GB ✔ A Reliable Game Drive: This PS4 external hard drive features fast and stable performance for PS4, PS4 Pro, and Xbox One, does not refuse or delete a game. Compatible with Microsoft Windows and Mac OS(10.6.5 and above) in the meantime ✔ Improve PC Performance: Powered by USB 3.0 technology, this USB hard drive is much faster than - but still compatible with - USB 2.0 backup drive, allowing for super fast transfer speed at up to 5 Gbit/s ✔ Plug and Play: This external drive is ready to use without external power supply or software installation needed. Ideal extra storage for your computer and game console ✔ What's Included: Portable external hard drive, 19-inch(48.26cm) USB 3.0 hard drive cable, user's manual, 3-Year manufacturer warranty with free technical support service [ad_2]
0 notes
Text
DMDE 3.8.0.790 Crack + License Key Latest Full Download 2021
DMDE 3.8.0.790 Crack
is a nice and powerful data search program in its comprehensive intuitive media feature. Data Check suggests your homework regarding any data loss from your computer or system due to some annoying problems. DMDE 3.8.0.790 Torrent is a perfect program that recovers all your data from your hard drive. Occasionally your data is lost due to some unplanned work and we are unable to bring back the basic and backup data and that concerns us. Now the DMDE license key helps you recover and save your most important data. It means that the recovery method is more ambiguous when we eradicate our data or put it in its place, so please don't click on it so you can get back all the lost data. Make a file link and provide a better forgetting your data response.
The DMDE 3.8.0.790 license key uses an attractive mathematical tool to change and format the data in progress. In the plan, it is inferred that customers lose data on simultaneous or sliding demand. More than that, DMDE is a highly respected program. Also, DMDE is called Partition Manager. You can use its free mechanical assemblies and without a doubt you can modify the basic flight without any weight. So you can make a circular image in addition to the clones. Also, create a RAID creator. Also, make a transition to recover from the current standard board. It has tools to recover data smoothly. Yes, DMDE Crack is a great plugin that recovers customer data in the blink of an eye.
DMDE 3.8.0.790 Crack Download Torrent (2021)DMDE 3.8.0.790 Crack also has a structure that asks clients to separate their records, data, and tuning process. With everything in mind, create another treasury architecture where customers always have enough data and warehouses, and when you lose that data, they help you access and inspect it on the main site. It highlights all your major issues, as the potential for harm indicates a combination of issues, major frustration, and other bundles. Following the methodology allows you to recover your lost data through the scan structure. Exactly when you can allow the domain system to fully retrieve our data without doing full processing. The file system has been damaged by various annoying promotions or promotions, you can get these files back with very little development.
Downloading DMDE is free and appropriate when you have recovery problems and we cannot recover them, but at this point, you can recover a log using the "Rough Recovery" report marker tool. The particularly functional mechanical assembly makes the recovery strategy possible with the automatic analyzer system. The DMDE license key contains a partition header, this master detects and restores its lost technology package records by taking data from the boot area. Otherwise, use FAT, NTFS, Ext2 / 4/3, HFS, exFAT to recover. Also, use fortified copies to seek deletion or link data. The main theme of the package is that it can display data, find and reset bugs. Did you know or not, the partition header fills in as a subroutine for quick search and restoration, deletion and loss of link splitting.
Also Download, SoundPad Crack
DMDE 3.8.0.790 Key and License Key Generator Free Download!The DMDE 3.8.0.790 license key is an excellent article heading for data recovery boards and programming. It changes the prestige information of your circuit and recovers the data lost from its capacity defects. In general, I work with a solid and intermittent memory. DMDE Crack is a smart data search tool that recovers various reports and partition tables. The live architecture works reliably, in light of the fact that the precision tool to perform high jobs, especially from the card, line and board, also cuts DMDE.
DMDE 3.8.0.790 The main serial disk article management tool is provided with the latest version of Windows or an outdated build. The main part is that it supports the volume of the live arrow on the watch to keep in touch with the volume area. With the transformation tool in the admin panel, review, modify, insert and exclude research through different circuit and record structures. It can be chassis, GPT, MBR, file tables, zone boot, and more.
DMDE 3.8.0.790 Torrent has custom organizations and map collection tool, this tool allows clients to find data records, and they are served in the area or base culture. Another tool for this application is called "Strike Constructo
Also Download,
BuildBox Pro Crack
Key Features of DMDE 3.8.0.790 Torrent!
Easy to download & Install.
World-famous data recovery software.
Veri interactive user interface.
No specific training required for using this software.
FAT12. FAT16, FAT32 NFS5 file support.
View binary data and also recover.
Search lost and broken partition data by the boot sector and superblocks.
You can reconstruct directory structure and retrieve all lost data (Remove, format, failure data manager, etc).
Best disk data editor.
Image file creating a tool. Partition Manager drive-by HDD and Solid-state.
Cloning disk works as a subroutine. All lost and damaged RAID rays rebuild.
You can use a single threat for retrieving deleted data.
Support all window versions also operating MAC.
Organize your data in a better way where users easily search.
Edit, remove, insert your data.
Fetch your data and save according to memory space.
Manage and customize your PC or laptop.
Drive data from corrupt hard disk.
System Requirements
CPU: i486 or higher.
OS For saving: FAT partition is needed DOS/ME/Win9x.
OS: 32Bit and 64Bit Windows supported (Win7, Win8, Vista, XP, 10,8.1)
RAM: 2GB. Hard Disk: 3GB is enough.
Operating System: Linux With libc Library.
Need 32-Bit for use on 64 and 32Bit Linux.
Need superuser rights. Gtk2.0 library for the GUI version or root terminal.
Support uft-8 locale
macOS 10.10+ operating system.
Driver: OS supported.
Administrator privileges.
How to Download & Install DMDE With Crack & License Key!
Download Patch setup from our link.
Extract the files to the desktop.
After that, Run the crack file on to your computer.
Now, press on a patch and browse to dmde.exe
After this generate the license key and also copy.
So, run dmde.exe and open the help tab, and paste the license key.
Press the Offline Activation Button.
Done and enjoyed.
If You Like Some Other Relatives Software :
IDM Activator 6.38 Build 16 Crack With Serial Key Free Download 2021
IDM 6.38 Build 16 Universal Crack Patch Keygen Serial Download
Z3X Samsung Tool Pro 41.11 Crack + Without Box Direct Loader [No Card]
Gihosoft TubeGet Activation Key + Crack 8.6.18 (Mac/Win) Torrent 2021
0 notes
Text
Paragon Ntfs For Mac Os X Аналоги

OS X 10.11 El Capitan; OS X 10.10 Yosemite; Other limitations: Supports VDI backup creation is removed from the UI (not implemented in the engine). Disk management and backup operations with NTFS encrypted with the Bitlocker are not supported. A default iCloud Keychain might need to be re-created after a full system recovery.
Microsoft NTFS for Mac by Paragon Software supports ALL the versions of NTFS (from Windows NT 3.1 to Windows 10). Microsoft NTFS for Mac by Paragon Software is able to get access to compressed files and folders, it has no problems with sparse files and enables all the needed operations with files and folders with security permissions.
Paragon ntfs for mac os x free download - Paragon NTFS for Mac Special Edition, Paragon NTFS for Mac, R for Mac OS X, and many more programs.
Paragon Software Ntfs For Mac
Paragon Ntfs For Mac Os X
Paragon Software Ntfs For Mac 15
Paragon Ntfs For Mac ® Os X
Paragon ntfs for os x free download - Paragon NTFS for Mac Special Edition, Paragon NTFS for Mac, Paragon ExtFS, and many more programs. Popular free Alternatives to Paragon NTFS for Mac OS X for Mac, Software as a Service (SaaS), Windows, Linux, Web and more. Explore apps like Paragon NTFS for Mac OS X, all suggested and ranked by the AlternativeTo user community. List updated: 2/8/2015 10:48:00 PM.
Download Paragon NTFS full crack free – This software let you access any NTFS volumes under OS X El Capitan, Sierra, High Sierra and Mojave. This software provides full read and write access to Windows-formatted NTFS partitions on OS X for free. It breaks down the barriers between Windows and OS X beautifully. Even with the newest update of the MacOS in October 2018.
The biggest problem of a new Mac user is that the inability to write into their external drive. The latest OS X El Capitan has been updated with the new System Integrity Protection (SIP) feature. This new security policy restricts any modifications to certain system files, folders, and processes. This new security measure is also protecting file and data on disk and at run-time, only allowing system binaries to be modified by the system installer and software updates. Very restrictive right? But you don’t to worry. Do you want to bypass this problem? Check out Paragon NTFS for Mac free. download full Version down below.
Paragon NTFS 15 Features Full Crack
Access to any version of NTFS on Mac X
The best support for the HFS + and NTFS file system features
Easy to use for any NTFS partition without the need for specific commands
New User Interface
A very powerful engine for partitioning tasks
Construct, format, delete, undelete, hide and reveal hard drives
Separate the operating system and information
Redistribute empty space
Convert normal MBR disks to GPT disks
Backing up the sectors or files with incremental or differential updates
Backup in called or not called partitions
Backup and play back to / from FTP / SFTP servers
Support for non-Roman characters and languages
Copy a complete hard disk or separate partitions
Supports various virtual machines like VMware Fusion and Parallels Desktop
Unprecedented stability even under heavy workload
Paragon NTFS 15 High Sierra and Older support
Paragon NTFS for Mac free. download full Version
Support MacOS Mojave and Catalina
How to Install Paragon NTFS for Mac Full Version
Download Paragon NTFS for Mac Full Crack
El Capitan, Sierra, High Sierra, and Mojave, disable SIP and Allow Apps
Unzip with zipper to any folder
Run the DMG files to start installation
Apply the patch, crack or Trial Reset
Restart Mac and Enjoy!
Also Download :Tuxera NTFS 2018 Final High Sierra
Download Paragon NTFS 15 Full Crack Mojave
Paragon NTFS Catalina v15.5 | ZippyShare | FileUpload
Paragon NTFS Mojave v15.4 | ZippyShare | MediaFire
High Sierra v15.2 | ZippyShare | MegaNZ
Older Version v14.3 | MediaFire | FileUpload
Password : www.yasir252.com
NTFS for Mac is macOS Big Sur compatible and already available for Apple Silicon
Full read-write access granted!
Microsoft NTFS is one of the primary file systems of Windows. If you work on a Mac computer and need to read or write files from HDD, SSD or a flash drive formatted under Windows, you need Microsoft NTFS for Mac by Paragon Software.
Write, edit, copy, move and delete files on Microsoft NTFS volumes from your Mac! Fast, seamless, easy to use. Mount, unmount, verify, format or set any of your Microsoft NTFS volumes as a startup drive.
New! Ready for macOS 11.0 Big Sur
Write files to Microsoft NTFS drives on your Mac
Can’t write, copy, edit or delete files on Microsoft NTFS-formatted drives from your Mac? It’s because macOS has limited support for Windows volumes — that is, you can only read data, but can’t write or delete anything. Microsoft NTFS for Mac by Paragon Software provides blazing fast, unlimited read/write access to Microsoft NTFS hard drives, SSDs or thumb drives formatted for Windows computers!
A no-brainer upgrade for those installing macOS 10.14 Mojave, Paragon NTFS for Mac remains the best cross-platform utility money can buy, especially now that it plays nice with Apple’s new dark mode.
MacWorld US, Editors’ Choice 2018 www.macworld.com
Whether you’re a hardcore Boot Camp user or just need to occasionally write to Windows-formatted media, this update keeps things working at peak performance…
MacWorld US, Editors’ Choice 2018 www.macworld.com
Running a Mac and having NTFS formatted external disks, you definitely need NTFS for Mac. It is well priced <…> and enables read and write access to your NTFs drives no matter what size.. The speed at which you can read and write the data on these drives is the best of any competitor if there really is one. Anyone who needs to use Mac and Windows computers, needs this app for easy data transfer. The interface is best of any application found, and the application itself offers additional drive tools for taking full control. The latest version also supports Mojave and APFS format to complete a perfect application. It is without real competition and deserves a full 5 star award. This utility makes your external storage usable on any computer system Windows or Mac. So your data remains interchangeable and is fully adapted for macOS MOJAVE.
MacSoftReview www.macsoftreview.com September 2018
Microsoft NTFS for Mac by Paragon Software is a great upgrade to an exceptional cross-platform utility that’s easily worth the money, especially if you own the previous version 14, in which case this one’s free. The user interface is tastefully designed, with buttons for mounting, unmounting, verifying, or erasing the selected volume. Dual-boot users also have the option to reboot into a compatible mounted Mac or Windows startup volume. There’s even a lovely color-coded space indicator like the one introduced with Mac OS X El Capitan, displaying content by Audio, Video, Apps, Images, and Other categories.
MacWorld, USA, August 2017, macworld.com
Microsoft NTFS for Mac by Paragon Software, the excellent third-party file system driver that enables writing to Windows-formatted volumes at native speeds.
MacWorld, USA, June 2017, macworld.com
Microsoft NTFS for Mac by Paragon Software is the best such software solution: reliable, fast, and now affordable as well… Fast, seamless, and easy to use, Microsoft NTFS for Mac by Paragon Software is required for those who need to write to Windows volumes. And now it’s more affordable than ever.
MacWorld, USA 2016, macworld.com
A very specialized product that does its job in a very unobtrusive way. You just install it and it works. When you plug an NTFS disk into your Mac, it just mounts on the desktop like any other disk, and when you copy a file to it, it just works, no muss, no fuss. This utility is also invaluable if you find yourself in a situation where you need to format a disk as NTFS, and it performs this task with an equal lack of drama
Apple Press, DVMUG
Microsoft NTFS for Mac by Paragon Software is an essential installation for anyone working with Macs and PCs, as it helps to break down the barriers that exist between the two operating systems
Mac World UK, macworld.com
It’ll install cleanly and easily on macOS 10.12 Sierra and “just work”, so it’s a good option
How-to-Geek
Microsoft NTFS for Mac by Paragon Software does exactly what we expect from it, by offering a seamless NTFS disk management. It’s good performances even allow working directly on the Windows partition, including for heavy applications such as video or photo processing.
mac4ever.com
WOW….Ive been struggling with the whole MAC/Windows NTFS issue for some time and have a number of external drives that I need to swap between Mac/PC all the time. I’ve always had a headache with NTFS drivers etc. I bought and downloaded your Microsoft NTFS for Mac by Paragon Software today and WOW. Amazing. Everything just works. Brilliant product. Worth every penny. Thank you.
Robinson Philip
It is pretty fast with NTFS transfers (slightly slower than OSX extended partitions obviously) and I’ve never had any problems mid-transfer or anything. For me, it’s always done what it said on the box, and now with V14 it’s got El Capitan compatibility, so no complaints here. If you’re looking for a way to have plug-and-play NTFS drives on your mac, there really isn’t a better alternative to Microsoft NTFS for Mac by Paragon Software. Highly recommended for all Mac users!
M. Doyle
If you have a Mac and you need to access volumes that are formatted NTFS, this is the best solution out there. Why Apple hasn’t just baked in support for NTFS after all these years still remains a mystery. I’ve been using Microsoft NTFS for Mac by Paragon Software for several years now and have never had any problems with it.
H. Jaynes
Blazing Fast
Microsoft NTFS for Mac by Paragon Software is up to six times faster than any of its closest commercial competitors!
Fully Compatible
Supports macOS Big Sur and older macOS See Specifications
Powerful Features
Safe data transfer, hassle-free work, easy to use, seamless user experience
How it Works
Simple as 1-2-3
Install
Download and install Microsoft NTFS for Mac by Paragon Software onto your Mac.
Done!
Microsoft NTFS volumes connected to your Mac are available in the Finder.
All operations just a click away!
If you need more than just a blazing fast and reliable Microsoft NTFS driver, our lightweight menubar and full-featured Microsoft NTFS for Mac by Paragon Software apps are always at your service.
Access all of your Microsoft NTFS drives and perform the most common volume operations like mount, unmount and verify.
Quickly restart your Mac in Windows from the menubar (assuming it’s installed on your mounted Microsoft NTFS drive).
Seamless User Experience
If you’ve ever used Apple’s Disk Utility, you already know how to use Microsoft NTFS for Mac by Paragon Software. If you haven’t, it will only take a few moments to get acquainted.
Microsoft NTFS for Mac by Paragon Software takes the best of Apple’s Disk Utility and moves it to the next level, augmenting Microsoft NTFS volume operations and advanced mount options.
Mounting is entirely under your control with advanced options
Mount in Read-Only: select this option if you need to access sensitive data without modifying any files.
Do not mount automatically: select this option if you want to manually control access to a volume.
Outstanding performance at blazing fast speed
Microsoft NTFS for Mac by Paragon Software is the fastest file system driver on the market:
6x times faster*
than competing solutions
Paragon Software Ntfs For Mac
*Tested on 2016 MacBook Pro with SSD drive, view benchmarks here.
Fresh review: check out the video review by European Motion Picture Association.
Paragon Ntfs For Mac Os X
Latest award: 5-star review of the Mojave-ready edition.
Features
Features
Benefits
Supported Operating Systems
macOS Big Sur
macOS Catalina
macOS Mojave
macOS High Sierra
macOS Sierra
Supported File Systems
All Microsoft NTFS versions are supported (from Windows NT 3.1 to Windows 10).
Write Access
When a volume is mounted in write mode, you can do everything with the files and folders it contains: read, edit, delete, rename, create new.
Automount
Microsoft NTFS for Mac by Paragon Software mounts supported volumes automatically at startup, so you don’t need to worry each time you restart the operating system or power your computer on. However, this feature can be disabled at any time in the program interface.
Volume Management
Microsoft NTFS for Mac by Paragon Software easily formats, checks integrity and repairs corrupted volumes.
Internationalization
Microsoft NTFS for Mac by Paragon Software supports all alphabets supported by your operating systems, including those that use non-Roman and non-Latin characters, so you will never face the problem of not getting access to file names on volumes mounted in non-native OS.
Compatible with Apple Boot Camp
Microsoft NTFS for Mac by Paragon Software is fully compatible with Apple Boot Camp software and provides direct read and write access to Mac partitions from Windows installed on Boot Camp.
Compatible with 3rd party software
Microsoft NTFS for Mac by Paragon Software is compatible with popular virtualization and encryption applications including VMware Fusion and Workstation, Parallels Desktop, TrueCrypt and its forks.
Paragon Software Ntfs For Mac 15
Paragon Technology Center
Want to learn more about the technology behind Microsoft NTFS for Mac by Paragon Software? Check out the Paragon Technology Portal!
Frequently Asked Questions
Could I try your product for free before buying?
Sure, you can try Microsoft NTFS for Mac by Paragon Software for ten days completely for free. After that it will be locked until you activate a purchased license.
I’m a user of a Seagate or Western Digital device with pre-installed NTFS for Mac. How can I get my update?
You are eligible for a special update for you current version of Microsoft NTFS for Mac by Paragon Software. Please contact our Support Service at [email protected] to reclaim your update.
Does it work with macOS 11.0 Big Sur?
Yes, Microsoft NTFS for Mac by Paragon Software works with the latest available macOS versions (incl. macOS Big Sur Public Beta).
How can I get the update if I have bought the previous version of Microsoft NTFS for Mac by Paragon Software?
Please, visit your MyParagon account. If an update is released, you will be able to download it there.
What operations do you mean saying “Full read/write access”?
You can perform create/read/modify/copy/delete operations as usual.
What data transfer rate I will get using Microsoft NTFS for Mac by Paragon Software?
The data transfer rate is fully the same as with the native macOS file system. There you can see the statistics.
What versions and features of the Microsoft NTFS file system are supported?
Microsoft NTFS for Mac by Paragon Software supports ALL the versions of NTFS (from Windows NT 3.1 to Windows 10). Microsoft NTFS for Mac by Paragon Software is able to get access to compressed files and folders, it has no problems with sparse files and enables all the needed operations with files and folders with security permissions.
Is BootCamp supported?
Yes, we completely support all BootCamp configurations.
What should I do if I have OS X 10.9 but Microsoft NTFS for Mac by Paragon Software doesn’t support OS older than 10.10?
Please follow steps below.
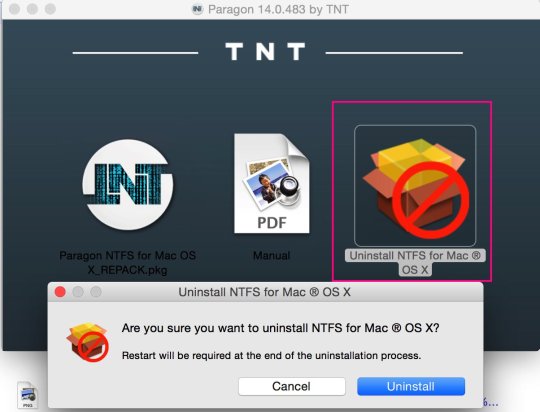
Uninstall Microsoft NTFS for Mac 15 by Paragon Software.
Restart Mac.
Download Microsoft NTFS for Mac 14 by Paragon Software from your MyParagon Account.
Install it.
Restart Mac.
Can I re-activate my license on another Mac?
Sure. Please re-activate the product following the steps below.
Log in to MyParagon portal.
Find your product in the list of My Products, then click “Show details”, press “Release license”.
License status will be marked as “Not in use”: article in Paragon Knowledge Base.
Then activate your product again.
How many times can I re-activate my license?
You can re-activate it 4 times. If you need to re-activate your license more than 4 times, please contact our Support or file a support ticket and we will help you to release the counter of licenses.
It doesn’t work! My Microsoft NTFS drive is not recognized by macOS, even after installing Microsoft NTFS for Mac by Paragon Software.
First of all, please check that Activate/Buy buttons are shown, and (if you have started the trial period) that you see “X days left” message. Then check NTFS for Mac Preferences and make sure that the driver is enabled. If it did not work, please check the troubleshooting guide.
I frequently work with NTFS, HFS+, APFS-formatted partitions on my Mac and Windows PC. Can I get a discount, if I buy all drivers at once?
Yes, you can purchase our new Paragon Mac ToolBox for just $39.95. The Suite contains 4 tools to guarantee seamless cross-platform data exchange and disk space management:
Microsoft NTFS for Maс by Paragon Software
APFS for Windows by Paragon Software
HFS+ for Windows by Paragon Software
Paragon CampTune
Ensure multi-platform access - activate required file system drivers based on your IT park, regardless of OS, in any proportion.
Resources
Current Version
Download Microsoft NTFS for Mac by Paragon Software
Product Documentation
Download Microsoft NTFS for Mac by Paragon Software One Pager
Need help?
Contact Support or file a support ticket
Latest review
European Motion Picture Association (EURMPA) reviews Microsoft NTFS for Mac by Paragon Software. Watch the videos!
NTFS for Mac build for Apple Silicon
Apple has announced a two-year transition to ARM-based processors known as “Apple Silicon.” Since the new Apple Silicon-based Mac computers are just around the corner, we proactively took on this project. We are delighted to offer Mac users our new NTFS for Mac build for Apple Silicon, which is available for download below.
This offer may be of particular interest for Developer Transition Kit users. If you currently participate in the Universal App Quick Start Program or are just planning to enroll, right now you can download and begin using the new NTFS for Mac build for Apple Silicon on your DTKs.
Paragon Ntfs For Mac ® Os X
Microsoft NTFS for Mac by Paragon Software speaks fluently many languages: English Deutsch Русский Español Français Italiano Čeština 简体中文 繁體中文 한국어 Svenska Suomi Magyar Polski
0 notes
Text
Format Seagate For Mac

There are two Mac disk formatting applications can help you easily format a Seagate hard drive for Mac. Disk Utility is a built-in app in Mac OS that can help you format external hard drive on your Mac. Super Eraser for Mac is a third-party application that can easily format your Seagate hard drive and thoroughly erase all the data on the.
Turn on your Mac. Log yourself in. Then plug your USB cable into your Seagate Backup Plus first.
Format Seagate For Mac
Format Seagate Expansion Drive
Format Seagate For Mac Time Machine
Seagate Format Utility
If you need to use your drive on both Mac and PC then it’s best to format exFAT. If you are not sure which one is best for you the File System Format Comparisions highlights the main difference between file systems. Seagate internal drives must be formatted before use.
A lot of people including you, storing important data on Seagate external hard drive instead of on your PC/Mac hard drive. The reason is perhaps that Seagate external hard drive has been well known for a long time as one of the most reliable drives for storing data. And it has super large storage up to 8TB.
If you're using Seagate external hard drive and you want to reformat your Seagate external hard drive, then you came to the right place. Because on this article, I'll show you the easiest, fastest, and the safest way to reformat a Seagate external hard drive. Whether you're using Mac or Windows, this method will work perfectly.
Please note: Reformating means that all the data you stored inside your Seagate external hard drive will be deleted permanently. And there's absolutely no way to recover the data once it's gone. Of course, it's good if you're planning to sell your Seagate external hard drive. But, if you have a plan to use it again someday, you may want to think again before reformating your Seagate external hard drive. It is strongly rcommended to back up your important data to another hard drive before your reformat the Seagate external hard drive.
Easy steps to reformat Seagate external hard drive
So are you ready to reformat Seagate external hard drive? If so, then keep reading and follow the method below carefully to make sure you're doing this method properly.
How to Reformat Seagate External Hard Drive?
Step 1: First of all, as I said before, reformating will erase all your data that stored on the hard drive permanently. So the first step you must do is move all of your important data to your PC/Mac, or to cloud storage service. Remember, once the data is gone, there's no way to recover it.
Step 2: Connect your Seagate external hard drive into your PC or Mac. Make sure it will be connected throughout the process or you may break the hard drive if it's unconnected while the reformatting process is running.
Step 3: The next step is downloading the software AweEraser. This software is the powerful data erasure which is fully compatible both with Windows and Mac. You can easily formate your Seagate external hard drive using this software. Once you downloaded the software, now install the software. Installing this software is easy so I thought it doesn't need to include installation guide in this article. Go install it now!
Step 4: When the installation process is done, now the software should run automatically. Now you'll see there are three data erasure options on the left section. There are: Erase Files, Erase Hard Drive, and Erase Free Space. Choose Erase Hard Drive option, and you should see a list of the drives connected to your PC/Mac including the external hard drive you want to reformat. Choose the external hard drive and click 'Erase' button at the bottom of the screen.
Step 5: Now you should wait until the process is done, while also making sure the process isn't interrupted. And please don't open any apps because it will slow down the reformatting process.
After the long reformatting process is done, good job! You just reformating Seagate external hard drive perfectly. Now you'll see all the data is gone and it's fresh like the first time you buy it. Don't forget to share this article to help people who're looking for this easy, fast, and safe way to reformating Seagate external hard drive.
Related Articles
How to Permanently Delete Photos From Memory Card?
Summary :
Want to format an external hard drive for Mac and Windows PC? Do you know how to do this work easily? This MiniTool article will show you specific methods to make external hard drive compatible with Mac and PC, which are easy and safe to complete.
Quick Navigation :
As we know, external hard drives are widely used to backup data or interchange files among different computers. Well, is there an external hard drive that could be shared between Mac and Windows PC? Of course, there is. Actually, most external hard disks could be compatible with Mac and PC as long as you format them correctly.
Why Need to Format External Hard Drive for Mac and PC
To put it simply, if you want to share external hard drive between Mac and PC, you need to format an external hard drive for Mac and PC.
Currently, hard drives for Windows PC are always formatted with NTFS, while hard disks for Mac are formatted with HFS+. However, when we connect a NTFS formatted disk to Mac, Mac OS X doesn't allow us to write files to the drive neither edit files, though it can read a NTFS drive. Similarly, Windows OS will ask us to format the HFS+ formatted drive when we connecting such a disk, let along edit files saved on HFS+ formatted hard disks unless we resort to third party programs.

But luckily, there are file systems well supported by both Mac and Windows PC, and they are FAT32 (it might be called MS-DOS on Mac) and exFAT. As long as we format the external hard drive to one of these 2 file systems, it can be shared between Mac and Windows.
Further Reading
Both FAT32 and exFAT have advantages and disadvantages.
FAT32: FAT32 works with all versions of Windows, Mac OS, Linux, game consoles, etc.
However, single files on a FAT32 drive can't be larger than 4GB. If your external drive saves files larger than 4GB or you plan to save larger files to this drive, converting to FAT32 is not recommended.
In addition, a FAT32 partition must be not more than 32GB if you create it in Windows Disk Management. Of course, there is free partition manager that can help create a FAT32 volume up to 2TB, which also functions correctly.
exFAT: exFAT has very large file size and partition size limits, which means it's a good idea to format your external hard drive to exFAT.
Nevertheless, a lot of users complained that exFAT is slow, and they highly suggest using FAT32 if you can avoid file size constraints.
Three Options for Accessing NTFS Drives on Mac
Paid Third-Party Drivers
Some paid third-party NTFS drivers for Mac can be used to access NTFS drives on Mac. They work well and they have better performance than the free solutions which will be mentioned in the following part. Paragon NTFS for Mac is such a driver.
Besides, you can also use the paid third-party file system converters to convert NTFS to FAT32 or exFAT which are compatible with both Mac and PC. MiniTool Partition Wizard is one representative.
Free Third-Party Drivers
FUSE for macOS is a free and open-source NTFS driver that can enable write support. But, this solution is slower relatively. And the automatically mounting NTFS partitions in read-write mode can be a security risk for your Mac computer.
Apple’s Experimental NTFS-Write Support
The Mac OS has an experimental support for writing to NTFS drives. Usually, it is disabled by default and needs some messing around in the Mac terminal to enable it.
It doesn’t work properly all the time and could lead to potential issues with your NTFS file system. For example, it had corrupted data before. Thus, we don’t suggest using this tool and we believe it is disabled by this reason.
Here, we recommend using the paid third-party tools since they are easy-to-use and can do good work for you.
Then, we will introduce these three options for you in the following content.
The Best Paid Third-Party Driver: Paragon NTFS for Mac
Paragon NTFS for Mac can write, edit, delete, copy, or move files on NTFS volumes from your Mac computer. It offers a 10-day free trial. If you want to use it all the time, you need to pay for it.
With it, you don’t have to fiddle with terminal commands to mount partitions manually. Additionally, it can mount partitions automatically and safely. More importantly, it can code with the potential corruption. If you purchase a Seagate drive, you can even get a free download of Paragon NTFS for Mac.
All in all, it does its works well and gives you good user’s experience.
The Best Free Third-Party Drivers: FUSE for macOS
FUSE for macOS is a free solution to access NTFS on Mac. But it is less secure.
If you want to make automatically mount NTFS partitions in read-write mode on Mac, you need to temporarily disable the System Integrity Protection and replace one of Apple’s built-in tools with a binary that is more vulnerable to attack. Thus, your Mac is in danger when using this driver.
However, you can use it to manually mount NTFS partitions in read-write mode if you never mind using the Terminal. This will be safer, but you need to do more work. You can go to google the steps and see how complex they are.
Apple’s Experimental NTFS-Writing Support: Don’t Do This, Seriously
Although we mentioned this method in our article, we still don’t recommend it because it is the least tested. It is just for educational purposes, and it is available on Mac OS 10.12 Sierra. Perhaps, it will be unstable forever.
How to Quickly Format External Hard Drive for Mac and PC without Losing Data
Another way to access NTFS drive on Mac is to convert the NTFS/HFS+ to FAT/exFAT. Then, the drive can be used on both Mac and PC.
There should be some important data on the drive. To keep it safe, you can choose this best NTFS/HFS+ to FAT/exFAT converter: MiniTool Partition Wizard.
How to Convert NTFS to FAT32 or exFAT Without Data Loss
To format hard drive for Mac and Windows without data loss, we suggest using MiniTool Partition Wizard and its 'Convert NTFS to FATS32' function. If you are a personal user, you can try its Professional Edition.
Step 1: Run MiniTool Partition Wizard

Download this software to your computer. Then, you can open the software and input the license key to the pop-out window to get its Professional Edition.
Step 2: Convert NTFS to FAT32 with This Software
After running the program successfully, we can see its main interface as follows:
Here, please select the NTFS partition of external hard drive and choose 'Convert NTFS to FAT' feature from the left action pane. If there is more than one NTFS partition, convert all of them one by one.
At last, click 'Apply' button to make the change executed.
When MiniTool Partition Wizard shows it applies the change successfully, the original NTFS will finally become a FAT32 partition.
By this way, you can easily format an external hard drive for Mac and PC without losing any data. Then, you can share external hard drive between Mac and PC
You Can Convert NTFS to exFAT in 3 Steps
However, if you want to convert NTFS to exFAT to make external hard drive compatible with Mac and PC, 3 steps are required.
Step 1: Transfer Data out from External Hard Drive
You can choose to copy and paste those files to other external devices or internal hard disk of Windows, but it will cost much time. Instead, you can use MiniTool Partition Wizard Free Edition to create a copy for your external drive, which is faster.
If there is only one NTFS partition on external hard drive, refer to the tutorial Copy Partition to get instructions. However, if there is more than one NTFS partition, view Copy Disk to get specific operations.
Step 2: Create exFAT Partition with MiniTool Partition Wizard
The Free Edition of this software also enables you to do this job.
Firstly, you need to delete the partition by using this software. Just open the software to enter its main interface. Then, choose the target partition and click 'Delete Partition' from the left action pane. After that, you should click 'Apply' to keep this change.
Secondly, the target partition will become unallocated. Here, you need to choose that partition and click on 'Create Partition' from the left action pane.
Thirdly, you will see a pop-out window. Here, you can choose 'exFAT' from the 'File System' setting option. At the same time, you can also set some other parameters for this partition, including 'Partition Label', 'Drive Letter', 'Size And Location'. After that, please click on 'OK'.

Fourthly, you will go back to the main interface. Then, please click on 'Apply' to save these changes.

Finally, an exFAT partition will be created on your external hard disk so that it could be shared between Mac and Windows PC
Step 3: Transfer Data back to External Drive
If you want to share files that you have backed up between Mac and PC, now please transfer these files back to external hard drive.
How to Convert HFS+ to FAT32 or exFAT without Losing Data
Besides, you can format an external hard drive for Mac and Windows by converting HFS+ to FAT32 or exFAT without losing any data.
Step 1: Backup Data in HFS+ Partition on Mac
Just transfer all useful files out from the external hard drive to other devices on Mac. Of course, if you have a backup already, ignore this step.
Step 2: Create a FAT32 or exFAT Partition on Windows PC
Some people may ask why create such partitions on Windows rather than Mac. That is because there are cases reporting FAT32 (MS-DOS) or exFAT partitions created on Mac did not work well on Windows.
Please skip to Solution 1: Format External Hard Drive to FAT32 to get steps to create a FAT32 partitions or go back to Step 2: Create exFAT Partition with MiniTool Partition Wizard to get operations to create an exFAT partition.
How to Make an Empty External Drive Compatible with Mac and PC
If there is no file saved on your external hard drive, how to make external hard drive compatible with Mac and PC?
It's very easy to share it between Mac and PC and you also need a Windows computer, a Mac machine, and the free partition manager MiniTool Partition Wizard Free Edition.
There are 3 solutions for this case, so please choose the one you like most to format external hard drive Windows 10/8/7.
Solution 1: Format External Hard Drive Windows 10/8/7 to FAT32
Since users are unable to create a FAT32 partition larger than 32GB in Windows Disk Management, they need to use MiniTool Partition Wizard Free.
Note: when you connect an external hard drive which is formatted with HFS+ with computer, Windows may ask you to format the drive. Please choose Cancel.
Please download and install this program on your Windows computer to format an external hard drive for Mac and PC.
Firstly, open the software to enter its main interface as follows. Here, please select the NTFS partition or HFS+ partition of external hard drive, and click 'Delete Partition' feature from the left action pane. If there are multiple partitions on the external disk, please select the disk and click 'Delete All Partitions' feature instead. After that, an unallocated space will be released.
Secondly, you can create one or more FAT32 partitions in unallocated space. Select the unallocated space and choose 'Create Partition' feature from the left side.
Then, you should choose 'FAT32' from the 'File System' option in the pop-out window. Meanwhile, you can set properties for this new partition and click 'OK' to go back to the main window of Partition Wizard.
At last, click 'Apply' button to make all changes performed.
Solution 2: Format External Hard Drive Windows 7/8/10 to exFAT
Firstly, please delete the NTFS or HFS+ partition in either MiniTool Partition Wizard or Windows Disk Management to release unallocated space. Then, you can create an exFAT partition with MiniTool Partition Wizard Free Edition by following steps introduced in the section Step 2: Create exFAT Partition with MiniTool Partition Wizard.
Once a FAT32 or exFAT partition is created on your external hard drive, you can share it on both Mac and Windows PC.
Solution 3: Create One HFS+ Partition for Mac and One NTFS Partition for Windows
Alternatively, you can create 2 partitions on the external hard drive: one is for Mac, and the other is for Windows. As to size for each partition, it depends on your own demands. By this way, you can easily format an external hard drive for Mac and Windows.

Step 1: Create a NTFS Partition and a FAT32 Partition
Please run MiniTool Partition Wizard Free Edition, then delete all the original NTFS or HFS+ partition(s), and create a new NTFS partition as well as a FAT32 partition, and the latter will be formatted to HFS+ in Mac machine.
Then, select the external hard drive and choose 'Delete All Partitions' to create an unallocated space.
Here, select the unallocated space and choose 'Create Partition' feature from the left action pane.
Now, please specify partition label (Windows is recommended), partition type (primary or logical), drive letter, file system (NTFS), cluster size, and partition size (you can change the length of the handle to adjust partition size). Then, click 'OK' to continue.
Now, you can see a NTFS partition is created. Please use the same way to create a FAT32 partition labeled with Mac. At last, click 'Apply' button to make all changes performed.
Step 2: Format the FAT32 Partition to HFS+ Partition on Mac
Please go to Utilities → Disk Utility to get the window below:
Then, select the external hard drive and click 'Partition' tab on the top.
Now, find the FAT32 partition and format it to OS X Extended (Journaled), which is the desired HFS+. Finally, click 'Apply' button to make all changes performed.
Tip: You may receive the prompt 'The volume 'MAC' is not journaled. As a result it can not be resized'. Just ignore the message and click 'OK' button to continue.
After NTFS partition and HFS+ partition are created on your external hard drive, it can be shared between Mac and Windows PC.
Note: You might be unable to share all files saved on external drive since Windows doesn't support HFS+ partition while Mac doesn't support NTFS partition completely.
Format Seagate For Mac
Bottom Line
Format Seagate Expansion Drive
Are you planning to format an external hard drive for Mac and PC? If yes, now try one of our methods to make external hard drive compatible with Mac and PC.
Should you have any problem, just feel free to leave us a message in comment part below or send an email to [email protected].
Format Hard Drive for Mac and PC FAQ
How do I make my hard drive compatible with Mac and PC?
If you want your hard drive to be compatible with both Mac and PC, you should format the hard drive to the file system that is supported by both of these two operating systems. FAT32 and exFAT can meet your requirements.
Format Seagate For Mac Time Machine
What is the best hard drive format for Mac and PC?
Seagate Format Utility
Although both FAT32 and exFAT are compatible with Mac and PC, exFAT is a much better choice because it has fewer limitations. For example, it has a larger file size and partition size limits.
If you formatted your hard drive to exFAT with Apple's HFS Plus, Windows will not recognize the exFAT drive. You can consider using a third-party partition tool to format your hard drive to exFAT.
Windows can only read a Mac hard drive that is formatted to FAT32 or exFAT using third-party software. If the file system of the Mac hard drive is HFS+ or APFS, the drive will become unreadable in Windows.
0 notes
Text
Maxone 250GB Ultra Slim Portable External Hard Drive HDD USB 3.0 for PC, Mac, Laptop, PS4, Xbox one – Gold
Product Description
Plug-and-Play High-Speed Connectivity Plug-and-play functionality on your PC without the need of an external power supply.
Slim design, fit in your palm. The sleek and protective metal finish is available in Black and Blue.
High-speed USB 3.0 and 2.0 connectivity SuperSpeed USB that can transfer data at up to 5 Gbit/s (625 MB/s), which is about ten times as fast as the USB 2.0 standard.
Multifunction usage, it can be used at extra storage device for computer and PS4.( need to format it on PS4).
Usage advice
Use it with your ps4 and you can save game data and play movies, music and much more straight from the hard drive ( you can not install PS4 games on to it as Sony do not allow it..) Please note some games have restrictions on this so check the game first.
If you connected a USB drive and Windows doesn’t show up in the file manager, you should first check the Disk Management window. To open Disk Management on Windows 8 or 10, right-click the Start button and select “Disk Management”. On Windows 7, press Windows+R to open the Run dialog, type diskmgmt.msc into it, and press Enter. To create a new partition on your drive, do the following:
1.Right-click on the Unallocated space, and go to New Simple Volume 2. Now set the size of the new volume, and you’re good to go!
Note: if you need it for PS3 and smart TV, this external hard drive has to be reformatted in Fat32 file.
capacity on the product will be different from the windows output: Capacity on product (Decimal)Windows Output (Binary) 250GB 238GB 320GB 298GB 500 GB 465 GB 1 TB (1,000 GB) 931 GB 2 TB (2,000 GB) 1,862 GB 3 TB (3,000 GB) 2,794 GB
Product Features

Ultra Slim and Sturdy Metal Design: Merely 0.4 inch thick. All-Aluminum anti-scratch model delivers remarkable strength and durability, keeping this portable hard drive running cool and quiet
Compatible With: Microsoft Windows 10/ Windows 8.1/ Windows 8/ Windows 7, Mac OS (★10.6.5 and above)/ Linux
Improve PC Performance: Powered by USB 3.0 technology, this USB hard drive is much faster than – but still compatible with – USB 2.0 backup drive, allowing for super fast transfer speed at up to 5 Gbit/s
Plug and Play: The external drive is ready to use without external power supply or software installation needed. Ideal extra storage for your PC and Laptop
What’s Included: Portable external hard drive, 19-inch(48.26cm) USB 3.0 hard drive cable, user’s manual, 3-Year manufacturer warranty with free technical support service
The post Maxone 250GB Ultra Slim Portable External Hard Drive HDD USB 3.0 for PC, Mac, Laptop, PS4, Xbox one – Gold appeared first on The Ram Memory Store.
The article was originally published here! Maxone 250GB Ultra Slim Portable External Hard Drive HDD USB 3.0 for PC, Mac, Laptop, PS4, Xbox one – Gold
0 notes
Text
Price: [price_with_discount] (as of [price_update_date] - Details) [ad_1] Plug-and-Play High-Speed Connectivity Plug-and-play functionality on your PC without the need of an external power supply.Slim design, fit in your palm. The sleek and protective metal finish is available in Black and Blue.High-speed USB 3.0 and 2.0 connectivity SuperSpeed USB that can transfer data at up to 5 Gbit/s (625 MB/s), which is about ten times as fast as the USB 2.0 standard.Multifunction usage, it can be used at extra storage device for computer and PS4/Xbox One.( need to format it on PS4/Xbox one).Usage advice Use it with your ps4 and you can save game data and play movies, music and much more straight from the hard drive ( you can not install PS4 games on to it as do not allow it..) The perfect extra storage solution for your Xbox one just plug it in and you have instant extra storage and can even install games directly to the external hard drive. Please note some games have restrictions on this so check the game first. If you connected a USB drive and Windows doesn’t show up in the file manager, you should first check the Disk Management window. To open Disk Management on Windows 8 or 10, right-click the Start button and select “Disk Management”. On Windows 7, press Windows+R to open the Run dialog, type diskmgmt.msc into it, and press Enter. To create a new partition on your drive, do the following: 1.Right-click on the Unallocated space, and go to New Simple Volume 2. Now set the size of the new volume, and you’re good to go! Note: if you need it for PS3 and smart TV, this external hard drive has to be reformatted in Fat32 file. capacity on the product will be different from the windows output: Capacity on product (Decimal)Windows Output (Binary) 250GB 238GB 320GB 298GB 500 GB 465 GB 1 TB (1,000 GB) 931 GB 2 TB (2,000 GB) 1,862 GB 3 TB (3,000 GB) 2,794 GB ✔ A Reliable Game Drive: This PS4 external hard drive features fast and stable performance for PS4, PS4 Pro, and Xbox One, does not refuse or delete a game. Compatible with Microsoft Windows and Mac OS(10.6.5 and above) in the meantime ✔ Improve PC Performance: Powered by USB 3.0 technology, this USB hard drive is much faster than - but still compatible with - USB 2.0 backup drive, allowing for super fast transfer speed at up to 5 Gbit/s ✔ Plug and Play: This external drive is ready to use without external power supply or software installation needed. Ideal extra storage for your computer and game console ✔ What's Included: Portable external hard drive, 19-inch(48.26cm) USB 3.0 hard drive cable, user's manual, 3-Year manufacturer warranty with free technical support service [ad_2]
0 notes