#Can you install linux on a mac
Explore tagged Tumblr posts
Visit Tumblr Blog
Explore Tumblr blogs with no restrictions, modern design and the best experience.
Last Seen Tumblr Blogs


Fun Fact
In 2020, 44% of users from Denmark used Tumblr daily.
Text
fuckin hate when people say the software thay're promoting is "available for PC and mobile" but they really mean "available for windows 10/11 x86, iOS, and android"
there's more than 3 fucking operating systems.
are devices running linux not PCs?
what about Macs?
How about KalibriOS? do you support that?
And HarmonyOS? that has roughly the same market share on mobile that linux does on desktop.
can it run on ARM or RISC-V?
if it does support linux, what package managers can you install it with?
and for fucks sake if it costs money at least say how much
if you mean windows 11 x86 then just fucking say windows 11 x86, it's not that hard.
#rant#rant post#say what you mean goddamnit#anyway zen browser is available for linux AND mac AND windows#both x86 and ARM#can be installed on linux with flatpak install zen OR yay -S zen-browser bin (on arch-based distros) or from an appimage#for macos either get it from zen-browser.app or with brew install --cask zen-browser#on windows you can download the exe from zen-browser.app or use winget install --id ZenTeam.Zen-Browser#zen is not currently available for mobile operating systems
9 notes
·
View notes
Text
i know this is my pokémon blog but i gotta say it. if you use windows i'm so fucking sorry i don't know how you guys deal with it
#modern windows is one of the most convoluted malicious operating systems i've ever seen in my fucking life#if you need windows for work or video games or something this is your sign from god to dual boot a linux distro on your computer/laptop/etc#and fuck i mean. gaming on linux is already getting a million times better than it was. and if anyone has ever told y'all that#linux was complicated to set up IGNORE THEM!!!! yes there are distros that require some assembly when installing#but there are also SOOOOO MANY that are as easy as windows to just install and start using. EASIER even#and fuck i mean i would even recommend mac over windows at this point even with mac's laundry list of problems#awful. all of it awful i tell you#i have recommendations for easy user-friendly distros. btw. if anyone's curious at all.#AND!!! THE THING ABOUT INSTALLATION!!! you can test out live version of them without ever installing them to see if you like it#if you boot it from a usb stick!!!#SO YOU CAN MAKE SURE YOU'RE COMFORTABLE WITH IT BEFORE EVER INSTALLING IT!!!!#like. head in my hands. haaaaate modern windows SO bad
9 notes
·
View notes
Text
Hey guess what. I'm about to be the annoying mutual campaigning hard to get you into a new fandom

Greatest video game of all time btw. Wish I was exaggerating
#about to go on the most insane reblogging spree you've been warned#also ignore the windows symbol you can run it just fine on linux and I think also mac!#message me if you get it and I'll run you through installing the patch you need to play it 💖#ash.txt#vtm
2 notes
·
View notes
Text
I feel like Linuxposting. Let's Linuxpost.
Aka. Lemme just shill for Linux Mint for like a solid paragraphs because I need to scream.
I use Windows for uni (have to use Power BI Desktop for one class), but at the start of the semester, my Monday class teacher would ask us "do you use Windows or are you happy?"
This was a little jab since he's a Mac user. At the time I had my Ubuntu dualboot system. Picked it since I had worked with it before, wasn't the Greatest fan (it would behave weirdly and just close programs due to "memory usage" when I Know it shouldn't be acting like that)
Thing is, my Linux partition is tiny. Attempts at shrinking my Windows were. Not good. Eventually I accidentally broke my Ubuntu install by trying to remove packages I shouldn't.
Reinstalled it, realized it didn't spark joy. Found Linux Mint, switched over.
If I could, I'd nuke my Windows install. It's Just That Nice.
I can customize the FUCK out of it. System font. Icons. Made up filetypes just because. Desklets. Applets.
Felt like "my system" instead of "the system I own".
Originally had a Linux system purely to write fic. LibreOffice felt a lot more freeing compared to Word. Hell, I realized I refused to swear on my fics because it felt like I was being judged. Most of my AO3 fics (barring the very first one) were written in LibreOffice.
Only issue I had was the Burn my Windows extension (and another that made the windows all wobbly) won't make Cinnamon launch properly. Wonder why.
No biggie if y'all have to use Windows as well for X and Y reasons, but whenever I see the GRUB menu, I just ask myself: "am I gonna use Windows, or am I gonna be happy?"
#my stuff#linux#linux mint#i wish i had a safer way to test other stuff i do on windows only like steam games#because my laptop's the strongest in the house#also i need a linuxposting tag hold on#tehc pingu#yes.
223 notes
·
View notes
Text
Installing Linux (Mint) as a Non-Techy Person
I've wanted Linux for various reasons since college. I tried it once when I no longer had to worry about having specific programs for school, but it did not go well. It was a dedicated PC that was, I believe, poorly made. Anyway.
In the process of deGoogling and deWindows365'ing, I started to think about Linux again. Here is my experience.
Pre-Work: Take Stock
List out the programs you use regularly and those you need. Look up whether or not they work on Linux. For those that don't, look up alternatives.
If the alternative works on Windows/Mac, try it out first.
Make sure you have your files backed up somewhere.
Also, pick up a 5GB minimum USB drive.
Oh and make a system restore point (look it up in your Start menu) and back-up your files.
Step One: Choose a Distro
Dear god do Linux people like to talk about distros. Basically, from what all I've read, if you don't want to fuss a lot with your OS, you've got two options: Ubuntu and Linux Mint. Ubuntu is better known and run by a company called Canonical. Linux Mint is run by a small team and paid for via donations.
I chose Linux Mint. Some of the stuff I read about Ubuntu reminded me too much of my reasons for wanting to leave Windows, basically. Did I second-guess this a half-dozen times? Yes, yes I did.
The rest of this is true for Linux Mint Cinnamon only.
Step Two: Make your Flash Drive
Linux Mint has great instructions. For the most part they work.
Start here:
The trickiest part of creating the flash drive is verifying and authenticating it.
On the same page that you download the Linux .iso file there are two links. Right click+save as both of those files to your computer. I saved them and the .iso file all to my Downloads folder.
Then, once you get to the 'Verify your ISO image' page in their guide and you're on Windows like me, skip down to this link about verifying on Windows.
Once it is verified, you can go back to the Linux Mint guide. They'll direct you to download Etchr and use that to create your flash drive.
If this step is too tricky, then please reconsider Linux. Subsequent steps are both easier and trickier.
Step Three: Restart from your Flash Drive
This is the step where I nearly gave up. The guide is still great, except it doesn't mention certain security features that make installing Linux Mint impossible without extra steps.
(1) Look up your Bitlocker recovery key and have it handy.
I don't know if you'll need it like I did (I did not turn off Bitlocker at first), but better to be safe.
(2) Turn off Bitlocker.
(3) Restart. When on the title screen, press your Bios key. There might be more than one. On a Lenovo, pressing F1 several times gets you to the relevant menu. This is not the menu you'll need to install, though. Turn off "Secure Boot."
(4) Restart. This time press F12 (on a Lenovo). The HDD option, iirc, is your USB. Look it up on your phone to be sure.
Now you can return to the Linux Mint instructions.
Figuring this out via trial-and-error was not fun.
Step Four: Install Mint
Just follow the prompts. I chose to do the dual boot.
You will have to click through some scary messages about irrevocable changes. This is your last chance to change your mind.
I chose the dual boot because I may not have anticipated everything I'll need from Windows. My goal is to work primarily in Linux. Then, in a few months, if it is working, I'll look up the steps for making my machine Linux only.
Some Notes on Linux Mint
Some of the minor things I looked up ahead of time and other miscellany:
(1) HP Printers supposedly play nice with Linux. I have not tested this yet.
(2) Linux Mint can easily access your Windows files. I've read that this does not go both ways. I've not tested it yet.
(3) You can move the taskbar (panel in LM) to the left side of your screen.
(4) You are going to have to download your key programs again.
(5) The LM software manager has most programs, but not all. Some you'll have to download from websites. Follow instructions. If a file leads to a scary wall of strange text, close it and just do the Terminal instructions instead.
(6) The software manager also has fonts. I was able to get Fanwood (my favorite serif) and JetBrains (my favorite mono) easily.
In the end, be prepared for something to go wrong. Just trust that you are not the first person to ever experience the issue and look it up. If that doesn't help, you can always ask. The forums and reddit community both look active.
179 notes
·
View notes
Text
Fixing Windows 11 - A Masterpost
Windows 11 is absolute crap for a good bunch of stuff so yeah, have a masterpost with most of the things I've found around to fix it haha (they're not all here because I did stuff around and I don't remember what)
YES, I KNOW at this point Linux would be a better alternative, however some here can't use Linux due to some proprietary programs that are not on Linux. This Masterpost is for the people in the same situation as I, aka those who have to have Windows or they can't do their job.
I am currently unemployed and haven't worked enough for the government to help me. I have a ko-fi if ever you want to help.
Stopping W11 from making you create an account/setting up your computer without internet (with a way to create gpedit.msc if your version doesn't have it)
Fixing the Taskbar (in case you also don't like the grouped Battery/internet/sound or the way the windows look)(there's more to it, check the settings)
There is the chance that Windows can't update because of this, you just have to uninstall it and reinstall it afterwards. They also completely nuked the Windows 10 look in the 24H2 update, so use the "Windows 10 (Explorer Patcher)" option instead of the plain "Windows 10".
Removing the rounded windows (since ExplorerPatcher doesn't do it anymore on 24H2)
https://github.com/valinet/Win11DisableRoundedCorners
How to move the volume and luminosity pop ups (so you can finally see those sweet sweet subtitles)
In case ModernFlyouts doesn't automatically start up, possible solution
Fixing the Start Menu (ExplorerPatcher can do that too, btw)
How to show all options right away
A way to bring back the Calendar
https://github.com/matej137/OutlookRemover
MICROSOFT FULLY NUKED THE CALENDAR!!! Possible fix is to downgrade the app (which is fine if you don't use the Mail), but do use the OutlookRemover to stop the automatic installation of the new version.
https://github.com/matej137/OutlookRemover/issues/15
Your Bluetooth suddenly doesn't work???
It happens sometimes for no clear reasons so here are a few things you can do:
Check if the icon is in the Taskbar. If not, verify if it is available in the pop up menu (the one from the gear icon)
If it's not here, check your parameter to see if you have the option to turn it on.
If it's still not here, reboot your PC.
If it's STILL not working, update your Bluetooth driver. You can do so by looking for "driver" in the menu and opening the Device Manager, then right click on the right Bluetooth component and update its driver.
If Windows says that the driver is up to date, try checking out this helper: https://support.microsoft.com/en-us/windows/fix-bluetooth-problems-in-windows-723e092f-03fa-858b-5c80-131ec3fba75c
If really nothing help, download and install a recent Bluetooth Driver. Be careful of what you download and from where.
Someone who stumbled on this post fixed it by downloading the Bluetooth Driver 5.0.1.1500 from Softonic (https://www.softonic.nl/download/bluetooth-driver/windows).
How to remove Copilot if you have it (I don't, but it might be because I'm in Europe??)
Archive
Apparently Copilot is being forced on people so hummm
Other stuff not specifically related to the shit W11 did
Changing the size of the scroll bars
How to fully remove Cortana
Website with tools to fix W10 and W11
2K notes
·
View notes
Text
on the topic of writing software
I want to ramble at you about some writing software options. 98% of the time I'm perfectly content with LibreOffice Writer (and previously I used Word, back when Microsoft products were less shitty). But every now and then when I have a new project (like now - more on that later) I start looking for something shiny and new to try. And I fell down into another research rabbit hole lol
I usually don't talk a lot about this bc my needs are very simple, and not sure how useful my opinion is to others, but I enjoy the topic. It's an intersection of creative writing and tech nerdiness and I like both of those things. Also what writing software you prefer really depends on the type of writer that you are, and everyone has a slightly different writing process and I find that fascinating.
Now, as I said, I'm coming at it from a slightly tech-nerd angle. I don't care if the installation is clunky, I'm happy to see the words open-source, and the need to create an account will already mildly piss me off (:
Don't worry, I'm not as intense as the guy writing his novel in Vim. Though fucking respect. And I can't say I'm not tempted to try it even with the steep learning curve lmao (Seriously, if you don't know Vim is notorious among software developers.)
Anyway, things I've tried so far:
Manuskript: this was listed as an open-source Scrivener alternative (though I haven't tried Scrivener. so.). I gave it a go when I was writing heart worth the trouble and it was pretty nice. It helped me when I had to move scenes and chapters around. But overall I think it was made with plotters in mind bc it wants you to enter a lot of information upfront. I'm not a planner/architect type of writer so this type of software is a bit overwhelming for me. Still, the fact that it's open source and works on Linux gets kudos from me.
Wavemaker: I recently played around with this, and I actually surprisingly like the features it has. You can put multiple books in a project, which is very nice if you like to work on different things, like fanfic, novels, etc. The mindmap is a feature I liked, though it's a bit clunky bc it collapses the text fields when you exit, and once I added an image field by accident that I could never remove lol I do like a bit of a snowflake method, so that feature is cool, and the cards are pretty straightforward too. Usually, my problem with these apps is that I don't even want to touch half of the features so they are pointless to me, but the features of Wavemaker were kind of nice. It's a web app that you can download and use offline but it's still working from your browser if that makes sense. That was what I didn't really appreciate. Also, it doesn't give you a lot of options to back it up. You either save the wavemaker file, export it into a document (which is fine, but it adds an extra step to the backup process) or you sync with Google Drive *shudders*
Things I want to try out:
Calmly Writer: now this is just purely a text editor that focuses on being very zen, streamlined, distraction-free, etc. It's pretty and it has typewriter sounds. (Yeah, I'm not immune to a pretty UI and harmless fun features alright? I can contain multitudes :P) It has an online version, but you can also download it, and works on Windows, Mac, and Linux. On paper, the desktop app requires a license, but the way they put it is that you can evaluate it for free and the evaluation doesn't have an enforced time limit... So. As good as free. (Though if I really like it, I would totally consider buying a license for 20usd that I can use on 3 computers, that seems fair. I appreciate a license over a subscription model for sure.) Honestly, I think this is the one I'm going to try next bc it just integrates perfectly into my writing process. That being: a multitude of messy, hand-written notes and notebooks + a document editor + backups on hard drive and GitHub (yes, really) ^^"
Shaxpir: This is on the opposite end of the spectrum basically, but out of the "fancy" ones, I kind of like the look of this the most. I like the statistics part in particular. But honestly, I probably won't try it bc it doesn't have a Linux version which would be a pain in the ass for me, and is cloud-based. I kind of don't really trust them, which is my biggest issue with these companies. (Although the creator's heart seems to be in the right place when it comes to AI. Basically, some of their features are based on machine learning and language models. For example, it will recognize passive voice, if it's an adverb with "-ly" or the emotion of a word. Which I think is all cool and fine and shouldn't be lumped in with generative AI. But he also had a website that did this analysis for already published works, and when people pointed out that it was sketchy, he took that down and I can respect that. I'm not sure how much it influenced the actual features of the app, maybe I'll just take a peek out of curiosity. The whole thing does make me have trust issues though lmao) If anyone has experience with it though, I'm interested to hear about it.
Obsidian: not a dedicated writing software, but rather an elaborate note-taking app. I heard good things about it from smart people lol If I really wanted to access my writing on my phone, I would probably use this bc it works on every platform and has end-to-end encrypted sync with version control. I heard you can also integrate it with GitHub which is always music to my ears lol But the setup probably takes a bit of time and I'm not particularly motivated to do that right now.
So yeah, those are the options that appeal to me right now. If anyone used these and has opinions, I'm all ears :D
137 notes
·
View notes
Text
obviously we'll have to wait and see, but i've been eyeing the steamdb page for silksong since i heard that team cherry uploaded language packs for the achievements, and i figure it might be a good idea to show what i've watched be uploaded in that time, for those curious about silksong development stuff.
for anyone who wants to review this themselves, here is the link to the steamdb page for the game.
so that others dont have to go to the page to verify what i'll be talking about here, i will provide screenshots. it's all under the cut, but if you don't want to read it all,
tldr; team cherry has uploaded translation packages for achievements in ten different languages (viewable on the steam page), uploaded two game packages (one of which uses the official title, the other being noted for developer & publisher use), updated a time or two more without adding details, and updated compatible operating systems to include mac & linux (not updated on the steam page).
JUNE 3RD, 2025.
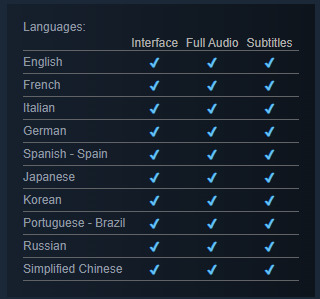
this was the translation package that restarted the silksong rumors! the steam page was updated to reflect the languages the game will be available in now, too, while steamdb specifically noted them to be achievement languages.
the added languages are brazillian portugese, english, french, german, italian, japenese, korean, russian, simplified chinese, and spanish.

after this, two more updates were released. the changelog doesn't note what they were,
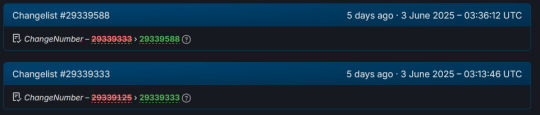
but if you head to the packages tab, you'll see a total of three packages noted. the first two are the ones that were updated during this day.

i had to look this up, so just to explain the billing type,
CD & Store Keys are how a game is verified after purchase. its their way of confirming that okay, yes, you did buy the game, and this is your copy. theyre called CD keys, because when games were distributed only on CD keys years ago, it was on the CD itself.
nowadays, it's basically a confirmation of purchase upon installation.
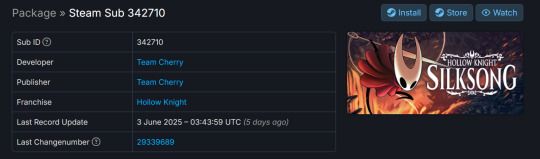
SO. let's start with that top one. Steam Sub 342710 (link to package) is for developer and publisher use only. it has ten different CD keys, is licensed for single purchase, and is listed as having 0 available. i would speculate here, but i know fuck all about game development, and i'm not gonna give any false hope.
...though i do wanna point out that if you go into the history for that package it has been there since 2019, and based on how it talks about a release override and counting as always being owned, this definitely is a dev-use only package. anyway.
you can see the information listed on the package's page below.

the other one, bearing the game's full name of Hollow Knight: Silksong (link to package), was actually updated like. twenty minutes before the other one. which unironically probably does not mean much, don't look too far into it, im giving you a timeline here. that's it.
this one has ten CD & Store keys, as opposed to only having CD Keys. i tried to look up the difference, but couldn't find anything. it's also only for single purchase, and is listed as having 0 available. it also has cross-region trading and gifting disabled.
you can see the information listed on the package's page below.


and that was all the changes for june 3rd, 2025.
JUNE 4TH, 2025.
there was one update on june 4th, and despite poking around, i couldn't figure out what the update was to. the changelog lists that there was an update, but it doesn't say what was changed. shrug.
you can see that below.

JUNE 6TH, 2025.
starting out strong with. well. a repeat of june 4th, we have a listed update that i could not find a notable change from.

and then, thirty minutes or so later, the compatible operating systems list was updated! i'll be honest, i don't understand all of what's listed here, but i do understand that this is confirmation that silksong will be playable on windows, mac, and linux.

unfortunately, as of the time this post has been made, the steam page still has not been updated to reflect this compatibility update.

that is, as of the time this post has been made, the last update listed on the steamdb page for silksong.
#our posts 🌊#silksong#hollow knight#team cherry#TELL ME THE RELEASE DATE FOR SILKSONG YOU AUSSIE PIECES OF SHIT [affectionate]#if they update shit more tonight after i already made this post im gonna start biting
59 notes
·
View notes
Note
Please, please explain how to install and use linux like I'm 5 years old. I'm so sick of windows adding AI and other bullshit to my already struggling elderly laptop but I'm really not good with computers at all so I have no idea where to start with Linux.
Okay, so, I'm going to break this down into steps I would give the average tumblr user first, and then if any of them are confusing or use words you don't understand, ask me and I'll explain that step in greater detail.
Step 0) BACK. UP. YOUR. SHIT.
NEVER EVER EVER CHANGE YOUR OPERATING SYSTEM WITHOUT A COMPLETE BACKUP OF ALL YOUR FILES.
Step 1) Learn your machine. You need to know:
How much RAM you have
If your processor is 32 or 64 bit
How big your hard drive is
On windows, you can find out all of this by going to the start menu, typing "about" and opening the first result on your system instead of the internet.
For additional instructions, visit this page.
Step 2) Pick your Linux.
There's like 10,000 kinds of Linux, each tailored to particular functions that the end-user (that is you!) might want to have. The sheer amount is very daunting, so first I'm going to give my suggestions, then I'll explain how to pick for yourself.
For Mac users, I suggest Kubuntu. For windows users, I suggest Mint Cinnamon. If your laptop is really REALLY old, I recommend Sparky Stable, which is the lightest weight Linux I would ever suggest for a new user. In every case, download the version suited to your processor (32 bit can be labelled "x86" or "32 bit"; 64 bit is always labelled "64 bit").
If you want to try a different type of linux, you'll need to make sure your laptop meets the "minimum specs" or "system requirements." These numbers tell you how much RAM, processor and hard drive space the linux will use. (That's why you needed those numbers at the beginning.)
Step 3) Collect your supplies. You're going to need:
An ISO burning program compatible with your current system, like Balena Etcher.
A copy of the ISO file for the Linux you want to use.
Your laptop.
An 8gb or larger USB flash drive.
Step 3) Make a bootable USB drive
Install Balena Etcher, hitting "okay" and "next" when prompted. Last I checked, Etcher doesn't have adware attached, so you can just hit next every time.
Plug your USB drive into the laptop.
Open Etcher.
Click "flash from file" and open the ISO file with your Linux on it.
Click "Select target" and open the USB drive location. Hit the "flash" button. This will start writing all the linux installer data to your flash drive. Depending on the speed of your machine, this could take as long as 10 minutes, but shouldn't be much longer.
Step 4) Boot to the USB drive
This is, in my opinion, the trickiest step for a lot of people who don't do "computer stuff." Fortunately, in a rare act of good will, Windows 10 made this process a lot easier.
All you'll need to do is go to settings, then recovery, then advanced startup and pick the button labelled "use a device."
This tutorial has images showing where each of those is located. It's considered an "advanced setting" so you may get a spooky popup warning you that you could "harm your system by making changes" but we're not doing anything potentially harmful so you can ignore that if you get it.
Step 5) Try out linux on the flash drive first.
Linux installs using a cool little test version of itself that you can play around in. You won't be able to make changes or save settings, but you can explore a bit and see if the interface is to your liking. If it's hideous or hard to navigate, simply pick a new linux version to download, and repeat the "make a bootable USB" step for it.
Step 6) Actually install that sucker
This step varies from version to version, but the first part should be the same across the board: on the desktop, there should be a shortcut that says something like "install now." Double click it.
Follow the instructions your specific linux version gives you. When in doubt, pick the default, with one exception:
If it asks you to encrypt your drive say no. That's a more advanced feature that can really fuck your shit up down the road if you don't know how to handle it.
At some point you're going to get a scary looking warning that says 1 of 2 things. Either:
Install Linux alongside Windows, or
Format harddrive to delete all data
That first option will let you do what is called "dual booting." From then on, your computer will ask every time you turn it on whether you want Windows or Linux.
The second option will nuke Windows from orbit, leaving only linux behind.
The install process is slower the larger your chosen version is, but I've never seen it take more than half an hour. During that time, most linux versions will have a little slideshow of the features and layout of common settings that you can read or ignore as you prefer.
Step 7) Boot to your sexy new Linux device.
If you're dual booting, use the arrow keys and enter key to select your linux version from the new boot menu, called GRUB.
If you've only got linux, turn the computer on as normal and linux will boot up immediately.
Bonus Step: Copy Pasting some code
In your new start menu, look for an application called "terminal" or "terminal emulator." Open that up, and you will be presented with an intense looking (but actually very harmless) text command area.
Now, open up your web browser (firefox comes pre-installed on most!), and search the phrase "what to do after installing [linux version you picked]"
You're looking for a website called "It's FOSS." Here's a link to their page on Mint. This site has lots and lots of snippets of little text commands you can experiment with to learn how that functionality works!
Or, if you don't want to fuck with the terminal at all (fair enough!) then instead of "terminal" look for something called "software manager."
This is sort of like an app store for linux; you can install all kinds of programs directly from there without needing to go to the website of the program itself!
297 notes
·
View notes
Text
Downloading fanfic from AO3
I've been downloading a lot of fanfic lately for personal archival purposes, and I figured I'd share how I do it in case it's useful to anyone else (and so I have it written down in case I forget!).
There are lots of different ways to save fic, including the file download built into AO3, but I find that this gives me the nicest ebooks in the most efficient way.
(Under a cut cause long.)
Download Calibre: https://calibre-ebook.com/ or (clickable link).
Calibre is about the best ebook management and control program around and it's free. You can get it for windows, mac, and linux or download and run it from a portable storage device (I'm using a windows PC).
Install it and run it. It's gonna ask you where you want to put your library. Dealer's choice on this one. I recommend your internal drive (and then back up to external/cloud), but YMMV.
If you want to keep fanfic separate from the rest of your ebooks, you can create multiple libraries. I do, and my libraries are creatively named 'Books' and 'Fic'.
Customise Calibre
Now you're gonna install some plugins. Go to Preferences on the menu bar (far right), click its little side arrow, then choose 'Get plugins to enhance Calibre'.
At the top right of the box that pops up is 'Filter by name'. The plugins you want to get are:
EpubMerge
FanFicFare
Install them one at a time. It will ask you where you want them. I recommend 'the main bar' and 'the main bar when device is attached' (should be selected by default). When you're done, close and reopen Calibre.
The plugins you just installed should appear on the far right of the toolbar, but if you can't see one or both of them, fear not! Just click Preferences (the button, not the side arrow), then Toolbars and Menus (in the 'Interface' section) then choose the main toolbar from the drop down menu. That will let you add and remove things - I suggest getting rid of Donate, Connect Share, and News. That'll leave you room to add your new plugins to the menu bar.
(Do donate, though, if you can afford it. This is a hell of a program.)
Now you're ready to start saving your fave fanfic!
Saving fanfic
I'll go through both methods I use, but pick whatever makes you happy (and/or works best for what you're downloading).
ETA: if the fics are locked you can't easily use FanFicFare. Skip down to the next section. (It does ask for a username/password if you try and get a locked fic, but it's never worked for me - I had to edit the personal.ini in the configuration options, and even then it skips locked fics in a series.)
Calibre and FanFicFare
You can work from entirely within Calibre using the FanFicFare plugin. Just click its side arrow and pick from the menu. The three main options I use are download from URL, make anthology from a webpage, and update story/anthology.
Download from URL: pick Download from URL (or just click the FanFicFare button) and paste the fic's URL into the box (if you've copied it to your clipboard, it will be there automatically). You can do more than one fic at a time - just paste the URLs in one after the other (each on a new line). When you're done, make sure you have the output format you want and then go.
Make Anthology Epub From Web Page: if you want a whole series as a single ebook, pick Anthology Options, then Make Anthology Epub From Webpage. Paste the series URL into the box (if you've copied it to your clipboard, it will be there automatically), click okay when it displays the story URLs, check your output format and go.
Update series/anthology: if you downloaded an unfinished fic or series and the author updates, you can automatically add the update to your ebook. Just click on the ebook in Calibre, open the FanFicFare menu using its side arrow, and select either Update Existing FanFic Books or Anthology Options, Update Anthology epub. Okay the URLs and/or the output format, then go.
Any fic downloaded using FanFicFare will be given an automatically generated Calibre cover. You can change the cover and the metadata by right clicking on the title and picking edit metadata. You can do it individually, to change the cover or anything else specific to that ebook, or in bulk, which is great for adding a tag or series name to multiple fics. Make sure you generate a new cover if you change the metadata.
Browser plugins, Calibre, and EpubMerge
You can also use a browser addon/plugin to download from AO3. I use FicLab (Firefox/Chrome), but I believe there's others. FicLab: https://www.ficlab.com/ (clickable link).
FicLab puts a 'Save' button next to fic when you're looking at a list of fics, eg search results, series page, author's work list etc. Just click the 'Save' button, adjust the settings, and download the fic. You can also use it from within the fic by clicking the toolbar icon and running it.
FicLab is great if you're reading and come across a fic you want to save. It also generates a much nicer (IMO) cover than Calibre.
You can add the downloaded fic to Calibre (just drag and drop) or save it wherever. The advantage to dropping it into Calibre is that all your fic stays nicely organised, you can adjust the metadata, and you can easily combine fics.
Combining fics
You can combine multiple fics into an anthology using EpubMerge. This is great if you want a single ebook of an author's short fics, or their AUs, or their fics in a specific ship that aren't part of a series. (It only works on epubs, so if you've saved as some other format, you'll need to convert using Calibre's Convert books button.)
Select the ones you want to combine, click EpubMerge, adjust the order if necessary, and go.
The cover of the merged epubs will be the cover of the first fic in the merge list. You can add a new cover by editing the metadata and generating a new cover.
Combing with FanFicFare
You can also combine nonseries fics using FanFicFare's Make Anthology ePub from URLs option by pasting the individual fic URLs into the box.
Where there's more than a few fics, I find it easier to download them with FicLab and combine them with EpubMerge, and I prefer keeping both the combined and the individual versions of fic, but again YMMV.
Reconverting and Converting
Once I'm done fussing, I reconvert the ebook to the same format, to ensure everything is embedded in the file. Is this necessary? YMMV, but it's a quick and easy step that does zero harm.
If you don't want your final ebook to be an epub, just convert it to whatever format you like.
Disclaimers
Save fanfic for your own personal enjoyment/offline reading/safeguarding against the future. If it's not your fic, don't distribute it, or upload it to other sites, or otherwise be a dick. Especially if the author deletes it. Respect their wishes and their rights.
This may work on other fanfic sites, eg FFN, but I've never tried so I don't know.
If you download a fic, do leave the author a kudo or a comment; you'll make them so happy.
This is how I save fic. I'm not pretending it's the only way, or even the best way! This is just the way that works for me.
#fanfic#fic#ao3#ficlab#calibre#fanficfare#epubmerge#downloading fanfic#adding the my fic tag so I can find this again#my fic
1K notes
·
View notes
Text
So I've recently been finally getting around to something I've wanted to do for a few years: switching to Linux.
To safely test out this process before applying it to my main tower machine, I decided to first do the switch over on an old Mac Mini which had a lot to gain from this as it was stuck on an outdated and unsupported version of MacOS.
But of course this all involved shuffling around a lot of old data and making sure everything was backed up. And here's where the story begins.
I backed up the Mini's MacOS install to its own partition on an external backup drive shared by my Windows tower machine. Once done, I shrank it to only the used size( which was complicated in its own right for reasons I'll explain shortly,) and then wanted to move it to the end of the drive so I could expand the Windows partition back out to fill the unused space.
Problem #1: MacOS's Disk Utility is so stripped down and lacking in functionality in the name of gloss, it literally cannot work with unallocated space on a drive in any way. You cannot see unallocated space, and you cannot create it. Want to shrink or delete a partition? It automatically creates a new one to fill the space whether you wanted it or not. Want to make a new partition in unallocated space without wiping the whole drive? Gotta use a different OS to make a dummy partition first and then replace it in Disk Utility. And the real problem… Want to move a partition? Can't.
Problem #2: Windows's Disk Management doesn't know what HFS+ is and refuses to work with it. Windows can't even read the Mac backup partition, let alone move it. But wait! I can use EaseUS Partition Manager! …Aaand most of its essential functionality is locked behind one of its multiple paywall tiers, including the ability to work with non-Windows filesystems at all.
But what about that new Linux install on the Mini?
I run 'sudo apt-get install gparted', a FOSS program, and in less than a minute I've already got it moving the partition. No hassle. No BS.
And if this whole thing doesn't just sum up the operating system trio, I don't know what does.
72 notes
·
View notes
Text
so i woke up to find that fucking m$ had installed copilot on my win10 laptop. Wrote a registry hack to fuck it off - not hide, *kill it* - if anyone wants a copy. You will need to run as administrator, hmu. (Also wrote another one to undo the changes and re-enable if you're completely insane)
And before anyone starts: yes yes microsoft bad all hale the lord and saviour linux shut the fuck up mac users this is not your fight but there are many reasons people are stuck with that OS so shut it. Some don't know how to change, some can't, and then you got cases like me being forced to use at least passingly this pos so I have the OS familiarity so i can support it workwise. So shush.
87 notes
·
View notes
Text
How to read the new Witcher book, Crossroads of Ravens, in English (e-book) [GUIDE]
Thanks to @nohtora for the method, I decided to write up a short post detailing how to use Calibre e-reader to read a side-by-side English translation from the Polish text.
This post is dated 12/02/2024 - as of yet, no English translation has been scheduled, nor even announced. I am writing this because I have seen many fans say they want to read the book and are sad because they can't read Polish and don't want to wait forever for a translation and get to posting memes already. Well, me too.
So, I read it.
Because, if you are an international fan like I, and do not live in Poland, you can still purchase a copy of the new book of Rozdroże kruków ("Crossroads of Ravens") and read it... also in English.
How, you might ask? Well, by buying it and translating it yourself... or rather, not yourself, but with the assistance of... *Percival Schuttenbach voice* modern technology!
Now, when I read it, I did the foolish thing of copying and pasting literally page-by-page into Google Translate. Noels (nohtora) had a much better solution, which I will detail here.
This method is easy, free (well you gotta buy the book, but not the software) and accessible (available on Mac, PC, Linux). If you have access to a computer and are OK with reading from screens, I recommend this.
In total, it took me about 10 to 20 minutes to set up from scratch.
Step 1. Download Calibre, a free and open-source e-reader program. Step 2. Install the translation plugin - also free and open-source. Step 3. Purchase the e-book. Step 4. Open the e-book with the plugin, translate. Step 5. Read!
Step 1: Install your e-book reader.
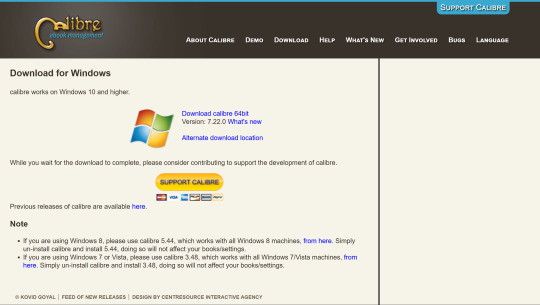
Download Calibre here. It is a free and open-source e-reader program for laptops/computers (although it does not run on mobile devices). You install it like any other program on your computer (Windows, MacOS, or Linux).
Step 2: Download the translation plugin.
youtube
Use this free Calibre plugin to translate e-books.
Watch until 1:00 to install the plugin. The rest of the video you should return to later, during Step 4.
Notes of steps to install plugin: (1) Open Preferences. (2) Get plugins. (3) Get "Ebook Translator" from Author "bookfere.com"
Step 3: Buy the book.
You can purchase Rozdroże kruków online for about $8.
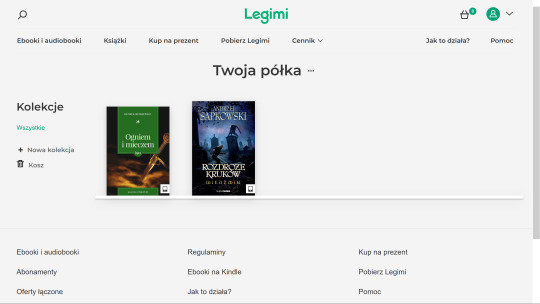
I purchased my copy from Legimi, which I will show you now. I didn't really poke around for other websites, it seems like Legimi had it the quickest. But other sites will have this ebook eventually, so don't feel pressured to get it from Legimi, specifically. I just wanted to include a "how to purchase" step in this guide because (1) it's a direct link to get it (2) in case people felt anxious about navigating a UI they can't read.
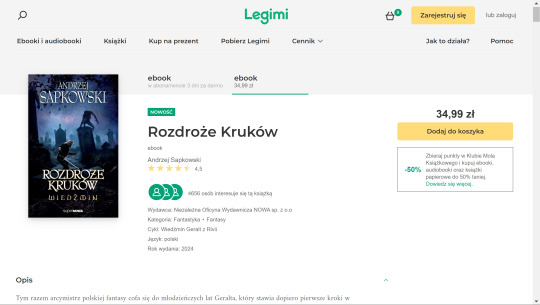
This is what the page for Rozdroże kruków looks like. As you can see, it is currently 34.99 zł, or: $8.57 US, $13.21 Aus, £6.77, or €8.15.
For me, it was $8.49 after foreign transaction fees. (I paid through PayPal).
But before you buy anything, you first need to create an account.

From the homepage, click the yellow button, "Zarejestruj się", "Sign up".

Put your username, email address, password, and confirm password. Check the first box to accept the terms of service. Don't check the second box unless you want their newsletter.
I kind of... already bought the book, so I can't buy it again on this account. I have selected a couple of other books for demonstration purposes. Same process.
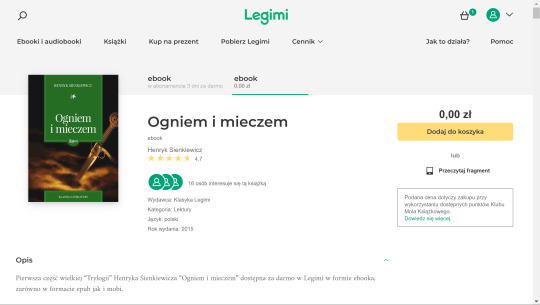
Select the "ebook" tab, the right one on the ribbon (underlined in green), to buy the singular book and not a subscription. Then select the yellow button, "Dodaj do koszyka", or "Add to cart".

After adding to your cart, click the yellow button to go to your cart and checkout.
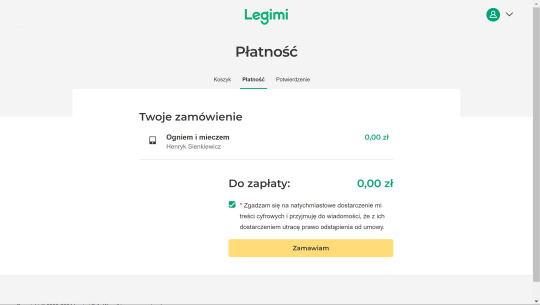
Check to accept the digital distribution agreement.
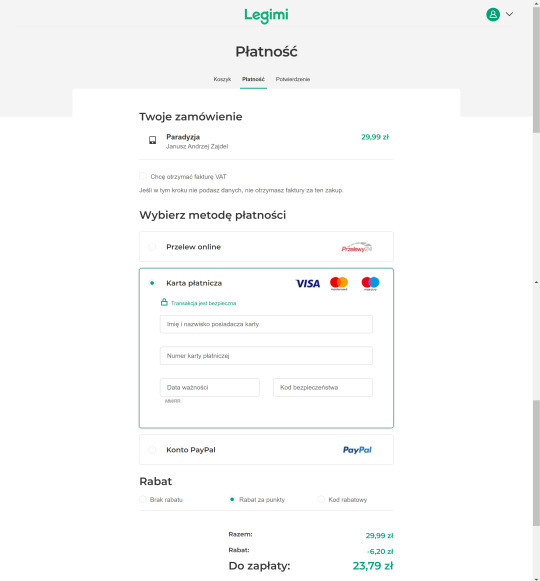
You can then pay with your credit card or PayPal. (From top to bottom, left to right: "First and last name on card" "Credit card number" "Expiration date" "Security code").
Don't worry that it says you will pay in złoty, it will be converted. There may be a foreign transaction fee depending on your bank, but it is typically small (around 3%). If you are only buying an $8 book, that will not be much.

From here, you are going to want to click the WHITE button: "Przejdź do półki", "Go to shelf". (The green button is to download their application, which we're not gonna do for this).
If you skip this on accident, just go to your profile in the top right corner and click "Półka", "Shelf", to see the books on your account.
You will see it in your shelf. Click on it.
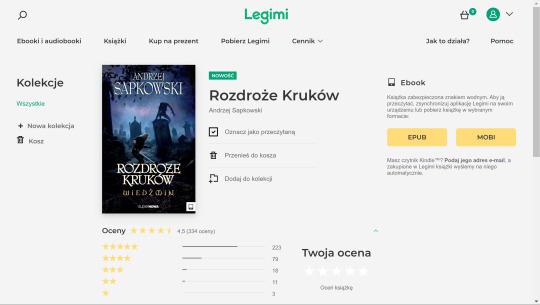
Click the yellow button "EPUB" to download it as a .epub format. Save to your Downloads or where-ever is convenient.
Step 4: Open the book in Calibre.
Refer back to the video from Step 2 for this section and watch the part on how to use the plugin. I will add my example here, too.
Open Calibre. Click "Add Book" at the top of the ribbon. Locate rozdroze-krukow.epub from where you saved it. It will be copied to your Calibre library.
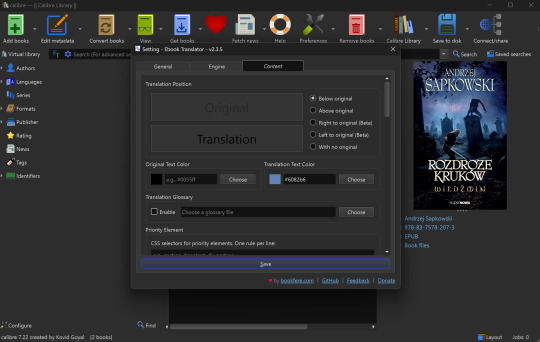
Before starting the translation, make sure to adjust settings in the Translate Book option (sometimes hidden in the ribbon as you can see in my screenshot - just click the kebab menu on the right to bring it up) to export the file the way you would like it to be formatted. I also recommend checking the box in "General" to allow it to merge paragraphs, Google Translate tends to work better when it has more context.
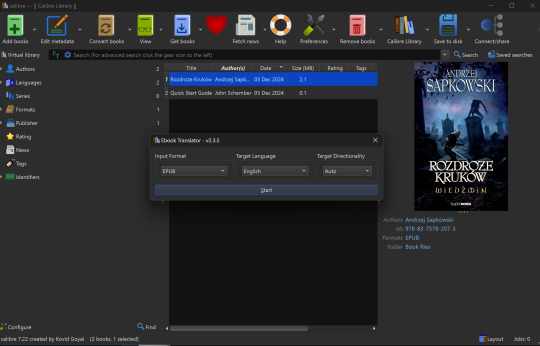
Select Translate Book as shown in the video. Translate into English (or - hey - language of your choice! Sky's the limit). You can also use different translation programs if you'd like, the default is Google.
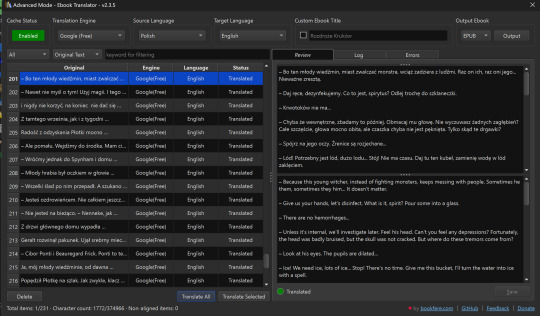
You should select "Output" at the top right after this is complete.

It will create a separate epub in your library, tagged as "Translation."
Step 5: Read it and have fun! It's a fun read!
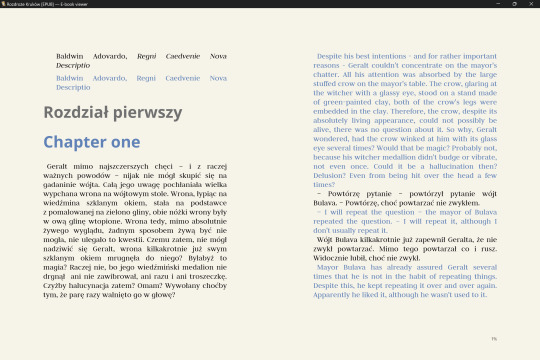
I set up my formatting this way because I want to read a Polish paragraph, then an English paragraph, but you can also set it up to be side-by-side (left page in Polish, right page in English), or even hide the original text if you're not interested and just want the translation.
The days of manually copying-pasting into Google translate are over! Thanks again to Noels for sharing this method in the Discord.
Now, this translation will NOT be 100% perfect - this is a Sapkowski novel after all; humans have difficult translating him, and this is only a machine. I wrote a Reddit post about some caveats to this desperate method of translation, and some silliness I specifically encountered with this book (light spoilers, I mention a couple of characters and settings, but no plot points).
My rule of thumb for when the translation is weird: Pay attention to the context. It is usually not too hard to figure out what the translation meant. If you have real trouble understanding it, or are just curious, Google the Polish phrase that it seems to be hitching on. Make use of Reverso Context, Reddit (r/learnpolish), and Polish learning forums.
Oh, and make sure to watch out for "grasshoppers" ;)
Finally, I recommend you also support the official English translation when it does come out; if not to compare translations, to show Orbit-Gollancz that English readers do want more translations (and ideally we'd like them sooner rather than later).
Good luck on the path ~ Powodzenia na szlaku ~
66 notes
·
View notes
Text
Imagine a butch who dates robotgirls and she's got the belt and carabiner "ready for business" look down, but all the stuff hanging from it is reverse-engineering tools.
A full set of screwdriver bits (including security torx and those weird tri-wing Nintendo ones), assorted spuders, those little rubber suction-cups you use to remove LCDs, a line flashlight, macro lenses, IPA wipes, chip pullers, portable hot air rework gun and a pinecil soldering iron, desoldering braid, a wide variety of ESD-safe tweezers, and one of those anti-stack wristbands but on a retractable lead like it's for walking a dog.
She left her backpack at home but it's got a stereo inspection station, a full set of lockpicks (including those tubular lock impresioning ones), and an aging ThinkPad with a bunch of USB adapters: every memory card format you can imagine, all the major hard drive interfaces, and even 3.5"/5.25" floppy disks thanks to a 3D printed enclosure with a greaseweazle flux imager (the Applesauce stays at home connected to her Mac Mini). A USB optical drive that can read and burn all the cd formats, and a as small plastic case of some blank CD-Rs, DVD-Rs, and Blu-rays. A bunch of USB flash drives, some blank, some preflashed with assorted tools and marked with little keychain labels: some linuxes, a warezed all-in-one windows installer, live distros for tails and kali and partionmagic and DBAN.
She's ready for anything.
#Robot girls#Robotgirls#Thee Silver Mt Zion Memorial Orchestra has an album called This Is Our Punk Rock#And this?#This Is My Pornography
1K notes
·
View notes
Note
do you know any good guides to get into furry muck?? ive wanted to try it for ages but find it confusing
so long as you have some familiarity with command line/terminal and the basic CLI procedures, i found the starting guide on the official site quite adequate. otherwise, first familiarize yourself with the command line interface of your computer. it takes a little getting used to, but this is how the entire MUCK will be, plus knowing how to use a CLI is a good skill to have.
you will need telnet installed on your computer. telnet is the protocol that will allow you to access furrymuck through your CLI (telnet is not secure, so don't type anything into furryMUCK you wouldn't want anyone to be able to see! this is the risk of using a legacy system, assume it has already been compromised and act accordingly). on windows telnet is preinstalled but you will need to enable it as described in this guide. on linux and macOS you can install it with a package manager. i use homebrew on mac.
once you have telnet, the official guides for connecting are here. character registration is done via email. mine took around a week and a half to come back. because your passwords are sent in plaintext over email and unsecured over telnet do not reuse another password. here in the registration guide.
once you access the MUCK, the area just outside the bandstand where you start has guides for new players and the people around there are generally willing to help new and clueless players (like me). it takes a little trial and error and exploring. i found this guide for interacting with the enviornment helpful.
furryMUCK is a very magical place when you're able to meet it at its own terms. part of the fantasy is the clunkiness of the ancient internet its idiosyncrasies. have so much fun!
63 notes
·
View notes
Note
Since some people might want a Mac, I'll offer a Mac equivalent of your laptop guide from the perspective of a Mac/Linux person.
Even the cheapest Macs cost more than Windows laptops, but part of that is Apple not making anything for the low end of the tech spectrum. There is no equivalent Mac to an Intel i3 with 4 gigabytes of RAM. This makes it a lot easier to find the laptop you need.
That said, it is possible to buy the wrong Mac for you, and the wrong Mac for you is the 13-inch MacBook Pro with the Touch Bar. Get literally anything else. If it has an M2 chip in it, it's the most recent model and will serve you well for several years. Any new MacBook Air is a good pick.
(You could wait for new Macs with M3, but I wouldn't bother. If you are reading these guides the M3 isn't going to do anything you need done that a M2 couldn't.)
Macs now have integrated storage and memory, so you should be aware that whatever internal storage and RAM you get, you'll be stuck with. But if you would be willing to get a 256 gig SSD in a Windows laptop, the Mac laptop with 256 gigs of storage will be just as good, and if you'd be willing to get 8 gigs of RAM in a Windows laptop the Mac will perform slightly better with the same amount of memory.
Buy a small external hard drive and hook it up so Time Machine can make daily backups of your laptop. Turn on iCloud Drive so your documents are available anywhere you can use a web browser. And get AppleCare because it will almost certainly be a waste of money but wooooooow will you be glad it's there if you need it.
I get that you are trying to help and I am not trying to be mean to you specifically, but people shouldn't buy apple computers. That's why I didn't provide specs for them. Apple is a company that is absolutely terrible to its customers and its customers deserve better than what apple is willing to offer.
Apple charges $800 to upgrade the onboard storage from a 256GB SSD to a 2TB SSD.
A 2TB SSD costs between $75-100.
I maintain that any company that would charge you more than half the cost of a new device to install a $100 part on day one is a company making the wrong computer for you.
The point of being willing to tolerate a 256GB SSD or 8GB RAM in a Windows laptop is that you're deferring some of the cost to save money at the time of purchase so that you can spend a little bit in three years instead of having to replace the entire computer. Because, you see, many people cannot afford to pay $1000 for a computer and need to buy a computer that costs $650 and will add $200 worth of hardware at a later date.
My minimum specs recommendations for a mac would be to configure one with the max possible RAM and SSD, look at the cost, and choose to go buy three i7 windows laptops with the same storage and RAM for less than the sticker price of the macs.
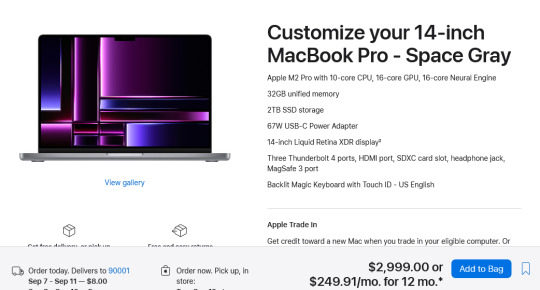
So let's say you want to get a 14" Macbook pro with the lowest-level processor. That's $2000. Now let's bump that from 16GB RAM and a 512GB SSD to 32GB and 2TB. That gets you to $3000. (The SSD is $200 less than on the lower model, and they'll let you put in an 8TB SSD for $1800 on this model; that's not available on the 13" because apple's product development team is entirely staffed by assholes who think you deserve a shitty computer if you can't afford to pay the cost of two 1991 Jeep Cherokee Laredos for a single laptop).
For $3000 you can get 3 Lenovo Workstation laptops with i7 processors, 32GB RAM, and a 2TB SSD.
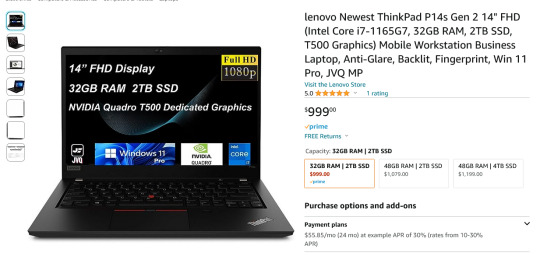
And look, for just $200 more I could go up to 48GB RAM and get a 4TB SSD - it costs $600 to upgrade the 14" mac from a 2TB SSD to a 4TB SSD so you could still get three laptops with more ram and the same amount of storage for the cost of one macbook.
I get that some people need to use Final Cut and Logic Pro, but hoo boy they sure are charging you through the nose to use products that have become industry standard. The words "capture" and "monopoly" come to mind even though they don't quite apply here.
"Hostile" does, though, especially since Mac users end up locked into the ecosystem through software and cloud services and become uncertain how to leave it behind if they ever decide that a computer should cost less than a month's rent on a shitty studio apartment in LA.
There's a very good reason I didn't give mac advice and that's because my mac advice is "DON'T."
#sorry i swear i know you're being nice#i am incapable of being nice when talking about apple#i was a total apple fangirl until the unibody#which is the domino that started all the other companies pulling shit like soldered RAM#they said 'fuck you - users shouldn't service their own computers' and I say 'fuck apple - users shouldn't use macs'#and that has been my stance on the matter since 2012#which was the last time i bought a macbook because i knew i'd never buy a computer that would fight me to change my own battery
475 notes
·
View notes