#Change PDF to Word Document
Explore tagged Tumblr posts
Visit Tumblr Blog
Explore Tumblr blogs with no restrictions, modern design and the best experience.
Last Seen Tumblr Blogs


Fun Fact
The Tumblr app for Google Glass was released on May 16, 2013.
Text
how do I get people to understand that if you need to make changes to a document - do NOT do it in the PDF version. PDFs are the devil's format and they will break everything.
always keep the original Word version and always make edits in Word itself.
and for the love of god DO NOT convert a Word document to PDF, then (for some reason) convert that PDF back to Word and expect it to still have the same functionality as the original!!!!
#every day I think about that post that said office jobs are piss easy and anyone can just pop in for a day and do a good job#where are all the people who think it's easy and why do none of them work at my office!!!#genuinely wish I could control the hiring process bc I would make people do a take home assignment:#you receive a word document with comments and tracked changes and a table of contents#plus a list of additional changes to make to the document. you make the changes.#accept tracked changes. resolve the comments. update the table of contents. and convert to PDF.#if you can do that successfully - congrats you are already better than 90% of my employees!#augh. I'm just. exhausted 🫠
2 notes
·
View notes
Text
Reading on the module website, which is basically a digital textbook 👍😊📝✍️
Reading from a textbook PDF ☹️👎😴🚫
#it doesn't help that the text is fairly clear but slightly blurry in some places#so it just feels like you can't focus#and to fix/change the font I've converted it to a word document#which is easier to read but it really fucks up all the formatting and some of the images that have text on#so sometimes I have to go back to the PDF anyway#opposed to a nice resizable web page
0 notes
Text
Hey everyone it seems there a malicious individual trying to hack the sims cc community again and fill it with malware you need to stay vigilant as a creator and a downloader so
i have some tips for both to stay safe while downloading:
1- sims cc file extension is always .Package never download anything that is .exe
2- do not auto unpack zip files and rar files into your mods folder directly, open each zip or rar individually check the file extensions and drag them to your mods folder one by one
3- the only mods that have a .ts4script extension are ones that affect gameplay or how the game works, understand that if you are downloading cas or bb items you shouldn't have a .ts4script file
4- if you are downloading gameplay mods that do have .ts4script make sure that A) the creator hasn't announced on their pages that its infected B) you are downloading from a link provided by the creator of the mods themselves not something off of google or a link you got sent and make sure dates of upload match dated of announcements
5- if the mod or cc creator has retired and hasn't posted for a while LOOK AT THE DATES OF THE UPLOAD if it has been "updated recently" after the creator has left the community its most likely re-uploaded by a hacker and infected
6- download mod gaurd by Twisted mexi and keep it updated and keep your windows defender or malware detector Program up to date and always running do not disable it
7- make sure everything you download comes from a direct link from the cc creator, in this day and age do not trust link shortners, adfly, linkverse, etc get the universal bypass extension and ublock extension to stay safe but genuinely NEVER CLICK ON THOSE no matter how much the creator reassures you its safe it. is. NOT.
8- this is more of a general saftey precaution but, create a system restore point weekly before you run the game with new mods that way if anything happens you could have a chance to restore your windows to an earlier date before you downloaded anything.
9- BACK UP YOUR SHIT im serious right now either weekly or monthly put your files somewhere safe like a usb a storage card a hard drive even an online cloud if you dont have any of the previous.
10- files you should back up are your media from games and media everything else, any mods, games saves, work files, passwords, saved bookmarks, any documents txt files word files pdfs, links you saved, brushes or actions for Photoshop if you have any, any digital bills or certificates if you have any, and keep a physical list of all programs you have installed and where you installed them from
11- turn on any 2 factor authentication and security measures for any account you have
12- google and firefox have the option to check your paswords and emails against any data leaks USE THIS FEATURE and change any leaked passwords
13- regularly check your logged in sessions to make sure all the logged in devices or computers are yours and log out any that aren't and any old devices or unused sessions do this for every website and app you have an account on if available
14- change your passwords often. I know this is a hassle i know its hard to come up with new passwords but changing your passwords every few months will help you against anything mention previously that wasn't detected.
15- and as a cc creator check your cc and the accounts you host cc on and its uplaod and update dates make sure nothing has been changed without your permission :(
16- generally try not to get swept up in the "i must get it" fever you do not need to "shop" for mods weekly or monthly you do not need to download everything by that one creator you do not need to download new cc everytime you want to make a sim, im guilty of this so i know how hard it is to resist but take a breath and think "do i want this or do i need it" before downloading.
These are prevention methods i cant claim they are 100% will prevent any hacking but its better to be safe than sorry and these do keep you safe so
Brought to you by someone who has had their laptop ruined and data leaked from downloading cc once upon a time
3K notes
·
View notes
Text


It is done! This is The Death of Translation, originally written in English by @landwriter, translated into Mandarin by @thirrith. Binding is dos-à-dos, with English version on one side and Mandarin on the other. Bookcloth was handwoven by me, on my rigid heddle loom :3
More under the cut!
Typeset: Fanbinders are Liars
Full stop, this typeset would not have been possible without Eth and all their patience, enthusiasm, and willingness to do even more translating! I reached out to them *checks watch* nearly a year ago in July 2023 (lololol), asking if I could use their translation of TDOT in a surprise bind I wanted to send along with Gloam's author copy of Flower King. They were kind enough to say yes, and even kinder to answer my questions when I reached out six months later in January, when I was finally able to start work on the typeset.
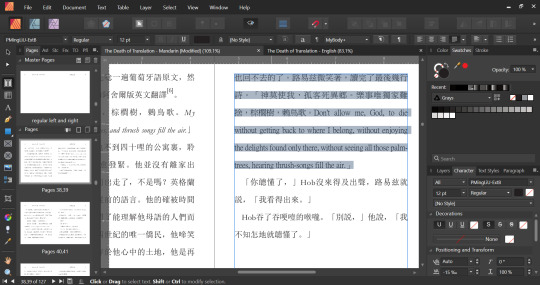
We talked about the many delicious things that are bound to come up when discussing translating not just from English to Mandarin, but also from digital space to meatspace. Some topics I had anticipated, like font questions, translating the colophon, etc. But even with the topics I thought I'd prepared for, there were still things that came up that both surprised and delighted: for example, while AO3's website allows for italics in Mandarin--
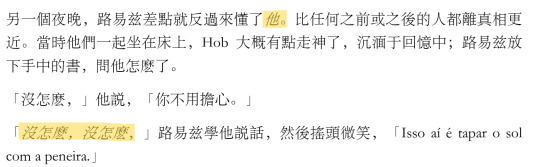
--my publishing program doesn't (or at least, it doesn't without needing to manually tilt every character by about 10 degrees). So as a workaround, Eth suggested changing these cases of italics to the font 华文楷体:

Through no one's fault but my own, this ended up being only slightly less work than manually tilting every instance of italics--I wanted to be sure that I got all of them, so I ended up doing a lot of double-checking manually anyway, instead of relying solely on the Search function. There was a lot of cross-referencing with the Word document that Eth was kind enough to provide, as well as squinting and general swearing. I also did the same for the uses of Latin script, manually styling each instance as Garamond to keep it consistent with the English edition:

The only other time I've had to do font surgery this intensive is probably for my typeset for Tell Me About the Big Bang, which I had to port over from a PDF. Folks, hell on earth. Do not recommend XD I remember squinting at my monitor as I had to visually confirm every instance of italics, thinking I will never do this again. Welp, four years later, here were are: fanbinders are liars, LMAO. At the very least, using Eth's Word document at least allowed me to search by styles, so it was a little easier on my eyes. 🙏
Is there a script that I might've been able to use if I was more code-savvy? Probably. But I figured going at it sledgehammer style would be the least hair-pulling way to get the job done, weirdly enough. Still, despite my best efforts, there are a few instances of PMingLiU to Garamond and PMingLiU to 华文楷体 that I know I missed, and I know I missed them because I caught them after I'd printed/cut/folded/sewn/glued (cue more swearing), so Gloam and Eth, my apologies >.< please consider them artifacts of a uniquely handmade object ajslkdjfs
In addition to the fonts, there were also some other fun things Eth and I discussed, like how to translate the notes I usually provide on the colophons! In addition to information on fonts, I also usually include some variation of:
This private, limited edition published by chubsthehamster (Moonham Press, imprint of Renegade Publishing) in 2024. This is chubsthehamster's personal copy. Out of three existing copies, this is the first.
The thing that came up with this, which still tickles my brain to this day, was how Eth chose how to translate "Moonham Press, imprint of Renegade Publishing." To get a better sense of what word to use for "imprint," they asked what the relationship was between Moonham Press and Renegade Publishing, which got me thinking about the relationship between my lil imprint and the wonderful @renegadeguild:
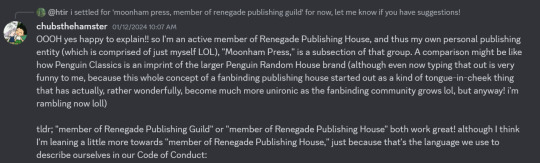
What's all very funny about all of this is that we are now, in fact, going by the name "Renegade Bookbinding Guild," per our most recently updated Code of Conduct. While this renders the wording I asked for out of date (and thus, the wording that made it into the book out of date :'D), I think it's also a testament to how cool the work @renegadeguild is doing--like any artform, fanbinding is alive, with its own evolving language, communities, and ideas about the craft. And I love it, I love it so much. (Was this also a plug for our new-ish website? Perhaps).
There's more I could say here, but this post is already going to be long enough, so I'll move on for now! If you get anything from this section, it's that @thirrith is amazing and very patient and kind, and I'm so grateful that we got to talk shop together. Thank you so much for all your invaluable help with this, Eth! I hope the typeset, though undoubtedly flawed, does your hard work justice!
Binding: Or, SO Much Math. Like, So Much, Guys. (It was worth it, though!)
Whoo, boy! So math was never my strong suit in school, but when I set out to do this bind last year, that wasn't an issue. At first. The dos-à-dos binding, if anything, just requires a little bit of finagling on the usual case-bound format--a bit more math if you want to do an all-cloth cover, like I planned on doing, but nothing I couldn't work out with some trial and error. (My prototype below!)

Then came February, when I took a weaving class with my friend, and then everything kinda exploded.
My original idea was to use some green Duo bookcloth I had on hand (this color, actually)--for those of you not initiated into the Duo cult, Duo is a Rayon bookcloth with a very devoted fan following in Renegade. It's very pretty; the Rayon weave is one color, and the paper backing is usually complementary color, so it has this cool two-toned effect. Duo is in high demand in Renegade circles because sadly, the company that manufactures it went out of business last year. (Although I've heard rumors recently that there's another company making something similar, but the cloth has a really high purchase requirement and is, like, for businesses only I think).
Anyway, I also wanted to have a gold line around the whole book as a kind of bellyband/obi to further connect the two versions of the story (another reason why I chose the dos-à-dos format to begin with heh), as you can see from my scribbled notes here--

But alas! I knew going in that adhering things to Duo is often Problematic, thanks to one very painful experience trying to get some iron-on foil on another bind (the textured surface of Duo just makes it kinda hard to stick or paint stuff on it). So if I wanted a clean, continuous line, the remaining options were to either paint it on a strip of paper that I'd somehow...adhere to the cloth? Or maybe cut different slices of bookcloth and glue them on. I wasn't satisfied with either of those options, though.
Then--the weaving class. I made a scarf, and I love it and I loved making it. But the whole time, I'll not lie, my thoughts were elsewhere.
In short, my decision to weave my own bookcloth kinda came from a few different factors:
The desire to attempt to recreate Duo, that elusive beauty, the one that got away, etc. (I have several yards in my stash, but still). Others have also attempted to recreate it, and I thought I'd throw my hat in the ring.
My current spiral into the deep hole that is fiber arts (it started with crochet, then knitting, then sewing, then weaving, then spinning, and now I'm eyeing quilting! Please help me).
The gold line. It kept bugging me. And when I found weaving, I just thought there was something very neat about the process of actually making the cloth for a dos-à-dos binding from scratch, and especially for this binding. I wanted to bind a story about translation (or rather, the death of it, and yet still the necessity of it--how we must try to communicate, despite of, or perhaps precisely because of, everything that gets lost in the spaces between people, and the tragedy of that loss, and the beauty of what makes it through, and the love always present in the effort regardless), and also, the translation of that story. Weaving is a very meditative process, and with every pass of the shuttle, back and forth, building slowly but surely the fabric that would hold the story that Gloam had written and that Eth had translated, I thought a lot about translation, and the gaps between people, and how we choose our words not just when translating, but when we speak at all. From a design perspective, I used the same colors I would've used had I chosen the Duo bookcloth--green and gold--so the design wasn't too altered in terms of color scheme. But I think the choice to weave the bookcloth--the thing that bound it all together--made the project take on a completely new meaning for me, both in process and in scope, one that hadn't been there when I started. I saw the warp, perhaps, as the original story, laying the groundwork for the weft, the translation; or maybe it was the other way around, with the translation providing the scaffolding for its own, new meaning, choices that Eth had to make with this word or phrase or another building something new, something translated, and the original a live, moving thing that wove over and under each word turned phrase turned story; or maybe it was both. Maybe it didn't matter which was which, in the end. And as I wove, the thing that connected them, that gold line that had started all of this, slowly formed.


All that to say: Good God, was there a lot of math. So much math. That prototype pictured above was actually made specifically so I could calculate exactly how much I needed to weave, lol, because while I certainly had enough thread, I didn't want to have to warp more than once. I'd learned the basics in my class, but the training wheels came off here. I wanted to make my own custom fabric, which meant calculating things like ends per inch, picks per inch, loom waste, shrinkage after washing, the width of that damn gold line, how much I'd need for the hinge, the turn-ins, the boards--the whole nine yards (I didn't actually weave nine yards tho heh). It was all absolutely worth it in the end--so challenging and so, so rewarding!


(And my final reason for weaving the bookcloth? Not gonna lie, It was because I just wanted to see if I could do it LOL. I love trying at least one new thing with each of my binds, and this was it for this project. While I've been bookbinding for a few years now, I'm still very much a beginner weaver, and I'm so excited to continue to learn and experiment! Also, here's a video of me unwinding the cloth from the loom, heh. I used 10/2 Perle cotton in gold and green colors :3)
Also, turns out, you can back handmade cloth the same way you can any other cloth! I backed it using my usual heat-n-bond method, and with some Unryu Tissue in the color Forest. Since the cloth itself is a bit transparent, there are a bunch of really fun fibers you can see when it's held up to the light, but which aren't visible when the cloth is glued down to the boards. Still, knowing they're there still makes me happy :D

Finally, capping all this off, is one final, small detail I really liked: ginkgo leaf endpapers :3 this one's for me and Eth and Gloam specifically <3
Aaaand that's all from me for today, folks! Thus ends (several months late XD) my last Binderary project for the year. This was probably my most ambitious bind to date, and gosh it was so, so much fun.


And, of course, thank you so much to Gloam for sharing your story, and Eth for translating it. I can't wait for y'all to receive your copies soon!
All my love! <3
#the sandman#The Death of Translation#bookbinding#fanbinding#binderary 2024#<<<lol#landwriter#Ethiseth#also IF YOU SAW THIS POST BEFORE I FINISHED WRITING IT. NO U DIDN'T AJLKSDJFS#weaving#rigid heddle weaving
1K notes
·
View notes
Text
where you’ve been assigned to working with john price on a report and the proximity is getting to you both…
(f!reader)
-
late nights pouring over reports in the base conference room with price. he tries to bring you coffee the second night and adjusts to black tea after watching the displeased twist of your lips. you start across the table, a respectful and professional distance, but by the third night, you’re shoulder to shoulder, peering over at each other’s screens silently. the information you’re reviewing is grave, life changing to the folks who live it, but you can’t help your laugh when john struggles to turn a pdf into a word document.
you give up on wearing business professional after the incident. the rip of your skirt as you jumped up from excitement, finally finding a breakthrough in your work. john’s eyes practically burned into your thigh, like the sight of your tights over newly bare skin offended him. you didn’t even notice until he pointed it out, swallowing thickly as he muttered “got a problem there, love.” before excusing himself to bring back more tea.
when you switched to wearing jeans, john started wondering if he had offended some sort of god in the past life. why was there so much bending involved in your work? bending over the table to find a report in the mess of papers, your ass practically wiggling in his face. sneaking past his shoulder so you can see if he’s made any progress, the glimpse of your thigh off the chair reminding him of what it would like if- never mind. he swore your perfume was laced into your clothes, a cloud of it remaining after you went home for the night, your familiar scent searing itself into the back of his brain.
“john?” your voice pulled him out of his trance of wondering how he’d gotten here. it had been a week of this proximity torture with no end in sight. “yeah?” your pen tapped the picture in front of you. “this guy’s copying your muttonchops.” snorting, john leaned over, staring hard at the suspect’s picture as he tried not to focus about being six inches from your lap. “nah, ‘s a different style. mine’s more grown out, his is jus’ a shadow.” you hummed thoughtfully. “didn’t realize there was so much discourse in the beard community. seems a bit confusing.” he laughed, that short bark that made you smile despite yourself.
“‘s not all that confusing. here, y’ can feel the difference.” he grabbed your hand and pulled it into his beard, manicured fingers diving into his facial hair. you scratched it on instinct and were rewarded with a low throaty groan and a fluttering of his eyelids. “so soft, john.” the normally serious captain seemed like putty in your hands as your fingers explored the line of his jaw. it was quiet for a long moment, john’s eyes closed as you took him in without his usual surly stare. “yeah, honey?” his eyes flicked open as you stopped your movement, thumb near the corner of his mouth. your mouth gaped open, the moment broken.
“fuck, i’ve made you uncomfortable.” john pulled away fast, your hand dropping his face as he moved farther and farther away. “i can ask the lieutenant to finish up ‘ere, should only take a week more.” he tried to get up from his seat but you were more determined, beating him to the punch with a hand on his shoulder, pushing him back down. “john, stop. it’s okay.” you’d never seen him like this: unsure. “didn’t mean to say what i said, love.” you shook your head vehemently. “it’s okay, i just…no one’s ever called me honey before. kinda thought it was a sitcom thing.”
he was doing the math, picking apart every word you said, every inflection of every letter. you could see it in his eyes, the realization that you weren’t uncomfortable. the change might have scared you if hadn’t been so damn attractive. his posture perfect again, thighs flexing as his hands, big calloused hands, laid relaxed against them. he wasn’t grinning but you saw his cheek pull up, the movement of the beard you’d just been touching. it was instantaneous; the captain was back.
“and?” he stood up, your hand still on his shoulder. “and…i don’t mind it.” he was forcing you to look up, a height difference between you that you’d never notice because you both were always sitting.
“c’mere, honey.” you stepped closer, your other arm wrapping around his other shoulder. those hands wrapped around your waist and dipped lower to your upper thighs. he picked you with ease, all protests of your weight dying on your tongue as you let out a squeal. john sat you on the conference table, pushing reports and laptops out of the way to make space for his meal. “fuck, ‘ve been wantin’ you on this table for a week now.” he rubbed his hands up and down your thighs, tracing the denim of your pants. “and these jeans.” you frowned. “you don’t like my jeans?” he shook his head, thumbs exploring your waistline, tucking under your shirt to meet bare skin. “i love ‘em, darling. want t’ see you in them everyday.” he popped the top button then looked up at you for permission. you nodded, lying back on your forearms, restraining your hips from canting.
he chuckled at your confidence, unzipping you then sliding down the denim from your legs and off, along with your shoes. maybe it had been a form of manifestation or delusion, but either way you had worn your favorite pair of lacy black underwear. john seemed to appreciative, growling at the sight as his fingers brushed over your clothed pussy. “were you expectin’ someone t’ see these?” you grinned. “maybe i was hoping.” he brushed over your entrance and your hips chased the feeling, riding up to meet his fingers. “someone’s eager.” he didn’t let you reply, pressing his thumb over your entrance, rubbing up and down around your clit as wetness pooled in your underwear. you whined at his teasing, a coil building low in your stomach. “john…” he dipped his thumb under the fabric of your underwear, tracing the slickness of your slit. “hm, honey?” his low tone sent a rush of warmth into your body, a combination of domesticity and restraint. “want you, please.” he was playing down, putting his thumb inside you but knowing the angle was all wrong, it barely brushing your entrance. “want me where?” he finally pulled down your underwear, leaning his body over you, putting you face to face. “want your fingers inside me.”
john captured your lips with his own, pushing a thick middle finger into you as he pressed his thumb to your clit. you moaned loudly, wrapping your legs around his waist and pulling him in further. “so wet f’ me, baby. you been wantin’ this?” you nodded eagerly, shutting him up with another kiss. he pumped his finger in and out as he circled patterns on your clit, the feeling of it overwhelming. you were so wet and hot, this big strong man panting into your mouth as he made you feel so good. your nipples scratched the inside of your bra as your cunt clenched around his finger. he added a second one, the fullness of it almost overwhelming. “john, i’m gonna…” he gave you another rough kiss. john pulled you closer using those fingers inside of your messy cunt, thumb pressing hard on your clit. it was so possessive and dirty that you could feel the start of your orgasm. “come f’ me, darling. go’on.” you let go, clenching hard around him. he kept going unless you went limp, finally removing his fingers with a pop. his other arm was holding you up as he tasted you on his fingers. “sweet like honey.” you rolled your eyes at his cheesiness. “you’re so full of shit.” he kissed you again, short and loving. “‘m not lyin’.” another kiss, this one to your forehead. “you wanna stay here tonight? ‘s already late.” you squirmed at the realization you were half naked in a conference room, your colleagues fingers dripping with your wetness as he stood fully clothed, his cock straining against his pants. “is that weird? or too fast? i don’t even know what you want or what i want-“ he kissed you again, this time gruff, like a captain. “jus’ come home with me, honey. ill handle the rest.” and to that, you nodded.
#price is right#price call of duty#captain john price#john price x female reader#john price#captain price#john price x reader#captain price x reader#price x reader#john price x f!reader#john price x y/n#john price x you#price x y/n#price x you#price cod#please dishonor me captain#captain johnathan price#tornadothoughts
611 notes
·
View notes
Text
How to use DXVK with The Sims 3
Have you seen this post about using DXVK by Criisolate? But felt intimidated by the sheer mass of facts and information?
@desiree-uk and I compiled a guide and the configuration file to make your life easier. It focuses on players not using the EA App, but it might work for those just the same. It’s definitely worth a try.
Adding this to your game installation will result in a better RAM usage. So your game is less likely to give you Error 12 or crash due to RAM issues. It does NOT give a huge performance boost, but more stability and allows for higher graphics settings in game.
The full guide behind the cut. Let me know if you also would like it as PDF.
Happy simming!
Disclaimer and Credits
Desiree and I are no tech experts and just wrote down how we did this. Our ability to help if you run into trouble is limited. So use at your own risk and back up your files!
We both are on Windows 10 and start the game via TS3W.exe, not the EA App. So your experience may differ.
This guide is based on our own experiments and of course criisolate’s post on tumblr: https://www.tumblr.com/criisolate/749374223346286592/ill-explain-what-i-did-below-before-making-any
This guide is brought to you by Desiree-UK and Norn.
Compatibility
Note: This will conflict with other programs that “inject” functionality into your game so they may stop working. Notably
Reshade
GShade
Nvidia Experience/Nvidia Inspector/Nvidia Shaders
RivaTuner Statistics Server
It does work seamlessly with LazyDuchess’ Smooth Patch.
LazyDuchess’ Launcher: unknown
Alder Lake patch: does conflict. One user got it working by starting the game by launching TS3.exe (also with admin rights) instead of TS3W.exe. This seemed to create the cache file for DXVK. After that, the game could be started from TS3W.exe again. That might not work for everyone though.
A word on FPS and V-Sync
With such an old game it’s crucial to cap framerate (FPS). This is done in the DXVK.conf file. Same with V-Sync.
You need
a text editor (easiest to use is Windows Notepad)
to download DXVK, version 2.3.1 from here: https://github.com/doitsujin/DXVK/releases/tag/v2.3.1 Extract the archive, you are going to need the file d3d9.dll from the x32 folder
the configuration file DXVK.conf from here: https://github.com/doitsujin/DXVK/blob/master/DXVK.conf. Optional: download the edited version with the required changes here.
administrator rights on your PC
to know your game’s installation path (bin folder) and where to find the user folder
a tiny bit of patience :)
First Step: Backup
Backup your original Bin folder in your Sims 3 installation path! The DXVK file may overwrite some files! The path should be something like this (for retail): \Program Files (x86)\Electronic Arts\The Sims 3\Game\Bin (This is the folder where also GraphicsRule.sgr and the TS3W.exe and TS3.exe are located.)
Backup your options.ini in your game’s user folder! Making the game use the DXVK file will count as a change in GPU driver, so the options.ini will reset once you start your game after installation. The path should be something like this: \Documents\Electronic Arts\The Sims 3 (This is the folder where your Mods folder is located).
Preparations
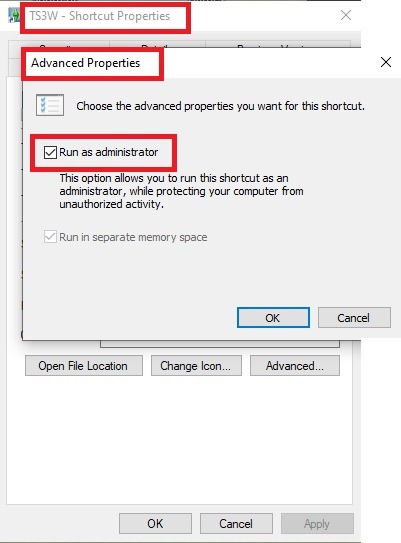
Make sure you run the game as administrator. You can check that by right-clicking on the icon that starts your game. Go to Properties > Advanced and check the box “Run as administrator”. Note: This will result in a prompt each time you start your game, if you want to allow this application to make modifications to your system. Click “Yes” and the game will load.
2. Make sure you have the DEP settings from Windows applied to your game.
Open the Windows Control Panel.
Click System and Security > System > Advanced System Settings.
On the Advanced tab, next to the Performance heading, click Settings.
Click the Data Execution Prevention tab.
Select 'Turn on DEP for all programs and services except these”:
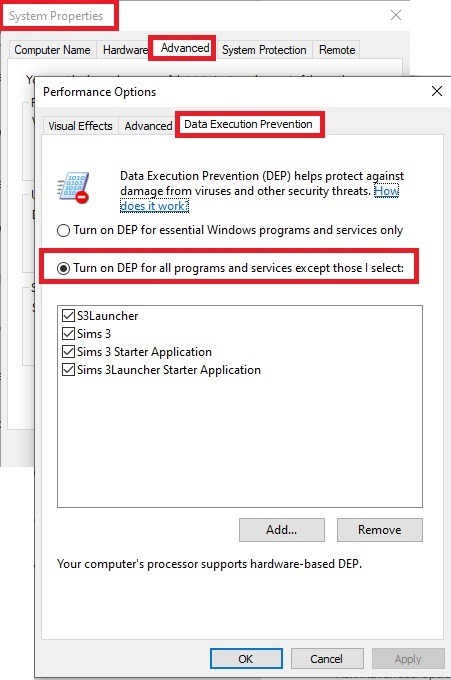
Click the Add button, a window to the file explorer opens. Navigate to your Sims 3 installation folder (the bin folder once again) and add TS3W.exe and TS3.exe.
Click OK. Then you can close all those dialog windows again.
Setting up the DXVK.conf file
Open the file with a text editor and delete everything in it. Then add these values:
d3d9.textureMemory = 1
d3d9.presentInterval = 1
d3d9.maxFrameRate = 60
d3d9.presentInterval enables V-Sync,d3d9.maxFrameRate sets the FrameRate. You can edit those values, but never change the first line (d3d9.textureMemory)!
The original DXVK.conf contains many more options in case you would like to add more settings.

A. no Reshade/GShade
Setting up DXVK
Copy the two files d3d9.dll and DXVK.conf into the Bin folder in your Sims 3 installation path. This is the folder where also GraphicsRule.sgr and the TS3W.exe and TS3.exe are located. If you are prompted to overwrite files, please choose yes (you DID backup your folder, right?)
And that’s basically all that is required to install.
Start your game now and let it run for a short while. Click around, open Buy mode or CAS, move the camera.
Now quit without saving. Once the game is closed fully, open your bin folder again and double check if a file “TS3W.DXVK-cache” was generated. If so – congrats! All done!
Things to note
Heads up, the game options will reset! So it will give you a “vanilla” start screen and options.
Don’t worry if the game seems to be frozen during loading. It may take a few minutes longer to load but it will load eventually.
The TS3W.DXVK-cache file is the actual cache DXVK is using. So don’t delete this! Just ignore it and leave it alone. When someone tells to clear cache files – this is not one of them!
Update Options.ini
Go to your user folder and open the options.ini file with a text editor like Notepad.
Find the line “lastdevice = “. It will have several values, separated by semicolons. Copy the last one, after the last semicolon, the digits only. Close the file.
Now go to your backup version of the Options.ini file, open it and find that line “lastdevice” again. Replace the last value with the one you just copied. Make sure to only replace those digits!
Save and close the file.
Copy this version of the file into your user folder, replacing the one that is there.
Things to note:
If your GPU driver is updated, you might have to do these steps again as it might reset your device ID again. Though it seems that the DXVK ID overrides the GPU ID, so it might not happen.
How do I know it’s working?
Open the task manager and look at RAM usage. Remember the game can only use 4 GB of RAM at maximum and starts crashing when usage goes up to somewhere between 3.2 – 3.8 GB (it’s a bit different for everybody).
So if you see values like 2.1456 for RAM usage in a large world and an ongoing save, it’s working. Generally the lower the value, the better for stability.
Also, DXVK will have generated its cache file called TS3W.DXVK-cache in the bin folder. The file size will grow with time as DXVK is adding stuff to it, e.g. from different worlds or savegames. Initially it might be something like 46 KB or 58 KB, so it’s really small.
Optional: changing MemCacheBudgetValue
MemCacheBudgetValue determines the size of the game's VRAM Cache. You can edit those values but the difference might not be noticeable in game. It also depends on your computer’s hardware how much you can allow here.
The two lines of seti MemCacheBudgetValue correspond to the high RAM level and low RAM level situations. Therefore, theoretically, the first line MemCacheBudgetValue should be set to a larger value, while the second line should be set to a value less than or equal to the first line.
The original values represent 200MB (209715200) and 160MB (167772160) respectively. They are calculated as 200x1024x1024=209175200 and 160x1024x1024=167772160.
Back up your GraphicsRules.sgr file! If you make a mistake here, your game won’t work anymore.
Go to your bin folder and open your GraphicsRules.sgr with a text editor.
Search and find two lines that set the variables for MemCacheBudgetValue.
Modify these two values to larger numbers. Make sure the value in the first line is higher or equals the value in the second line. Examples for values: 1073741824, which means 1GB 2147483648 which means 2 GB. -1 (minus 1) means no limit (but is highly experimental, use at own risk)
Save and close the file. It might prompt you to save the file to a different place and not allow you to save in the Bin folder. Just save it someplace else in this case and copy/paste it to the Bin folder afterwards. If asked to overwrite the existing file, click yes.
Now start your game and see if it makes a difference in smoothness or texture loading. Make sure to check RAM and VRAM usage to see how it works.
You might need to change the values back and forth to find the “sweet spot” for your game. Mine seems to work best with setting the first value to 2147483648 and the second to 1073741824.
Uninstallation
Delete these files from your bin folder (installation path):
d3d9.dll
DXVK.conf
TS3W.DXVK-cache
And if you have it, also TS3W_d3d9.log
if you changed the values in your GraphicsRule.sgr file, too, don’t forget to change them back or to replace the file with your backed up version.
OR
delete the bin folder and add it from your backup again.
B. with Reshade/GShade
Follow the steps from part A. no Reshade/Gshade to set up DXVK.
If you are already using Reshade (RS) or GShade (GS), you will be prompted to overwrite files, so choose YES. RS and GS may stop working, so you will need to reinstall them.
Whatever version you are using, the interface shows similar options of which API you can choose from (these screenshots are from the latest versions of RS and GS).
Please note:
Each time you install and uninstall DXVK, switching the game between Vulkan and d3d9, is essentially changing the graphics card ID again, which results in the settings in your options.ini file being repeatedly reset.
ReShade interface
Choose – Vulcan
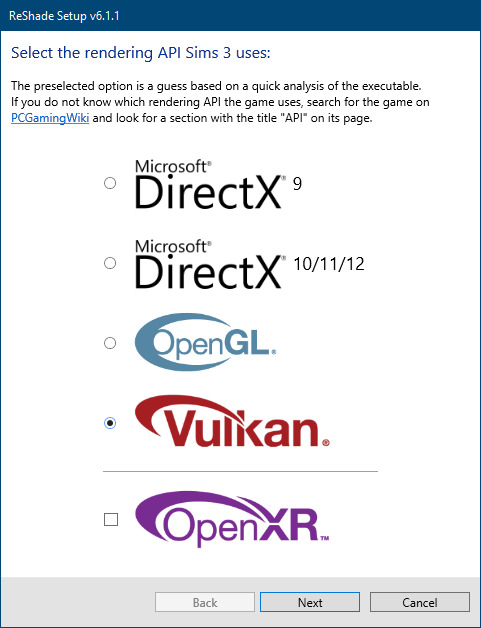
Click next and choose your preferred shaders.
Hopefully this install method works and it won't install its own d3d9.dll file.
If it doesn't work, then choose DirectX9 in RS, but you must make sure to replace the d3d9.dll file with DXVK's d3d9.dll (the one from its 32bit folder, checking its size is 3.86mb.)
GShade interface
Choose –
Executable Architecture: 32bit
Graphics API: DXVK
Hooking: Normal Mode
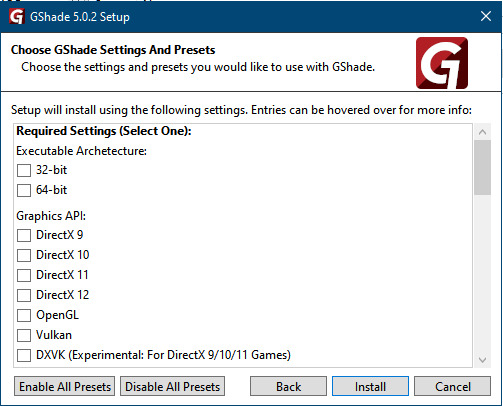
GShade is very problematic, it won't work straight out of the box and the overlay doesn't show up, which defeats the purpose of using it if you can't add or edit the shaders you want to use.
Check the game's bin folder, making sure the d3d9.dll is still there and its size is 3.86mb - that is DXVK's dll file.
If installing using the DXVK method doesn't work, you can choose the DirectX method, but there is no guarantee it works either.
The game will not run with these files in the folder:
d3d10core.dll
d3d11.dll
dxgi.dll
If you delete them, the game will start but you can't access GShade! It might be better to use ReShade.
Some Vulcan and DirectX information, if you’re interested:
Vulcan is for rather high end graphic cards but is backward compatible with some older cards. Try this method with ReShade or GShade first.
DirectX is more stable and works best with older cards and systems. Try this method if Vulcan doesn't work with ReShade/GShade in your game – remember to replace the d3d9.dll with DXVK's d3d9.dll.
For more information on the difference between Vulcan and DirectX, see this article:
https://www.howtogeek.com/884042/vulkan-vs-DirectX-12/
754 notes
·
View notes
Text
Part V: How Trump 2.0 has Harmed Foreign Policy
Part five of my summary report of the second Trump administration's first 100 days is out now, along with the conclusion. Now that the full report is finished, you have three options for reading it: a new PDF version, a website version, and these Medium posts.
For this final entry in the project, we're examining 16 ways that the second Trump administration has already worsened US policies on diplomacy, war, foreign aid, trade, and more:
85. Abandoning Global Diplomacy 86. Destroying Foreign Aid 87. Starting a Trade War 88. Advocating Expansionism 89. Waging Imperialist Pressure Campaigns 90. Spending More on War 91. Killing More Civilians 92. Bombing the Broader Middle East 93. Doubling Down on Violence in Palestine 94. Risking War in Iran 95. Risking War in Mexico 96. Meddling in Latin America 97. Supporting the Salvadoran Dictatorship 98. Exploiting Ukraine 99. Risking War in China 100. Decreasing Nuclear Security
Now that we've reached the end, I've also published a conclusion to the report at the end of the article linked above. In it, I argue that Trump's second presidency is defined by a balance between major changes to and major continuity with the status quo of US politics. Because of this, a "return to normalcy" is not an option:
So long as the next Democratic presidency prioritizes a “return to normalcy,” Trump will be successful in permanently reshaping US politics in his image. This is not a wound which will heal on its own, but a wound which will become infected without proper treatment. The first 100 days of the next administration must be committed to a campaign of Detrumpification which is at least as ambitious as Trump’s first 100 days, pursing a positive vision for the future rather than promising a return to the status quo which produced Trump in the first place.
Thanks to everyone for your kind words and support throughout this project!
100 notes
·
View notes
Text
Code Lyoko Chronicles 2.0
The Code Lyoko Chronicles are a series of 4 sequel books originally released in Italian in around 2010. Set a short while after the season 4 finale, parts of book 1 recap a story similar to the TV series but with a number of small changes (there's no RTTP for example) while the gang uncover some new secrets in the Hermitage that set them on the path to finding Aelita's mother, Anthea. But XANA survived and is coming back for revenge, and the gang's investigation into the secret history of Franz Hopper, Project Carthage and the Supercomputer puts the men in black on their trail as well, not to mention the shady Green Phoenix organisation who funded Hopper's work.
The books were published in a number of languages, but not in English - so that's where the fans come in. As one of the first translation projects we did for CodeLyoko.fr, finishing in 2014, the original completed English release was pretty rough. 10 years later, armed with more translation sources, better resources and many years of translation experience, I decided to take another crack at it. And after many months of hard work and procrastination, I've produced a version 2.0 that I'm pretty happy with.
Links and notes on the various changes under the cut!
New translations!
My co-translator Kelsey and I didn't have a lot of serious translation experience when we picked up where Rhys Davies left off in his English translation project, and we were definitely prone to making mistakes. And it didn't help that for books 3 and 4, a few things got lost somewhere in the process of the text being translated from Italian > Spanish > French > English. I revised our original translation and this time I referenced multiple sources to try and make sure I got the interpretation right. It won't be perfect, but it's definitely better than our original attempt!
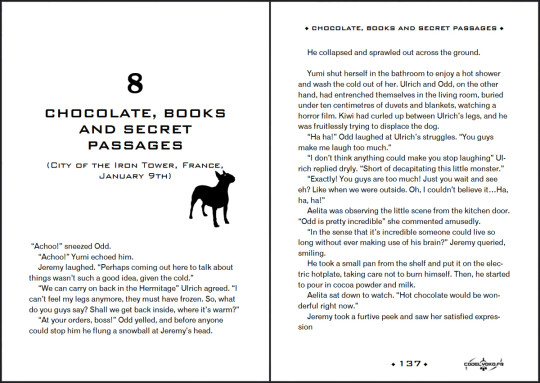
The second half of book 2 was based on the official French version, which I discovered was slightly condensed and abridged to lower the page count. The new English translation expands the text to restore the parts that were omitted. I also changed the title from The Nameless City to The City with No Name - there was never an official English translation, but I did find a marketing document with the titles listed in English, and that was the only one that differed.
Here's a page comparison with a few changes, mostly minor, but one big change to the context of Odd and Ulrich's conversation. With my apologies to Kiwi for the original mistranslation.
New formatting!
I got better at formatting Word docs and realised I should have the text alignment set to justify. The books look a lot neater now!
Accessibility!
I added alt text descriptions to all the images, and the PDFs all have a proper table of contents now so you don't have to scroll to the end of the book to find the navigation.
(Note I don't have a lot of experience with detailed image descriptions and I haven't done much testing with a screen reader - feedback is welcome from people who know more about it!)
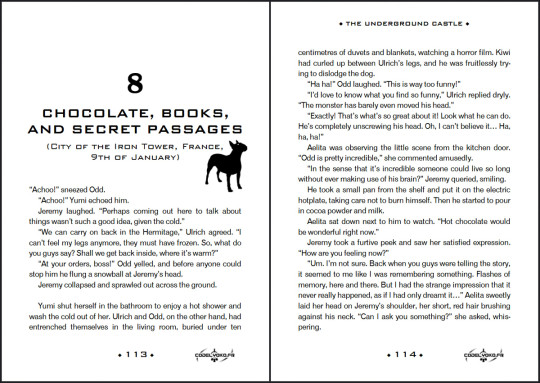
New scans!
The centre of each book has several colour pages with images and text to supplement the story, and some of the original scans were quite small or had part of the image disappearing into the spine of the book. And the only way to fix it seemed to be to obtain physical copies of the books (probably in Spanish), pull the pages out and scan them flat. So I did. And I think they look great. (Black lines added to hide spoilers.)
My original intention was to upload these to CodeLyoko.fr, but I haven't been able to do that yet, so for now they'll just be available on Google Drive. This translation wouldn't have been possible if not for the other people on the fanslation team - not just my fellow translators, but also all the people who worked on scanning, formatting and editing. Special thanks also to Rhys Davies for kicking off the English translation. You can read more about the Chronicles and the fanslation project here on the website. (Yes I still need to revise the translation of those pages too. Someday.)
So yeah, it's taken a while, but I'm glad I can finally put out a better version of these books for people to discover. Enjoy!
Version 2.0 PDFs here! (Google Drive) ePub versions coming soon.
82 notes
·
View notes
Note
what writing program do you use?
I use LibreOffice, a free open source word processor. It's very customisable, I change my document bg to medium grey so that my eyes don't hurt. It saves documents as .odt by default
When I was finished a book I would open it in Word to run a spelling and grammar check as Word used to have more sophisticated proofreading abilities but the last time I did it it was absolute tripe due to increased implementation of ai. I also use Word to format the pdf for printing
To turn the .odt document into an epub novel i save as .html and open in Calibre to format the ebook. You can then read it using google books or apple books on ur phone
Other programs I've used/tried:
Google docs - the only reason anyone should use this is if they're writing cross platform in which case it can be useful. Hands-down the worst spelling suggestions out there and stupidly lacking in functionality on mobile
Bear (iOS) - it's nice if you like markdown and only exporting as .rtf files in the free version. Works well, stores documents offline, and uses a nice tag system to organise stuff. I wrote all my Siren prose in this
Scrivener - overcomplicated and distracting
Discord - honestly prefer it when writing cross platform over gdocs, sometimes I'll write a paragraph or so on mobile and just paste it into my libreoffice when I get home. My pc is immovably large & I don't own a laptop
Word (for writing) - if you click & drag to highlight text in libre, it will highlight only the exact letters you selected. Word has a fun feature where it makes assumptions about what you REALLY wanted to do and tries to fight you on it. Fuck Word
103 notes
·
View notes
Note
how did you get into studying chinese?? also any tips for beginners?
How I Got Into Studying Chinese + A Beginner's Guide!
So, a lot of you have asked me about how I started studying Chinese and tips for beginners. I thought I’d share my story and a little guide for anyone wanting to dive into this (Piàoliang ! 漂亮 - beautiful ) language! +++ I will put a link of a PDF document and free webs that will help uuu at the end !
First things first, why Chinese? For me, it’s because I’ve always been drawn to the culture—everything from the festivals, history, and even Chinese dramas. But most importantly, my dream is to get into a good college in China! 🏫Just thinking about living there, speaking the language fluently, and experiencing everything firsthand keeps me motivated.
Starting Out:
When I first started, I was overwhelmed (it’s Chinese, after all!). But once I broke it into smaller steps, things became manageable and even fun! Here’s what helped me:
Step 1: Master the Basics
Learn Pinyin: Pinyin is the Romanized system for pronouncing Chinese words. It’s like the training wheels for speaking Chinese. Apps like HelloChinese, or Duolingo (for pinyin .. it HELP TRUST ME) !
Practice Tones Daily: Chinese is a tonal language, meaning the tone you use changes the meaning of the word. Start with the four basic tones and practice them with simple words like 妈 (mā - mom), 马 (mǎ - horse), or 吗 (ma - question particle). Don’t stress if it feels awkward at first—it gets easier!
Step 2: Build Vocabulary Slowly
Focus on high-frequency words like numbers, greetings, or common verbs. Think of words you’d use every day.
Try flashcards! Apps like Anki or Quizlet are amazing for memorizing characters and words.
Step 3: Start Learning Characters
Characters might seem scary at first, but they’re not impossible! I recommend starting with basic ones like 人 (rén, person) or 好 (hǎo, good).
Practice writing them—it helps you remember better. Plus, it’s oddly relaxing!
Step 4: Immerse Yourself
Watch Chinese shows or movies (C-dramas are SO good). Even if you don’t understand, you’ll start picking up tones and common phrases.
Listen to Chinese music or podcasts. [My playlist here!] while reading lyrics to learn new words.
Step 5: Practice Speaking
Speak out loud as much as possible, even if you’re just talking to yourself.
My Top Tips for Beginners:
1. Set small goals. Start with something achievable, like learning 5 words a day.
2. Be consistent. Even just 15 minutes a day is better than cramming once a week.
3. Get a notebook. Writing down characters and vocab feels more fun
4. Celebrate your wins. Did you recognize a word while watching a show? Did you finally pronounce something right? That’s progress!
5. Don’t compare yourself to others. Everyone learns at their own pace.
PDF DOCUMENTS + SITE WEB (FOR MANDARIN LEARNING)
document n¹ if the link didn't work write down on Google ( nihao textbook 1 pdf)
document n² if the link didn't work write down on Google ( Chinese text a pdf )
site num ¹
site num²
Why You Should Keep Going:
I know learning Chinese can feel overwhelming, but trust me, every step you take gets you closer to your goal. For me, imagining myself walking around a college campus in China, speaking fluently, and making friends there keeps me inspired. If you have a big dream like mine, hold onto it—it’ll carry you through the tough days!
Remember: 加油 (jiā yóu - "keep going"). You've got this!
@bloomzone ✒️
#bloomivation#bloomdiary#becoming that girl#glow up#wonyoungism#wonyoung#it girl#dream life#divine feminine#creator of my reality#it girl affirmations#love affirmations#study blog#study motivation#studyspo#stay focused#study inspiration#confidence#jang wonyoung#this is what makes us girls#feminine energy#alone but not lonely
67 notes
·
View notes
Text
Hey so you can format your ebook in MS Word.

This is a *very* quick demo that I threw together as an example. These are for publshing on places that use PDFs, not .epubs, like Ko-Fi. I use .epubs so I'm not super knowledgable on which sites prefer PDFs.
And the crucial part and appeal of ebooks is that the're reflowable. Which means that the end user picks the font size and shape for their e-reader and personal experience. A regular MS Word PDF isn't reflowable.
There are ways to do it fully, and tediously, to make it reflowable with Word, I just didn't bother, but there are tutorials out there. This is post is specifically for PDFs.
If you're not loading a book into an e-reader, you can use MS word to still make your PDF *look* like a print book.
Saying this now because in trying to read a book printed on 8.5x11 legal paper with those margins is a little tough.
And it's not hard, either. You just go into the layout settings and change it from "Letter" to something more fitting of a standard book page size. I picked A5 for this example.
Drop-Cap is also a super simple option, then set the text to align justified, add your page numbers, and boom.
I will say, though, that as someone with a pretty intense need for full creative freedom, MS Word is infamous for being finnicky and difficult when you try to get complicated beyond black and white text on the page, doing any sort of fancy formatting especially with images.
This is what I did in Adobe InDesign, a program built for the layout and design of print media used by professionals across industries:

I made that chapter art and my first chapter pages don't have page numbers by choice. This is the full print-ready page of the PDF I send to my printers, not the .epub file.
You do not need InDesign, there are plenty of programs out there (like Vellum) with less of a learning curve and more plug-and-play options. ID is just what I use because I already know it.
MS Word is good enough for what it's good for, and if you are giving people PDFs to read, it doesn't take much to make their reading experience that much more enjoyable by making it *look* like an actual book, not just a Word document.
#writeblr#writing#writing a book#writing advice#writing resources#writing tips#writing tools#ebooks#ms word
31 notes
·
View notes
Text
I've heard some people lauding the NATO phonetic alphabet, and am just sort of scratching my head about that.
Like, here were the criteria for words in the alphabet:
Be a live word in each of the three working languages.
Be easily pronounced and recognized by airmen of all languages.
Have good radio transmission and readability characteristics.
Have a similar spelling in at least English, French, and Spanish, and the initial letter must be the letter the word identifies.
Be free from any association with objectionable meanings.
But then you look at what they actually picked and it's like ... okay, you picked a bunch of names? You picked "Whiskey"? On the assumption that what, this is a drink that's common everywhere in the world? That everyone is fine having an alcoholic drink as one of the words? Nowadays I can pull up a global map of whiskey consumption, but that's not something they could do in the 50s, and I would guess that they were not considering e.g. Muslim pilots. (Some places do actually change out "Whiskey" for this reason, along with other regional variants, which are exactly the sort of thing you want in a standard everyone is supposed to be on the same page about.)
And alright, whatever, I think the list is kind of confusingly culturally bound given what the criteria were, but it served its purpose well enough ...
Except that as standards do, it began to be used in other places, including by civilians, and including by civilians when both parties have not agreed on the NATO phonetic alphabet. It would be great if we all had an agreed upon phonetic alphabet that everyone knew, but the fact that some people don't know it makes it a lot worse, particularly if you're on a customer service call, and particularly if you're on a customer service call with someone who is not a native English speaker and who was not raised in the same cultural context that the NATO phonetic alphabet assumes.
If you, like me, love terrible quality PDFs, then some helpful soul made a FOIA request for "The Evolution and Rationale of ICAO Spelling Alphabet", and you can read it. This is a fun read for me, because it's not just concerned with the phonetic alphabet, but the history of it, and in one case they're just like "welp, we have been completely unsuccessful in locating this file". And I'm sitting here in 2024 reading a ratty PDF of a file from 1959, thinking "yup, that's how it is sometimes, they do all that work making a report and then no one fucking preserves it".
(Most of the document is about whether they would use the US-UK version or the ICAO version, and then some modifications and why they were made, and this is all interesting, but I'm kind of still scratching my head about some of these, especially given what they say the criteria were. "An international alphabet designed to fit the multilingual requirements of all nations"? Maybe they really thought that's what they were doing in the 1950s.)
Anyway, this isn't to say that I think we need a new, better phonetic alphabet, just that I think the current one is not actually the pinnacle of standards that some people seem to think it is, and in fact, it contains a lot of baggage from the time and place it was made. Further, it's being used in places well outside the environment it was made for, and unless everyone is trained in it (and maybe even if they are) some of the deficiencies get magnified.
69 notes
·
View notes
Text
Flatland: An Adventure in Many Dimensions, a 2024 translation into casual English, is done!
You can read and download it completely 100% for free on the Internet Archive!
When it's done loading, you will be able to read it directly online, and the Internet Archive will automatically generate audiobook versions with text to speech.
You can also download and torrent various versions as PDFs, epubs, and editable documents so you can change the font, paragraph styles, and do anything else you want with it, like give everyone neopronouns or turn them into unicorns!
I will also be making my own audiobook version at some point. but that's gonna take a while since this is around 38,000 words long. You can make your own too! And you can translate this into other languages!
Edit: The "lazy" (unedited) audiobook is now available on youtube! It is in two videos, since my computer wouldn't let me combine them lol.
“https://www.youtube.com/playlist?list=PLpFcEwm88RUsMYmhY6DBYZcIvvKv6_ZS3”
Did I mention this is public domain? Because I hate capitalism and I'm poor and I want other people to also be able to enjoy books for free.
Buy the cheapest possible print version for $7.45 (I get $2).
This version is a paperback with no illustrations, no prefaces, a greyscale cover to make it as cheap to print as possible, so that more people can afford to buy it.
Buy the regular print version for $22.17 (I get $5).
This version is a hardpack with illustrations, the preface from the original author, and one from me.
You can also download all the HD illustrations included in this story here on the Internet Archive.
If you enjoy reading it, you can also donate directly to "TinyelFlatland" on paypal!
And if I haven't made it clear yet, this is Public Domain. You are 1million% encouraged to download it, print it, share it, do literally anything you want with it. I am 100% serious.
Now you can all join me in laughing at the narrator :)
Edit: oh wait lol. I realize I wrote this post assuming only people who already know what Flatland is will see it.
Uh so people who have no clue what Flatland is, here's a quick summary:
The narrator, who hides his identity using the alias "A. Square", is a resident of a world called Flatland, a world that only exists in two dimensions, where every person is a flat geometric shape. A. Square tells us the history and culture of his world, which is rife with bigotry that he buys into without question. Until New Year's Eve, before the first day of the year 2000, when a mysterious stranger claiming to come from the third dimension appears in his living room, and starts saying things that sound absurd, and performing what seem like magic tricks.
The original Flatland: A Romance of Many Dimensions, was published in 1884 by Edwin Abbot Abbot. It is both a scathing political satire criticizing the systems of bigotry in Victorian England, and an entertaining introduction to the concept of more than three dimensions.
Edit: Now there's an itch.io page too!
Edit again: And you can read it here on tumblr now! @flatland-a-2024-translation and on Pillowfort!
#Free books#ebooks#audiobooks#public domain#Flatland#Rjalker writes Flatland a 2023 Translation#Rjalker reads Flatland a Romance of Many Dimensions#Flatlandaromanceofmanydimensions#Flatland an Adventure in Many Dimensions#Flatland an Adventure in Many Dimensions a 2024 translation into casual English#A Square#A Sphere#modern translation#modern adaptation#WOOHOOOOOOOOOOOOO#Flatlandanadventureinmanydimensions
130 notes
·
View notes
Text
Kimi ni Koisuru Satsujinki-Killer In Love
Review + Document Read

"Suzuki Ryuto is an introverted, timid college student. Every day he puts on a fake smile, trying his best to blend into a group of outgoing students even despite cruel teasing over his virginity. One day he comes to a drinking party where he meets a beautiful girl, Kokoa. Per her request, he pretends to be her boyfriend to ward off the stalker who has been harassing the girl."
Read it yourself!
I've spent the past few days compiling the panels into a Word document for easy access to read. I recommend converting it to a pdf document for better results. However, if on mobile, just copy the link or view the document in a browser and change your browser to the desktop site. I tried my best to make the document look nice for better viewing, but alert me if there's any problems. There are 900 pages/pictures, so please give it time to load.
Lazy review;
Im not good with reviews, but this was such a good read with such a disappointing ending.. I wish we had more insight into the reasons the other yanderes liked our main character, Kokoa. I feel like we got left out of a lot of information, the people behind it all, what happened to Kokoa, what happened to Ryuto? Will they reconnect? I honestly had hopes for a better ending.. i was shocked once it was over. It was well written (in my eyes), yet I couldn't help but feel like it was cut short. The final chapter loses the feelings of the first chapter. It makes me think the manga got canceled, or hopefully, there will be a sequel? I think the yandere representation is very relatable, I found myself relating to almost all characters involved. Despite the disappointment in the final chapter, this was still a very good read, and I totally recommend it. (Considering the document i made is free, and I paid 10$ for the ability to read it, abuse the opportunity. ) Can't get over the ending and all the unanswered questions.. felt left in the dark nearing the final chapter. I didn't like how unlikable the Darling was, most of the yanderss fell flat, nearing the same motives.
Ranking?

⭐️⭐️⭐️
#Kimi ni Koisuru Satsujinki#killer in love#yandere manga#yandere media#yanblr#irl yan#yan blog#yancore#bpd obsession#bpd yandere#stalker bf#stalker yandere#irl yandere#obsession#yandere#obsessive yandere#killer manga#romance manga#obsessive read#actually obsessive#obsessive love#obsessive thoughts#obsessive
48 notes
·
View notes
Text
🍓Bunni's Commissions!🍓
After hitting 2000 followers and realizing I would like some kind of extra income for the massive amounts of writing I put out, I've decided to open commissions! Below will detail what I will write, my prices, the payment method, and the number of slots available! Please read carefully before reaching out!
Content
What will I write?
Most things! I'll write sfw and nsfw, and am okay with most content that you might ask from me. (Be sure to check the 'What won't I write?' section for details) Character x Character, Character x Reader, Character x OC are all accepted, and all relationships will be accepted as well! Yandere, omegaverse, and other alternate AUs are also allowed.
The current fandoms I am offering are: Honkai Star Rail, Genshin Impact, Zenless Zone Zero, Twisted Wonderland, and Cookie Run Kingdom.
Prices between all listed options will change the final price, so read the pricing section carefully!
What won't I write?
I will not write incest or any extreme kinks/fetishes, so no vore, inflation, etc.. If you have any questions, I will confirm or deny them when discussing them in private. I also will not write detailed extreme abuse, but I am fine with alluding to past abuse. No teacher/student relationship and no adult/child relationship unless the relationship is strictly platonic or parental.
References for my writing are on my masterlist.
Pricing
Prices vary between each fic written because price is dependent on word count + relationship + content within the fic.
Word Count
500-1000 words = $5
1000-2000 words = $10
2000-3000 words = $15
3000-4000 words = $20
4000-5000 words = $25
5000-6000 words = $30
6000-7000 words = $35
If I go over the word limit set slightly, you will not have to pay extra money for it.
Relationships
Character x Character = $5
Character x OC = $10
Fic Content
Nsfw is an additional $5
Each specific kink is also an additional $5
AUs are also an additional $5
Payment
I accept payment through Paypal or Kofi. All payments will be discussed privately between me and the requester. I require half (or full, if the requester would prefer) to be paid up front, and the other half to be paid after the work is finished before I give it to the requester.
You will receive the work as a pdf file and be given access to the document which I wrote it on as a viewer. I can also post the writing on my tumblr if the requester wishes.
I do not permit the posting of my commissions publicly by anyone other than myself.
How do I get a commission?
Privately messaging me on my tumblr account is the only way to start a commission with me. In the private messages we will discuss the details of pricing and the fic itself. I will only have a set amount of slots open at a time, and if you do not respond quickly, you may lose your spot. (I will try to be understanding, as my time difference is very large when compared to most of you.)
Current Slots
Currently, I am accepting 5 commissions to start. I will make a separate post and update this post when slots are taken. This post will be added as a link on my rules at the top of my page. My commission status will also be listed at the top of that post.
Currently, 1/5 slots are open.
19 notes
·
View notes
Text
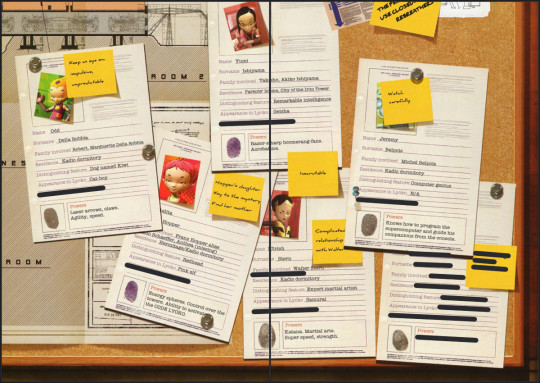
Tiny Book? Tiny Book. Pt1.
Idk yall I just felt like writing a little how-to of how-I-do my tiny A9 books! So if you've ever been interested, I hope this will be helpful. This will be neither a beginner typesetting nor beginner bookbinding tutorial; as I go through my process I will only be showing my process and providing a few tips, assuming you already have the basics understood. We can worry about the rougher technical skills in another post.
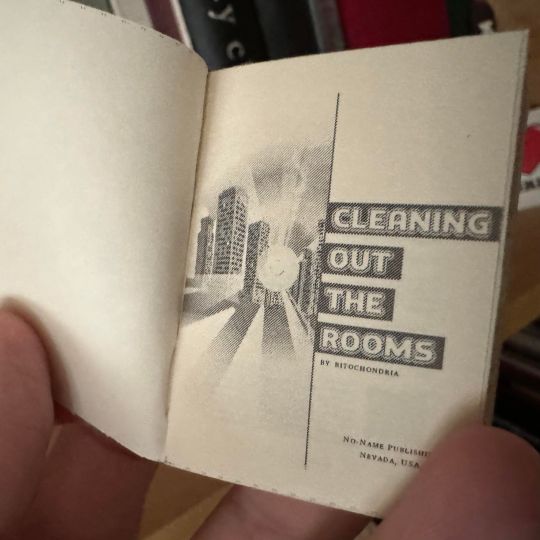
Also keep in mind that this guide includes images of fic I've bound, and you're zooming into these fics at your own discretion. I am not responsible if you read something yucky. I know you have a lot of options out there but thank you for flying No-Name Publishing.
Tiny books part 2; Tiny books part 3

Just like with regular ficbinding, there are layers, and they are:
1 - Typesetting and Imposing 2 - Printing 3 - Cutting, Folding, and Sewing 4 - Gluing, Rounding/Backing, Endbands 5 - Building the Case and casing in 6 - BOOK
In this part we will be focusing on steps 1 and 2. Please feel free to skip to the area you're interested in most.
1 - Typesetting and Imposing
Okay, so this area has some nuances that you don't have to consider so closely with typesetting for more traditionally sized books. To me, these tiny books are not about readability, they are about novelty. As such, I do not prioritize readability. Instead, I try to achieve something that is closer to scale. That said, neither do I want these illegible. But we'll begin from the top.
You want to make a tiny book, but you're wondering, what would be an appropriate word count for a tiny book? Tiny books are the perfect medium for the ficlettes, the shorties, the one-shots. They are also perfect for the mid-sized, 10-15-20k fics, in my opinion. Here we can see,

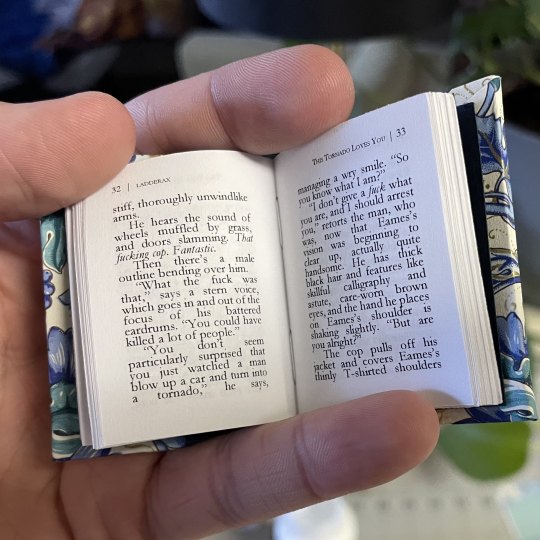
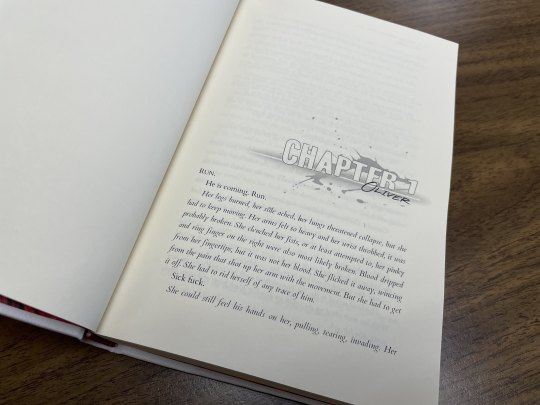
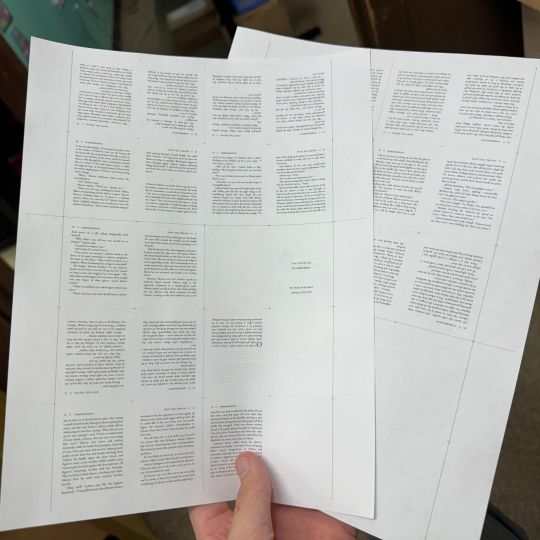
On the left we have a fic that is exactly 12,771 words, typeset on a 1.5" x 2" (37 × 52 mm) document, with .3" margins, 6pt Garamond font, and 5pt line spacing. This book is only approaching 1/2" (13mm) wide, and only took 5 sheets of Letter paper to print. On the right we have a fic that is exactly 1,939 words, typeset to the same specifications. This book is only 4-5mm wide, and took only 1 sheet of Letter paper.
In my opinion this format of book begins getting unruly around the 300-page mark. However, making any combination of margins, fonts size, and line spacing will yield different page results for different word counts. For example:
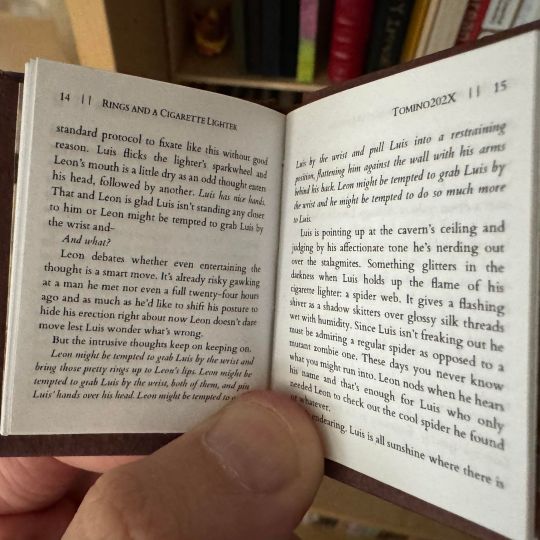
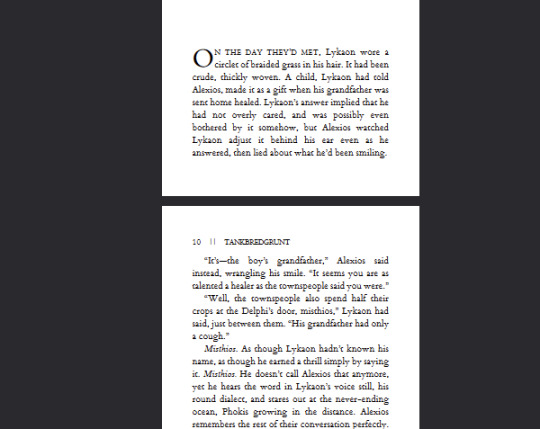
Like the above, in each of these examples I typeset in Garamond font @ 6pt size and 5pt line spacing. Typesetting on an A9 page, this is about as small as I felt comfortable sizing my font while still being legible. But notice the rivers between the words--the rivers of white space bisecting the lines, due to the Justified alignment battling the admittedly tiny work surface. At this scale, with the font at this size and alignment, those will be unavoidable. Over time I began disliking this in my own work, so I pursued a different method, which was typesetting on a quarter letter page (4.25" x 5.5" / 108mm x 140mm), and allowing my imposer to scale the PDF down.
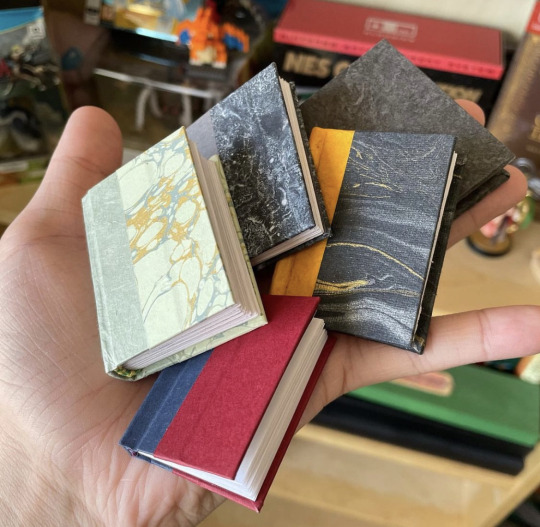
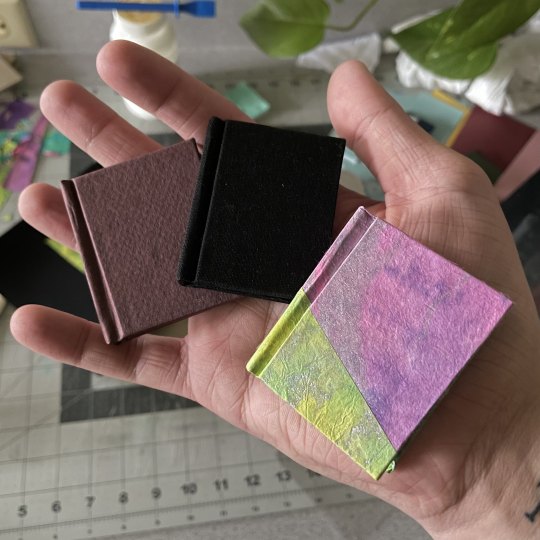
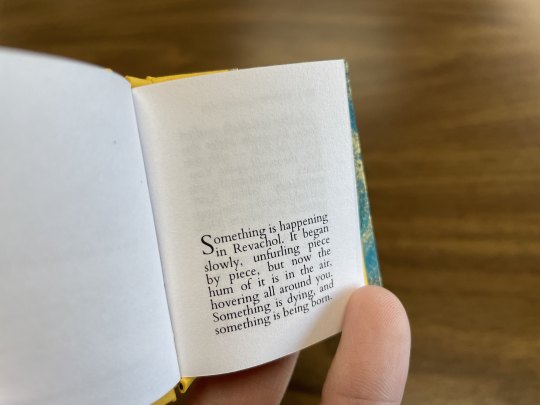
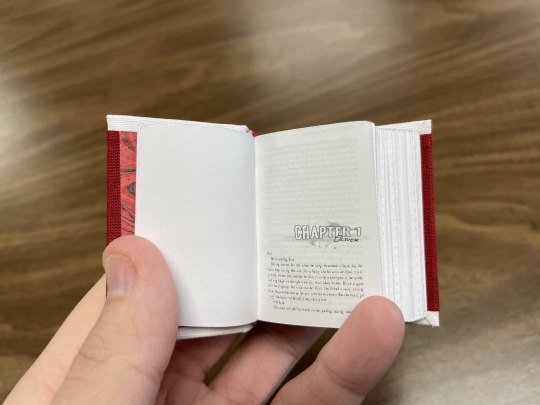
Have you ever seen anything sexier. THIS looks like a tiny book. Little to no rivers, still legible (hand-wobble), and preserves the novelty feel that I desire from a tiny book. This method of scaling down (specifically from quarter letter to A9) does change the final shape of the book, from A9 to A9-ish in this case. Specifically, from 1.5"X2" (37 × 52 mm) to 1.625"X2" (41.3mmX52mm). You're achieving something closer to a square shape, which is delightful to hold. All this to say, you have some freedom with word count, with font size, with page size. I've done as many pages as 376 and as few as 17. The fantastic thing about tiny books--their structure will not be load-bearing, meaning--the only thing stopping you are your tastes.
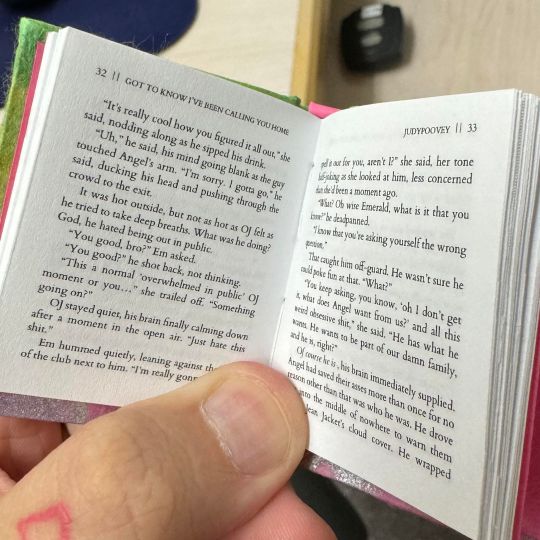
Quickly, some more examples of features in a regularly sized typeset and their tiny counterpart after the imposer has scaled them down. First, scaling half-letter down to A9, a little-over 4X shrinkage:
And from B6 to B9, smaller by 3x:

You notice the compression of every element, and too how entirely unparcable the text in the first example is, sometimes not horrible, sometimes very. Make your decisions dependent on your tastes!
You have decided on the fic you'd like to bind into a tiny book. I will be using my own fic as the typesetting example, and I will be using Word 365 for PC. I'm sure many of my pointers during this process might not apply 1-to-1 if you are using a different word processing software, but hopefully you can adapt the concepts to your program of your choosing.
Kay, next you will do your typesetting. Since this is not a typesetting guide I'm trusting that you have your preferred methods, but I will go through my key steps for setting up a tiny typeset:
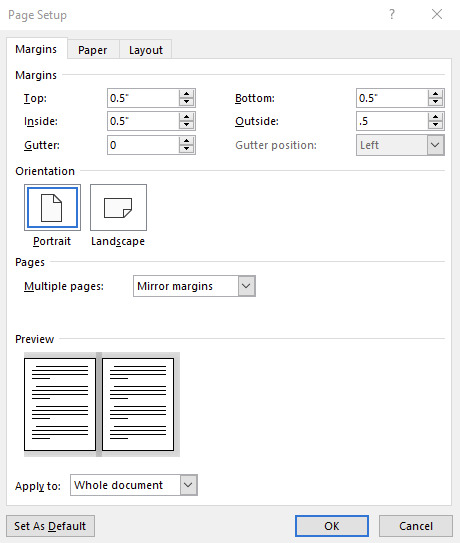
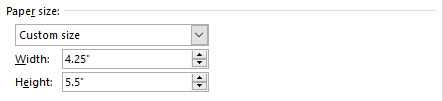
First, for every typeset I delete each default Style, create mine own, and dictate the document size. For this example I will be doing my preferred quarter letter method, setting the custom page size to 4.25" wide and 5.5" tall, and .5" page margins all around (except Gutter; leave 0"). On the Multiple pages dropdown I will select Mirror margins (however, as all my margins are the same size, this is redundant, though may not be the case for you). My body text style will be Cardo font @ 11pt size and Exactly 15pt line spacing, with a .2" first line indent and Justified alignment.
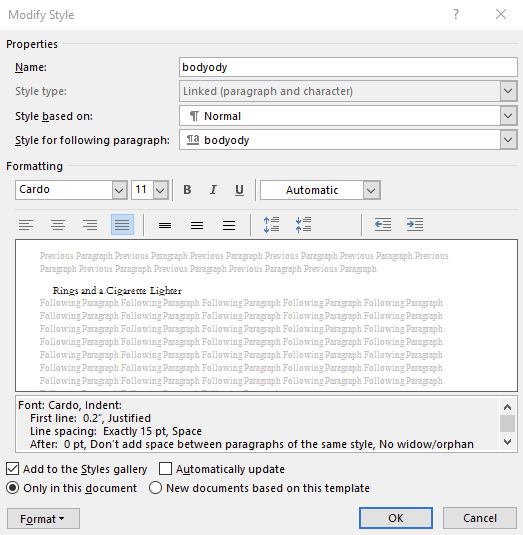
You can use whatever body font you like, I only encourage you to do many many test prints to refine your preferences. Your favorite font for half-letter books might not translate to tiny books. After ~30 tiny books I've found I like Cardo at this size and spacing. And if you're using A-paper sizes, consider doing quarter A4 instead of quarter letter, which is technically A6--4.1"X5.8", or 105mmX148mm. Follow your heart~~nyah 🐱♥
Now I will go to my fic and download the HTML file. I hugely prefer copying from the HTML file rather than the browser itself. It kind of standardizes any goofy formatting that might try to make its way over otherwise, while still preserving the italics and bolds, etc, and makes for an easier editing process. It was important I made my body Style in Word first, so that once I paste the text into my document that Style is automatically applied in one fell swoop (if not, you can change that in your Word settings. Advanced -> Cut, copy and paste -> Merge Formatting. It is a huge time saver.)
Now you've gone through your typesetting process, you have a liddle quarter letter Word document that you're happy with. Gets real close to you. Listen to me--listen, you're going to Export as PDF. Not Save As PDF. Not Print to PDF. Export. It's in--listen--it's in File, then Export, then Create PDF/XPS. You need to Export. Especially if you selected Bookfold instead of Mirror margins in your page settings because we need an unimposed PDF in order for this to work right and exporting to PDF is going to solve 99% of your pdf formatting woes with Word. Okay, I love you 👨❤️💋👨
Now, your EXPORTED pdf should look something like mine. Straight, unimposed.
Now what we're going to do is take this PDF back to my penthouse and freak it. Go to this link for the Renegade Bindery-created and -curated imposition tool. This has been will be is such an incredible FREE asset to you, maintained by a crew of intelligent, skilled Renegade Bindery members who understand the importance of community and accessibility. If you find someone hiding this link behind a paywall of any kind it is not with the creators' permission, so shame on them.
Anyway I will be assuming that you know what imposing your document means. If you've never used this site before, it's very straight forward, and here are my settings for making Tiny Books.
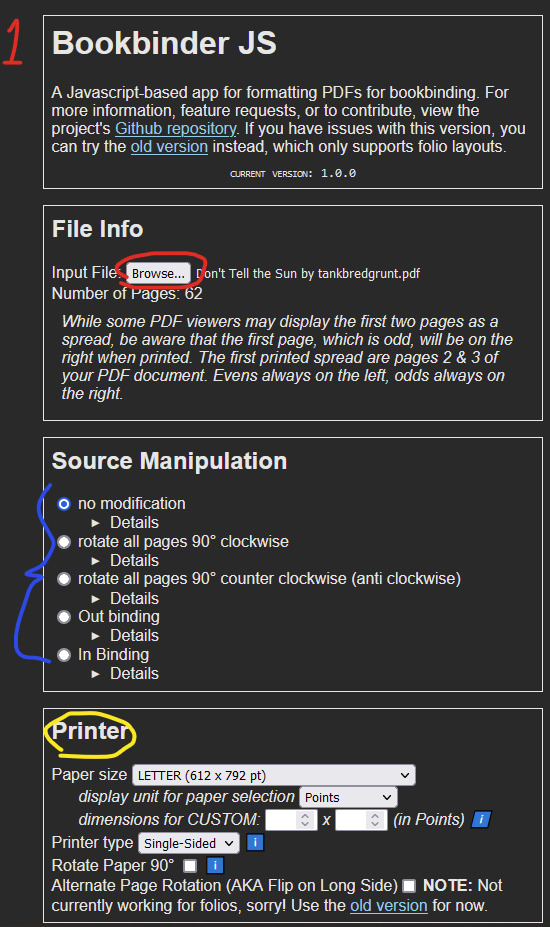
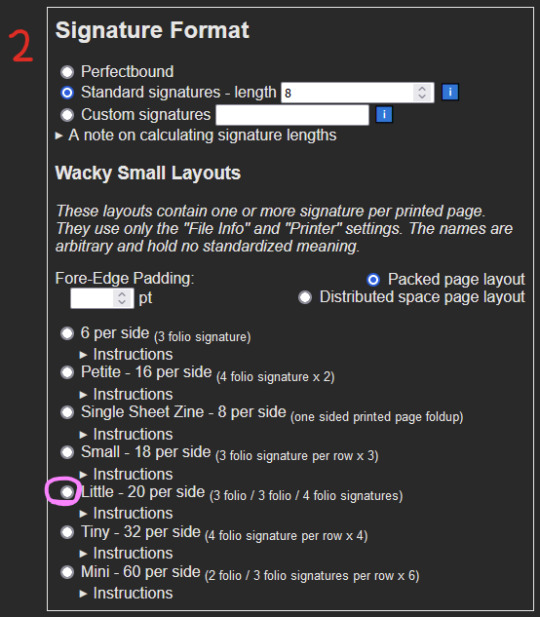
1 - Upload your unimposed exported pdf. 2 - ignore 3 - Select the paper size you will be printing on. This is not the FINAL size of the book, this is what paper you are printing on. These instructions are for Letter sized paper. Don't change any of the other settings right now, I will explain more about the Single-sided vs Duplex option in a bit. 4 - Skip aaalllll the way down to Signature Format. Under Wacky Small Layouts, click on the bubble next to Little. You'll notice there are a lot of options here. I encourage you to play with these settings later on as well, there are so many things you can make with this tool.
Once that's done, scroll down to the very bottom. You'll see the Signature Info area, telling you the results of your imposition. In the case of using the Little option we've selected, 1 sheet of our paper will make 40 book pages. 3-signature-sets of 3/3/4 folio configuration. That's a lot of pages per page.

Anyway for our document today it will cost us 2 sheets of Letter paper, and will make 6 signatures. Math says that's 80 pages. Now, you may be concerned because your typeset PDF is not formatted in a number equally divisible by 40. And why would it be. The imposer is doing that math for you in the background, organizing your pages regardless. In my case, my finished typeset is 62 pages, which means that from my second page, I will only be using my 3 folio segments, and discarding the 4 folio segment. This will make more sense later. Click the Generate button, and save the zipped folder wherever you want. Don't change the name of it.
Unzip that baby, and inside you'll notice 2 files--(filename).pdf_little_packed_backs, and .pdf_little_packed_fronts. Appropriately named as one file contains one side of the sheet that will be printed, and the other file the other side.
And when you open them up, they will look like:
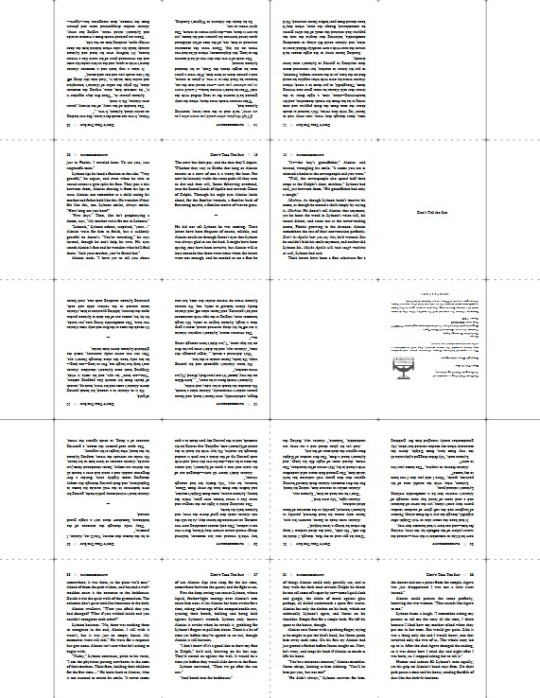
2 - Printing
We are manually duplexing this bad boy, because working at this scale amplifies and compounds every millimeter of difference. Manual duplexing will keep printer skew to a minimum, as the printer will not have to perform gymnastics in order to print on the reverse side of your page. Here are some examples:

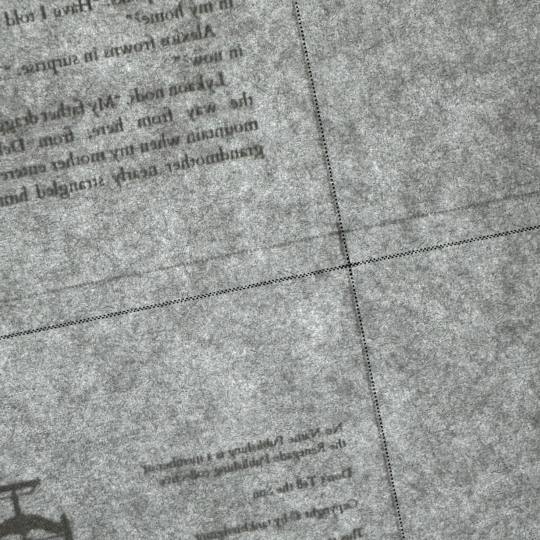
Two auto-duplexing examples of skew, one horizontal and one vertical, dependent on which direction my paper was loaded into the feeder. There is significant skew. Not a horrible issue on full-sized books but these will matter much more on our tiny books, the key issue being that we do not have much to work with in the margins department. Trimming 5-6-7mm of margins of your half-letter sized textblocks might not be much of an issue; however, here, in order to remove all the trim lines during the cutting process, you will be significantly impacting the margins of your tiny textblock.
Now here is an example of the skew from manual duplexing:
MUCH subtler. Your skew with manual duplexing will range from this--less than .5mm--to no skew at all, and you will have to cut off far less of each page to remove the trim lines, maintaining the consistency of appearance of your tiny, beautiful pages. This is why during step 3 of the imposing process we selected Single-sided (which is MANUAL duplexing), and not Duplex (which is AUTO duplexing) appropriately. This will result in you either getting two files for manual duplexing, or one auto duplexing file.
Your next consideration when it comes to printing your liddle book will be whether you want to use an inkjet printer or a laser printer. I've until recently only had a laser printer available to me. I can say after about 6 or 7 little books on an inkjet printer that I prefer the laser printing on tiny books. Here is an example of why:

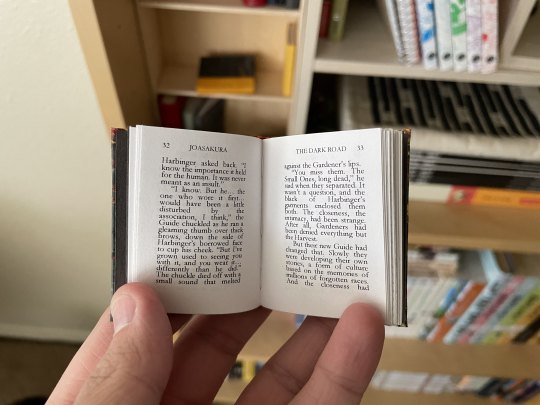
On the left you have a tiny book printed from an inkjet printer printed on the highest quality setting, and on the right is a tiny book printed from a laser printer. These were both printed at the same scaling, same font size, same line spacing, everything. The inkjet printer, printing at this scale, introduces pretty glaring feathering on the letters, whereas the laser printer is crisp as can be. I've said before that to me tiny books are more for novelty rather than readability, however I do still want to make out the word I'm looking at, you know what I mean? For this reason I prefer printing my tiny books from a laser printer. Use what you got though, you'll get a tiny book regardless. Make sure you're flipping on the short edge with these tiny books too, and double check to make sure your page numbers line up. And when you're done you got...
BOOK(-adjacent).
Continue on to part duex.
246 notes
·
View notes