#Delete System Cache with the Disk Cleanup tool.
Explore tagged Tumblr posts
Visit Tumblr Blog
Explore Tumblr blogs with no restrictions, modern design and the best experience.
Last Seen Tumblr Blogs


Fun Fact
70% of Tumblr users say the Dashboard is their favorite place to spend time online.
Text
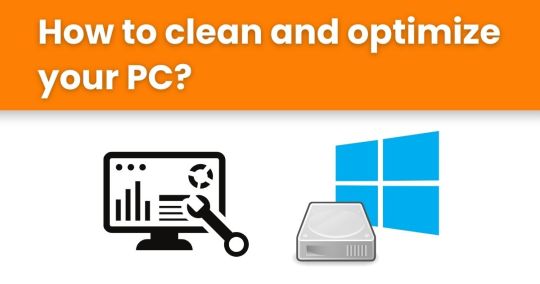
How to clean and optimize your PC?
Your PC is a valuable tool, but over time, it can slow down due to clutter, outdated software, or hardware inefficiencies. Cleaning and optimizing your PC can not only improve its performance but also extend its lifespan. In this guide, we’ll walk you through the steps to clean and optimize your PC for peak performance.
You can also read our latest blog to discover the Best PC Cleaner and Optimizer Software for Windows in 2025 .
1. Clean Up Your Storage
a. Remove Unnecessary Files
Unused files, downloads, and programs can take up valuable space on your hard drive. Follow these steps:
Delete Temporary Files: Use the built-in Disk Cleanup tool on Windows or a third-party application.
Uninstall Unused Programs: Go to "Control Panel > Programs > Uninstall a Program" and remove software you no longer use.
Empty the Recycle Bin: Deleted files still take up space until permanently removed.
b. Organize Your Files
Keeping your files organized helps you find what you need quickly and reduces clutter.
Create specific folders for documents, photos, videos, and downloads.
Regularly back up important data to an external drive or cloud storage.
c. Use Storage Optimization Tools
There are various tools like Rabid Cleaner or CleanMyPC that can help automatically detect and remove junk files.
2. Optimize Your Operating System
a. Update Your OS
Keeping your operating system up to date ensures you have the latest security patches and performance improvements.
For Windows, go to "Settings > Update & Security > Windows Update."
For macOS, navigate to "System Preferences > Software Update."
b. Manage Startup Programs
Too many programs running at startup can slow down boot times.
Open Task Manager (Ctrl + Shift + Esc), go to the "Startup" tab, and disable unnecessary programs.
c. Defragment Your Hard Drive
If you’re using a traditional hard drive (HDD), defragmenting can improve access speeds.
Type "Defragment and Optimize Drives" in the Windows search bar and follow the prompts.
Note: SSDs do not require defragmentation.
3. Improve Hardware Performance
a. Clean Your Hardware
Dust buildup can cause overheating and slow performance.
Shut down and unplug your PC.
Use compressed air to clean out dust from vents, fans, and components.
Wipe external surfaces with a soft cloth.
b. Check and Upgrade RAM
Insufficient RAM can lead to lag during multitasking. Consider upgrading your RAM if your system struggles with resource-intensive tasks.
c. Use an SSD
Upgrading from an HDD to an SSD can significantly improve boot times and overall system performance.
4. Enhance System Security
a. Install Antivirus Software
Viruses and malware can slow down your PC. Use reliable antivirus software to regularly scan and remove threats.
b. Enable Firewall and Windows Defender
These built-in tools add an extra layer of security against unauthorized access.
c. Avoid Unnecessary Browser Extensions
Extensions can slow down your browser and compromise security. Remove ones you don’t use.
5. Optimize Internet Performance
a. Clear Browser Cache
Clearing cache and cookies can speed up your browser.
Go to your browser’s settings and select "Clear browsing data."
b. Test Your Internet Speed
Slow internet can feel like a PC problem. Use tools like Speedtest to measure your connection and upgrade if necessary.
c. Update Network Drivers
Outdated drivers can limit your connection. Update them through "Device Manager" or the manufacturer’s website.
6. Regular Maintenance Tips
Schedule Automatic Updates: Ensure your OS and software stay current.
Run Performance Troubleshooters: Windows and macOS have built-in tools to diagnose and fix common issues.
Restart Regularly: A simple reboot can resolve temporary glitches and improve performance.
Monitor System Health: Use Task Manager or third-party tools to track CPU, memory, and disk usage.
Cleaning and optimizing your PC is essential for maintaining its performance and longevity. By following these steps, you can enjoy faster speeds, better reliability, and a more efficient system. Regular maintenance, combined with occasional hardware upgrades, ensures your PC remains a powerful and productive tool.
2 notes
·
View notes
Text
How to Free Up Space on Windows 10: A Comprehensive Guide
As your Windows 10 system accumulates more files and applications, it can start to slow down and become less efficient. Freeing up space not only improves your system’s performance but also extends its lifespan. In this guide, we’ll explore various methods to free up space on Windows 10, going beyond the basics to ensure you have a well-optimized system.

Table of Contents
Introduction
Understanding Disk Space Usage
Utilizing Built-in Windows Tools
Disk Cleanup
Storage Sense
Uninstalling Unnecessary Applications
Managing Temporary and Cached Files
Cleaning Up System Files
Windows Update Cleanup
System Restore and Shadow Copies
Using Third-Party Disk Cleaners
Handling Large Files and Folders
Moving Data to External Storage
Using Cloud Storage Solutions
Conclusion
1. Introduction
As modern software and files grow larger, managing disk space effectively becomes crucial. This guide offers practical steps and tips to reclaim disk space on your Windows 10 computer, ensuring it runs smoothly and efficiently.
2. Understanding Disk Space Usage
Before freeing up space, it’s essential to understand how your disk space is being used. Navigate to Settings > System > Storage to view a detailed breakdown. This will help identify which areas need attention.
3. Utilizing Built-in Windows Tools
Disk Cleanup
Windows 10 features a built-in Disk Cleanup tool designed to delete unnecessary files. To access it:
Type “Disk Cleanup” in the search bar and select the app.
Choose the drive you want to clean.
Select the file types to delete (e.g., temporary files, system cache).
Storage Sense
Storage Sense automates disk cleanup. To enable it:
Go to Settings > System > Storage.
Toggle on Storage Sense and configure settings to regularly delete temporary files.
4. Uninstalling Unnecessary Applications
Unused applications take up significant space. To uninstall them:
Go to Settings > Apps > Apps & features.
Review the list and uninstall non-essential programs.
5. Managing Temporary and Cached Files
Temporary files can quickly accumulate and consume disk space. Use Disk Cleanup or third-party tools to regularly clear these files. Browsers also store cached data, which can be cleared from the browser settings.
6. Cleaning Up System Files
Windows Update Cleanup
Old update files can take up substantial space. Disk Cleanup includes an option to remove these:
Open Disk Cleanup and select Clean up system files.
Choose Windows Update Cleanup.
System Restore and Shadow Copies
System Restore points and shadow copies can consume significant disk space. Manage these by:
Typing “System Protection” in the search bar.
Selecting the drive and clicking Configure.
Adjusting the Max Usage slider to limit space usage.
7. Using Third-Party Disk Cleaners
Third-party tools like CCleaner provide more comprehensive cleaning options. They can remove junk files, clean registries, and manage startup programs to free up space.
8. Handling Large Files and Folders
Identifying and managing large files is crucial. Use tools like WinDirStat to find large files and folders. Consider moving non-essential large files to external storage.
9. Moving Data to External Storage
Free up space by moving data such as videos, photos, and documents to external hard drives or USB sticks. Ensure you regularly back up important data to avoid loss.
10. Using Cloud Storage Solutions
Cloud storage services like OneDrive, Google Drive, and Dropbox offer substantial space. Move infrequently accessed files to the cloud to save local disk space.
11. Conclusion
Regular maintenance and mindful storage practices can keep your Windows 10 system running efficiently. Use the tips and tools outlined in this guide to manage and optimize your disk space effectively.
External Authoritative Sources
Microsoft Support: Free up drive space in Windows
CCleaner Official Website
How-To Geek: The Ultimate Guide to Freeing Up Space on Your Windows PC
By following these detailed steps, you can efficiently manage and optimize your disk space on Windows 10, ensuring your system remains fast and reliable.
#Windows 10 Performance#Disk Cleanup#Storage Management#System Optimization#PC Maintenance#Free Up Space#Windows 10 Tips#Specific Techniques:#Disk Cleanup Tool#Storage Sense#Uninstall Programs#Temporary File Management#System File Cleanup#Third-Party Disk Cleaners#Advanced Techniques:#Large File Management#External Storage Solutions#Cloud Storage for Windows#System Restore Management#Windows Update Cleanup#How-To Guide#Windows 10 Efficiency
2 notes
·
View notes
Text
Sorry, I don't have any guides for these tools and didn't find any good one on the internet either. I made one myself for you this morning, super long and complete with screenshots and all, and then tumblr just... disappeared it... And I don't think I have the will to do it all over again with all the screenshots and explanations. I'll make a shorter one.
I'm assuming that you use Windows.
WizTree
The link to the installer is here. The wizard is straightforward.
You should run the disk cleanup utility as administrator first, so that you can rid of any unnecessary file (but please check that you don't have any important file in the recycle bin before having it emptied). You can just type up "disk cleanup" in the Windows search bar for it, then right-click instead of left-click, and select "run as administrator". You should definitely do this again every now and then btw.
When you open WizTree, what you want to look for is either big squares (single files that take up a lot of space, like movies or zip files) or many smaller squares all clumped together. The latter might be cache (Spotify, Telegram, all internet browsers, generate a lot of it. WizTree gives you the cue to open these programs and clean the cache from their respective settings), or some other thing (AMD Radeon for some reason likes to keep all past versions of its installer, even though only the most recent is useful). You might also notice some folders that are considerably bigger, for example all Adobe products are naturally chunky and so you might want to consider alternatives, like Photopea in lieu of Photoshop. Here I highlighted some examples on my laptop, files and folders which I would definitely check out first thing. And after deleting them, I would hit the "Scan" button again to refresh the graph.

It takes some effort to get used to the game the first time, but I think the immediate visual feedback of the colored blocks, the highlighting of the folder as you hover on it, the size proportion... They make WizTree a great tool. I also wish I could give you more precise information on what to look for exactly, but it really varies greatly from PC to PC, so I can't know for certain what might take up space on your machine.
Beware! Some big squares are best left untouched because they're Windows files: namely $MFT, hiberfil.sys, pagefile.sys, anything in "System Volume Information" or in "Recovery", and of course anything in the "Windows" folder.
If pagefile.sys is very big (say, bigger than 5 GB) and you're running out of storage space, you can reduce its size to something like 2 or 3 GB, following this guide.
Everything
Link to the installer here. This wizard is also pretty straightforward, you don't need to touch any of the default settings, just hit "next".
It takes just a few seconds to index all the files the first time you open it after turning your PC on, and then it's good to go. Instant search, system-wide, in milliseconds.
You should extend the "file path" column a bit so that you can clearly see *where* each result is located, and see if that's the file you were looking for or not.
Apart from the basic search, there are some useful options in the "Search" tab in the top row. Namely: case sensitive/insensitive search, including file paths in the search (e.g. if you want to look up a file called "Pamphlet" in folders called "Campus" instead of in folders called "Work". Then you would activate that option and search "pamphlet campus"), and including full words (e.g. if you know the file has the word "Boy" and you're not interested in files with "tomboy", "boyish", "flamboyant"). They're the top options in here (sorry that it's all in Italian, I'm a pizza pasta mandolino citizen):

In the lower part you can also see how you can filter the results based on whether it's an audio file, a zip file, an exe file, a folder etc. Neat, right?
any computer people wanna explain how the hell this works


it wont let me do shit bc i apparently have 81 gigs of apps clogging my c drive, but my largest app is 0.4gb?????? its not system applications either because system is its own segment of storage. wadda hell are you talking about
#again I'm so sorry that this is quite blunt and doesn't go into detail step-by-step... but I just spent so much time this morning and then I#lost everything... I just honestly don't feel like repeating it
58K notes
·
View notes
Text
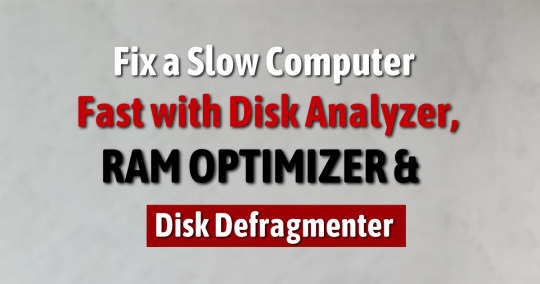
Fix a Slow Computer Fast with Disk Analyzer, RAM Optimizer & Disk Defragmenter
Is your computer crawling like a snail, freezing at the worst times, or taking forever to load basic programs? Don’t worry—you’re not alone. Many users experience frustrating slowdowns, especially when their PC gets bogged down with junk files, bloated memory, and unoptimized storage. But the good news is: you don’t need to be a tech genius to bring your system back to life.
In this blog, we’ll explore how a combination of tools like a Disk Analyzer, RAM Optimizer, and Disk Defragmenter can drastically improve your computer’s performance. We’ll also discuss how all-in-one PC Cleaner Software like Rabid Cleaner can simplify the entire process for you—whether you're tech-savvy or a beginner.
Why Is Your Computer Running Slow?
Before diving into solutions, it’s important to understand why your PC becomes sluggish over time. Here are some common culprits:
Temporary files and cache buildup
Fragmented files across your hard drive
Background programs consuming memory
Outdated or bloated system registries
Unnecessary browser data
When these issues pile up, your device becomes slow, unresponsive, and unreliable. Fortunately, smart tools are available that tackle each of these problems efficiently.
Start with a Disk Analyzer – Uncover the Storage Hogs
One of the biggest reasons behind poor performance is a bloated hard drive. Files accumulate without notice—videos, duplicate documents, temporary data, and even leftover files from uninstalled programs. A Disk Analyzer scans your entire drive and visualizes which files and folders are taking up the most space.
By using a disk analyzer, you can:
Identify unnecessary large files
Pinpoint junk folders hiding in your system
Reclaim gigabytes of wasted space
Speed up load and search times
This is the first step in cleaning your digital clutter. Once you know what’s dragging your system down, you can take meaningful action.
RAM Optimizer – Give Your System Room to Breathe
Memory (RAM) is where your system stores active processes. If your RAM usage is maxed out, even simple tasks like opening a browser tab can feel like a burden. A RAM Optimizer clears up memory being hogged by background apps, system junk, and old processes that are no longer needed.
Benefits of using a RAM optimizer:
Instantly boosts system responsiveness
Prevents unnecessary crashes or freezes
Helps multitask without lag
Maximizes memory usage efficiency
This tool is especially useful if you often work with multiple apps, have limited RAM, or use your PC for editing, gaming, or streaming.
Disk Defragmenter – Reorganize and Accelerate File Access
Hard drives (especially traditional HDDs) store files in blocks. Over time, files get scattered across the drive, leading to fragmentation. This forces your system to work harder to piece them back together, significantly slowing down performance.
A Disk Defragmenter rearranges these fragmented files to ensure everything is stored in a continuous, logical sequence.
Why defragmentation matters:
Speeds up boot time and file access
Reduces wear and tear on hard drives
Optimizes system resource usage
Extends the life of your hardware
It’s a classic solution that still plays a vital role in system health—especially for older machines.
Why Use PC Cleaner Software Instead of Doing It Manually? While individual tools like analyzers, optimizers, and defragmenters are effective, using them separately can be time-consuming and confusing. That’s where all-in-one PC Cleaner Software steps in to save the day.
A robust software suite can:
Combine all essential tools in one dashboard
Schedule automatic cleanups
Detect and delete duplicate files
Fix broken registries
Monitor real-time performance
By automating what would normally take hours, PC cleaner software ensures that your system remains optimized at all times.
Rabid Cleaner – A Smart, Lightweight System Boosting Tool
Rabid Cleaner is a feature-rich utility designed to make PC optimization seamless. It's lightweight, fast, and extremely user-friendly—perfect for people who want results without the hassle of manual tweaking.
Key features of This PC Cleaner include:
Advanced disk scan with intuitive visuals
One-click RAM boost
Smart disk defragmentation
Deep browser cleanup to improve browsing speed
Real-time health monitoring
Whether you're a gamer, a student, or a working professional, What Is Utility Software? Types and Benefits offers the right balance of power and simplicity.
Browser Cleaner – Clean Up What You Don’t See
One often overlooked area that eats into speed is your web browser. Cache files, cookies, autofill data, and download history accumulate quickly. This not only eats memory but can also lead to browser crashes and privacy risks.
Using a Browser Cleaner regularly helps:
Clear hidden junk files
Improve browsing speed
Protect your online privacy
Prevent ad-tracking cookies
It’s a crucial step in your full system cleanup routine, especially if you use your computer heavily for internet-related tasks.
A Routine to Follow – The Smart Way to Maintain Speed
Here’s a simple weekly checklist to keep your PC in top condition:
Run a disk scan with a disk analyzer
Clear RAM with a one-click optimizer
Defragment the drive for faster access
Delete browser junk and cache
Use your PC cleaner software to finalize the cleanup
This routine can easily be automated with tools like Rabid Cleaner, which lets you schedule everything so your system stays clean without you even thinking about it.
Final Thoughts – Faster PC, Better Productivity
You don’t need a new computer to enjoy faster speed—you just need the right tools. Investing in optimization solutions like a Disk Analyzer, RAM Optimizer, and Disk Defragmenter can deliver immediate improvements. And if you're looking for a complete solution, using PC Cleaner Software like Rabid Cleaner takes the guesswork out of performance tuning.
0 notes
Text
Resolving Storage and Internet Issues
Computers are indispensable tools in our daily lives, but they can sometimes present frustrating challenges, such as running out of storage space or losing internet connectivity. These issues can disrupt productivity and cause significant inconvenience. This article explores practical solutions for two common problems: managing a nearly full startup disk on a Mac and addressing internet access issues on a Windows system. By following these steps, users can restore their devices to optimal performance and maintain seamless operation.
Addressing a Full Startup Disk on Mac
When a Mac displays a warning that the startup disk is nearly full, it signals that the primary drive, which houses the operating system and user files, is running out of space. This can lead to sluggish performance, application crashes, and an inability to save new files. How to Fix Your Startup Disk Is Almost Full on Mac begins with understanding the root cause and taking systematic steps to free up space.
The first step is to check how much storage is being used. Navigate to the system menu, select "About This Mac," and click on the storage tab to view a breakdown of space usage. This visual representation helps identify which file categories—such as applications, documents, or media—are consuming the most space. Once you have this overview, prioritize clearing out unnecessary files. Start by emptying the trash, as deleted files often linger there, taking up valuable space. Next, review the downloads folder, where temporary or forgotten files like installers or duplicates tend to accumulate. Deleting these can quickly reclaim space.
Another effective strategy is to manage large files, such as videos or archived projects, which often occupy significant portions of the disk. Use the built-in storage management tool to locate these files and consider moving them to an external drive or cloud storage. For users with extensive photo or video libraries, optimizing storage by enabling cloud-based syncing can offload files while keeping them accessible. Additionally, uninstall unused applications, as they not only consume disk space but may also run background processes that slow down the system.
Clearing system clutter is another critical step. Temporary files, caches, and logs can accumulate over time. Use trusted cleanup tools available in the Mac’s application store to safely remove these without affecting system stability. For advanced users, manually deleting cache files from the library folder can free up space, but caution is advised to avoid deleting essential system files. Regularly performing these maintenance tasks ensures the startup disk remains manageable, preventing future warnings.
Troubleshooting Internet Connectivity on Windows
Losing internet access on a Windows computer can be equally disruptive, whether it’s due to a misconfigured setting, hardware issue, or network problem. How to Fix No Internet Access in Windows involves a step-by-step approach to diagnose and resolve the issue, restoring connectivity efficiently.
Begin by verifying the physical connections. Ensure the Ethernet cable is securely plugged in or that the Wi-Fi adapter is enabled. Restarting the router and modem can resolve temporary glitches, as these devices sometimes encounter conflicts that disrupt connectivity. After rebooting, check the network status in the Windows taskbar. If the system indicates a connection but still shows no internet access, proceed to deeper troubleshooting.
Run the built-in network troubleshooter by accessing the network settings and selecting the option to diagnose problems. This tool automatically detects common issues, such as incorrect IP configurations or disabled services, and applies fixes where possible. If the troubleshooter doesn’t resolve the issue, manually reset the network settings. This can be done by navigating to the network and internet settings, selecting the reset option, and restarting the computer. Be aware that this resets all network adapters, requiring you to reconnect to Wi-Fi networks afterward.
Another potential cause of internet issues is outdated or corrupted network drivers. Visit the device manager, locate the network adapters, and check for any warning indicators. Updating drivers through the system or downloading the latest versions from the manufacturer’s website can resolve connectivity problems. If the issue persists, check for conflicts with security software. Firewalls or antivirus programs sometimes block connections inadvertently. Temporarily disabling these programs can help identify if they are the culprit, but ensure they are re-enabled after testing to maintain system security.
For persistent problems, consider external factors like network congestion or service provider outages. Contacting the internet service provider to confirm the status of the connection can clarify whether the issue is local or network-wide. Testing the connection on another device can also help determine if the problem is specific to the Windows system or a broader network issue.
Proactive Maintenance for Long-Term Performance
Preventing these issues from recurring requires proactive habits. For Mac users, regularly monitoring storage usage and setting up automatic cloud backups can prevent the startup disk from filling up. Scheduling monthly cleanups to remove redundant files and optimizing storage settings ensures the system runs smoothly. For Windows users, maintaining updated drivers and routinely checking network settings can prevent connectivity disruptions. Keeping security software updated and avoiding unnecessary applications also contributes to stable performance.
0 notes
Text
Boost PC Performance with Yamicsoft’s Windows Cleaner: The Ultimate Tool for a Cleaner, Faster System
Over time, every Windows PC starts to slow down — cluttered files, system junk, and leftover traces from uninstalled programs begin to pile up. If your computer feels sluggish or takes too long to boot, it might be time for a cleanup. One of the most effective ways to do this is with Yamicsoft’s Windows Cleaner software, part of the Yamicsoft Windows Manager suite.

What Is Yamicsoft’s Windows Cleaner?
Windows Cleaner is a powerful utility that helps remove junk files, clear browser history, delete temporary files, and eliminate system clutter that accumulates during everyday use. Unlike basic cleanup tools, Yamicsoft goes deep into the system to find hidden or hard-to-remove clutter, improving both speed and stability.
Key Features of Yamicsoft Windows Cleaner
1. Junk File Remover Scans and deletes temporary files, log files, clipboard data, error reports, and Windows update leftovers that waste valuable disk space.
2. Deep System Scan Analyzes the entire system for non-essential files, browser caches, invalid shortcuts, and application leftovers.
3. Privacy Cleaner Clears browser history, download records, cookies, and recently accessed files to protect your privacy.
4. Registry Cleaner Identifies and removes invalid or obsolete entries in the Windows Registry, which can help resolve errors and reduce crashes.
5. Custom Cleanup Rules Advanced users can define which folders, file types, or applications should be included or excluded during a cleaning session.
Benefits of Using Yamicsoft Windows Cleaner
Improved System Performance: Less junk means more resources available for programs and multitasking.
Faster Boot Times: Clears unnecessary startup entries and temporary files that slow down startup.
Better Disk Space Management: Reclaims storage space without deleting personal files.
Enhanced Security & Privacy: Erases traces of online activity and file usage.
Regular Maintenance Options: Schedule automatic cleanups so your system stays optimized with zero effort.
Final Verdict
If you're looking for a reliable, easy-to-use tool to clean up and speed up your Windows PC, Yamicsoft’s Windows Cleaner delivers professional-grade results. Whether you’re dealing with sluggish performance or just want to keep your system running like new, this utility is an essential part of the Windows Manager toolkit.
Take control of your computer’s health — try Yamicsoft Windows Cleaner and experience the difference.
#Yamicsoft Windows Cleaner#window cleaner software#free windows repair tool#free pc repair tool#windows repair software#windows repair tweak
0 notes
Text
Laptop Running Slow? Top Tips to Boost Speed and Performance
A slow laptop can be frustrating, especially when you're trying to get work done or enjoy your favourite content without interruptions. Fortunately, there are several effective ways to speed up a lagging device. Here’s a complete guide to boosting your laptop’s performance, divided into actionable steps.
1. Check for Resource-Heavy Applications
Your laptop may be slow due to apps and processes consuming too many resources. To identify and close these:
For Windows: Press Ctrl + Shift + Esc to open the Task Manager, and navigate to the Processes tab to view what’s using CPU, memory, and disk resources. Right-click on unnecessary processes and select End Task.
For macOS: Press Command + Space to open Spotlight, type Activity Monitor, and check the CPU and Memory tabs. Quit unnecessary apps to free up resources.
2. Uninstall Unnecessary Programs
Unused programs can take up valuable storage and background resources. Removing them can help improve performance:
For Windows: Go to Settings > Apps > Apps & features and click Uninstall on applications you no longer use.
For macOS: Open the Applications folder, drag unwanted apps to the Trash, then empty the Trash to free up space.
3. Disable Startup Programs
Programs that launch on startup can drastically slow down your laptop’s boot time and overall performance. Here’s how to manage these:
For Windows: Open the Task Manager (Ctrl + Shift + Esc) and navigate to the Startup tab. Right-click on programs with high impact and select Disable.
For macOS: Go to System Preferences > Users & Groups, click Login Items, and uncheck items you don’t want to start automatically.
4. Clear Cache and Temporary Files
Temporary files and cache can accumulate over time, taking up space and slowing down performance. Regularly clearing them can help:
For Windows: Use Disk Cleanup by searching for it in the Start menu. Select the drive to clean (typically C:) and choose Temporary files and Recycle Bin for deletion.
For macOS: Go to Finder > Go > Go to Folder, type ~/Library/Caches, and delete contents in the cache folders to free up space.
5. Update Your Operating System and Drivers
Outdated software or drivers can cause performance issues, incompatibilities, and security vulnerabilities. Keeping everything updated ensures your laptop runs smoothly:
For Windows: Go to Settings > Update & Security and click Check for updates. Make sure all drivers are up-to-date by going to Device Manager and right-clicking devices to select Update driver.
For macOS: Go to System Preferences > Software Update and check for any available updates.
6. Increase RAM or Storage
If your laptop has limited memory (RAM) or an older hard drive, upgrading these components can make a noticeable difference in performance:
RAM: Adding more RAM can be a cost-effective way to improve multitasking and performance, especially for applications like photo or video editing. Consult your laptop’s manual or manufacturer for compatible RAM upgrades.
Storage: Switching from an HDD to an SSD can drastically improve boot times and loading speeds. SSDs are faster, more durable, and energy-efficient compared to traditional hard drives.
7. Run a Malware Scan
Malware or viruses can consume system resources, slowing down your laptop. Regular scans can detect and remove malicious software:
For Windows and macOS: Use trusted antivirus software or built-in tools like Windows Defender to perform a full scan. For macOS, consider third-party tools like Malwarebytes to supplement built-in security.
8. Defragment Your Hard Drive (HDD Only)
Over time, files on traditional hard drives (HDDs) can become fragmented, causing slowdowns. Defragmenting can help organize and speed up file access:
For Windows: Type Defragment and Optimize Drives in the Start menu, select your HDD, and click Optimize. SSDs do not require defragmentation as they handle data differently.
For macOS: macOS automatically manages drive fragmentation, so manual defragmentation is unnecessary.
9. Use Lightweight Software Alternatives
Heavy software can slow down your laptop, especially if it’s an older model. Opt for lightweight alternatives:
Web Browsers: Use browsers like Microsoft Edge or Safari, which are optimized for their operating systems, rather than resource-heavy ones.
Productivity Tools: For document editing, try Google Docs instead of a full Office suite or LibreOffice for a lighter offline solution.
10. Adjust Power Settings
On Windows laptops, the power settings affect performance and battery life. Adjusting them can balance your laptop’s power usage:
For Windows: Go to Control Panel > Power Options and select High Performance for better performance. Note that this might reduce battery life.
For macOS: Go to System Preferences > Energy Saver and adjust settings based on performance needs versus energy conservation.
11. Reinstall the Operating System
If you’ve tried everything else and your laptop is still slow, reinstalling the OS can remove clutter and reset settings to default. Be sure to back up your data first!
For Windows: Go to Settings > Update & Security > Recovery and select Reset this PC. Choose either to keep your files or to do a clean reinstall.
For macOS: Restart in Recovery Mode by holding Command + R during startup. Select Reinstall macOS from the menu to start fresh.
12. Manage Visual Effects and Animations
Turning off unnecessary visual effects and animations can make your laptop feel faster:
For Windows: Right-click This PC > Properties > Advanced system settings. Under Performance, select Adjust for best performance or manually deselect specific effects.
For macOS: Go to System Preferences > Accessibility > Display and check Reduce motion and Reduce transparency to limit visual effects.
13. Regularly Restart Your Laptop
Sometimes, all your laptop needs is a fresh start. Restarting clears memory and temporary processes, improving performance. Set a habit of shutting down your laptop regularly rather than keeping it on sleep mode for days at a time.
Final Thoughts
A slow laptop can be annoying, but with a few adjustments, you can bring it back up to speed. Regular maintenance, like removing unnecessary files, disabling startup programs, and updating software, can make a world of difference. Try out these tips, and you’ll likely notice an improvement in performance, no matter how old your laptop may be! The Authorized Toshiba Service Centre in Nagpur offers expert service and support for Toshiba products, ensuring quality service with genuine parts and knowledgeable technicians. Customer satisfaction is our priority.
0 notes
Text
Clearing cache on your HP laptop is a simple yet effective way to boost its performance and free up valuable storage space. Over time, temporary files and cached data can accumulate, slowing down your system. By following a few easy steps, you can quickly clear different types of cache, including system, browser, and app cache, to keep your laptop running smoothly. Whether you use the built-in Disk Cleanup tool or manually delete cached files, regular maintenance will ensure your HP laptop remains fast, responsive, and efficient while running Windows 11.
0 notes
Text
How to Make a Laptop Run Faster? Speed Up My PC - Rabid Cleaner
A slow laptop can be incredibly frustrating — whether you're working, gaming, or simply browsing the internet. If you're constantly asking yourself, “How to make my laptop run faster?”, you’re not alone. In this detailed guide, we’ll help you understand the causes of sluggish performance and provide actionable, trustworthy solutions to Speed Up My PC.

Why Is Your Laptop Running Slow?
Before we jump into solutions, it’s essential to identify what’s slowing down your system. Here are the most common reasons:
Too many startup programs
Lack of available RAM
Outdated or bloated software
Fragmented or full hard drive
Malware or unwanted software
Background processes consuming resources
Old or failing hardware components
Understanding the cause will help you apply the most effective fixes.
Disable Unnecessary Startup Programs : Experience Tip: Many laptops become sluggish because of too many apps launching at startup.
How to Fix:
Press Ctrl + Shift + Esc to open Task Manager
Go to the Startup tab
Disable programs you don’t need on boot-up
Benefit: Faster boot time and quicker access to your desktop.
Use a PC Cleaner and Optimizer Tool: Over time, your system collects junk files, cache, and broken registry entries. A trusted PC Cleaner and Optimizer like Rabid Cleaner can:
Remove temporary and junk files
Clean invalid registry entries
Optimize memory usage
Manage startup items
Note: Use only reputed tools with positive user reviews and verified developers. Avoid unknown or suspicious software.
Uninstall Bloatware and Unused Programs: Pre-installed software or apps you never use can consume memory and storage.
Steps:
Go to Control Panel > Programs > Uninstall a program
Review the list and uninstall what you don’t use
Pro Tip: Check for toolbars, third-party browser add-ons, and outdated utilities.
Upgrade RAM or Switch to SSD: If your laptop has less than 8GB RAM, it may struggle with multitasking. Upgrading your RAM or switching from an HDD to an SSD is one of the most powerful performance boosts.
Benefits of SSD:
Faster boot and shutdown times
Quicker file access
Better overall speed and responsiveness
Tip: Consult your laptop manufacturer’s website for compatible hardware specifications before upgrading.
Scan for Malware and Viruses: Malicious programs can hog system resources or spy on your activity. Always use a trusted antivirus software.
Recommendation:
Use tools like Malwarebytes, Bitdefender, or Windows Defender
Perform a full system scan weekly
Reminder: Never download antivirus software from suspicious sites. Stick to official sources.
Keep Windows and Drivers Updated: Outdated software can slow your laptop or create security vulnerabilities.
Go to Settings > Update & Security > Windows Update
Also update your drivers via Device Manager or manufacturer’s software
Keeping your system current ensures compatibility and optimal performance.
Optimize Background Processes: Too many processes running in the background can kill speed.
What to Do:
Open Task Manager (Ctrl + Shift + Esc)
Click on Processes
Identify and end high CPU/memory-consuming tasks (if you recognize them)
Note: Be careful not to end essential system processes.
Restart Your Laptop Regularly: If you keep your laptop in sleep or hibernate mode all the time, background apps and memory leaks can build up.
Recommendation: Restart your laptop every 1–2 days to keep it fresh and responsive.
Clean Up Disk Space: Freeing up disk space helps the system run faster and smoother.
How:
Use Windows Disk Cleanup
Delete temporary files: Run > temp, Run > %temp%
Clear Downloads and Recycle Bin
Or use a professional PC Cleaner to automate this process.
Disable Visual Effects: Fancy animations and shadows can look good but slow down older systems.
How to Do It:
Search “Adjust the appearance and performance of Windows”
Select Adjust for best performance or manually disable unwanted effects
Bonus Tips to Speed Up My PC
Defragment HDD (if you're not using SSD): Type “defrag” in search
Use lightweight software: Opt for apps with fewer system demands
Clear browser cache: Speeds up web browsing
Disable Cortana or Windows search indexing if not needed
Reset Windows (if all else fails): Consider factory reset as a last resort
How to Make a Laptop Run Faster?
Q1. Will cleaning my laptop physically help improve speed? Answer: Yes, especially if your laptop is overheating. Dust can clog fans and reduce cooling efficiency, which may throttle performance.
Q2. How often should I clean my PC with an optimizer? Answer: Ideally once a week or every two weeks for best results.
Q3. Does antivirus slow down the laptop? Answer: Some antivirus programs can be heavy. Choose lightweight, cloud-based solutions that don’t overload your CPU or RAM.
Make Your Laptop Run Like New
Speeding up your laptop doesn’t always require buying a new one. By following the above tips — from managing startup programs and cleaning junk files to upgrading your hardware — you can dramatically improve performance.
If you're not tech-savvy or want quick results, using a trusted PC Cleaner and Optimizer like Rabid Cleaner can automate many of these steps for you.
0 notes
Text
How to Improve the Performance of Your Refurbished Laptop

In today's fast-paced world, laptops are essential for work, study, and entertainment. Whether you're using an old laptop or a refurbished laptop, performance can sometimes be a concern. But with a few simple tweaks, you can significantly boost the speed and efficiency of your device. In this blog, we’ll explore how to improve the performance of your refurbished laptop and get the most out of your investment.
1. Clean Up and Organize Your Hard Drive
Over time, files and applications can clutter your hard drive, causing your laptop to slow down. Start by cleaning up unnecessary files, deleting unused programs, and organizing your folders. Tools like Disk Cleanup or third-party apps can help you clear out temporary files, cache, and system logs. This is especially important if you’ve purchased a second-hand laptop or a refurbished laptop with pre-installed software.
In markets like India, where affordability is key, refurbished laptops in India often come with older hardware. By decluttering your hard drive, you can free up valuable space and improve the speed of your device.
2. Upgrade to an SSD (Solid-State Drive)
One of the most effective ways to improve the performance of your renewed laptop is by upgrading to an SSD. SSDs are much faster than traditional hard drives (HDDs) and can significantly reduce boot times and increase the overall responsiveness of your laptop. If your old laptop came with an HDD, replacing it with an SSD can make it feel like a brand-new machine.
Even refurbished laptops in India can benefit from this upgrade, allowing you to enjoy faster file access, quicker program launches, and an overall smoother experience.
3. Increase RAM for Better Multitasking
If your refurbished laptop struggles with multitasking, upgrading the RAM can make a big difference. Your laptop can run more apps at once without stuttering if it has enough RAM. For basic tasks like browsing the web or streaming videos, 8GB of RAM is usually sufficient. However, if you're using your old laptop for more intensive tasks such as video editing or gaming, consider upgrading to 16GB or more.
Upgrading the RAM on a second-hand laptop is often a cost-effective way to improve performance without having to invest in a new device.
4. Update Software and Drivers
Updating your drivers and software is essential for optimum performance. Make sure your operating system, antivirus software, and drivers are regularly updated to the latest versions. Outdated software can slow down your refurbished laptop and expose it to security risks.
Check for system updates periodically and ensure that all hardware drivers, including graphics and sound cards, are up to date. This will help your renewed laptop run smoothly and efficiently.
5. Remove Unnecessary Startup Programs
Many laptops, including refurbished laptops, can become sluggish due to too many startup programs. These are applications that automatically launch when you start your laptop, using up valuable system resources. To improve boot times and overall speed, disable any unnecessary programs from starting automatically.
For second-hand laptops that may have pre-installed software from previous users, this can be particularly helpful in speeding up your device.
6. Regularly Clean the Laptop's Hardware
Dust and other debris can build up within your laptop over time, leading to overheating and subpar performance. Regularly cleaning your old laptop can prevent this from happening. Use compressed air to clean out the vents and fans, ensuring proper airflow. Overheating can lead to a decrease in performance and even damage internal components.
Cleaning the hardware on your reconditioned laptop might improve its performance and prolong its life if it is overheated.
7. Consider Installing Lightweight Software
If your refurbished laptop in India has older hardware, installing lightweight software can help improve its speed. Opt for software that uses fewer system resources, such as lightweight web browsers and office suites. These programs are designed to run smoothly on older devices, helping you get the most out of your second-hand laptop without slowing it down.
8. Keep Antivirus Software Updated
Viruses and malware can severely impact the performance of your refurbished laptop. Make sure you have a reliable antivirus program installed and that it is regularly updated. Perform routine scans to identify and get rid of any unwanted software that could be causing your system to lag.
In regions like India, where refurbished and second-hand laptops are popular, keeping your laptop secure from online threats is essential for maintaining its performance.
Conclusion
With the right upgrades and maintenance, you can significantly improve the performance of your old laptop or refurbished laptop. Whether it’s upgrading to an SSD, increasing RAM, or simply cleaning up unnecessary files, these steps can help your laptop run faster and more efficiently. Investing time in these improvements ensures that your renewed laptop will serve you well for years to come. For those looking to purchase or upgrade refurbished laptops in India, ReTechie offers a wide range of high-quality options. Explore our selection today to find the best second-hand laptop or refurbished laptop to meet your needs.
#Old laptop#Old laptops#Renewed laptop#refurbished laptop#refurbished laptops#refurbished laptops in India#refurbished laptop in India#Second hand laptops#Second hand laptop
0 notes
Text
How to Maximize Your Storage Device Performance

As digital data surges daily, your storage devices will probably greatly impact how well your system functions. Whether a tech-savvy person works with extensive files on a day-to-day basis, a gamer expects instant loading time or a casual user expects flawless performance from their storage devices, performance enhancement is crucial. Without further ado, let’s proceed with the outline of all necessary tips to improve storage device performance.
1. Choose the Right Storage Device
SSD vs. HDD
It is also important to distinguish between the types of disks you will use, as this greatly affects performance. Indeed, compared to conventional hard disk drives, known as solid-state drives, they are faster, have better reliability, and consume less power. If the user has not transitioned to an SSD yet, it is easy for him to do so, as the speed difference is highly noticeable.
NVMe SSDs
If you are looking for greater performance optimization, there are NVMe (Non- non-volatile memory Express) SSDs that have a higher transfer rate as compared to SATA SSDs. It is most relevant to tasks that entail fast data retrieval, such as reading and writing in databases.
2. Regularly Update Firmware
Whereas firmware updates are minor revisions of the code released to the market by manufacturers to repair glitches or enhance storage devices. Visit the producer’s website frequently and apply updates to ensure the optimal functioning of your device.
3. Optimize Storage Space
Defragmentation
In the case of HDDs, defragmenting is beneficial to an extent in rearranging filed data so that the head can access particular fragments of data faster. Windows has an an in-built disk defragmenter you use, use or most modern operating systems do.
TRIM Command for SSDs
In the case of SSDs, make sure that the TRIM command is supported and turned on. TRIM is useful to the SSD to build awareness of unused blocks, which also aids it when writing and its durability.
4. Manage Storage Wisely
Delete Unnecessary Files
Lastly, it is recommended to clean up your hard drive and reduce unnecessary files and programs. This is not only helpful to create extra space but also helps to declutter the drive a little bit and is beneficial for data search.
Use Storage Management Tools
Applications such as Disk Cleanup are available in the Widows and other applications like CCleaner and other third-party applications help in the management of storage and cleaning.
5. Enable Write Caching
Extended write caching: it is possible to enhance write caching where frequently issued write commands can be temporarily stored in the cache space before getting to the disk. Make sure you allow write caching to drive as it can enhance performance; however, be prepared for a situation where a power failure can lead to data loss.
6. Monitor Drive Health
SMART Monitoring
Use SMART tools to monitor the drive’s condition, as there are often cases of errors or hardware glitches sensed by computers. For instance, you can either use CrystalDiskInfo software or the software that your hard disk drive manufacturer has included with your hard disk drive to point out issues before they turn into large-scale disasters.
7. Upgrade Your Hardware
Increase RAM
Increasing the amount of RAM means the system could use less of the storage device to handle virtual memory requirements that slow down the system.
Upgrade Interface
Make sure that your drive is connected through the best cable interface available for the system that you have (SATA III, USB 3.0, or Thunderbolt, for example).
READ MORE- https://donicelectronics.com/how-to-maximize-your-storage-device-performance/
0 notes
Text
How Rabid Cleaner Helps You Maintain a Secure and Optimized PC
How Rabid Cleaner Helps You Maintain a Secure and Optimized PC In an age where speed, efficiency, and digital safety are essential, ensuring your computer remains in top condition is no longer optional—it’s a necessity. Over time, systems slow down, become cluttered, and may even be exposed to potential threats. Rabid Cleaner offers a comprehensive solution to all of these problems, helping you achieve a smoother, safer computing experience.
This blog explores how Rabid Cleaner contributes to keeping your PC optimized, secure, and functioning like new—without overwhelming you with complicated processes or unnecessary features.
Cleans Your System from the Inside Out
Computers naturally accumulate temporary files, cache, residual program data, and other digital clutter. These unwanted files can not only reduce available storage space but also interfere with system processes and slow down performance.
Rabid Cleaner thoroughly scans your system and intelligently removes these digital leftovers. It targets only unnecessary files—leaving essential data untouched—ensuring your system stays clean, organized, and efficient.
As a reliable PC Cleaner, it goes beyond superficial fixes and digs deep into the areas most users don’t even realize are causing slowdowns.
Improves System Responsiveness
There’s nothing more frustrating than a slow computer, especially when you have deadlines, meetings, or games to enjoy. Rabid Cleaner optimizes resource allocation, reduces RAM usage, and manages startup programs effectively. You’ll notice significantly reduced boot times, faster application response, and overall smoother multitasking.
It’s designed to adapt to all user types—whether you’re casually browsing the web or running high-performance tasks. This makes it more than just a cleaning utility—it functions as a true PC optimization tool that consistently boosts speed and system performance.
Enhances Privacy and Digital Security
One often overlooked risk in PC maintenance is digital privacy. Your system stores traces of browsing history, cookies, and other data that could be exploited by cyber threats. Rabid Cleaner helps safeguard your sensitive information by identifying and removing tracking files, browser cache, and data logs that can reveal personal activity.
It also includes protective modules that monitor threats in real time, adding an extra layer of digital security without compromising speed. Whether you're shopping online or using public networks, Rabid Cleaner ensures your data remains private and secure.
Smart and Precise Cleaning Technology
Unlike basic cleaning software that deletes files indiscriminately, Rabid Cleaner uses advanced algorithms to identify what’s truly harmful or unnecessary. It evaluates system health carefully before executing any changes, reducing the risk of deleting important data.
With its intelligent diagnostic system, users are given clear insight into what’s being removed and why. This transparency builds user confidence and trust, while maintaining total control over your device’s maintenance routines.
A Multifunctional Maintenance Suite
Rabid Cleaner isn’t limited to cleanup tasks—it provides a full toolkit for long-term system health. You can analyze disk space usage, disable high-impact startup programs, and schedule regular maintenance scans. These tools work together to prevent performance issues before they arise.
This makes Rabid Cleaner more than just PC cleaning software; it becomes an all-in-one utility that keeps your system running at its best, day after day.
Built for All Types of Users
One of the biggest strengths of Rabid Cleaner is its simplicity. Whether you're a first-time user with no technical knowledge or a seasoned expert looking for advanced tools, its user interface is designed for ease and clarity.
One-click cleaning options allow beginners to maintain their systems effortlessly, while advanced users can explore detailed analytics and manual optimization settings for deeper control. It’s truly a tool that adapts to your comfort level.
The Difference You Can Measure Here’s a side-by-side comparison of typical results after a complete scan and cleanup with Rabid Cleaner:
Feature Before Cleanup After Cleanup
Boot Time 3–4 minutes Under 45 seconds
Storage Space Constantly full 5–8 GB freed
RAM Usage High (70–90%) Reduced by 30–40%
Security Risks Frequent alerts Stable and secure
These results show the measurable value users can expect from consistent use.
Why You Should Try Rabid Cleaner
If you’re tired of dealing with constant lag, unexplained system errors, or worrying about privacy threats, it may be time to simplify your maintenance routine. Rabid Cleaner brings together powerful features in a user-friendly package that eliminates clutter, protects your data, and keeps your PC running like new.
You don’t need to be a tech expert to benefit—just install, scan, and let the software do the heavy lifting.
Final Thoughts
In today’s digital landscape, your PC is more than just a machine—it’s where you work, connect, create, and relax. Keeping it in peak condition isn’t just helpful, it’s essential. Rabid Cleaner offers a modern, intelligent solution to protect and enhance your system with minimal effort on your part.
From increasing speed and freeing up storage to reinforcing your privacy and optimizing long-term performance, Rabid Cleaner is a dependable partner for anyone looking to take better care of their device.
0 notes
Text
Empty Trash Securely on macOS: Ensuring Data Privacy
In the digital age, data privacy has become a paramount concern for individuals and organizations alike. Whether you're a casual user or a professional handling sensitive information, ensuring that deleted files are permanently erased is crucial. On macOS, simply dragging files to the Trash and emptying it might not be enough to ensure that your data is irretrievable. This article delves into the methods and best practices for Empty Trash Securely on macOS to ensure your data privacy is uncompromised.
Understanding the Basics of Trash on macOS
The Trash on macOS functions similarly to the Recycle Bin on Windows. When you delete a file, it's moved to the Trash, where it stays until you empty it. This provides a safety net, allowing you to recover accidentally deleted files. However, until the Trash is emptied, the files are still present on your disk and can be easily recovered.
How Emptying Trash Works
When you empty the Trash, macOS removes the references to the files from the file system's directory structure, marking the space as available for new data. However, the actual data remains on the disk until it's overwritten by new data. This means that with the right tools, deleted files can be recovered, posing a potential risk to data privacy.
Why Secure Deletion Matters
Secure deletion is vital for several reasons:
Preventing Data Theft: Deleted files can contain sensitive information, including personal documents, financial records, and confidential business data. If these files are not securely erased, they can be recovered by malicious actors.
Compliance with Regulations: Many industries are subject to data protection regulations that require the secure disposal of sensitive information. Failing to comply with these regulations can result in severe penalties.
Personal Privacy: For individuals, secure deletion is essential to protect personal privacy and prevent identity theft.
Methods for Securely Emptying Trash on macOS
There are several methods to ensure that deleted files are securely erased on macOS. These range from built-in features to third-party tools designed for secure data deletion.
1. Using Macube Cleaner
Macube Cleaner is a comprehensive utility designed specifically for Mac users to optimize system performance, manage storage efficiently, and enhance data security. Beyond basic file management, Macube Cleaner offers robust features tailored to Mac environments, including secure file deletion to prevent unauthorized data recovery.
Key Features of Macube Cleaner:
System Junk Cleanup: Identifies and removes unnecessary system files, caches, and logs that accumulate over time, thereby improving system performance.
Large & Old Files Finder: Scans for large files and outdated data, helping users reclaim valuable disk space.
Duplicate Finder: Detects and deletes duplicate files, reducing redundancy and optimizing storage usage.
Privacy Cleaner: Safely erase browsing history, cookies, and other sensitive data to protect user privacy.
File Shredder: Securely deletes files by overwriting them multiple times, ensuring they are irrecoverable by data recovery software.
Scheduled Secure Deletion: Allows users to automate the process of securely deleting files at specified intervals, maintaining system cleanliness and data security.
How To Use:
Step 1: Get Macube Cleaner
First, download Macube Cleaner, a dedicated tool designed to remove unnecessary files from your Mac. This application is tailored to pinpoint and delete redundant files, which can help free up space and enhance your system's speed.
Step 2: Run a Smart Scan
Once Macube Cleaner is launched, initiate a Smart Scan. This powerful feature comprehensively examines your Mac, detecting and listing cache, temporary files, and other data that can be safely deleted. By removing these files, you'll effectively boost your Mac's overall performance.

Step 3: Emptying the Trash
After completing the scan, navigate to the Trash section within Macube Cleaner. Here, you'll find a list of items identified during the scan. To permanently remove these items, simply click on "Clean". If you wish to selectively delete certain files instead, you can choose those specific items before initiating the cleaning process. This ensures that your system remains clutter-free and optimized for better performance.

Pros and Cons
Pros
Enhanced Data Security: Macube Cleaner ensures that deleted files are thoroughly overwritten and cannot be recovered, enhancing overall data security.
Intuitive Interface: It features a user-friendly design that simplifies navigation and usability, making it accessible for all users.
Comprehensive Functionality: In addition to file deletion, Macube Cleaner offers a range of tools for optimizing and maintaining system performance.
Customizable Options: Users have the flexibility to configure shredding passes according to their security needs, providing tailored protection for sensitive data.
Efficiency Boost: By swiftly and effectively removing unnecessary files, Macube Cleaner helps improve system speed and performance.
Cons
Cost Consideration: Macube Cleaner is a paid utility, which may be a factor for users looking for free alternatives.
2. Using Secure Empty Trash (macOS El Capitan and Earlier)
In macOS versions prior to El Capitan, Apple included a feature called "Secure Empty Trash." This option overwrites the deleted files with random data, making them much harder to recover.
How to Use Secure Empty Trash:
Move Files to Trash: Drag the files you want to delete to the Trash.
Secure Empty Trash: Right-click on the Trash icon in the Dock, hold down the Command key, and select "Secure Empty Trash."
Unfortunately, Apple removed this feature in macOS El Capitan and later versions due to changes in how modern storage systems, such as SSDs, handle data.
3. Using Terminal for Secure Deletion
For advanced users, the Terminal offers a powerful way to securely delete files using command-line tools. One such tool is srm, which securely removes files by overwriting them multiple times.
How to Use:
Open Terminal: Launch the Terminal application from Applications > Utilities.
Navigate to File Location: Use the cd command to navigate to the directory containing the file you want to delete. For example:bashCopy codecd ~/Desktop
Securely Delete the File: Use the srm command followed by the filename. For example:bashCopy codesrm filename.txt By default, srm overwrites the file 35 times, ensuring secure deletion. You can adjust the level of security with additional flags, such as -m for a faster but less secure deletion.
4. Encrypting Your Disk with FileVault
Another effective method to protect your data is to encrypt your entire disk using FileVault. While this doesn't directly relate to emptying the Trash, it ensures that even if deleted files are recovered, they cannot be accessed without the encryption key.
How to Enable FileVault:
Open System Preferences: Click on the Apple icon in the top-left corner and select "System Preferences."
Go to Security & Privacy: Click on "Security & Privacy," then select the "FileVault" tab.
Enable FileVault: Click on "Turn On FileVault" and follow the on-screen instructions to encrypt your disk.
Best Practices for Data Privacy on macOS
In addition to securely emptying the Trash, there are several best practices you can follow to enhance your data privacy on macOS.
1. Regularly Clear Browser Data
Web browsers store a significant amount of data, including browsing history, cookies, and cached files. Regularly clearing this data can help protect your privacy.
How to Clear Browser Data:
Safari: Open Safari, click on "Safari" in the menu bar, select "Preferences," go to the "Privacy" tab, and click "Manage Website Data" to remove stored data.
Chrome: Open Chrome, click on the three dots in the top-right corner, select "Settings," go to "Privacy and security," and click "Clear browsing data."
Firefox: Open Firefox, click on the three lines in the top-right corner, select "Preferences," go to "Privacy & Security," and click "Clear Data."
2. Use Secure Passwords and Two-Factor Authentication
Strong, unique passwords and two-factor authentication (2FA) add layers of security to your accounts, making it harder for unauthorized users to gain access.
Password Management Tools:
1Password: A robust password manager that stores and generates strong passwords.
LastPass: Another popular password manager that offers secure password storage and generation.
3. Regularly Back Up Your Data
Regular backups ensure that you can recover your data in case of accidental deletion, hardware failure, or cyberattacks. Use Time Machine or a third-party backup solution to keep your data safe.
How to Use Time Machine:
Open System Preferences: Click on the Apple icon and select "System Preferences."
Go to Time Machine: Click on "Time Machine" and select "Backup Disk."
Select a Backup Disk: Choose an external hard drive or network location for your backups.
4. Stay Updated
Regularly updating macOS and your applications ensures that you have the latest security patches and features. Enable automatic updates to keep your system secure.
How to Enable Automatic Updates:
Open System Preferences: Click on the Apple icon and select "System Preferences."
Go to Software Update: Click on "Software Update" and check the box for "Automatically keep my Mac up to date."
Conclusion
Ensuring data privacy on macOS involves more than just emptying the Trash. Secure deletion methods, disk encryption, regular maintenance, and following best practices are all essential components of a comprehensive data privacy strategy. By taking these steps, you can protect your sensitive information from unauthorized access and maintain your digital privacy.
1 note
·
View note
Text
PC Systems Utility Software: Enhancing Performance And Efficiency
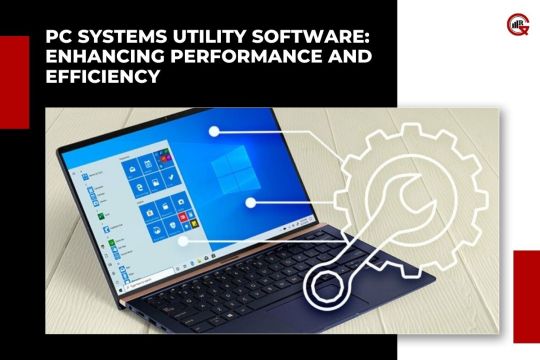
PC systems utility software plays a crucial role in maintaining, optimizing, and securing computers. These tools help users manage their systems more effectively, ensuring smooth operation and enhanced performance. This article delves into the various types of PC Systems Utility Software, their functions, benefits, and some popular examples.
Types of PC Systems Utility Software
Utility software can be broadly categorized into several types, each serving a specific function to keep the system running efficiently. The main categories include:
System Optimization Tools
Disk Management Utilities
Security and Privacy Tools
Backup and Recovery Software
System Monitoring Tools
File Management Utilities
1. System Optimization Tools
System optimization tools are designed to enhance the overall performance of a computer by managing system resources and removing unnecessary files.
Registry Cleaners: These tools clean the Windows registry by removing obsolete and redundant entries, which can slow down the system. Popular registry cleaners include CCleaner and Wise Registry Cleaner.
Defragmentation Tools: Over time, files on a hard drive can become fragmented, causing the system to slow down. Defragmentation tools reorganize fragmented data, improving access speed and system performance. Examples include Defraggler and Auslogics Disk Defrag.
Startup Managers: Startup managers help users control which applications run at startup, reducing boot time and freeing up system resources. Autoruns and Startup Delayer are well-known tools in the category of PC Systems Utility Software.
2. Disk Management Utilities
Disk management utilities assist in managing hard drive space, partitioning disks, and ensuring data integrity.
Disk Cleanup Tools: Disk cleanup utilities remove temporary files, system cache, and other unnecessary data to free up disk space. Windows built-in Disk Cleanup and CleanMyPC are examples of such tools.
Disk Checking Tools: These utilities scan the hard drive for errors and bad sectors, ensuring data integrity and preventing potential data loss. CHKDSK (Check Disk) is a built-in Windows utility, while SpinRite is a third-party option.
3. Security and Privacy Tools
Security and privacy tools protect the system from malware, unauthorized access, and data breaches.
Antivirus Software: Antivirus programs detect and remove malware, protecting the system from viruses, worms, and other malicious software. Popular antivirus software includes Norton, Bitdefender, and Kaspersky.
Firewall Software: Firewalls monitor incoming and outgoing network traffic, blocking unauthorized access and protecting the system from cyber threats. Comodo Firewall and ZoneAlarm are well-regarded firewall solutions.
Privacy Tools: Privacy tools help users protect their personal information by securely deleting files, clearing browsing history, and managing cookies. Examples include BleachBit and Privacy Eraser.
4. Backup and Recovery Software

Backup and recovery software ensures data safety by creating copies of important files and providing recovery options in case of data loss.
Backup Tools: Backup utilities create copies of files and folders, allowing users to restore data in case of hardware failure or accidental deletion. Acronis True Image and EaseUS Todo Backup are popular backup solutions.
Recovery Tools: Data recovery tools help retrieve lost or deleted files from hard drives, USB drives, and other storage devices. Recuva and Disk Drill are commonly used recovery tools.
5. System Monitoring Tools
System monitoring tools provide real-time information about system performance, helping users identify and resolve issues quickly.
Resource Monitors: These tools display detailed information about CPU, memory, disk, and network usage, helping users identify resource-hungry applications. Task Manager (built-in Windows utility) and Process Explorer are widely used resource monitors.
Temperature Monitors: Temperature monitoring tools help prevent overheating by displaying real-time temperature data for CPU, GPU, and other components. HWMonitor and Core Temp are popular choices.
Benchmarking Tools: Benchmarking utilities measure the performance of system components, allowing users to compare their hardware against industry standards. Examples include 3DMark and Cinebench.
6. File Management Utilities
File management utilities assist in organizing, searching, and managing files more efficiently.
File Compression Tools: These tools compress files to reduce their size, making them easier to store and transfer. WinRAR and 7-Zip are popular file compression tools.
Duplicate File Finders: Duplicate file finders scan the system for duplicate files, helping users free up disk space. Duplicate Cleaner and Auslogics Duplicate File Finder are commonly used tools.
File Search Tools: File search utilities provide advanced search capabilities, making it easier to find files and folders on the system. Everything and UltraSearch are popular file search tools.
Benefits of Using Utility Software
Using utility software offers numerous benefits, including:
Improved Performance: By cleaning up the system, optimizing resources, and managing startup programs, utility software can significantly improve system performance and responsiveness.
Enhanced Security: Security and privacy tools protect the system from malware, unauthorized access, and data breaches, ensuring the safety of personal and sensitive information.
Efficient Disk Management: Disk management utilities help users manage their storage space more effectively, preventing disk errors and ensuring data integrity.

Real-Time Monitoring: System monitoring tools provide real-time information about system performance, allowing users to identify and resolve issues quickly.
Better File Management: File management utilities assist in organizing, searching, and managing files more efficiently, saving time and effort.
Popular PC Systems Utility Software
Here are some popular utility software programs widely used by PC Systems Utility Software users:
1. CCleaner: A comprehensive system optimization tool that includes a registry cleaner, disk cleanup utility, and startup manager.
2. Norton Antivirus: A robust antivirus solution that protects against malware, viruses, and other cyber threats.
3. Acronis True Image: A reliable backup tool that offers full system backups, incremental backups, and cloud storage options.
4. HWMonitor: A temperature monitoring tool that displays real-time temperature data for CPU, GPU, and other components.
5. WinRAR: A powerful file compression tool that supports various file formats and offers high compression ratios.
6. Recuva: A data recovery tool that can retrieve lost or deleted files from various storage devices.
Conclusion
PC systems utility software is essential for maintaining, optimizing, and securing computers. These tools help users manage their systems more effectively, ensuring smooth operation and enhanced performance. By understanding the various types of utility software and their benefits, users can choose the right tools to keep their systems running efficiently. Whether it’s optimizing system resources, protecting against cyber threats, managing disk space, or ensuring data safety, utility software plays a vital role in the overall health and performance of PC systems utility software.
0 notes
Text
Essential Maintenance Tips to Keep Your Laptop Running Smoothly

Our laptops are more than just machines; they're portals to work, entertainment, and connection. They hold our documents, photos, and memories, making them invaluable tools in our daily lives. However, like any well-used machine, laptops require regular maintenance to ensure they continue to operate smoothly and efficiently. Neglecting proper laptop care can lead to performance issues, overheating, and even hardware failure.
By implementing a consistent maintenance routine, you can extend the lifespan of your laptop and avoid costly repairs. This blog explores eight essential maintenance tips to keep your machine running smoothly. For those seeking a deeper understanding of laptop care or aspiring to enter the field of laptop repair, consider exploring laptop repairing course in Delhi offered by a reputable laptop repairing institute.
1. Keep Your Software Updated
Outdated software can lead to a variety of problems, including security vulnerabilities, performance issues, and compatibility problems. Here's how to ensure your software stays up-to-date:
Operating System Updates: Regularly install updates for your operating system (Windows, macOS, etc.). These updates often contain bug fixes, security patches, and performance enhancements.
Application Updates: Update all your installed applications whenever new versions become available. Application updates can address bugs, improve functionality, and enhance compatibility with your operating system.
2. Manage Startup Programs
Many programs automatically launch at startup, which can slow down your boot time. Here's how to streamline your startup process:
Windows: Access Task Manager (Ctrl+Shift+Esc) and navigate to the "Startup" tab. Disable programs you don't need to run at startup.
macOS: Go to System Preferences > Users & Groups > Select your user > Login Items. Uncheck programs you don't want to launch automatically at startup.
3. Regularly Clean Up Your Hard Drive
Over time, your hard drive can accumulate unnecessary files, including temporary files, unused programs, and duplicate data. This clutter can consume valuable storage space and potentially slow down your system. Here's how to declutter your hard drive:
Uninstall Unused Programs: Review your installed programs and uninstall any you no longer use. Free up valuable storage space and streamline your application list.
Disk Cleanup: Utilize your operating system's built-in disk cleanup tools to remove temporary files, cache, and other unnecessary data.
Identify Large Files: Use your operating system's search function to identify large files and determine if they can be deleted or moved to an external storage device.
4. Defragment Your Hard Drive
This tip applies only to laptops with traditional Hard Disk Drives (HDDs). Solid-State Drives (SSDs) don't require defragmentation. Defragmentation reorganizes fragmented files on your hard drive, improving read/write speeds and potentially enhancing overall system performance. Consult your operating system's documentation for instructions on defragmenting your hard drive.
5. Optimize Your Power Settings
Optimizing your power settings can help conserve battery life and potentially reduce heat generation. Here's how to adjust your power settings:
Windows: Go to Control Panel > Hardware and Sound > Power Options. Choose a power plan that balances performance with power consumption based on your needs.
macOS: Go to System Preferences > Battery. Adjust settings like display brightness and automatic sleep to optimize battery life.
6. Keep Your Laptop Cool
Excessive heat is a major enemy of laptops. Here are some practices to keep your laptop cool:
Clean Vents Regularly: Dust buildup in vents can restrict airflow and lead to overheating. Use compressed air to clean your laptop's vents regularly.
Avoid Using Your Laptop on Soft Surfaces: Placing your laptop on soft surfaces like blankets or pillows can block vents and trap heat. Use a hard, flat surface for optimal airflow.
Consider a Cooling Pad: A laptop cooling pad can provide additional ventilation and help keep your laptop cool during extended use.
7. Back Up Your Data Regularly
Regular data backups are crucial to protect your valuable information from potential data loss due to hardware failure, software malfunctions, or accidental deletion. Here are some backup options:
External Hard Drive: Back up your data to an external hard drive at regular intervals. Choose a storage capacity that can accommodate your current and future data needs.
Cloud Storage: Cloud storage services offer a convenient way to back up your data online. Explore free and paid cloud storage options based on your storage requirements.
File History/Time Machine: Utilize built-in backup features like File History (Windows) or Time Machine (macOS) to automatically back up your data to a designated location.
8. Invest in Laptop Maintenance Tools
Having a few basic laptop maintenance tools readily available can be helpful for routine cleaning and troubleshooting. Here are some essential tools to consider:
Compressed Air Can: Ideal for cleaning dust buildup from vents and keyboards.
Microfiber Cloth: Use a microfiber cloth to safely clean your laptop's screen and exterior surfaces.
Small Screwdrivers (Optional): If you're comfortable opening your laptop for more thorough cleaning, a set of small screwdrivers might be necessary. However, proceed with caution and consult your laptop's manual or a qualified technician if unsure.
Beyond Basic Maintenance: When to Seek Professional Help
While the maintenance tips outlined above can significantly enhance your laptop's performance and lifespan, some situations require professional assistance. Consider seeking help from a qualified laptop repairing institute in Delhi if you encounter:
Hardware Issues: Internal hardware problems like a failing hard drive, malfunctioning keyboard, or faulty display require professional diagnosis and repair.
Liquid Damage: Liquid spills pose a serious threat to your laptop's internal components. Prompt professional intervention is crucial to minimize potential damage.
Data Recovery: If you experience significant data loss due to hardware failure, software malfunction, or accidental deletion, data recovery specialists might be able to salvage your valuable information.
Empower Yourself with Knowledge: Explore Laptop Repair Courses
By following these essential maintenance tips, you can significantly extend the life of your laptop and ensure it runs smoothly for years to come. However, if you're interested in a deeper understanding of laptop repair or aspire to enter this rewarding field, consider enrolling in a laptop repairing course offered by a reputable institute.
Why Choose Hi-Tech Institute?
Established in 2004, Hi-Tech Institute (ISO and MSME certified) has been a leader in laptop and mobile repair education in Delhi for over 20 years. With over 3 lakh students trained, they possess a wealth of experience and a proven track record of success.
The laptop repair industry is experiencing a growing demand for skilled professionals. By enrolling in a laptop repair course at Hi-Tech Institute, you gain valuable knowledge and skills that extend beyond basic maintenance. Their courses delve into hardware repair, software diagnostics, and essential tools and techniques used by professional laptop repair technicians.

By implementing a consistent maintenance routine and understanding the signs that might necessitate professional help, you can become a proactive steward of your laptop's health. Remember, prevention is key when it comes to maintaining a reliable and smooth-running machine.
Invest in Your Productivity: Don't wait for performance issues to arise! Implement the maintenance tips in this blog and explore the possibilities offered by Hi-Tech Institute's laptop repair courses. Equip yourself with the knowledge and skills to keep your laptop running optimally and potentially embark on a fulfilling career in the ever-evolving field of laptop repair.
#laptop repairing course#laptop repairing institute#laptop repairing course in delhi#laptop repairing institute in delhi#laptop repairing course near me#laptop repairing institute near me#laptop repairing course in west delhi
0 notes