#How To Connect To The Internet Without An Ethernet Port
Explore tagged Tumblr posts
Visit Tumblr Blog
Explore Tumblr blogs with no restrictions, modern design and the best experience.
Last Seen Tumblr Blogs


Fun Fact
Tumblr was created by web developers David Karp and Marco Arment.
Text
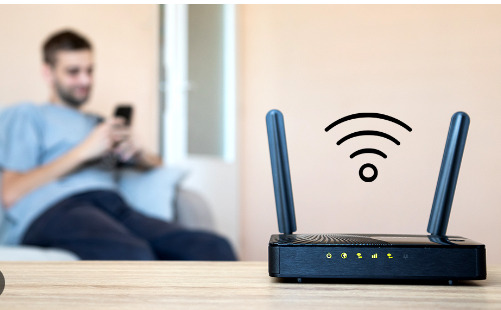
ok time for wifi troubleshooting dump (for Windows but the concepts are true for any device)
First, how this happens. Imagine you had a router that wasn't plugged into anything but power, and a laptop with an ethernet port. If you plugged the laptop into the router, you would get a similar message of "connected without internet" but it would show an ethernet icon with instead of wifi icon.
What that error means is that you did, in fact, connect to the wifi. That's layers 1 and 2 of the internet. Trouble is, there's more layers, and you need all the layers to use the internet.
Layer 3 of the internet is the Routing layer. Yes, this is where the name "router" actually comes from, but I digress. This is the layer of the internet that deals with "IP addresses". Where your computer or your phone or TV or whatever normally gets an IP address from is something called "DHCP". Dynamic Host Configuration Protocol.
You don't need to memorize that. Just know that after you connect to a network with wifi or ethernet cable, one of the first things device will do by default is send a broadcast on the network asking "Hey! Is anyone here a DHCP server?" This works because certain sorts of broadcasts don't need your computer to know how to use the network more than just being connected to it.
The addresses used when asking this are actually 0.0.0.0 and 255.255.255.255. If those sound like special addresses, that's cuz they are. "no address" and "everyone who can hear this". Anyways...
Your home router by default is running a dhcp server on it, so it SHOULD hear this broadcast and it SHOULD respond and your computer SHOULD negotiate whats called a "DHCP lease". This basically is just a bit of information saying "ok so here's your address and subnet size, here's your default gateway, here's some DNS servers, it's good for [LENGTH OF TIME HERE]."
The first thing to check is, did DHCP work? Right-click the network icon, whether ethernet or wifi, and chose "Open Network and Internet Settings".

Then go to the network properties of either the ethernet or the wifi, whichever one you're connected to.

Yours won't say "connected" cuz yall internet is broken but the buttons are still there.

The big thing you're looking for is the "IPv4 address". IPv6 is different don't worry about it right now and usually if IPv4 is broken then IPv6 is broken anyways, if your internet provider even serves you IPv6... ANYWAYS.
If you have an address like 192.168.something.something or 10.something.something.something you probably got a DHCP lease so that's not the issue.
If you have an address like 169.254.something.something then that means that either the DHCP server didn't respond, or it did respond but your wifi signal is so bad that your computer didn't hear the response.
Restart your router, look into changing the wifi channel settings on the router to a less occupied channel, try using 5ghz wifi if possible though not everyone's computer or router supports that, sometimes restart your computer cuz sometimes Windows' networking software does stupid thing.

Also, unless you KNOW you're supposed to be using Static addressing, make sure you're set to Automatic. Someone may have turned off Automatic addressing cuz they're a prankster. Or they don't know what they're doing. Or both.
Well, if you got to this point because you aren't having a DHCP issue, then things get a little tougher cuz the "internet is out and you should call your ISP to find out if it's a wider outage that they're already working on fixing or if it's just you" possibilities start to show up now.
Time for Command Prompt. I promise it's not nearly as scary as you might think.


Alright, time for our first command. Type in "ipconfig" without the quotes, and hit enter. It'll spew out a bunch of text at you, but it's not as complicated as it looks.

I crossed the things in thick red out cuz I don't trust tumblr to not pull some shit, and the one thing in thin orange because it's fine if people see that but it's in the middle of some stuff we want.

Yall have used Discord at some point, right? You see that Default Gateway? We're gonna ping it. "ping 192.168.1.1" or put whatever your gateway is instead.

I'm on ethernet with properly functioning equipment, so my ping delay is <1ms (less than 1 millisecond). Wifi is gonna be higher, anywhere from 10 to 200 milliseconds, depending on your wifi quality.
Also, if your wifi connection is really bad, you may see "Request Timed Out".
If you're having trouble pinging the gateway, you may want to do a ping test. Adding a -w 50 (wait 50 milliseconds) will make the computer not wait long for failed pings, and -n 40 will make it try 40 times instead of just 4 times, cuz we need more data than just 4 tries.

This'll take a while to run (about 40 seconds to be exact). If you get tired of it running or just everything is timing out constantly then you can press Control C (like copying something in a text editor) to interrupt the program.

The big things to pay attention to are the "round trip times" and the % loss.
If your % loss to the gateway is 100% then either your computer is configured wrong and you should check that you're using the right addressing, or your wifi is extremely bad, or extremely rarely your router doesn't respond to pings on its local network. This is almost never the case. Your router probably doesn't respond to pings from the internet for security reasons, but pings from the inside are good for troubleshooting.
If your % loss to the gateway is over 10%, and/or your times are consistently very high (over 100ms or so) then your wifi conditions are extremely bad. Either you don't have enough signal strength, or there's heavy interference and basically your computer and router are effectively trying to have a conversation while at a loud metal concert. Neither of them can hear eachother very well.
There might be something wrong with your internet service provider still; but if you were wondering why using your wifi is suffering even when the internet isn't out, that's a hint.
If your % loss to the gateway is over 1% but under 10% then that's Not Great and you should still look into wifi channelization but it wouldn't stop you from being able to use the internet entirely.
Under 1% is okay, that means it's not a wifi issue.
The next thing to try is to ping a well-known usually-up service, such as Cloudflare Public DNS (1.1.1.1) or Google Public DNS (8.8.8.8) or Quad9 (9.9.9.9)


My internet is working fine, so I have 0 loss and while there is some variance (one got 34ms instead of 11) everything looks peachy.
If your pings to one of these public services all fail, then either your router needs to be configured because either 1. it wasn't set up in the first place (you would not believe how many people I take calls from that have this issue) or 2. it factory reset itself for some reason (some people think that rebooting the router means use the reset button. IT DOES NOT MEAN THAT.) and you need to pay attention cuz if it happens again that may mean ur router is screwed.
Or, there's an actual service outage, and you should call your ISP to find out if it's just you, or if it's a general outage and they're already working on it and all you can do is hurry up and wait.
And... that's it. There are other weirder issues that you can have, sure. As long as this post is, explaining some of those issues would take even longer. And I would LOVE to explain some of them. But this post is already more than long enough, and it covers the vast majority of cases.
Thank you for reading and good luck!
when the wifi says "connected without internet" how about i fucking kill you
#long post#come get yalls juice#i promise promise promise that the first 90% of the troubleshooting i do in my irl job is not hard#i also promise that the remaining 10% of the troubleshooting i do in my irl job IS that hard but that's why i get paid to do it#seriously i have handheld 70 year olds through the process please im begging u learning this one thing will make ur life so much better#please dont let the powers that be gatekeep you from learning how to fix stuff
41K notes
·
View notes
Text
Faceplate: What It Is And Why It Matters

It’s challenging to envision life without the Internet in today’s technologically advanced society. Have you ever wondered, though, how all those magical signals and data manage to travel over wires and through the air to your devices? Well, here’s where the faceplate comes into play.
Now, we know the term “Faceplates” might sound a bit cryptic, but don’t worry; we’ve got you covered. In this blog, we’ll uncover the world of faceplates, which is concealed beneath the surface. We will explore what they are, why they are important, what materials they are composed of, and how to install them correctly.
What is a Faceplate?
Alright, first things first. What exactly is this faceplate? A faceplate (also commonly referred to as a wallplate) in networking is the interface between your networking cables and your devices.
Imagine it as the translator in a conversation between your high-speed internet cables and your computer, TV, or any other device. This little piece ensures a seamless flow of data and signals from one place to another.
Why Use Faceplate?
Now, you might be wondering, “Why do I need a faceplates in the first place?” Well, hold onto your hats, because it’s about to get interesting.
1. Aesthetic Appeal:
Faceplates enhance the aesthetic appeal of your home or place of business in addition to their functionality. You may match them with your decor thanks to the variety of designs and colors available, which makes your network setup more palatable.
2. Structured Cabling:
No one likes tangled wires. Faceplates are like the heroes of cable management. They neatly house your cables, keeping them organized and accessible when you need to make adjustments.
How Do You Install a Faceplate?
Now, let’s tackle the age-old question: How do you install a faceplates? It’s easier than you might think!
Step 1: Gather Your Tools
Before you begin, you’ll need a few tools handy:
Screwdriver
Faceplate (of your choice)
Screws
Cable punch-down tool
Ethernet cable
Step 2: Prepare the Cables
Strip the ends of your Ethernet cables and arrange them neatly.
Step 3: Attach the Faceplate
Position the faceplate where you want it and secure it with screws. Ensure it’s level and secure.
Step 4: Punch Down the Cables
Using the punch-down tool, connect the cables to the faceplate’s ports. This ensures a snug fit and proper connectivity.
Step 5: Test the Connection
Plug in your devices and test the network connection. If all goes well, you’re ready to surf the web at warp speed.
Elevate Your Network with AE Connect’s Premium Faceplate
In a world where every click, call, and connection matters, having a network that’s as smooth as silk is a must. That’s where “AE Connect” steps into the spotlight – your ultimate gateway to top-notch faceplates.
Our faceplates are made from the highest-quality, long-lasting materials with the utmost care and precision. You will be enthralled by our faceplates’ unmistakable elegance and sophistication the instant you lay your eyes on them.
In our opinion, a faceplate should shield your cabling from harm such as scratches in addition to improving its aesthetic appeal. Because of this, our faceplates are designed to resist the rigors of regular use, guaranteeing that your cabling is always safe and secure.
What Sets AE Connect Faceplate Apart?
Premium Quality
Style and Versatility
Enhanced Performance
Expert Support
Competitive Pricing
Whether you need a single modular faceplate, dual modular faceplate, or quad modular, we have the solution you’re looking for. From home networks to high-performance environments, we have the right faceplate to meet your needs.
Join the AE Connect family today, and experience the difference for yourself. Your network will thank you for it!
Conclusion
So there you have it, folks! In a world where our connection to the digital world is more vital than ever, faceplates quietly keep everything running smoothly. We hope that this blog has clarified the significance of faceplates and how they help to a smoother, more orderly, and aesthetically beautiful network arrangement.
At AE Connect, we’re not just in the business of providing faceplates; we’re in the business of enhancing your digital life. Our commitment to excellence, premium quality, style, versatility, enhanced performance, expert support, and competitive pricing sets us apart as a trusted name in the networking and connectivity solutions industry.
So, whether you’re looking to spruce up your home network or ensure high performance in a professional environment, AE Connect’s premium faceplates are the answer.
0 notes
Text
Stop Renting, Start Saving: Best Verizon Fios Approved Modems for Faster Internet in 2025
If you use Verizon FiOS for Internet you are likely to pay a monthly fee for the router or gateway. With time the rental fee adds up sometimes even more than $15 per month which is almost $200 a year. The good news is that you can now buy your own VERIZON FIOS APPROVED MODEMS and save a lot of money while getting faster and more reliable service.

What do you need to know about Verizon Fios ?
Unlike cable Internet service providers like Xfinity Verizon Fios users fiber optic technology. That means there is no traditional modem like you would have used with a cable provider like XFINITY TRIPLEPLAY MODEM. You need to know that optical network terminal easily converts fiber optic signals into Internet data or phone signals. It is basically installed on a wall inside or outside your home. Router connects to the Ont and broadcasts Wi-Fi in your home. So when you talk about like that Verizon Fios you actually mean routers that are compatible with Verizon Fios . The ONT stays in place you only replace the router.
Why you must own router for Verizon Fios ?
You can stop paying Verizon Fios s $15 month router rental fee. A1 time router purchase can save you hundreds with time. Some routers are older models with limited range and speed. Or modern router can give you must speed and cover more of your home. You can also get complete access to more settings parental control guest networks and better security features. With your own router you can just upgrade whenever you want without dealing with the equipment swaps.
How to set up your router with Verizon Fios ?
Firstly you need to disconnect the old router and power it off. Plug your new routers Wan port into the ont using Ethernet cable. Plug in the power using adapter and turn the router on. Verizon Fios might require you to release the old Mac address. You can do this by logging into the old router then releasing the IP address or you can also call Verizon Fios support to reset the connection. You can also use Verizon Fios app or web interface to set your Wi-Fi name and password.
So above all you need to know that buying your own Verizon Fios compatible router is one of the safest and smartest things that you can do to save money and improve your home Internet. You will stop paying rental fees enjoy faster speeds and also have better control over your network.
To know more about these products please visit our website buyyourownmodem.com
#BRIGHTSPEED APPROVED MODEMS#VERIZON FIOS APPROVED MODEMS#CENTURYLINK COMPATIBLE MODEMS#XFINITY APPROVED MODEMS#SPECTRUM APPROVED MODEMS#CENTURYLINK APPROVED MODEMS#WINDSTREAM APPROVED MODEMS#TDS APPROVED MODEMS#XFINITY TRIPLEPLAY MODEM#BRIGHTSPEED COMPATIBLE MODEMS
0 notes
Text
Free Parking + High-Speed WiFi: 3 Hassle-Free Coworking Spaces on OMR

When it comes to setting up a workspace in Chennai, OMR (Old Mahabalipuram Road) is hard to beat. Known as the city’s IT corridor, OMR is a magnet for startups, freelancers, and MNCs alike. However, as the area becomes busier, many professionals are looking for more than just a desk — they want hassle-free coworking spaces that solve the everyday problems of commuting, internet reliability, and basic comfort.
That’s why coworking spaces offering free parking and high-speed WiFi have become hot property. No one wants to circle around endlessly for a spot or work through internet lags during Zoom calls. If you’re a professional or a small team searching for a coworking space in OMR, convenience and efficiency are everything.
Below, we explore three coworking spaces on OMR that deliver just that — comfort, connectivity, and cost-efficiency — all in one package.
Why Free Parking and Fast WiFi Matter More Than You Think
Let’s be honest. Traffic on OMR can be brutal during peak hours. Finding a reliable parking spot, especially in crowded office zones, can eat up valuable time and energy. Similarly, spotty WiFi can derail productivity, interrupt client calls, and create unnecessary stress.
Here’s how free parking and high-speed WiFi make your coworking experience better:
No Daily Parking Hassles: Save 15–30 minutes daily otherwise spent on finding spots or paying parking meters.
Better Client Impressions: Clients visiting your office won’t have to deal with parking headaches.
Seamless Video Conferencing: Fast internet ensures Zoom, Teams, or Google Meet calls run without glitches.
Higher Productivity: No disruptions mean more flow, faster work, and better output.
These aren’t perks anymore — they’re necessities for modern professionals.
1. The Work Zone – Kandanchavadi
Best for: Freelancers, remote teams, and consultants who need consistent performance.
What You’ll Love:
Dedicated Free Parking Lot: Spacious, well-managed, and monitored by CCTV — available for two-wheelers and four-wheelers.
Blazing Fast WiFi: 300 Mbps leased-line connection with 24/7 IT support.
Private cabins & hot desks: Options available for solo workers or small teams.
Breakout Areas: Beanbags, reading corners, and chill zones to recharge.
Café-style Pantry: Great coffee and a rotation of snacks — from healthy to indulgent.
Atmosphere: Quiet and focused with plenty of natural light. Ideal for people who want to work without distractions.
Location: Just off the main OMR stretch, close to IT parks like SP Infocity.
Pricing: Starts at ₹6,500/month for hot desks, ₹9,500/month for dedicated desks. Includes all utilities.
2. GoFloaters – Perungudi
Best for: Hybrid workers and solopreneurs needing a drop-in setup with zero stress.
Why It Works:
Free Covered Parking: No more worrying about the Chennai sun or random street parking. You’ll have reserved space every day.
Ultra-High-Speed Internet: 500 Mbps internet with dual failovers.
Zoom Booths & Private Cabins: Ideal for those who need to make frequent calls or conduct virtual meetings.
Plug-and-Play Access: Just bring your laptop and plug in. They take care of everything else.
Affordable Day Passes: Perfect if you work only 2–3 times a week outside your home.
Atmosphere: Buzzing, modern interiors with vibrant colors, ergonomic chairs, and work pods.
Location: Near Apollo Hospital, surrounded by restaurants and cafes.
Pricing: ₹200/day for hot desks (day pass), ₹7,500/month for regular users.
3. Hive CoWorks – Sholinganallur
Best for: Small to midsize teams needing structure, security, and amenities.
Key Features:
Spacious Parking Area: Dedicated slots for team members and visitors — no charges, no trouble.
Gigabit WiFi: Seamless bandwidth even during peak hours. Also has Ethernet ports for heavy-duty users.
Dedicated Manager & Front Desk: No more worrying about courier handling or surprise guests.
Multi-level Access Control: Biometric + access cards for private zones.
Recreation + Pantry Zones: Ping pong tables, quiet rooms, and free tea/coffee.
Atmosphere: A good balance between professional and lively. Think Google-style vibe meets Chennai work ethic.
Location: Close to major residential areas, schools, and tech hubs.
Pricing: Hot desks from ₹8,000/month. Team cabins start at ₹20,000/month.
How These Spaces Compare
FeatureWork ZoneGoFloatersHive CoWorksFree Parking✅✅✅High-Speed WiFi✅ (300 Mbps)✅ (500 Mbps)✅ (1 Gbps)Private Meeting Rooms✅✅✅Pantry Facilities✅☕ Only Drinks✅ Full KitchenStarting Price (per month)₹6,500₹7,500₹8,000
Who Are These Spaces Perfect For?
These coworking spaces are not just randomly picked — they solve very real problems for different types of workers:
Remote workers who need solid infrastructure outside their home.
Freelancers tired of cafés with bad WiFi.
MNC branch teams needing quick setups for 5–10 employees.
Startups looking for budget-friendly options with big-office perks.
Creative teams that want breakout zones and reliable facilities.
All three spaces offer flexible terms, no lock-in periods (unless you choose private cabins), and excellent user support.
Final Thoughts
You don’t need to choose between comfort and cost when picking a coworking space in OMR. If your priorities include stress-free parking, high-speed internet, and reliable work infrastructure, then The Work Zone, GoFloaters, and Hive CoWorks should be on your shortlist.
More than just desks and chairs, these coworking offices are designed to improve how you work — every single day. From getting a secure parking spot to making Zoom calls without internet hiccups, it’s these little things that add up to a great experience.
Whether you’re a one-person army or a small team scaling fast, a hassle-free coworking setup on OMR can save you time, effort, and even money.
FAQs
Q1: Are these coworking spaces suitable for teams of 5–10 people? Yes. All three offer flexible plans that can scale from solo desks to small team cabins.
Q2: Is free parking available for both bikes and cars? Yes. Each space mentioned provides free parking for two-wheelers and four-wheelers (subject to availability).
Q3: Can I tour the workspace before booking? Absolutely. Most coworking providers allow free tours or trial days. Contact them in advance to schedule.
Q4: Do I need to commit to a long-term plan? No. Hot desks and shared desks can be rented monthly or even daily. Cabins may require short-term contracts depending on availability.
0 notes
Text
What is Network LAN, MAN, and WAN Explained
In today’s connected world, everything we do online is powered by computer networks. Whether you're streaming videos, working remotely, or browsing social media, you’re interacting with different types of networks. This article explains what a network is, the differences between LAN, MAN, and WAN, and the role of Port 53 in making it all work.

What is a Network?
A network is a system where two or more computing devices (like computers, servers, or mobile devices) are connected to share information and resources. These connections can be wired (using cables) or wireless (like Wi-Fi).
Benefits of a Network:
File and resource sharing
Centralized data access
Enhanced communication (emails, chats)
Internet access
Types of Computer Networks
Networks are classified based on their coverage area, purpose, and ownership. The three most common types are:
1. LAN (Local Area Network)
A Local Area Network (LAN) connects devices in a limited area like a home, office, or school.
Features of LAN:
Small geographic range (a few hundred meters)
High-speed data transfer (up to 10 Gbps)
Managed by a single organization
Can be wired (Ethernet) or wireless (Wi-Fi)
Examples:
Office computers connected to a printer
Home Wi-Fi connecting phones, laptops, and TVs
Keyword use: LAN is the most common type of network used in homes and small offices.
2. MAN (Metropolitan Area Network)
A Metropolitan Area Network (MAN) spans a city or a large campus. It connects multiple LANs within the same geographical region.
Features of MAN:
Covers areas from 5 to 50 km
Higher bandwidth than WAN
Often managed by ISPs or government bodies
Used for connecting university campuses, hospitals, or city infrastructure
Keyword use: MAN is larger than a LAN but smaller than a WAN, ideal for linking buildings in a city.
3. WAN (Wide Area Network)
A Wide Area Network (WAN) connects devices over a broad area—often across cities, countries, or even globally.
Features of WAN:
Covers hundreds or thousands of kilometers
Slower speeds compared to LAN and MAN
Uses leased telecom lines and satellite links
Most complex and expensive to maintain
Examples:
The Internet (the world’s largest WAN)
Corporate networks connecting branch offices worldwide
Keyword use: A WAN connects multiple LANs and MANs together across long distances.
Understanding Port 53 and Its Role in Networks
Every network, whether it's LAN, MAN, or WAN, relies on DNS (Domain Name System) to convert human-readable website names (like example.com) into IP addresses. This process is powered by Port 53.
What is Port 53?
Port 53 is the port used by DNS services.
DNS queries usually use UDP Port 53.
For larger queries or zone transfers, TCP Port 53 is used.
Without Port 53, you wouldn't be able to visit websites by name—only by IP address.
Keyword use: Port 53 is essential in every network type for resolving domain names into IP addresses.
LAN, MAN, WAN & Port 53: How They Work Together
In a LAN, Port 53 is used by local DNS servers to resolve websites for connected devices.
In a MAN, organizations may use dedicated DNS infrastructure over Port 53 to support larger, campus-wide networks.
In a WAN, DNS services over Port 53 are crucial for accessing global web resources.
Keyword integration: Whether you're connected to a LAN, MAN, or WAN, Port 53 plays a critical role in translating domain names and enabling smooth network communication.
Conclusion
Understanding what a network is and the differences between LAN, MAN, and WAN is foundational for anyone interested in IT or digital communications. Each network type serves a specific purpose, and behind them all, essential services like DNS via Port 53 keep things running smoothly. As technology continues to evolve, so does the importance of networking and the protocols that support it.
0 notes
Text
A Brief Guide to Configure Netgear Orbi 850 Mesh WiFi System
In today's hyper-connected world, strong and reliable internet coverage throughout your home or office is no longer a luxury—it's a necessity. If you're struggling with dead zones, buffering, or inconsistent Wi-Fi performance, the Netgear Orbi 850 Mesh WiFi System is an excellent solution. With its high-performance tri-band technology, support for Wi-Fi 6, and sleek design, it ensures seamless connectivity across every corner of your space.
If you're new to mesh networks or just looking to set up your new Orbi 850 system, this blog is the perfect starting point. In this brief yet comprehensive guide, we’ll walk you through how to configure your Netgear Orbi 850 Mesh WiFi System step-by-step.
What is the Netgear Orbi 850 Mesh WiFi System?
The Netgear Orbi 850 series is a high-end mesh WiFi system that includes a main router and one or more satellite units. The system uses Wi-Fi 6 (802.11ax), offering faster speeds, higher capacity, and better performance in high-traffic environments. It’s ideal for large homes or offices, capable of covering up to 5,000 square feet with a 2-pack system, and more with additional satellites.
Key Features of the Orbi 850
Before diving into the configuration, let’s look at some standout features of the Orbi 850:
Tri-Band WiFi: One dedicated 5GHz band for backhaul ensures faster and more reliable connections between router and satellites.
Wi-Fi 6 Technology: Up to 6Gbps total speed with support for multiple simultaneous devices.
Seamless Roaming: Switch between satellites without drops in connection.
High Security: Includes WPA3 encryption, NETGEAR Armor, and parental controls.
App-based Setup: The Orbi app simplifies the entire setup process.
What’s in the Box?
When you purchase the Orbi 850 system (usually the RBK852 or RBK853 model), you will find:
1 Orbi WiFi Router (RBR850)
1 or 2 Orbi Satellites (RBS850)
Ethernet cable
Power adapters for each unit
Quick start guide
Prerequisites Before Setup
Before you begin configuring the Orbi 850, make sure:
You have a working internet connection.
You know your ISP login details (if required).
Your modem is compatible and working correctly.
You’ve downloaded the Orbi App on your smartphone (available for iOS and Android).
Step-by-Step Guide to Configure Netgear Orbi 850 Mesh WiFi System
Step 1: Disconnect Old Hardware
Start by powering off your modem and disconnecting any existing routers. If you're replacing an existing Wi-Fi network, it’s important to avoid signal interference.
Step 2: Connect the Orbi Router
Connect the Orbi router’s WAN port to your modem using the supplied Ethernet cable.
Power on both the modem and the Orbi router.
Wait for the LED ring on the Orbi router to pulse white and then turn solid white, indicating it's ready for setup.
Step 3: Install the Orbi App
Download and install the Orbi app from the Apple App Store or Google Play Store.
Launch the app and create or log into your NETGEAR account.
Step 4: Start the Setup Process
The app will detect the Orbi device and prompt you to start setup.
Follow the on-screen instructions:
Confirm the router is powered on.
The app will automatically detect your Orbi router.
Assign a Wi-Fi name (SSID) and password.
Wait for the configuration to complete.
Step 5: Add Orbi Satellites
Place the satellites within range of the router for optimal signal.
Plug in and power on the satellite units.
The LED will pulse white while syncing and turn blue when connected successfully.
Blue: Strong connection
Amber: Fair connection
Magenta: No connection (move closer to the router)
The app will guide you through syncing and positioning each satellite.
Step 6: Test Your Network
Once the setup is complete, walk around your home or office with your phone to test signal strength and speed.
The Orbi app includes tools to check signal strength, connected devices, and run speed tests.
Advanced Configuration (Optional)
If you’re a more advanced user, you can tweak your Orbi 850 system further:
Access Web Interface
Open a browser and go to http://orbilogin.com
Login using the default credentials (found on the router) or the ones you set during setup.
Set Up Guest Network
Navigate to “Guest Network” and enable it.
Assign a unique SSID and password for visitors.
Enable Parental Controls
Use the Orbi app to configure Smart Parental Controls.
Set screen time limits, content filters, and schedules.
Firmware Updates
Regularly check for firmware updates to ensure the best performance and security.
The app usually prompts for updates, or you can manually check in the settings menu.
Troubleshooting Tips
LED Glows Magenta? Satellite can’t connect—try moving it closer to the router.
Internet Not Working? Check modem status and cabling. Reboot all devices.
App Won’t Detect Orbi? Ensure your phone is connected to the Orbi’s temporary setup network.
Firmware Update Fails? Restart both router and satellite, then try again.
Why Choose the Netgear Orbi 850?
Aside from its powerful performance, here are a few reasons why the Orbi 850 stands out:
Handles dozens of devices with ease (perfect for smart homes).
Professional-looking design blends well with home interiors.
Easy-to-use mobile app with powerful configuration options.
Strong backhaul connection improves satellite efficiency.
Final Thoughts
The Netgear Orbi 850 Mesh WiFi System is an investment in future-ready connectivity. Whether you’re a remote worker, a gamer, a streamer, or managing a smart home, the Orbi 850 ensures fast, reliable internet throughout your space.
Setting it up is easier than ever thanks to the user-friendly Orbi app and intuitive design. By following this brief guide, you'll have your home or office WiFi up and running in no time.
If you’ve just unboxed your Orbi 850 or are considering upgrading your home network, this guide should have you covered from start to finish. Say goodbye to dead zones and hello to smooth, high-speed internet.
1 note
·
View note
Text
RBR50 Orbi Router Setup With Home WiFi
Orbi RBR50 is a AC3000 tri band WiFi router which provides high speed performance. Throughout your home it gives reliable and fast WiFi coverage. RBR50 has the ability to add satellites to extend coverage. Do the Orbi RBR50 setup by two methods: By an Orbi app or via web interface.
Orbi RBR50 Router Core Function
Below are few essential functions, which you enjoy:-
Tri-Band Technology Function
Orbi utilizes tri-band technology, which includes the dedicated backhaul connection between Orbi router and its satellites.
Providing fast and stable WiFi speed even with a lot of WiFi devices connected.
Comes With Wired Connection
Get 4 gigabit ethernet port at Orbi RBR50 unit.
Easily connects an Orbi RBR50 unit with a modem for internet access.
Parental Control & Security
NETGEAR Armor function for advanced cybersecurity.
Guest WiFi network function helps to secure visitor access.
Do parental control by an Orbi application.
Easy To Configure
Orbi RBR50 unit is mainly designed for quick configuration, allowing users to make a secure WiFi network in minutes by using an Orbi application or through a web interface.
Essential Features
It covers an area up to 2000 square feet.
By adding Orbi satellites, you can expand its coverage.
It allows you to watch 4k videos, play online games, install large files without any buffer, etc.
Orbi applications give convenient access to your router’s features, including parental control, guest WiFi and network monitoring.
How To Use Orbi RBR50 Extender
Early, connect the RBR50 Orbi router with your modem which is provided by an internet service provider. After that, open the web browser or use an Orbi application to configure the Orbi network by setting up the WiFi network name and security password. Once the Orbi RBR50 setup is done, you enjoy fast and reliable WiFi coverage throughout your home.
How To Add Satellite To Orbi RBR50
First, locate Orbi satellite in the power source but closer to an Orbi router.
After that, launch the Orbi application or go to Orbi default web interface on a WiFi device.
Enter Orbi router network SSID and password.
Now, go to the add satellite mode option.
Then, consider all prompts. The Orbi application will guide you through the configuration process, which involves pushing a sync button on both router and satellite unit.
Further, open the Orbi application or WEB UI to verify the satellite appears as a ‘connected’ option.
Remove the Orbi satellite if signal strength is weak.
Hence Orbi RBR50 setup process with host modem or router is successfully done now. If you still face slow speed, RBR50 units don’t blink any light or any other issue, then try below troubleshoot tips.
Tips To Resolve Orbi RBR50 Issues
There are several kinds of issues you can face in the Orbi RBR50 unit. Let’s read solutions for every problem.
If Orbi Internet Or WiFi Is Not Working
Make sure that the modem unit must be attached with the Orbi RBR50 unit WAN port.
Contact your internet service provider for outages.
Go to Orbi default web page and look up whether the router shows an internet connection or not.
Orbi RBR50 Satellite Not Connecting
Re-Establish Orbi RBR50 Satellite
Follow below steps to re-establish RBR50 satellite
Move the RBR50 satellite closer to the router.
Push sync button on both satellite and router units.
Next, wait for the LED to turn into solid blue.
If the LED shows amber color then try to move the satellite more closer to the router.
If there is magenta LED then there is no connection between the satellite and router.
Download latest firmware
First on a WiFi device, open an Orbi application or go to the Orbi login page.
Make sure that your WiFi device must connect with the Orbi RBR50 default network.
Fill in the official username and password information.
After that, tap on network administration and then at software install.
At the end, install the latest firmware if anyone is there.
Facing Slow Internet Speed
Disable Few Interferences
Place your Orbi RBR50 router away from walls, microwaves, fridge, etc.
Use the 5GHz band for fast internet speed.
Change WiFi Channel
Go to the Orbi web interface page to change the WiFi channels.
Device Not Connects With WiFi
Power Cycle Device And Orbi RBR50 Router
From the device turn off WiFi, restart it and try to reconnect it.
Restart both Orbi router and satellite by pushing the power button.
Forget And Reconnect With Orbi WiFi Network
On your WiFi device such as computer or mobile, forget the Orbi WiFi network and reconnect with it by entering the correct WiFi password.
Orbi Web Page Not Loading
Use Wired Connection
Connect your WiFi device to the Orbi router by an ethernet cable.
Erase Browser Cache
Try to launch an Orbi login page with a different web browser or remove chrome/browser cache and cookies.
Reset Orbi To Factory Defaults
If nothing tip works to fix the issue of your device, then try to reset your Orbi router.
Look for the reset button at Orbi RBR50 router back.
Hold the reset button for 15 to 20 seconds until the power LED turns to amber.
At last, do the Orbi RBR50 setup again with the help of Orbi app or web interface.
By reading all this page information, you can install an Orbi RBR50 router with home WiFi. In future if you need any help then try to find the best tech expert for you.
0 notes
Text
0 notes
Text
0 notes
Text
0 notes
Text
0 notes
Text
How to Set Up a TV Box for Live TV: Step-by-Step Guide
With the growing popularity of streaming services and the decline of traditional cable TV, many people are opting for TV boxes to access live TV. TV boxes, especially IPTV boxes, offer an affordable and efficient way to stream live television, sports, and movies directly on your TV. But setting up a TV box for live TV can be a daunting task if you're not familiar with the process. A superbox coupon code offers discounts on IPTV services and products, allowing users to save on their live TV streaming experience. Find the latest codes for affordable Superbox deals to enhance your viewing options!
In this step-by-step guide, walk you through the essentials, including how to set up a TV box for live TV, choose the best TV box for streaming live TV channels, and troubleshoot common issues.
What is a TV Box and Why Use One for Live TV?
A TV box is a small device that connects to your television and allows you to stream content via the internet. With a smart TV box with live TV app support, users can easily watch live TV, movies, and shows without a traditional cable or satellite subscription. The box acts as a bridge between your TV and the internet, providing access to a variety of streaming services, including IPTV, live TV channels, and on-demand video.
Why You Should Choose the Best TV Box for Streaming Live TV Channels
When it comes to choosing a TV box for live TV streaming, there are numerous options on the market. However, selecting the best TV box for streaming live TV channels ensures a seamless viewing experience, superior picture quality, and access to your favorite TV shows and sports events. Whether you’re looking for an affordable TV box for live TV streaming or a top-rated IPTV box for live TV, it’s essential to choose a device that meets your specific needs.
In this section, we’ll cover the different types of TV boxes and help you decide which one is best for your live TV needs.
Step-by-Step Guide: How to Set Up a TV Box for Live TV
Setting up a TV box for live TV is a straightforward process, but it requires a few essential steps. Below is a step-by-step guide that you can follow to ensure proper installation and configuration:
Step 1: Choose the Right TV Box
The first step is to select the best TV box for your needs. Some of the best options on the market include:
Best Android TV Box for Watching Live TV: Android TV boxes are highly versatile and offer access to multiple apps, including live TV streaming services like IPTV and others.
Top-Rated IPTV Box for Live TV: IPTV boxes specialize in streaming live TV channels from around the world. They are ideal for cord-cutters who want access to a wide variety of live channels.
TV Box with Access to Live TV Channels Worldwide: If you're looking to stream international live TV, this type of box offers access to global channels, including local programming from different countries.
TV Box with Live TV and Sports Channels: For sports enthusiasts, selecting a TV box with live sports channels is key to enjoying live games and events without cable.
Step 2: Unbox and Connect the TV Box
Once you’ve chosen your TV box, the next step is to unbox it and connect it to your television. Here’s what you need to do:
Unbox your TV box and ensure that all necessary cables (HDMI, power adapter, etc.) are included.
Connect the TV box to your TV via the HDMI port. Most modern TVs have at least one HDMI input.
Plug in the power cable to the TV box and connect it to a power outlet.
Turn on your TV and switch to the HDMI input that corresponds to the TV box.
Step 3: Set Up Your Internet Connection
The next crucial step is ensuring that your TV box is connected to the internet. There are typically two options for connecting to the internet:
Wired (Ethernet) Connection: If your TV box supports Ethernet, connect it to your router using an Ethernet cable for a more stable and faster connection.
Wireless (Wi-Fi) Connection: If your TV box supports Wi-Fi, you can connect wirelessly. Navigate to the settings menu on your TV box and select your Wi-Fi network. Enter the password to establish the connection.
Step 4: Install Live TV Apps or IPTV Services
Once you’re connected to the internet, you’ll need to install the necessary apps or IPTV services to start streaming live TV. Follow these steps:
Access the app store on your TV box (Google Play Store for Android-based boxes or a proprietary app store for other types of TV boxes).
Search for the best live TV apps or IPTV services. Some popular apps include:
IPTV apps like IPTV Smarters or TiviMate for streaming live TV.
Live TV streaming services such as Sling TV, Hulu + Live TV, YouTube TV, or Pluto TV.
Install the app or service of your choice by following the on-screen instructions.
Log into the app using your account credentials. Some apps require a subscription, so make sure you’ve signed up for the service beforehand.
Step 5: Configure Your TV Box Settings
Once you’ve installed the necessary apps, the next step is to configure your settings to ensure optimal performance:
Adjust the display settings to match your TV's resolution (e.g., 1080p, 4K).
Configure the audio settings if needed, especially if you’re using a surround sound system or soundbar.
Set up parental controls if you want to restrict certain content or channels.
Step 6: Start Watching Live TV
After setting up everything, you’re ready to start watching live TV! Open the app or IPTV service on your TV box and browse through the available live channels, sports events, and on-demand content. You can now enjoy watching live TV from the comfort of your home without the need for a traditional cable subscription.
How to Watch Live TV with an IPTV TV Box
If you’re using an IPTV TV box for live TV streaming, here’s a more detailed look at how to watch live TV:
Choose an IPTV provider that offers live TV channels. Providers typically offer a wide range of channels, including news, sports, and entertainment.
Download the IPTV app on your TV box, such as IPTV Smarters, Perfect Player, or TiviMate.
Enter the IPTV subscription details provided by your IPTV provider. This may include a URL, username, and password.
Browse through live TV channels and start streaming your favorite programs.
Troubleshooting Common TV Box Setup Issues
While setting up a TV box for live TV is generally easy, you might encounter some issues along the way. Here are a few common problems and how to troubleshoot them:
No Signal on TV: Make sure the HDMI cable is securely plugged into both the TV and the TV box. Try using a different HDMI port on your TV.
Poor Internet Connection: If the streaming quality is poor or the connection is slow, consider using an Ethernet cable for a more stable connection.
App Installation Issues: If you can’t install a live TV app, check if the app is compatible with your TV box model. Ensure that you have enough storage space on your TV box.
Audio/Video Sync Issues: If the audio and video are out of sync, check the settings on your TV box and make sure the TV box is set to the correct resolution.
FAQs: TV Box
Q1: Can I watch live TV for free with a TV box? A1: Some TV boxes come with free live TV apps like Pluto TV or Tubi. However, to access premium channels or content, you’ll likely need a paid IPTV subscription or a live TV streaming service.
Q2: Do I need a smart TV to use a TV box for live TV? A2: No, a TV box works with any TV that has an HDMI input. Even older TVs that are not smart can use a TV box for live TV streaming.
Q3: How do I set up parental controls on my TV box? A3: Most TV boxes allow you to set parental controls through the settings menu. You can restrict certain apps or channels based on your preferences.
Q4: Can I stream live sports on my TV box? A4: Yes, you can stream live sports on a TV box with live TV and sports channels by subscribing to IPTV services or live TV apps that include sports channels.
Conclusion
Setting up a TV box for live TV is an easy and cost-effective way to access your favorite shows, sports, and movies without a cable subscription. Whether you choose the best Android TV box for watching live TV, a top-rated IPTV box for live TV, or a smart TV box with live TV app support, you can enjoy a seamless viewing experience. Follow this guide to set up your TV box, install the necessary apps, and troubleshoot common issues along the way. Once everything is up and running, you’ll be able to enjoy live TV with ease and convenience, all from the comfort of your own home.
St. Patrick's Day is on March 17, 2025! It's a great time to celebrate Irish culture with parades, wearing green, enjoying festive food and drinks, and taking advantage of special sales and promotions. Are you planning anything for the day?
Read Below: St. Patrick's Day shopping deals

#superbox#TV box for streaming#Smart TV box#tv shows#streaming#trendingnow#tv series#Android TV box#IPTV TV box#TV channels#TV box setup#How to watch live TV#Live sports streaming#TV box for live channels
0 notes
Text
Oh my fucking gosh I’m so incredibly vaguely happy a little bit
So, yesterday (or maybe the day before) my dad disconnected my iPad from the internet (it is the ONLY place I can access Tumblr, Reddit, and a few other VERY IMPORTANT TO ME APPS). His logic is that we’re doing an (involuntary) experiment to see if less unregulated internet access will improve the completion of my schoolwork at home (I’ve spent hours on end using this thing almost every day recently). He doesn’t know, however, that I DO schedule homework time, and I work on it during that time, and it’s quite a while I have scheduled too. I just get burnt out after a while, and need to stop, which usually happens later in the day. This is when I go to my iPad, and end up spending hours chatting on Discord, scrolling Reddit and Tumblr, and other things. A big thing here is scrolling Tumblr. Tumblr is where I feel the most free to be myself, in terms of what I reveal about my personal self, as well as letting my filter thin a bit (this is the only place I swear). Tumblr is ALSO where I’m trying to find help with identifying my own identity (see my pinned post. Please.), which unfortunately, in my case is something that I both have little to no knowledge of, and there’s no one who I know can help me with it. I’m not in any spaces that have a whole lot of information on it either.
It all ended up being a really stressful thing for me, and I genuinely felt like hurting someone (not myself) at times. That was a big problem, because I know a lot of ways to cause significant damage to someone without using any weapons, and even a weapon-less way to kill a person. Fortunately, I only drew about stabbing someone instead (see vent art below. Tw: blood, stab wound), and that calmed me down a bit.
Don’t get me wrong, I love my dad, but sometimes he does stupid shit with no good reason that just fucks me up in ways I don’t know he understands. I’ve told no one about my trans thing except for whoever reads my blog, my friends in a Discord server, and an IRL friend who knows I’m a furry, so no one in my immediate family even knows about it or why this is such an issue to me.
ANYWAY, you’re probably wondering how I got internet access back. A while ago, my dad bought me a USB port to Lightning cable adapter, so that I could use it in conjunction with an Ethernet port to USB cable adapter and an Ethernet cable to connect to the house’s internet non-wirelessly. We only have Ethernet ports in the living room, so I’d have to be in the open to be on my iPad, and not hiding away in my room. Dad had me find the initially mentioned adapter to connect to the internet, which took a few days. I’ll be trying to find wireless ways to reconnect it (hotspots are off the table btw), but for now at lest, I have tumblr back. And once again, I have no idea how close I am to violence.
I am NOT okay lmao
Have a nice day <3<3<3
The vent art:

#wofs117#vent post#personal vent#vent art#tw: blood#how the fuck do I tell my therapist about this#I don’t even know what he thinks of furries or trans people let alone trans furry people#aaaaaaaaaaaaaaaaaaaaaaaaaaaaaaaaaaaaa#where the fuck is my tail
0 notes
Text
How Powerline Adapters Improve Your Home's Network Performance: Your Key to Effortless Travel
In today’s digitally connected world, a reliable and fast home network is crucial. Whether you're working from home, streaming your favorite shows, or gaming online, slow or unreliable Wi-Fi can be a frustrating experience. Fortunately, one solution that’s becoming increasingly popular is the powerline adapter. These small, affordable devices can significantly improve your home’s network performance by using your existing electrical wiring to create a robust, wired internet connection throughout your house. In this blog post, we’ll explore how powerline adapters work, their benefits, and why they’re a game-changer for effortless connectivity—especially when traveling or moving between rooms in your home.

What is a Powerline Adapter?
A powerline adapter is a networking device that allows you to extend your internet connection by utilizing the electrical wiring in your home. Essentially, it converts your electrical outlets into network ports, giving you a stable, high-speed internet connection anywhere there is an electrical socket. This is especially useful in homes where traditional Wi-Fi signals can struggle to reach certain areas due to walls, floors, or other obstructions.
The basic setup involves two adapters: one is plugged into a power socket near your router and connected via Ethernet cable, while the second adapter is plugged into another socket wherever you need the connection. The data is transmitted over the electrical wiring between these adapters, ensuring a fast and stable connection without needing to run long Ethernet cables through your home.
How Do Powerline Adapters Work?
At their core, powerline adapters take advantage of the electrical wiring that already runs throughout your home. Here's a simplified overview of how they work:
Signal Transmission: The first powerline adapter connects to your router via an Ethernet cable and plugs into a nearby electrical outlet. It converts the internet signal from your router into electrical signals that can travel through the wires.
Signal Reception: The second adapter is plugged into an electrical outlet in the room where you need a connection. It receives the electrical signals, converts them back into data, and sends them to your device via Ethernet or Wi-Fi.
Dual-band Support: Many modern powerline adapters also support both Wi-Fi and Ethernet connections, allowing you to connect devices wirelessly in areas where your Wi-Fi signal might be weak.
Benefits of Using Powerline Adapters
There are numerous advantages to using powerline adapters over traditional Wi-Fi routers or even mesh Wi-Fi systems. Here’s why you should consider upgrading your home network with a powerline adapter:
1. Improved Speed and Stability
One of the most significant benefits of powerline adapters is the improvement in internet speed and stability. Wi-Fi signals are prone to interference from walls, furniture, and other devices that can weaken the signal. Powerline adapters bypass this issue by sending data over the electrical wires, which are generally less prone to interference.
With a powerline adapter, you can achieve speeds comparable to a wired Ethernet connection, which is much more stable and reliable than Wi-Fi. This is particularly beneficial for tasks that demand high-speed internet, such as streaming in 4K, online gaming, or large file downloads.
2. Easy Setup and Convenience
Setting up a powerline adapter is incredibly simple. You don’t need to drill holes or install additional cables. Just plug one adapter into a socket near your router, connect it to the router with an Ethernet cable, and plug the second adapter into any socket where you need better connectivity. In just a few minutes, you’ll have a stronger and more reliable internet connection in rooms that previously had weak Wi-Fi signals.
3. Cost-Effective Solution
Powerline adapters offer a more affordable alternative to mesh Wi-Fi systems. While mesh networks are great for large homes or offices, they can be expensive and require multiple units to cover the entire space. Powerline adapters, on the other hand, are relatively inexpensive and still provide excellent coverage in areas where Wi-Fi struggles.
4. No Need for Additional Wi-Fi Extenders
Wi-Fi extenders can be helpful in boosting a Wi-Fi signal, but they often degrade speed and don’t provide the same level of reliability as a wired connection. Powerline adapters, however, offer an internet connection as stable as Ethernet, meaning you won’t need to rely on additional devices to extend your signal. Whether you're in the basement, upstairs, or in a room with thick walls, powerline adapters ensure consistent performance.
5. Ideal for Travel or Large Homes
For people who travel frequently or live in large homes, powerline adapters are incredibly convenient. They provide easy access to the internet regardless of where you are in the house, making them perfect for connecting multiple devices without worrying about weak Wi-Fi signals. Even when you're moving between rooms, you won’t have to worry about losing your connection or dealing with spotty coverage.
Powerline Adapters for Effortless Travel
For those who frequently travel or work remotely, staying connected to the internet can be a challenge. Powerline adapters make it easier to maintain a stable connection, whether you're at home or in a temporary living space like an Airbnb, hotel, or vacation rental. By carrying a portable powerline adapter, you can ensure that you'll always have a reliable and fast internet connection as long as you have access to a power outlet.
If you’re in a rental property and the Wi-Fi connection is subpar, a powerline adapter could be your solution. Just plug it in, connect it to the router, and you'll be able to use the internet with minimal hassle, whether you're working remotely or streaming your favorite shows in comfort.
Conclusion
In summary, powerline adapters are a fantastic solution for improving your home’s network performance. They offer an easy, cost-effective way to extend internet coverage, boost speed and stability, and eliminate Wi-Fi dead spots. Whether you're at home or traveling, powerline adapters ensure you stay connected effortlessly. With their straightforward setup and reliable performance, powerline adapters are a must-have for anyone looking to enhance their home network experience.
1 note
·
View note
Text
The Best 7 IPTV Boxes 2024
Are you tired of being stuck with traditional cable TV?
Do you want to watch your favorite shows anytime, anywhere? IPTV boxes are the answer! They’re changing the game in France, offering endless channels and services.
In this guide, we’ll explore the top 7 IPTV boxes for 2024 in France. We’ve tested these smart TV and Android TV boxes to help you choose the best one. Whether you’re cutting the cord or just want more options, an IPTV box is perfect.
Join us as we explore the world of internet protocol TV. Discover how these amazing devices can change how you watch content. With the right IPTV box, you can create a viewing experience that’s all about you. So, sit back and let’s dive into the exciting possibilities!
Key Takeaways
IPTV boxes offer a flexible and convenient way to access a wide range of content
We’ve tested the top 7 IPTV boxes available in France for 2024
Consider factors such as compatibility, processing power, storage, and video output when choosing an IPTV box
Setting up and using an IPTV box is a straightforward process
IPTV technology is revolutionizing the way we watch television in France
What to Look for in an IPTV Box
When looking for an IPTV box, there are key things to consider. These include compatibility with your favorite IPTV services, processing power, and storage options. Making the right choice can greatly improve your viewing experience.
Compatibility with IPTV Services
It’s vital to check if the IPTV box works with your preferred services. Ensure it supports platforms like Netflix and Amazon Prime Video. Also, check if it works with specialized IPTV providers you might use. This ensures you can easily access your favorite content.
Processing Power and RAM
For smooth streaming, choose an IPTV box with a strong processor and plenty of RAM. This helps avoid buffering and lag, so you can enjoy your shows and movies without pause. Aim for a device with at least a quad-core processor and 2GB of RAM.
Storage Capacity
Consider storage capacity if you want to download content or install many IPTV apps. Some boxes have built-in storage, while others let you add more via USB or microSD card. Opt for a device with at least 8GB of storage, expandable if needed.
Video Output Quality
Choose an IPTV box that supports high-quality video output, like 4K resolution and HDR. This ensures your content looks stunning, with great detail and color. Also, make sure it has the right ports to connect to your TV, like HDMI 2.0 for 4K streaming.FeatureRecommended SpecificationProcessorQuad-core or higherRAM2GB or moreInternal Storage8GB or moreVideo Output4K, HDR supportConnectivityHDMI 2.0, USB, Ethernet, Wi-Fi
Top IPTV Boxes on the Market
In this section, we will introduce the top 7 IPTV boxes available in France for 2024. These devices have been selected based on their performance, features, and user reviews. The MAG 425A is known for its seamless integration with popular IPTV services. The Xiaomi Mi Box S offers excellent value for money. The NVIDIA Shield TV Pro is a high-end option with exceptional performance and features.
Other top contenders include the Amazon Fire TV Cube, Formuler Z8 Pro, BuzzTV XR4000, and Dreamlink T3. Each device has its own strengths and unique features. They cater to different user preferences and budgets. Let’s take a closer look at what makes these IPTV boxes stand out.IPTV BoxKey FeaturesPrice RangeMAG 425ASeamless integration with popular IPTV services, user-friendly interface€100 – €150Xiaomi Mi Box SAffordable, supports 4K HDR, Android TV operating system€50 – €100NVIDIA Shield TV ProHigh-end performance, AI upscaling, gaming capabilities€200 – €250Amazon Fire TV CubeBuilt-in Alexa voice control, supports 4K HDR, Dolby Vision€100 – €150Formuler Z8 ProPowerful processor, large storage capacity, supports multiple IPTV apps€150 – €200BuzzTV XR4000Customizable interface, supports popular IPTV services, built-in VPN€100 – €150Dreamlink T3User-friendly interface, supports multiple IPTV apps, reliable performance€100 – €150
When choosing an IPTV box, consider compatibility with your preferred IPTV services. Also, think about processing power, storage capacity, and video output quality. The MAG 425A is known for its seamless integration with popular IPTV services. The NVIDIA Shield TV Pro offers exceptional performance and features for those willing to invest in a high-end device.
Setting Up and Using Your IPTV Box
Choosing the right IPTV box is exciting. Now, it’s time to set it up and enjoy your favorite shows and movies. Setting up an IPTV box is easy. Follow a few simple steps, and you’ll be streaming your favorite content in no time.
Connecting Your IPTV Box
The first step is connecting your IPTV box to your TV. Most come with an HDMI cable for high-quality video. Plug the HDMI cable into your box and your TV’s HDMI port. Then, connect your box to the internet. You can use Wi-Fi or an ethernet port, depending on your home setup.
Installing IPTV Apps and Services
Once connected, install the apps and services you want. Most boxes have an app store for popular streaming apps like Netflix and Hulu. Some also let you sideload apps from outside the store. This is great for finding niche services or content specific to your region.
Navigating the User Interface
Now, explore your IPTV box’s user interface. Use the remote control to navigate easily. You’ll find a home screen with your apps and settings. Many boxes also let you customize the interface to your liking. You can change icons, backgrounds, and even create shortcuts to your favorite content.Connection TypeAdvantagesDisadvantagesHDMI CableHigh-quality video and audio, simple to set upRequires a free HDMI port on your TVWi-FiNo additional cables needed, convenient for wireless setupsSignal strength may vary depending on distance from routerEthernet PortStable, reliable connection, ideal for streaming high-quality contentRequires a physical connection to your router or modem
With the right IPTV box and a little bit of setup, you’ll be well on your way to enjoying all your favorite content from the comfort of your own home.
Explore your IPTV box and try different settings and customization options. Find the perfect setup for your viewing preferences. With so many features, your IPTV box will be a key part of your home entertainment.
Conclusion
Choosing the best IPTV box can greatly improve your viewing experience. It gives you access to many streaming services and content. The top IPTV boxes for 2024 have great performance, lots of storage, and high-quality video.
By picking a device that fits your needs, you get a smooth and engaging home entertainment experience. This lets you enjoy a wide range of movies, TV shows, and live channels.
Setting up your IPTV box is easy, thanks to user-friendly interfaces. Just connect it to your TV and network. Then, you can install your favorite apps and services.
This makes it simple to access a huge library of content. As IPTV technology gets better, these devices will shape the future of TV. They offer more choice, convenience, and control over what you watch.
Getting one of the best IPTV boxes for 2024 is a wise choice. It lets you enjoy a premium home entertainment experience. By choosing the right device, you open up a world of possibilities.
Embrace the future of TV with a top IPTV box. It will take your viewing experience to new levels.
FAQ
What is an IPTV box?
An IPTV box is a device that lets you stream services and channels over the internet. It makes watching TV better by offering lots of content choices.
What should I look for when choosing an IPTV box?
Look at the box’s compatibility with your IPTV services. Also, check its processing power, RAM, and storage. Make sure it supports 4K resolution and HDR for the best video quality.
Can I use my IPTV box with any IPTV subscription or service?
Not all IPTV boxes work with every service. Make sure the device you pick supports your favorite platforms like Netflix or Amazon Prime Video.
How do I set up my IPTV box?
Setting up your IPTV box is easy. Just connect it to your TV with an HDMI cable and ensure a stable internet connection. Then, install apps and services from the device’s app store or by sideloading them.
What are some of the top IPTV boxes available in France for 2024?
In 2024, top IPTV boxes for France include the MAG 425A, Xiaomi Mi Box S, and NVIDIA Shield TV Pro. Also, consider the Amazon Fire TV Cube, Formuler Z8 Pro, BuzzTV XR4000, and Dreamlink T3. Each offers unique features for different needs and budgets.
Can I customize the user interface of my IPTV box?
Yes, many IPTV boxes let you customize the interface. You can rearrange apps, change themes, and set shortcuts for your favorite shows. This way, you can make your viewing experience personal.
1 note
·
View note
Text
How to Choose the Best Router for Your Home Network Needs
A good router is essential for a smooth online experience, but there are so many on the market that it can be hard to figure out which one is right for you. This guide will help you select a router that offers high speeds, excellent coverage and the extra features your home network needs.
Before diving into the features, let’s explore how xFi Complete can enhance your internet experience.
Budget
The router you buy is a critical component of your home network. It connects to your ISP via Ethernet and manages data transfer between your devices. That's why the brand and price of the router you choose is essential. A good router can boost Wi-Fi speeds, provide quality service options, and protect your privacy with parental controls.
If your ISP offers a gigabit router, it is ideal. This router type provides higher throughput for large file transfers between wired devices like computers, NAS drives, and smart-home systems. You should also consider the number of ports a router has. Most routers have four Ethernet ports connecting devices like smart TVs and gaming consoles to the Internet. It would be best to look for a router with USB ports to connect printers and storage to the network.
If you plan to use the router for gaming or streaming, look for one with MU-MIMO technology. This feature increases Wi-Fi speed by using multiple antennas to transmit data. It also improves reliability and reduces lag times between the router and connected devices. Look for a router with parental controls, too, to block access to websites and apps you don't want kids to see. If you have a larger house or thick walls, consider adding a mesh Wi-Fi system or router extender to improve coverage.
Compatibility with ISP
If you’re switching to a new ISP or already have a cable modem and router combo, ensure the device is compatible with your internet service. This ensures you can utilize the full speed of your service (if it’s advertised) without the device slowing down your connection. If you’re moving to a new ISP, the provider should have a list of approved routers.
Another critical factor is the router’s maximum speed. You want a device that can handle your internet service’s maximum speed and have enough ethernet ports to support wired devices like desktop PCs, network-attached storage (NAS) drives, or home automation hubs. Depending on your needs, you may also want to look for a router that supports link aggregation. This feature combines two gigabit Ethernet LAN ports into one and improves performance for large file transfers.
Other features to consider include beam-forming, which focuses wireless signals in a single direction to improve your connection with the router and individual devices. Mesh Wi-Fi systems use multiple devices to cover larger homes, which can be an excellent solution if you have dead spots in your house. These are typically more expensive than standalone routers, but they offer a high-performing network and may save you money on equipment rental fees in the long run.
MU-MIMO
MU-MIMO is one of the more essential features to consider when buying a router. It allows multiple devices to connect simultaneously, resulting in faster download speeds and fewer Wi-Fi problems. It also increases the range of your wireless signal, ensuring a strong and reliable connection throughout your home.
If your current router doesn't support MU-MIMO, it's worth upgrading to a model that does. However, you'll want to ensure that your devices are also MU-MIMO compatible. Otherwise, the technology won't be fully utilized.
Another feature to look for is link aggregation, which helps increase your network's overall speed. This technology works by connecting two gigabit Ethernet LAN ports on your router to create a single virtual port capable of handling up to 2Gbps of data. It's a great option to transfer large files, such as movies or music, over your network.
Finally, you'll want to ensure that the router you choose supports Quality of Service (QoS). This feature lets you prioritize different devices or activities, reducing the risk of choppy video calls during work meetings or lagging gaming sessions. This is especially useful if you live with roommates or other family members who use the internet regularly. You can also use QoS to prioritize specific applications or services.
Read more: Understand the working and features of 6G today.
Range
When choosing a router, consider how far you want it to reach your home. For better range, you can buy a mesh Wi-Fi system or a standalone router. Ideally, placing your router somewhere central in your house, such as the living room or kitchen, would be best. This will help prevent dead spots. Putting your router in a closet or other small area will only limit its coverage.
Most quality routers will indicate how much they can cover on the box. However, you should note that these numbers are often theoretical maximums or lab test results. Routers rarely, if ever, reach these speeds in real-life situations.
Many routers are dual-band, connecting to devices with two different frequencies. These frequencies are typically 2.4 GHz and 5 GHz. This can be enough for most people, but you should opt for a tri-band router if you have multiple devices that need high bandwidth. These routers provide an additional 5 GHz frequency for more devices to use simultaneously without impacting speed.
Other features that can improve your router’s performance include beamforming and QoS (quality of service). These technologies focus the router’s signals on individual devices, improving their connection to the router. This can be especially helpful when you have a lot of streaming or online gaming.
0 notes