#Installing XRDP on Ubuntu
Explore tagged Tumblr posts
Visit Tumblr Blog
Explore Tumblr blogs with no restrictions, modern design and the best experience.
Last Seen Tumblr Blogs


Fun Fact
BuzzFeed published a report claiming that Tumblr was utilized as a distribution channel for Russian agents to influence American voting habits during the 2016 presidential election in Feb 2018.
Text
Installing XRDP on Ubuntu Remote Desktop Access Easy Way

Introduction
Remote access to systems has become an essential part of today’s tech environment. Whether for system administration, remote support, or accessing files on a home server, having reliable remote desktop access is crucial. For Ubuntu users, one of the most efficient ways to achieve this is by Installing XRDP on Ubuntu.
XRDP is an open-source server that allows Linux users to access their systems via the Remote Desktop Protocol (RDP), which is widely supported by Windows and other operating systems. With XRDP, you can log into your Ubuntu machine’s graphical desktop environment from virtually any other device.
This comprehensive guide will cover what XRDP is, why it’s useful, how to install and configure it on Ubuntu, and how to ensure it runs securely and efficiently.
What is XRDP?
XRDP is a free and open-source implementation of the Microsoft RDP server for Unix-like systems, including Linux. It bridges the gap between Linux and RDP, allowing remote access to the Linux desktop using Microsoft’s native Remote Desktop client.
This means if you're using a Windows PC and want to remotely control your Ubuntu machine, you can use the built-in “Remote Desktop Connection” tool to log in and interact with your Linux desktop. That’s the power of XRDP.
Why Use XRDP on Ubuntu?
Using XRDP on Ubuntu brings multiple benefits:
Cross-Platform Access: XRDP allows users to connect from Windows, macOS, or another Linux system.
No Extra Clients Needed: Windows has a built-in RDP client, which makes it easy to connect without installing third-party software.
Multiple Desktop Environments: XRDP supports lightweight desktops like Xfce, MATE, and more, ensuring fast and smooth sessions.
User-Friendly: Graphical desktop access makes tasks easier for those less comfortable with the command line.
Open Source & Free: No licensing costs or vendor lock-in—just a reliable tool supported by the community.
Preparing to Install XRDP on Ubuntu
Before Installing XRDP on Ubuntu, make sure:
Your system is updated.
You have sudo access.
The firewall allows traffic on port 3389 (the default RDP port).
You have or plan to install a desktop environment.
This guide is tailored for Ubuntu 20.04, 22.04, or later, but the steps will work for most Ubuntu versions.
Step-by-Step Guide: Installing XRDP on Ubuntu
Step 1: Update the System
Run the following commands to update all packages:sudo apt update && sudo apt upgrade -y
This ensures the system is running the latest stable software before adding XRDP.
Step 2: Install XRDP
Install XRDP using the apt package manager:sudo apt install xrdp -y
After installation, XRDP runs automatically. You can check its status:sudo systemctl status xrdp
It should show the XRDP service as active and running.
Step 3: Install a Desktop Environment
If you're using Ubuntu Server or a minimal version without a graphical interface, install one. Xfce is lightweight and works well with XRDP:sudo apt install xfce4 xfce4-goodies -y
Other supported desktop environments include MATE, LXQt, and KDE Plasma, but Xfce is preferred for speed and compatibility.
Step 4: Configure the Desktop Environment for XRDP
Tell XRDP to use Xfce for the remote session:echo "startxfce4" > ~/.xsession chmod +x ~/.xsession
This file will be executed when you log in via XRDP, starting the Xfce desktop.
Step 5: Edit XRDP Startup File (Optional Fix)
Edit the XRDP startup script to ensure the right session loads:sudo nano /etc/xrdp/startwm.sh
Find and comment out the following lines (if present):# test -x /etc/X11/Xsession && exec /etc/X11/Xsession
Then add this line before the final exec:startxfce4
Save and close the file.
Step 6: Allow RDP Through the Firewall
Enable RDP traffic through the default port 3389:sudo ufw allow 3389/tcp
If you’re using another firewall tool, adjust the settings accordingly.
Step 7: Restart XRDP
Apply all configuration changes:sudo systemctl restart xrdp
Connecting to Ubuntu via XRDP
After installing and configuring XRDP, connect from another computer.
On Windows: Open “Remote Desktop Connection,” type the Ubuntu system’s IP address, and log in with your Ubuntu username and password.
On Linux/macOS: Use an RDP client such as Remmina, FreeRDP, or Microsoft Remote Desktop.
Upon connection, you’ll be greeted with your Ubuntu desktop environment remotely.
Securing XRDP on Ubuntu
While XRDP is powerful, security should always be top of mind. Here are best practices:
Use SSH Tunneling
Instead of exposing XRDP directly to the internet, set up an SSH tunnel to forward port 3389 securely. This encrypts your connection and reduces attack risks.
Restrict Access to Specific IPs
Use UFW or other firewall tools to allow RDP access only from trusted IPs:sudo ufw allow from 192.168.1.100 to any port 3389
Use Fail2Ban
Install Fail2Ban to monitor failed login attempts and block potential brute-force attacks:sudo apt install fail2ban -y
Enable TLS Encryption
XRDP supports TLS for encrypted communication. Set this up by creating and configuring SSL certificates in the XRDP config files.
Keep Your System Updated
Security patches and updates often fix vulnerabilities in XRDP and Ubuntu itself. Keep your system current using:sudo apt update && sudo apt upgrade -y
Troubleshooting XRDP on Ubuntu
Black Screen After Login
This usually means the desktop environment isn’t configured correctly. Verify .xsession has the line:startxfce4
Also check if the session is conflicting with another X server.
Immediate Logout
This can occur if file permissions are incorrect. Ensure the user owns their home directory and .xsession is executable.
Port Blocked
If you can’t connect, test port 3389 using telnet or nmap from the client machine. Check firewall settings if blocked.
Advantages of XRDP for Ubuntu Users
Seamless Remote Access: Provides a graphical interface without the need for SSH or CLI-based tools.
Lightweight Performance: Excellent for low-resource systems when paired with Xfce.
Reliable for Daily Use: Stable connections and session persistence.
Great for Teams: Enables multiple users to access their own sessions simultaneously.
Enterprise-Friendly: Can be integrated with Active Directory and centralized access management.
Final Thoughts
Installing XRDP on Ubuntu gives users a powerful and flexible way to remotely access their Linux systems through a graphical interface. Whether you are managing your home server, working remotely, or offering IT support, XRDP is a reliable solution that integrates easily with Windows-based RDP clients.
The steps outlined above provide everything needed to get started—from installation to configuration and security. By taking the time to set up XRDP correctly, you can ensure stable, secure, and smooth remote desktop sessions on any Ubuntu machine.
0 notes
Text
How to Fix XRDP Ubuntu Black Screen After Login? Step by Step Guide
If you’re trying to connect to your Ubuntu system remotely using XRDP Ubuntu black screen after login in, you’re not alone. This frustrating issue has been experienced by many users across different versions of Ubuntu, especially after recent updates or fresh installations. In this article, we’ll explain why the XRDP black screen appears on Ubuntu after login, and we’ll walk you through…
0 notes
Text
Create Ubuntu 24.04.2 VM in Hyper-V, with "Enhanced Session" RDP support (Windows 11, xrdp, development)
To setup an Ubuntu 24.04.2 development Hyper-V VM, with built-in “Enhanced Session” + Remote Desktop Protocol (RDP) support (until it’s available in Hyper-V’s “Quck Create”): Create Hyper-V VM Configure VM for “Enhanced Session”, allow nested virtualisation Start VM, install Ubuntu XRDP Setup Optional, but really useful setup Fix Xrdp slow performance Connect to VM Create Hyper-V VM Create VM…
0 notes
Text
遠端至Linux環境並安裝Fail2ban阻擋惡意攻擊
Windows的使用者大多都習慣使用圖形介面,而當Windows使用者要去連線使用Linux的環境時,大多都是使用文字介面做連線。而對於文字介面不熟悉的使用者也可以使用Xrdp(X windows Remote Desktop Protocol)這套的中繼程式來幫忙完成Windows遠端桌面可以直接連接Linux。而近來在對於惡意攻擊這塊除了寫死防火牆等網路路由設定外,也可以 安裝Fail2ban 這個套件來輔助大家達到封鎖惡意攻擊的常用連線。
遠端桌面安裝
1.安裝Xrdp Sudo apt-get update sudo apt-get install xrdp


2.安裝xfce4圖形介面 sudo apt-get install xfce4 -y

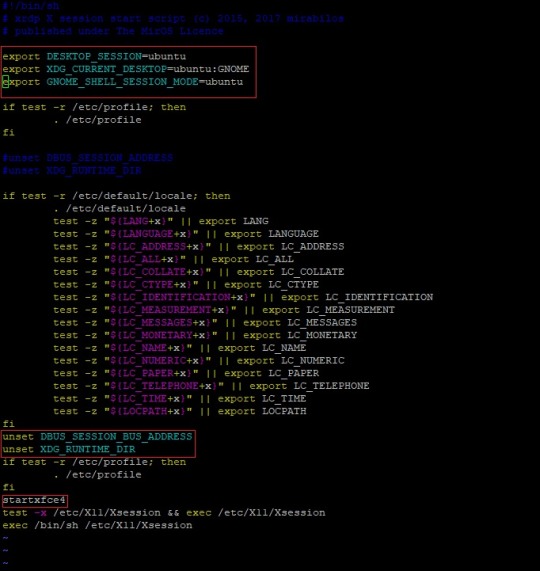
3.設定參數避免黑屏或連線閃退等目前常遇到的問題。 新增參數在相對位置,設定檔路徑/etc/xrdp/start export DESKTOP_SESSION=ubuntu export XDG_CURRENT_DESKTOP=ubuntu:GNOME export GNOME_SHELL_SESSION_MODE=ubuntu unset DBUS_SESSION_BUS_ADDRESS unset XDG_RUNTIME_DIR startxfce4
4.新增xrdp遠端桌面使用者憑證授權存取 Sudo adduser xrdp ssl-cert

5.設定xrdp登入使用者桌面的���設桌面環境 echo xfce4-session > ~/.xsession 6.確認防火牆連線是否有開通 sudo netstat -tlnp | grep 3389

7.遠端登入畫面

8.登入xfce4桌面 還有其他桌面可以使用如:Gnome

除了使用xrdp外也可以使用如:X2GO,RDP以及VNC等的遠端軟體來實現windows可以直接遠端桌面操作Linux作業系統。當然圖形介面有圖形介面的好處優點,能夠圖形與文字介面兩者之間使用的很順暢,來因應不同的情況去做使用這樣能讓我們事半功倍!
安裝Fail2Ban
1.sudo apt-get install fail2ban
2.安裝完成後/etc/fail2ban底下會有這些檔案分別代表: ● /etc/fail2ban/fail2ban.conf #fail2ban的配置文件 ● /etc/fail2ban/jail.conf #阻檔設定文件目錄 ● /etc/fail2ban/filter.d/ #具體過濾規則文件目錄 ● /etc/fail2ban/action.d/ #具體過濾規則檢測到後採取相對應措施的目錄

3.Fail2ban偵測的方式: ● 設定Jail.conf,選擇要監控的項目(或者自定義)這邊使用sshd,系統會依照Jail.conf內節點[sshd]自動去找filter.d/sshd.conf,對應到filter.d/sshd.conf,符合篩選的狀態,執行action.d內設定的動作。 ● 例如:sshd的jail.conf設定檔寫banaction=iptables-mutiport,則會執行action.d/iptables.mutiport.conf; ● 例如設定action = %(action_mw)s,則會阻擋來源,並發出含有 whois報表的email通知信。
4.先備份Jail.conf設定檔: sudo cp /etc/fail2ban/jail.conf /etc/fail2ban/jail.local 5.檢查目前開啟的設定 sudo fail2ban-client status

6.發現有一個jail設定執行中,檢查一下是哪個檔案有啟動。 需檢查jail.d 底下的設定檔,以及jail.conf。

7.檢查 jail.d底下設定檔已經有一個enabled=true的設定。

8.Sudo vim /etc/fail2ban/jail.conf查看設定參數。 查看Jail.conf 內sshd的設定

9.查看目前啟動的Jail檔設定與封鎖狀態 sudo fail2ban-client status sshd

10.測試登入封鎖,故意輸入錯誤,第五次錯誤後立刻被封鎖

11.手動解除封鎖 sudo fail2ban-client unban IP sudo fail2ban-client unban -all

12.封鎖設定值可以參考 /etc/fail2ban/jail.conf ● Bantime:封鎖時間 ● Findtime:搜尋到設定 ● Ignoreip:白名單IP 別忘了把常用的連線加入白名單

Jail.conf設定有一個預設值,如果節點內沒有設定,才會套用Jail.conf內的預設參數來做使用。 除了大家常用的sshd防止惡意登入外,也可以自己新增想監控的port服務去做設定,如常用的Fail2ban封鎖如:SSH、Apache、FTP、postfix等。 新的設備除了設定防火牆規則,以及網路設備的設定外,現在還有新的選擇!就是使用Fail2ban來防止電腦受到惡意攻擊。 Fail2ban也可以設定通知信來做告知系統管理者,讓管理者底下設備遭受攻擊時,可以即時收到訊息來應對這些惡意連線。
0 notes
Quote
インストール $ sudo apt install xrdp lxde 設定 $ echo lxsession -s LXDE -e LXDE > ~/.xsession 以下のファイルを編集する $ sudo vi /etc/xrdp/xrdp.ini crypt_levelをlowからhighにする xrdp1セクションのport=-1をask=-1にする 端末を起動して $ gsettings set org.gnome.Vino require-encryption false サービスを起動 $ sudo service xrdp restart 左上の"コンピューターを検索"から"デスクトップの共有設定"と入力し、設定画面を開きます。 “他のユーザーが自分のデスクトップを表示できる"にチェックを入れて、リモートデスクトップアクセスを許可します。 “このマシンへのアクセスを毎回確認する"のチェックは外しましょう。これが有効になっていると、アクセスするたびに、Ubuntu側で許可しなくてはいけません。
Windows10からUbuntu16.04へリモートデスクトップ接続する設定 - watariseinの日記
3 notes
·
View notes
Text
macからubuntu mateにxrdpでリモートログイン
概要
最近のコロナの騒ぎを受けて、弊社でもリモートワークが始まりました。 今まで社内では、macbookからデスクトップubuntuにsshでログインして作業していたんですが、異なるネットワークを介して接続したことはありませんでした。 弊社のネットワークはセキュリティを意識してか、vpn環境に入るとsshできず、rdpならできるという謎仕様なので、それならということでubuntuにxrdpサーバーを立ち上げてみました。 同様の記事は他にもたくさんあるのですが(例えばこことか)、あちこち情報が散らばってて設定に苦労したので、備忘録として残しておきます。
環境
繋ぐ方:macOS
繋がれる方:ubuntu mate 18.04
ubuntu側の設定
まずRDPをするのに必要なパッケージをインストールします。
sudo apt install xrdp xorg xorgxrdp
xorgxrdpを入れるのを忘れていると、リモートログイン出来ても、その後ブラックスクリーンになるので注意します(ここでハマった)。
つぎに、ログイン後のカーソル周りの不具合を治すために、/etc/xrdp/xrdp.iniでつぎの行を書き換えます。
書き換え前:
new_cursors=true
書き換え後:
new_cursors=false
さらに、~/.xsessionにつぎのコマンドを書き加えます:
unset DBUS_SESSION_BUS_ADDRESS export GTK_IM_MODULE=ibus export QT_IM_MODULE=ibus export XMODIFIERS="@im=ibus" ibus-daemon -rdx exec mate-session
ほかの方の記事では、/etc/xrdp/startwm.shに書き込んでいたのですが、こっちに落ち着きました。 また~/.xsessionrcは空のままにしておきます。
最後に~/.zshrcの下の方につぎを加えます。
export "LIBGL_ALWAYS_INDIRECT=1" unset SESSION_MANAGER
正直何がなんだかわからないまま試行錯誤した結果、上記の設定でつなげるようになりました。
mac側の設定
まずmicrosoft remote desktop clientをインストールします。 App Storeからダウンロードしてください。
起動したら、新規のPCを追加し、
PC name: ubuntuのipアドレス
user account: ubuntuのユーザ名とパスワード
とします。 これで保存し、接続したらつなげるはずです。
1 note
·
View note
Text
Remote desktop for ubuntu 13.10

#REMOTE DESKTOP FOR UBUNTU 13.10 HOW TO#
#REMOTE DESKTOP FOR UBUNTU 13.10 INSTALL#
We need to perform an additional configuration change in order to reconnect to the existing session. However given that we have performed a standard configuration, if you disconnect from your session the next time you will reconnect you create a new session. Step 6 – Restart the xrdp service by issuing the following commandĪt this stage, you should be able to connect to your Ubuntu machine using remote desktop client. In the terminal, type the following command When Done, you have to configure your xsession.
#REMOTE DESKTOP FOR UBUNTU 13.10 INSTALL#
Step 4 – then in the terminal session issue the following command to install the xfce interface Step 3 – In the terminal window, type the following command to install the xrdp package. Step 2 – Using the Dash, search for Terminal. In this post, we will perform the installation process using command line (really fast) In this post, we will simply outline the necessary steps to be performed in order to be able to reconnect to same session while using the standard xrdp ubuntu package.
#REMOTE DESKTOP FOR UBUNTU 13.10 HOW TO#
A detailed description on how to install the xrdp package on ubuntu 13.10 has been described here. Step by Step Installation Processįor this post, we assume that you are using Ubuntu 13.10. This approach is not as good as the one described in this post but provide a good workaround if you simply want to use the default xrdp package available in the official repository. We scratched our head a little bit and we actually found out that a simple configuration change could allow users to reconnect to the same session while still using the default xrdp package from ubuntu repository. The main drawback with the standard package is that each time you perform a remote desktop to your xrdp server a new session was created. So, in its case the user installed an alternative desktop to be used with Xrdp (gnome-fallback,xfce,lxde…) and simply install the xrdp package from the Ubuntu repositories.Įverything was working as expected. Because of this error, the user rollback to the standard installation process of xrdp software. Recently, one of our reader encountered an issue with the described procedure. More info about how to reconnect to the same session.You can find detailed instructions on how to reconnect to the same xrdp session In our blog, we have already discussed how you could reconnect to the same xrdp session. Today again, we will speak about xrdp on ubuntu.
0 notes
Text
Ubuntu 16.04 vnc server xstartup gnome panel missing

UBUNTU 16.04 VNC SERVER XSTARTUP GNOME PANEL MISSING INSTALL
UBUNTU 16.04 VNC SERVER XSTARTUP GNOME PANEL MISSING UPDATE
UBUNTU 16.04 VNC SERVER XSTARTUP GNOME PANEL MISSING PASSWORD
UBUNTU 16.04 VNC SERVER XSTARTUP GNOME PANEL MISSING PLUS
UBUNTU 16.04 VNC SERVER XSTARTUP GNOME PANEL MISSING DOWNLOAD
enable firewall traffic on the vnc port (in the AWS console).
In that mindset, launching each component yourself makes it clearer what is doing what. It also matters whether you want things to run on the GPU, or the CPU. The responses here are good for getting one solution up and running, but I recommend understanding the basics of the different layers which result in a functioning GUI / OpenGL environment / remote desktop in Unix. I ran into the same problem, and ended up writing a how-to guide for myself ( ) If you want to return to a session later, specify this number in the port field of the xrdp login dialog box. Pay close attention to these status messages and make note of the VNC port number displayed. When you start a session, the port number is -1.ġ9) When the system connects, several status messages are displayed on the Connection Log screen.
UBUNTU 16.04 VNC SERVER XSTARTUP GNOME PANEL MISSING PASSWORD
sudo service xrdp restartġ7) On Windows, open the Remote Desktop Connection client, paste the fully qualified name of your Amazon EC2 instance for the Computer, and then click Connect.ġ8) When prompted to Login to xrdp, ensure that the sesman-Xvnc module is selected, and enter the username ubuntu with the new password that you created in step 8.
UBUNTU 16.04 VNC SERVER XSTARTUP GNOME PANEL MISSING INSTALL
First Install the xrdp with sudo apt-get install xrdp then edit the above mentioned file)ġ5) Look for the section and change the following text (then save and exit ). sudo cp /home/ubuntu/.xsession /etc/skelġ4) Open the xrdp.ini file to allow changing of the host port you will connect to. xsession to the /etc/skel folder so that xfce4 is set as the default window manager for any new user accounts that are created. echo xfce4-session > ~/.xsessionġ3) Copy. Sudo -E apt-get install -y ubuntu-desktopġ1) Install xrdp sudo apt-get install xfce4ġ2) Make xfce4 the default window manager for RDP connections. su ubuntuġ0) Install Ubuntu desktop functionality on your Linux instance, the last command can take up to 15 minutes to complete. sudo –iĩ) Switch back to the ubuntu user account and cd to the ubuntu home directory. Press the Enter key after typing the command passwd ubuntu, and you will be prompted to enter the new password twice. sudo /etc/init.d/ssh restartĨ) Temporarily gain root privileges and change the password for the ubuntu user to a complex password to enhance security. sudo vim /etc/ssh/sshd_configĦ) Change PasswordAuthentication to yes from no, then save and exit.ħ) Restart the SSH daemon to make this change take effect.
UBUNTU 16.04 VNC SERVER XSTARTUP GNOME PANEL MISSING UPDATE
Refer this guide to create permanent sessions as serviceĤ) Execute: sudo apt-get update sudo apt-get upgradeĥ) Because you will be connecting from Windows Remote Desktop, edit the sshd_config file on your Linux instance to allow password authentication. Now you can access GUI using IP/Domain and port 1įor AWS, you have to allow port 5901 on firewall Log file is /home/lonely/.vnc/ubuntu:1.log Starting applications specified in /home/lonely/.vnc/xstartup New 'ubuntu:1 (lonely)' desktop is ubuntu:1Ĭreating default startup script /home/lonely/.vnc/xstartup Xauth: file /home/lonely/.Xauthority does not exist You will require a password to access your desktops. "gnome-session & ".ģ) Create VNC password and vnc session for the user using "vncserver" command. $ sudo apt install gnome-panel gnome-settings-daemon metacity nautilus gnome-terminal vnc4serverĢ) Edit /usr/bin/vncserver file and modify as belowįind this line "# exec /etc/X11/xinit/xinitrc ".Īnd add these lines below. So run the vnc server also on same user instead of "awsgui" user.ġ) Install packages $ sudo apt update sudo apt install -no-install-recommends ubuntu-desktop Mostly because of ".vnc/xstartup" file on different user. Sudo iptables -A INPUT -p tcp -dport 5901 -j ACCEPT Mac VNC client can be downloaded from here:
UBUNTU 16.04 VNC SERVER XSTARTUP GNOME PANEL MISSING PLUS
In the vnc client, give public DNS plus ":1" (e.g.
UBUNTU 16.04 VNC SERVER XSTARTUP GNOME PANEL MISSING DOWNLOAD
You can download xtightvncviewer to view desktop(for Ubutnu) from here When you're done, hit Ctrl + C on the keyboard, type :wq and hit Enter. "Uncomment the following two lines for normal desktop." And on the second line add "sh" so the line reads exec sh /etc/X11/xinit/xinitrc. Then hit the Insert key, scroll around the text file with the keyboard arrows, and delete the pound (#) sign from the beginning of the two lines under the line that says Then run following commands and enter the login password for vnc connection: su - awsgui Run following commands to install ui and vnc server: sudo apt-get update Setting up ui based ubuntu machine on AWS. Sudo vim /etc/ssh/sshd_config # edit line "PasswordAuthentication" to yes Following are the steps to setup the GUI Create new user with password login sudo useradd -m awsgui
0 notes
Text
Install rdp on ubuntu 16.04

#Install rdp on ubuntu 16.04 how to
#Install rdp on ubuntu 16.04 install
#Install rdp on ubuntu 16.04 update
#Install rdp on ubuntu 16.04 upgrade
#Install rdp on ubuntu 16.04 update
So if you’re having the same issues, or even others, when establishing RDP connections to Ubuntu 16.04, I trully recommend to update XRDP before anything else. There is also workarounds for that with the previous XRDP versions, but it required a lot of commands and tweaks on the XRDP keyboard maps. The keyboard layout (we use en-GB here) is now automatically recognized instead of defaulting to en-US.It was possible to workaround that but it required to change some XRDP settings and to remember the port used everytime we established a session so that we could use the same port when reconnecting Everytime we now reconnect to those machines via XRDP, it recovers the already existing session instead of creating a new one, something that happened with the previous version.
#Install rdp on ubuntu 16.04 upgrade
So upgrade XRDP we just had to perform the following commands with sudo privileges: sudo add-aptĪfter the upgrade, all the above issues were gone and we noticed some other improvements, such as: So our approach to solve this was to add a PPA to our machines and in this case we used one from hermlnx. Protocol errors when trying to RDP into the machines using the Microsoft Remote Desktop app that we have installed on our Surface Hub (yes, we have acquired one of those and it’s simply awesome!)Īfter some research we decided to find a way to update the XRDP package but we really didn’t want to go with all the trouble of getting the source code from the XRDP Github repo and compiling it ourselves.In this case the graphical interfaces only worked if we were connecting directly to the virtual machine but not via XRDP
#Install rdp on ubuntu 16.04 install
Doing this should start the installation Process You should then be prompted to type your password and authenticate only admin or users with admin rights can install packages on Ubuntu desktops. So if you want to access an Ubuntu 16.04 server remotely from your Windows PC or MAC, you can follow this tutorial to configure it. Installing and configuring VNC server on a Ubuntu 16.04 LTS server to enable remote desktop is easier than ever.
Crashes on some applications that require more graphical capabilities such as the Robot Operating System (ROS). right-click the downloaded file then Open With Software Install When the Ubuntu Software app opens, click the Install button to install AnyDesk. Ubuntu 16.04 LTS is out for a quite while now.
Unfortunately the XRDP version that you can get from the standard apt-get command in Ubuntu 16.04 is really outdated and that causes the following to happen: Since we have Windows laptops, it’s very common for us to use this protocol to connect remotely to our linux machines so we always install XRDP on those servers every time we need to have a remote connection to a graphical interface. But if you’d like to install a desktop environment, this part of the article is exactly for you.In the past week we were having some issues at work while trying to connect to some Ubuntu servers via RDP. Gnome is the default environment for the recent Ubuntu versions. In the Ubuntu Software Center, you may choose between a range of desktop environments. In this part we’ll install the Gnome desktop environment if you do not have it installed for any reason. Jump to Install Ubuntu desktop if you wish to install the latest version. It is not recommended to use this release for home use. This means it is no longer supported without Ubuntu Advantage.
#Install rdp on ubuntu 16.04 how to
This article will cover how to set up a remote desktop experience using Xrdp on Ubuntu Linux. This tutorial covers the installation of Ubuntu 16.04 LTS which released in 2016 and is now end-of-life. Xrdp integrates parts of the RDP and X Windows systems to transmit the visuals and controls between client and system. RDP will enable you to log into a remote machine and create actual desktop sessions in the same way you would on a local device. It delivers an entirely operational RDP-well-matched remote desktop experience. Xrdp is a free and open-source alternative to the Microsoft RDP server that allows non-Windows operating systems.
0 notes
Text
Remote desktop ubuntu from windows

#REMOTE DESKTOP UBUNTU FROM WINDOWS HOW TO#
#REMOTE DESKTOP UBUNTU FROM WINDOWS DOWNLOAD#
#REMOTE DESKTOP UBUNTU FROM WINDOWS WINDOWS#
#REMOTE DESKTOP UBUNTU FROM WINDOWS HOW TO#
You can toggle between full screen and window mode by pressing CTRL +ALT + Enter. This tutorial will show you step-by-step and demonstrate how to install and then use the xRDP Remote Desktop software on Ubuntu 20.04 (but any flovour of Lin.
#REMOTE DESKTOP UBUNTU FROM WINDOWS WINDOWS#
N.B.:- To open the remote Windows Desktop in full screen mode, you may type the following command at the command prompt in the terminal Once the Windows desktop is opened, you can work in this box as if you are working on a real Windows machine. Now the Windows desktop will open as shown in the following screenshot. It is a cross-platform software that is freely available for personal use. Teamviewer is one of the popular remote desktop application. Now by entering the User Name and Password, and then pressing the OK button, we can log in to the distant Windows machine. Best Linux Remote Desktop Tools For Ubuntu 20.04 LTS To Share Your Desktop In 2020. Therefore, by typing the following command, I will begin the remote desktop sessionĪfter issuing the command, a Window will open with Windows login screen as shown in the following screenshot. In the following example, IP address of my distant Windows machine is 10.42.43.11. Where, IP-address is the address of the distant Windows machine on a LAN or Internet. Now you can connect to a Windows machine by typing the following command: Step 2: Access the distant Windows machine This command will install rdesktop utility on your Ubuntu machine. Click on ‘Yes’ in the message box that appears. In the session, enter the IP address of your remote Linux computer that you have noted down earlier, and click on ‘Open’. Once the terminal is open, type the following command in the command prompt Here we will enter remote Linux server Ip address in Putty. This is done from the Menu bar by navigating to Applications -> Accessories -> Terminal and then clicking on Terminal.
#REMOTE DESKTOP UBUNTU FROM WINDOWS DOWNLOAD#
To use rdesktop, you have to download it from the repository and install it on Ubuntu Linux-based machine. This utility uses Ubuntu Remote Desktop (remote desktop Linux) Protocol to connect to another machine. Highlighted is the New Connection Profile button. Screenshot of Remmina remote desktop client. After that’s loaded up, click the New Connection Profile button in the top left corner of the window. Screenshot of the Ubuntu program select menu. In this article, I’ll show you how to access a windows computer from a remote machine running on Ubuntu Linux Operating System.įrom Ubuntu Linux, you can access Windows machine using a utility called rdesktop. This is a Remote Desktop client built into Ubuntu. When such a need arises, you can connect to your Windows-based computer from a distant place by using Ubuntu Remote Desktop Protocol.Īccessing Windows computer from another Windows computer is very easy using RDP, but when you want to access Windows computer from a machine that is running on Linux, it can be a challenging task. At other times, you may need to access your home computer from a remote place. Sometimes you may not be able to go to the office and you need to access into your work computer from a distant place.
0 notes
Text
Rdesktop ubuntu download

#Rdesktop ubuntu download install
#Rdesktop ubuntu download serial
#Rdesktop ubuntu download update
#Rdesktop ubuntu download driver
It offers features like built-in support for redirecting webcams and smart cards, configuring remote apps, regular security updates and hardware-accelerated video decoding to extend the battery life of your device, ideal when working on the go.Īs of today, we are the main contributor to the FreeRDP project. If you are using Mate Environment, include mate-session nano /home//.Thincast Client is a free multi-platform RDP (Remote Desktop Protocol) Client with FreeRDP at it's core that allows you to connect to a Remote PC or to virtual applications and desktops. Type the below command in terminal and include xfce-session. Include “xfce4-session” in “/home//.xsession”. Tell xRDP to use your environment XFCE sudo sed -i.bak ‘/fi/a #xrdp multiple users configuration xfce-session ’ /etc/xrdp/startwm.sh MATE sudo sed -i.bak ‘/fi/a #xrdp multiple users configuration mate-session ’ /etc/xrdp/startwm.sh
#Rdesktop ubuntu download install
Then Install XRDP Package sudo apt install xrdp sudo systemctl status xrdp sudo systemctl restart xrdp Step 5 : Configure Environment MATE sudo apt-get install mate-core mate-desktop-environment mate-notification-daemon XFCE 4 sudo apt install xfce4 xfce4-goodies xorg dbus-x11 x11-xserver-utils You can choose another environment of your choice, like MATE. I am using XFCE as my desktop environment as its light on resources and I don’t always have a good internet connection when working remotely. In Xrdp, XFCE4 and MATE are best for Robust Remote Desktop Environments
#Rdesktop ubuntu download driver
nvidia-390 is the latest driver version for the GTX 1xxx series).Īfter the installation is done, we need to reboot the computer: sudo reboot # Install Xrdp Supported Packages sudo apt-get install xorg sudo apt-get install xserver-xorg-core sudo apt-get install xorgxrdp Step 4 : Install Xrdp
#Rdesktop ubuntu download update
Please note that the command is different for each graphic card, depending on the driver available for it sudo apt-get install nvidia-XYXYX sudo apt-get update sudo apt-get upgrade Using the acquired information when typing “nvidia-smi”, we download and install the latest Nvidia driver supported by our GPU. → If Nvidia Driver is not Installed, Install Nvidia-Driver sudo add-apt-repository ppa:graphics-drivers/ppa → First Check which GPU Hardware is in your System sudo lshw -numeric -C display This driver provides you GUI(Graphical User Interface) to the system for Remote Desktop. Here first we check Nvidia Driver is Installed or Not. Install Supported Packages : Xorg, Xrdp, Xserver, Xfce4 and Mate Packages Restart the System sudo reboot Step 3 : Installing Supported Packages Update the System Packages sudo apt-get update sudo apt-get upgrade sudo apt purge hwe* sudo apt purge xorg* sudo apt purge xserver-xorg-core sudo apt purge xrdp* sudo apt purge mate* sudo apt purge xfce4* sudo apt purge xfce4 xfce4-goodies xorg dbus-x11 x11-xserver-utils sudo apt purge mate-core mate-desktop-environment mate-notification-daemon sudo rm /etc/systemd/system/rvice (if already have rvice) sudo apt autoremove So, Remove the Xorg, Xrdp, Xfce 4, Mate, Xserver and hwe packages and install freshly. Unwanted Packages like Hardware Enablement Stack and Partiallly Installed packages may affect Xrdp Session Failures. It supports several network protocols, including SCP, SSH, Telnet, rlogin, and raw socket connection.
#Rdesktop ubuntu download serial
PuTTY is a free and open-source terminal emulator, serial console and network file transfer application.
0 notes
Text
VcXsrvのインストール
今までUbuntu側へxrdpを入れてリモートデスクトップ接続してた。最近はWindows10+WSL2+VcXsrvでWindowsへX WINDOWを入れると動作が軽いらしいので試してみた。
インストール
VcXsrv
SORCEFORGEのVcXsrvからVcXsrvをダウンロードする。Filesタブをクリックし、vcxsrvフォルダ内の最新版を使った。2022/06/14時点では1.20.14.0。
インストール時の設定は基本デフォルト。ただし、一番最後のAdditional parametersに「-ac」を追加すること。
Desplay settingsはMultiple windowsを選択(左上)、Display numberは-1のまま
Client startupではStart no clientを選択(一番上)
Extra settingsではClipbordとPrimary Selection、Native openglの3つにチェック
Extra settingsのAdditional parameters for VcXsrvに「-ac」を入力!
Configuration completeでSave configurationをクリックして設定を保存できる。保存した設定ファイルをスタートアップに登録すると自動起動するみたい。
VcXsrvの初回起動時にWindows Defenderファイアウォールの設定が表示される。すべてのネットワーク上で許可しておくこと。ここで許可しなかった場合は[コントロールパネル]-[Windows Defenderファイアウォールを介したアプリまたは機能を許可]からVcXsrvにチェックを入れる。VcXsrv windows xserverはプライベートにチェックが入ったものと、パブリックにチェックが入ったものの2つにチェックが入っていればよい。
そのほかに/etc/ssh/sshd_configのX11Forwarding yes設定とかあるかも。その場合はググって。
WSL2
wsl2のインストールはググっていれる。デストリビューションはMicrosoft StoreからUbuntu20.04.4LTSを入れた。
WSL2のubuntuの環境変数設定とx11-app追加
$ export DISPLAY=$(cat /etc/resolv.conf | grep nameserver | awk '{print $2}'):0.0 $ export LIBGL_ALWAYS_INDIRECT=1 $ sudo apt install x11-apps $ xeyes (起動確認。Ctrl-Cで終了) $ $ ssh -XC ユーザ名@ホスト名またはIP sshログイン先のマシン $ xeyes (起動確認。Ctrl-Cで終了)
ssh接続先��LIBGL_ALWAYS_INDIRECT変数設定
どうやらLIBGL_ALWAYS_INDIRECT環境変数はssh接続先で設定しないといけないらしい。 ということでssh接続先の~/.bashrcに以下を追加した。
~/.bashrc if [ -v SSH_CLIENT -o -v DISPLAY ]; then export LIBGL_ALWAYS_INDIRECT=1 fi
ssh自動タイムアウト対策
タイムアウトでssh接続が自動で切断されてしまうと、作業中のウィンドウが消えてしまってヘコむ。その対策。~/.ssh/configファイルを作って以下の設定をしておけばokらしい。
~/.ssh/config ServerAliveInterval 300 ServerAliveCountMax 10
インターバル300(秒)に設定すると5分に1回クライアントからサーバへ生きてる通知を送ってくれるようになる模様。
0 notes
Text
Instale Xrdp en Ubuntu 20.04 / Debian 10
Instale Xrdp en Ubuntu 20.04 / Debian 10
Hola amigos. En esta sencilla publicación, aprenderá cómo instalar XRDP en Ubuntu 20.04 / Debian 10. Esta herramienta permitirá a los clientes de Windows conectarse de forma remota a Ubuntu Fundamental para tareas de soporte técnico. Xrdp es una implementación de código abierto de RDP (Protocolo de escritorio remoto), el protocolo utilizado por Windows Terminal Services para la conectividad…

View On WordPress
0 notes
Text
How to Install Remote Desktop (Xrdp) on Ubuntu 18.04
How to Install Remote Desktop (Xrdp) on Ubuntu 18.04
Introduction Remote Desktop (Xrdp) is a free and open-source implementation of the Microsoft RDP server that enables operating systems other than Microsoft Windows to provide a fully functional RDP-compatible remote desktop experience. This tutorial will explain to you how to install and configure the Xrdp on Ubuntu 18.04. Prerequisite Sudo access to your Ubuntu 18.04 server Step 1: Log in to…
View On WordPress
0 notes
Text
Instalar Xrdp Server en Ubuntu, Debian y derivados

Instalar Xrdp Server en Ubuntu, Debian y derivados. XRDP es una implantación del protocolo RDP (Remote Desktop Protocol) de Microsoft, para servidores Linux. Si eres de los que por extrema necesidad aun utilizas Windows, con esta herramienta podrás conectarte desde Win a tu servidor Linux mediante el cliente de Escritorio Remoto (de Windows) que viene por defecto. Claro, ahora pensarás que para que sirve XRDP si los servidores linux normalmente no tienen entorno de escritorio gráfico. Bueno... tranquilo no pasa nada, lo que haremos será instalar una versión ligera del escritorio XFCE para que puedas conectarte por XRDP y trabajar en el como si fuera un sistema de escritorio.
Instalar Xrdp Server en Ubuntu, Debian y derivados
Independientemente de la distribución del servidor, lo primero que debemos hacer es actualizar el sistema. apt update && apt upgrade Ahora instalamos el entorno de escritorio XFCE. sudo apt install xfce4 xfce4-goodies xorg dbus-x11 x11-xserver-utils Una vez termine la instalación de XFCE, continuamos con XRDP. sudo apt install xrdp Verificamos XRDP. sudo systemctl status xrdp ejemplo de salida... sololinux # sudo systemctl status xrdp ● xrdp.service - LSB: Start xrdp and sesman daemons Loaded: loaded (/etc/init.d/xrdp; bad; vendor preset: enabled) Active: active (running) since sáb 2020-04-11 10:09:47 EEST; 8s ago Docs: man:systemd-sysv-generator(8) CGroup: /system.slice/xrdp.service ├─14372 /usr/sbin/xrdp └─14374 /usr/sbin/xrdp-sesman Normalmente se crea el usuario "xrdp", si no es tu caso... lo creas manualmente y lo agregas a sudo. adduser xrdp ................ gpasswd -a xrdp sudo XRDP utiliza el certificado /etc/ssl/private/ssl-cert-snakeoil.key, conviene agregar el usuario a su grupo. sudo adduser xrdp ssl-cert Reiniciamos Xrdp para concluir la configuración. sudo systemctl restart xrdp Como punto final solo necesitas abrir el puerto correspondiente (por defecto 3389) en el firewall. Si utilizas UFW ejecuta el siguiente comando: # Puedes definir las ip/s con acceso. sudo ufw allow from 192.168.1.0/24 to any port 3389 # Tambien puedes abrir el puerto a todas las ip. sudo ufw allow 3389 Si en vez de UFW, usas nftables... sudo nft add rule inet filter input tcp dport 3389 ct state new,established counter accept Ya puedes abrir la aplicación nativa de Windows y conectarte al servidor.

Conexión a escritorio remoto Acceso a XFCE.

Remote Desktop con Xrdp Listo, ya estamos dentro del servidor con XFCE via Xrdp. Felicidades.

Escritorio XFCE de servidor remoto Canales de Telegram: Canal SoloLinux – Canal SoloWordpress Espero que este articulo te sea de utilidad, puedes ayudarnos a mantener el servidor con una donación (paypal), o también colaborar con el simple gesto de compartir nuestros artículos en tu sitio web, blog, foro o redes sociales. Read the full article
#/etc/ssl/private/ssl-cert-snakeoil.key#escritorioXFCE#InstalarXrdp#InstalarXrdpServerenUbuntu#protocoloRDP#RemoteDesktop#RemoteDesktopProtocol#servidorremoto#windows#XRDP
0 notes