#ScienceInTheClassroom
Explore tagged Tumblr posts
Visit Tumblr Blog
Explore Tumblr blogs with no restrictions, modern design and the best experience.
Last Seen Tumblr Blogs


Fun Fact
In 2020, 44% of users from Denmark used Tumblr daily.
Text
Teaching Chemistry with Real Lab Equipment
Making Science Real for Students
Chemistry is often called the central science, linking biology, physics, and countless real-world applications. Yet for many students, chemistry remains abstract—especially when it's limited to diagrams and digital simulations. The solution? Real lab equipment.
When students work directly with laboratory tools—measuring, mixing, heating, and observing reactions—they turn theory into practice. This experience not only strengthens understanding but builds practical scientific skills and confidence.
In this article, we explore the benefits, tools, and techniques for teaching chemistry using actual lab equipment, especially in schools, colleges, and STEM training environments.
🔬 Why Real Lab Equipment Matters in Chemistry Education
✅ 1. Hands-On Learning
Physically interacting with chemicals and equipment allows students to solidify theoretical concepts through direct observation and experimentation.
✅ 2. Higher Student Engagement
Chemistry comes alive when students mix reactants, see color changes, or watch a substance boil or crystallize. These moments capture attention and curiosity.
✅ 3. Builds Scientific Thinking
Using real tools encourages students to:
Form hypotheses
Record observations
Analyze outcomes
Think critically
These steps reflect the scientific method in action.
✅ 4. Trains for Safety & Protocol
Students learn lab safety rules early—like wearing goggles, handling acids, or using fire safely—which prepares them for higher education or lab careers.
✅ 5. Career Readiness
Familiarity with standard chemistry instruments helps students pursue careers in:
Pharmacy
Biotechnology
Environmental science
Chemical engineering
Teaching and research
🧪 Must-Have Chemistry Lab Equipment
Here’s a breakdown of essential categories of equipment for any school or college chemistry lab:CategoryExamplesPurposeGlasswareBeakers, test tubes, flasks, burettes, pipettesMixing, heating, titration, measurementHeating ToolsBunsen burners, hot plates, cruciblesHeating and combustion reactionsMeasuring DevicesBalances, thermometers, pH metersQuantitative experiments and monitoringSafety GearGoggles, gloves, lab coats, fume hoodsPersonal protection during experimentsSeparation ToolsFunnels, filter paper, centrifugesPurification and separation of compoundsStorage ToolsDropper bottles, reagent shelves, lockable cabinetsSafe organization and chemical storageSupport EquipmentStands, clamps, tongs, gauze, tripodsStability and handling during experiments
Properly equipped labs can deliver curriculum-aligned, interactive lessons and prepare students for standardized assessments and practical exams.
🧑🔬 Engaging Chemistry Experiments with Real Equipment
Here are classroom-tested, concept-rich experiments you can do using basic lab tools:
1. Acid-Base Titration
Concept: Neutralization and pH
Tools: Burette, pipette, conical flask, indicators like phenolphthalein
Skills: Precise volume measurement, identifying endpoints
2. Reaction Rate Study
Concept: How temperature or concentration affects speed
Tools: Beakers, stopwatch, measuring cylinder
Chemicals: Sodium thiosulfate + HCl
Skills: Data plotting and graph interpretation
3. Electrolysis of Water
Concept: Decomposition and gas formation
Tools: Electrodes, beaker, DC power supply
Skills: Understanding redox reactions and conductivity
4. Ink Chromatography
Concept: Separation of mixtures
Tools: Filter paper, beaker, dropper
Skills: Observing pigment behavior, capillary action
5. Thermal Decomposition
Concept: Chemical change through heating
Tools: Crucible, tongs, Bunsen burner
Example: Heating copper carbonate to yield copper oxide + CO₂
These experiments help visualize key principles and strengthen lab report writing skills.
📚 Tips for Effective Lab-Based Teaching
🔹 Plan Ahead
Run experiments beforehand
Check equipment availability
Prepare instructions and learning outcomes
🔹 Prioritize Safety
Brief students before each session
Use proper PPE (lab coats, goggles)
Demonstrate equipment usage clearly
Ensure access to fire blankets and eye wash stations
🔹 Encourage Inquiry
Let students suggest their own variations
Guide them to ask questions and interpret outcomes
Foster teamwork with assigned lab roles (timer, recorder, leader)
🔹 Connect Theory to Practice
After the experiment:
Discuss observations
Relate back to chemical equations
Assign worksheets or further reading
💰 Budget-Friendly Lab Setup Tips
You don’t need a million-dollar lab to offer quality education. Here’s how schools can maximize their resources:
✅ Start with core tools like beakers, burners, and pipettes
✅ Buy bundled lab kits for topics like titration or electrolysis
✅ Use household items (e.g., baking soda + vinegar) where safe
✅ Apply for education grants from STEM programs or local ministries
✅ Collaborate with colleges or donors for used equipment
💡 Enhance Real Labs with Digital Tools
Combine physical labs with modern tech for a hybrid experience:
Digital microscopes for better projection
Data loggers and sensors to track results
Virtual simulations for pre-lab preparation
AR/VR demos to show atomic structures and reactions
Technology doesn’t replace hands-on learning—but it can make it more accessible and comprehensive.
#ChemistryEducation#ScienceTeaching#STEMLearning#HandsOnScience#LabExperiments#RealLabExperience#TeachChemistry#ScienceInTheClassroom#ChemistryLabSkills#PracticalScience
0 notes
Photo
We never take these moments with students in schools for granted. Thank you, Southampton Academy, Beazley Elementary, Walton Elementary and J.E.J. Moore Middle, for inviting @scalyadventures to be a part of your week! We had a great time with you all! 😃🦎🐍 With @thatsnakedude #scalyadventures #southamptonacademy #beazleyelementary #waltonelementary #jejmoore #americasscalyfamily #piercecurren #tanyacurren #rickcurren #inschoolfieldtrip #reptiles #stemeducation #science #classroomscience #scienceintheclassroom #educationalentertainment #antidrug #antibully https://www.instagram.com/p/BvpIt0ignuz/?utm_source=ig_tumblr_share&igshid=a6spda69v6zd
#scalyadventures#southamptonacademy#beazleyelementary#waltonelementary#jejmoore#americasscalyfamily#piercecurren#tanyacurren#rickcurren#inschoolfieldtrip#reptiles#stemeducation#science#classroomscience#scienceintheclassroom#educationalentertainment#antidrug#antibully
0 notes
Photo
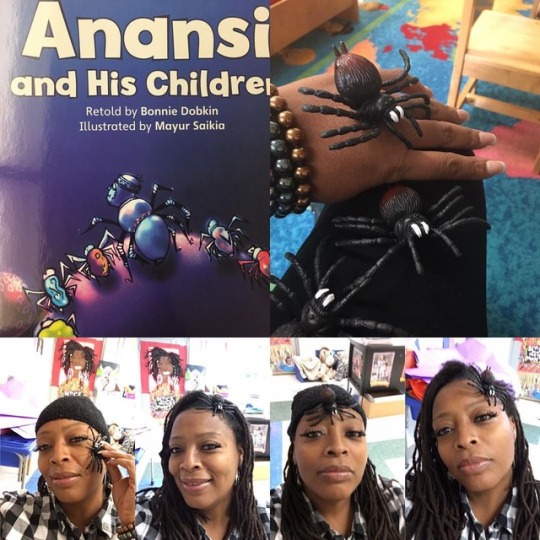
Do what it takes to inspire children to read and love it.... They were putting them on my head. Then they found out... I’m NOT SCARED. #read#school #schoolisfun #myteacherrocks #scienceintheclassroom #books https://www.instagram.com/p/BuornGml0R0/?utm_source=ig_tumblr_share&igshid=1d00zo2chnidt
0 notes
Video
instagram
Look at this mini-science experiment we did today! Demonstrating how precipitation happens in the clouds when it storms! ⚡⚡☁☁💧💧💧 #NerdGlassesOn 📚📚 We used shaving cream and liquid watercolor paint! #ScienceExperiment #ScienceInTheClassroom
0 notes
Text
How nerds roll on Halloween.
This past week my lesson plans were inspired by Halloween activities. Let me stress the fact that my class room consists of students that range from gifted to very low functioning. To start off the week my students completed a famous scientist research project. I got this activity from the NSTA web site. You can take the students to the computer lab or print off biographies for them to use in the class room. The activity included a rubric and checklist of research items needed. Students then had the chance to use their creativity by putting their information into the form of a tombstone. It was a great spin on the ordinary famous scientist research project, and my student really got into it.
Next we did an epidemiology inspired zombie out break activity from the CDC. Student read interviews and was introduced to the steps and procedures that epidemiologist go through when studying a epidemic. I’ve included the link. I think next year I might turn this into a role play activity. http://www.cdc.gov/phpr/documents/learn/disease_detectives.pdf
Finally in some of my classes we are studying the different properties of matter and the biochemistry of polymers, so what better way to introduce those lessons than doing a hands on activity with slime! This activity is easy enough that a kindergarten class can do it,but you can beef it up by discussing the monomer and polymer formation of the slime, and also including inquiry questions that students can use in a Mini- laboratory write up. Slime recipe includes the following
Materials- borax soap, water, Elmer’s glue, food coloring, 2 cups and a bowl.
- cup of water with one tsp of borax….you can get at your local dollar general put in container and mix -1/2 of Elmer’s glue and 1/2 of water mixed in a separate cup( add your food coloring to the glue) -get another bowl sizes container and mix the two contents together and you got slime
All of my students really enjoyed this activity, and if permitted they can take their slime home. I saved this activity for Halloween day.
If you have any questions or you would like the lesson plans and activity sheets please message me.
0 notes