#Top 5 Best Screen Capture Software for Windows
Explore tagged Tumblr posts
Visit Tumblr Blog
Explore Tumblr blogs with no restrictions, modern design and the best experience.
Last Seen Tumblr Blogs


Fun Fact
If you dial 1-866-584-6757, you can leave an audio post for your followers.
Text
Top 3D Scanners: Best Picks for Every Application in 2025
As 3D scanning technology evolves rapidly, businesses and individuals are turning to 3D scanners for applications in reverse engineering, product design, healthcare, architecture, art preservation, and even entertainment. The market is flooded with scanners varying in accuracy, speed, portability, and cost. Choosing the right one can be challenging. This article highlights the top 3D scanners in 2025, categorized by use cases to help you make an informed choice.
What is a 3D Scanner?
A 3D scanner is a device that analyzes real-world objects or environments to collect data on their shape and appearance. This data is then used to construct 3D models. These scanners use technologies like laser triangulation, structured light, or photogrammetry.
Why Choosing the Right 3D Scanner Matters
Whether you're scanning small parts for reverse engineering or large structures for architectural conservation, the right scanner can:
Improve accuracy
Reduce time in post-processing
Enhance model detail and surface capture
Ensure compatibility with CAD or 3D printing software
Now let’s explore the best 3D scanners in 2025, segmented into categories for professionals, prosumers, and hobbyists.
1. Artec Leo – Best Overall 3D Scanner
Price: ~$25,000 Technology: Structured Light Accuracy: Up to 0.1 mm Use Case: Industrial Design, Medical, Manufacturing
Artec Leo continues to dominate the high-end scanner market. It's a wireless, standalone scanner with an integrated touch screen and real-time 3D data visualization. The Leo offers high accuracy, portable use, and powerful AI-based software (Artec Studio). Ideal for scanning both small and large objects.
Key Features:
3D reconstruction in real-time
No tethered cables
Wide field of view for fast scanning
Works seamlessly with CAD software
Why It’s Top-Tier: The Artec Leo stands out with its ease of use, portability, and exceptional scanning quality—making it ideal for professionals.
2. EinScan HX – Best Hybrid 3D Scanner
Price: ~$10,000 Technology: Hybrid (Laser + Structured Light) Accuracy: Up to 0.04 mm Use Case: Automotive, Aerospace, Reverse Engineering
EinScan HX, developed by Shining 3D, combines blue laser scanning and LED structured light, making it extremely versatile. It's capable of scanning dark, reflective surfaces without the need for spray or powder.
Key Features:
Dual blue laser & LED light source
Fast data acquisition
Ideal for challenging materials
Plug-and-play interface
Why It’s a Favorite: The combination of two scanning technologies makes the EinScan HX extremely adaptable, especially in industrial applications.
3. Revopoint RANGE 2 – Best Budget-Friendly Option
Price: ~$800 Technology: Structured Light Accuracy: Up to 0.1 mm Use Case: 3D printing, DIY, Art, Education
Revopoint RANGE 2 is a cost-effective solution for those who want reliable scans without breaking the bank. Lightweight and easy to use, it’s perfect for hobbyists and educators.
Key Features:
Affordable and portable
USB and battery-powered
Comes with mobile scanning app
Works with Mac, Windows, iOS, and Android
Why It’s Great: Ideal for students, makers, and entry-level designers who need decent accuracy for personal projects or prototyping.
4. FARO Focus Premium – Best for Large-Scale Scanning
Price: ~$30,000 Technology: Laser Scanning Accuracy: ±1 mm Use Case: Architecture, Construction, Forensics
If you need to scan buildings, bridges, or crime scenes, the FARO Focus Premium is the top choice. It captures large areas with remarkable detail and is widely used in BIM (Building Information Modeling).
Key Features:
Long-range scanning up to 350 meters
High-speed laser capture
Integration with CAD/BIM software
On-site scan visualization
Why It’s a Top Pick: Unmatched in surveying and large-volume applications, the FARO Focus offers high precision and dependable performance for field engineers.
5. Creality CR-Scan Ferret Pro – Best for Beginners
Price: ~$450 Technology: Structured Light Accuracy: Up to 0.1 mm Use Case: Education, Entry-level 3D Printing
For beginners or hobbyists getting into top 3D scanners, the Creality CR-Scan Ferret Pro is an ideal starting point. It offers decent scanning capabilities at an extremely low price point.
Key Features:
Lightweight (under 200g)
USB-C connectivity
Compatible with Android and PC
Basic AI denoising algorithm
Why It Stands Out: For under $500, it delivers surprisingly clean scans for small to medium-sized objects.
6. Peel 3 – Best for Reverse Engineering
Price: ~$7,500 Technology: Structured Light Accuracy: Up to 0.1 mm Use Case: Industrial Reverse Engineering, Product Development
Peel 3 from Peel 3D is a powerful yet affordable scanner focused on reverse engineering, design, and manufacturing workflows. It is portable, ergonomic, and captures high-resolution data efficiently.
Key Features:
Ergonomic handle with haptic feedback
Touch screen controls
Supports texture and geometry capture
Real-time preview of scans
Why It's a Winner: Peel 3 bridges the gap between consumer and industrial-grade scanners, offering professional features at a mid-range price.
7. Polyga Compact C504 – Best for Small Parts
Price: ~$12,000 Technology: Structured Light Accuracy: Up to 0.01 mm Use Case: Small Objects, Jewelry, Dentistry, Research
When detail is everything, the Polyga C504 delivers. It is highly accurate and best suited for scanning tiny, intricate components like jewelry, teeth, or machine parts.
Key Features:
Ultra-high resolution
Scan objects as small as 1 cm
USB 3.0 connectivity
Compatible with Polyga’s FlexScan3D software
Why It’s Ideal: For ultra-precise applications, especially in metrology and microscale modeling, this scanner is hard to beat.
8. Matter and Form 3D Scanner V2 – Best for Education
Price: ~$750 Technology: Laser Triangulation Accuracy: Up to 0.1 mm Use Case: Schools, Libraries, Basic Product Design
This compact and foldable desktop scanner is ideal for educational institutions. It provides plug-and-play simplicity and encourages experimentation with 3D digitization.
Key Features:
Easy to set up and use
Safe for classroom environments
Compatible with Windows and Mac
Affordable for schools
Why Educators Love It: Simple enough for middle-schoolers, yet powerful enough to produce usable scans for basic design projects.
How to Choose the Right 3D Scanner
Here’s a quick guide based on your requirements:
Use Case
Recommended Scanner
Budget Range
Reverse Engineering
EinScan HX, Peel 3
$7,000–$10,000
Industrial Inspection
Artec Leo, FARO Focus Premium
$20,000+
Entry-Level/Beginner
Revopoint RANGE 2, CR-Scan Ferret Pro
<$1,000
Education & Classrooms
Matter and Form V2
~$750
Small Object Scanning
Polyga Compact C504
$10,000–$12,000
Large Scale Architecture
FARO Focus Premium
~$30,000
3D Scanner Trends in 2025
Some noteworthy trends shaping the 3D scanning industry include:
AI Integration: Smart software helps correct errors and automate post-processing.
Wireless Capabilities: Many top scanners are ditching cables for better portability.
Mobile Compatibility: Increasing scanners work with Android/iOS for flexibility.
Affordable High-Res Options: New entrants are driving down costs of decent-quality scanners.
Software-Driven Enhancements: Improvements in 3D reconstruction software are narrowing the gap between cheap and expensive models.
Conclusion
Whether you're a hobbyist, professional, or educator, 2025 brings a wide range of powerful top 3D scanners for every budget and application. From the Artec Leo’s unmatched performance to the affordable Revopoint RANGE 2, there’s a scanner that suits your needs.
Always consider scanning volume, required accuracy, material compatibility, and software ecosystem before investing. With the right scanner, your digital transformation journey becomes faster, more accurate, and ultimately more successful.
0 notes
Text
How to Improve Your Video Quality in Healthcare: Simple Tips for Clear Communication
In healthcare, video content plays a vital role in patient education, telemedicine, training, and marketing. Whether you’re creating an educational series for patients or hosting a video meeting with colleagues, video quality can make or break the communication experience. Crisp visuals, clear audio, and engaging delivery ensure your message resonates with the intended audience — be it patients, internal teams, or external partners.
Here’s how to enhance your video quality with simple tips for clear communication that will keep your audience engaged and informed.
1. Start with High-Quality Equipment
Your video quality begins with the tools you use. While you don’t need a Hollywood budget, investing in the right equipment can make a world of difference.
Camera: Use a high-definition (HD) camera. A good webcam or DSLR camera can produce sharp, professional visuals.
Microphone: Poor audio can ruin even the best visuals. Invest in a USB microphone or a lapel mic for clear sound.
Lighting: Good lighting is crucial. Natural light works well, but a ring light or softbox light ensures consistency. Avoid harsh overhead lighting, which can create unflattering shadows.
Pro Tip: Test your equipment before recording or going live to avoid surprises.
2. Create a Professional Setting
Your video environment sets the tone for your communication.
Background: Choose a clean, clutter-free background. For a more polished look, consider a branded backdrop or a virtual background.
Lighting Placement: Position your light source in front of you, not behind, to avoid shadows. Ensure your face is evenly lit and easy to see.
Camera Angle: Set your camera at eye level for a natural and engaging perspective. Avoid angles that look up your nose or cut off the top of your head.
Pro Tip: A neutral or branded background not only looks professional but also minimizes distractions.
3. Prioritize Clear and Reliable Audio
In healthcare communication, clarity is non-negotiable. Muffled or distorted audio can lead to misunderstandings, especially in telemedicine or training videos.
Eliminate Background Noise: Choose a quiet space, and use noise-canceling software or headphones if needed.
Speak Clearly: Enunciate your words and maintain a steady pace, particularly when explaining complex medical concepts.
Test Your Mic: Ensure the microphone captures your voice clearly without distortion or static.
Pro Tip: Conduct a quick sound check before starting a video call or recording.
4. Optimize for Mobile and Desktop Viewers
Your audience will likely access your videos on a range of devices, from smartphones to desktops.
Use Responsive Design: Ensure videos display correctly on different screen sizes.
Subtitles and Captions: Include captions to make your videos accessible to viewers in noisy environments or those with hearing impairments.
Compressed Files: Optimize video files for fast streaming without compromising quality.
Pro Tip: Test your videos on multiple devices to ensure consistency.
5. Master the Art of Lighting
Proper lighting enhances video quality and ensures your audience stays focused on you, not the shadows or glares.
Natural Light: Position yourself facing a window for soft, even lighting.
Artificial Light: If using artificial light, place it slightly above and in front of you to avoid harsh shadows.
Avoid Backlighting: Prevent being backlit by positioning light sources behind the camera rather than behind you.
Pro Tip: Use a ring light for an even glow that enhances facial features.
6. Engage Your Audience with Clear Communication
Whether you’re addressing patients or colleagues, how you communicate is just as important as the video’s technical quality.
Maintain Eye Contact: Look directly into the camera to create a sense of connection.
Use Visual Aids: Incorporate slides, graphics, or animations to explain complex information.
Keep It Concise: Respect your audience’s time by delivering your message succinctly.
Pro Tip: Practice your delivery to ensure a smooth, confident presentation.
7. Address Healthcare-Specific Needs
Healthcare videos often require extra considerations:
Compliance: Use HIPAA-compliant platforms for telehealth or patient-related content.
Clarity: Simplify medical jargon for patient education videos.
Accessibility: Add captions, transcripts, and audio descriptions for inclusivity.
Pro Tip: Test your content with a sample audience, such as staff or patients, to identify areas for improvement.
8. Test, Edit, and Refine
No video is perfect on the first try. Take the time to review and refine your content:
Watch Playback: Look for areas where lighting, audio, or visuals can be improved.
Edit Thoughtfully: Use video editing software to trim unnecessary parts and enhance visuals.
Seek Feedback: Share your video with a colleague or focus group for constructive input.
Pro Tip: Even minor adjustments can significantly improve the overall quality of your video.
9. Train Your Team for Better Video Communication
For internal and external communication, ensure everyone involved understands best practices:
Offer training on video tools and platforms.
Provide guidelines for creating professional video content.
Encourage consistent branding and messaging across all videos.
Pro Tip: Host workshops or provide resources to help your team master video communication.
Credit Source: https://bit.ly/3X3CMwb
0 notes
Text
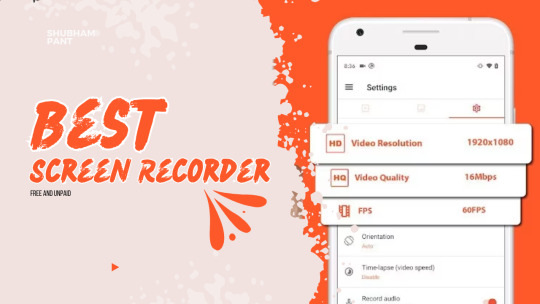
In today's digital landscape, screen recording has emerged as an indispensable tool for content creators, educators, and professionals seeking to communicate ideas effectively.
With the abundance of free screen recording software available, users have a plethora of options to choose from.
In this article, we'll explore the top 5 free screen capture software, their features, and how they empower individuals to unleash their creativity.
1. OBS Studio

The Gold Standard in Free Screen Recording OBS Studio stands out as one of the most versatile and feature-rich screen recording tools available for free.
With its customizable settings, high-quality recording capabilities, and support for multiple platforms, OBS Studio has become the go-to choice for content creators, streamers, and gamers alike.
Users use this software famously for gamers and streamers.
2. ShareX
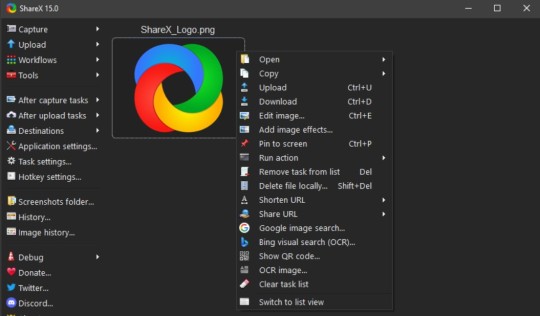
Simplifying Screen Recording for Everyone ShareX offers a user-friendly interface and a plethora of features designed to simplify the screen recording process.
From capturing full-screen videos to specific regions or windows, ShareX provides flexibility and efficiency.
Additionally, its built-in editing tools and integration with cloud storage services make it a compelling choice for users looking for a seamless screen recording experience.
3. Screencast-O-Matic
The Perfect Blend of Simplicity and Functionality Screencast-O-Matic strikes the perfect balance between simplicity and functionality.
With its intuitive controls and high-quality recording capabilities, Screencast-O-Matic is ideal for beginners and professionals alike.
Whether you're creating tutorials, presentations, or gameplay videos, Screencast-O-Matic offers the tools you need to bring your ideas to life.
4. Captura

Lightweight and Powerful Screen Recording Captura may be lightweight, but it packs a punch when it comes to screen recording.
Offering various capture modes, hotkey support, and basic editing features, Captura provides users with a streamlined recording experience.
Whether you're recording software demonstrations or capturing gameplay footage, Captura delivers high-quality results without weighing you down.
5. CamStudio

Time-Tested Reliability for Basic Screen Capture Needs CamStudio has been a staple in the world of screen recording for years, thanks to its time-tested reliability and simplicity.
While it may lack some of the advanced features found in other screen recording tools, CamStudio gets the job done when it comes to basic screen capture needs.
Whether you're recording video tutorials or capturing presentations, CamStudio offers a straightforward solution for users seeking a no-frills recording experience.
Conclusion
Free screen recording software offers diverse options for users. These tools empower creativity and communication effectively. They cater to various needs and preferences. Users can achieve professional-quality results without financial burden. Explore the features of these best free screen recorder today!
1 note
·
View note
Text
TUTORIAL 2
Giphy Capture and Gifski
FULL TUTORIALS | EASY NON-RECOLORED GIFS
This tutorial is Mac only unfortunately, but is for the girlies who hate steep learning curves, don't want to recolor, and don't want to touch a command line with a 10-foot pole. It is wickedly easy and can produce great results for non-recolored sets.
Interface: Graphic User (GUI)
Needed software: Giphy Capture and Gifski (GUI version)
Operating systems: Mac
Time: 7 minutes for the 2 gif set (below)
Difficulty: Easy
Input: ANY video you can screencapture.


LIMITATIONS: 1 Mac only. 2) No recoloring. 3) Captions are limited in size, color, and font (but should generally be sufficient even for longer captions). 4) Since you are screen-capturing video, the quality of your recordings will be limited by the physical size and resolution of your computer screen. 5) You cannot crop after screen-capturing. You have to adjust your screencapture window to the aspect ratio you want your gifs to have.

1. Installation
You can get Gifski (GUI version) and Giphy Capture in the Apple App store.
2. Screen Capturing
When you first open Giphy Capture this screen capture screen should appear:

Open the video you want to screen capture, and make it as large as possible on your screen for the best quality!!!
If you want to make a square set, or a 3:2 set, adjust the size of the screencapturing box accordingly. You can't crop a capture to a different shape after recording.
In my example, since I only want a close up on Dean, and I want it to be square, I will reposition the box and drag the bottom right edge to resize this box as needed.
It's difficult to see in the above image, but there is a box in the bottom right of the green screen that tells me the exact pixel x pixel size of my capture screen so I can drag it until I get a precise screen ratio. In my case, the largest I can screencapture my square set (due to limitations of the physical size of my laptop's screen) is 850 x 850 px, so that's the dimensions I will adjust to.
Minimizing your screencapture screen will retain its shape. Minimize it then start the video you want to record a little before the point where you want to start recording, then press play, and quickly un-minimize your Giphy Capture window so it is on top of the window you want to record and hit the red button to start screen capturing.
You can record for only 30 seconds at a time, but Giphy Capture will save hundreds of 30-second successive screencaptures. You'll see them as thumbnails you can open in the bottom of your screen capture screen.
3. Cut into clips and caption
Once you have captured all of the sections of your video you want and are happy with the size and how the shots are framed, it's time cut your 30-second recording into clips representing each gif, and caption them one by one (you can make multiple gifs from the same capture).

Click on the thumbnail of your capture and a new box will open. Here, you can trim your recording and caption it.
Trim the recording by adjusting the ends of the purple bar.
Note: I recommend you not let the length of your gifs exceeding 4 seconds when possible, but I have gone to 5 or 6 seconds before.
You want to go ahead and caption each shot right after clipping it to length.
Click on the tab labeled "Captions" and a new box will open.

Click "Add Caption". A huge box will open on top of your gif.
Set the caption size to XS, change color as desired, and drag the caption box down and center it on the bottom of your screen and type in your dialogue in the top right.
If you have two people talking back and forth in the same gif, you can click "Add Caption" in the bottom left to add another caption, and set one caption on top of the other, or set one caption to end where another caption begins by adjusting the edges of the purple bar.
4. Exporting to MP4
When you're happy with your captions and the length of the clip that will become your first gif, go back to the "Options" tab and set the following options:
Loop style: Normal
Pixel Size: Original
Frame Rate: HD (we'll adjust the frame rate later in Gifski. It does something a little weird if you adjust it here—even to 23 FPS).
Click "Save As..." and then save the file as an .mp4.
Repeat this process for every clip intended to be a gif in your set, until you have them all saved.
5. Compressing and converting to .gif in Gifski
Now open Gifski and open your first .mp4 clip. It may give you a warning about the frame rate. Just ignore it.

In the bottom left corner, you can see the estimated size of your resulting gif. This estimate will auto-update as you adjust your compression settings. Remember: To upload your gif on Tumblr, it needs to be about 10MB or less. If it's already 10MB, just go ahead and click convert! If not (which is more than likely):
Adjust FPS to 18. I find this frame rate to be a good balance of compression and retained quality.
Decrease the dimensions of your gif as needed. Whether you use the drop down box or the dialogue boxes, Gifski will automatically scale to retain your gif's screen ratio rather than stretch it to fit, so you don't need to worry about keeping your gif proportional.
You can finely adjust the settings until your gif is exactly 10 MB if you want to keep the best quality, or just aim for a ballpark.
Cick "Covert" then save the resulting gif. Do this for all your .mp4 clips and then boom. You're done.
But what if I don't WANT to use the Gifski GUI??? Let me automate!!
Maybe you AREN'T scared of the command line and you're thinking, "I don't want to adjust the compression on these things one by one! Was captioning in Giphy Capture not enough for you???"
Well then you can easily automate the process by using the Gifski command line interface (CLI) instead. I already wrote the script for you here.
If you're already going to use the command line, you could also use FFmpeg Script 1 or FFmpeg Script 2 to batch convert and optimize your clips into gifs.
Wait... so why aren't we compressing straight to gif in Giphy Capture???"
Because the quality after compressing will not be as good (usually), and the compression options are much more limited in terms of rescaling and setting the frame rate of your set. Giphy Capture also produces strange motion results often when adjusting frame rates. You can see a comparison set here. Or check these out:


The left is exported to GIF straight from Giphy Capture. The right converted to .gif in Gifski.
If you want to try compressing straight to gif in Giphy though, my recommended settings are:
Pixel Size: 640 px or 480 px if needed (I wouldn’t go lower unless you're arranging in 2x or 3x orientation)
Frame Rate: HD (or High in a pinch, but don’t do Standard or lower).
#easy#giphy capture and gifski#GUI only#giphy capture#gifski#tutorial#if anyone has suggestions for a Windows and/or Linux version swapping out the work done in giphy capture let me know!
9 notes
·
View notes
Text
How to make a gif + sharpening
Gifs are part of the Tumblr experience and you may want to learn how to do them.
If that is the case, here is a tutorial, showing all the tricks I learned in the past years.
Contents
Software needed
Videos
The process.
Software needed
Windows or Mac OS
Gom Player [download]
Photoshop (I use Photoshop CC 2018, but you can really use any version as long as it has the timeline option).
Talking about Photoshop. You should buy it - but for educational purposes, I can tell you that if you google, you can find many many tutorials on how to install it.
Here is the link to one & [another one]
Overall, I suggest you to google for tumblr tutorials - there are plenty.
Videos
To make HQ gifs you may want to get the scene you want to gif in the highest quality possible.
On Youtube there are a lot of 4K and 1080p videos (especially music videos)
If you are looking for a film or a TV show I am sure you know there are some websites that provide you with 1080p quality files (look for Bluray Rips, they have the best quality).
The process
Now for the fun part. Before starting I want to give you a little cheat sheet on Tumblr’s post dimensions (useful if you want to have really HQ gifs) [here].
Here is the gif I’m gonna make with you today:

It has no filter: just some sharpening.
STEP ONE: SCREENCAPPING
Run Gom Player and open the video you want to get the screencaps from.
See that little button there? You have to press it. It is called Control Panel.
Once you pressed on it, a pop-up window should load + make sure to click on the Video bar, and the Advanced Capture option:

These are my options:

Now, play the video and press the Burst Capture: once you’re done, press that same button again to stop the process.
Now, the designated folder where you saved the screencaps should have all of the saved frames.
STEP TWO: PHOTOSHOP
On Photoshop go to File > Scripts > Load Files into Stack
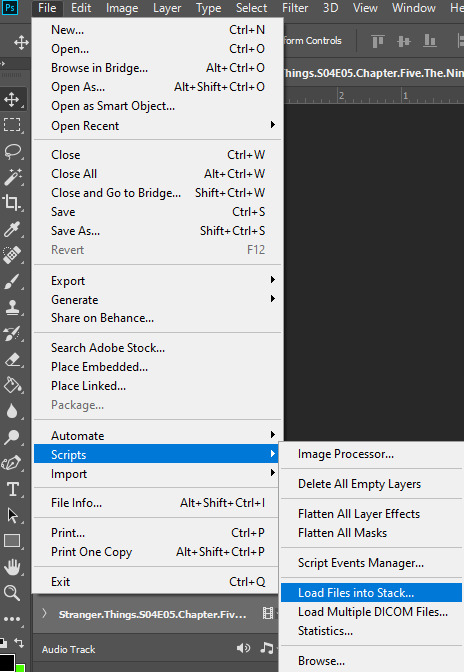
This window will pop up:
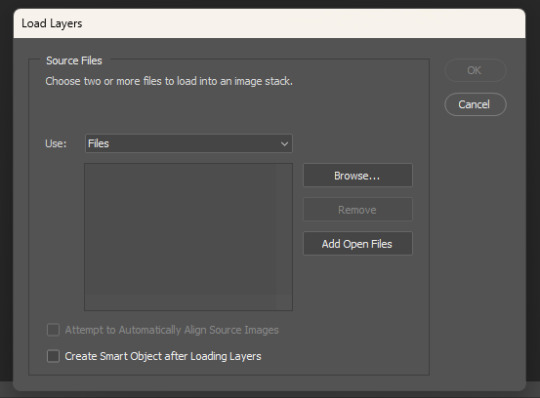
Click on Browse… and select your screencap folder, and select now all the frames of the scene you want to gif, you’ll get something like this:
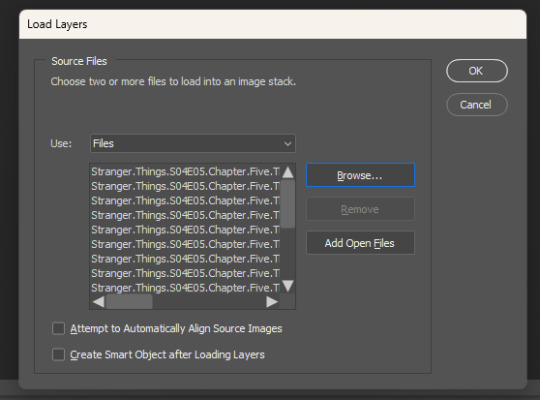
Now press OK and let Photoshop do its job.
Before starting, make sure the timeline is on (it’s on if it has a tiny check next to it - see the picture below):
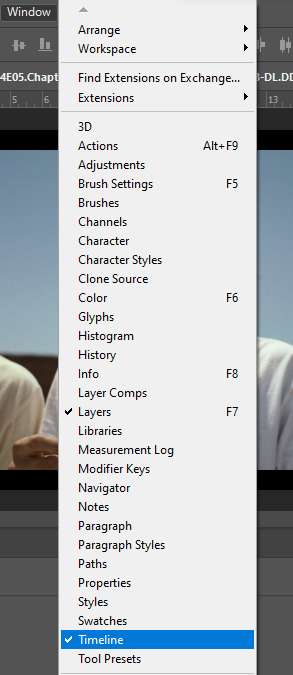
Now, your timeline should be visible at the bottom of your screen. Please select the Create Frame Animation option:


Once you’re done, click on the burger menu on top left (see image above):
Click on Make frames from layers
Click again on that menu
Now on Reverse frames
For the last time click on the menu
Select all frames.
Now all of your frames should be selected. Right click on one of those frames where you read “0 sec.”:

Select Other… and write 0.05 (or 0,05 - it's the same tho, for example, my version of Photoshop supports as decimal symbol the comma instead of the full stop!) and confirm.
STEP THREE: CROPPING
Ok, now cropping is really delicate. First, select the crop tool and on the top bar use the Ratio option, like this:
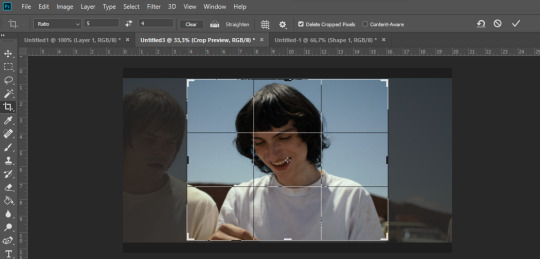
Now, really pick whatever ratio you want (mine is 5:4), and using the handles cut out the black portions of the scene - nothing more. Then confirm.
Go to Image > Image size and write the width based on the cheat sheet I linked above (if the little chain symbol is selected, the height will automatically adjust!) -> These are my options:
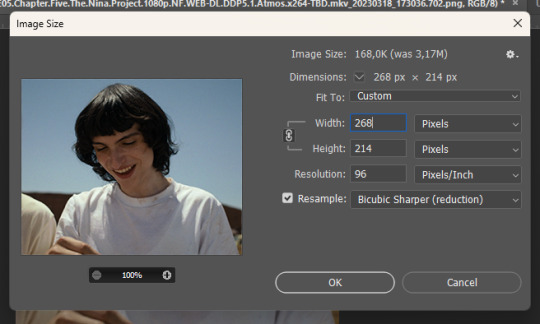
Note: if your resolution is different than 96, don’t change it - leave the number you have.
Confirm.
STEP FOUR: CREATING THE SMART OBJECT AND SHARPENING
Now, on the timeline, select the first frame, and on the bottom left there is this symbol you may want to click:

Select all the layers, right click and select Convert to Smart Object
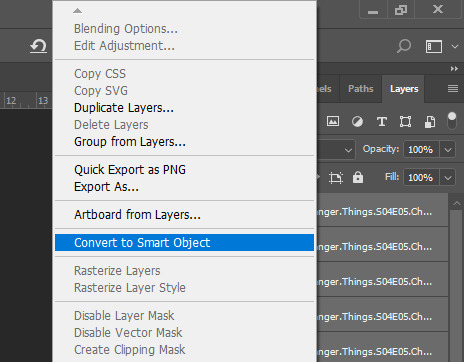
Select the newly made smart object and go on the Filter > Sharpen menu and pick Smart Sharpen: these are my options
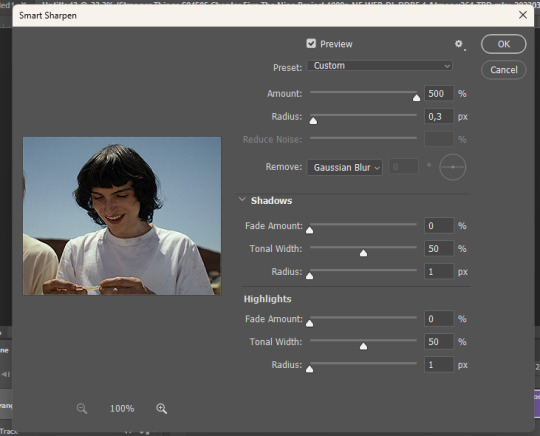

Press OK and then redo it (the smart object has to be sharpened twice).
STEP FIVE: SAVING
File > Export > Save for web

Make sure the looping setting is on Forever - click on save and you’re done!
[list of other tutorials here]
9 notes
·
View notes
Text
Free screen and webcam recorder windows 10

こたつパンチラしてる素人さんを盗撮したエ 画像21枚.
Best Free Screen Recorder with Audio for Windows 10, and Mac.
実家で妹を盗撮しまくった変態兄の秘蔵動画&画像集 | スクールガールレビュー.
Two Webcam Recorders for Windows 10 (Default and Suggested).
Free Screen Recorder - Screencast-O-Matic.
撮りためた姉ちゃんのこたつの中の黒タイツ①②パンスト見放題セット | 盗撮動画紹介所.
【坂口みほの】こたつの中でパンチラ・パンモロしてる無防備な下半身にこっそりイタズラ♡ニーハイ美少女jkは声出せずにピンクパンツに染みがつくほど.
シェアハウスで女子高生の着替えやオナニーを盗撮した激ヤバ動画 | 東京パンチラ通り.
盗撮動画ミッション - Part 2.
How to record screen and webcam on Windows 10 - AddictiveTips.
Screen Recorder - Webcam & Voice Recorder - VEED.
30ページパンチラav動画リスト。無料hdダウンロード | Avサンプル.
【熟女画像】人妻熟女のスカートの中を逆さ撮りしたパンチラ盗撮エロ画像 - 熟女画像ハメママ.
眠れるパンティ食い込み動画の美女 - 2nt.
こたつパンチラしてる素人さんを盗撮したエ 画像21枚.
Instructions for use: First, you can select the "Recorder" button in the startup interface to enter the recording interface. Second, Please adjust the area of the screen to be recorded, zoom in, zoom out, move by dragging the border. Third, click the "Record" button in the lower right corner of the interface. Recording begins..
Best Free Screen Recorder with Audio for Windows 10, and Mac.
All you need is a Microsoft Edge installed and you can record anything - tabs on Edge or other browsers, Desktop Screen, or your webcam. Just one click to open the gateway for narrating and sharing ideas, stories, and updates. → How to use StoryXpress to record screen video? - Download the Extension. - Choose from 3 recording modes - Screen. Filmora Screen Recorder. Our top pick to record video from webcam windows 10 is the. Apr 15, 2022 · Top 3. OBS (Windows & Mac & Linux) ⭐ Our Rating: 4.6/5. Open Broadcaster Software (OBS) is an open-source screen recording software that is free to use and can record screens without watermark and time limit. And it's compatible with multiple platforms including Windows 11/10/8.1/8/7, Mac, and Linux.
実家で妹を盗撮しまくった変態兄の秘蔵動画&画像集 | スクールガールレビュー.
パンチラ av動画リスト (30ページ) 02:18:00. mmus-010 - 美人性的妄想過剰セクシズム... 2017年4月27日. 04:00:00. okax-211 - 無防備パンチラ. 向かいの部屋の巨乳美女の生着替えを覗いていると… 平凡な日常、何気なく窓先を覗いて見るとそこには…卑猥でえげつない巨乳美女の生着替え姿が!. Bandicam is a free screen recorder for Windows that enables you to capture any area of your screen either as a screenshot or screencast video file. You can record lectures, webinars, games, and Skype calls with the option to add narration from your microphone and video from your webcam, as well as share on YouTube or Vimeo.
Two Webcam Recorders for Windows 10 (Default and Suggested).
.
Free Screen Recorder - Screencast-O-Matic.
【こたつ】暖かくなってきたけどまだこたつの中はパンチラ天国 20枚... エロ画像美術館... 無料エロ動画 LOVEPOP R18 PANTY-LOVE DUGA FC2動画見放題 6ms カリビアンコム 天然むすめ 一本道 HEYZO のぞきっくす のぞきザムライ アダルトランキング SOKMIL Girl's Blue Fetish. 女子校生(女子高生・JK)専門のエロ無料動画まとめサイト。制服・美少女・ギャル・パンチラ動画が無料で見放題!スマートフォンにも対応 パンチラ盗撮(女子校生・JK・美少女)専門のエロ無料動画まとめサイト。制服・美少女・ギャル・パンチラ動画が無料で見放題!スマートフォンにも対応.
撮りためた姉ちゃんのこたつの中の黒タイツ①②パンスト見放題セット | 盗撮動画紹介所.
Webcam and Screen Recorder Logitech Webcam Software for Windows 10 Free Capture photos and videos, upload to Facebook with one-click, adjust camera settings. Windows Logitech Webcam Software for.
【坂口みほの】こたつの中でパンチラ・パンモロしてる無防備な下半身にこっそりイタズラ♡ニーハイ美少女jkは声出せずにピンクパンツに染みがつくほど.
.
シェアハウスで女子高生の着替えやオナニーを盗撮した激ヤバ動画 | 東京パンチラ通り.
Jan 13, 2021 · 3. ShareX - Free Webcam Capture. Supported OS: Windows. ShareX is a lightweight, free and open source Webcam recorder to record computer screen, Webcam video and take screenshots. The built-in video editing tool of ShareX helps users edit videos, add video effects and add watermark to photo..
盗撮動画ミッション - Part 2.
Version: 4.2.8 Updated: May 27, 2022 Support external device capture. This webcam screen recorder also provides the video editing option Debut Video Capture is also a great free webcam recording software for Windows 10. Super Webcam Recorder is a tool enabling users to capture streaming video and snapshots. Internet. 覗き大好きなあなたへ…素人女性の動画&画像がてんこ盛りサイト!... 街でolをストーキングしてパンチラを盗撮した映像! 目をつけたolにスッポンのごとく食い下がり盗撮! 街を歩いていて好みのタイプの女性とすれ違った時、思わずムラっときて後を.
How to record screen and webcam on Windows 10 - AddictiveTips.
京 府某温泉宿で隠し撮り 修学旅行女子学生たちのこたつパンチラ盗撮3 60人300分... 【動画配信限定特典映像付】部活合宿で出会った たわわな天使たちとただ欲望のままに…~ロリ巨乳、風呂・着替え盗撮、夜 い、乱交、猥褻映像~. Instructions for use: First, you can select the "Recorder" button in the startup interface to enter the recording interface. Second, Please adjust the area of the screen to be recorded, zoom in, zoom out, move by dragging the border. Third, click the "Record" button in the lower right corner of the interface. Recording begins.
Screen Recorder - Webcam & Voice Recorder - VEED.
こたつの中だからと安心しきって無防備にお股全開パンチラ美少女にイタズラ三昧♡。特にフェラに興味のある方、是非ご視聴下さい - 動画ちゃんねるの無料エロ動画。.
30ページパンチラav動画リスト。無料hdダウンロード | Avサンプル.
ゲーセンで椅子に座っている女の子の対面パンチラ動画w... こたつパンチラ画像101枚。こたつ布団で見えないからと大胆に股を開いて座ってるjkやミニスカギャルのこたつパンチラや人妻のテーブル下パンチラをお楽しみください!.
【熟女画像】人妻熟女のスカートの中を逆さ撮りしたパンチラ盗撮エロ画像 - 熟女画像ハメママ.
. ホーム パンチラ・逆さ撮り 【パンチラ】お花見で盗撮された座りパンチラ動画... 【パンチラ】セーラー服の女子高生の汚れたパンティーのしゃがみパンチラを対面から盗撮. Jan 12, 2019 · Click or tap on Cortana's search box from the taskbar and type in the word camera. Then, click or tap on the Camera app. To record videos with the Camera app from Windows 10, you first have to switch to Video mode. Click or tap the Video button from the right side of the app's window. Then, to start recording a video with the Camera app, click.
眠れるパンティ食い込み動画の美女 - 2nt.
More Than Just Free Screen Recording. Upload an existing video or record your own with the Vidyard Screen and Webcam Recorder. Embed your video on your website, send it in emails, or share it on social media with just a few clicks. Get notified the moment your video has been watched (and see who watched it, and for how long). そうやって盗撮された妹の着替え、お風呂、トイレ、オナニーの写真や動画をかき集めてみました。. パンチラやブラチラは言うに及ばず、さらに過激な部分が映ってしまってる映像も!. ロリコンでシスコンのあなたならきっとわかる家庭内盗撮の魔力. Supported OS: Windows, Mac. Price: Free but $30 for the PRO version. #5. Litecam HD. This is a great tool for recording your webcam and screen since it is designed to capture everything that appears on the screen. You can add your overlay in the settings. Pros.
Other links:
Macbook Pro Install Windows 10 From Usb
Scanner Software For Windows 10 64 Bit
Fl Studio Registration Key Generator
Mario 3Ds
Free Audit Programs Download
10 notes
·
View notes
Text
7 best cheap golf simulators Under $1000 in 2021 – [Tested]
The golfer would love to have their own golf simulator setup, but unfortunately many aren’t able to afford mid-range simulators because the mid-range simulator price near about $5000. On the other hand, many golfers want to practice day or night but aren’t willing to pay more than $1000.
If you belong in this category then this article suits you. However, as golf simulator technology has advanced, very cheap solutions have appeared in the market.
There are some cheapest golf simulators available in the market to help you improve or enjoy golf in this COVID-19 situation, and in this article, I’ll review and compare our picks for the best golf simulator for under $1000 and some even are less than $500 bucks.
Things you should keep in mind before choosing best cheap golf simulators
Before we go further, you ought to understand that you'll get a limited experience with these sorts of cheap golf simulators. Some devices measures some shot data, simulation software, and maybe a net or mat, but not much more than this. Detailed shot data and more extra features you will get on a high-budgets simulator like SkyTark Golf Simulator, Trackman Golf, etc. But you don’t get advanced features on the cheap golf simulators. However, you’ll still get good experience and these cheap golf simulators can get your job done in terms of improving your game. We have tested all of those simulator setups. Some offer fewer features than others, but all of them give an exceptional home/outdoor golf simulators experience for the cost.
1. OptiShot 2 Golf Simulator for Home | Golf in A Box Series

Key Features:
Expanding library with 15 world-class golf courses.
Ability to play up to 4 players.
3D realistic environment.
Hit all shots from tee to hole.
Play with your own setup.
Practice shots from anywhere on the course.
Size: 1.5M long x 1.2M wide
High-quality dense foam and turf
Lightweight, easy to store, and has firm foam-based.
What’s Included:
Golf Simulation Software by Dancin’ Dogg
Infrared Optical Golf Simulator Swing Pad
OptiShot Practice Net.
OptiShot Hitting Mat
USB Cable, 10 feet long.
2 foam practice balls.
2 adjustable rubber tees.
Pros
Best visuals and course options
Training academy adds to the practice options
Only true studio system under $1000.
Comes as a package box and just plug it in and play
Swing stats with distance, speed, path, and clubface angle
Play online against other golfers
Cons
Doesn’t track actual ball flight, so you can miss launch angle
Graphics aren’t as good as other simulator sets
2. Rapsodo Mobile Launch Monitor for Golf Indoor and Outdoor

Key Features:
Professional-level accuracy: Distance accuracy is within 2.5% similar to Trackman, which is more than $30,000.
Set up within the 30s — Simply open the app, connect to your device via Bluetooth and start playing.
The instant real-time video feedback comes with a shot trace and data overlay which makes it easier to understand cause and effect.
Access your history to view averages, trajectory, dispersion, and standard deviation for each of your clubs.
Gps satellite view.
You can use it at home and outdoor also.
Pros
Very cheap price, under $500.
High quality and accurate
Whatever you needed, included in the box.
Can use your own sets
100% portability
Cons
Only compatible with ios(iPhone, iPad) devices.
Need a computer for a permanent home setup.
3. Rapsodo R-Motion and The Golf Club Simulator and Swing Analyzer
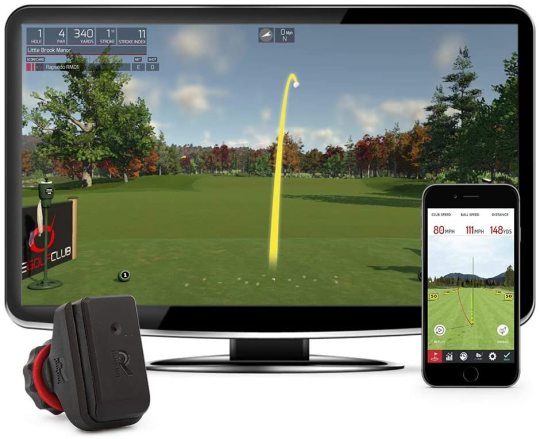
Key Features:
Play real rounds of golf with your friends by attaching your own clubs.
15 top courses included.
Incredibly accurate club and ball data.
Runs on your PC — no launch monitor or projector needed. 4 hours long battery life.
Extremely easy to use — just provide your own mat and net and start playing!
Play any time, no matter the weather.
What’s Included:
1 sensor
Clip
USB dongle
Charging cord
Pros
The incredible accuracy of the simulator
High-quality graphics
Software quality is also good
Cons
Don’t support Mac
Some users failed to connect to PC
4. FlightScope Mevo — Portable Personal Launch Monitor for Golf
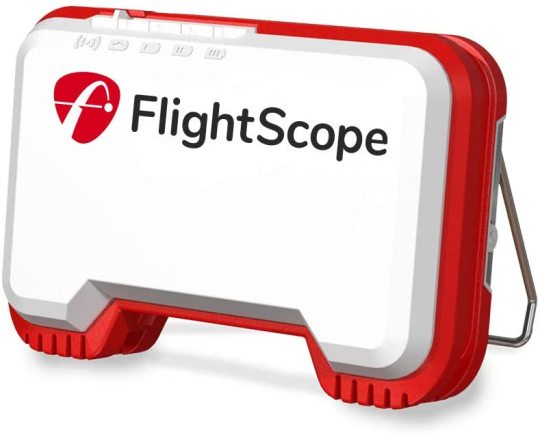
Key Features:
You can use it at home, on the driving range, or even on the course.
MEASURE: It provides accurate real-time performance data to help you train and improve with every club in the bag.
EVALUATE Data parameters that include carrying distance, clubhead speed, ball speed, smash factor, vertical launch angle, spin, apex height, and flight time.
Automatically capture data and video on your mobile device.
Save and compare data over time to trace your progress.
Your videos and data are captured and stored automatically, allowing you to review each session, share together with your coach, and analyze your progress over time.
Real-Time Performance Data includes:
Carry distance
Clubhead speed
Ball speed
Spin rate
Launch angle
Smash factor
Apex height
Flight time
Pros
Very affordable
Usable on all OS
Truly portable system, using GPS for swing data analysis
A small device fits in your pocket or golf bag.
Cons
Accuracy can be affected sometimes by monitor placement.
Metallic stickers must be attached to every ball hit, which can take time
5. tittle X Home Golf Simulator 2021

Key Features:
The best home cheapest golf simulator has E6 Connect with 4K ultra-high definition.
Provides real screen golf experiences in various practice modes.
An impressive reaction rate of 0.1 sec provides no delay in data transfer.
The smart stick offers the ability to play golf at home.
Up to 8 people can play golf with this simulator.
Title X home simulator analyzes your swing with a fancy designed lightweight sensor.
What’s Included:
Title X Device
Swing Stick
E6 Connect Product Key
Charger Cable and Manual
Multi Clip and Bands
Fixed 4 Clips
Pros
Simple design, easy to use
12 courses included with purchase
Instant, live feedback on every swing.
Cons
Without a computer, you can analyze data
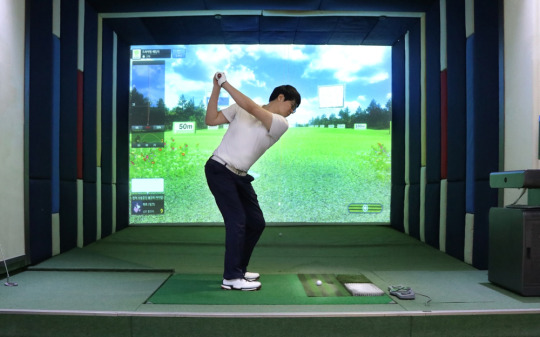
6. Phigolf Mobile and Home Smart Golf Game Simulator
Key Features:
Connect the app to your TV and immerse yourself in realistic golf courses available fully HD.
Enjoy a round of golf without the necessity for extra setup. Use the swing trainer included within the Phigolf WGT Edition and begin playing without nets or balls.
With the swing trainer measuring only 2 ft, Phigolf WGT Edition allows you to enjoy golf in your own front room.
Bad weather won’t stop you from having fun. Play golf anytime, anywhere; challenge your friends online — all at the comfort of your house.
What’s Included:
Game Simulator
Swing Stick
Pros
Realistic
Can play in your home
Has multiple practice options
Really cheap
Cons
Doesn’t allow the use of real clubs or balls
Can only be used indoors and not on range or course
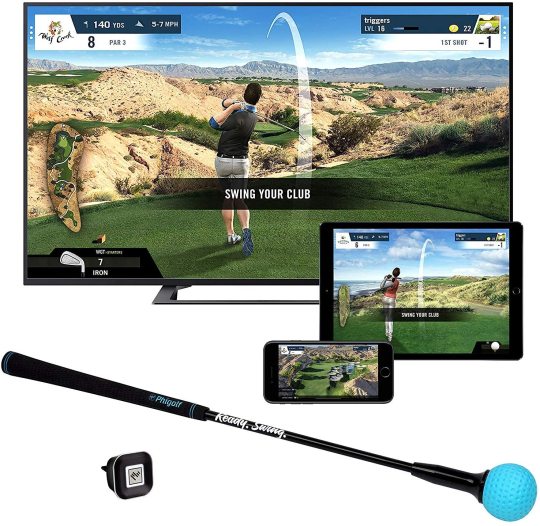
7. Matro Home Screen Golf Practice and Playing Simulator Tmax Swing Baro
Key Features:
You can play golf at your home or office or wherever together with your loved ones at any time.
Courses and Ranges Are ahead of You — This amazing unit can bring the golf courses and driving ranges into your home or office, wherever you’re in by TV connection.
Easy reference to TV and Just Play Golf — Connect main body with TV by HDMI cable and just play golf, no need internet or computer.
Perfect Equipment for The Novice and Experienced Golfer — it’s great to play and practice golf for both the novice and therefore the experienced golfer.
What’s Included:
Playing Simulator Tmax Swing Baro
Sensor, sensor clip
Practice stick
Pros
Multi-functional
Usable at home
Very easy to set-up
Affordable
Cons
Doesn’t allow the use of real clubs or balls
Can’t be used on range or course
Conclusion
Golf simulators became a lot more accessible and affordable over the past decade, and this suggests more golfers than ever before are ready to have their own personal setup.
Even a cheap golf simulator is often a huge boon to your golf toolkit. Finding a simulator package that may meet your needs is certainly possible with some research.
Each of the simulator options reviewed above offers excellent value for the price. We’ve given you the information you would like to create a decision; now it’s up to you to go the remainder of the way.
While it’s likely that no golf simulator setup will tick all of your boxes, some will come pretty near to doing so. If you wish for an excellent better experience, consider increasing your budget.
We highly recommend reading consumer and professional reviews of golf simulators to accumulate useful insights on how they really perform. this can assist you a lot within the decision-making process.
FAQ
What type of computer do I need? Can it be used on a Mac/iPhone/iPad?
Each system will have its own list of minimum system requirements. generally, though, you’ll need Windows 7 or later, 4gig of RAM, and a minimum of 1gig of disk drive space. an honest graphics card is going to be required to point out the courses in high definition, and you’ll need a powerful processor just like the Intel i5 or newer. Most of the listed systems here will work on Mac also as Windows PCs. However, you ought to double-check with the manufacturer before making a sale.
Will, I should buy these golf simulators?
No. Each listed simulator comes with everything you want to have to play, with the exception of mobile apps and computers. Of course, you’ll also need your own golf clubs to play, and you’ll always prefer to purchase more courses.
#best golf simulators#best cheap golf simulators#cheap golf simulators#golf lounge 18#golf simulators#hbg golf simulator#home golf simulators#paddock golf dome simulator#picked product#proximity golf lounge#simulator league#cheap golf simulator#cheapest golf simulators#cheapest golf simulator#golf simulator home
33 notes
·
View notes
Text
How to gif without photoshop (second method)
Hello! A couple months ago I made a tutorial on how to gif without photoshop using the website ezgif. I got a really great response for it and received some requests for the other giffing program I use when I don’t have access to photoshop. The program is called instagiffer; this is a software so it needs to be downloaded but I have never had any trouble with my version.
Warning that this is VERY text and image heavy because I know how frustrating it can be when a tutorial feels like it’s skipping steps and I want this to be as clear as possible. Also please read this on desktop, tumblr mobile kills the quality of gifs inside text posts.
Please reblog if you found this helpful!
This is the video I will be giffing and here is the gif I will be making!

What you need:
Instagiffer
This program has been around since 2013 and I have used it since 2016. Unfortunately, it hasn’t been updated since 2016 and the download link on the official website is broken. That being said, there are a few other websites that still have a working download, which is what I linked to above.
ezgif
Although we aren’t going to use this website to make the gif, we are going to use it to add more color and brightness to the gif.
A video downloader
This is the video downloader I use but basically any youtube/video download website works. There are two ways to gif on instagiffer; using a video and using the built in screen recorder. I will show you how to use both.
A video to gif
This program is a lot more forgiving about video quality than ezgif is, but for best results 720p or 1080p is still the standard. Scenes with good lighting and bright colors turn out the best, but you can still make good looking gifs from darker or unsaturated scenes if you know what you’re doing.
1. Making a gif with a downloaded video
Step One: Getting the frames
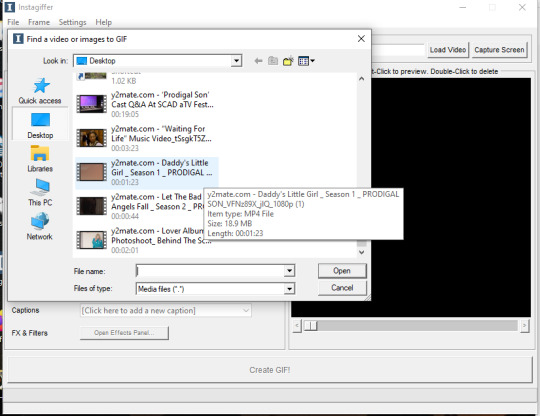
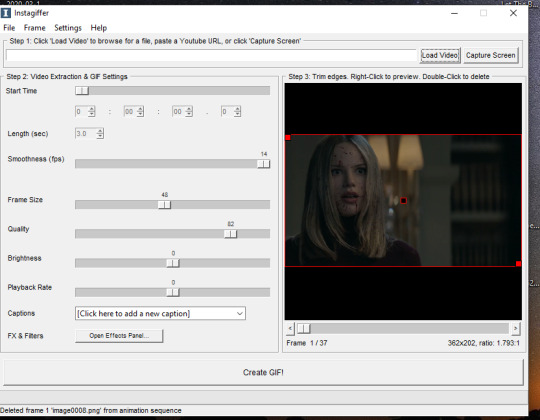
First, you download the video you want to gif. Then you open up instagiffer and click on “load video.” Scroll down until you find the video you want to gif and click on it.
The video will appear on the screen in the right hand side. Go ahead and put “smoothness” up as high as it can go. This increases the frames per second and makes the gif look smoother. It also makes the gif longer, so you may have to bring it down later so it doesn’t go over tumblr’s size limit, but I always start as high as possible then work down.
Next, find the moment in the video you want to gif. You can either use the sliding bar or just type in the start time (you can use hours, minutes, seconds, and millisecond). You also want to put how long the clip you want to gif is. 3 seconds is the default but I usually bump it up to at least 4 (unless I know it’s a really short clip) just because it’s a lot easier to delete frames than add them.
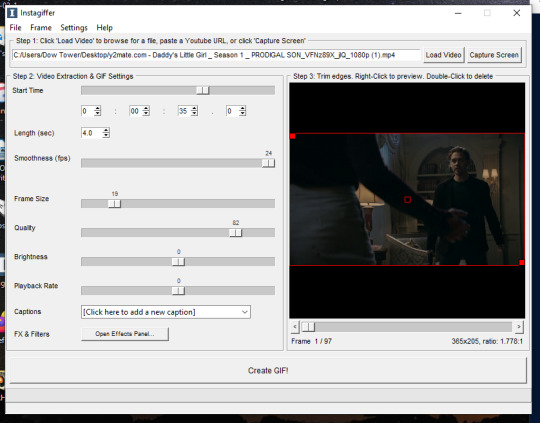
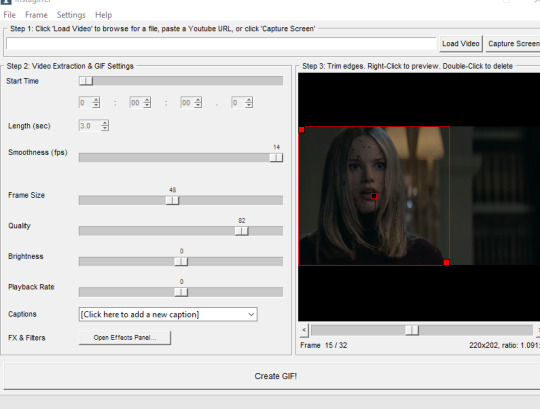
If you do this, you’ll quickly realize your gif has extra frames that appear slightly before and slightly after the moment you want to gif. It’s really easy to get rid of those frames; just click on them until you only see the frames you want in the gif. Use the scroll bar at the bottom of the gif to move around the frames, and use it to make sure the only thing on screen is the clip you want included in the gif.
Step Two: Resize the gif, brighten the gif, change the speed and add captions
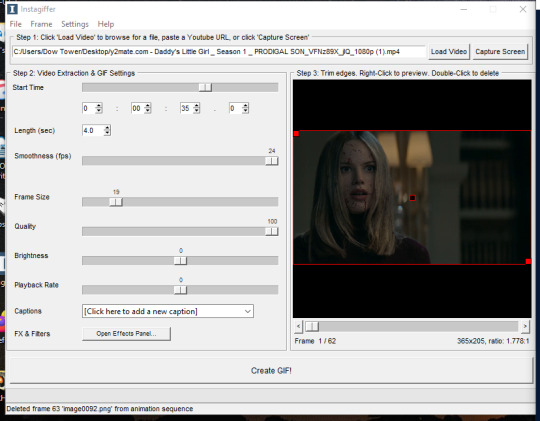
Now, it’s time to size, brighten, and color your gif! First look at the “frame size” option. Using the correct gif size for tumblr is one of the easiest ways to make sure the gif looks good. For gifs that take up a whole row, the size should be 540p wide. For two gifs in one row, the size is 268p each. For three gifs in one row, the sizes are 177p, 178p, and 177p in that order. Here is a visual of it. You can see what the width/height of the gif is in the bottom right hand corner of the gif screen. I am making this gif 268p. Get the frame size as close to the width you want as possible; right now, it is 269x151. To get it down to 268 exactly, go up to the top of the program, click on “frame” > “manual crop”. This little box will pop up. Just set the width to 268 and make sure the size is listed as 268 under the gif as well. The height can stay the same.

Keep quality up to 100 obviously. I almost always brighten by 2. Unless you’re giffing something with a huge spot of light, 2 is basically standard. Going up any higher usually makes the gif just look grainy, but if the scene is REALLY badly lit, you can go up to 3. Playback rate is usually -1, just to make the gif look smoother. Unless it’s a super long gif or a super short gif, I don’t mess with it further.
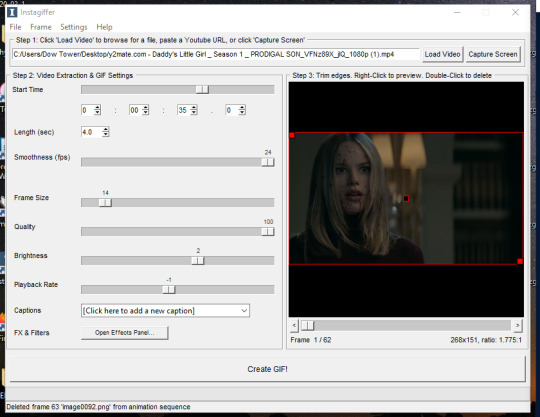
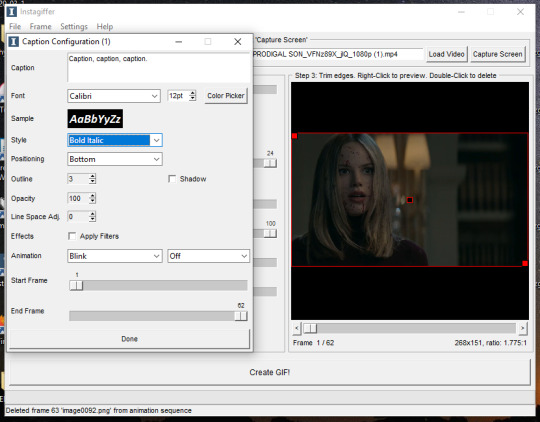
Captions are obviously optional but if you want to add one, click on “click here to add a new caption.” A box will pop up with options of how you want the text to look. I only use this to “caption” gifs (aka add dialogue). The settings I use are 12pt font, calibri, white, bold italic, bottom of gif, outline up to 3. You can also chose what frame you want the caption to start/end on if you want. Since this gif doesn’t have talking, I’m not going to include the caption in the final gif, but I wanted to show how to use this function.
Step Three: Color the gif
There are two parts to this. The first place I color the gif is on instagiffer, and then I use ezgif to add more effects. The second part is totally optional but they have more choices for coloring there.
Click on the “open effects panel”. A window will open showing what the gif currently looks like, along with a variety of filters you can use. Ignore how grainy it looks, it won’t look that way when it’s finished.

First thing is keep “enhance” up to 100. This is basically a sharpening function and without it the gif will get super blurry. There are a ton of filters you can play around with, but the only two I focus on usually are “color fade” and “colorize.” For color fade, I click it on and set it at 10. Obviously, if you’re trying to make a desaturated gifset, you can raise it up for a faded color effect, but I use it more for color balance than desaturation. Next click on colorize, and then color picker.
I almost always pick a light shade of blue, purple or pink; it brings out the color in the gif and tends to keep skin tones from being washed out. This is usually my default:
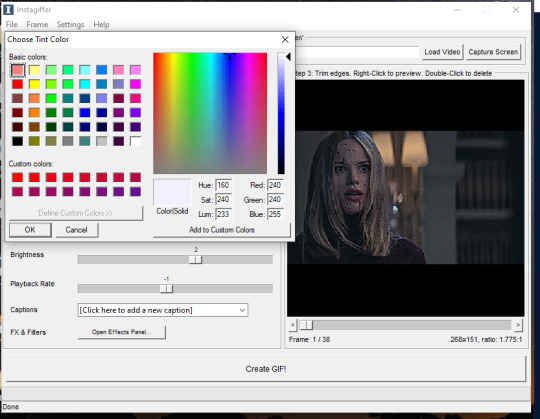
Then, I bring the “colorize” option down to 90 to increase the effects of shadows.
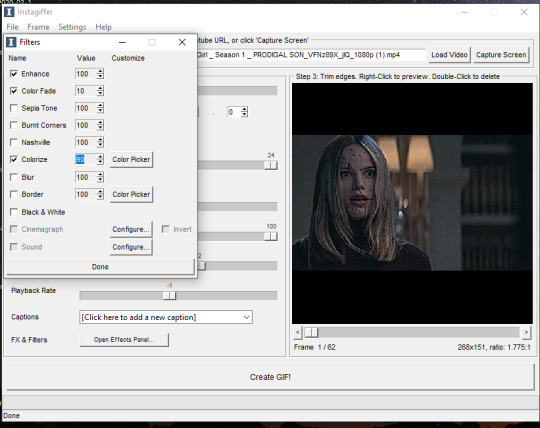
Last thing to do is click create gif! It’ll take a few seconds, especially for longer gifs, so be patient. ALSO there is a good chance you’re going to get a message saying something to the effect of “this gif is too big for tumblr’s photo limit.” Feel free to ignore that; the software being old means it still has the photo limit as 2gb when now it is 5-6gb so almost any gif you make will be considered “too big.”
Your gif now shows up in a preview tab! It should also show up as a file labeled “insta” on your desktop.
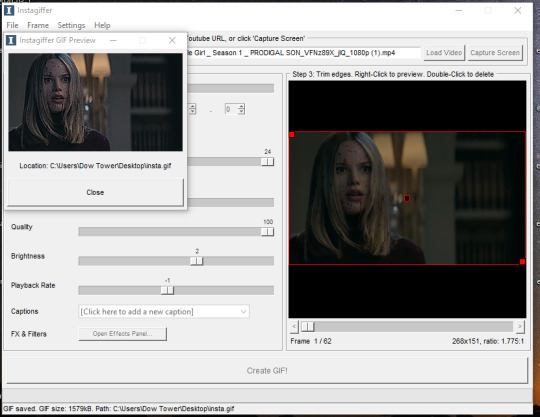
Here is the gif so far.

You can end here if you want. But when using instagiffer, I always go to ezgif to brighten up the colors further.
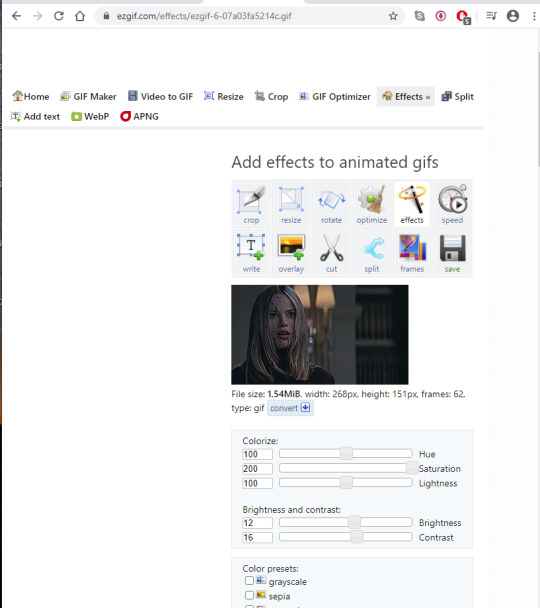
This part is basically the same as how you would color a gif you made in ezgif (see this tutorial) but I’ll quickly walk through what I do.
Go to ezgif.com/effects. Click chose file and upload your gif. First, you’re going to want to up the saturation, brightness, and contrast. You have to play around with these functions a lot because every scene is different, but in general, I have my saturation up pretty high and my brightness and contrast at at least 8. For a scene as dark and desaturated as this, I put saturation at 200, brightness at 12, and contrast at 16.
Afterwards, you want to go down to “color presets” and select “tint.” In my other tutorial, I recommended tinting with a light red or light blue, but for gifs made on instagiffer, I tend to use a light yellow/gold. I already tinted the gif purple in instagiffer so adding yellow in ezgif tends to balance it out. The shade I used for this gif is #fffcf0.
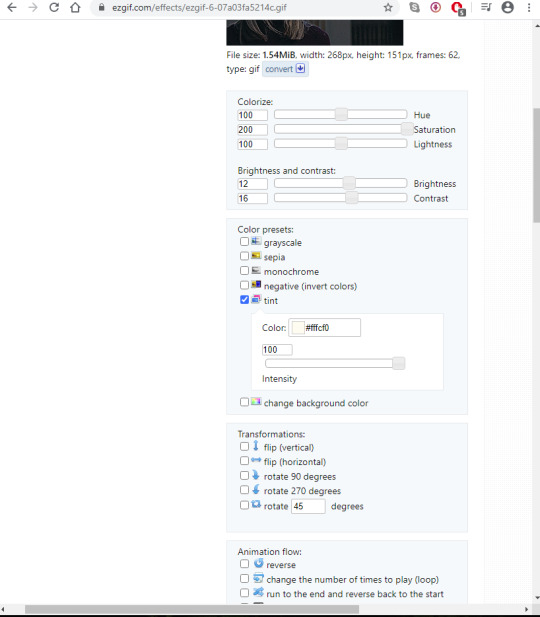
If the gif ends up looking too yellow, either decrease saturation, or click the “effects” button under the gif and add a layer of light purple to balance the colors more.
Your final gif should look like this.
2. Making a gif with the “capture screen” feature
This only changes the method of how you get gif frames. Everything related to resizing, coloring/effects, and adding captions is the same as above.
What if you don’t have a download of the thing you want to gif? The great thing about instagiffer is it has a built in screen recorder so you can gif any video you want, even if you can’t download it (or if you’re like me and don’t want to deal with downloading a 45 minute episode of something just to gif one scene).
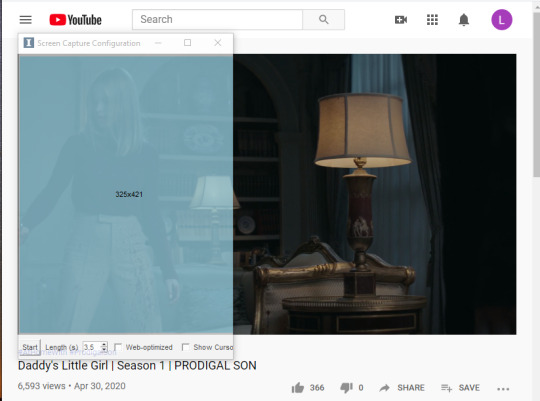
To use this tool, click on the “capture screen” button on the top right corner next to “load video.” Then this screen will pop up.
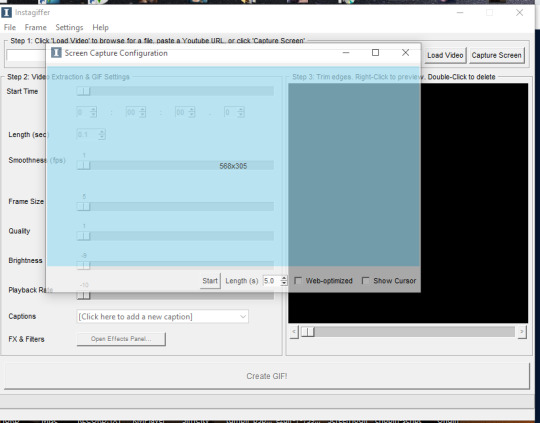
You’re going to want to take this blue screen over to the screen you want to capture. I’m going to put it over the youtube video I am giffing. Adjust it so the only thing it’s focused on is the video and set the length in seconds. I usually set it for longer than the clip is just because it’s easier to remove extra frames than rerecord a scene. There is also sometimes a lag so starting it right before the scene you want to gif helps with that. For example, if the clip I’m giffing is 3 seconds long, I set it to 3.5. Then start running the video and click “start” on the screen!
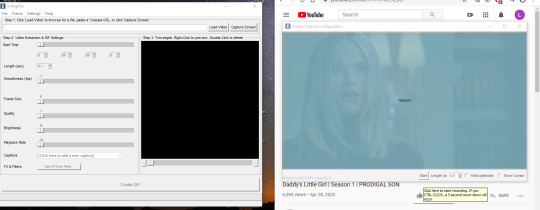
Your frames will now show up on instagiffer. Everything is the same, except you can’t change the frame rate or timing. Go ahead and delete frames that you don’t need by clicking on them. After that, just use the same resizing, and coloring method I outlined above.
Some notes:
When using the video download option, the effects you use will save, as will the size of the gif. So if you gif one part of a video, then move the time stamp to another part, it will stay in whatever size you put the gif as. However, when using screen capture, you have to resize the gif and go to the effects menu each time because they reset after each use of the screen recorder.
You can also just paste a youtube link into the white bar at the top of instagiffer to gif it, but I’ve found that the quality is much better if you download or use the capture screen.
To crop a gif, move the red box around (just make sure it stays the right width size!)
If you are using the screen recorder and only want to record part of the video (like just a characters outfit) size the gif recorder so it’s just surrounding the part of the video you want to see.
I hope this made sense lol, it took me a few days to write it all so please let me know if you have questions or need anything clarified! Support me on Ko-Fi if you’d like and are able 💕💕💕
#gif tutorial#giffing tutorial#giffing#gifmaking#mine#my gifs#blood //#long post#@ anon hope this helps!
85 notes
·
View notes
Text
Best 3D Scanners in 2025: Top Picks for Professionals and Hobbyists
As technology continues to evolve, 3D scanners have become essential tools across industries—from engineering and design to healthcare, education, and gaming. Whether you're reverse-engineering parts, creating digital twins, or enhancing your 3D printing workflow, choosing the best 3D scanner is crucial for accuracy, efficiency, and usability.
In this article, we will explore the best 3D scanners in 2025, covering a range of budgets and use cases. We’ll also help you understand key features, top brands, and buying tips to make an informed decision.
🔍 What Is a 3D Scanner?
A 3D scanner is a device that analyzes a real-world object or environment to collect data on its shape and appearance. The collected data is then used to construct digital 3D models. These models can be used for reverse engineering, 3D printing, virtual reality, gaming, animation, and more.
🏆 Top 10 Best 3D Scanners in 2025
1. Artec Leo – Best Overall Professional 3D Scanner
Price: $$$$ Technology: Structured Light Accuracy: Up to 0.1 mm Scanning Speed: 3 million points/sec Best For: Industrial design, forensics, medical, and art preservation
Why It’s the Best: The Artec Leo is a wireless 3D scanner with a built-in screen and onboard processing. It’s perfect for professionals who need high-speed scanning without tethering to a PC.
Pros:
Real-time feedback
High accuracy
Portable and wireless
Cons:
Expensive
Requires a learning curve
2. Shining 3D EinScan H2 – Best Hybrid 3D Scanner
Price: $$$ Technology: Hybrid (LED + Infrared) Accuracy: Up to 0.05 mm Best For: Face scanning, medical, cultural heritage
The EinScan H2 uses infrared and structured light, making it ideal for color texture capturing and scanning humans. Its hybrid capability ensures flexibility and reliability.
Pros:
Great color capture
Smooth face and body scans
Plug-and-play
Cons:
Not ideal for tiny objects
3. Revopoint POP 3 – Best Budget 3D Scanner
Price: $500–$700 Technology: Infrared Accuracy: Up to 0.05 mm Best For: Beginners, hobbyists, small parts
The POP 3 is one of the best 3D scanners under $1,000. It’s portable, USB-powered, and compatible with Windows, macOS, and mobile platforms.
Pros:
Affordable
High-resolution for the price
Works on battery or USB
Cons:
Struggles with reflective surfaces
Needs good lighting
4. Creality CR-Scan Ferret – Best for Beginners
Price: $300–$500 Technology: Structured Light Accuracy: 0.1 mm Best For: Entry-level scanning
This affordable 3D scanner from Creality is simple and effective for those just getting into 3D scanning for 3D printing or personal projects.
Pros:
Low cost
Simple operation
Mobile scanning
Cons:
Lower scan detail
Limited software features
5. Artec Eva – Best for Fast Professional Scanning
Price: $$$$ Technology: Structured Light Accuracy: Up to 0.1 mm Best For: Rapid prototyping, industrial applications
The Artec Eva is a staple in many industries. Known for its speed and versatility, it works great with medium to large objects.
Pros:
Fast data capture
No targets or calibration required
Lightweight
Cons:
Not ideal for very small objects
High price
6. Matter and Form V2 – Best Desktop 3D Scanner
Price: $$ Technology: Laser triangulation Accuracy: 0.1 mm Best For: Desktop use, education, and design
If you’re looking for a compact, plug-and-play 3D scanner, the Matter and Form V2 offers reliability and accuracy in a stylish foldable design.
Pros:
Sleek, compact
Good value
Easy to use
Cons:
Limited scan volume
Slower than handheld models
7. Scan Dimension SOL PRO – Best for Small Object Precision
Price: $$ Technology: Structured Light Accuracy: 0.05 mm Best For: Jewelry, small mechanical parts
Ideal for ultra-precise scans, the SOL PRO offers industrial-level accuracy in a desktop setup. It’s excellent for reverse engineering and precision modeling.
Pros:
High precision
Dual-axis rotation
Excellent texture capture
Cons:
Limited object size
Software needs improvement
8. Polyga Compact S1 – Best for Industrial Metrology
Price: $$$$ Technology: Structured Light Accuracy: Up to 0.035 mm Best For: Metrology, inspection, QA
Used in industrial applications, Polyga scanners deliver top-tier scanning performance for professionals who need high-accuracy 3D scanning.
Pros:
Incredible precision
Professional-grade output
Durable build
Cons:
Very expensive
Complex setup
9. Peel 3D Peel 3.CAD – Best for Reverse Engineering
Price: $$$ Technology: Structured Light Accuracy: 0.1 mm Best For: Engineering, mechanical design
Built for engineers, Peel 3.CAD includes mesh editing and CAD tools. It bridges the gap between scanning and CAD modeling seamlessly.
Pros:
Integrated CAD tools
Intuitive software
Great accuracy
Cons:
Requires powerful PC
Steep learning curve
10. Phiz 3D Scanner – Best Smartphone-Compatible Scanner
Price: $$ Technology: Photogrammetry Accuracy: 0.2 mm Best For: DIYers, students, creators
The Phiz 3D scanner converts your smartphone into a capable scanning device. It’s portable, cost-effective, and perfect for hobbyists.
Pros:
Uses your phone
Portable and affordable
Ideal for simple projects
Cons:
Lower detail
Limited professional application
🔑 Key Features to Look for in the Best 3D Scanners
When choosing the best 3D scanner, consider the following factors:
✅ Accuracy
High-precision scanners (0.01–0.1 mm) are essential for professional work such as metrology and engineering.
✅ Resolution
The resolution affects how detailed your 3D scan will be. The finer the resolution, the more precise the mesh.
✅ Scanning Volume
Make sure the scanner can capture the size of your intended objects—from tiny gears to full human bodies.
✅ Speed
Faster scanners are crucial for industrial environments where time efficiency matters.
✅ Portability
For fieldwork or on-site applications, wireless and handheld 3D scanners offer flexibility.
✅ Software Compatibility
Great hardware needs equally good software. Look for easy-to-use, feature-rich software that supports mesh editing and file export formats like STL, OBJ, or PLY.
📈 Applications of 3D Scanners
Reverse Engineering: Recreate broken or legacy parts.
Quality Control: Inspect manufactured parts for tolerance.
3D Printing: Convert real objects into printable models.
Healthcare: Orthotics, prosthetics, dental impressions.
Education: STEM training and digital modeling.
Gaming & Animation: Create 3D characters and assets.
🛠️ Best 3D Scanner Brands to Trust in 2025
Artec 3D – High-end scanners with pro features
Shining 3D – Reliable, mid-range options for professionals
Revopoint – Best value for money
Creality – Budget-friendly and beginner focused
Peel 3D – Great for engineers and reverse engineering
Matter and Form – Compact and educational models
Polyga – Precision scanners for industrial use
💬 Final Thoughts: Which Is the Best 3D Scanner for You?
The best 3D scanners depends on your budget, application, and desired accuracy. For professionals who demand top performance, the Artec Leo or Polyga Compact S1 are excellent choices. Beginners may find the Creality CR-Scan Ferret or Revopoint POP 3 more accessible and affordable.
Regardless of your choice, today’s 3D scanning technology offers remarkable precision and ease of use—making it a smart investment for professionals, hobbyists, educators, and makers alike.
📌 Frequently Asked Questions (FAQs)
Q1: What is the best 3D scanner for 3D printing?
Revopoint POP 3 and Shining 3D EinScan H2 are great for creating printable 3D models.
Q2: Can 3D scanners scan living humans?
Yes, scanners like the EinScan H2 or Artec Eva are safe and effective for scanning humans, including faces and full bodies.
Q3: Are cheap 3D scanners worth it?
Yes, budget models like the Creality CR-Scan Ferret offer decent quality for beginners and DIY users.
Q4: What file formats do 3D scanners export?
Most scanners export in STL, OBJ, or PLY formats, which are compatible with 3D printers and CAD software.
0 notes
Text
Codec All In One For Mac Os

by Christine Smith • 2020-09-21 16:03:20 • Proven solutions
Codec All In One For Mac Os Catalina
Codecs For Mac Os X
Wmv Codec For Mac
For watching your favorite movies and videos on PC/Mac in high quality, an excellent MP4 player is essential. Your computer might have a default media player, but a third-party player offers a compact interface, high-quality video playback, and other useful and practical functions. There are different types of MP4 player for Windows and Mac. To help you make a choice, listed below are the top-rated ones.
Part 1. Top 5 MP4 Players on Windows 10/8/7
There is no dearth of MP4 player download options for Windows PC. These players support different versions of the Windows OS and come with an array of features. Depending upon your player requirements, pick up the most suitable one. Listed below are the top Windows Media Player MP4:
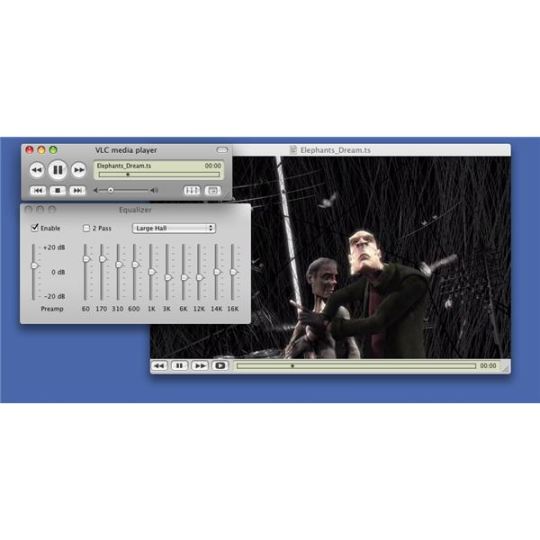
1. VLC Media Player
XviD Codec for Mac by XviD is a tool that you can't use at the moment for it hasn't been yet developed. However, here you can find similar software that enables you to compress or decompress video files in/from XviD videos. All the functions of XviD Codec for Mac can easily be substituted by any of these applications. Elmedia Player is the best free Mac video player because its playback capabilities are beyond competition. It easily reproduces all popular as well as less common media formats, such as FLV, SWF, WMV, AVI, MOV, MP4, MP3, DAT, FLAC, M4V, MPG, MKV, Blu-ray unencrypted discs and many others.
Supported Formats: Support a wide range of video and audio formats, including ASF, AVI, MP4, OGG, OGM, WAV, FLV, VOB, AAC, AC3, FLAC, and others.
VLC Media Player needs no introduction, as one of the highly rated, feature-rich players. This is a free and open-source media player that works on all platforms, including Windows, Mac, and Linux. For Windows users, the player is compatible with Windows 10/8.1/7/Vista/XP, and others. The player supports playing popular video and audio formats, DVDs, CDs, and VCDs with ease. Using the player MP4 videos encoded with MPEG-4 and H.264 can be directly played on the Windows PC without any third-party codecs. With a simple and intuitive interface, the player also allows converting files and ripping DVDs, Blu-ray, and CD to popular formats like MP4, TS, MP3, WebM, and others.
2. KM Player
Supported Formats: All mainstream video and audio formats including MPEG-4/2/1, WMV, FLV, MKV, 3GP, AVI, Quicktime, MP3, AAC, FLAC, and others. VCD and DVDs can also be played.
It is another widely used Windows MP4 player that supports the latest Windows 10 as well as other OS versions. The player has the built-in codec for the Windows 10 OS and to improve the compatibility even more; additional external codecs can be added. Almost all popular video formats, including 3D, 4K, and UHD can be played on a 5K player in high quality. The player supports an array of additional features like editing subtitles, choosing favorites, remapping the keys for remote interface, downloading video from online sites, streaming audio and video through Airplay, and DLNA, and others.
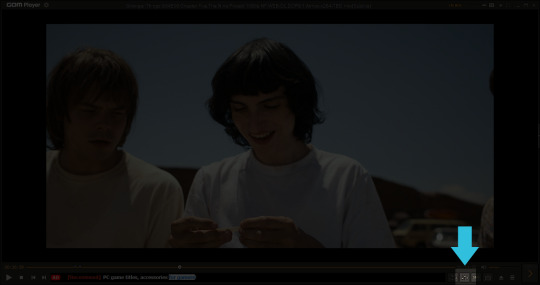
3. GOM Player
Supported Formats: All popular audio and video formats, including AVI, MKV, MP4, WMV, MOV, FLV, OGM, VOB, DAT, OGG, ASF, M1V, m2V, MP3, AAC, FLAC, WMA, RMA, and others.
Codec All In One For Mac Os Catalina
Standing for Gretech Online Movie Player, GOM is an excellent MP4 player for Windows. It is a free-to-use player that supports an array of advanced features like speed control, A-B repeat, audio and video effects, extracting audio track from the video file, Media Player Capture, screen capture, and others. If you want to get a customized look of the player, there is an option to change its skin. The library of the GOM player comes with full content that allows downloading movies, TV shows, and other content in your language. The codec finder feature of the player helps in automatically locating the missing videos.
4. Real Player
Supported Formats: All popular and widely used formats including MP4, MPEG, MOV, VOB, AVI, MPEG, RM, AAC, M4A, and others.
If you want to play MP4 on Windows 8 and other OS versions, Real Player is a good choice. This is a cross-platform player that is also compatible with Mac, Linux, Windows Mobile, and Android Mobile. Besides supported formats, plug-ins for additional format support is also available. Media streaming over the net, managing media collection, video conversion, and burning DVD and CD are some of the extra features. The player also supports downloading good quality videos from an array of sites, including YouTube, Vimeo, and others.
5. BS Player
Supported Formats: All popular audio, video, and container formats including WebM, Xvid, AVI, MPG, MPEG-1, MPEG-2, MPEG-4, 3IVX, M1V, M2V, MP4, MPV, SWF, VOB, WAV, MPA, MP1, MP2, MP3, OGG, AAC, AIF, and others.
For video playback MP4 on Windows 7 and other OS versions, BS Player is a decent choice. This is a free-to-use player that supports playing high-quality videos. The interface of the player is simple, and it costs low on CPU to facilitate video playback even on less capable PCs. The latest player version is an all-sided multimedia program that allows managing video, audio, radio programs, web-based TV, and also live streaming. Using the player, YouTube videos can be directly played and can also be saved to a local disk. The advanced subtitle feature of the player allows the user to watch their footage with subtitles in different formats. The player can also search and download the missing subtitles automatically. It also works as an AVCHD Player for playing videos recorded in digital tapeless camcorders.
Part 2. Top 3 MP4 Players Mac
There are a number of players to play MP4 on your Mac system, and choosing between them is a daunting task. To help you with the same, enlisted below are the top ones.
1. MPlayer X
Supported Formats: All popular and commonly used formats.
Compatible with Mac OS 10.7 and later OS versions, this player supports a wide range of formats and codecs. The player supports FFmpeg and MPlayer that allows playing almost all types of formats without any need for additional codec packages or plug-ins. The playback of the videos can be controlled in a simple manner through a pinch, swipe, or tap using the player. The encoding methods of the subtitle files are automatically detected and converted with the support of different languages. Graphic equalizers and video filter options are the added features.
2. DivX Player
Supported Formats: All mainstream formats, including DivX, MP4, AVI, MKV, and others.
Codecs For Mac Os X
This is a top-rated MP4 player Mac that supports playing a wide range of formats, including HD 1080p/720p and 4K UHD videos at a fast speed. The player also allows streaming online content up to 4K and can also stream your video, photos, and music files to DLNA compatible devices like tablets, PS3, Chromecast, Xbox, and others. The videos can also be converted to MP4, HEVC, MKV, and DivX format quickly and simply. The Windows version of the player is also available.
3. QuickTime Media Player for Mac
Supported Formats: All commonly used video and audio formats including MOV, MP4, M4V, MPEG-2, 3GPP, 3GPP2, AVCHD, AVI, M4A, M4B, MP3, and others.
Developed by Apple, this is the default and an acclaimed MP4 music player and video player for the Mac system. With a simple interface, the player allows high-quality video playback and also supports editing and conversion features. Using the player, you can also view HD video trailers, personal media files, and videos on the Internet. This free-to-use player does not support playing DivX and WMV formats.
Part 3. FAQs About MP4 Player
The following frequently asked questions and their solutions will help you with seamless playback of your MP4 files on Windows and Mac.
1. How to play MP4 on Windows 10?
If you are using Windows 10 OS, playing MP4 files is simple and easy. On your Windows 10 computer, select Start > File Explorer. Alternatively, you can also choose File Explorer from the taskbar. Next, choose the MP4 file that you want to play, press and hold it, and select the Open with option. A list of player applications will appear from where you choose the desired player.
2. How to solve Windows 10 won't play MP4?
There are some reasons when your MP4 file does not play on your Windows 10 PC like settings issue, compatibility issues, codec issues, a player not supporting, and others. The most straightforward solution to resolving the problems with your MP4 not playing on Windows 10 is to install any third-party software supporting the format. In the above part of the article, we have listed various players for Windows and Mac that can be used as per requirements.
If the media players can't solve your problem, you can try to use Wondershare UniConverter (originally Wondershare Video Converter Ultimate). With it, you can convert MP4 to other formats and change the video encoder as well. Meanwhile, you can trim the unplayable part of your video.
3. Can Xbox 360 play MP4?
Talking broadly, Xbox 360 supports playing MP4 file format, but not all of them. The MP4 files with H.264, MPEG-4 codec is only compatible with Xbox for playback. So if your MP4 files are in any other codec than the supported ones, they will not play on Xbox 360. To play different codecs MP4 files on Xbox 360, you need an excellent and professional video converter that supports converting them to a compatible format.
You can get a step-by-step guide to know how to play MP4 on Xbox 360 here >>.
4. How to Play MP4 on TV?
If you want to watch your MP4 computer files, there are a number of solutions for the same. Using Audio-Visual cable is the most commonly used method. But in this situation, you need to check the type, compatibility, and the ports available on your TV and computer for seamless playback. Wireless connection between PC and TV is also a solution to play your files, and for this, you would need a wireless PC to the TV conversion box. If your TV set has a USB port, you can transfer your MP4 files to a USB and then connect it to your TV and enjoy playing it. Another quick and straightforward method is to stream your MP4 content on your TV using expert software like Wondershare UniConverter. Click the link to know more about these solutions:
You can move to how to play MP4 on TV to learn more.
Wondershare UniConverter - Your Complete Video Toolbox for Windows/Mac
Convert MP4 to WMV, MKV, AVI, MOV, and other 1000 formats without quality loss.
Burn MP4 to DVD to play with your DVD player on a big TV.
Convert video to optimized conversion presets for iDVD, iMovie, Final Cut Pro.
Edit videos with advanced video editing functions like trimming, cropping, adding watermark, subtitles, etc.
Download videos from YouTube and other 10,000+ video sharing sites.
Supported OS: Windows NT4/2000/2003/XP/Vista/7/8, and Windows 10 (32 bit & 64 bit), Mac OS 10.15 (Catalina), 10.14, 10.13, 10.12, 10.11, 10.10, 10.9, 10.8, 10.7, 10.6.
Security Verified. 5,481,347 people have downloaded it.
Apple apps such as QuickTime Player, Photos, and Keynote work with many kinds of audio and video formats. Some apps prefer specific formats, but QuickTime movie files (.mov), most MPEG files (.mp4, .m4v, .m4a, .mp3, .mpg), some AVI and WAV files, and many other formats usually work in most apps without additional software.
Older or specialized media formats might not work in your app, because the format requires software designed to support it. If that happens, your app won't open the file or won't play back its audio or video.
How to search for an app that works with your file
You might already have an app that supports the format of your file. If you don't know which of your installed apps to try, your Mac might be able to suggest one:
Control-click (or right-click) the file in the Finder.
From the shortcut menu that opens, choose Open With. You should see a submenu listing all of the other installed apps that your Mac thinks might be able to open the file.
If none of your installed apps can open the file, search the Internet or Mac App Store for apps that can play or convert the file:
Include the name of the media format in your search. To find the format, select the file and press Command-I to open an Info window. The format might appear after the label Kind, such as ”Kind: Matroska Video File.”
Include the filename extension in your search. The extension is the letters shown at the end of the file's name, such as .avi,.wmv, or .mkv.
Wmv Codec For Mac
Learn more
QuickTime Player (version 10.0 and later) in OS X Mavericks through macOS Mojave converts legacy media files that use certain older or third-party compression formats.
Learn about incompatible media in Final Cut Pro X and iMovie.
1 note
·
View note
Text
Personal Budget Software Free Mac 10.6.8

Feb 03, 2020 The best budgeting apps can help you manage your money and, dare we say, even make it fun. Here are our picks for the top personal finance tools. Personal Budgeting Software for Mac and iOS. Latest News - May 7th 2020 MoneyWell 3.0.14. Taking control of your personal budget. MoneyWell is a personal finance package built around the concept of envelope budgeting. It's designed to keep you from overspending by using proactive budgeting techniques. Try MoneyWell For Free. Three Simple. Zoom Free VIEW →. Start or join a 100-person meeting with face-to-face video, high quality screen sharing, and instant messaging.
When you upgrade to macOS Catalina, you get more of everything you love about Mac. Experience dedicated apps for music, TV, and podcasts. Smart new features in the apps you use every day. And Sidecar, which lets you use iPad as a second Mac display. Best of all, upgrading is free and easy.
Chances are, your Mac can run macOS Catalina.
Mac computers with Metal-capable graphics processors (GPUs) can upgrade to macOS Catalina.
Make sure you’re ready to upgrade.
Before you upgrade, we recommend that you back up your Mac. Then, if your Mac is running OS X Mavericks 10.9 or later, you can upgrade directly to macOS Catalina.
Personal Budget Software Free Mac 10.6.8 Pc
Upgrading is free. And easier than you think.
Upgrading from macOS Mojave?
Go to Software Update in System Preferences to find the macOS Catalina upgrade. Click Upgrade Now and follow the onscreen instructions to begin your upgrade. If you don’t have broadband access, you can upgrade your Mac at any Apple Store.
Upgrading from an older version of macOS?
If you’re running High Sierra (10.13), Sierra (10.12), or El Capitan (10.11), upgrade to macOS Catalina from the App Store. If you’re running Lion (10.7) or Mountain Lion (10.8), you will need to upgrade to El Capitan (10.11) first. If you don’t have broadband access, you can upgrade your Mac at any Apple Store.
OS X 10.9 or later
4GB of memory
12.5GB of available storage (OS X El Capitan 10.11.5 or later)*
Some features require an Apple ID; terms apply.
Some features require a compatible internet service provider; fees may apply.
For details about your Mac model, click the Apple icon at the top left of your screen and choose About This Mac. These Mac models are compatible with macOS Catalina:
MacBook (Early 2015 or newer)
MacBook Air (Mid 2012 or newer)
MacBook Pro (Mid 2012 or newer)
Mac mini (Late 2012 or newer)
iMac (Late 2012 or newer)
iMac Pro (2017)
Mac Pro (Late 2013 or newer)
Siri
Requires a broadband internet connection and microphone (built-in or external).
Personal Budget Software Free Mac 10.6.8 Download
Hey Siri
Supported by the following Mac models:
MacBook Pro (2018 or newer)
MacBook Air (2018 or newer)
iMac Pro
Dictation, Voice Control, and Voice Memos
Requires a microphone (built-in or external).
Spotlight Suggestions
Requires a broadband internet connection.
Gestures
Requires a Multi-Touch trackpad, Force Touch trackpad, Magic Trackpad, or Magic Mouse.
Force Touch gestures require a Force Touch trackpad.
VoiceOver gestures require a Multi-Touch trackpad, Force Touch trackpad, or Magic Trackpad.
Photo Booth
Requires a FaceTime or iSight camera (built-in or external), or USB video class (UVC) camera.
Personal Budget Software Free Mac 10.6.8 X
FaceTime
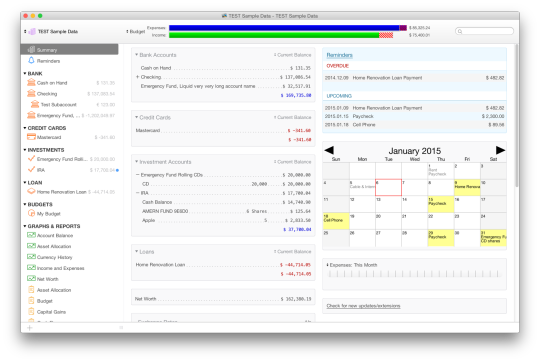
Audio calls require a microphone (built-in or external) and broadband internet connection.
Video calls require a built-in FaceTime camera, an iSight camera (built-in or external), or a USB video class (UVC) camera; and broadband internet connection.
Apple TV
High Dynamic Range (HDR) video playback is supported by the following Mac models:
MacBook Pro (2018 or newer)
iMac Pro (2017)
Mac Pro (2019) with Pro Display XDR
Dolby Atmos soundtrack playback is supported by the following Mac models:
MacBook Air (2018 or newer)
MacBook Pro (2018 or newer)
Sidecar
Supported by the following Mac models:
MacBook (2016 or newer)
MacBook Air (2018 or newer)
MacBook Pro (2016 or newer)
Mac mini (2018 or newer)
iMac (late 2015 or newer)
iMac Pro (2017 or newer)
Mac Pro (2019)
Supported by all iPad models with Apple Pencil support:
12.9-inch iPad Pro
11-inch iPad Pro
10.5-inch iPad Pro
9.7-inch iPad Pro
iPad (6th generation or later)
iPad mini (5th generation)
iPad Air (3rd generation)
Continuity Camera
Requires an iPhone or iPad with a Lightning connector and iOS 12 or later.
Continuity Sketch and Continuity Markup
Requires an iPhone with iOS 13 or an iPad with iPadOS.
Handoff
Requires an iPhone or iPad with a Lightning connector and iOS 8 or later.
Instant Hotspot
Requires an iPhone or iPad with cellular connectivity, a Lightning connector, and iOS 8.1 or later. Requires Personal Hotspot service through your carrier.
Universal Clipboard
Requires an iPhone or iPad with a Lightning connector and iOS 10 or later.
Auto Unlock
Supported by Mac models introduced in mid 2013 or later.
Requires an Apple Watch with watchOS 3 or later or an iPhone 5 or later.
Approve with Apple Watch
Supported by Mac models introduced in mid 2013 or later.
Requires an Apple Watch with watchOS 6 or later or an iPhone 6s or later with iOS 13.
Apple Pay on the Web
Requires MacBook Pro with Touch Bar, an iPhone 6 or later with iOS 10 or later, or an Apple Watch with watchOS 3 or later.
Phone Calling
Requires an iPhone with iOS 8 or later and an activated carrier plan.
SMS
Requires an iPhone with iOS 8.1 or later and an activated carrier plan.
Home
Requires an iPhone with iOS 12 or later and a configured Home app.
AirDrop
AirDrop to iOS and iPadOS devices requires an iPhone or iPad with a Lightning connector and iOS 7 or later.
AirPlay
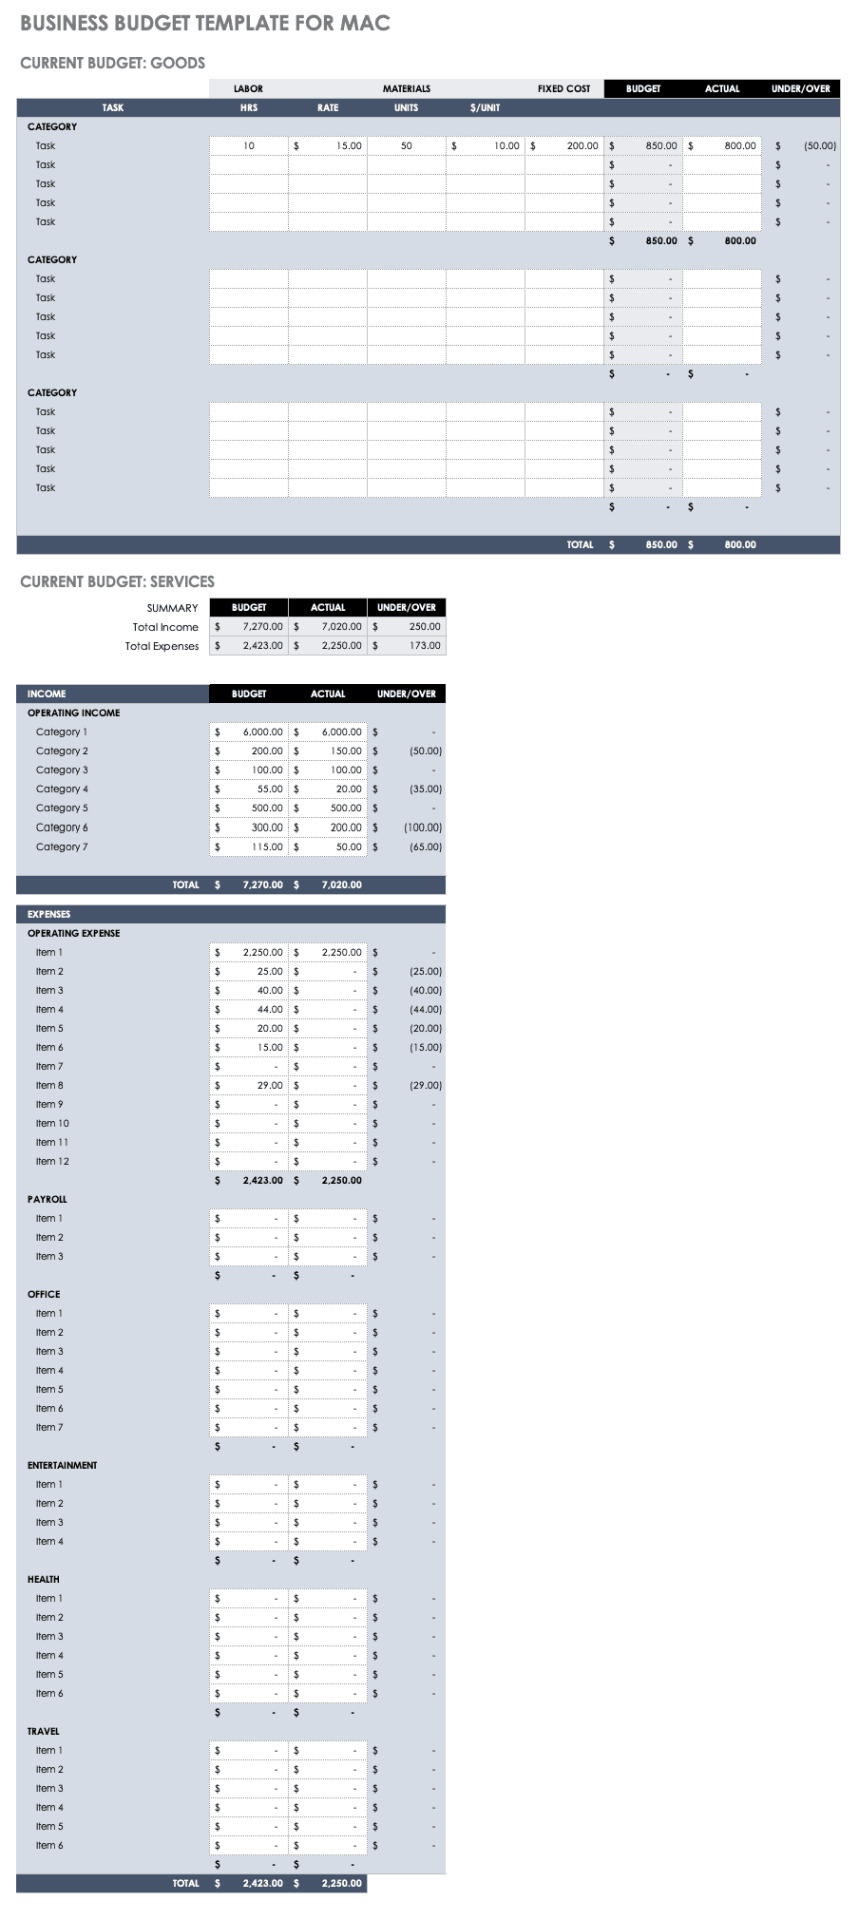
AirPlay Mirroring requires an Apple TV (2nd generation or later).
AirPlay for web video requires an Apple TV (2nd generation or later).
Peer-to-peer AirPlay requires a Mac (2012 or later) and an Apple TV (3rd generation rev A, model A1469 or later) with Apple TV software 7.0 or later.
Time Machine
Requires an external storage device (sold separately).
Power Nap
Supported by the following Mac models:
MacBook (Early 2015 or newer)
MacBook Air (Mid 2012 or newer)
MacBook Pro with Retina display (Mid 2012 or newer)
Mac mini (Late 2012 or newer)
iMac (Late 2012 or newer)
iMac Pro (2017)
Mac Pro (Late 2013 or newer)
Boot Camp
Allows Boot Camp installations of Windows 10 on supported Mac models.
Exchange Support
Requires Microsoft Office 365, Exchange 2016, Exchange 2013, or Exchange Server 2010. Installing the latest Service Packs is recommended.
Windows Migration
Supports OS X 10.7 or later and Windows 7 or later.
App Store
Available only to persons age 13 or older in the U.S. and many other countries and regions.
Apple Books
Apple News
App Store
Automator
Calculator
Calendar
Chess
Contacts
Dictionary
DVD Player
FaceTime
Find My
Font Book
Home
Image Capture
Launchpad
Mail
Maps
Messages
Mission Control
Music
Notes
Photo Booth
Photos
Podcasts
Preview
QuickTime Player
Reminders
Safari
Siri
Stickies
Stocks
System Preferences
TextEdit
Time Machine
TV
Voice Memos
Activity Monitor
AirPort Utility
Audio MIDI Setup
Bluetooth File Exchange
Boot Camp Assistant
ColorSync Utility
Console
Digital Color Meter
Disk Utility
Grapher
Keychain Access
Migration Assistant
Screenshot
Screen Time
Script Editor
Sidecar
System Information
Terminal
VoiceOver Utility
Arabic
Catalan
Croatian
Simplified Chinese
Traditional Chinese
Traditional Chinese (Hong Kong)
Czech
Danish
Dutch
English (Australia)
English (UK)
English (U.S.)
Finnish
French
French (Canada)
German
Greek
Hebrew
Hindi
Hungarian
Indonesian
Italian
Japanese
Korean
Malay
Norwegian
Polish
Brazilian Portuguese
Portuguese
Romanian
Russian
Slovak
Spanish
Spanish (Latin America)
Swedish
Thai
Turkish
Ukrainian
Vietnamese
1 note
·
View note
Text
Top 5 Best Free Video Editing Software[Without Watermarks]
Marketing professionals in today’s competitive platform are making efforts to attract audiences towards their products and services by transforming their raw footage into stunning videos; ordinary users need to share with friends about what is happening on platforms such as YouTube, Facebook, Instagram, Vimeo.
Here is the top 5 best video editing software which you can use in your dailylife:
#1.Lightworks - Free Video Editor for Professionals
Compatibility: Windows, Mac and Linux

For over 25 years Lightworks editor has been at the forefront of film editing, having been used on many of the finest films in cinema history: The Wolf of Wall Street, LA Confidential, Pulp Fiction, Heat, Road to Perdition, Hugo, The King’s Speech and many more! Now with the release of Lightworks 2020 we have created the complete video creative package so everyone can make video that stands out from the crowd. Whether you need to make video for social media, YouTube or for a 4K film project, Lightworks makes it all possible!
Lightworks comes loaded with these amazing features:
Simple & intuitive User Interface
Access amazing royalty-free audio & video content
Easy timeline editing & trimming
Lo-Res Proxy workflows for 4K
Real time ready to use audio & video FX
Export video for YouTube/Vimeo, SD/HD, up to 4K
Wide file format support including variable frame rate media
Grade your sequence professionally utilising up to 32bit GPU precision and histogram tool
#2.Shotcut- Open source Free Video Editor
Compatibility: Windows, Mac, and Linux
Siri Shortcuts deliver a quick way to get things done with your apps with just a tap or by asking Siri. The Shortcuts app enables you to create personal shortcuts with multiple steps from your favorite apps. Start from hundreds of examples in the Gallery or drag and drop to create your own. Shortcuts includes over 300 built-in actions and works with many of your favorite apps including Contacts, Calendar, Maps, Music, Photos, Camera, Reminders, Safari, Health as well as any app that supports Siri Shortcuts.
Use the Shortcuts app to:
* Get directions home, send your ETA and start listening to the news, just by asking Siri
* Add a home screen icon that calls a loved one
* Make animated GIFs
* Make PDFs from Safari or any app with a share sheet
* Get directions to the nearest coffee shop in one tap
* Tweet the song you're listening to
* Get all of the images on a web page
* Send a message including the last screenshot you took
* And so much more...
#3.VSDC Free Video Editor- Free Video Editor for Beginners [No watermark]
Compatibility: Windows
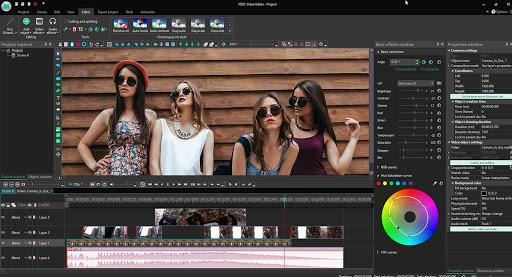
This free multimedia suite brings a set of tools for editing video, improving audio, recording voice , capturing desktop screen, and more.
Feature of VSDC Free video Editor:
All the popular video/audio formats and codecs supported.
Powerful chroma key tool to remove green background
A large set of trendy video effects, filters and transitions
Convenient export profiles that make saving videos for various devices a snap.
Lowest system requirements possible- VSDS works even on outdated PCs!
#4.OpenShot - Open Source Free Video Editor for Beginners
Compatibility: Windows, Mac, Linux
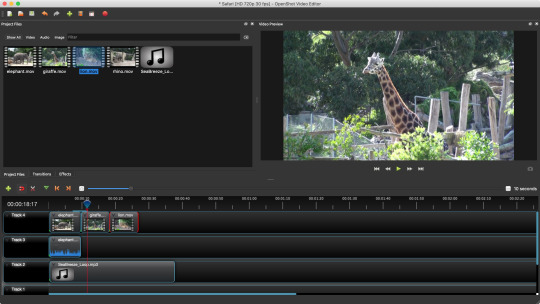
Features
Cross-Platform
Trim & Slice
Animation & Keyframes
Unlimited Tracks
Video Effects
Audio Waveforms
#5.Blender- Free 3D Creation Video Editor for Professionals
Compatibility: Windows, Mac, and Linux
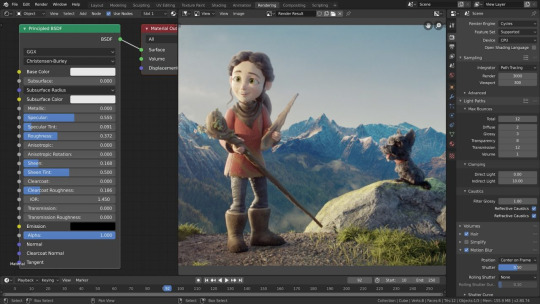
Blender is the free and open source 3D creation suite. It supports the entirety of the 3D pipeline—modeling, rigging, animation, simulation, rendering, compositing and motion tracking, video editing and 2D animation pipeline
#freevideoeditingsoftware#freevideoeditingsoftwareformacnowatermark#freevideoeditingsoftwares#freevideoeditingsoftwarewithoutwatermark#freevideoeditingtools#freevideoediting#freevideoeditingsoftwaremac#freevideoeditingsoftwaredownload#freevideoeditingsoftwareforwindows#freevideoeditingapps#freevideoeditingsoftwarepc#inshot#inshotvideo#videoeditingapps#videoediting
2 notes
·
View notes
Text
Best 3D Scanners in 2025: Top Picks for Professionals and Hobbyists
As technology continues to evolve, 3D scanners have become essential tools across industries—from engineering and design to healthcare, education, and gaming. Whether you're reverse-engineering parts, creating digital twins, or enhancing your 3D printing workflow, choosing the best 3D scanner is crucial for accuracy, efficiency, and usability.
In this article, we will explore the best 3D scanners in 2025, covering a range of budgets and use cases. We’ll also help you understand key features, top brands, and buying tips to make an informed decision.
🔍 What Is a 3D Scanner?
A 3D scanner is a device that analyzes a real-world object or environment to collect data on its shape and appearance. The collected data is then used to construct digital 3D models. These models can be used for reverse engineering, 3D printing, virtual reality, gaming, animation, and more.
🏆 Top 10 Best 3D Scanners in 2025
1. Artec Leo – Best Overall Professional 3D Scanner
Price: $$$$ Technology: Structured Light Accuracy: Up to 0.1 mm Scanning Speed: 3 million points/sec Best For: Industrial design, forensics, medical, and art preservation
Why It’s the Best: The Artec Leo is a wireless 3D scanner with a built-in screen and onboard processing. It’s perfect for professionals who need high-speed scanning without tethering to a PC.
Pros:
Real-time feedback
High accuracy
Portable and wireless
Cons:
Expensive
Requires a learning curve
2. Shining 3D EinScan H2 – Best Hybrid 3D Scanner
Price: $$$ Technology: Hybrid (LED + Infrared) Accuracy: Up to 0.05 mm Best For: Face scanning, medical, cultural heritage
The EinScan H2 uses infrared and structured light, making it ideal for color texture capturing and scanning humans. Its hybrid capability ensures flexibility and reliability.
Pros:
Great color capture
Smooth face and body scans
Plug-and-play
Cons:
Not ideal for tiny objects
3. Revopoint POP 3 – Best Budget 3D Scanner
Price: $500–$700 Technology: Infrared Accuracy: Up to 0.05 mm Best For: Beginners, hobbyists, small parts
The POP 3 is one of the best 3D scanners under $1,000. It’s portable, USB-powered, and compatible with Windows, macOS, and mobile platforms.
Pros:
Affordable
High-resolution for the price
Works on battery or USB
Cons:
Struggles with reflective surfaces
Needs good lighting
4. Creality CR-Scan Ferret – Best for Beginners
Price: $300–$500 Technology: Structured Light Accuracy: 0.1 mm Best For: Entry-level scanning
This affordable 3D scanner from Creality is simple and effective for those just getting into 3D scanning for 3D printing or personal projects.
Pros:
Low cost
Simple operation
Mobile scanning
Cons:
Lower scan detail
Limited software features
5. Artec Eva – Best for Fast Professional Scanning
Price: $$$$ Technology: Structured Light Accuracy: Up to 0.1 mm Best For: Rapid prototyping, industrial applications
The Artec Eva is a staple in many industries. Known for its speed and versatility, it works great with medium to large objects.
Pros:
Fast data capture
No targets or calibration required
Lightweight
Cons:
Not ideal for very small objects
High price
6. Matter and Form V2 – Best Desktop 3D Scanner
Price: $$ Technology: Laser triangulation Accuracy: 0.1 mm Best For: Desktop use, education, and design
If you’re looking for a compact, plug-and-play 3D scanner, the Matter and Form V2 offers reliability and accuracy in a stylish foldable design.
Pros:
Sleek, compact
Good value
Easy to use
Cons:
Limited scan volume
Slower than handheld models
7. Scan Dimension SOL PRO – Best for Small Object Precision
Price: $$ Technology: Structured Light Accuracy: 0.05 mm Best For: Jewelry, small mechanical parts
Ideal for ultra-precise scans, the SOL PRO offers industrial-level accuracy in a desktop setup. It’s excellent for reverse engineering and precision modeling.
Pros:
High precision
Dual-axis rotation
Excellent texture capture
Cons:
Limited object size
Software needs improvement
8. Polyga Compact S1 – Best for Industrial Metrology
Price: $$$$ Technology: Structured Light Accuracy: Up to 0.035 mm Best For: Metrology, inspection, QA
Used in industrial applications, Polyga scanners deliver top-tier scanning performance for professionals who need high-accuracy 3D scanning.
Pros:
Incredible precision
Professional-grade output
Durable build
Cons:
Very expensive
Complex setup
9. Peel 3D Peel 3.CAD – Best for Reverse Engineering
Price: $$$ Technology: Structured Light Accuracy: 0.1 mm Best For: Engineering, mechanical design
Built for engineers, Peel 3.CAD includes mesh editing and CAD tools. It bridges the gap between scanning and CAD modeling seamlessly.
Pros:
Integrated CAD tools
Intuitive software
Great accuracy
Cons:
Requires powerful PC
Steep learning curve
10. Phiz 3D Scanner – Best Smartphone-Compatible Scanner
Price: $$ Technology: Photogrammetry Accuracy: 0.2 mm Best For: DIYers, students, creators
The Phiz 3D scanner converts your smartphone into a capable scanning device. It’s portable, cost-effective, and perfect for hobbyists.
Pros:
Uses your phone
Portable and affordable
Ideal for simple projects
Cons:
Lower detail
Limited professional application
🔑 Key Features to Look for in the Best 3D Scanners
When choosing the best 3D scanner, consider the following factors:
✅ Accuracy
High-precision scanners (0.01–0.1 mm) are essential for professional work such as metrology and engineering.
✅ Resolution
The resolution affects how detailed your 3D scan will be. The finer the resolution, the more precise the mesh.
✅ Scanning Volume
Make sure the scanner can capture the size of your intended objects—from tiny gears to full human bodies.
✅ Speed
Faster scanners are crucial for industrial environments where time efficiency matters.
✅ Portability
For fieldwork or on-site applications, wireless and handheld 3D scanners offer flexibility.
✅ Software Compatibility
Great hardware needs equally good software. Look for easy-to-use, feature-rich software that supports mesh editing and file export formats like STL, OBJ, or PLY.
📈 Applications of 3D Scanners
Reverse Engineering: Recreate broken or legacy parts.
Quality Control: Inspect manufactured parts for tolerance.
3D Printing: Convert real objects into printable models.
Healthcare: Orthotics, prosthetics, dental impressions.
Education: STEM training and digital modeling.
Gaming & Animation: Create 3D characters and assets.
🛠️ Best 3D Scanner Brands to Trust in 2025
Artec 3D – High-end scanners with pro features
Shining 3D – Reliable, mid-range options for professionals
Revopoint – Best value for money
Creality – Budget-friendly and beginner focused
Peel 3D – Great for engineers and reverse engineering
Matter and Form – Compact and educational models
Polyga – Precision scanners for industrial use
💬 Final Thoughts: Which Is the Best 3D Scanner for You?
The best 3D scanners depends on your budget, application, and desired accuracy. For professionals who demand top performance, the Artec Leo or Polyga Compact S1 are excellent choices. Beginners may find the Creality CR-Scan Ferret or Revopoint POP 3 more accessible and affordable.
Regardless of your choice, today’s 3D scanning technology offers remarkable precision and ease of use—making it a smart investment for professionals, hobbyists, educators, and makers alike.
📌 Frequently Asked Questions (FAQs)
Q1: What is the best 3D scanner for 3D printing?
Revopoint POP 3 and Shining 3D EinScan H2 are great for creating printable 3D models.
Q2: Can 3D scanners scan living humans?
Yes, scanners like the EinScan H2 or Artec Eva are safe and effective for scanning humans, including faces and full bodies.
Q3: Are cheap 3D scanners worth it?
Yes, budget models like the Creality CR-Scan Ferret offer decent quality for beginners and DIY users.
Q4: What file formats do 3D scanners export?
Most scanners export in STL, OBJ, or PLY formats, which are compatible with 3D printers and CAD software.
0 notes
Note
can you please make an updated version of how you make your gifs? pretty please!
Hello, yes I can! This is my new and improved tutorial. Here is the link to my previous tutorial, in case you don’t like this way of making gifs.
As I’ve said before, I’m not an expert in gif-making, so this is not by any means the “correct” way of making them. This is just how I do it! If I’m unclear on a step, feel free to message me and I’ll clarify it for you :-)
This is the gif I will be teaching you how to make:

Let’s do this! If this is your first time making gifs, you’ll need three things: a software to play your videos, any version of Photoshop, and lots of patience. Have these three things and you’re golden.
This tutorial will be explained through the softwares I use. I use KMPlayer to catch the screencaps of my gifs and Photoshop CC 2017 to create them. Unfortunately, I don’t have any reliable way of finding a free download for Photoshop (you just have to search around and hope for the best, but I find that Tumblr can hook you up sometimes). However, here is the link for KMPlayer! Once you have these two softwares, you’re ready to go!
Step 1: Find the video you want to gif
Regardless if it’s a Youtube video or anime episode, find a direct download link to the video. Some reliable websites for anime episodes are kissanime, gogoanime, or animeultima. Search for the video, right click, click save video as, and place it in a folder you can find. Important: For clear gifs, download videos that are 1080p, but 720p will work too.
You can also download a torrent (this is the best website to find them) but you will also have to install UTorrent to actually watch the video. Torrents are pretty nice since you can add/remove the subtitles or any text. This is especially helpful when an anime episode only is available subbed. With direct downloads, you may be stuck with some text you don’t want. But it’s all up to your preference, of course!
Step 2: Open the video in KMPlayer
Once it’s all downloaded and ready to open, pick a scene you want to gif. If you downloaded a torrent, you can remove the subtitles by pressing Ctrl+X.
Now, go back a few seconds before the scene and pause the video. Press ctrl+G and Frame Extraction will appear. I prefer to use the default settings. It should look like this:
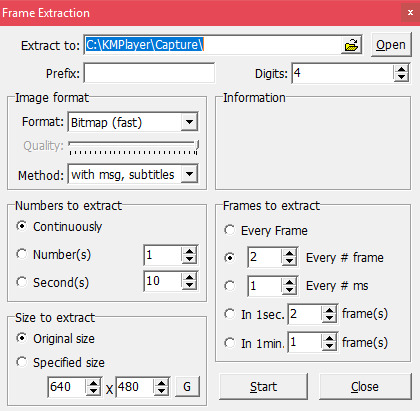
Step 3: Capture the screencaps
As soon as you click Start, KMPlayer will capture each frame from the second you play the video. This is why I advise playing the video a few seconds before your preferred scenes since you don’t want to miss any frames.
When you are ready, click Start and play the video. After capturing the frames, click Stop and pause the video. Your screencaps will be in your Capture folder. It should look like this:
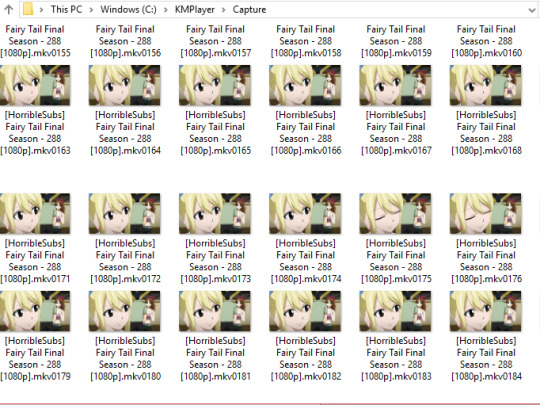
Step 4: Open Photoshop
Now it’s time for the nitty gritty, so sit tight and get ready. Again, I am using Photoshop CC 2017. Every PS version is different, so there may be some slight differences. But for the most part, making gifs should be similar.
On the top left corner, click File -> Scripts -> Load Files into Stack… A box will appear that looks like this:
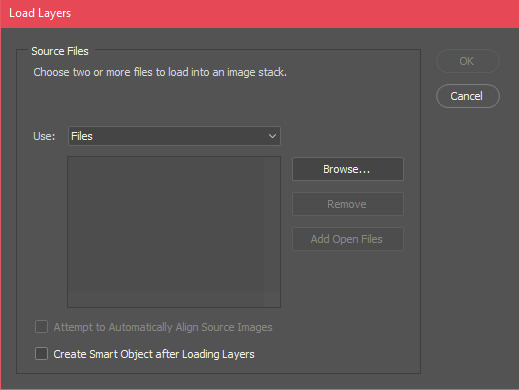
Click Browse and you should be directed to your Capture folder. If not, find the folder where your screencaps are saved. Choose the screencaps you’d like to import. I like to start with one screencap and while holding the shift key click the last screencap. It will select all the screencaps in between them. Important: The more screencaps you select, the larger the gif will be. Be mindful how much you want gif. Normally, gifs will be 30-40 screencaps.
After selecting your screencaps, click Open and the box will reappear. It should have your screencaps loaded and look like this:
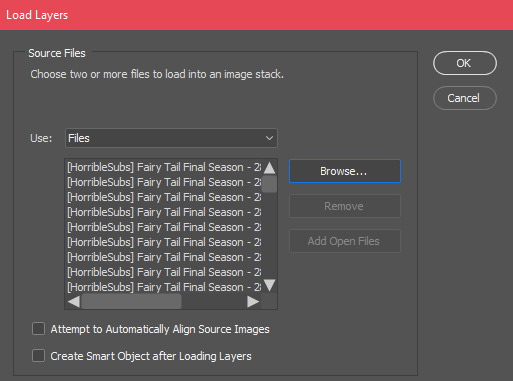
Click OK and watch your frames load.
Step 5: Get your frames situated
If you do not have your Timeline opened, go to Window -> Timeline. If It’s already opened, click Create Frame Animation. Important: Do not click Video Timeline. The box should look like this:

Once you’ve clicked it, a single frame will be in your timeline. Your screen should now look like this:
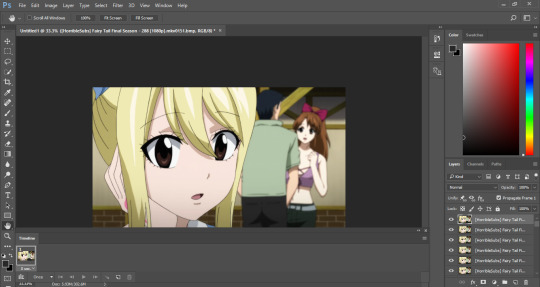
Next, there’s a little box on the bottom right that will cause a menu to appear. It’s small but it’s there! You’ll be using it a few times after this. Here is where it is:
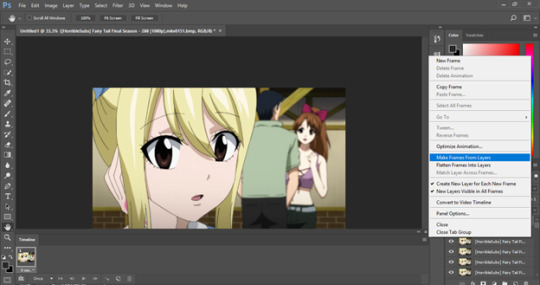
Click Make Frames From Layers, the highlighted option in the picture. Now your Timeline should look like this:
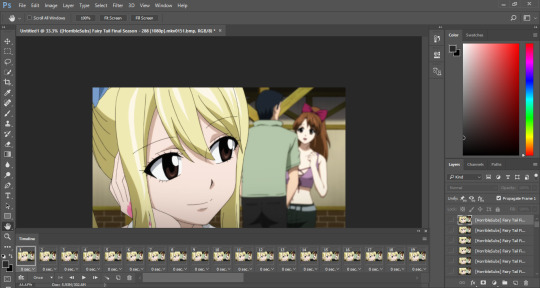
All of the screencaps that you chose will appear in your Timeline, but in frame form. For some reason, PS likes to reverse all the frames once you import it. To correct your frames in order, click the little box from before on the right again and click Reverse Frames. Now your screen should look like this:
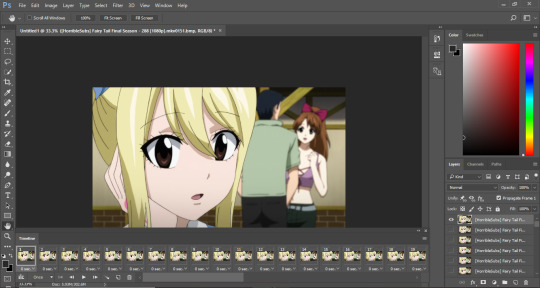
Now is the time where you can play around the frames. See the play button? You can watch how your gif will look like. Sometimes there are too many frames between small details, like a change of facial expressions. Feel free to delete frames that repeat, so it makes the image move faster! This is what I personally do when picking frames:
1. Click the Forever button, so your gifs will loop when you watch them. It is right next to the play button and it’ll have the tab as Once. There will be a picture a few steps down.
2. Make sure there are no more than 40 screencaps. You can delete the frames you don’t want by clicking the trash can icon near the play button, which removes frames from your timeline.
3. Set the delay to 0.1 seconds. I like this setting because it makes the movement look smoother and not as fast as Photoshop wants to process them. The tab looks like this, which is also where you can change the settings from Once to Forever.
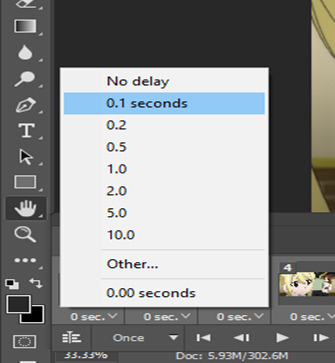
Once that is done with, play through the gif a few times. If you like the way it looks, then we can move forward.
To be organized, I like the labels of my frames and layers to coincide. To do that, go to the little box again and click Flatten Frames Into Layers. All of the layers in your tray on the bottom right will be labeled “Frame Number.” The original frame labels will be on the bottom. It should look like this:
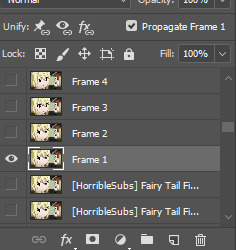
Now you can delete the unlabeled layers! In my case, it is the “[Horrible Subs]” layers. You can delete them easily by clicking the first one, holding shift while clicking the last one, and clicking the trash icon. Important: Now is this time to delete any unwanted frames in your timeline and layers in your tray. That way, you will not be confused by the numbers.
Click Frame 1, hold the shift key, and click your final frame. Once all the frames are selected, press ctrl+G. Now your frames will be compiled into a tidy group. Your tray should look like this:
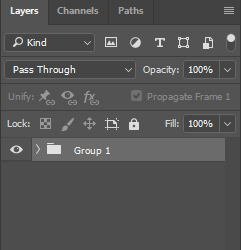
Step 6: Resize the gif
The gif on PS is actually extremely large right now, so you need to accommodate to Tumblr’s format! Here is a post on Tumblr post sizes. Important: The smaller the gif, the more frames the gif can have; however, the resolution of the gif will lower if the gif is too small.
To resize your gif, make sure Group 1 is selected. Go to the top left of the screen and click Image -> Canvas Size. Or you can press Alt+Ctrl+C. A menu like this should appear:
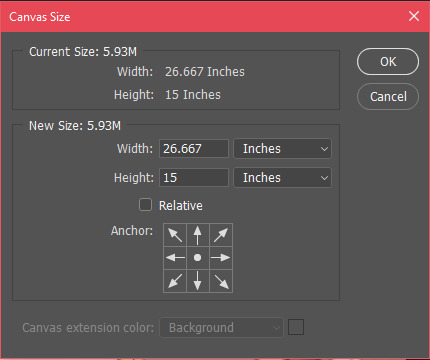
Click Centimeters and convert it to Pixels. I personally like to use 540x280 since it’s the size the posts that appear on your dash, but again, use that dimensions post if you want another size. Now the menu should look like this:
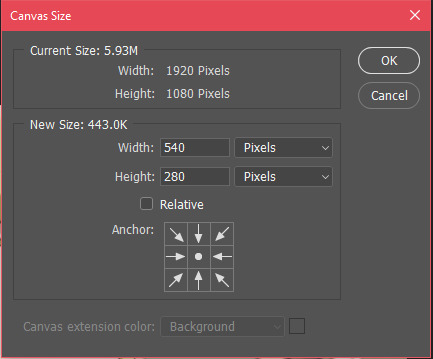
When you press OK, your screen will change a bit but don’t panic! This is how your screen should look now:
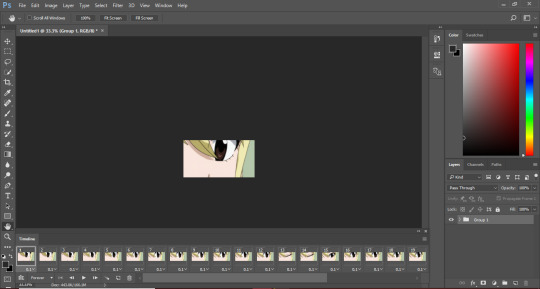
To get the gif back to its rightful size, press ctrl+T and your screen should look like this:
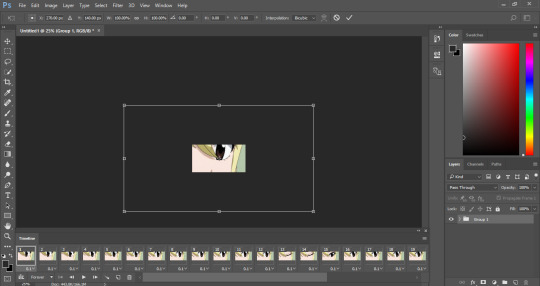
Below the words Filter and Window, there are percentages for the width and height. This is where guess and check comes into play—start with the width percentage first. What you are doing is adjusting the width’s gray lines exactly to the edge of the rectangle. You may need to zoom in to see if the gray lines are inside the image. If they are, try to adjust the percentages a few decimals. The percentage that works for me are 28.3%. Important: The percentage of your height and width must be the same. If they are not, your gif will be distorted. Once you’ve found a good balance, your screen should look like this:
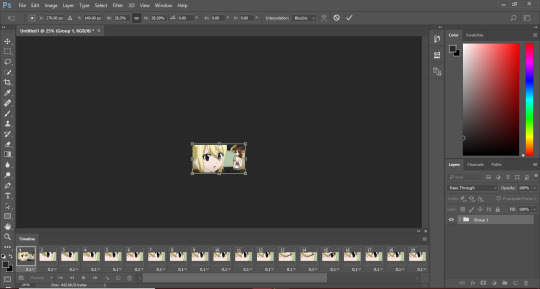
Click enter or press the check mark icon on the side and your gif will transform! The gif will be tiny now, but press ctrl and + to zoom into it. I personally like to zoom in about three times.
Step 7 (Optional, but recommended): Add a PSD
PSDs are basically a filter for your gifs that can differentiate yours from the rest. It makes gifs brighter,more fun, and original! There are tons, and tons, and tons of PSDs you can choose from. You can even create your own if you’re feeling creative!
This is how you use a PSD. After downloading one you’ve found, find it in your files and double click on it. It should open in PS like this:
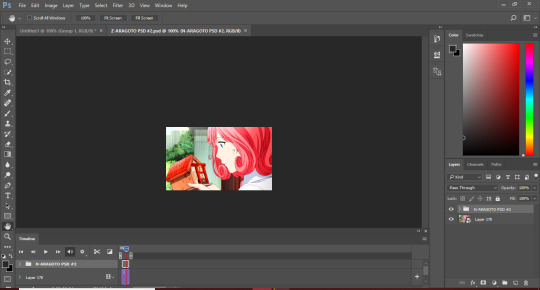
Notice how now there’s a new tab at the top? Drag it down and make it its own window. Now your screen will look like this:
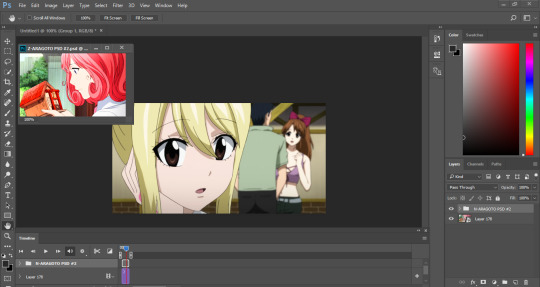
Select the PSD’s group in your tray to the right. In my case, it’s the N-ARAGOTO PSD #2 group. Click the group, drag it onto your original gif and voila!
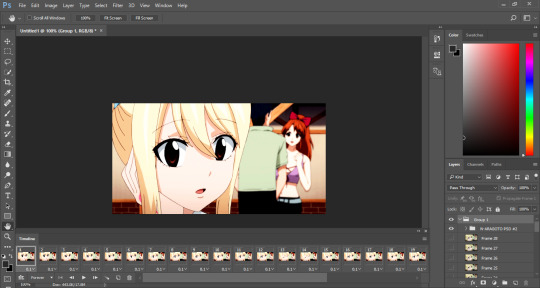
The PSD is now on the gif! Doesn’t it look lovely? I personally like to play with the opacity since sometimes the PSD may be too much for my liking. But if you’re a 100% type of person, you go for it!I’m going to shift mine down to 50%.
Step 8: Sharpen the gif
Sharpening your gif is essential if you want a high-quality, top-notch gif. Hopefully, you picked a 1080p video so it’ll be even more HQ.
In case you need to see how drastically important sharpening is, this is the unsharpened gif:

Sharpened gif:

To sharpen, make sure all of your contents in are in Group 1, like how it looked when you first grouped all the frames together. Now, go that small box right above the timeline. Click Convert To Video Timeline. It’ll look like this:
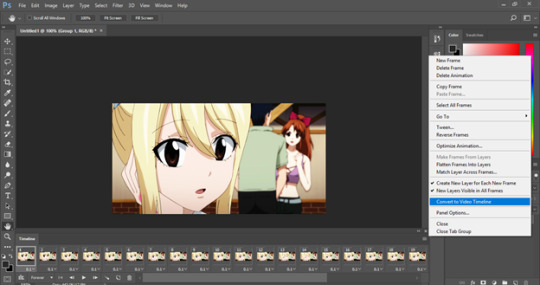
Your timeline will change a little bit, but don’t worry about it. You won’t be messing with it, so don’t touch it! Instead, go to the top of the screen and click on Filter -> Convert for Smart Filters
Your timeline is going to change again, but that’s okay! Now click Filter again and instead go to Sharpen -> Smart Sharpen… This box will pop up next.
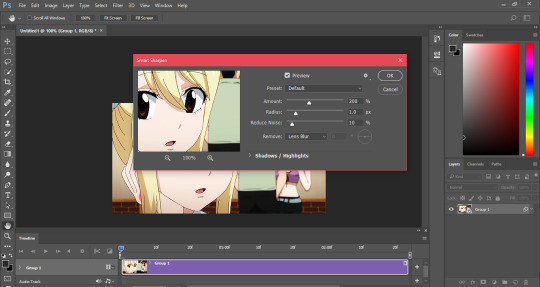
These are the settings I use, but I believe it’s the default one. I find that it looks the cleanest. Press OK and there is your new, sharpened gif!
Step 9: Save it
Finally, you are ready to save your gif! Go to File -> Save For Web or you can press Alt+Ctrl+Shift+S. This window should appear:
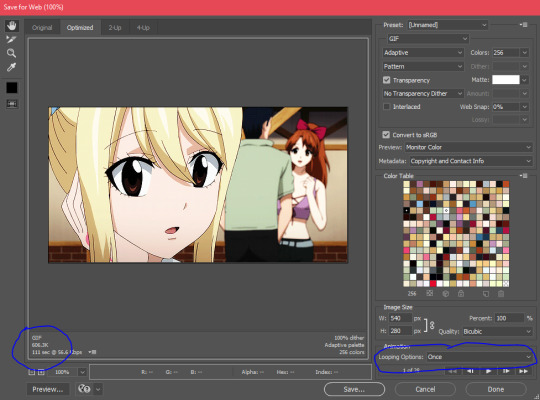
Make sure to match all of the settings, especially that it is being saved as a GIF and its Looping Options are Forever! I circled where you can switch the looping options.
Important: Make sure your gif size does not exceed 3M. Otherwise, the gif will not move on Tumblr. You can decrease the size by importing less frames or making the gif’s dimension size smaller. I circled where you can see the size of your gif.
Step 10: Post!
You’re finally finished! After all the sweat and tears, you’ve made your first gif! Like I said, patience is much needed for making a gif. But before you know it, it’ll only take you less than ten minutes to make a gif and you’ll be making tons every day.
There are so many different ways to make gifs; you just have to try some techniques and decide which one works for you! But even then, I hope mine helped or perhaps inspired you to start making gifs.
You’re awesome if you made it all the way through! Happy gif-making!
128 notes
·
View notes
Text
Mp3 Converter?
Is the fastest and best approach to convert audio to video on-line. MP3 is the preferred audio file kind based totally on MPEG-1 Layer III compression. That is the rationale when you copy aCDA file to our hard drive and attempt to play it with an audio participant, nothing occurs. It could extract CDA recordsdata from CDs and convert them to mp3. Choose the knowledge that you just simply want to burn with mouse and click on Open". For the second and further input CD-audio tracks, 2 second of silence will applied into the center of the ripped information. Step 5: Test the abstract. Rip your Audio CD to MP3. Briefly, hook up the player by way of USB, download Audacity 2.0.5 (free), change Mac System Preferences - Sound - Input - to "USB PnP Audio Machine". In Audacity, go to the Transport tab and switch off Overdub, and activate Software program Playthrough (may also be modified under Audacity - Preferences - Recording). Make DOC and DOCX recordsdata simple to read by changing them to PDF. Hey! The software program is superior. It took me so long to find an audio converter that wasnt crammed full of useless, superfluous features that I could not attainable care about.
This command copies the video stream from into and encodes the Vorbis audio stream right into a FLAC. The -c flag is admittedly powerful. Select the 'Disc' tab on the prime of the 'Open Media' screen and select the 'Audio CD' button. Changing audio recordsdata. How do I convert audio recordsdata from wma to mp3 on the Home windows 7 media participant? I've regarded everywhere throughout the media player and there's no window which will enable it. When you assume quantity of your media file is just too large or too low, you must use CDA to MP3 Converter to increase or lower the sound quantity. The software program might normalize amount robotically as correctly. Wait few seconds without spending a dime CDA to MP3 changing with Home windows Media Player robotically. As well as, remember to tick Eject CD after ripping below Rip settings, to suggest your self as quickly as CD extraction accomplished. Convert CDA to MP3 with CDA to MP3 converter - Leawo Video Converter Leawo Video Converter has been widely known as the most well-liked program for you to convert CDA recordsdata to MP3 data with the consumer-pleasant interface. WAV format information contain uncompressed audio and that may lead to large file sizes, relying on the length. MP3 is the most popular file format for audio. It uses specific compression methods that reduce the file size of the audio without losing significant high quality of the recording. Naturally, it's up to you what format and what bitrate you'd like to make use of. For larger high quality transfer the slide for Bitrate" further to the precise. For smaller information move it more to the left. I might nevertheless recommend to not go under 130Kbps with MP3's. Because of their comparatively small file measurement, audio-transcoder.com you may burn many MP3 files to a single CD. Uncheck the check-field for any track you don't wish to convert into MP3 format. Spotify Music Converter is a a nicely-designed audio converter for Mac customers to convert Spotify music to MP3 or AAC format with 10X faster velocity and good output quality. Step 1Launch the latest iTunes in your LAPTOP or Mac. Examine iTunes changing settings by click "Edit" from the top menu and choose "Preferences". 3. Click on on the video and choose the Extra option from the popup menu that seems. Next, convert cda to mp3 online select the Convert option. The file will seem in the popup conversion box. Now, click on the 'Import CD' button on the decrease left side. The conversion process begins and the files are robotically transformed to themp3 format. Moreover converting audio format from one to a different, you can too use this app to cut the wanted half from an audio file or merge a number of audio information into one single audio file. A: The CDA to MP3 Converter obtain for COMPUTER works on most current Windows operating methods. Free Audio CD to MP3 Converter. Copy audio CDs into digital music. It's simply beautiful in its simplicity. Step 3: Choose data. After loading the availability info, they will be displayed throughout the file file. Preserve "Ctrl" button and left-click on one after the opposite to focus on data you want to convert. Step 2Choose the tracks you to need convert to MP3. If you do not install these further codecs and attempt to add (drag and drop) MP3 information to your compilation you'll get the following error message: convert cda to mp3 online Chances are you'll manually convert these audio information to wave utilizing another utility supporting the audio format and then add the wav recordsdata to the k3b venture". Click on Rip CD. It is a tab on the excessive of the Home windows Media Player page. Residence home windows Media Participant will begin ripping your CD's recordsdata. We didn't find outcomes for: On-line Audio Converter. Attempt the options beneath or kind a model new question above. Click on a content type to see the sorts of filters obtainable inside it. Most filters have many standards you presumably can select from, which change relying in your search time period. Media > Open Capture Device > Choose Desktop because the Seize Mode > Set your body fee > Click on the drop-down menu on the underside of the screen and select Stream > A brand new window will open where you possibly can choose the output file format and placement. Listed here are the various advantages you acquire once you convert cda to mp3 format. iConverter is a free mobile app for iPhone and iPad It has a good selection of audio enter and output file sorts along with its exhaustive list of supported document and video file varieties. This conversion app works seamlessly with the File app and means that you can drag and drop information in break up-screen duties. iConverter has a simple audio modifying software and supports the most well-liked compression formats to help ship massive folders through e mail or textual content.
Sometimes all it's essential to know is what's inside the media container. While there are a number of tools that can do this, my preferred one is MediaInfo MediaInfo exhibits all the knowledge inside a media container, for every of the totally different streams, in addition to the metadata for the input file. This gives you the whole lot you would possibly need to know—and possibly a bunch of stuff you didn't. - ConverterLite is based on FFmpeg and supports the following video codecs: AVI, MPEG, DivX, MP4, M4V, XviD, H.264, WMV, FLV, QuickTime, MOV, DVR, and more.
1 note
·
View note
Text
5 Best Webcam For Streaming 2019 Plus Buyer’s Guide
I am convinced that technology is becoming bigger and bigger part of our lives. Knowing this, we must admit that communication has gone as far as using visual technology when two people are trying to connect. The most important aspect here is playing the webcam. There are a number of things one person can do with the webcam when it is attached to his/her computer. Just by using or installing some software you can do a lot more with your camera than just the regular video calls or checking your make-up or hair. These things sound great, And if you are a guy seeking a webcam for streaming, This Guide: Best Webcam For Streaming 2019, will set you on a right path.
Top 10 Best Webcam For Streaming 2019
# Preview Product Price 1
Logitech C922x Pro Stream Webcam – Full 1080p HD Camera – Background Replacement Technology for… $72.46 Buy on Amazon 2
Logitech BRIO – Ultra HD Webcam for Video Conferencing, Recording, and Streaming $176.80 Buy on Amazon 3
Pro Stream Webcam 1080P HD Video Auto Focus Camera for Streaming, Game Recording, Conferencing, USB… $59.99 Buy on Amazon 4
Logitech 1080p Pro Stream Webcam for HD Video Streaming and Recording at 1080p 30FPS $84.95 Buy on Amazon 5

Logitech C922 Pro Stream Webcam 1080P Camera for HD Video Streaming & Recording 720P at 60Fps with… $79.63 Buy on Amazon 6

Spedal Full HD Webcam 1536p, Beauty Live Streaming Webcam, Computer Laptop Camera for OBS Xbox… $42.99 Buy on Amazon 7
Razer Kiyo: Full HD 1080p 30FPS / 720p 60FPS - Built in Adjustable Ring Light - Advanced Autofocus… $87.80 Buy on Amazon 8

Logitech C920S Pro HD Webcam with Privacy Shutter - Widescreen Video Calling and Recording, 1080p… $69.99 Buy on Amazon 9

Spedal Full HD Webcam 1080p, Beauty Live Streaming Webcam, Computer Laptop Camera for OBS Xbox… $32.99 Buy on Amazon 10
Dericam 1080P Full HD Live Streaming Webcam, USB Desktop and Laptop Webcam, Mini Plug and Play Video… $24.95 Buy on Amazon
Why You Should Buy a Webcam
You can get your own camera for the price of 50$ up to 100$, and there are many places where you can get them. If you are asking yourself what are the cool things you can do with your camera here are some examples that might help you: • You can use your camera as a surveillance system in your home or even your office. • You can use your face to log in to windows. • Optical character recognition. • You can create cool time lapse videos. • Turning your boring PC into a photo booth. • You can use it to watch the birds that visit your bird feeder. • You can even create your own fonts. • You can do live streaming. • You can use it to make your gaming sessions more fun.
How I Picked These Top 5 Webcam for Streaming
When it comes to streaming cameras I have 5 favorites that happened to be liked by other users as well. The first one is Logitech HD Pro Webcam C920 with its 1080p Camera. The second one is Logitech C922x Pro Stream Webcam, then the Microsoft LifeCam HD-3000, then the Logitech C930e 1080P HD Video Webcam and the last, but not least, is Logitech HD Pro Webcam C910.
Top 5 Picks Reviews: Choose Your Best Webcam For Streaming
All of these webcams have 1080p camera, which is probably the main reason why I picked them. Another important thing when choosing a webcam is how fast and compatible with most of the computers they are and these 5 stand strong on that point. You will also want a camera that is easy to use, so easy that even beginners can use it, out of all these 5 the Microsoft LifeCam HD-3000 is probably the easiest to use. Of course, when I invest my money in something I want quality products and all five of these have great quality for a relatively fair price. Another thing is that these five webcams have similar design and they are easy to install on the monitor. Therefore, low price, great picture, good sound, handling dark and light settings with ease, fast installation, looks good on your monitor what else can you ask for a fairly priced webcam? For me personally, these are the main characteristics that I look for when I buy a webcam.
Logitech HD Pro Webcam C920 Reviews
The Logitech HD Pro Webcam C920 has no bounds with self-expression. No matter if you use it for Skype or video blogs, this webcam will offer you lifelike HD picture. For Skype video calls this camera offers you full HD 1080p up to 1920 x 1080 pixels same as the video recordings. This webcam also has built-in microphones, which has an automatic noise reduction and that will ensure natural stereo sound. The webcam has a lens that has a five-element glass with very precise auto-focus that will give you amazingly clear and detailed picture. It also has a low-light correction and it can be used with a tripod and it has a universal clip for LCD monitor and laptops. This webcam is compatible with Windows 7, Windows 8, Windows 10 or later, Mac OS 10.6 or later, Android v 5.0 or above, Chrome OS, Available USB port, and Internet connection.
What Current Owners said This Webcam
People, who have bought this webcam, say that it is more than what they expected from a webcam that does not cost much. They are surprised by the quality and the wide view that this webcam offers. Another thing that the users like is that you are able to adjust focus, color, white balance, zoom and so on, the way you prefer it. Buyers are also pleased with this webcam’s monitor mouth, which can be clamped at any monitor. Probably the biggest pro for this webcam will be the low cost, and then the quality and clarity of the view and that it can be put on any monitor. The only con might be the auto-focus meaning when you use this camera for streaming the auto-focus will constantly try to find focus and that might make the stream unwatchable.
The Logitech C922x Pro Stream Webcam Reviews
The Logitech C922x Pro Stream Webcam is the webcam you need if you what your YouTube or Twitch videos to have a professional quality. The recordings or the stream will have a very lifelike view with this webcam with its HD 1080P video at 30Fps/ 720P at 60FPS. This webcam has full HD glass lens with premium auto-focus that will give you clear video. This product also has built-in microphones that will capture the voice in rich Stereo Audio. You do not have to worry if you are recording in dim or poorly backlit settings as this webcam has an automatic light correction. For all the streamers out there by purchasing this webcam you will receive, for free, a six-month Xsplip license, an app that can help you make your streams as professional looking as possible. If you are streaming games, lagging will never be an issue with the Logitech C922x Pro Stream Webcam. The performances that this webcam offers will simply give you a quality that will raise you above the others and that will be possible from your very own home. The webcam also has technology that offers background replacement and you can use it without the need for a green screen. This webcam is compatible with Windows 7-10, Mac OS X 10.9 or later, Chrome OS, and Android v5.0 and above, all you will need to start broadcasting is a USB port.
People find it easy to set up this webcam and they are very pleased with the quality of the view. The con would be that some people have experienced difficulty when streaming music due to the sound phasing when you use it in stereo. Anyhow, once you figure out how to work with this webcam the possibilities that it offers are endless.
The Microsoft Life Cam HD-300 Reviews
The Microsoft Life Cam HD-3000 offers you a widescreen with 720p HD recording and video chat. The built-in microphone has noise reduction, which is always a good thing. Thanks to the True Color technology your videos will be colorful and bright. You can attach it to any laptop, desktop or notebook thanks to the universal attachment base. As its manufacturer would say ‘your picture or video is worth 1,000 texts’ and this webcam will interpret that with HD view. Another thing is that this camera is easy to use that you do not have to be a professional to make good videos.
What Current Owners said This Webcam
Users have reported that you get your money worth with this webcam. They are satisfied with the clarity of the picture, as well as with the wide angle lens which allows for a better picture. Users have noticed that this webcam handles dark and light settings with ease and the attachment that comes with it is easy to put on any monitor without damaging it. The video is stutter free on record and the microphone offers crystal clear audio. There have been noticed some flows like Windows 7 might not support this webcam and so far there has not been found a solution for this problem. Also, some people have reported that the webcam is not compatible with Windows 10. Knowing that this is a relatively cheap camera you cannot expect a long working period, but it is a good webcam that, for a low cost, can give you a good starting point with your streaming hobby.
Logitech C930e 1080P HD Video Webcam Reviews
The Logitech C930e 1080P HD Video Webcam is a business grade HD video webcam that offers full 1080p HD videos at 30 frames per second for the purposes such video conferences on your PC or Mac. This camera has the widest field of view of 90 degrees and it is the perfect tool for face to face video collaboration or whiteboard presentations in any office. This camera comes with a universal clip that fits laptops, CRT or LCD monitors. The webcam has HD 1080p H.264/SVC UVC 1.5 encoding, this frees up system bandwidth and your video stream will be smoother by putting video processing in the camera. Other features are pan, zoom and tilt functions as well as the advanced light correction technology which will deliver you the best video experience that you can ever fish for. The autofocus is smooth and it will keep your video image razor-sharp, even in close up situations. This webcam is compatible with Microsoft Lync 2013 and Skype and it is compatible with the of most UC and web conferencing applications.
What Current Owners said This Webcam
People who have bought this camera are pleasantly surprised by how wide the screen actually is. Another pleasant feature, that its users found, is how professional the image looks with this camera and no need to mention that the clarity of the image was impeccable. When it comes to this webcam’s flows some users have noticed that the autofocus can get jumpy at times. Every single time something moves the camera will try to readjust the focus and you end up with a few frames of defocus before everything becomes sharp again. You can get around this issue by setting the focus to manual. Also, the camera sometimes might not be recognized by your computer even after you have unplugged it and restart it several times. And finally, some of the users have found that the sound is not so great and the recording capacity of the microphone is poor.
The Logitech HD Pro Webcam C910 Reviews
The Logitech HD Pro Webcam C910 has a Logitech Fluid Crystal

Technology which gives you Full HD 1080p video recording and smooth HD 720p video calling. With this webcam, it will take you only click to upload a video on either YouTube or Facebook. The webcam also has 5 MP HD sensor and precision Carl Zeiss lens. For crystal clear videos and awesome 1- MP photos this webcam has autofocus and an intelligent auto light correction. The built-in microphones have noise-canceling properties which will make your sound be heard in clear and rich HD quality dual stereo. This webcam works with Logitech Vid HD, Yahoo Messenger, Microsoft Live Messenger and Skype. The wide HD 720p screen will is with no doubt a nice feature.
What Current Owners said This Webcam
People that had the chance to try this product have reported that the installation is very quick and easy and they find the menu easy to understand. Users are also satisfied with how sharp the picture is with this webcam and the longevity of the camera is also quite long. The users have also noticed that the built-in microphones are capable of picking up even the quiet voices. About the flaws, some have noticed that the quality of the picture is not as good when they have used the webcam for video chats. Also, the clip that comes with the camera might not fit some laptop monitors.
If I Were You, I Will Choose Logitech C922x Pro Stream Webcam, Here Are the Reasons
Now comes the question which one out of these five should you buy. Since we are mainly interested in streaming my personal favorite is the Logitech C922x Pro Stream Webcam. This is the webcam that will make your videos look very professional, even if you are only a beginner. The audio is impeccable and it will capture even the quiet voices and the auto-focus will make every frame look crystal clear. Plus, we can forget that by purchasing this webcam you will receive, for free, a six-month Xsplip license, this the app that can help you make your streams as professional looking as possible. So, if you are about to start career or hobby with streaming, this is the webcam that I would strongly recommend for you.
5 Important Features when Choosing a Webcam
The functionality of the camera you choose has a direct correlation with the sum of money you are ready to spend on that camera. Naturally, if you need a webcam for the sole purpose of video chatting with your friends and family, then you will need one that cost less and that does not have high quality. But, if you are in search of a webcam for professional purposes, then you might want to check one with functionality such as video conferencing, because those are the ones that offer more features and higher picture quality.
The market is offering thousands of different webcams that have different sizes, shapes, prices, and specifications. Here are the 5 main tips you should pay attention to, and that will help you select the one that will meet your own needs:
The megapixels – Those tiny color dots that when they are combined they make the resulting visual picture are named megapixels. Naturally, the more megapixels one webcam has the more vivid and clear picture it will deliver. Nowadays, there is no big issue with the quantity of megapixels as there have been in the earlier period. The majority webcams on the market today are providing a realistic image quality. You are advised to for one that has 640X480 or 320X240 pixels as it will give you a good picture. You should pick a better specification for your webcam of 1280X720 pixels if you have the HD functionality.
The frame rate – First we saw that the megapixels are responsible for the image and its color vividness, and the frame rate is the one responsible for the smoothness and quality of the video. The amount of images that are displayed per second is decided by the frame rate. For a webcam that you will need for standard use 30fps (or frames per second) is more than fitting for you. But, those who are looking for with higher quality moving image and also one that is smoother should pick a webcam with the capabilities of 60 frames per second.
The lens quality – the video processing comes in stages and the first one is the lens. Naturally, it is very important for you to buy the exact lens to cater to your needs. Here you are advised to get a webcam with glass lens and not with plastic one because the glass one has more quality.
The continuous autofocus – Many times you will want to record with your camera scenario where there is a significant amount of movement in the background and the autofocus will enable the webcam to maintain you as the central focus and not diverting to another movement inside the frame.
The low light quality – You will with no doubt end up with very poor image quality if you use your camera in low light surroundings or in the evenings. In case you try interfering with the screen contrast and brightness, you will create a foggy and continued bad image on the screen. Some of the Logitech webcams have created ‘Right Light’ in the webcam. This will enable the image quality to be optimized in the reduced light conditions.
Other important thing you should consider when you use a webcam is your Internet connection’s speed. The speed of your computer processor and Input/Output ability is also an important issue. The video images take up lots of the capacity of the computer’s communications, therefore the faster it is the better it will work. I would suggest the fastest broadband speed you can find for the money you have, to avoid jumpy, start and stop video images. A lot people have bought webcams and very soon have faced a disappointment because of the bad video quality that resulted from the communications and computer limitations.
Choosing Webcam? It’s your turn now!
Just like when you want to buy a computer, there are many models of webcams available on the market. The prices start from low and very affordable to extremely pricey ones. You have to figure out what you need and want from your webcam so that you will not end up buying some extra features that will cost you more and you will never need to use.
What You Definitely Need
You need to pay attention to the webcam’s resolution; you will want one with high resolution. If you buy one with a lower resolution you will end up with an image that will look grainier on other’s screens. Your starting point for a good resolution should be 640 x 480.
Just like with the resolution the frame rate is also crucial, so you should look for a high FR. The reason for this is that high frame rates mean that the webcam will produce images will not periodically freeze or stutter on the viewer’s screens. Just look on the webcam’s packaging and find the fps (frames per second) a good frame rate starts at 15 fps and above. The higher you go the better you streams will be. Try to get as close as you can to 30 fps if you can afford higher than that it’s going to be even better for you.
What You Should Get
When it comes to the lens of the webcam you should always go for the glass lenses and try to avoid the plastic ones. This is because the glass ones will offer you a better performance and the price for them is not so much higher than the plastic ones. Needless to say, the lens is a crucial feature for the webcam’s performance.
If you are going to use your webcam in a room with a poor light that the auto-focusing, as well as the auto light adjustment, are the technologies that will come very handy to you.
Other standard webcam features are the ability to take still images and the built-in microphone. Also, make sure that the webcam you choose is able to take at least 2.0 megapixels images.
Bells and Whistles
Some webcams come with the feature like motion sensor and this is useful if you want to use your webcam as a security system. This feature can be built into the webcam or you can later download the software for it.
Some webcams have the abilities that include special and video effects; this will come handy if you want to include those kinds of things into your streams and videos. These features can also be downloaded as software.
High-Def Considerations
Another popular feature that a webcam can have is the ability to capture videos in high-definition. This feature will come handy if you plan to use your webcam for video streams to the YouTube or Twitch sites. You must be aware that this feature will also make the webcam cost a lot more; therefore, if you do not need it then it is better to not spend your money on it. Capturing video in 720p or higher is considered to be an HD.
What You Should Get
You will want a webcam with high resolution and high FR fir better images that do not tend to freeze or stutter. A glass lens for better performance alongside with auto-focusing and auto light adjustment. Your webcam should be able to take at least 2.0 megapixels images and to have a built-in microphone.
Pricing
When it comes to the prices, just like I mentioned above, they can be from very affordable to the high-end ones. Usually, the prices start from $9.97 and go up to $299 on websites like Amazon.com and ToysRUs.com. What you must figure out is exactly what you want and need from your webcam so that you will not end up buying or not buying the features that you need or don’t need.
Conclusion
Read 5 Best Webcam For Streaming 2019 Plus Buyer’s Guide on Game Roe.
source https://www.gameroe.com/best-webcam-for-streaming source https://sheepmone.tumblr.com/post/183955438267
1 note
·
View note