#Wavlink Extender Setup
Explore tagged Tumblr posts
Visit Tumblr Blog
Explore Tumblr blogs with no restrictions, modern design and the best experience.
Last Seen Tumblr Blogs


Fun Fact
Tumblr.com rank in the US is 25.
Text
#wifi repeater setup#wifi.wavlink.com extender setup#wifi.wavlink.com repeater setup#setup tutorial#wavlink wifi repeater setup#wavlink ac600 setup#wavlink n300 wifi repeater setup#wavlink router setup#how to setup wavlink n300 wifi router#wavlink extender setup#wavlink n300 wifi range extender setup#wifi.wavlink.com#wifi.wavlink setup#wifi.wavlink.com login#wifi extender setup#wavlink setup#how to setup wifi extender#wifi range extender setup
0 notes
Text

Wavlink Range Extender Setup
The first thing you have to do is to connect the extender into the wall socket within the vicinity of the host router. So that, you can connect both extender & router without any cable in a hassle-free manner.There are two methods of setting up your Wavlink WiFi range extender: WPS method and web-based interface method. Let’s learn both the methods.
0 notes
Text
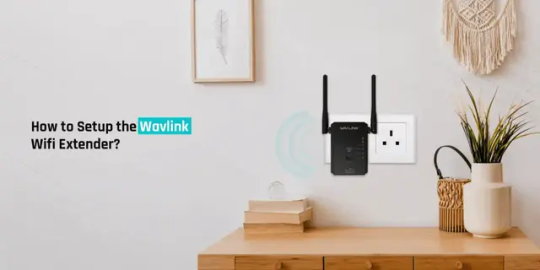
How to setup Wavlink WiFi extender?
To initiate the Wavlink WiFi extender setup process, connect it to your router. Later, plug in the extender and connect it to your computer device. Now, open an internet browser and type in the web address of your extender in the address bar. Tap on Enter and follow the on-screen instructions. In case of any difficulty during the setup procedure, you can get in touch with our experts!
0 notes
Text
Wavlink WiFi Extender Setup
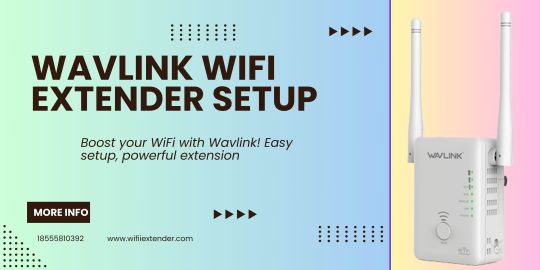
Consider that you have a big house and your Wi-Fi is unable to provide Wi-Fi in your entire house. Simply don’t roam around your home in search of a strong Wi-Fi network. Thus, you must complete the Wavlink WiFi Extender Setup to establish an uninterrupted & flawless network coverage. Through this blog post, you will learn to set up the Wavlink extender. So, go through this blog post right away.
Steps for Wavlink WiFi Extender Setup
Now that you want to extend your Wi-Fi network, you can carry out the Wavlink WiFi extender's setup process. You can set up your Wavlink extender through the web address as well as using the "WavRouter" app. Simply follow the below setup process now.
Connect your smartphone or computer to the Wavlink extender's WiFi network.
You will find the extender's network name (SSID) & password on the extender's label.
Once the connection is established, open a web browser on your device.
After that, type in the default web address or IP address for the Wavlink extender.
It's usually something like "wifi.wavlink" and "192.168.10.1".
Consequently, you must hit the Enter button to access the configuration page.
Next, follow the on-screen instructions and set up your Wavlink extender.
Hereon, you must choose your existing Wi-Fi network and enter the network password.
Once you are done, save the configured settings and wait for your extender to restart. This will eventually complete the Wavlink WiFi extender setup process.
Wrapping Up
At last, this blog post includes the complete Wavlink extender setup process. But if you are still facing certain issues during the extender setup process, connect with our technical experts now. Our technical experts will guide you through the complete setup process.
0 notes
Text
Wavlink Outdoor AP Setup: A Complete Guide
Wavlink offers a huge variety of networking devices for both indoor as well as outdoor connectivity. There is no denying the fact that access to the internet is crucial at every step of our way. Therefore, the router isn't able to provide coverage to an outdoor area. So when it comes to Wi-Fi coverage outdoors, a Wavlink outdoor AP setup is one of the best options that you can pick. Whether you require it for your home balcony, terrace, backyard or for an outdoor space in your office, it can serve all outdoor networking needs. So if you also got your hands on one of them, then in this guide we'll be sharing the complete Wavlink outdoor AP setup details.
What Is A Wavlink Outdoor AP ?
A Wavlink Outdoor access point is a device that extends the wireless signals of your router to an outdoor area. Generally, these devices are weatherproof. So they can easily handle multiple weather conditions from rain, snowfall, extreme heat to thunderstorms as well. Basically, the Wavlink outdoor AP setup is ideal for individuals who need consistent and dependable internet access in areas where traditional routers don’t reach. After its successful installation, you won't face issues like buffering, slow speed or drop in signals. The device works in collaboration with your existing network (router). Thus it provides the same stability outdoors as you experience in your indoor areas.
Step-by-Step Guide to Wavlink Outdoor AP Setup
For easy understanding, we have break down the setup process into various steps:
✓ Collect The Essentials
First up, begin the process by unboxing and collecting all the package contents. Inside you'll find the main AP extender, an Ethernet wire, a power adapter, quick installation manual, POE converter and wall mounting kit as well. Apart from the package contents, for the Wavlink outdoor AP setup, you also need:
A wifi enabled gadget like a smartphone or a laptop.
Next up, a router.
An active internet plan.
A vacant power outlet.
Lastly, the credentials of your main network. Ensure the accuracy of the same.
✓ Position Your Wavlink Outdoor AP
The placement of your Wavlink outdoor AP setup is crucial to ensure maximum coverage. So place it in an outdoor area on some higher surface possibly onto the pole or drill it on the wall. Ensure it's in a clear line of sight to your router.
✓ Connect Hardware
Moving forward, first of all attach the antennas tightly and securely to the main Wavlink unit. Thereafter, link the ethernet wire to the POE IN port of the Wavlink device. Thereafter link it to the POE port of the converter.
Now fetch the wire coming from your router's LAN port and link it to the DATA IN port of your POE converter. Finally, with the help of a power cord, turn on the device. You should see some indicator lights showing that the AP is powered up and is ready for configuration.
✓ Configure The Wavlink Outdoor AP
For further Wavlink outdoor AP setup, you require your laptop or any other wifi enabled device. Now visit its wifi settings. Enable wifi. Link the device to the Wavlink Outdoor AP’s default network. The credentials for the same are written on the extender itself as well as in the user manual.
Thereafter, launch an internet browser. In the URL field, type 192.168.10.1. Click Enter. If by any chance the address didn't serve the purpose then use the alternative. It is http://waplogin.link.
Now as you enter the login screen, you'll be prompted to fill up a password. It is “admin” if not altered previously. Tap on Login.
Finally, wrap up the Wavlink outdoor AP setup, by selecting the AP mode. Thereafter fill up information like wifi SSID and security key (password). As you fill in the accurate details, tap on Apply. Lastly, connect to the new outdoor network and test the connectivity by streaming any high definition content in the outdoor area.
Troubleshooting Common Issues
If you encounter any issues with your Wavlink outdoor AP setup then first do not panic as it is very common. Now check out these few troubleshooting tips to eradicate the problem.
✓ Weak Signal: If you are not getting a strong signal from your Wavlink device then try repositioning the AP higher up or closer to your router. Also make sure there are no physical barriers between the AP and your router. As this will block signal transmission.
✓ Connectivity Issues: To solve connectivity issues, you need to ensure that all cables are securely plugged in. Also your host device is linked to the right Wavlink network. If the connection is unstable you can reboot the AP as well as the router.
✓ No Power: Check the power adapter and ensure it’s properly connected to the AP and an active power source.
0 notes
Text
Wavlink Av500 Powerline Setup?

The Wavlink AV500 Powerline Wifi extender setup. Start by supplying one adapter with the provided Ethernet wire to a power outlet close to your router. The second adapter should then be connected to a power strip in the place where you wish to grow your network. On both adapters, press the Pair/Reset button to create a secure connection. An effective connection will be confirmed by the powerline LED signs. Now, attach your devices to the second adapter using extra Ethernet cables or, if in line, the built-in Wi-Fi function. With the Wavlink AV500 Powerline kit, you can expand your network by utilizing the electrical wiring in your home in an effective and straightforward manner.
Requirement for Wavlink AV500 Wi-Fi setup?
The following items are all you need to set up the Wavlink AV500 Powerline:.
Ensure that there are open power outlets in the area of your router and where you plan to grow your network.
When setting up your router, have an Ethernet cable open to connect one adapter to it.
Read More:-
1 note
·
View note
Text

The Wavlink powerline setup functions as a WiFi extender kit designed to enhance the performance of your existing router. Whether in a spacious home or a multi-story office, it effectively extends router signals to every corner. To make the most of this service, it’s crucial to understand its configuration and other essential aspects. Familiarize yourself with these points for optimal use.
0 notes
Text
0 notes
Text
Wavlink Extender Setup
Wavlink Extender Setup involves a series of steps to ensure proper configuration and optimal performance. Please refer to the user manual that came with your specific Wavlink extender model for detailed instructions, as setup steps may vary slightly between models. In case you are facing some problems while using the Wavlink WiFi extender. Just follow certain troubleshooting ways to sort out the issue.
1 note
·
View note
Text

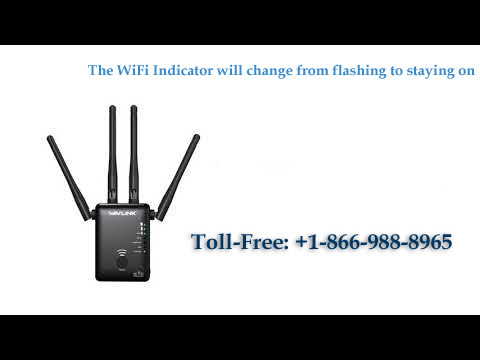
To reset a Wavlink WiFi extender, follow these five simple steps. First, ensure the extender is plugged into a power outlet and powered on. Second, locate the Reset button, usually found on the side or bottom of the device. Third, use a paperclip or pin to press and hold the reset button for about 10 seconds until the LED lights start blinking, indicating the reset process has started. Fourth, wait for the extender to reboot, which may take a couple of minutes. Finally, once the lights stabilize, the extender will be restored to its factory default settings and can be set up again from scratch using either the WPS method or the web-based setup page.
0 notes
Link
How to Setup Extender Router Login To setup the Extender Router login, firstly, plug in the Extender Router in the electrical outlet nearer to the router. Then press the WPS button on the extender router. Just wait for sometime as the Extender Router will automatically configure to the Wifi network. Then check it whether the connection is good or poor. Call on 833-666-7003
#Setup Extender#how to setup extender#833-666-7003#wifiextenderhub#wavlink extender setup#tplink extender setup#netgear extender login#netgear extender#netgear extender setup#dlink extender login#wifi extender#extender#router login#router
2 notes
·
View notes
Link
Ap.setup or 192.168.10.1 both web pages are using while setup your wavlink extender. You need to click on setup after login www.ap.setup page.
1 note
·
View note
Text
How to access wifi.wavlink.com
Wavlink’s default web address is wifi.wavlink.com. With the help of Wifi.wavlink.com, wavlink users may conveniently set up their accounts and login to their accounts. Users must use an updated browser and type Wifi.wavlink.com in the address bar to complete either Wifi.wavlink.com login or Wifi.wavlink.com setup. A setup or login window will display on your screen after a few seconds. However, if you encounter the error Wifi.wavlink.com not working, log in to the Wavlink device and try a different web browser. An Ethernet cable is used to connect to the Wavlink device. If you have any problems throughout the process, our experienced team of specialists will be able to help you and fix your problem in a matter of minutes. You can reach us by calling our toll-free number.
Wavlink extender setup
Wavlink repeater setup
#wifi.wavlink.com#wavlink extender setup#wavlink repeater setup#wavlink extender login#wavlink mesh wifi setup#wavlink login#wavlink setup
1 note
·
View note
Photo
Wavlink WiFi range extenders are easy to set up, configure, and manage. You can install the device on your own by going through simple procedures. For any othery query contact Ap Setup support team +1-866-988-8965
1 note
·
View note