#ap extender setup
Explore tagged Tumblr posts
Visit Tumblr Blog
Explore Tumblr blogs with no restrictions, modern design and the best experience.
Last Seen Tumblr Blogs


Fun Fact
25% of US internet users with an annual income of $80-100K use Tumblr.
Text
Ap.setup | http //ap.setup Login | Extender AP Setup.
To configure your WiFi extender, simply connect to its network and visit ap.setup in a browser. This local web address lets you log in, scan for available networks, and extend your router’s signal. If ap.setup isn’t working, try the default IP instead. Need help? Chat with our experts for quick guidance!
1 note
·
View note
Note
Recently I took a panorama of the Pittsburgh skyline at night that got a positive response. That was done on the spur of the moment with an iPhone. I want to do that again and more, but this time with a dedicated camera setup. It's been years since I've had one, so I'm basically starting over again. I'm mostly interested in getting day and night cityscapes, and maybe the carryings-on at this year's Anthrocon. Would you have any particular knowledge to pass on as I set off on this journey?
Since you didn't specify a budget I'm going to assume it is in the $10K range.
And you're probably thinking I'm going to suggest a Leica. Every dentist and his brother (who is also a dentist) gets a Leica. But I just can't take a camera brand seriously when they charge you an extra $2200 for the privilege of not being able to shoot in color.
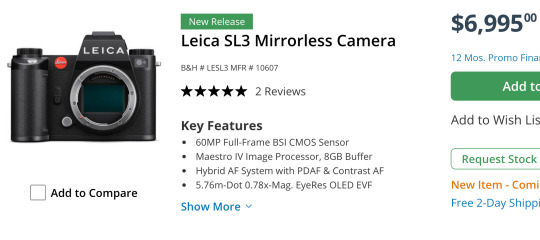
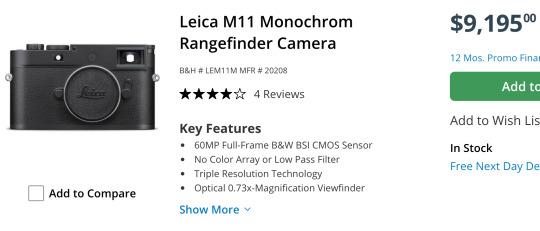
Sure, you can hit a single button in Lightroom to get B&W and save some money, but then you won't be able to brag about how limiting yourself to only shades of gray has opened up new artistic pathways in your brain while a clueless person responds in mumbles during their root canal.
What you really want for your landscapes is a Hassie.
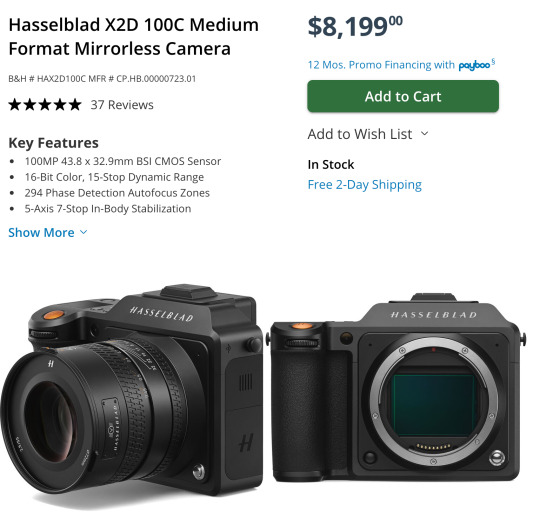
They were the first camera on the moon! How could you *not* want a Hasselblad? That is some camera gorgeousness right there. And it's so reasonably priced*!
*compared to their previous $40,000 camera systems.
And if you are doing landscapes with the Hassie you'll need a nice wide angle lens to go with it. This one is actually quite affordable*!
*compared to their previous $8000 lenses.
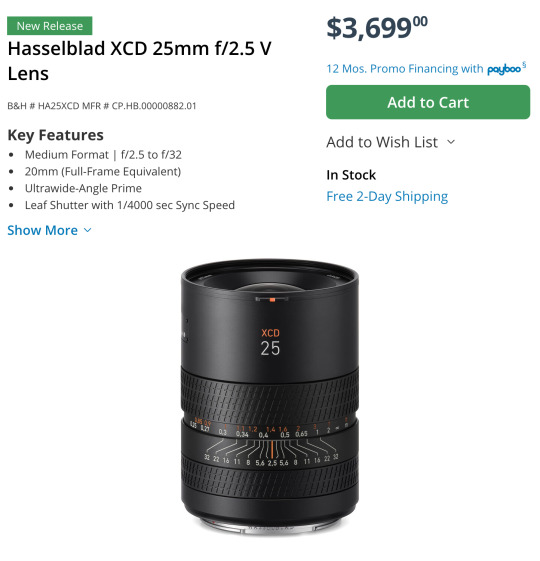
Can we all agree that is a work of art? They even use their H logo as the knurling.

That is just so... extra. And I love it.
Out of the entire alphabet I've heard Hs give you the best grip.
Man, I almost wish I was a dentist just so I could buy a fancy camera.
Sorry... I was just having a little fun.
I never get to recommend the super cool expensive cameras. Because, ya know, the economy and the fact that only dentists have Hasselblad money.
You probably think I'm being silly but there actually is an entire community of dentist photographers keeping the high end camera market alive.
Okay, let's get started...
Landscape Buying Guide
Opening Thoughts
For landscapes I would highly suggest a full frame camera and a high quality wide angle lens.
Full frame has several advantages but it is not necessary. You can go with a smaller sensor like APS-C and get great images. Personally I would not go any smaller, but there have been some great landscapes taken on micro 4/3 and even smartphones. Technique, knowledge, experience, and composition will usually win the day over a camera, but having a nice camera makes things a lot easier.
At this point, with full frame options being very affordable now, the main reason to get a smaller sensor is if you want a smaller system that is easier to carry for extended periods and easier to pack when traveling. Or if you aren't sure you want to take on photography as a hobby, you can get an old APS-C DSLR for under $200 to learn with and test out.
So if you need a very cheap OR very compact system, APS-C and Micro 4/3 might be worth considering, but a bigger sensor will cause less frustration most of the time.
Froggie Note: The expensive Micro 4/3 and APS-C systems are the compact ones. The cheap systems are about as bulky as full frame.
The biggest advantages to full frame are low light shooting, lens selection, and field of view. Full frame cameras have many, many more lenses to choose from. And since the sensor is bigger, it is much easier to get a wider field of view that is often needed for landscapes. And the high ISO noise performance tends to be better on full frame.
However, you can use full frame lenses on APS-C camera bodies within the same ecosystem. They just get a little... zoomier. Roughly 1.5x zoomier. A 35mm acts like a 50mm, for example. So if you want to spend a little less now you can get an APS-C camera with a full frame lens and then upgrade to full frame later on without having to buy a new lens. Full frame lenses work on APS-C bodies but not the other way around.
Most landscapists have a really solid 16-35mm lens and that covers almost all of their needs. So I would suggest something comparable. Please don't get suckered into some crazy 18-300mm superzoom. Just get the focal range you need for the photos you want to achieve.
A purpose-built lens always outperforms one that was made to do everything.
As far as where to get used gear, I highly recommend using KEH or MPB when buying used camera bodies. They check every device and offer between 3 and 6 months warranty to make sure the device won't crap out on you. Lenses are typically a lot more robust and a safer thing to buy on eBay or Facebook Marketplace if you can find a better deal. But the security of having a warranty and a return apparatus if something goes wrong might be worth the extra price when using these two sites.
I am going to recommend Canon, Nikon, and Sony systems. I feel they have the most complete ecosystems with gear that spans all budget ranges. I'm not saying there aren't good cameras from other brands, but you have to remember every camera has an ecosystem surrounding it. There are accessories and upgrade paths and niche lenses that may not be available with other brands. I think Fuji has some tempting options and if you like the look of vintage film photography, their emulation options are quite stunning. Their cameras are also quite attractive and have very satisfying knobs. But I still can't recommend them unless you have a specific reason for wanting their gear.
Just remember that for every Canon DSLR I recommend there is a comparable Nikon option available as well. There are more lenses for a Canon full frame DSLR body than any other brand with Nikon coming in a close second.
So if you choose not to go mirrorless yet, the Canon and Nikon DSLR camera ecosystems are immense and have tons of gear and accessories available to go with them. And since used gear holds up really well, those ecosystems will survive for decades.
Should you buy a mirrorless camera or a DSLR?
Mirrorless cameras are the latest camera technology for interchangeable lens camera systems. At this point they are superior in every aspect and they continue to improve year by year. Because of that, used DSLRs have plummeted in price. This allows people greater access to a starter ILC (interchangeable lens camera) without a significant investment. You can get professional quality images on either format, but mirrorless has a shallower learning curve and much better automatic modes.
The in-body image stabilization (IBIS) stabilizes *every* lens and the eye tracking autofocus make "focus and re-compose" extinct. These are huge selling points for a lot of people. With IBIS you can take photos with up to 2-4 second shutter speeds without a tripod. And never missing focus on a human or animal or bird is pretty cool too.
DSLR camera bodies are no longer being designed by most of the major manufacturers. Thankfully Canon and Nikon developed plenty of bodies and lenses, so you will always have options and upgrade paths. But you will not be able to upgrade to systems with the latest advanced features.
The best DSLRs available are probably the Nikon D850 and the Canon 5D Mark IV. That is as good as it will ever get. The technology ends there. So if you want to enter an active camera ecosystem then you will have to get a mirrorless camera.
DSLR Camera Systems
Full Frame DSLR Camera Bodies
Canon
If you buy a used DSLR, there are some very affordable full frame options. In fact, the classic much-praised budget full frame Canon 6D can be had for under $300 right now.
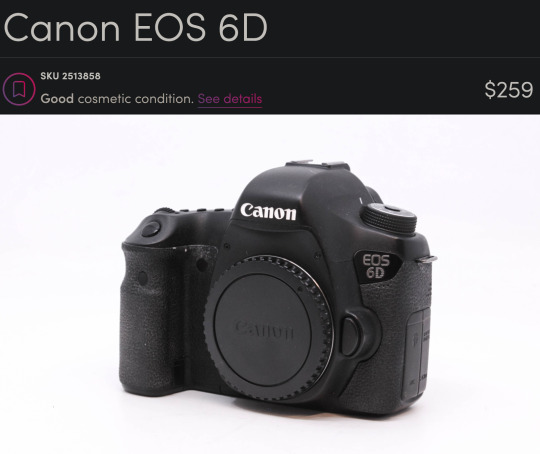
This is an old camera. It has no fancy features. It only has 20 megapixels. It just does what it says on the tin. But it has a big sensor and a *ton* of really cool lenses available for it.
If you are specifically looking to create really high resolution panos, you could also look at the 50 megapixel 5DS R for around $1000.
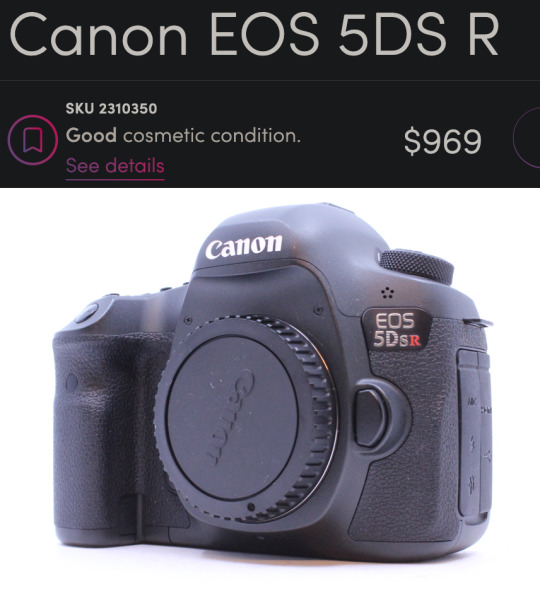
There is a community of landscape pano-maniacs that love to create "gigapans" that have endless amounts of detail where you can zoom in and find new details in every photo. I was only able to create a 120 megapixel photo, but you can still find things like people starting a campfire and a dude fishing and a truck on a far off bridge. So even though this seems expensive for a DSLR, you are looking at another thousand bucks to find anything with more megapixels than this bad boy, so it is quite a good deal relatively speaking.
Nikon
Probably the best DSLRs ever made were the Nikon D800 series and you can get the Nikon D800 for $464.
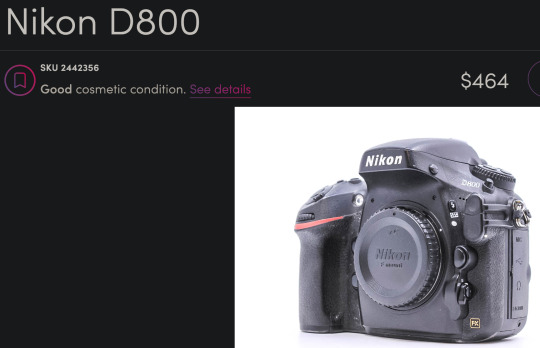
This is a newer camera than the 6D with more megapixels (36) and a better sensor. It also has a more modern autofocus system and about 3 more stops of dynamic range which can come in handy for landscapes. This is an incredible camera for this price.
APS-C DSLR Camera Bodies
If you aren't sure you want to commit to this hobby, you can look into a Canon APS-C sensor body like the Canon Rebels and Canon 60D through 90D models and get good results.
And there are many Nikon DX APS-C bodies that would be great starter cameras as well. If you get a Nikon, you'd have an upgrade path to the D800 if you get hooked by the photography bug. I would miss a few very special Canon lenses like the 100mm f/2.8L macro and the 400mm f/5.6 telephoto but I'm sure I could figure out some reasonable Nikon alternatives that would do roughly the same thing.
Canon APS-C
There is a Canon 60D for $139 right now that would be perfectly adequate for landscape work on a tripod.
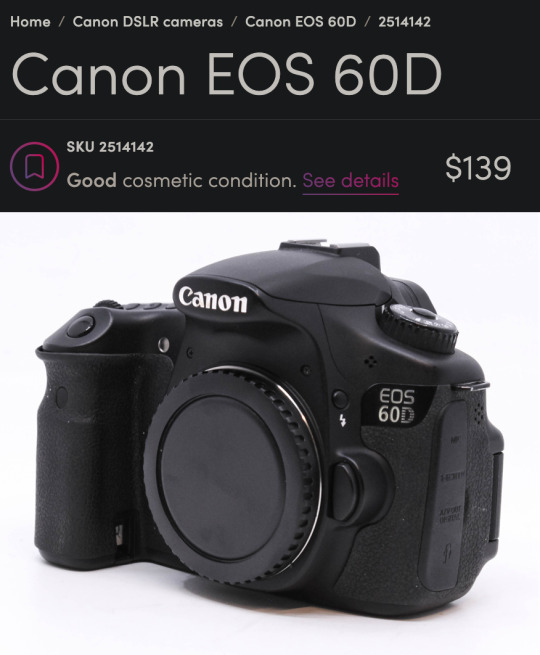
That was my first camera and I took some very nice photos with it. Only 18 megapixels but it has a very convenient flippy screen which was really helpful for a disabled photographer trying to get low angles.
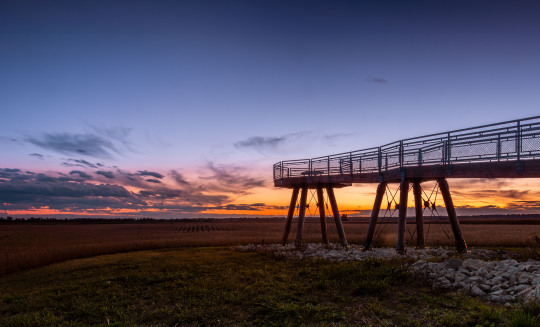
This was in 2014 and I didn't know what I was doing but that is a pretty stellar-looking sunset for a (now) $140 camera.
Nikon APS-C
And the Nikon D3400 would be a great option as well at around $184.
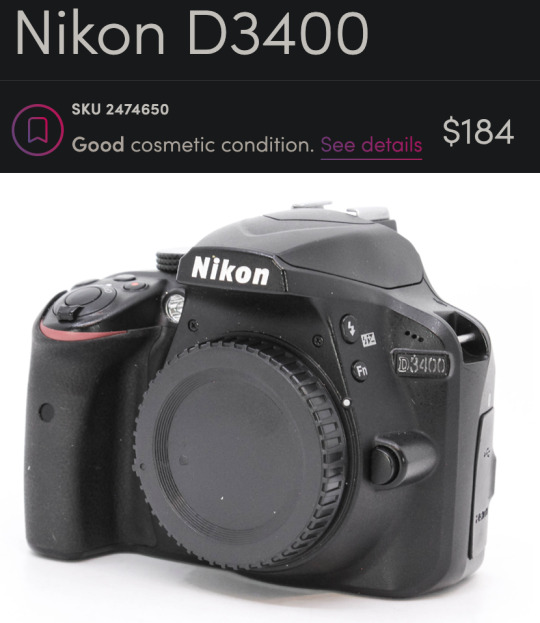
You get some extra megapixels (24) and it is a bit newer than the Canon. I get the sense that used Nikon DSLRs give you more value for your money right now but I don't have a large enough sample size to confirm that.
Full Frame DSLR Lenses
Froggie Note: I am recommending full frame lenses even if you choose an APS-C DSLR body so you have an upgrade path. But also very few purpose-built APS-C lenses had superior glass. Just remember, crop sensor APS-C cameras add ~1.5x to your focal length. So a 16-35mm will have the equivalent field of view of a 24-50mm lens. Still quite acceptable for landscapes, but you may benefit from doing panoramas more often. And if you upgrade to full frame down the road, you'll already have the ideal lens.
Canon DSLR Lenses
If you get the 6D or another Canon you could pair it with the beloved-by-landscapists Canon 16-35mm f/4L.
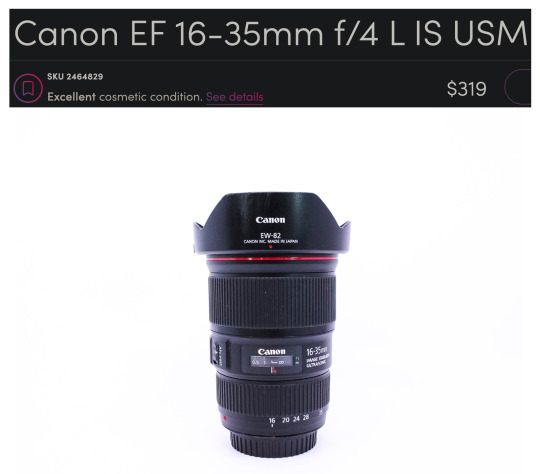
Honestly, it is blowing my mind you can get that combo for under $600. Me from 12 years ago is super jealous right now.
If you are worried you might need something to work in lower light and still want a zoom, the f/2.8L starts at around $434.
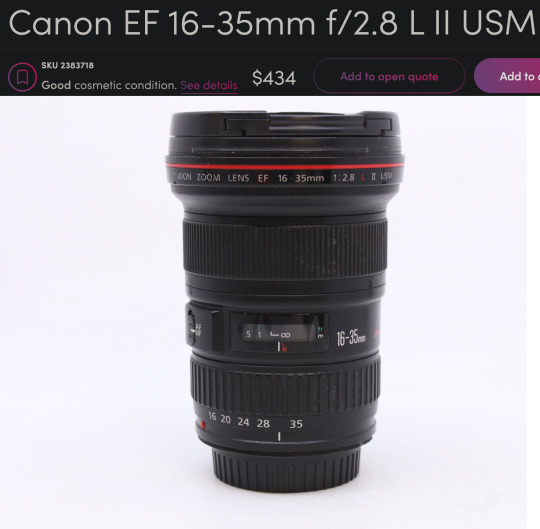
This might be the most famous landscape lens of all time. Kinda boggles the mind how many gorgeous vistas this thing has captured the light of.
If you can live without the zoom, you could get a much sharper prime lens that can also be used in even lower light. A used Sigma 24mm f/1.4 Art lens is $439 would be a fantastic option.
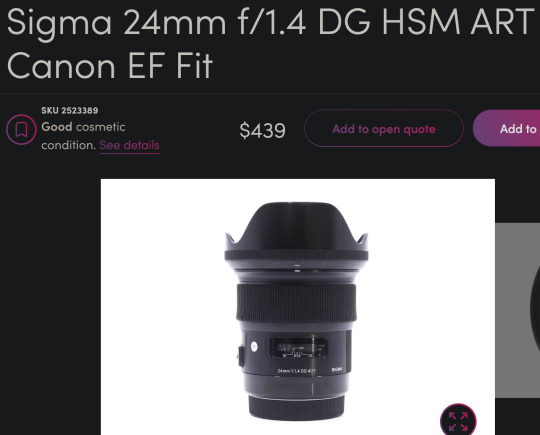
24mm is still a very good focal length for landscapes and the sharpness of this lens lends well to panoramic stitches. Seriously, these art lens are so freaking sharp. Although 35mm is typically preferred for most street photography, I think this would do great for that purpose as well. It couldn't do close up portraits, but 3/4 and full body portraits would look great. I also love this focal length for doggos. It enlarges their heads a bit which enhances adorable-ness.
Though I probably wouldn't recommend the 24mm on APS-C for landscapes as it would put you near a 40mm full frame equivalent field of view.
Nikon DSLR Lenses
And on the Nikon side of things you could get the Nikkor 16-35mm f/4 for $399.
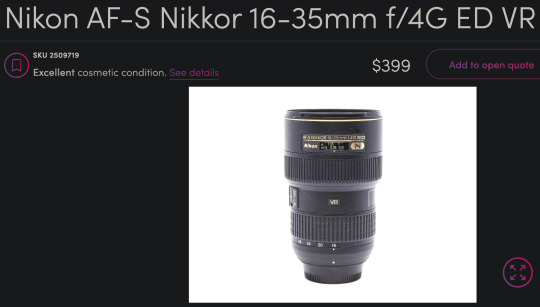
This is a great lens too. Very comparable to the Canon L glass. And paired with that D800 you would have a better shooting experience than with the 6D if it fits within your budget.
It's a little harder to find, but you can also get that same Sigma 24mm f/1.4 Art lens for Nikon at around $528 used on Amazon and in the $400 range on KEH and MPB when it is available.
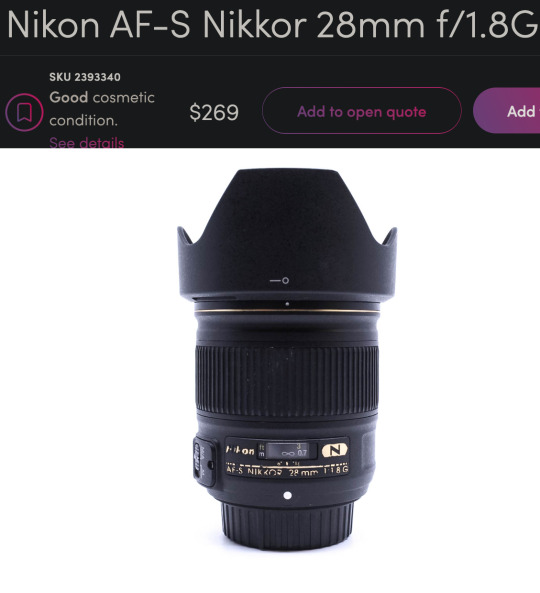
The older and softer Nikkor 28mm f/1.8 is a little more affordable and easier to find.
What if you are not a dentist but are willing to save up for something a little nicer?
Enter the world of...
Mirrorless Camera Systems
Sony currently has my favorite ecosystem of mirrorless cameras and lenses and they are consistently ahead of the other brands as far as technology and features. In fact, many other manufacturers use Sony sensors. They literally supply their competition with their own tech. They are also pretty good about updating firmware—even with older models. So I feel like Sony has a lot of future-proofing advantages over other brands. Sony has a great selection of 3rd party lenses like Sigma, Tamron, Viltrox, Laowa, Samyang, etc. These lenses often have nearly the same optical quality as Sony's G Master lenses at a fraction of the price.
Full Frame Mirrorless
Currently, I think the best value full frame mirrorless camera for landscapes would be the Sony a7R III.
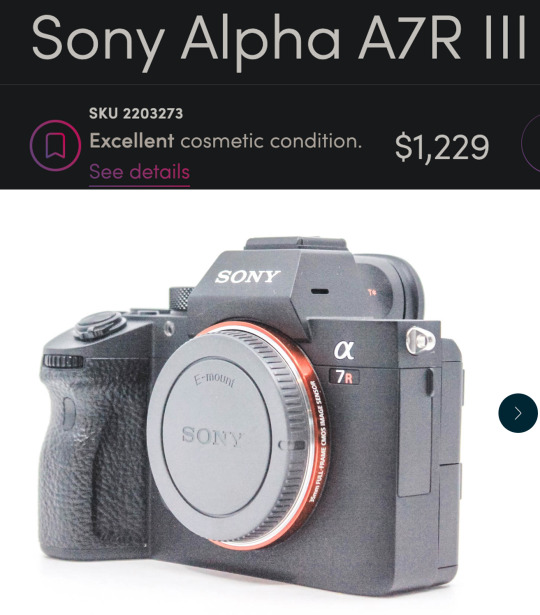
This is very nearly a top-of-the-line landscape camera for a little over $1200.
That might sound like a lot, but I want to be clear...
This isn't just decent. This isn't "good enough." This is a spectacular professional grade full frame camera.
10 years ago you could spend $6500 for a *worse* camera. 5 years ago you could spend $3000 for a *worse* camera.
It can do every genre of photography except for maybe fast paced sports/action. It has an amazing 42 megapixels—which are not necessary but they do make editing and printing a lot less of a headache. The file sizes can get a little big, but storage is a lot cheaper than it used to be.
Oh, and it can be used for professional quality 4K video work too.
The a7R III comes with all of the modern bells and whistles including in-body stabilization (IBIS) so you can handhold at very slow shutter speeds. It has one of the best autofocus systems—complete with eye tracking. But not just human eyes! Dog eyes. Cat eyes. Bird eyes. If it has an eye, the Sony can probably lock focus on it. And it has an admirable 10 fps burst shooting mode.
APS-C Mirrorless
If you want to enter the Sony ecosystem but can't afford full frame quite yet, you could do the a6400 for about $600.
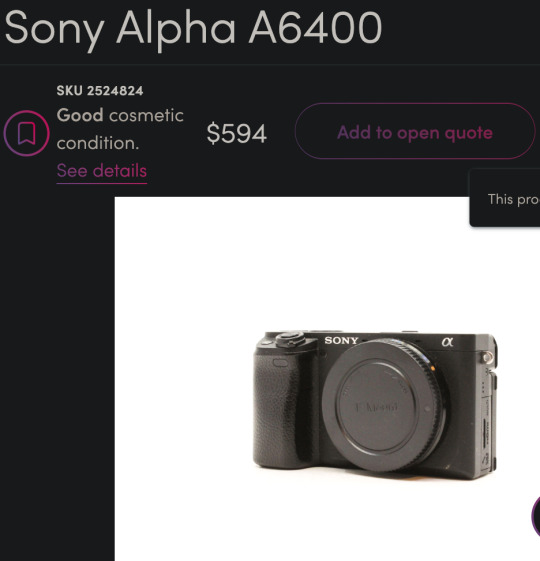
You still get the eye-tracking and the in-body stabilization, but you will lose some image quality at higher ISOs due to the smaller sensor size. However, you can get the same full frame E-mount lenses for it and upgrade to a bigger sensor later on and not have to buy new lenses.
Mirrorless Landscape Lenses
I think a good value landscape lens would be the very impressive Tamron 20-40mm f/2.8.

This is a newer lens so there aren't many deals on used options yet. But this is still a great price for the quality and versatility you get. You will never regret spending a little more on glass.
The 20mm range can fit an entire cityscape in the frame without needing to do a panorama. But if you zoom to 40mm and mount the camera vertically, you could stitch together several photos to get well over the 100 megapixel range.
Also, the 40mm focal range is long enough to do street photography and even head & shoulder portraits. The wide f/2.8 aperture combined with the high-ISO friendly full frame sensor and in-body stabilization means you can shoot in very low light without a tripod. You can also get some great pictures of stars if you travel to someplace with minimal light pollution.
The cheapest landscape zoom lens I could find was the Sony 16-35mm f/4 at $384.
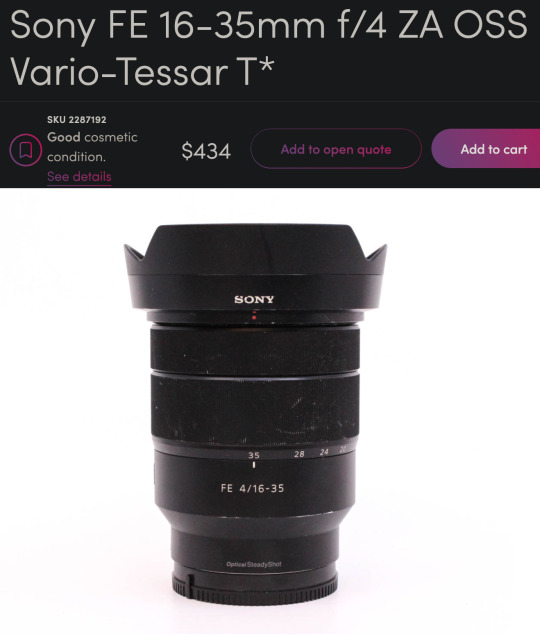
It's one of Sony's older lenses and may not take advantage of all of the a7R III's pixels, but it would be a good option to get you started in this system and upgrade the lens later on.
Mirrorless Prime Lenses
Zoom lenses are great but you have to spend more to get tolerable quality. Kit zooms can be softer than even the tiny plastic lenses on your phone. So a great way to stretch your budget is to get multiple fixed focal length "prime" lenses. Primes can be built inexpensively while still having good low light performance and decent sharpness.
For instance, you could start with something like the Tamron 20mm f/2.8 for $175. And if you want to do more than landscapes you could add the Sony 50mm f/1.8 for $170 later on. Cheap primes will outperform any of those mediocre kit zoom lenses in that same price range. You lose some versatility and have to deal with the pain of changing lenses or zooming with your feet, but sometimes a tight budget demands a little pain.
There is also a higher quality 3rd party wide angle prime lens that is very popular right now. The Viltrox 16mm f/1.8 is only $549 and the reviews say it has similar quality to lenses 3 times its price.
If you have to choose between a better camera body or a better lens, a good lens will help your photos more than a fancy camera body.
Froggie Note: These are examples. You should always do your own research before making a major technological purchase. This post could be a year old by the time you see it and there could be new stuff that is better. But all of the principles I tried to convey should hopefully guide you to a good decision. Also, feel free to message me if you want to ask about specific gear you are considering purchasing.
More Resources
This is my Encyclopedia of Lens Terms which is a helpful primer in understanding all of the wonderful and different lens options available on ILCs.
This is my buying guide for low budget used DSLRs. Similar to this post but less geared toward landscapes.
And this guide for getting decent landscape photos with any camera.
This is a free tutorial that teaches you everything you need to get started with an ILC system.
youtube
And this free tutorial by Karl Taylor is quite good as well.
70 notes
·
View notes
Text
MEDIC!
“Come in, take a seat! I hear you had some questions for me?”
Welcome to the blog! This has been edited to be more of an intro post, but to also cover some boundaries on these ask blogs.
All blogs run by this account adhere to both pieces of canon lore and extended content made by the creator.
That being said, not all blogs in the group will! When in doubt, check their introductions.
RULES:
If your blog hosts explicit NSFW content, especially untagged, we’d prefer you don’t follow us.
While we deal with some heavy topics, being a TF2 based blog; our blog is not comfortable with nsfw/18+ themes and we’d like to make that distinction rather clear.
We especially need to say this with the knowledge that there are a lot of people thirsty over the mercs. Keep in mind that there are human beings behind these blogs, and therefore we ask that you treat us like you would irl.
Otherwise, as long as you’re respectful to the mods, go ape with asks! We don’t tend to do long form magic anons, but if you have an idea, go for it!
EXTRA NOTES:
Our blog follows and runs under slightly altered but canon-based lore.
If you’d like to know more about the Mountain Base lore and be kept up to date on mercenary and asker findings, the official document(s) will be listed in a reblog.
If you see someone chatting in different colors on this blog, it often means they’re a different character! #Not your Scout is the BLU Rover Scout, and #Not your Medic is the RED Rover Medic!
Posts and interactions to blogs that aren’t within the canon or that are unrelated will be tagged with #Not your canon.
We don’t tend to interact as much with random roleplay prompts, due to experiences in the past. If you’d like to do a more serious interaction, just dm us! We’d be happy to do one with you!
INTERCONNECTED BLOGS:
@thecozycamper - A new Sniper on base! What happened to the old one, and how will he fare on this experimental base setup? He’s adjusting, but he’ll have to adjust a lot quicker for what’s to come. (Interacts with canon and non-lore canon blogs, tagged accordingly!)
@rengineer - An extra RED Engineer brought in to help maintain base functions and battles, as Rusty the in-house Engineer is less familiar with the respawn systems. (Interacts with canon and non-lore canon blogs, tagged accordingly!)
RUN BY THE HOST:
@askredmedic - You are here!
@thenewscout - Previously the newest mercenary on the team, and still the newest in terms of experience. He’s doing his best, okay?
@askredspy - He didn’t want to make a blog, but now he has a blog. Ask him questions, but don’t always expect a straight answer.
@askredengineer - Rusty wasn’t brought up into the life of a Mercenary, but he was called to action by Miss Pauling eventually. He occasionally helps Medic with experiments and is a lot smarter than he lets on, he’s just a bit shy at times.
Thanks to innovations by his hand, he’s developed mobile mini-sentries. They were banned from the battlefield until he made them smaller.
@askspybot - Medic’s experiment that led to the creation of the mobile respawn mechanism seen in MVM. (Within this universe, TF2 and MVM kind of take place parallel to each other.)
#askredmedic#important#(Been a while! Found this in my drafts. Let me know if you’d like me to remove your link here rengie! /gen)#ask to tag.#tf2#medic tf2#tf2 medic#ask medic#ask blog#ask me anything
9 notes
·
View notes
Text
1Bhk Service Apartments In Bangalore That Offer Comfort and Convenience
Bangalore, the bustling IT hub of India, attracts professionals, scholars, and business travelers from all over the country and abroad. With its thriving smart culture, presto- paced development, and ever- growing opportunities, the city has a nonstop demand for flexible living solutions. For those looking for comfort, convenience, and value, Long Stay Service Apartments In Bangalore offer a unique mix of hostel-suchlike amenities and the warmth of a home.
Unlike traditional hotels, service apartments give an uncomely atmosphere, making them ideal for extended stays. Whether you are relocating for a job, on a business assignment, or simply exploring life in Bangalore, these apartments offer thoughtfully designed spaces to decompress after a busy day. Fully furnished interiors, modular kitchens, Wi- Fi, cleaning services, and even dedicated workspaces make long stays more manageable and comfortable.
For those seeking a touch of substance, Luxury Service Apartments Bangalore elevate the experience with ultramodern architecture, elegant interiors, smart home features, and curated amenities similar as gyms, swimming pools, concierge services, and premium furnishings. These apartments are frequently located in upmarket points like Indiranagar, Koramangala, Whitefield, and HSR Layout — areas that combine proximity to business zones with life conveniences like cafés, malls, and entertainment hubs.
Managing a home in a new city can be inviting, especially for beginners. That’s where managed apartments in Bangalore come into play. These properties are professionally maintained by devoted brigades that handle everything from security and housekeeping to repair services and guest relations. Managed apartments are n't just accessible, they're also cost-effective in the long run, especially for residents who do n't want to deal with the hassles of changing maids, plumbers, or dependable conservation.
Another major benefit is flexibility. In contrast to rigid rental agreements, Monthly Stay In Bangalore options allow residents to commit to durations that match their needs — be it a many weeks or several months. This setup is especially useful for people in transitional phases, similar to job changers, interns, patients seeking medical care, or families renovating their homes. The flexibility to stay without long- term list contracts gives people peace of mind, freedom, and fiscal clarity.
Beyond inflexibility, there’s also the question of location. Strategic placement is crucial to comfort and convenience in a city like Bangalore. That’s why Service Apartments In Bangalore are frequently situated in high areas with access to transportation, caffs, tech parks, and healthcare. Whether you’re staying in the east near Whitefield, the south near Electronic City, or central regions like MG Road, there are ample options that suit all needs — from solo professionals to families.
A key difference between short-term and long-term accommodations lies in how they support daily living. Service apartments come with well- stocked kitchens, living rooms, washing machines, devoted internet, and entertainment systems. They’re designed to allow residents to live as they would at home — cook their reflections, host guests, and work in peace. This makes them a top choice over hotels for longer durations.
Also, Service Apartments In Bangalore For Monthly Rent give exceptional value. Their cost per night is significantly lower than hotels, yet they offer analogous or better installations. For companies arranging accommodation for workers or expats, these apartments also serve as commercial housing — combining luxury, comfort, and cost efficiency under one roof. Some properties indeed offer co-working zones and meeting apartments to support hybrid working professionals.
Finally, if you are someone who enjoys shopping or dining out, Service Apartments Near Forum Mall Bangalore could be the ideal option. Located in the heart of bustling Koramangala, Forum Mall is a corner surrounded by restaurants, cafés, bookstores, fitness studios, and services. Staying near to such a hub means convenience is no way out of reach — you get to enjoy the city while also having a cozy and well- managed place to retreat to.
In conclusion, whether you are planning an extended visit, looking for upmarket accommodations, or simply want a hassle-free living arrangement, the city's wide range of flexible casing options is ready to meet your needs. And if you are seeking both comfort and convenience in one location, especially near popular shopping and entertainment hubs, you will find a complete and enriching living experience suited for every kind of resident. Visit Us: https://myhomestay.co.in/gallery/studio-stay/
#Best Service Apartments In Bangalore#1 Bhk Service Apartments In Bangalore#1Bhk Service Apartments In Bangalore#2 Bhk Luxury Service Apartments In Bangalore#Bhk Stay In Bangalore#Budget Service Apartments Bangalore#Furnished Serviced Apartments In Bangalore#Long Stay Service Apartments In Bangalore#Luxury Service Apartments Bangalore#managed apartments in bangalore#Monthly Stay In Bangalore#Service Apartments In Bangalore#Service Apartments In Bangalore For Monthly Rent#Service Apartments Near Forum Mall Bangalore#Shared Stay services in bangalore#Studio Service Apartments In Bangalore#Studio Stay Apartment Rental Bangalore#Studio Stay In Bangalore#Studio Stay Rental Apartment Bangalore
0 notes
Text
Power-Packed Performance with Cisco C1300-8P-E-2G – 8-Port PoE+ Switch
In today's fast-paced small office and branch network environments, compact yet capable networking gear is essential. The Cisco C1300-8P-E-2G delivers all the features you need—reliable Gigabit PoE+, versatile uplinks, and flexible deployment options—packaged in a sleek, fanless chassis that fits perfectly in any space.
Key Features of the C1300-8P-E-2G
8× Gigabit Ethernet PoE+ ports: Provides up to 30 W for devices like IP cameras, Wi‑Fi access points, and VoIP phones. With a total PoE budget of 67 W, this switch handles edge deployments easily.
2× 10/100/1000 Mbps combo uplinks (RJ‑45/SFP): Offers flexibility to connect via copper or fiber, extending your reach across the network backbone.
Fanless and whisper‑quiet: Ideal for noise-sensitive offices or retail environments, its silent operation ensures a discreet presence.
Stackable design: Supports stacking of up to four units, allowing network growth without replacing existing infrastructure.
Rack- and desktop-mountable: Installation in standard 19″ racks or on desktops is equally simple and fast.
Why the C1300-8P-E-2G Stands Out
Small to medium-sized networks often need to balance high performance with budget constraints. The C1300-8P-E-2G hits that sweet spot, supporting Power over Ethernet without the bulk and high cost of larger enterprise switches. The combo uplink ports give you copper-based convenience or fiber flexibility—with a future-ready mindset.
Being fanless, it runs silently without moving parts, improving reliability in places where conventional switched fan units would be a distraction. The stackable capability extends your network seamlessly: add more switches as your setup grows, and manage them all as a single logical entity for simplified configuration.
Ideal Use Cases
Edge office or branch locations: Enough PoE ports to support wireless APs and phones without over-provisioning.
Retail environments: Compact form and silent operation make it perfect for store shelves, kiosks, or behind-the-wall installations.
Temporary or remote setups: Lightweight and easy to install, ideal for pop-up offices, events, or project sites.
Distributed networks: Combine with fiber uplinks to bring connectivity from central hubs to satellite offices or outdoor kiosks.
Conclusion
The Cisco C1300-8P-E-2G is a thoughtfully engineered networking solution—compact, quiet, flexible, and scalable. It delivers essential PoE+ power alongside adaptable uplink options, making it a go-to switch for edge deployments, small office setups, or noise-sensitive environments. Fast to deploy, easy to manage, and ready to grow—this switch is built to scale with you.
0 notes
Text
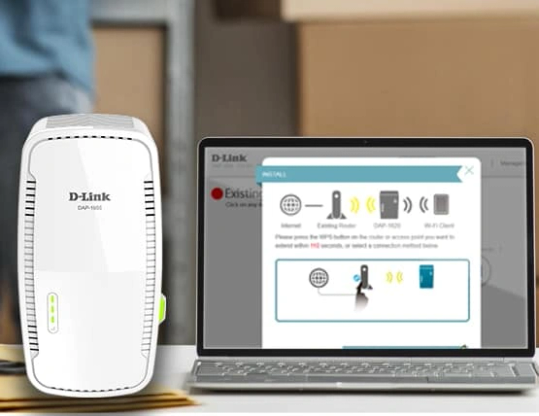
How to Access Dlinkap.local and Set Up Your D-Link Extender
Navigate to Dlinkap.local in your web browser to access the setup and management interface for your D-Link Access Point. Connect your device to the D-Link AP's network. This local web address provides a direct gateway to configure Wi-Fi settings, security protocols, and monitor your access point's status. Follow our easy guide to access your router.
#DLink#DLinkExtender#DLinkWiFi#DLinkAP#DLinkSetup#DlinkapLocal#WiFiExtender#RangeExtenderSetup#WiFiSetupHelp#ExtenderTroubleshooting#FixWiFi#NetworkSetup#WiFiFix#RouterSetup
0 notes
Text
Wavlink Outdoor AP Setup: A Complete Guide
Wavlink offers a huge variety of networking devices for both indoor as well as outdoor connectivity. There is no denying the fact that access to the internet is crucial at every step of our way. Therefore, the router isn't able to provide coverage to an outdoor area. So when it comes to Wi-Fi coverage outdoors, a Wavlink outdoor AP setup is one of the best options that you can pick. Whether you require it for your home balcony, terrace, backyard or for an outdoor space in your office, it can serve all outdoor networking needs. So if you also got your hands on one of them, then in this guide we'll be sharing the complete Wavlink outdoor AP setup details.
What Is A Wavlink Outdoor AP ?
A Wavlink Outdoor access point is a device that extends the wireless signals of your router to an outdoor area. Generally, these devices are weatherproof. So they can easily handle multiple weather conditions from rain, snowfall, extreme heat to thunderstorms as well. Basically, the Wavlink outdoor AP setup is ideal for individuals who need consistent and dependable internet access in areas where traditional routers don’t reach. After its successful installation, you won't face issues like buffering, slow speed or drop in signals. The device works in collaboration with your existing network (router). Thus it provides the same stability outdoors as you experience in your indoor areas.
Step-by-Step Guide to Wavlink Outdoor AP Setup
For easy understanding, we have break down the setup process into various steps:
✓ Collect The Essentials
First up, begin the process by unboxing and collecting all the package contents. Inside you'll find the main AP extender, an Ethernet wire, a power adapter, quick installation manual, POE converter and wall mounting kit as well. Apart from the package contents, for the Wavlink outdoor AP setup, you also need:
A wifi enabled gadget like a smartphone or a laptop.
Next up, a router.
An active internet plan.
A vacant power outlet.
Lastly, the credentials of your main network. Ensure the accuracy of the same.
✓ Position Your Wavlink Outdoor AP
The placement of your Wavlink outdoor AP setup is crucial to ensure maximum coverage. So place it in an outdoor area on some higher surface possibly onto the pole or drill it on the wall. Ensure it's in a clear line of sight to your router.
✓ Connect Hardware
Moving forward, first of all attach the antennas tightly and securely to the main Wavlink unit. Thereafter, link the ethernet wire to the POE IN port of the Wavlink device. Thereafter link it to the POE port of the converter.
Now fetch the wire coming from your router's LAN port and link it to the DATA IN port of your POE converter. Finally, with the help of a power cord, turn on the device. You should see some indicator lights showing that the AP is powered up and is ready for configuration.
✓ Configure The Wavlink Outdoor AP
For further Wavlink outdoor AP setup, you require your laptop or any other wifi enabled device. Now visit its wifi settings. Enable wifi. Link the device to the Wavlink Outdoor AP’s default network. The credentials for the same are written on the extender itself as well as in the user manual.
Thereafter, launch an internet browser. In the URL field, type 192.168.10.1. Click Enter. If by any chance the address didn't serve the purpose then use the alternative. It is http://waplogin.link.
Now as you enter the login screen, you'll be prompted to fill up a password. It is “admin” if not altered previously. Tap on Login.
Finally, wrap up the Wavlink outdoor AP setup, by selecting the AP mode. Thereafter fill up information like wifi SSID and security key (password). As you fill in the accurate details, tap on Apply. Lastly, connect to the new outdoor network and test the connectivity by streaming any high definition content in the outdoor area.
Troubleshooting Common Issues
If you encounter any issues with your Wavlink outdoor AP setup then first do not panic as it is very common. Now check out these few troubleshooting tips to eradicate the problem.
✓ Weak Signal: If you are not getting a strong signal from your Wavlink device then try repositioning the AP higher up or closer to your router. Also make sure there are no physical barriers between the AP and your router. As this will block signal transmission.
✓ Connectivity Issues: To solve connectivity issues, you need to ensure that all cables are securely plugged in. Also your host device is linked to the right Wavlink network. If the connection is unstable you can reboot the AP as well as the router.
✓ No Power: Check the power adapter and ensure it’s properly connected to the AP and an active power source.
0 notes
Text
The Future of Marine Commercial Engines: Trends and Innovations
Running a commercial vessel today is not about getting from port to port—it’s about doing it consistently, safely, and affordably. Engine performance has become a make-or-break factor for vessel operators. With fuel prices climbing and emission rules tightening, it’s not enough for an engine to start up and run.
It has to run well, every time, under load, in heat or salt spray, without costing a fortune to maintain. And when it breaks, parts can’t take weeks to arrive. What’s needed now are Marine Commercial Engines that hold up in real-world conditions—not just during factory testing.
Marine Commercial Engines – Ins and Outs
A Marine Commercial Engine powers the working vessels that keep coastal economies moving—fishing boats, ferries, survey crafts, cargo launches, and more. These engines aren’t there for comfort or show. They’re the muscle that pushes through currents, carry tons of load, and run for hours without pause.
They face extremes—salt corrosion, heat, vibration, or heavy-duty cycles. They have to keep going even when conditions are not ideal. What separates these engines from recreational models is the design for uptime—less downtime, fewer breakdowns, and parts that last. Everything about them is made for one thing: work.
Trends & Innovations in Marine Commercial Engines
Downtime in the marine industry is quite expensive. Operators now shift toward engines that are built for the demands of the future. Here are the latest innovations in marine engine manufacturing:
Cleaner Combustion & Better Fuel Economy
Rising diesel prices hit operators hard. Every percentage point in fuel savings matters over months of operation. New Marine Commercial Engines focus on optimising fuel burn. The combustion systems are engineered to get more work out of each drop of fuel.
These engines are proving their value over time, especially when vessels are logging hundreds of operating hours per month. What owners want is straightforward—lower running costs without sacrificing torque or power. That’s exactly what newer engines deliver.
Compact Design with High Power Output
Space on commercial vessels is tight. There’s cargo, equipment, and people. Engines need to perform without taking up more room than they should. Modern Marine Commercial Engines are designed with compact frames and high power-to-weight ratios.
As a result, they ensure easier installation and good layout options without compromising on performance. A few engines also come in modular form, (it simplifies maintenance). So, you can service parts & keep the vessel operational longer rather than replacing a full block.
Corrosion Resistance & Marine Durability
Saltwater can be brutal. It corrodes, clogs, as well as wears everything down. A big pain point for marine operators is engine breakdown due to corrosion in high-moisture environments. That’s why some of the newer models feature layered protective coatings—up to five layers—to extend life.

Local Production & Region-Specific Calibration
Imported engines may not always suit the local conditions. Operators may find themselves retrofitting systems or even tweaking them. Note that new manufacturing setups in South Asia are addressing such a condition.
Engines are now calibrated specifically for tropical climates, variable loads, and fuel quality differences in these regions. This localisation makes a real difference. Engines run more efficiently and suffer fewer issues when they’re designed for actual working conditions—not someone else’s operating environment.
Emission Compliance Without Complex Retrofitting
New rules around emissions are forcing engine upgrades. However, operators are frustrated with retrofit kits and the cost of modifying old systems. New Marine Commercial Engines already meet IMO Tier II standards right out of the crate.
That means faster vessel registration, access to more ports, as well as fewer fines.
Suited for Multiple Vessel Applications
A common challenge for fleet operators is finding engines that work across different vessel types. One might need quick acceleration for passenger routes, and another might need low-RPM endurance for cargo hauls. The newer engines are built with that in mind.
Their power bands are flexible, making them useful across fishing boats, patrol launches, ferries, and small cargo vessels. This adaptability simplifies fleet management and reduces spare part variety onboard.
Power Range Flexibility & Gear Compatibility
Not all vessels require 1000 horsepower. Some only need 100. That’s why engines now come in wider power ranges—starting around 54 hp and scaling up to 1650 hp.
With compatible gearboxes available for each model, matching engine and propulsion requirements has gotten easier. This kind of flexibility is something vessel operators specifically asked for. It helps cut costs while ensuring optimal performance for each vessel's role.
Stronger After-Sales Support & Shorter Service Cycles
Service used to be the weak link. Operators had to wait weeks for parts or deal with technicians who didn’t understand marine systems. That’s changing. Some manufacturers now offer 24/7 service across coastal belts with stocked parts and trained personnel ready to go.
That means less downtime when something breaks and faster resolution when issues arise. And for engines that are critical to daily operation, that’s no small detail—it’s a deal breaker or maker.
Simpler Maintenance alongside Long Service Intervals
Marine operators aren’t asking for zero-maintenance engines. They’re asking for engines that won’t fail constantly. New designs focus on simplifying upkeep—better filter access, fewer scheduled services, & longer part life. That lets crews handle routine checks without specialised training.
In many cases, planned maintenance intervals have doubled, meaning fewer stops and more time spent doing actual work. It's one of the biggest gains for operators managing multiple vessels.
Integration with Propulsion Systems & Onboard Gear
Marine engines no longer work in isolation. They need to interact seamlessly with other onboard systems—gearboxes, props, cooling, navigation interfaces, etc. Today’s Marine Commercial Engines are designed keeping in mind compatibility. It is not about digital dashboards and flashy controls. It’s about seamless integration with propulsion and control systems to keep everything running in sync without added complexity.
Vessel operators don’t have time for guesswork. They need Marine Commercial Engines that are efficient, serviceable, reliable, and compliant. Innovations are useful only when they solve actual problems—fuel costs, tight spaces, high maintenance, and even delayed support.
The future of marine engines is already here. It’s built on real-world demands, not fancy features. What's clear now is this—if the engine doesn’t make work easier or operations smoother, it's not going to last long in the water.
0 notes
Text

RangeXTD Setup in WiFi AP Mode
When the router and the Range XTD extender connects with the help of an Ethernet cable and the extender transforms the wired signals of the router into wireless ones to give internet access on multiple devices, the method is called the AP mode. The following steps will help you complete the RangeXTD set up in the AP mode.\
0 notes
Text
Enhance Your Network with PoE Switch: Streamline Connections & Boost Productivity

The technology around us keeps changing, and so do the pieces needed for a good telecom network. One key piece is the network switch. There are mainly two types of Switches: the regular network switch and the Power over Ethernet (PoE) switch.
Understanding PoE Switch
PoE switch lets data and power go through one Ethernet cable. Normally, a device needs two cables: one for power and one for the network. But with PoE, the Ethernet cable can carry electricity too.
Power over Ethernet (PoE) is a technology that sends both power and data over the same Ethernet cable. This means devices like wireless access points, IP cameras, and VoIP phones can get power from the same cable that connects them to the network, instead of needing separate cables for power and data.
Advantages of PoE Switch
PoE Switch play an important role in today’s networking environments, powering and linking devices around us. This technology offers many useful points for people and businesses.
Cost-Efficiency: Traditional networking setups often entail significant expenses related to electrical installations and infrastructure.
Flexibility: With PoE Switches, devices can be deployed in locations without access to standard power outlets.
Simplified Installation: PoE Switch streamline the deployment process, reducing reliance on specialized personnel such as electricians.
Devices that use PoE Switch
Within the networking sphere, PoE Switches serve as an important component for powering and transmitting data to multiple connected devices. These switches are used for many tasks. Let us understand where the different PoE Switches are used.
Low Watt Devices
VoIP and Video Phones: These devices were among the first to adopt PoE technology, benefiting from simplified installations and reduced wiring complexities.
IP Security Cameras: Positioned in high-level locations, such as ceilings or walls, these cameras depend on PoE Switch for both power and data connectivity, removing the need for separate power sources.
Wireless Technology: Wireless access points, network repeaters, RFID readers, and other wireless devices leverage PoE Switch to streamline installations and ensure reliable connectivity.
Remote Systems: PoE technology benefits devices deployed in remote or hard-to-access locations, simplifying deployment and maintenance efforts.
Audio Devices: PoE Switches provides an easy-to-use power source for audio devices, contributing to streamlined setups and enhanced efficiency.
High Watt Devices
Laptops: Some advanced PoE switches can deliver higher power outputs, accommodating power-hungry devices such as laptops and providing a versatile solution for both power and data transmission needs.
Monitors: PoE Switches with sufficient power capabilities can also support monitors, offering a centralized power source for display devices in various applications.
Televisions: In certain scenarios, PoE Switch can power televisions, facilitating streamlined installations and reducing the clutter of multiple power cables.
Applications of PoE Switch
PoE Switches caters to a diverse range of applications, including:
Surveillance: IP cameras benefit from PoE technology, simplifying installation and enabling remote monitoring in various environments.
Communication: VoIP phones leverage PoE Switches for power and data connectivity, facilitating seamless communication within organizations.
Wireless Networking: Access points (APs) utilize PoE Switch to extend Wi-Fi coverage, enhancing connectivity for users across different locations.
Wired Connections: PCs, printers, and other networked devices benefit from the convenience and efficiency of PoE-enabled switches.
Choosing the Best PoE switch
Considerations must be made while choosing a PoE switches, such as:
A number of PoE Ports: Determine the number of PoE-enabled ports required to accommodate your devices.
Network Speed: Consider the desired network speed, with Gigabit and Fast Ethernet being common options. Ensure compatibility with the bandwidth requirements of your connected devices.
Managed vs. Unmanaged: Assess whether your network necessitates the advanced features and monitoring capabilities offered by managed PoE Switches.
PoE Budget: Evaluate the power budget of the switch to ensure sufficient power delivery for connected devices.
Main Types of PoE Switch
PoE switches give data and power through one cable, making setups simpler. Different types have different port numbers, such as 16-port, 8-port, and 4-port PoE switches. These meet different needs based on how many devices need connecting.
16 port PoE switches
The 16 port PoE switch is a useful tool for medium to large places. It can connect many devices that need power, like cameras, phones, and Wi-Fi points. With sixteen ports, lots of devices can be plugged in. It works well in offices, schools, or warehouses where many things need internet and power.
8 port PoE switches
The PoE switches 8 port is a smaller option. It works well for smaller setups or places with fewer powered devices. Even though it has fewer ports, it still lets you connect important devices without extra power outlets or lots of cables. People often use this kind of switch in small offices, home networks, or branch locations where there isn’t much space. However having PoE switches is still important to power devices like security cameras or wireless access points.
4 port PoE switch
Similarly, the PoE switches 4 port serves as a minimalist option, ideal for scenarios with limited device connectivity requirements or where space constraints are paramount. While it offers fewer ports compared to its larger counterparts, it remains a valuable tool for powering and connecting essential devices efficiently. Applications for this type of switch include small home networks, retail kiosks, or IoT (Internet of Things) setups where only a handful of PoE devices need to be integrated into the network infrastructure.
PoE switches come with different port options. They are helpful for setting up networks in different places. A PoE switch 16 port can connect many devices in a big office network. A PoE switches 8 port works well for medium-sized setups needing good performance and room to grow. A PoE switch 4 port is small and simple for basic home use. No matter the size, PoE switches make it easy to add devices that need power over the network cables. This technology is very useful for businesses and homes alike.
Reasons to opt for AE Connect PoE Switch.
In the realm of PoE Switches, AE Connect emerges as a distinguished provider, renowned for its innovative features and steadfast performance.
Searching on the internet, ‘PoE switches near me,’ AE Connect offers different types of PoE switches like PoE switch 16 port, PoE switch 8 port, and PoE switch 4 port, with many benefits
Long-Range Transmission: With Extend Mode functionality, PoE Switches supports data and power transmissions up to 250 meters, which is ideal for surveillance applications in large areas.
Port Prioritization: Priority Mode enables the prioritization of critical applications such as video and voice, ensuring optimal performance in high-demand environments.
Traffic Separation: Isolation Mode enhances network security by segregating traffic for downlink ports, minimizing the risk of snooping and tampering.
PoE Auto Recovery: PoE Switches features PoE Auto Recovery, which detects and reboots unresponsive devices, ensuring continuous operation and uptime.
Cloud Centralized Management: Managed PoE Switch integrates seamlessly, providing centralized cloud management for scalable and efficient network administration.
Conclusion
To summarize, PoE Switches signify a crucial milestone in networking tech. These switches offer affordability, versatility, and user-friendliness. They make installations simple by providing data and power through Ethernet, enabling efficient connectivity. Businesses can easily implement security cameras, VoIP systems, or wireless networks. With AE Connect‘s innovative solutions leveraging PoE tech, companies boost efficiency and foster innovation in today’s digital landscape.
FAQs
Q1. How many ports can a PoE switch have?
PoE Switches come with a variety of options, ranging from four to 48 PoE output ports, also known as PSE ports (Power Sourcing Equipment).
Q2. Do all switches provide PoE?
No, not all switches are PoE-enabled. Regular switches do not supply power over Ethernet. However, you can make a regular switch PoE-enabled by using a PoE injector or splitter. When choosing a switch for your network, consider the benefits and limitations of PoE devices for your specific requirements.
#poe switch#4 port poe switch#4 port switch#switch poe 4 port#4 port network switch#poe 4 port switch#poe switch 8 port#8 port switch#8 port gigabit switch#switch poe 8 port#8 port network switch#poe switch 16 port#16 port poe switch#16 port switch#16 port gigabit switch#switch poe 16 port#16 port network switch#poe 16 port switch#24 port poe switch#poe switch 24 port#24 port switch#24 port network switch#poe 24 port switch
0 notes
Text
How to Accomplish the D-Link WiFi Repeater Setup?

What are the Multiple Ways to Perform D-Link WiFi Repeater Setup?
A D-Link WiFi Repeater Setup is an essential device when you want to extend your home networks' WIFI signal to areas with weak or no connectivity. Whether you're in a large house or have dead zones in certain parts of your home, a Wi-Fi extender can ensure smooth internet access across your space. While it’s easy to get started, performing the D-Link WiFi Repeater Setup involves a few steps, and there are multiple methods you can use. This guide will walk you through the web interface setup, the app setup, and using the WPS button for a hassle-free installation.
Pre-setup Requirements:
Before proceeding with any of the setup methods, ensure you have the following essentials:
Active Internet Connection: You must have an active internet connection from your router to extend the Wi-Fi network.
Correct Web/IP Address: Ensure you know the correct IP address or URL (dlinkap.local) for accessing the extender’s web interface.
Admin Credentials: You’ll need the default admin login credentials (usually mentioned in the product manual or on the device label).
D-Link WiFi App: Make sure you have the D-Link WiFi app downloaded and installed on your smartphone for the app setup method.
Computer/Smartphone: Depending on your preferred setup method, you’ll need either a computer or a smartphone.
Now, let’s look at the different ways to configure your D-Link WiFi Range Extender.
D-Link WiFi Repeater Setup Using the Web Interface:
This is one of the most common and straightforward methods of setting up your D-Link WiFi Range Extender. Follow these steps:
Power on the Extender: Connect your D-Link extender to a power outlet and ensure it’s powered on.
Connect to the Extender's Network: On your computer or smartphone, go to the WIFI settings and connect to the network broadcasted by the extender. It might be labeled something like “D-Link_Extender” or similar.
Open a Web Browser: Launch any web browser (Google Chrome, Firefox, Safari, etc.), and in the browser's address bar, type dlinkap.local and hit enter. This will take you to the login page of your D-Link WiFi Extender.
Login with Admin Credentials: Enter the admin username and password. The default credentials are usually “admin” for both fields (unless changed). You can find the details on the label of the extender or in the user manual.
Smart Setup Wizard: After logging in, you’ll be directed to the smart setup wizard. Follow the on-screen prompts to configure your extender.
Wi-Fi Setup: Navigate to the Wi-Fi Setup section. Here, you can modify your extenders' Network Name (SSID) and Password to match your primary router’s settings. It's recommended to use a unique SSID and a strong password.
Advanced Settings: Optionally, go to the Advanced Settings section, where you can configure Parental Controls, AP Mode, Bridge Mode, or Guest Networks based on your needs.
Save Settings: After making the necessary changes, click Save Settings to apply them. Your D-Link WiFi Extender is now configured.
Completion: Once the settings are saved, your extender should be ready to use, and your Wi-Fi coverage will be extended throughout your home.
D-Link WiFi Repeater Setup Using the App:
If you prefer using your smartphone, you can easily set up your D-Link extender using the official D-Link WiFi app. Here’s how:
Download the App: First, download the latest version of the D-Link WiFi app from the App Store (for iPhone) or Google Play Store (for Android).
Connect to the Extender’s Network: Connect your smartphone to the D-Link extender’s Wi-Fi network.
Launch the App: Open the D-Link WiFi app on your phone. If you don’t already have an account, you will need to create one. Once your account is ready, log in with your credentials.
Access the Home Dashboard: After logging in, you will be directed to the home dashboard of your extender. Here, you can manage all settings related to your Wi-Fi extender.
Wi-Fi Setup: Go to Settings > Extended Wi-Fi. You can change the SSID and password here, as well as other security settings.
Save Changes: After entering the new network name and password, click Save to apply the changes. You can also modify additional settings such as Guest Network and Internet Settings if needed.
Completion: After saving the settings, your extender will be configured, and your extended Wi-Fi network will be active.
D-Link WiFi Repeater Setup Using the WPS Button:

For those who prefer a quick and simple setup without involving any browser or app, the WPS method is the best option. Here’s how to perform the setup using the WPS button:
Power On the Extender: Plug the D-Link extender into a power outlet and make sure it’s powered on.
Place the Extender Near the Router: Position your extender close to the router for the initial setup.
Locate the WPS Button: Find the WPS (Wi-Fi Protected Setup) button on both your router and your D-Link extender.
Activate WPS: Press and hold the WPS button on your router for about 3 seconds. After that, press and hold the WPS button on your extender for about 3 seconds.
Wait for Connection: The LED lights on your extender will start blinking green, indicating that the devices are successfully communicating and pairing.
Release the Button: Once the connection is established, the LED light will become solid, indicating that the setup is complete.
Completion: Your D-Link WiFi Extender is now successfully connected to the router, and your extended Wi-Fi network is up and running.
Final Words The D-Link WiFi Repeater Setup can be performed in multiple ways, depending on what’s more convenient for you. Whether you prefer the traditional web interface, the app, or the simple WPS method, all these methods allow you to extend your Wi-Fi signal easily. Make sure you walk through the setup process step-by-step and choose the method that suits you best. By following the instructions carefully, you’ll have your Wi-Fi extended in no time, improving coverage throughout your home.
1 note
·
View note
Text
D-Link DIR-615 | 300Mbps Wi-Fi Router | Affordable Wi-Fi| Fast Ethernet ports (WAN/LAN) | High-Gain Antennas | WI-FI Extender for Home | Easy Setup |MTCTE Certified
Price: [price_with_discount](as of [price_update_date] – Details) [ad_1] From the manufacturer . N 300 Mbps wireless Router with high gain Omni Antenna. Dynamic IP (DHCP) : Yes;Support Multiple operating modes: Router | AP | Repeater | Client;Easy Setup: Super simple set-up with the D-Link Assistant Mobile APP Or with intuitive WEB GUI setup wizard.;Advance security with WPA/WPA2 and firewall…
0 notes
Text
Budget Service Apartments in Bangalore – MyHomeStay
Experience Comfort and Convenience at MA Residency
Prime Location for Easy Connectivity
MA Residency is strategically located near Gangotri Circle in BTM 1st Stage, making it ideal for individuals who value availability. BTM Layout is one of the most well-connected points in Bangalore, with easy access to major IT capitals, educational institutions, coffee shops, and entertainment centers. The megacity's expansive transportation network makes traveling to different corridors hassle-free. Enjoy the best-shared stay services in Bangalore in a prime location with easy access to everything you need.
The position is particularly salutary for professionals working in Electronic City, Koramangala, and Bannerghatta Road. The vacuity of public transport, hack services, and metro connectivity makes diurnal trips accessible. For scholars, proximity to reputed sodalities and guiding centers adds to the appeal of MA Residency as a preferred accommodation choice.
Completely Furnished, ready-to-move-in apartments
One of the biggest advantages of staying at MA Residency is the vacuity of completely furnished apartments. The 1 BHK units come equipped with an essential cab network, including a comfortable bed, wardrobe, study table, lounge, and dining setup. The innards are designed to produce a cozy and functional living terrain, making residents feel at home from the moment they move by. Experience the best-managed apartments in Bangalore with fully furnished accommodations designed for modern living.
The apartments also include a well-equipped kitchen with necessary appliances and implements, allowing residents to prepare their meals easily. This point is especially useful for those who prefer home-cooked food over eating out regularly.
A Range of Essential Amenities
At MA Residency, comfort is rounded by a range of ultramodern amenities that enhance the overall living experience. Some of the crucial amenities available include
High-Speed Wi-Fi In today’s digital world, an endable internet connection is a necessity. MA Residency provides continued high-speed Wi-Fi, making it perfect for remote workers, scholars, and entertainment kers.
RO Drinking Water Clean and safe drinking water is handed out to ensure the well-being of all residents.
Housekeeping Services Regular cleaning and conservation services keep the apartments neat and aseptic, barring the hassle of urnal chores.
Washing Machine Residents have access to washing machines, making laundry easy and accessible.
24/7 Power Backup Power outages are no longer a concern, thanks to the round-the-time power backup installation.
CCTV Security Safety is a top priority, with CCTV surveillance installed in common areas for enhanced security.
Lift Access The presence of elevators ensures convenience for residents, especially those living on advanced floors.
Client Support A devoted support platoon is available to address any surprises or backing needed by the residents.
Ideal for Short-Term and Long-Term Stays
MA Residency caters to different accommodation requirements by offering flexible stay durations. Whether you need a place for a week, a month, or a time, there's an option that suits your demand. 1 BHK Service Apartments in Bangalore at MA Residency provide a fully furnished and comfortable living space with modern amenities.
Short-Term Stays Perfect for business tripper interns or excursionists looking for a comfortable stay with all essential services included.
Monthly Rentals Suitable for professionals, scholars, and remote workers who need a stable, home-like terrain for an extended period.
Long-Long-Ammmodation Ideal for individualities or families seeking a less home in Bangalore without the hassle of setting up a new house from rape.
A CommunitCommunity-AcquaintedExperience
One of the highlights of staying at MA Residency is the sense of community among residents. Unlike traditional rental apartments where neighbors may hardly interact, this accommodation offers a more social terrain, where people from different backgrounds live together and produce a friendly atmosphere.
Common areas similar to the lobby and participated installations give openings for networking and socializing, making it a great place to meet inclined individuals. Whether you're new to the megacity or looking for a community-driven experience, MA Residency offers an inclusive and welcoming range.
Why Choose MA Residency?
Full-furnished apartments Move in with just your particular things and settle into a ready-to-live.
Strategic Location Enjoy easy access to workspaces, educational institutions, and entertainment capitals.
Comprehensive Amenities High-speed internet, power backup, housekeeping, and security ensure a comfortable life.
Affordable and Flexible Stays Choose from short-term or long-term termination plans.
Safe and Secure Environment CCTV surveillance and-on-point give a solicitude-free living experience.
Service Apartments in Bangalore at MA Residency provide a fully furnished and comfortable living space with modern amenities.
Final studies
Still, secure, and comfortable stay in Bangalore, If you're looking for a well-furnished, courteously designed living space and a range of ultramodern amenities, it provides a hassle-free living experience acclimatized to professionals, scholars, and anyone seeking a temporary or long-term home.
Whether you long-fight for work, studies, or particular reasons, MA Residency ensures that your stay in Bangalore is comfortable and accessible. Explore the benefits of a home away from home and experience the style of civic living with a 1 BHK fully furnished Bangalore residence at MA Residence.
#Best Service Apartments In Bangalore#Luxury Service Apartments Bangalore#Service Apartments In Bangalore For Monthly Rent#1Bhk Service Apartments In Bangalore#Monthly Stay In Bangalore#Budget Service Apartments Bangalore#Furnished Serviced Apartments In Bangalore#Studio Service Apartments In Bangalore#Studio Stay Rental Apartment Bangalore#Studio Stay Apartment Rental Bangalore#2 Bhk Luxury Service Apartments In Bangalore#Bhk Stay In Bangalore#Studio Stay In Bangalore#Long Stay Service Apartments In Bangalore#Service Apartments Near Forum Mall Bangalore#Service Apartments Near Forum Mall#Bangalore Home Stay#Service Apartments In Bangalore#1 Bhk Fully Furnished Flat For Rent In Bangalore#1 Bhk Fully Furnished Flat In Bangalore#1 Bhk Service Apartments In Bangalore#Fully Furnished 1 Bhk In Bangalore#1 Bhk Fully Furnished Bangalore#managed apartments in bangalore#Shared Stay services in bangalore
0 notes
Text
High-Performance Wi-fi Access Points
WiFi Access Point: Your Key to Better Connectivity A WiFi access point (AP) is a device that connects wireless devices to a wired network, acting as a bridge between your internet connection and devices like smartphones, laptops, and smart home gadgets.
Key Benefits: Extended Coverage: Expands your WiFi range, ensuring a strong signal throughout your home or office. Improved Performance: Creates a mesh network for faster speeds and reliable connections, even with multiple devices online. Easy Setup: User-friendly installation with mobile apps or web interfaces for quick configuration. Enhanced Security: Features like WPA3 encryption protect your network from unauthorized access. Guest Network Options: Allows visitors to connect without compromising your main network's security.
0 notes
Text
The Anchor: A Tribute to Precision on Two Wheels

When the spirit of craftsmanship meets the world of motorcycle customization, the result is bound to be extraordinary. "The Anchor" is precisely that—a powerful, old-school hardtail chopper built on a Royal Enfield Himalayan frame. Designed for an Indian Naval officer, this unique build brings to life the aesthetics of a war submarine, creating a bike that is as bold as it is meticulously crafted.
At the heart of "The Anchor" is its distinctive setup, starting with an impressive 12021" front tire paired with a robust 20018" rear tire. This aggressive stance gives the bike a solid road presence, which is complemented by the fatter front suspension. Notably, there is no brake setup on the front end—a rare choice that puts all the focus on its stunning 80-spoke wheel assembly. With this bold decision, the bike achieves a minimalist look while still retaining a vintage, raw appeal.
The color combination of black and copper mirrors the style of a submarine, paying homage to the military inspiration behind the build. The bike’s fuel tank and wiring box are attached to the chassis with a unique fastening system, featuring Indian Air Force Helicopter Mil Mi-4 fastening cables—a confidential component that truly elevates the bike’s authenticity and gives it an air of exclusivity. Copper studs are crimped into place, adding a level of finesse that speaks to the skill and creativity poured into every inch of this build.
The hand-crafted touches extend to the foot controls and hand grips, both turned from copper, tying the theme together and lending a warm metallic contrast against the sleek black body. Meanwhile, the front and rear hubs have been turned out of aluminum and painted black, aligning with the bike's no-nonsense, military-grade look. The visible bolts, cables, and fittings reinforce the “super mechanical” vibe, much like the intricate, exposed workings found in a submarine’s engine room.
One standout feature is the ape handlebars, installed under the T-plate to achieve a clean, old-school finish. This attention to detail enhances "The Anchor’s" vintage chopper appeal while maintaining a polished, cohesive look from end to end.
"The Anchor" isn’t just a bike—it’s a story of military-inspired craftsmanship, a showcase of dedication, and an embodiment of raw power. Each detail, from the submarine-inspired color scheme to the specially sourced copper and aluminum components, tells a story of precision, discipline, and artistry that’s sure to captivate motorcycle enthusiasts and military aficionados alike.
#automotive innovation#automobile#automotive#automotive design#custom motorcycle#motorcycle#cafe racer#moto love#harley davidson#royal enfield
1 note
·
View note