#broccoli.js
Explore tagged Tumblr posts
Visit Tumblr Blog
Explore Tumblr blogs with no restrictions, modern design and the best experience.
Last Seen Tumblr Blogs


Fun Fact
China blocked Tumblr because of pornography and censorship problems in 2013.
Text
A simple asset pipeline with Broccoli.js
Updated on 15 October 2017 to support Babel 6.
I’ve been doing some research on how to set up an asset pipeline using Broccoli, which is part of the toolset provided by Ember.js. The official website shows a good example of use, but I wanted to do something a bit more advanced. Here’s the result.
At the end of this text, we’ll have an asset pipeline able to read these inputs:
ES6-flavoured JavaScript modules
JavaScript packages from NPM
Sass files
And generate these outputs:
A single JavaScript file, in the dialect more commonly understood by contemporary browsers
A single CSS file
I will be using Yarn instead of NPM, because it will create fewer headaches down the road. Also, it’s 2017, happy new year!
Basic setup
Broccoli works as a series of filters that can be applied to directory trees. The pipeline is defined on a file named Brocfile.js, which at its minimum expression would look something like this:
1module.exports = 'src/html';
A “Brocfile” is expected to export a Broccoli “node”, which is a sequence of transforms over a directory tree. The simplest possible example would be just a string representing a filesystem path, so the above does the job. We could read it as “the output of this build is a copy of the contents of the src/html directory”.
Note that I say Broccoli “nodes”. There’s a lot of literature out there referring to Broccoli nodes as Broccoli “trees”. It’s the same thing, but “node” seems to be the currently accepted nomenclature, while “tree” is deprecated.
Running a build
We have a very simple Brocfile. Let’s run it and see its result. We need the Broccoli CLI and libraries for this, so let’s first create a Node project, then add the required dependencies:
1$ yarn init -y 2$ yarn add broccoli broccoli-cli
Then we add the following entry to our package.json:
1"scripts": { 2 "build": "rm -rf dist/ && broccoli build dist" 3}
Now we can run the build process any time with this command:
1$ yarn run build
When we run this command, we run a Broccoli build. Since we are not doing much at the moment, it will simply copy the contents of the src/html directory into dist. If dist exists already, our build script deletes it first, as Broccoli would refuse to write into an existing one.
Did you get an error? No problem, that’s probably because you didn’t have a src/html directory to read from. Create one and put some files on it. Then you’ll be able to confirm that the build process is doing what it is expected to do.
NOTE: working with Node/NPM, it’s common to see examples that install a CLI tool (broccoli-cli in this case) globally using npm install -g PACKAGE_NAME. Here we avoid this by installing it locally to the project and then specifying a command that uses it in the scripts section of package.json. These commands are aware of CLI tools in our local node_modules, allowing us to keep eveything tidier, and locking the package version of the CLI tool along with those of other packages.
Using plugins
Most transforms we can think of will be possible using Broccoli plugins. These are modules published on NPM that allow us to transpile code, generate checksums, concatenate files, and generally do all the sort of things we need to produce production-grade code.
Now, in the first example above we referred to a Broccoli node using the string src/html, meant to represent the contents of the directory of the same name. While this will work, using a string this way is now discouraged. Current advice is to instead use broccoli-source, which is the first of the plugins that we will use in this walkthrough. Let’s install it:
1$ yarn add broccoli-source
Now we can require it into our Brocfile and use it. I’m going to use variables in this example to start giving this pipeline some structure:
1var source = require('broccoli-source'); 2var WatchedDir = source.WatchedDir; 3var inputHtml = new WatchedDir('src/html'); 4var outputHtml = inputHtml; 5 6module.exports = outputHtml;
If we run the build, we’ll get exactly the same result as before. We needed more code to get the same thing, but this prepares us for things to come, and follows best practices.
The development server
In the previous example, we referred to the input HTML as a WatchedDir. This suggests that, similarly to other build tools, Broccoli includes a development server that will “watch” the input files, running a build automatically when we save any changes. Let’s create a command for this on our packages.json file, adding a new entry to the scripts section:
1"scripts": { 2 "build": "rm -rf dist/ && broccoli build dist", 3 "serve": "broccoli serve" 4},
Now we can start the development server with:
1$ yarn run serve
Assuming you have a file called index.html in your src/html directory, you should see it at the URL http://localhost:4200. If the file changes, you can simply refresh the page and the changes will appear without you having to explicitly run the build.
Adding a CSS pre-processor
So far this isn’t very exciting. The development server is just showing copies of the HTML files in our project. Let’s add a proper transform.
For this we can use a CSS pre-processor. For example, we can install the Sass plugin:
1yarn add broccoli-sass
Require it at the start of our Brocfile:
1var sass = require('broccoli-sass');
And add it to our pipeline on the same file:
1var inputStyles = new WatchedDir('src/styles'); 2var outputCss = sass([inputStyles], 'index.scss', 'index.css', {});
This example will:
read files from src/styles.
start processing from the file index.scss, which must be in the first node given in the first argument.
leave the result in a file called index.css in the output location.
There’s a problem now. We have an HTML pipeline and a SaSS pipeline. We have to merge the two into a single result.
Merging Broccoli nodes
When you have several sources of code, to be treated in different ways, you get separate Broccoli nodes. Let’s merge the ones we have into a single one. Of course for this we need a new plugin:
1$ yarn add broccoli-merge-trees
Now we can perform the merge and export the result:
1var MergeTrees = require('broccoli-merge-trees'); 2 3// ...process nodes... 4 5module.exports = new MergeTrees( 6 outputCss, 7 outputHtml, 8);
Now ensure that your HTML points to the produced CSS, which in the above example we have called index.css. Reload the develpment server and check the results.
From modern JS to one that browsers understand
All that was quite easy. Dealing with JavaScript took some more figuring out for me, but eventually I got there. Here’s my take on it.
We are going to transform some ES6 files into a more browser-friendly flavour of JavaScript. For this, we need Babel, and there’s a Broccoli plugin that provides it for us. We start by installing the appropriate package, as well as as a Babel plugin that provides the transform we need:
1$ yarn add broccoli-babel-transpiler babel-preset-env
And now we alter our Brocfile.js to look like this:
1var babelTranspiler = require('broccoli-babel-transpiler'); 2 3// ...etc... 4 5var BABEL_OPTIONS = { 6 presets: [ 7 ['env', { 8 targets: { 9 browsers: ['last 2 versions'], 10 }, 11 }], 12 ], 13}; 14 15var inputJs = new WatchedDir('src/js'); 16var outputJs = babelTranspiler(inputJs, BABEL_OPTIONS); 17 18// ...etc... 19 20module.exports = new MergeTrees( 21 outputCss, 22 outputHtml, 23 outputJs, 24);
The BABEL_OPTIONS argument can be used to tell Babel what platforms its output should target. In this case, we specify that we want code compatible with the last 2 versions of current browsers. You can find the list of supported browsers at https://github.com/ai/browserslist#browsers.
Write some JavaScript that uses modern features of the language, and put it in src/js, then check the results. Remember to restart the dev server and reference the JS files from your HTML. The output will consist of files of the same name as those in the input, but converted to JavaScript compatible with current browsers.
NOTE: in previous versions of this guide, we didn’t need BABEL_OPTIONS, as Babel’s default behaviour was good enough for us. Since version 6 of Babel, we need to be more explicit at to what exactly we want, and this new argument is now required.
Local JavaScript modules
The one thing Babel is not doing there is handling module imports. If your project is split into several modules, and you use import in them, these lines will have been transpiled into require lines but these won’t actually work on a browser. Browsers can’t handle JavaScript modules natively, so we will need a new step that will concatenate all files into a single one, while respecting these module dependencies.
I have figured out a couple of ways of doing this, so I’ll explain the one I like best. First we are goint to need a new Broccoli plugin:
1$ yarn add broccoli-watchify
Watchify is a wrapper around Browserify. In turn, Browserify reads JavaScript inputs, parses them, finds any require calls, and concatenates all dependencies into larger files as necessary.
Let’s update the lines of our Brocfile that dealt with JS to look as follows:
1var babelTranspiler = require('broccoli-babel-transpiler'); 2var watchify = require('broccoli-watchify'); 3 4// ... 5 6var inputJs = new WatchedDir('src/js'); 7var transpiledJs = babelTranspiler(inputJs, BABEL_OPTIONS); 8var outputJs = watchify(transpiledJs);
The watchify transform assumes that you will have a file index.js that is the entry point of your JavaScript code. This will be its starting point when figuring out all dependencies across modules. The final product, a single JavaScript file with all required dependencies concatenated, will be produced with the name browserify.js.
Note that imports are expected to use relative paths by default. This is, the following won’t work as it uses an absolute path:
1import utils from 'utils';
But this will (assuming the module utils lives in the same directory as the one doing the import):
1import utils from './utils';
That is the default behaviour. If you use different settings, you can pass some options in. For example, say that you want Browserify to:
Use a file called app.js as entry point
Put the results in a file called index.js
To achieve this, you invoke it with these options:
1var outputJs = watchify(transpiledJs, { 2 browserify: { 3 entries: ['app.js'] 4 }, 5 outputFile: 'index.js', 6});
Using modules from NPM
The best thing about Browserify though, is that it can pull NPM modules into your project. For example, say you want to use jQuery. First you have to fetch it from NPM:
1$ yarn add jquery
Then you would import it in a module in your own code:
1import $ from 'jquery'; 2 3// ...
And finally you tell the Watchify plugin where it can find it, passing an option pointing to your local node_modules as a valid place to pull modules from:
1var outputJs = watchify(transpiledTree, { 2 browserify: { 3 entries: ['index.js'], 4 paths: [__dirname + '/node_modules'], 5 }, 6});
In this example, jQuery will be pulled into the final file, where your code can use it freely.
NOTE: even though by default it expects index.js as entry file, I have noticed sometimes watchify (or browserify, or the plugin, or something), doesn’t work correctly if we pass options and don’t specify the entries value. Therefore, I recommend always including it.
A complete example
I have a GitHub repo that I’m using to experiment with build tools. At the time of writing, there are two working Broccoli examples that you can check out. I may add others in the future, as well as examples with other tools.
Check it out at pablobm/build-tools-research. I hope you find it useful.
0 notes
Text
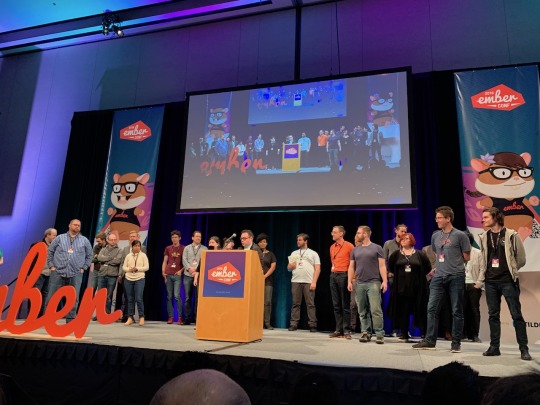
EmberConf 2019 Recap
Now that the dust has settled on EmberConf 2019, I thought I'd take some time to write up my experience and what I learned.
I (@oli) was fortunate to be invited to teach my Broccoli.js workshop this year at EmberConf 2019 during March in Portland, Oregon. I taught a similar workshop last year at the conference and received great feedback, and so of course was more than happy to come back this year with a refresher course. For those unfamiliar with Broccoli.js, it's a JavaScript build system used to compile JavaScript projects, and it makes up the build system for Ember.js. My workshop covered an introduction to how Broccoli.js works and how to integrate with it into your Ember.js application. The workshop this year was another great success with attendees leaving with skills to turbo charge their Ember.js build pipeline.
The conference
EmberConf is one of my favourite conferences, not only because I get to geek out with fellow engineers about Ember.js, but mainly due to the stellar organization by Leah Silber and the amazing EmberConf team. EmberConf places a big emphasis on inclusivity, with no space for harassing behavior or anything that makes anyone's experience unpleasant as is outlined in their code of conduct. It's great to be part of such a welcoming community and the organisers should be very proud of the atmosphere that they foster, I didn't see one unhappy face!

The night before the storm
There was a buzz in the air this year, something felt different. After speaking with Tom Dale at the speakers' dinner the night before the conference kicked off, it was hard not to feel infected by his excitement for the keynote the following morning. Tom Dale and Yehuda Katz are the parents of Ember, it was their takes on the technology of the web circa 2010 that gave birth to SproutCore and what subsequently evolved into Ember.js. From their original mantra of Stop Breaking the Web, to today's JavaScript that you wouldn't dream of writing without a compiler of sorts, Tom and Yehuda have pioneered web technologies for nearly a decade. It's for this reason that when Tom gets excited about something, it's probably worth getting excited about.
Keynote time

Conference day one rolls around, and it's keynote time, the room is packed with 1000 or so people, the lights dim and Yehuda and Tom approach the stage. As is customary for EmberConf, they start off with reiterating that EmberConf is an inclusive conference and if you feel someone looks uncomfortable to go and interject into the situation to disperse it or speak to a conference organiser. I've never seen anyone look uncomfortable at EmberConf — quite the opposite for that matter, which is fantastic.
History
Tom covers a bit of Ember's history, being 8 years old this year, and highlights how much the web has changed since Ember was released. The web has evolved so much in the last 8 years, and Ember has kept up and in a lot of cases spearheaded those changes. Ember was founded on the idea of being a framework to "Build ambitious web applications" and one of the founding values of Ember is "Climb the mountain together" (borrowed from DHH). So the mountain is "ambitious web applications" and we climb it together through shared tools, shipping features, and with big changes we move as a community. This really is a fundamental benefit of Ember, that the shared conventions, tooling, and features avoid bike-shedding over things that we as a community collectively agree on and allows Ember to focus on innovation and new ways of solving common problems in a cohesive manner.
A quick recap of some of the things that Ember has done in the past 8 years:
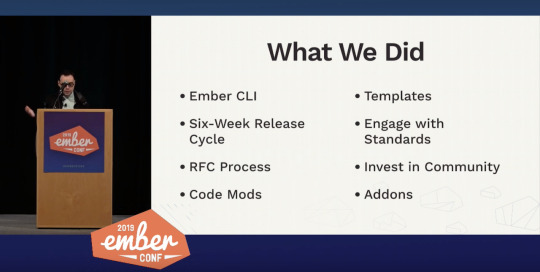
Things like the six-week release cycle, the RFC process, and engaging in standards and code mods have made it easy and predictable for everyone who uses Ember to upgrade as a community and benefit from all the enhancements that come with that. To that end, the Ember Community Surveys show that the majority of users are on the latest LTS or newer version of Ember.
Using the same tools is also important, Ember CLI allows everyone who uses Ember to use the same build tool, and combined with Addons allows for shared extensions to Ember and the build pipeline and allows for the community to experiment and extend Ember in predictable and collaborative ways. Due to the shared conventions anyone opening an Ember application should immediately feel at home and understand how the app is structured, how the build pipeline works, and how additional functionality can be added through shared endeavors.
Stability & Progress
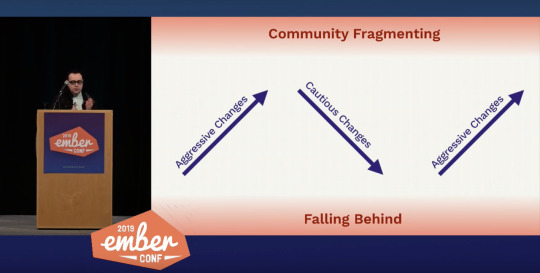
Frameworks must strike a careful balance with the tension between stability and progress. On one hand we don't want to break peoples apps when they upgrade, but at the same time we don't want that to necessarily hold us back from progress, we must climb the mountain together. As such one must strike a balance between aggressive changes cause community fragmentation and cautious changes that leave Ember falling behind its competition.
During the Ember one lifecycle, lots of aggressive changes were made at the expense of leaving some users behind who were unable to upgrade. Comparatively in the 2.0 release cycle, very few major features landed with most releases saying "No new features are added in Ember core", but focused more on internal non-breaking changes to improve stability and coherence. On that note, the fact that the core team managed to ship an entirely new rendering engine under the hood without breaking existing apps, but whilst simultaneously taking advantage of new technologies and improving rendering performance of over 2x is pretty staggering. The Ember 3.0 release cycle tried to strike a balance between shipping things incrementally whilst keeping an eye on the direction of the whole system, driving towards coherence.
Coherence
Coherence is about how features and APIs interact with one another, and making commitments to stability without designing the entire future. For example it means we don't need to land all the changes to a specific programming model in a single release, we can improve the model in one so that new features can be adopted and peoples lives become easier, and finish it off in another thus rounding out the full model and making the API coherent.
An example of this is the component getter and setter model, and how to get rid of this.get('foo') and this.set('foo', 'bar') within a component and replace them with native JavaScript getters and setters this.foo and this.foo = 'bar' would have in the 2.0 series been held back by not having a good story for the setter and this make an asymmetrical and incoherent API. However in the 3.0 series the decision was made to ship the getter syntax, and continue working on the setter syntax until a good solution had been found, and when it does, symmetry was restored and the API became coherent again. So long as there is a long term goal of where we need to get to, we can get there iteratively without having to land everything at once. This strikes a balance between progress and stability.
Incoherence
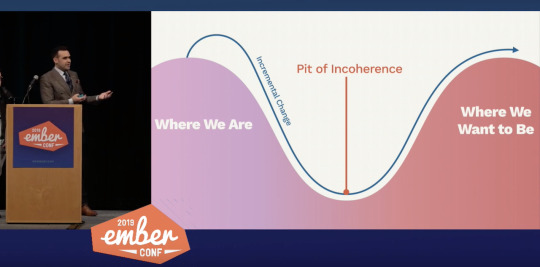
The problem with this idea of intentionally making something incoherent for the sake of progress leads to the intermediary state potentially being confusing to developers. This confusion state has been termed "the pit of incoherence", it's the middle point between where we are and where we want to be.
The side effect of this is the idea of "churn", that developers have to continually upgrade their apps and adopt new models and ways of thinking, rolling with the punches if you will. So there needs to be a way to communicate to developers when a set of APIs and features have all landed and are all coherent, that documentation is ready and the set are officially supported by the core teams. Traditionally this would be done by cutting a new major release, but Ember uses major releases to signify things that have been finally removed after being deprecated instead of new features being added. This really is the idea of a major version change, signifying that change have been made without preserving backwards compatibility. What most frameworks tend to do however is bundle end of life features with new features, which makes it difficult to upgrade and developers are faced with not only features being removed, but also having to learn new paradigms for the new major version. As an attempt to solve this, Ember is introducing "Editions".
Editions
The idea is to take a snapshot of the framework as a way of signalling to all Ember developers, to all of the core teams, the Ember community and the wide JavaScript community these points of maximum coherence. Essentially "these features are all related and they all reinforce and complement one another, they've all landed, they're all polished and documented, it's a good time for you to go and adopt these features in your application".
And with that, Ember will be releasing its first "official" edition: Octane. Octane is a snapshot of the Ember framework at a given time when a set of features are cohesive and represent "the new way" of building an Ember application. These features are as follows:
Octane is a snapshot, a "peak" of coherence where the core teams have landed a bunch of great new features and now is a good time for the community to adopt them.
To find out more about Octane, checkout the offical preview website.
Roundup
I think editions is an awesome way of packaging a set of features that together for a cohesive experience, that isn't coupled to a semver major release but allows developers to adopt a complete set of changes in one go, invest in learning the "new" ways of doing things and collectively we as a community move up the mountain together.
With the release of Ember Octane, we have a bright future for the Ember project. This edition really does feel like a fundamental shift in the programming model, bringing itself up-to-date with the JavaScript wider community, whilst also ushering in awesome new features like tracked properties, something no other framework is doing as far as I can see.
I think Tom said it best at the end of the keynote:
"I got into web development in the first place because I wanted to make cool things for my friends, and I really love the web because I could write a little bit of code, save the file and instantly I got that feedback loop and I saw something happening on the screen. A little bit of code gave me something really visual and fun and interactive, and I could share it with my friends and they loved it as much as I did. I want that feeling when I'm building things at work."
And Tom is absolutely right, using Ember Octane really does have that similar feedback loop, it really does feel fun.

You can find out more about Ember Octane on the Ember.js website https://emberjs.com/editions/octane/ or watch the EmberConf keynote (and the rest of the conference) in full here: https://www.youtube.com/watch?v=O3RKLHvpUAI
I personally want to give a huge shout out to all the Ember core team members who have made this possible, bravo 👏
35 notes
·
View notes
Text
8 best and essential tools for NodeJS software development
In current times to gain potential customers software is very essential. To develop software Node js is a very useful programming language. In this following article very are going to learn in detail about the 8 best and essential tools for NodeJS software development like ExpressJS, Meteor, Socket.io, Koa.JS, Keystone.JS, Electrode.JS, PM2, Broccoli.JS. Click on the following link to read full article https://www.thetechxp.com/essential-tools-for-nodejs-software-development/
0 notes
Photo

An Introduction to Gulp.js
Developers spend precious little time coding. Even if we ignore irritating meetings, much of the job involves basic tasks which can sap your working day:
generating HTML from templates and content files
compressing new and modified images
compiling Sass to CSS code
removing console and debugger statements from scripts
transpiling ES6 to cross-browser–compatible ES5 code
code linting and validation
concatenating and minifying CSS and JavaScript files
deploying files to development, staging and production servers.
Tasks must be repeated every time you make a change. You may start with good intentions, but the most infallible developer will forget to compress an image or two. Over time, pre-production tasks become increasingly arduous and time-consuming; you'll dread the inevitable content and template changes. It's mind-numbing, repetitive work. Wouldn’t it be better to spend your time on more profitable jobs?
If so, you need a task runner or build process.
That Sounds Scarily Complicated!
Creating a build process will take time. It's more complex than performing each task manually, but over the long term, you’ll save hours of effort, reduce human error and save your sanity. Adopt a pragmatic approach:
Automate the most frustrating tasks first.
Try not to over-complicate your build process. An hour or two is more than enough for the initial setup.
Choose task runner software and stick with it for a while. Don't switch to another option on a whim.
Some of the tools and concepts may be new to you, but take a deep breath and concentrate on one thing at a time.
Task Runners: the Options
Build tools such as GNU Make have been available for decades, but web-specific task runners are a relatively new phenomenon. The first to achieve critical mass was Grunt — a Node.js task runner which used plugins controlled (originally) by a JSON configuration file. Grunt was hugely successful, but there were a number of issues:
Grunt required plugins for basic functionality such as file watching.
Grunt plugins often performed multiple tasks, which made customisation more awkward.
JSON configuration could become unwieldy for all but the most basic tasks.
Tasks could run slowly because Grunt saved files between every processing step.
Many issues were addressed in later editions, but Gulp had already arrived and offered a number of improvements:
Features such as file watching were built in.
Gulp plugins were (mostly) designed to do a single job.
Gulp used JavaScript configuration code that was less verbose, easier to read, simpler to modify, and provided better flexibility.
Gulp was faster because it uses Node.js streams to pass data through a series of piped plugins. Files were only written at the end of the task.
Of course, Gulp itself isn't perfect, and new task runners such as Broccoli.js, Brunch and webpack have also been competing for developer attention. More recently, npm itself has been touted as a simpler option. All have their pros and cons, but Gulp remains the favorite and is currently used by more than 40% of web developers.
Gulp requires Node.js, but while some JavaScript knowledge is beneficial, developers from all web programming faiths will find it useful.
What About Gulp 4?
This tutorial describes how to use Gulp 3 — the most recent release version at the time of writing. Gulp 4 has been in development for some time but remains a beta product. It's possible to use or switch to Gulp 4, but I recommend sticking with version 3 until the final release.
Step 1: Install Node.js
Node.js can be downloaded for Windows, macOS and Linux from nodejs.org/download/. There are various options for installing from binaries, package managers and docker images, and full instructions are available.
Note for Windows users: Node.js and Gulp run on Windows, but some plugins may not install or run if they depend on native Linux binaries such as image compression libraries. One option for Windows 10 users is the new bash command-line, which solves many issues.
Once installed, open a command prompt and enter:
node -v
This reveals the version number. You're about to make heavy use of npm — the Node.js package manager which is used to install modules. Examine its version number:
npm -v
Note for Linux users: Node.js modules can be installed globally so they’re available throughout your system. However, most users will not have permission to write to the global directories unless npm commands are prefixed with sudo. There are a number of options to fix npm permissions and tools such as nvm can help, but I often change the default directory. For example, on Ubuntu/Debian-based platforms:
cd ~ mkdir .node_modules_global npm config set prefix=$HOME/.node_modules_global npm install npm -g
Then add the following line to the end of ~/.bashrc:
export PATH="$HOME/.node_modules_global/bin:$PATH"
Finally, update with this:
source ~/.bashrc
Step 2: Install Gulp Globally
Install Gulp command-line interface globally so the gulp command can be run from any project folder:
npm install gulp-cli -g
Verify Gulp has installed with this:
gulp -v
Step 3: Configure Your Project
Note for Node.js projects: you can skip this step if you already have a package.json configuration file.
Presume you have a new or pre-existing project in the folder project1. Navigate to this folder and initialize it with npm:
cd project1 npm init
You’ll be asked a series of questions. Enter a value or hit Return to accept defaults. A package.json file will be created on completion which stores your npm configuration settings.
Note for Git users: Node.js installs modules to a node_modules folder. You should add this to your .gitignore file to ensure they’re not committed to your repository. When deploying the project to another PC, you can run npm install to restore them.
For the remainder of this article, we'll presume your project folder contains the following sub-folders:
src folder: preprocessed source files
This contains further sub-folders:
html - HTML source files and templates
images — the original uncompressed images
js — multiple preprocessed script files
scss — multiple preprocessed Sass .scss files
build folder: compiled/processed files
Gulp will create files and create sub-folders as necessary:
html — compiled static HTML files
images — compressed images
js — a single concatenated and minified JavaScript file
css — a single compiled and minified CSS file
Your project will almost certainly be different but this structure is used for the examples below.
Tip: If you're on a Unix-based system and you just want to follow along with the tutorial, you can recreate the folder structure with the following command:
mkdir -p src/{html,images,js,scss} build/{html,images,js,css}
Step 4: Install Gulp Locally
You can now install Gulp in your project folder using the command:
npm install gulp --save-dev
This installs Gulp as a development dependency and the "devDependencies" section of package.json is updated accordingly. We’ll presume Gulp and all plugins are development dependencies for the remainder of this tutorial.
Alternative Deployment Options
Development dependencies are not installed when the NODE_ENV environment variable is set to production on your operating system. You would normally do this on your live server with the Mac/Linux command:
export NODE_ENV=production
Or on Windows:
set NODE_ENV=production
This tutorial presumes your assets will be compiled to the build folder and committed to your Git repository or uploaded directly to the server. However, it may be preferable to build assets on the live server if you want to change the way they are created. For example, HTML, CSS and JavaScript files are minified on production but not development environments. In that case, use the --save option for Gulp and all plugins, i.e.
npm install gulp --save
This sets Gulp as an application dependency in the "dependencies" section of package.json. It will be installed when you enter npm install and can be run wherever the project is deployed. You can remove the build folder from your repository since the files can be created on any platform when required.
Step 4: Create a Gulp Configuration File
Create a new gulpfile.js configuration file in the root of your project folder. Add some basic code to get started:
// Gulp.js configuration var // modules gulp = require('gulp'), // development mode? devBuild = (process.env.NODE_ENV !== 'production'), // folders folder = { src: 'src/', build: 'build/' } ;
This references the Gulp module, sets a devBuild variable to true when running in development (or non-production mode) and defines the source and build folder locations.
ES6 note: ES5-compatible JavaScript code is provided in this tutorial. This will work for all versions of Gulp and Node.js with or without the --harmony flag. Most ES6 features are supported in Node 6 and above so feel free to use arrow functions, let, const, etc. if you're using a recent version.
gulpfile.js won't do anything yet because you need to …
Step 5: Create Gulp Tasks
On its own, Gulp does nothing. You must:
install Gulp plugins, and
write tasks which utilize those plugins to do something useful.
It's possible to write your own plugins but, since almost 3,000 are available, it's unlikely you'll ever need to. You can search using Gulp's own directory at gulpjs.com/plugins/, on npmjs.com, or search "gulp something" to harness the mighty power of Google.
Gulp provides three primary task methods:
gulp.task — defines a new task with a name, optional array of dependencies and a function.
gulp.src — sets the folder where source files are located.
gulp.dest — sets the destination folder where build files will be placed.
Any number of plugin calls are set with pipe between the .src and .dest.
The post An Introduction to Gulp.js appeared first on SitePoint.
by Craig Buckler via SitePoint http://bit.ly/2PBh4vG
0 notes
Text
Intro to Broccoli.js: Demystify the build tool https://t.co/FMX9UFq5Co
— JavaScript Facts (@mentallion) April 25, 2017
0 notes
Photo

An Introduction to Gulp.js
Developers spend precious little time coding. Even if we ignore irritating meetings, much of the job involves basic tasks which can sap your working day:
generating HTML from templates and content files
compressing new and modified images
compiling Sass to CSS code
removing console and debugger statements from scripts
transpiling ES6 to cross-browser–compatible ES5 code
code linting and validation
concatenating and minifying CSS and JavaScript files
deploying files to development, staging and production servers.
Tasks must be repeated every time you make a change. You may start with good intentions, but the most infallible developer will forget to compress an image or two. Over time, pre-production tasks become increasingly arduous and time-consuming; you'll dread the inevitable content and template changes. It's mind-numbing, repetitive work. Wouldn’t it be better to spend your time on more profitable jobs?
If so, you need a task runner or build process.
That Sounds Scarily Complicated!
Creating a build process will take time. It's more complex than performing each task manually, but over the long term, you’ll save hours of effort, reduce human error and save your sanity. Adopt a pragmatic approach:
Automate the most frustrating tasks first.
Try not to over-complicate your build process. An hour or two is more than enough for the initial setup.
Choose task runner software and stick with it for a while. Don't switch to another option on a whim.
Some of the tools and concepts may be new to you, but take a deep breath and concentrate on one thing at a time.
Task Runners: the Options
Build tools such as GNU Make have been available for decades, but web-specific task runners are a relatively new phenomenon. The first to achieve critical mass was Grunt — a Node.js task runner which used plugins controlled (originally) by a JSON configuration file. Grunt was hugely successful, but there were a number of issues:
Grunt required plugins for basic functionality such as file watching.
Grunt plugins often performed multiple tasks, which made customisation more awkward.
JSON configuration could become unwieldy for all but the most basic tasks.
Tasks could run slowly because Grunt saved files between every processing step.
Many issues were addressed in later editions, but Gulp had already arrived and offered a number of improvements:
Features such as file watching were built in.
Gulp plugins were (mostly) designed to do a single job.
Gulp used JavaScript configuration code that was less verbose, easier to read, simpler to modify, and provided better flexibility.
Gulp was faster because it uses Node.js streams to pass data through a series of piped plugins. Files were only written at the end of the task.
Of course, Gulp itself isn't perfect, and new task runners such as Broccoli.js, Brunch and webpack have also been competing for developer attention. More recently, npm itself has been touted as a simpler option. All have their pros and cons, but Gulp remains the favorite and is currently used by more than 40% of web developers.
Gulp requires Node.js, but while some JavaScript knowledge is beneficial, developers from all web programming faiths will find it useful.
What About Gulp 4?
This tutorial describes how to use Gulp 3 — the most recent release version at the time of writing. Gulp 4 has been in development for some time but remains a beta product. It's possible to use or switch to Gulp 4, but I recommend sticking with version 3 until the final release.
Step 1: Install Node.js
Node.js can be downloaded for Windows, macOS and Linux from nodejs.org/download/. There are various options for installing from binaries, package managers and docker images, and full instructions are available.
Note for Windows users: Node.js and Gulp run on Windows, but some plugins may not install or run if they depend on native Linux binaries such as image compression libraries. One option for Windows 10 users is the new bash command-line, which solves many issues.
Once installed, open a command prompt and enter:
node -v
This reveals the version number. You're about to make heavy use of npm — the Node.js package manager which is used to install modules. Examine its version number:
npm -v
Note for Linux users: Node.js modules can be installed globally so they’re available throughout your system. However, most users will not have permission to write to the global directories unless npm commands are prefixed with sudo. There are a number of options to fix npm permissions and tools such as nvm can help, but I often change the default directory. For example, on Ubuntu/Debian-based platforms:
cd ~ mkdir .node_modules_global npm config set prefix=$HOME/.node_modules_global npm install npm -g
Then add the following line to the end of ~/.bashrc:
export PATH="$HOME/.node_modules_global/bin:$PATH"
Finally, update with this:
source ~/.bashrc
Step 2: Install Gulp Globally
Install Gulp command-line interface globally so the gulp command can be run from any project folder:
npm install gulp-cli -g
Verify Gulp has installed with this:
gulp -v
Step 3: Configure Your Project
Note for Node.js projects: you can skip this step if you already have a package.json configuration file.
Presume you have a new or pre-existing project in the folder project1. Navigate to this folder and initialize it with npm:
cd project1 npm init
You’ll be asked a series of questions. Enter a value or hit Return to accept defaults. A package.json file will be created on completion which stores your npm configuration settings.
Note for Git users: Node.js installs modules to a node_modules folder. You should add this to your .gitignore file to ensure they’re not committed to your repository. When deploying the project to another PC, you can run npm install to restore them.
For the remainder of this article, we'll presume your project folder contains the following sub-folders:
src folder: preprocessed source files
This contains further sub-folders:
html - HTML source files and templates
images — the original uncompressed images
js — multiple preprocessed script files
scss — multiple preprocessed Sass .scss files
build folder: compiled/processed files
Gulp will create files and create sub-folders as necessary:
html — compiled static HTML files
images — compressed images
js — a single concatenated and minified JavaScript file
css — a single compiled and minified CSS file
Your project will almost certainly be different but this structure is used for the examples below.
Tip: If you're on a Unix-based system and you just want to follow along with the tutorial, you can recreate the folder structure with the following command:
mkdir -p src/{html,images,js,scss} build/{html,images,js,css}
Step 4: Install Gulp Locally
You can now install Gulp in your project folder using the command:
npm install gulp --save-dev
This installs Gulp as a development dependency and the "devDependencies" section of package.json is updated accordingly. We’ll presume Gulp and all plugins are development dependencies for the remainder of this tutorial.
Alternative Deployment Options
Development dependencies are not installed when the NODE_ENV environment variable is set to production on your operating system. You would normally do this on your live server with the Mac/Linux command:
export NODE_ENV=production
Or on Windows:
set NODE_ENV=production
This tutorial presumes your assets will be compiled to the build folder and committed to your Git repository or uploaded directly to the server. However, it may be preferable to build assets on the live server if you want to change the way they are created. For example, HTML, CSS and JavaScript files are minified on production but not development environments. In that case, use the --save option for Gulp and all plugins, i.e.
npm install gulp --save
This sets Gulp as an application dependency in the "dependencies" section of package.json. It will be installed when you enter npm install and can be run wherever the project is deployed. You can remove the build folder from your repository since the files can be created on any platform when required.
Step 4: Create a Gulp Configuration File
Create a new gulpfile.js configuration file in the root of your project folder. Add some basic code to get started:
// Gulp.js configuration var // modules gulp = require('gulp'), // development mode? devBuild = (process.env.NODE_ENV !== 'production'), // folders folder = { src: 'src/', build: 'build/' } ;
This references the Gulp module, sets a devBuild variable to true when running in development (or non-production mode) and defines the source and build folder locations.
ES6 note: ES5-compatible JavaScript code is provided in this tutorial. This will work for all versions of Gulp and Node.js with or without the --harmony flag. Most ES6 features are supported in Node 6 and above so feel free to use arrow functions, let, const, etc. if you're using a recent version.
gulpfile.js won't do anything yet because you need to …
Step 5: Create Gulp Tasks
On its own, Gulp does nothing. You must:
install Gulp plugins, and
write tasks which utilize those plugins to do something useful.
It's possible to write your own plugins but, since almost 3,000 are available, it's unlikely you'll ever need to. You can search using Gulp's own directory at gulpjs.com/plugins/, on npmjs.com, or search "gulp something" to harness the mighty power of Google.
Gulp provides three primary task methods:
gulp.task — defines a new task with a name, optional array of dependencies and a function.
gulp.src — sets the folder where source files are located.
gulp.dest — sets the destination folder where build files will be placed.
Any number of plugin calls are set with pipe between the .src and .dest.
Continue reading %An Introduction to Gulp.js%
by Craig Buckler via SitePoint http://ift.tt/2DO6sCV
0 notes
Photo

Ember.js: The Perfect Framework for Web Applications
Ember.js is an opinionated frontend JavaScript framework that has been getting a lot of interest lately. This article will introduce some key concepts of the framework while building a simple application with it, in order to show a basic example of what it is capable of producing.
Our example application is going to be a Dice Roller, including the ability to roll some dice and view a history of all dice rolls that have been performed to date. A fully working version of this application is available from Github
The Ember.js framework pulls together a lot of modern JavaScript concepts and technologies into one single bundle, including but not limited to:
The use of the Babel transpiler tool, to support ES2016 throughout.
Testing support at the Unit, Integration and Acceptance levels as standard, powered by Testem and QTest.
Asset building using Broccoli.js.
Support for live reloading, for shorter development cycle times.
Templating using the Handlebars markup syntax.
URL Routing first development to ensure that deep linking is fully supported throughout.
Full data layer built around JSON API, but pluggable for whatever API access you need.
In order to work with Ember.js, it is assumed that you have an up-to-date installation of Node.js and npm. If not then these can be downloaded and installed from the Node.js website.
It should also be mentioned that Ember is purely a frontend framework. It has a number of ways of interacting with the backend of your choice, but this backend is not in any way handled by Ember itself.
Introducing ember-cli
A lot of the power of Ember.js comes from its command line interface (CLI). This tool - known as ember-cli - powers much of the development lifecycle of an Ember.js application, starting from creating the application, through adding functionality into it all the way to running the test suites and starting the actual project in development mode.
Almost everything that you do whilst developing an Ember.js application will involve this tool at some level, so it is important to understand how best to use it. We will be making use of it throughout this article.
The first thing we need to do is ensure that the Ember.js CLI is correctly installed and up-to-date. This is done by installing from npm, as follows:
$ npm install -g ember-cli
and we can check it was successfully installed by running the following command:
$ ember --version ember-cli: 2.15.0-beta.1 node: 8.2.1 os: darwin x64
Creating Your First Ember.js App
Once ember-cli is installed, you are ready to start creating your application. This is the first place we will be making use of the Ember.js CLI tool - it creates the entire application structure, setting everything up ready to run.
$ ember new dice-roller installing app create .editorconfig create .ember-cli create .eslintrc.js create .travis.yml create .watchmanconfig create README.md create app/app.js create app/components/.gitkeep create app/controllers/.gitkeep create app/helpers/.gitkeep create app/index.html create app/models/.gitkeep create app/resolver.js create app/router.js create app/routes/.gitkeep create app/styles/app.css create app/templates/application.hbs create app/templates/components/.gitkeep create config/environment.js create config/targets.js create ember-cli-build.js create .gitignore create package.json create public/crossdomain.xml create public/robots.txt create testem.js create tests/.eslintrc.js create tests/helpers/destroy-app.js create tests/helpers/module-for-acceptance.js create tests/helpers/resolver.js create tests/helpers/start-app.js create tests/index.html create tests/integration/.gitkeep create tests/test-helper.js create tests/unit/.gitkeep create vendor/.gitkeep NPM: Installed dependencies Successfully initialized git. $
This has caused an entire application to be created which is ready to run. It has even set up Git as source control to track your work.
Note: If you wish, you can disable the Git integration and you can prefer Yarn over npm. The help for the tool describes this and much more.
Now, let's see what it looks like. Starting the Ember application for development purposes is - once again - also done using ember-cli:
$ cd dice-roller $ ember serve Livereload server on http://localhost:49153 'instrument' is imported from external module 'ember-data/-debug' but never used Warning: ignoring input sourcemap for vendor/ember/ember.debug.js because ENOENT: no such file or directory, open '/Users/coxg/source/me/writing/repos/dice-roller/tmp/source_map_concat-input_base_path-http://ift.tt/2yq7keZ' Warning: ignoring input sourcemap for vendor/ember/ember-testing.js because ENOENT: no such file or directory, open '/Users/coxg/source/me/writing/repos/dice-roller/tmp/source_map_concat-input_base_path-http://ift.tt/2wZEQHr' Build successful (5835ms) – Serving on http://localhost:4200/ Slowest Nodes (totalTime => 5% ) | Total (avg) ----------------------------------------------+--------------------- Babel (16) | 4625ms (289 ms) Rollup (1) | 445ms
We are now ready to go. The application is running on http://localhost:4200, and looks like this:
It is also running a LiveReload service which automatically watches for changes to the filesystem. This means that you can have an incredibly fast turnaround time when tweaking your site design.
Let's try it?
The initial page already tells us what to do, so let's go and change the main page and see what happens. We're going to change the app/templates/application.hbs file to look like the following.
This is my new application.
Note: The tag is part of how Routing works in Ember. We will cover that later on.
The first thing to notice is the output from ember-cli, which should look as follows:
file changed templates/application.hbs Build successful (67ms) – Serving on http://localhost:4200/ Slowest Nodes (totalTime => 5% ) | Total (avg) ----------------------------------------------+--------------------- SourceMapConcat: Concat: App (1) | 9ms SourceMapConcat: Concat: Vendor /asset... (1) | 8ms SimpleConcatConcat: Concat: Vendor Sty... (1) | 4ms Funnel (7) | 4ms (0 ms)
This tells us that it has spotted that we changed the template and rebuilt and restarted everything. We've had zero involvement in that part of it.
Now let's look at the browser. If you've got LiveReload installed and running you will not even have needed to refresh the browser for this to be picked up, otherwise, you will need to reload the current page.
Not very exciting, but this is with almost no effort on our part that we've achieved this.
In addition, we get a fully set up test suite ready to run. This is - unsurprisingly - run using the Ember tool as well, as follows:
$ ember test ⠸ Building'instrument' is imported from external module 'ember-data/-debug' but never used ⠴ BuildingWarning: ignoring input sourcemap for vendor/ember/ember.debug.js because ENOENT: no such file or directory, open '/Users/coxg/source/me/writing/repos/dice-roller/tmp/source_map_concat-input_base_path-http://ift.tt/2ypNuAD' ⠇ BuildingWarning: ignoring input sourcemap for vendor/ember/ember-testing.js because ENOENT: no such file or directory, open '/Users/coxg/source/me/writing/repos/dice-roller/tmp/source_map_concat-input_base_path-http://ift.tt/2x0OGZZ' cleaning up... Built project successfully. Stored in "/Users/coxg/source/me/writing/repos/dice-roller/tmp/class-tests_dist-PUnMT5zL.tmp". ok 1 PhantomJS 2.1 - ESLint | app: app.js ok 2 PhantomJS 2.1 - ESLint | app: resolver.js ok 3 PhantomJS 2.1 - ESLint | app: router.js ok 4 PhantomJS 2.1 - ESLint | tests: helpers/destroy-app.js ok 5 PhantomJS 2.1 - ESLint | tests: helpers/module-for-acceptance.js ok 6 PhantomJS 2.1 - ESLint | tests: helpers/resolver.js ok 7 PhantomJS 2.1 - ESLint | tests: helpers/start-app.js ok 8 PhantomJS 2.1 - ESLint | tests: test-helper.js 1..8 # tests 8 # pass 8 # skip 0 # fail 0 # ok
Note that the output talks about PhantomJS. This is because there is full support for Integration tests that run in a browser, and by default, these run headless in the PhantomJS browser. There is full support for running them in other browsers if you wish, and when setting up continuous integration (CI) it is worth doing this to ensure that your application works correctly in all supported browsers.
How an Ember.js app is structured
Before we get to actually writing our application, let's explore how it is structured on the filesystem. The ember new command above will have created a whole directory structure on your computer, with lots of different parts. Understanding all of these is important to efficiently work with the tool and create amazing projects.
Continue reading %Ember.js: The Perfect Framework for Web Applications%
by Graham Cox via SitePoint http://ift.tt/2ylUiSi
0 notes