#how to install mysql in ubuntu
Explore tagged Tumblr posts
Visit Tumblr Blog
Explore Tumblr blogs with no restrictions, modern design and the best experience.
Last Seen Tumblr Blogs


Fun Fact
Tumblr Inc. is funded by 13 investors.
Text
How to Install Wordpress on Ubuntu 24.04
How to Install Wordpress on Ubuntu 24.04 - Install and configure WordPress on Ubuntu 24.04 with LEMP. Set up Nginx, MySQL, and PHP to host secure, dynamic WordPress sites.
0 notes
Video
youtube
How To Install PHP 8.0 Apache Mysql 8.0 On Ubuntu 25.04
0 notes
Text
How to Install MySQL 8 – Step-by-Step Guide
How to Install MySQL 8 – Step-by-Step GuideMySQL 8 brings improved performance, security, and features. Below are the installation steps for different operating systems. For Ubuntu / Debian-based LinuxStep 1: Update your system sudo apt updatesudo apt upgradeStep 2: Add the MySQL APT repository wget https://dev.mysql.com/get/mysql-apt-config_0.8.29-1_all.debsudo dpkg -i…
0 notes
Text
How to Optimize Your Offshore SSD VPS for Maximum Efficiency
Having a well-optimized Offshore SSD VPS Hosting Solution is crucial for maintaining high performance, security, and cost-effectiveness. By implementing the right strategies, you can maximize the efficiency of your SSD VPS Servers while ensuring a seamless experience for your users. Here’s a step-by-step guide to help you achieve optimal performance.

1. Select the Right Operating System
Choosing an efficient OS like Linux (Ubuntu, CentOS, or Debian) can reduce resource consumption and improve server stability. Opt for minimal installations to avoid unnecessary processes that slow down your Offshore VPS Hosting Services.
2. Keep Software and System Updated
Regular updates enhance security and efficiency. Ensure your Offshore VPS Hosting Solutions receive the latest OS patches, security fixes, and software upgrades to maintain peak performance.
3. Optimize SSD Performance
Since SSDs provide high-speed storage, enabling TRIM support and reducing unnecessary write operations will extend their lifespan and enhance server performance. Using a lightweight file system like ext4 or XFS can further optimize storage efficiency.
4. Implement Caching Mechanisms
Caching reduces server load and speeds up content delivery. Tools like Memcached, Redis, or Varnish can significantly improve the responsiveness of your SSD VPS Servers by storing frequently accessed data.
5. Use a Lightweight Web Server
Switching to a high-performance web server like Nginx or LiteSpeed can enhance efficiency by handling more simultaneous connections with fewer resources. This optimization is essential for Offshore VPS Hosting Services that deal with heavy traffic.
6. Optimize Database Queries
Inefficient database queries can slow down your server. Use indexing, query caching, and database optimization tools to ensure fast and efficient data retrieval. MySQL tuning with InnoDB adjustments can also improve performance.
7. Strengthen Security Measures
Securing your Offshore SSD VPS Hosting Solutions is critical. Use firewalls (like UFW or CSF), SSH key authentication, and regular malware scans to prevent vulnerabilities and unauthorized access.
8. Leverage a Content Delivery Network (CDN)
A CDN reduces latency and speeds up global content delivery by caching and distributing resources across multiple locations. This reduces the direct load on your Offshore VPS Hosting Solutions.
9. Monitor Resource Usage
Tracking CPU, memory, and disk space usage is essential for identifying bottlenecks. Use monitoring tools like Nagios, Zabbix, or htop to ensure your SSD VPS Servers operate efficiently.
10. Optimize Bandwidth Usage
Reduce data transfer costs and improve performance by enabling Gzip or Brotli compression, minimizing HTTP requests, and optimizing website images. This ensures efficient bandwidth usage for your Off shore SSD VPS Hosting Solutions.
Conclusion
By applying these optimization techniques, you can enhance the efficiency, security, and performance of your Offshore SSD VPS Hosting Solutions. A well-maintained VPS ensures smooth operation, better user experience, and cost savings. Start implementing these strategies today to get the most out of your hosting solution!
0 notes
Text
How to Manage Ubuntu Boot Services: List, Start, and Stop Systemd Services at Startup
Services, also known as daemons, are background programs and scripts that provide essential functionalities, such as database services like MySQL, or web server capabilities (e.g., Tomcat). As the number of services installed and running increases overtime, it can become challenging to keep track of all active applications. Understanding which services are configured to start automatically when…
0 notes
Text
Install b2evolution on Ubuntu 24.04 with Nginx
This article explains how to install b2evolution with Nginx on Ubuntu 24.04. b2evolution is an open-source content management system (CMS) and blogging tool written in PHP, using MySQL/MariaDB. It supports multi-blog management, forums, newsletters, and more within a single installation. Due to its event-driven architecture, Nginx excels at handling high traffic and concurrent connections…
0 notes
Text
How to install LAMP Stack on Ubuntu 24.04
Learn how to install the LAMP stack on Ubuntu 24.04 with this step-by-step guide. Set up Linux, Apache, MySQL, and PHP for web development efficiently.
youtube
0 notes
Text
Deploying Laravel Applications to the Cloud
Deploying a Laravel application to the cloud offers several advantages, including scalability, ease of management, and the ability to leverage various cloud-based tools and services. In this guide, we will explore the steps to deploy a Laravel application to the cloud using platforms like AWS, DigitalOcean, and Heroku. We'll also touch on best practices for server configuration, environment variables, and deployment automation.
1. Preparing Your Laravel Application
Before deploying, it’s essential to ensure that your Laravel application is production-ready. Here are some preparatory steps:
Update Dependencies: Run composer install --optimize-autoloader --no-dev to ensure that only production dependencies are installed.
Environment Configuration: Make sure your .env file is configured correctly for the production environment. You’ll need to set up database connections, cache, queue configurations, and any other service keys.
Caching and Optimization: Laravel provides several optimization commands to boost the performance of your application. Run the following commands to optimize your app for production:bashCopy codephp artisan config:cache php artisan route:cache php artisan view:cache
Assets and Front-End Build: If your application uses frontend assets like JavaScript and CSS, run npm run production to compile them and ensure that assets are optimized.
Database Migration: Make sure your database schema is up to date by running:bashCopy codephp artisan migrate --force
2. Choosing a Cloud Platform
There are several cloud platforms that support Laravel applications, including AWS, DigitalOcean, and Heroku. Let's look at how to deploy on each.
A. Deploying Laravel to AWS EC2
AWS (Amazon Web Services) offers a robust infrastructure for hosting Laravel applications. Here's a high-level overview of the steps:
Launch an EC2 Instance: First, you need to create an EC2 instance running a Linux distribution (e.g., Ubuntu). You can choose the instance size based on your traffic and performance needs.
Install PHP and Required Software: Once the instance is up, SSH into it and install PHP, Composer, Nginx (or Apache), and other necessary services:bashCopy codesudo apt update sudo apt install php php-fpm php-mbstring php-xml php-bcmath php-mysql unzip curl sudo apt install nginx
Configure Nginx: Set up Nginx to serve your Laravel app. Create a new Nginx configuration file under /etc/nginx/sites-available/your-app and link it to /etc/nginx/sites-enabled/.Example configuration:nginxCopy codeserver { listen 80; server_name your-domain.com; root /var/www/your-app/public; index index.php index.html index.htm; location / { try_files $uri $uri/ /index.php?$query_string; } location ~ \.php$ { fastcgi_pass unix:/var/run/php/php7.4-fpm.sock; fastcgi_index index.php; fastcgi_param SCRIPT_FILENAME $document_root$fastcgi_script_name; include fastcgi_params; } error_log /var/log/nginx/error.log; access_log /var/log/nginx/access.log; }
Database Configuration: Set up a MySQL or PostgreSQL database (you can use Amazon RDS for a managed database) and configure your .env file with the correct credentials.
SSL and Security: Secure your application with SSL (using Let's Encrypt or AWS Certificate Manager) and ensure your firewall and security groups are configured correctly.
Deploy Code: You can deploy your Laravel application to EC2 using Git, FTP, or tools like Envoyer or Laravel Forge. For Git deployment, clone your repository and configure your environment variables.
B. Deploying Laravel to DigitalOcean
DigitalOcean provides a simple and cost-effective way to host Laravel applications. Here’s how to deploy:
Create a Droplet: Log into your DigitalOcean account and create a new Droplet with a suitable operating system (typically Ubuntu).
Install PHP, Nginx, and Composer: SSH into your droplet and install the necessary dependencies for your Laravel app:bashCopy codesudo apt update sudo apt install php php-fpm php-mbstring php-xml php-bcmath php-mysql unzip curl sudo apt install nginx
Configure Nginx and Laravel Application: Configure Nginx to point to your Laravel application’s public folder and set up SSL.
Database Configuration: Set up MySQL or PostgreSQL on your droplet, then configure the .env file for your database credentials.
Deploying the Code: You can either deploy your code via Git or use an automation tool like Envoyer to streamline deployments. You’ll also need to configure file permissions for storage and cache directories.
C. Deploying Laravel to Heroku
Heroku is an excellent choice for quick and easy Laravel application deployment with minimal configuration. Here’s how you can deploy a Laravel app on Heroku:
Create a Heroku App: Sign up or log into your Heroku account and create a new app. This will automatically provision a server for you.
Install Heroku CLI: Install the Heroku CLI on your local machine if you haven't already:bashCopy codecurl https://cli-assets.heroku.com/install.sh | sh
Configure the .env File for Heroku: Heroku uses environment variables, so make sure you configure your .env file correctly or set them directly in the Heroku dashboard.
Deploy the Code: Push your code to Heroku using Git:bashCopy codegit push heroku master
Database Configuration: Heroku offers a managed PostgreSQL database that you can provision with the command:bashCopy codeheroku addons:create heroku-postgresql:hobby-dev
Run Migrations: Run database migrations on Heroku with:bashCopy codeheroku run php artisan migrate
3. Automating Deployment with Laravel Forge or Envoyer
For smoother deployment management, you can use tools like Laravel Forge or Envoyer.
Laravel Forge: Laravel Forge is a server management and deployment service designed for PHP applications. It automates tasks like server provisioning, security updates, and Laravel deployments to platforms like AWS, DigitalOcean, and others.
Envoyer: Envoyer is a zero-downtime deployment tool that ensures your Laravel app is deployed with no interruption to your users. It handles the deployment process seamlessly, ensuring the application is running smoothly at all times.
4. Conclusion
Deploying a Laravel application to the cloud can seem daunting, but it becomes easier with tools and services that automate much of the process. Whether you choose AWS, DigitalOcean, or Heroku, each platform offers unique benefits for hosting your Laravel application. Using automation tools like Forge and Envoyer, you can further streamline the deployment process, ensuring your app runs smoothly and efficiently in the cloud.
0 notes
Text
How To Install Linux, OpenLiteSpeed, MySQL, PHP Stack on Ubuntu
Over the past few months, I’ve been hosting a few live streams on setting up a VPS web server for hosting WordPress sites with Multisite support. I started with Apache, followed by Nginx. My last live stream will be using OpenLiteSpeed. For the Apache and Nginx live streams, I had a full tutorial on how to set everything up, Digital Ocean’s LAMP tutorial, and SpinupWP’s server set-up guide. For…
0 notes
Text
Setting Up a Home Server: A Comprehensive Guide
In today’s digital age, having a home server can be a game-changer. It allows you to centralize your data, stream media, and even host your own websites or applications. Setting up a home server may seem daunting, but with the right guidance, it can be a rewarding and empowering experience. In this blog post, we’ll walk you through the steps to set up your very own home server.
Choosing the Right Hardware
The first step in setting up a home server is to select the appropriate hardware. The hardware you choose will depend on your specific needs and budget. Here are some factors to consider:
Processor: The processor, or CPU, is the heart of your server. Look for a processor with multiple cores and a decent clock speed to ensure smooth performance.
RAM: The amount of RAM you need will depend on the tasks you plan to perform on your server. As a general rule, aim for at least 4GB of RAM, but 8GB or more is recommended for more demanding applications.
Storage: The storage capacity of your server will determine how much data you can store. Consider using a high-capacity hard drive or a combination of hard drives in a RAID configuration for redundancy and improved performance.
Operating System: Choose an operating system that suits your needs. Popular options include Windows Server, Linux (e.g., Ubuntu Server, CentOS), or even a NAS (Network Attached Storage) operating system like FreeNAS or Synology DSM.
Setting Up the Server Hardware
Once you’ve selected your hardware, it’s time to set up the physical server. Follow these steps:
Assemble the Hardware: Carefully follow the instructions provided with your server components to assemble the hardware. This may involve installing the CPU, RAM, and storage drives.
Connect the Cables: Connect the necessary cables, such as the power cable, network cable, and any additional cables required for your specific setup.
Install the Operating System: Follow the installation instructions for your chosen operating system. This may involve creating bootable media, partitioning the storage, and configuring the initial settings.
Configuring the Server Software
With the hardware set up, it’s time to configure the server software. The specific steps will vary depending on the operating system you’ve chosen, but here are some general guidelines:
Update the Operating System: Ensure that your operating system is up-to-date by installing the latest security patches and updates.
Set Up Network Settings: Configure the network settings, such as the server’s IP address, subnet mask, and default gateway, to ensure it can communicate with your home network.
Install and Configure Services: Depending on your needs, you may want to install and configure various services, such as a web server (e.g., Apache or Nginx), a file server (e.g., Samba or NFS), a media server (e.g., Plex or Emby), or a database server (e.g., MySQL or PostgreSQL).
Secure the Server: Implement security measures, such as setting up a firewall, enabling two-factor authentication, and regularly updating your server’s software to protect against potential threats.

Accessing and Managing the Server
Once your server is set up and configured, you’ll need to learn how to access and manage it. Here are some tips:
Remote Access: Depending on your server’s operating system, you may be able to access it remotely using a web-based interface, a desktop client, or a command-line tool. This allows you to manage your server from anywhere.
Backup and Restore: Implement a reliable backup strategy to protect your data. This may involve using a cloud-based backup service or setting up a local backup solution.
Monitoring and Maintenance: Monitor your server’s performance, logs, and resource usage to ensure it’s running smoothly. Regularly maintain your server by applying updates, managing user accounts, and addressing any issues that arise.
Practical Applications for a Home Server
A home server can be used for a variety of purposes, including:
File Storage and Sharing: Use your home server as a central storage location for your files, documents, and media, making them accessible to all devices on your home network.
Media Streaming: Turn your home server into a media hub by hosting your personal media library and streaming it to various devices throughout your home.
Web Hosting: Host your own websites, web applications, or even a personal blog on your home server, giving you full control over your online presence.
Backup and Disaster Recovery: Utilize your home server as a backup solution, ensuring your important data is safe and secure in the event of a hardware failure or other disaster.
Home Automation: Integrate your home server with smart home devices and services, allowing you to centralize and automate various aspects of your home.
0 notes
Text
How To Migrate MySQL Database Hosted On An EC2 Instance To Amazon RDS?
Scaling an EC2-based database involves manual intervention to adjust compute and storage resources which leads to downtime during scaling operations and requires careful planning to accommodate changing workloads. Achieving high availability for a database on EC2 typically involves setting up and managing failover mechanisms, which can be complex.
We were handling all these difficulties within our organisation so in order to overcome we decided to migrate to fully managed service like Amazon RDS which provides cost-efficient, high availability features with automated failover, resizable capacity for an industry-standard relational database and manages common database administration tasks.
AWS Database Migration Services help us to migrate databases whether it is (Homogeneous/Heterogeneous ) to the cloud in a very simple manner as per the requirements with minimal downtime.
To know more about AWS DMS you may follow the link below : Database Migration Service in AWS

So, let’s start at the beginning…
Launch an EC2 instance and install MySQL Database ( Source ) into it by following these links https://docs.aws.amazon.com/AWSEC2/latest/UserGuide/option3-task1-launch-ec2-instance.html ,
Create MySQL Database ( Target ) within Amazon RDS by following this link https://aws.amazon.com/getting-started/hands-on/create-mysql-db/
Create a Replication Instance


If your security group has an existing rule that allows for access to your MySQL database instance then enter the “name of the security group” used for your Amazon RDS database instance and replication instance in source instead of any IP address
Creating Target and Source Endpoints
Target endpoint

Source endpoint

Creating a Migration Task
A migration task is responsible for migrating data from a source database to a target database. In our hands-on, we are moving data from an EC2 existing database to our newly created database in Amazon RDS.

“Migrate existing data and replicate ongoing changes ”. Use this to migrate large databases with minimal downtime.

You can check more info:
Iaas/Paas Migration
Cloud And DevSecOps Solutions
Hybrid Cloud Implementation
Kubernetes Implementation in USA
0 notes
Video
youtube
How To Install Linux, Apache, MySQL, PHP LAMP Stack on Ubuntu 24.04
0 notes
Text
Getting Started with My SQL DBMS
MySQL is a widely used database management system that's been developed and published by Oracle. It's a powerful, multi-user, multi-threaded platform that can handle a variety of mission-critical tasks. It's based on SQL, which is a standard language for creating database objects like tables and views, as well as building queries to access data from those objects. Here's how to get started with MySQL.
Installing and Starting MySQL
MerrySQLit can be installed on a variety of operating systems, ranging from Windows to macOS and Oracle Solaris. Additionally, it is compatible with a variety of Linux distributions, including Ubuntu, Debian and Fedora. The process of installing MySQL on Windows will vary depending on the type of operating system and the preferences of the user. The most straightforward approach is to use the MySQL Installer tool, which provides a step-by-step guide to setting up and installing a MySQL instance on Windows.
Some Basic Operations with MySQL
Logical operators are used in MySQL to join multiple conditions within a WHERE clause in order to filter data in a table. The three logical operators used in MySQL are AND (and), OR (or), and NOT (not). AND returns a record only when both the conditions are true, whereas OR (or) returns a record when at least one condition is true. NOT (not) negates the condition. Logical operators are commonly used in conjunction with comparison operators, such as =, >, and LIKE, to construct conditions.
There are three logical operators in MySQL: AND, OR, and NOT.
AND Operator (&&): The AND operator is a logical operator in MySQL that can be used to filter data in a table by using a WHERE clause. The AND operator returns true only if all the conditions in the WHERE clause are true. For example, if any condition in the WHERE clause is false, then the AND operator returns true.
OR Operator (|| or OR): The OR operator is a logical operator in MySQL that enables data to be filtered from a table when two or more conditions are combined in a WHERE statement. The OR operator returns true when at least one condition in the WHERE statement is met.
NOT Operator (! or NOT): The NOT operator is a logical operator in MySQL that allows you to NOT condition in a WHERE clause in order to filter the data in a table. The NOT operator returns only the records that have a condition that is TRUE in a WHERE clause.
Operator Precedence
Operator precedence in MySQL is the order in which logical operators are evaluated in an SQL query. It is important to understand operator precedence when constructing complex SQL queries to ensure that the result is accurate. Matter uses a series of rules to determine the order in which to evaluate operators in MySQL. These rules are based on the type and associativity of the operator. For example, multiplication and division are evaluated from the left to the right, while addition and subtraction are evaluated from the right. Understanding operator precedence in MySQL will help you to perform your SQL queries in the correct order and ensure that the results you get are correct.
Using Parentheses for Clarity
The use of parentheses in MySQL queries allows for the grouping of conditions and the construction of more complex logical expressions, which can improve query readability and readability. This is especially useful when there are multiple conditions in a query. Parenthesis can help to avoid confusion regarding the logic of the query by grouping the conditions with parentheses and evaluating them in the desired order. In summary, the use of parentheses in queries in MySQL can make them simpler to understand, easier to maintain, and easier to troubleshoot.
Combining Operators
Logical operators can be used to combine multiple queries in MySQL to generate more complex and precise conditions that can be used to access or modify data in a database. This can help to reduce the amount of queries that need to be executed, thus saving both time and data. Additionally, the use of logical operators can enable the creation of queries that are more dynamic and adaptive, able to adjust to changes in data and conditions within the database. For example, if a table has multiple conditions, the logical operators can be combined in a query to only retrieve the required data.
Wrap Up
Once you are familiar with the installation of MySQL and the use of the MySQL Workbench tool, you can begin to explore the various features available, create various types of Database Objects, and begin constructing SQL Queries. MySQL is an adaptable database system that is suitable for a broad range of tasks. As you gain a better understanding of how it operates, you will be able to make the most of its features. MySQL Installer is designed to facilitate the installation of relational databases, and the Workbench tool makes it simple to interface with the environment and interact with the MySQL database and data. By building on this foundation, Brigita software development services can assist you in becoming more proficient in the creation of Databases and Queries, thus enabling you to better support your Data-Driven Applications.
0 notes
Text
How to Fix Missing MySQL Extension Error in WordPress
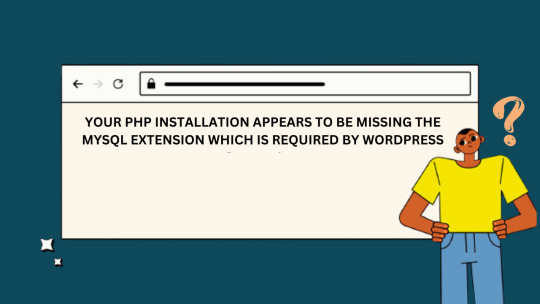
WordPress is a powerful and popular content management system used by millions of websites worldwide. Besides, it relies on various server-side technologies, including MySQL, to store and manage data. Occasionally, users may encounter a “Missing MySQL Extension” error, which can be frustrating but is usually easy to fix. In this guide, we will walk you through the steps to resolve this issue and get your WordPress site up and running smoothly.
WHAT CAUSES THE “MISSING MYSQL EXTENSION” ERROR?
The “Missing MySQL Extension” error typically occurs when your server lacks the necessary PHP extension to connect to the MySQL database. WordPress relies heavily on MySQL to manage and store content, so this error can disrupt the functionality of your website.
STEP 1: CHECK YOUR PHP VERSION
Before proceeding with any fixes, it’s essential to ensure that you are using a compatible PHP version with WordPress. At the time of writing this article, WordPress recommends using PHP 7.4 or later. You can check your PHP version by creating a simple PHP script:
<?php phpinfo(); ?>
Save this script as phpinfo.php, upload it to your website’s root directory, and access it through your web browser. Look for the PHP version information on the page.
STEP 2: ENABLE MYSQL EXTENSION
If you find that you are using a compatible PHP version, but the MySQL extension is still missing, you need to enable it. Follow these steps to enable the MySQL extension:
For Windows Servers:
Locate your PHP installation directory (e.g., C:\PHP).
Open the php.ini file in a text editor.
Search for the following line and remove the semicolon (;) at the beginning:
;extension=mysqli
4. Save the changes.
5. Restart your web server (e.g., Apache or Nginx).
For Linux Servers (e.g., Ubuntu):
SSH into your server.
Open the PHP configuration file using a text editor (e.g., nano or vim). The file is typically located at /etc/php//cli/php.ini.
Look for the following line and uncomment it by removing the semicolon (;) at the beginning if necessary:
;extension=mysqli
4. Save the changes and exit the text editor.
5. Restart the PHP service to apply the changes:
sudo service php<your-php-version>-fpm restart
STEP 3: VERIFY THE MYSQL EXTENSION IS LOADED
After enabling the MySQL extension, it’s crucial to verify that it’s loaded correctly. Create a PHP script named mysql_check.php with the following code:
<?php if (extension_loaded('mysqli')) { echo "MySQLi extension is enabled."; } else { echo "MySQLi extension is not enabled."; } ?>
Upload this script to your website’s root directory and access it through your web browser. You should see a message confirming that the MySQLi extension is enabled.
The “Missing MySQL Extension” error in WordPress can be a hindrance, but it’s usually easy to fix by enabling the MySQL extension in your PHP configuration. By following the steps outlined in this guide, you should be able to resolve the issue and ensure your WordPress website operates seamlessly. Remember to keep your PHP version up to date and perform regular maintenance to prevent similar issues in the future.
0 notes
Text
Setting Up WordPress on Ubuntu with Apache2, MySQL, and SSL
Ubuntu is a great hosting environment choice if you want to build a strong and secure WordPress website. In this tutorial, we’ll show you how to install WordPress, Apache, MySQL, and SSL encryption on a server running Ubuntu. You’ll have a fully operational WordPress site with HTTPS enabled by the end of this lesson. Step 1: Install Apache Server To start, let’s install the Apache web server on…

View On WordPress
0 notes
Text
How To Install osTicket v1.14 On Ubuntu 20.04
I want to share how to install osTicket v1.14 for Ubuntu 20.04 server. osTicket written by php mysql. This guide for installation process not for any customize. You can use this system for your company support portal. ★ How To Install Java And Tomcat On Ubuntu 16.04 ★ How To Install DNS Server (Bind9) On Ubuntu 20.04 My server info : IP address : 10.66.11.15 OS : Ubuntu 20.04 LTS RAM : 2 GB Disk…

View On WordPress
0 notes