#html head tag image
Explore tagged Tumblr posts
Visit Tumblr Blog
Explore Tumblr blogs with no restrictions, modern design and the best experience.
Last Seen Tumblr Blogs


Fun Fact
130K people were victims of a chain letter scam that affected Tumblr in May 2011.
Text
========================================================
[tutorial: build your own neocities/nekoweb page]
========================================================
a beginner's guide for making your very own home on the indie web—retro, personal, weird, and 100% yours.
this ain’t an average wix, squarespace, or tiktok aesthetic.
we’re talking full html/css with soul and attitude.
[ prerequisites ]
------------------
> an idea
> basic text editor (vscode, notepad++, or even notepad)
> account on https://neocities.org or https://nekoweb.org
> some gifs or tiles you love (dig deep or make your own)
> optional: image host or gif repo (or self-host everything)
[ feeling overwhelmed? read this. ]
-----------------------------------
you do *not* need to know everything.
html is not a mountain. it's a garden.
you plant one tag. then another. then a style. then a button.
you can build your site piece by piece.
and every piece is a portal to somewhere personal.
you are allowed to make broken pages.
you are allowed to use templates.
you are allowed to start over as many times as you want.
this is *your* world. you control the weird.
[ step 1: create an account ]
-----------------------------
> neocities: https://neocities.org
> nekoweb: https://nekoweb.org
register a name, log in, and enter your file manager.
this is where you upload your files and see your site live.
[ step 2: your first file - index.html ]
----------------------------------------
make a new file: `index.html`
basic starter:
<html>
<head>
<title>my weird little corner</title>
<link rel="stylesheet" href="style.css">
</head>
<body>
<h1>welcome to the void</h1>
<p>this is my page. it’s strange. like me.</p>
<img src="mygif.gif">
</body>
</html>
> upload to the dashboard
> boom. you’re live at
https://yoursite.neocities.org
or https://nekoweb.org/u/yoursite
[ step 3: add a style sheet - style.css ]
-----------------------------------------
create a file called `style.css` and upload it.
here’s some nostalgic magic:
body {
background: url('tile.gif');
color: lime;
font-family: "Courier New", monospace;
text-shadow: 1px 1px 0 black;
}
img {
image-rendering: pixelated;
}
marquee {
font-size: 20px;
color: magenta;
}
link it in your html and the vibes activate.
[ step 4: decorate it like a haunted usb ]
------------------------------------------
> use <marquee> for chaos scrolls
> embed gifs from https://gifcities.org/
> steal buttons from https://cyber.dabamos.de/88x31/
> set up a guestbook at https://www.smartgb.com/
> loop audio with <audio autoplay loop>
> add fake errors, 90s web lore, random link lists
[ step 5: resources, themes, and comfort ]
------------------------------------------
> templates & layouts: https://numbpilled-themes.tumblr.com
> glitchy gifs & buttons: https://glitchcat.neocities.org/resources
> layout builder: https://sadgrl.online/projects/layout-builder/
> free tiled backgrounds: https://backgrounds.neocities.org/
> beginner html intro: https://www.w3schools.com/html/
> pixel fonts & cyber assets: https://fontstruct.com/
remember:
you don't need to know js. you don't need to be a coder.
you just need a mood, a direction, a dream.
the html will follow.
[ bonus concept: shrine pages ]
-------------------------------
> a page just for one character you love
> a room to house digital fragments of your identity
> embed quotes, music, images like altars
> call it shrine.html and link it from your homepage
[ closing mantra ]
------------------
you are not here to be optimized.
you are not a brand.
you are a ghost inside the machine,
carving your initials into the silicon void.
welcome to Your website.
========================================================
#webcore#old web graphics#neocities#web graphics#carrd graphics#carrd resources#rentry decor#rentry graphics#carrd moodboard#carrd inspo#neopets#indie#indie web#early web#webdevelopment#web development#web resources#web design#old internet#old web#oldweb#nekoweb#transparent gif#tiny pixels#pixel gif#moodboard#tutorial#html page#html theme#htmlcoding
490 notes
·
View notes
Text
.。*♡゚ A/n: totally not trying to learn html (which technically isn't a programming language, for what I had read), and well, if Idia was teaching me I would learn everything so quickly tbh. Or not. He would start explaining and I would have the sudden urge to kiss him, oh well it happens ig

"Uh... I think I have an error in my code." You break the silence, tone soft as the computer screen lights up your eyes just the right way for Idia to lost himself in the reflex. He love your eyes, your concentrated face, the way you stick out your tongue without realizing.
And he loves the way you timidly look to him, as if he has all the answers to your questions - which, about this subject, he have, by the way.
"Ah~ your closing array is missing a closing slash. Here, Yuu-shi." He pointed your error with a soft tone, blue nail hitting the screen, and a surprised pout grew on your lips.
He wanted to smother you in his arms, to pick you up and hold you till his arms fell off and his corpse rot - that was how bad he yearned for you, your skin, you smell. He breathes really hard to refrain from doing it, though. You wouldn't want that. He was just a mere R card, a lonely gamer, a-
"Thank you, Idia. You're the best." You giggle to yourself, feeling yourself warm under his eyes and lousy smile. Unbeknownst to you, the only things that were going through his head were about you.
Your smile, the way your eyes lightened up, your laughters and giggles, the messages you passed each other in class (when he was there in person), your secret handshake. Idia loved you. He loved your very dearly.
He loved you so much that he could cry.
"Uh... it's no big deal," yet his hair was getting hotter, rosey tone starting to burn brightly. "Don't forget the closing stash, and everything should work properly. This programming language is not that used anymore, but most can learn useful things learning it anyway. I think."
Idia had half of his mind to know that he was rambling again, talking so fast that he could make Eminem cry. But he couldn't stop when you looked at him with such big eyes filled with curiosity and wonder, taking notes of everything he was saying.
He noted then that you had hello kitty stickers on your page. A few drawings that Ortho made of him, Idia and you; that almost killed him right then and there.
"Ah... HTML uses elements, tags, and attributes to organize text, images, links, and other multimedia elements. It can be combined with CSS for styling and JavaScript for interactivity."
#twst idia shroud#yandere idia shroud x reader#idia shroud x reader#idia shroud#idia x reader#idia x mc#yandere idia#twst idia#twisted wonderland idia#yandere idia x mc#yandere idia x reader#idia x yuu#idia x you#yandere idia x yuu#yandere idia shroud x yuu#yandere idia shroud x mc#yandere idia shroud
96 notes
·
View notes
Text
Convert HTML to Image: A Step-by-Step Guide ✨

Do you want to turn some HTML code you've made that's on your website and have a way to convert it into an image for you to save?
Well, look no further! I too wanted to do the same thing but funny enough, there weren't any straightforward tutorials out there that could show you how! After hours of searching, I finally discovered the solution~!
This is an old tutorial I made 🐼

💛 Set your environment
Before we dive into the conversion process, I'll assume you already have your HTML code ready. What you want to learn is how to turn it into an image file. You should have a good grasp of HTML and JavaScript. For this tutorial, we'll use the following HTML code example:

We won't include the CSS code, as it doesn't affect this tutorial. The JavaScript file (script.js) at the bottom of the body element is where we'll add the functionality for the conversion.
Your page should resemble the following:

As you can see, the "Click me" button will handle the conversion. We aim to convert everything within the div.info-div into an image.
💛 Using the html2canvas JavaScript Library
The html2canvas library allows you to take screenshots of webpages and target specific elements on a screen. Here are the steps to include the library in your project:
The steps to put the library in your project:
Visit the html2canvas website for more information.
Copy the CDN link from here

and include it in a script tag in your project's head tag in the HTML file:

That's it for including the library on the HTML side. Now, let's move on to the JavaScript code.
💛 JavaScript Functionality
Here's the JavaScript code to handle the conversion:

In this code, I want to turn the whole div.info-div into an image, I put it into a variable in const div = document.querySelector(".info-div");.
I also put the button into a variable in const button = document.querySelector("button");
I added a click event listener to the button so when the user clicks the button, it will follow the code inside of the event listener!
You can find similar code like this in the documentation of the html2canvas library:

What is happening here is:
We add the div (or what the element we want to take an image of) into the html2canvas([element]).then((canvas)
Added the image file type url to a variable = const imageDataURL = canvas.toDataURL("image/png"); - You can replace the png to other image file types such as jpg, jpeg etc
Created an anchor/link tag, added the href attribute to imageDataURL
The download attribute is where we will give the default name to the image file, I added "dog.png"
Perform the click() function to the anchor tag so it starts to download the image we created
And that's it!
💛 The End
And that's it! You've successfully learned how to turn your HTML into an image. It's a great way to save and share your web content in a unique format.

If you have any questions or need further clarification, please comfortable to ask. Enjoy converting your HTML into images! 💖🐼
#my resources#coding#codeblr#programming#progblr#studying#studyblr#programmer#html#html css#javascript#neocities#coding tips#html5 tutorial#html tutorial
157 notes
·
View notes
Text
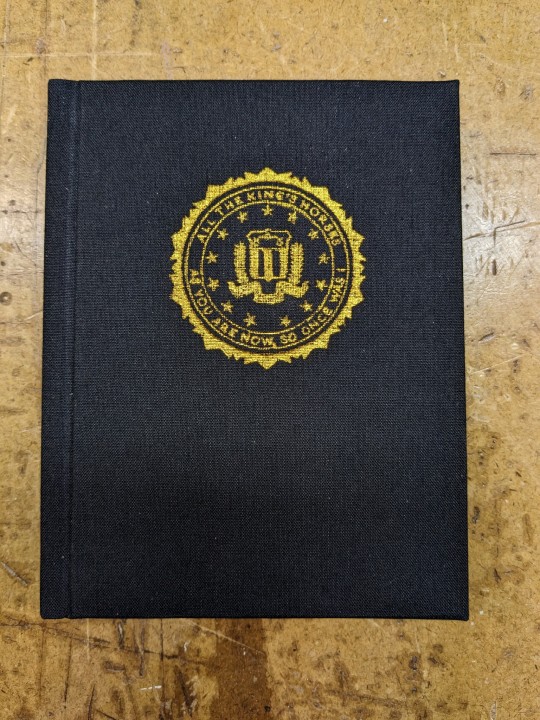

All The King's Horses | As You Are Now, So Once Was I by @samwpmarleau (grumkinsnark)
All The King's Horses [LiveJournal ch1] [Fanfiction.net ch1]
As You Are Now, So Once Was I [LiveJournal ch1] [Fanfiction.net ch1]
Fandom: Supernatural, Criminal Minds
Rating: Teen | PG-13
Category: Gen
Words: ~36,192
All The King's Horses: Protect and Serve. Fidelity, Bravery, Integrity. To what lengths would you go to uphold those oaths? When it comes to a particularly brutal and unsolvable case, the BAU just may have to resort to some more unorthodox methods. SPN/Criminal Minds crossover.
As You Are Now, So Once Was I: Sequel to "All the King's Horses." When Dean catches J.J.'s press conference on the news about a current case and notices a few...inconsistencies, he realizes the BAU is definitely going to need his help. Again. ON HIATUS


About the Book
FORMAT: Letter quarto, flatback bradel binding, french link stitch, no tapes
FONTS: EB Garamond [via Google Fonts], Supernatural Knight [via DaFont], D-Din [via Font Squirrel], Daniel [via DaFont], Permanent Marker [via Google Fonts], Arial
IMAGES: Seal of the FBI [via Wikipedia], Dean's handprint scar [by greenhorn-art]
MATERIALS: 24lb Xerox Bold Digital paper (8.5"x11"), 80pt binder's board (~2mm), 30/3 size waxed linen thread, embroidery floss (DMC #721), 1.9mm cording, brown cardstock, black Cialux bookcloth, gold foil transfer sheet (came with We R Memory Keepers hot foil pen)
PROGRAMS USED: Fic exported with FicHub, word doc compiled in LibreOffice Writer, Typeset in Affinity Publisher, imposed with Bookbinder-JS, title pages designed in Affinity Designer/Photo
.
I first read these stories on LiveJournal back in 2013, some time after I first encountered Tumblr, Supernatural, and the wider world of online fandom. Once I discovered SPNxCriminal Minds crossovers I devoured so many of them. Something about POV Outsider on the Winchesters, the existing connections with investigating monster vs human-crazy cases, and run-ins with the FBI... it's just works so well.
Of all the SPNxCM fics I read and enjoyed, All The King's Horses is among those that bookmarked themselves in my brain. Since it's been living there all these years, I thought it deserved a place on my bookshelf too.
(Rambling below)
Sourcing the Fic
I used FicHub to download the fics off of Fanfiction.net as HTML. Then I pasted them into LibreOffice Writer and created rich text documents of each fic, so I could Place them into Affinity Publisher.
The stories were crossposted, first on LiveJournal and then Fanfiction. I included the metadata from both sites in the appendices.
(It's fascinating to see the differences in the same work between platforms. FFN requires genres, so if the author doesn't add them on LJ then by default there's more info on FFN. But FFN limits listed characters to 2, so authors have to pick and choose the most important. Then there's the author's amusing disclaimers and spoiler warnings for these fics, which are only included in the LJ version)
Shoutout to the author for how they linked/listed their accounts on other platforms! Thanks to that I was easily able to track down all the tags/metadata for the fics, and find them here to express my appreciation for their stories!
Typesetting
Fonts
EB Garamond is my new favourite body font, 11pt as per my usual.
The title page is entirely Arial: 1) it was the closest match I have to the case file prop I was copying, and 2) if it was a government doc they wouldn't be using anything but the most basic fonts.
Headings and the the bullets bracketing the page numbers are set it Supernatural Knight, a free font in the style of Supernatural's title.
The location segments are in D-DIN, the closest free match to the font Criminal Minds uses (which is probably DIN).
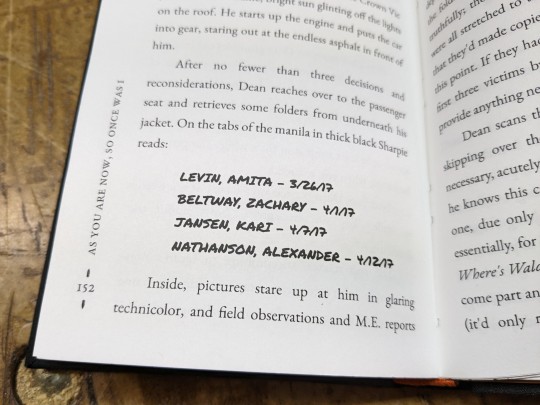
Daniel is used for Dean's 'rushed but legible' note.
Permanent Marker for the 'thick black Sharpie' case file labels.
Artwork
Title pages designed as FBI case files, copied from a prop found online (specifically Etsy's propfictionstudios', but it's all over the web so no idea who actually created it). I had fun plugging in all the fanfic/bookbinding meta!
The ID# above the author's name is the FFN story ID, and the date is the date originally posted on LJ.
The handprint used in the headings of ATKH is Dean's scar. I traced off of a screenshot from s4e01 Lazarus Rising. I chose to use the handprint instead of the anti-possession tattoo or a Devil's Trap as my SPN art element because 1) it's specific to Dean, and 2) indicates/reminds that the story is not set during the season 3 Agent Henriksen/FBI arc.
Grabbed the FBI seal off of Wikipedia.
Construction
Both fics typeset and printed separately, then sewn together into one book. Title page for the sequel was tipped in like an endpaper prior to sewing.
Endbands sewn with orange embroidery floss (DMC 721) around 1.9mm cording. I chose orange because Dean's being in jail brought to mind the orange prison jumpsuits Sam and Dean wore in s1e19 Folsom Prison Blues.

Black bookcloth for the cover, like the Winchesters' beloved black '67 Chevy Impala. (I'd wanted a Supernatural reference to balance out the Criminal Minds-ness of the FBI case files).
I'd originally planned to make lineart of the front of the car, and have it stretch across the bottom of the cover (maybe even wrap around to the back). Even found a useful reference to trace [from here], but it didn't look as good as I'd hoped. Instead I reused the FBI seal and swapped out its text with the titles.
(The effect of shiny foiled FBI symbol on small black book reminds me of one of those FBI badge wallets!)
The foiling process was an unnecessarily long and gruelling affair. My laptop served as a massive power bank for the hot foil pen as I spent 2hrs ever so slowly tracing the image, and then 15mins on the author name and touch-ups. Did it need to take so long? Moving slowly, pushing down hard, going over everything at least three times? I'm sure it didn't. BUT I did not want to chance peeling up the foil to check how I was doing and risk shifting it. It was worth it in my books (haha) ‒ I feel giddy and kick my feet like a schoolgirl whenever I see it!
New Things
Used 24lb paper for the first time, and I love it! It's a little thicker and heavier then regular 20lb printer paper, feels more substantial.
The page numbers & running/section headers are along the outer margin, instead of in the header/footer. This was my way around Affinity's buggy-ness regarding pinning things inline in master pages. (More about that below). If I had been thinking, I could have formatted them like the tabs on a file folder and cut the textblock to match. Oh well, the things you notice once it's printed 😔
This time I also started new chapters/sections using text flow & paragraph spacing settings, instead of using a master. As always, there are pros and cons.
Pro: much faster and less involved. (find chapter start, apply paragraph style VS working from the end cutting text, inserting a frame break, unlinking frames, inserting new pages with master, relinking, pasting, and adding chapter title to a different text box)
Con: images need to be added manually (whether by adding image directly, or by applying a master with the image). I forgot to do this for the second fic, so only ATKH have Dean's handprint scar.
Difficulties Encountered
Affinity Publisher is fighting me on pinning things inline on master pages. They like to disappear on regular pages I've applied the master to. Sometimes it works, sometimes it doesn't, sometimes it only works on some of the pages. Idk what's up. (The bullet character only faces one way so I had use textboxes, flip/mirror one, and pin them inline to the page number).
So instead of having page numbers in the footer, bookended left and right by text boxes with Supernatural Knight's bullet, I put it vertically down the side.
Updated Publisher and all my paragraph styles' fonts changed/went funny. Something to do with the update's variable font support, I think. What was previously 'EB Garamond' regular, was now something along the lines of 'EBGaramond-Regular' which isn't a font. Issue seems to have ironed itself out in my original (near-complete) doc while I was busy remaking it. 😐
On the bright side, the update brought QR code generation to Affinity!
#All The King's Horses#As You Are Now So Once Was I#grumkinsnark#samwpmarleau#fanfiction#bookbinding#fanbinding#supernatural#criminal minds
109 notes
·
View notes
Note
Previous anon here! I would love to read how you did it. Im suprised you managed to did it in Google Docs. I thought you used a program similar to InDesign or programs that are more suitable for graphic design ANYWAY i am also curious how many chapters you used. Was it seven? Did you stop there because the length was convinient or because a story arc ended there? I am not really good at identifying where an arc begins and stops. okay bcgjkkcj THANK YOU FOR YOUR TIME
YAYYY I LOVE TALKING ABOUT ARTS AND CRAFTS!!
gonna put this in main tags as well this time so:

this is my bookbind of trod pt 1 :] by @bamsara which u can and SHOULD read here
ok so this first bit is how I made the pdf and then the next bit is how I turned it into signatures for binding. Then the last bit is splitting up chapters and stuff. If anyone has any advice or tips on what I could do differently (for free or v cheap haha) please let me know!! This is so fun I love learning and discussing and making things
first thing I did was grab a real book so I could take a look at where they put the title page, where they left the pages blank, etc
I then formatted the title and contents and stuff in docs by messing with font and position on the page (etc) until it was to my liking! THEN I realised I wanted an image on the very first page so I went back and put that in. I got to design it it was sooo fun
OH. I ALSO STUCK A SHAMURA QUOTE WHERE THE DEDICATION WOULD BE. HEHE
thennn I went and changed all the heading, title and normal text options for the doc so that they looked nice! I used times new roman size 16 :) but that might be a bit big for most people. I like bigger text
^^ that step was important so that when I started copy-pasting in the text it would all come out the right size automatically. also so that my chapter titles and notes pages looked consistent
next I downloaded trod from ao3 as a html file! I found it works better than pdf bc there aren’t any page breaks
I just copied and pasted trod in one chapter at a time and added in the notes and summary for every chapter where I wanted it and that worked pretty well for me
THEN SPELLCHECK. I didn’t want to do it automatically (docs had some horrible opinions sometimes. Also kept trying to erase bits of the writing style that made perfect sense and sound beautiful???) so I had to confirm every change which took a while but I think was worth it
lastly I added page numbers. They did not want to cooperate with me and I still do not understand the tiny fuckers, but I managed to get them in the middle of the page for book 2 so it looks less weird (hurrah). There’s a button for it
then I saved it as a pdf!
OK NEXT THING : SIGNATURES
this post is my bestest friend (link is to a tumblr post that was really helpful)
and this webpage is how I got a pdf of the signatures (it’s the same one linked in the post)
CHAPTERS:
yeah I split it into chunks of 7 chapters! Book 1 ends on the argument in the field bc a) it was getting wayyy too long and b) I want to lend it to my friends and that’s a delightful emotional cliffhanger. Book 2 (which is actually finished. I’ll try and post photos later today or something) ends after hekets release from purgatory which is I thiiiink another 7 chapters? Book 3 is gonna be a bit longer bc I want to do it up to the most recent chapter, which I was gonna leave out bc of length but then it came out and I went insane haha
OH in book 2 I did drop caps and title decoration which I designed in procreate and then imported into docs and moved around as imported photos. I’ll put a bunch of pictures at the end too
THANK U FOR ASKING!!! If there’s anything else u want to know then let me know!! :]


16 notes
·
View notes
Text
neocities heracles trials: from a chaotic newbie
okay so i want to actually start posting here and i finally got it through my thick skull that this is LITERALLY A BLOG. i'm supposed to blog. so here's a blog post.
anyways, for context, i've been working on my neocities for a while now, recently started over to make things more original and more me. another thing to note is that i'm using VScode.
the issue here is that i have zero well not exactly zero but i lack any professional/academic background experience with making websites. the html isn't the issue (thankfully) but holy shit dude...css+javascript implementation . basic styling with css is no biggie, right? absolutely, however...may i introduce: smooth transitions + the absolutely tragic fact that the <marquee> tag is deprecated an accessibility issue.
so, my first goal day one was to recreate a marquee animation through css. so i tried to simply implement this incredibly useful bit of code into my site (in which if you're interested i totally think my failure to get it working was user error so please check it out it works great if you're not me) but, lo and behold, despite me getting it to work in my V1 project, i could not, for the life of me, get it to work. so i, not too familiar with css animation and completely lost when it comes to javascript, started grasping at straws. i ended up finding this tutorial and, with some improvisation since the tutorial is for webflow and i'm manually writing everything, managed to make my own css recreation of a marquee effect essentially from scratch, and even learned about the animation-play-state css attribute so i could pause the effect when the marquee is hovered over! victory, basically.

then, i looked around the many cool and absolutely awesome sites on neocities to get inspiration, and then i was like "hey what if i made a custom button background image" and with some trial and error, made myself a pretty decent base (for now) with aseprite, and learned more about the program in the meantime which is always a plus.
then i decided that i wanted to do more with the buttons. i wanted to make it animate on hover. not too hard right? you'll...you'll see why i struggled...in a moment...
anyways, i settled on a simple shrink animation. which THIS i could do with ease, messed around a bit, got the keyframes, assigned that to the button:hover and all of that and all was good!...until i realized that once i stopped hovering over it, it snapped back to its original scale instead of transitioning smoothly again. THIS is where the "fun" began.
see, although i can wrap my head around things easily when it comes to css, i have to constantly look up what the proper syntax for everything is because otherwise i'll mess everything up. and through my research i had conducted (aka surfing through multiple blogs and reddit posts alongside other things on random forum websites) i had discovered the very neat transition attribute.
but we'll have to return to this because i have adhd, and i ended up getting distracted during this process. see, originally i had decided that the button would change it's visual to appear like it was pressed when the user's mouse hovered over it. then i was like "i don't think this makes sense" so i changed it so that the button wouldn't change its background image unless the user actually clicked on it. so i did that. then i had to make sure that the button wouldn't magically scale up again so i had to transform the styling and blah blah blah those details aren't really that important ANYWAYS the actual important bit about this is that if you use the transition attribute and there's a change in background images that change will also be transitioned unless you set the transition to only apply to a specific change. and i didn't know that originally. so every time i tried to fix things up with a transition so the button wouldn't snap back to it's original size out of nowhere the background would slooowly change as well and i actually got so frustrated with this that i wanted to burn something down because that's a totally normal reaction i guess. anyways, then i started frantically searching for answers on the topic and EVERY. SINGLE. THING. THAT I FOUND. INCLUDED JAVASCRIPT.
i do not know javascript. i have not learned anything about it unlike css and html. it SCARES me and it is FRUSTRATING. but i thought i'd try it anyways. news flash that shit didn't work at all and i almost thought about scrapping the animation entirely especially when it randomly stopped working when i made certain changes, but i ended up eventually figuring out what i mentioned earlier (CSS transitions and the fact that you can assign them to only affect a specific change instead of everything) so with some dabbling here and there i eventually managed to finally figure out how to make everything smooth through pure css and although it still snaps if the element hasn't finished animating i'm happy with it.

moving on to another thing, i wanted to then make a sound effect play when you click the button. yes, we are still talking about buttons. THIS i could not do with css, like, at all. javascript admittedly is for interactivity and i had already been bending the rules quite a bit with the animations since those teechnically should've been done with javascript as well but this? this was impossible without javascript. so i found a free mp3, and searched up a nice little tutorial on the very basics of javascript.
little did I know that apparently, this would be my own personal little hell.
see, no matter how many times i tried a different script, the sound just would not work like at all. i'd do everything in what i assumed to be the correct way, and no matter what, it would not play. knowing that i'd just have to revisit this, i decided it was best to just sort of put it on the back burner.
and this is where i wish i could say this is the end of my absolutely gobstopping rant. however, i cannot.
see, one thing that i really like that i've seen in a lot of other people's sites is draggable windows. i think they're sick. but this ALSO requires javascript, but i didn't think this could POSSIBLY be that bad since so many people did it.
...right?.......right? guys. right?
MOTHERFUCKER I WAS SO WRONG.
see, it turns out that a lot of people do this sort of thing with jQuery, specifically for user interfaces. but vscode doesn't have a "user friendly" way to get jquery to work with it. and because i don't want to mess with program files, i decided that logically speaking jquery just makes writing things in js scripts less complicated and doesn't introduce things that are impossible in vanilla javascript so i decided i could suffer a little bit and try and do things without jquery.
this led me to looking at many sites with draggable windows to look at their own scripts, in which every single time i tried replicating things i FAILED.
i eventually stumbled upon a nice code that worked. but the issue with it - in which unfortunately i can't find it, else i'd link it - is that it works with not only element classes but also a specific ID. see, this would be fine if i only wanted ONE draggable element. but i want multiple. and i thought that maybe if i just duplicated the script and dedicated it to a different ID and changed function names it would work but nooo life cannot be this easy apparently. so after setting up my webmaster status window, getting that to work, i tried doing the aforementioned method for what will eventually be a guestbook of sorts. it failed.
so i decided, "hey i'll revisit this later!!" and i went on to finding a way to implement a status widget into my site. this honestly was really easy as i ended up stumbling upon status.cafe . so i registered, eventually got my account activated, and i got it working in my live port of vscode just fine!! all is good in the world.
well that's what i thought until i found out that since i had created my neocities account in march of 2024, and i'm unemployed since i'm still in high school hence i have a free account, that i could not. use the widget. in neocities. so i tried finding a work around, found this handy guide (which is genuinely useful by the way) and set up things through a RSS feed instead which is essentially just a work around that complies with the security restrictions of neocities that i'm bound by. anyways, this works great but i literally just can't customize it to how i want so this is another fail. then i find imood.com which, although is NICE, doesn't suit what i want on its own. so i'm at a loss here too.
so, again, another thing to put to the side i suppose.

so i started working on getting my guestbook, browsed through people's homepages again, and found chattable . and you probably think i have another paragraph complaining about this but honestly i can't write about something when i can't figure out how to even create a chat to implement onto my site in the first place so...y'know.
plus, i honestly have no clue if it'll work on my site either due to security restrictions so this is fun!!
anyways, after dealing with all of this, i finally decided it was about time i ported what i had so far over onto my neocities account. which isn't actually that hard i just had to wipe all of my files, overwrite the content in my index.html file there and paste in what i have now, and then upload my new files. but for some god awful reason after i went through all of this chrome just. kept depending on my old stylesheet??? so i had to clear some of my browsing data and eventually everything was loading properly for me.
and THIS is finally the end of my ridiculous documentation concering my neocities adventure so far.
i have no doubts i'll end up ranting here AGAIN about all of this but for now this is all i have on my plate...besides finally caving and learning javascript for real and continuing to learn more about html and css. hopefully one day i'll stop having such frequent issues but now is not the time and i doubt that'll be anytime soon either.
moral of the story, if you want to start something new and pick up a new hobby, please for the love of all that is of substance in this world don't go in completely blind like i've done if you're going to be making a project of some sorts. it will only lead to many misfortunes.
anyways you can see what i currently have done in my neocities here, make suggestions or give advice in the notes and whatnot i don't know.
#neocities#rant post#rant#coding#web development#geocities#html#html css#htmlcoding#css#javascript#losing my mind#holy shit#send help
7 notes
·
View notes
Photo

2023 September 21
Tagging Bennu Image Credit: OSIRIS-REx, University of Arizona, NASA, Goddard Scientific Visualization Studio
Explanation: The OSIRIS-REx spacecraft's arm reached out and touched asteroid 101955 Bennu on October 20, 2020, after a careful approach to the small, near-Earth asteroid's boulder-strewn surface. Dubbed a Touch-And-Go (TAG) sampling event, the 30 centimeter wide sampling head (TAGSAM) appears to crush some of the rocks in this close-up recorded by the spacecraft's SamCam. The image was snapped just after surface contact some 321 million kilometers from planet Earth. One second later, the spacecraft fired nitrogen gas from a bottle intended to blow a substantial amount of Bennu's regolith into the sampling head, collecting the loose surface material. And now, nearly three years later, on Sunday, September 24, that sample of asteroid Bennu is scheduled to arrive on planet Earth. The sample return capsule will be dropped off by the OSIRIS-Rex spacecraft as it makes a close flyby of Earth. Twenty minutes after the drop-off, the spacecraft will fire its thrusters to divert past Earth and continue on to orbit near-Earth asteroid 99942 Apophis.
∞ Source: apod.nasa.gov/apod/ap230921.html
99 notes
·
View notes
Text
A Robot and a Girl - Part 1

I've been working a lot on polishing things up for this series, including doing a full rewrite of all three chapters of the first story in this series.
So let's start things off with a bang.
You'll also be able to read this over on Fiction Press, and Tapas.
Edit: Unfortunately, because Tumblr has somehow become even more broken, posts with certain images can't register in their tags! And Tumblr removed the ability to have line breaks without having to code them in HTML by hand a long time ago. So, unfortunately, the Tumblr version of all of these stories are going to be without those linebreaks! Which sucks! THANKS STAFF!
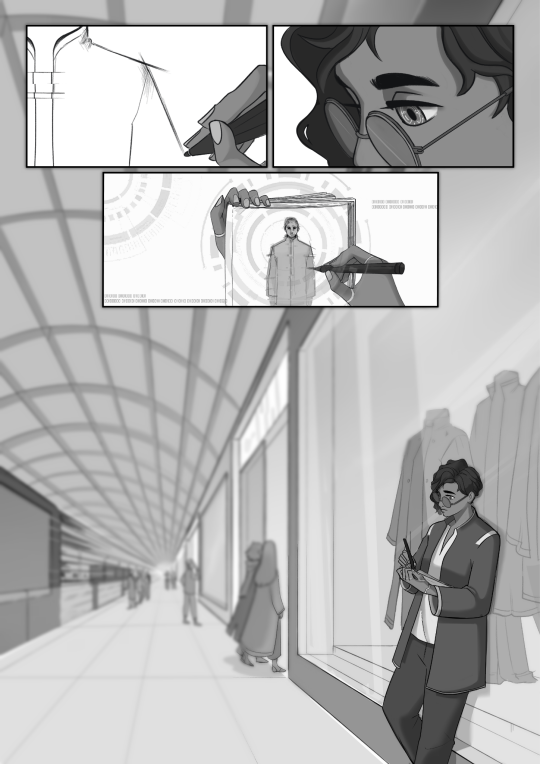
The stylus shifted about in D'Anna's grip as she trailed along the pages of her notebook. Her knuckles stood out against her dark skin, gold-alloy joints smoothly shifting with every curve and line. She followed along the edges of the coat in her memory. The image lay over the page before her eyes, like a digital ghost.
It had been difficult to get it out of the tower security systems. Tanu had tried to piece it together as best they could. Lines of loose code bled into the image of the man, roughing up the edges of his coat.
But still, she sketched them in. A little flourish of her own. She kept her focus on the notebook in her hands-
The light panels overhead flickered, and the trams rumbled down the center of the corridor. The door beside her opened and shut as people moved past along the side of the transport lane.
-and the security door across the way.
Every flash and tone of the signal light ran ahead of the next wave of sound as it crashed through the corridors like a current. Passengers rode past on the transport lanes. Cargo runners raced somewhere over their heads. And people gathered at the lane crossings. The rumble of the trams faded down the corridor, the crossing gates opened, and the crowd rushed away. The signal flashed again as another wave gathered-
D'Anna glanced back and forth from her sketch to the crowd.
-the cargo runners racing by-
There he was. Stepping right into the crowd as the lights changed-
-and the crossing gates opened. D'Anna watched as the man approached the door across the corridor. Circuits silently whirred to life in her eyes, tracking the man as he unlocked the door - scratching down the code as he punched it in - and slipped inside.
It looked like the info she'd gotten from Tanu was right on the mark-
She brushed her thumb over a name she'd written on the same page, Rosi.
She'd made a promise, and she planned to keep it…
She tucked everything away, the gates sliding shut behind her as she crossed to the other side.
-now she just had to stay on him.
D’Anna’s breath turned to fog in the cold air of the hall as she trailed her mark.
The man tugged his coat tighter against the cold, the steam of his breath glowing in the cold lighting of the panels overhead. Dark green spread across his shoulders, a stark contrast to the pale gray that wrapped his arms and waist. It wasn’t too uncommon to see on an engineer’s coat… But she could see a white synth-silk scarf poking out over his collar.
That kind of fabric wasn’t cheap. Hardly something she’d see on an engineer this far down in the city. He was owned, whether he admitted it or not. That scarf was as much a collar as a comfort, paid for by his patron. But who paid him didn’t matter-
Another door slid open with a click, the engineer more focused on pulling his data card from the lock and tucking it away than on the hall. D’Anna followed close behind him as he stepped through.
Too close. Dammit, she was too close!
The door failed to close when it should have, the engineer’s heel grinding to a halt on the concrete floor.
She had to be quick. Think of something…
D’Anna tucked her hands away in her pockets as he turned, quickly speaking up, “I’m sorry, sir. I would have announced myself sooner, but my employer prefers discretion.”
-what mattered was the job.
With a cautious frown, he looked her up and down, nervously adjusting his scarf.
If he knew she was lying, he didn’t show it. He was too twitchy for her liking…
He kept glancing at her wrap-tunic, eyeing the synth-silk with a thoughtful tug of his scarf.
Sometimes it paid to keep a few of her old things.
His voice was low and ragged, “What sort of work, ma’am?”
He waved a hand over a sensor by the door, shop tables lining the wall next to him lighting up all at once. The light was just as cold as the hall, old metal arches casting shadows along the curved ceiling of the narrow shop. A pair of mech tables formed an island in the center of the room, their mechanical arms and cables neatly folded away.
It seemed innocent enough, a mechanics shop like any other. And yet, it felt wrong. It was too clean and put together, almost like a showroom. What was it hiding?
He chuckled as he looked back at her, waving to the selection of parts that sat neatly on his table, “We can work with whatever you might need: Mechanical, Cybernetic, even Mechatronic.”
Every piece had its place like he was proud of his work. He probably was. But it wasn’t good enough. Come on. If he could just show her where he could be keeping them…
“A mech,” she said, earning a pause from the man as he looked at her more carefully. “It’s my employer’s understanding that you’re in supply.”
The engineer frowned in thought as he picked an eye from the table, the gold-alloy iris shining under the light as he turned back to her. She stared at the eye as he rolled it in his hands, thankful for her tinted glasses.
“Well, that depends,” he started, slowly turning his back. He tossed the eye behind him, inquiring over his shoulder, “What model?”
D’Anna caught it on reflex, her joints glinting in the shop lights. She did her best to ignore the gleam in his eye and the self-satisfied smile on his face. He was getting a little too curious…
“An RC-N unit,” she said, keeping her voice gentle as she set the eye back in its place on the table.
“Workhorse,” he mused. “Now why is an expensive android like you coming here? And all for a mech that’s easy to order anywhere?”
“As I said, my employer prefers discretion,” D’Anna said with a frown. “And a workhorse isn’t the only model they’re looking to get, even if you’d have to reset their cores.”
She was pushing him, but if he took the bait…
He hummed thoughtfully, striding over to the far end of the wall as he spoke, “Very well, miss…?”
“AT-S-039,” D’Anna lied, earning a chuckle from the man.
“Tower staff, hmm?”
“Yes, sir.”
“I see why your employer would wanna keep things quiet,” he said, eyeing her over his shoulder as he rummaged for his tools. “Folks up in the towers have reputations to uphold.”
“Yes, they do,” D’Anna said, her eyes scanning around the shop as she approached a tool chest embedded into the opposite wall.
“Well-” the engineer said as he came up behind her, core resetter in hand, thumb waiting on the trigger. “-you’re in luck, ma’am. I came into an RC-N unit recently.”
She heard the tell-tale click and crackle of electricity, spinning around in time to block the prongs of the resetter with her hand. Lightning arced from the three metal prongs, surging up through her arm, and into her shoulder as it threw her back. She slammed into the drawers behind her, shoulder screaming from the impact. She clutched at her arm, limp and numb from the jolt. Her hand was smoking…
“Took the shock to your arm and not your body. You’re pretty quick,” he hummed, giving the resetter another crackling click as he loomed over her. “Now, why are you here?”
She groaned as she tried to flex her fingers, “Looking for someone…”
D’Anna cried out as she slammed her arm into the drawers, shocking some sensation back into the limb.
The engineer just shook his head with a ragged chuckle, “No one else here but us. Not that it matters.”
Sparks arced across the triple prongs as he lunged for her.
One good jolt, and she’d be out like a light. She’d have to be quick.
She jabbed him in the arm - alloyed knuckles slamming into muscle - and sent the tool clattering to the floor. She surged up from her place on the ground. Her burned hand ached as another punch to the button of his chin sent him stumbling back into the mech table, head rattling.
“You…!” he sputtered, leaning against the table as his head spun.
She closed the gap in a single lunge, stepping like a boxer as she hooked an arm under his ribs. With her whole weight, she yanked him up and drove him back down onto the floor. She hauled him up by shirt and scarf, her joints whirring as she held him tight. He grabbed her wrist as he tried to stand, his feet scrambling against the floor. But she wouldn’t budge.
“You’ve got a storage space somewhere, don’t you, sir. Somewhere out of sight,” she kept her voice a soft-spoken threat, knocking his footing with a firm shake that ripped his collar.
“I don’t know what you’re talking about,” the engineer snapped, looking back at the tool chest embedded in the wall.
“It’s behind there, isn’t it, sir?”
She shook a yes from him before she threw him onto the floor again. She grabbed his collar and dragged him back over to the worktable, harshly propping him against its leg.
She yanked off his scarf, the man groaning as she tied his hands to the table, “W-Wait. Wait!”
“Don’t worry sir,” she dismissed him with a shake of her head. “I’m sure you’ll get yourself out in an hour-”
-maybe three, if she was being honest. But now-
D’Anna sighed and rose to her feet, her eyes scanning over the walls and floor as she approached the tool chest.
-she had a door to find.
She frowned at the wall as she looked it over, muttering under her breath, “Now, how do you open…?”
She could see the way the tool chest moved, her eyes picking up the grooves it left behind.
But she couldn’t find the lock…
She closed her eyes as she ran her hands along the sides of the chest, focusing on the contacts in her palms. As her hand trailed halfway down, she felt it, a gentle signal pinging against her palm.
“Data lock,” she hummed, feeling out the interface. She looked back at the man, still struggling against his scarf as she spoke, “Your card’s the key, isn’t it, sir.”
It wasn’t a question.
His data card wasn’t hard to find. No one’s was really…
She paused as she pulled it from his pocket, a softer green than his coat. But it was the emblem etched into the plastic circuits that caught her eye. A white oval with two flattened sides, three diamonds cut out along its center.
She knew it well.
“Mr. Archer,” she said with a frown, curling her hands into a fist. “Now why is he funding a chop shop?”
“Wouldn’t know,” the engineer coughed, trying to get the wind back in his lungs.
“Yeah, you do,” she said, rolling her eyes as she walked away.
“Who are you?” he asked, staring at her as she looked back.
“I don’t really know myself, sir…”
#A Robot and a Girl#d'anna android detective#Science Fiction#Detective Stories#Original Fiction#trans character#d'anna
15 notes
·
View notes
Text
HTML Tags and Elements You Must Know
HTML, or Hypertext Markup Language, is the backbone of web development. Whether you're a beginner or an experienced developer, understanding HTML tags and elements is crucial for creating structured and accessible web content. This guide will explore essential HTML tags, including headings, paragraphs, images, links, lists, and tables, complete with examples to help you grasp their usage effectively.
HTML Code
Headings
Headings are used to define the structure and hierarchy of content on a web page. They range from <h1> to <h6>, with <h1> being the highest level of importance and <h6> the lowest.
Example:
<h1>Main Heading</h1> <h2>Subheading</h2> <h3>Sub-subheading</h3>
Headings help search engines understand the structure of your content and improve accessibility for screen readers.
Paragraphs
Paragraphs are used to separate blocks of text, making content more readable. The <p> tag is utilized for creating paragraphs.
Example:
<p>This is a paragraph of text that provides information to the reader.</p>
Using paragraphs effectively can greatly enhance the flow and readability of your content.
Images
Images are a vital part of web content, providing visual interest and information. The <img> tag is used to embed images, and it requires at least the src and alt attributes.
Example:
<img src="image.jpg" alt="Description of image">
The alt attribute is crucial for accessibility, as it describes the image to users who cannot see it.
Links
Links connect web pages and provide a way for users to navigate through content. The <a> tag is used to create hyperlinks.
Example:
<a href="https://www.example.com">Visit Example</a>
The href attribute specifies the URL of the page the link goes to. Including descriptive text within the link improves accessibility and user experience.
HTML Code
Lists
Lists are a great way to organize information. HTML supports ordered lists (<ol>) and unordered lists (<ul>), with list items marked by the <li> tag.
Ordered List Example:
<ol> <li>First Item</li> <li>Second Item</li> <li>Third Item</li> </ol>
Unordered List Example:
<ul> <li>Bullet Item One</li> <li>Bullet Item Two</li> <li>Bullet Item Three</li> </ul>
Ordered lists are ideal for step-by-step instructions, while unordered lists are perfect for bullet points.
Tables
Tables are used to display data in a structured format. They consist of the <table>, <tr>, <th>, and <td> tags.
Example:
<table> <tr> <th>Name</th> <th>Age</th> </tr> <tr> <td>John Doe</td> <td>30</td> </tr> <tr> <td>Jane Smith</td> <td>25</td> </tr> </table>
Tables are useful for organizing data but should be used sparingly as they can be less mobile-friendly than other elements.
HTML Code
Conclusion
Understanding these essential HTML tags and elements is the first step toward creating well-structured, accessible, and visually appealing webpages. Incorporating headings, paragraphs, images, links, lists, and tables into your HTML documents will significantly enhance your ability to communicate content effectively.
FAQs
1. What is the purpose of the alt attribute in an <img> tag?
The alt attribute provides a text alternative for images, improving accessibility for users who cannot see the image, such as those using screen readers.
2. Can headers be used for styling purposes in HTML?
While headers can affect the appearance of text, they should primarily be used for content hierarchy and structure. Styling should be handled with CSS.
3. Are tables still relevant in modern web design?
Yes, tables are relevant for displaying structured data but should be used judiciously, especially in responsive designs, where other layout techniques might be more appropriate.
4. How do you create a link that opens in a new tab?
To open a link in a new tab, use the target="_blank" attribute within the <a> tag.
5. What is the difference between ordered and unordered lists?
Ordered lists (<ol>) display items in a sequential order, often numbered, while unordered lists (<ul>) use bullet points without implying a specific sequence.
#HTMLBasics#LearnHTML#WebDevelopment#HTMLTags#FrontEndDevelopment#WebDesign#HTMLForBeginners#CodeNewbie#HTMLTutorial#AssignmentHelp#WebDevTips#AssignmentOnClick#machinelearning#techforstudents#aiforstudents#assignmentwriting#assignment service#assignmentexperts#assignment help#assignment
2 notes
·
View notes
Text
Writing tag game by @bonecarversbestie !
Describe your writing process from idea to posting/publishing?
My ideas: I'm often inspired by moodboards, pinterest images, writing prompts I see on tumblr, movies and shows I watch...inspiration is everywhere! I also try and write things I'm familiar with or things I have interest in. It makes the research part more entertaining and engaging! Once I get an idea I play out the story in my head for a few days before I'm sure I like the possibilities of the story...if I really like the idea I get right to writing, even if it's a part of a scene or a small intro.
I LOVE THE RESEARCH ASPECT OF WRITING
I know, the boring part, but I learn so many new things and I like my fics to be accurate to a degree...of course at some point I just have to be like "Debbi, it's okay if it's not possible for your character to survive a fifty foot drop -- you're doing it for the angst!!!!!"
Writing/Editing: I keep everything I do to Google docs! I can access it anywhere from my phone and I love the outline tool. As soon as I get an idea, I make a new doc and add the idea or outline.
I will write at home, on the bus, on my break at work, anywhere! I'm shameless so I don't mind writing smut next to strangers on a bus or in a cafe 😅 I like to write a chapter out without really focusing on editing, and if there's a moment where I'm struggling to find a way to phrase or talk about something or a word to use, I just bold that section and keep going. Then I'll go back and edit it.
I'll admit, I'm an awful editor LOL I'll go back through and make sure it makes sense (I like to try and find creative ways to get what's in my head on paper and sometimes it just doesn't sound good LOL)
I only recently had people start reading my stuff before posting and I always feel so bad for the grammar of mine they have to endure (To my beta readers, I love you and you're awesome! 💖)
I just have to remind myself that Stephen King had horrible grammar, but incredible stories. That keeps me going hahaha
Posting/Publishing: I am too lazy to go back through and type in the html, so I just hope and pray my italics make it through while copying it to AO3. So far it's cooperated. I've only had to go back and add in italics two or three times.
I like to promote my stuff with sneak peeks before posting fully, and recently I've been addicted to making playlists on spotify for my fics, little collages for when I post a new chapter on tumblr, creating ways for my readers to engage with the story by letting them choose certain things that happen next.
Are you a plotter or a pantser?
Both! 😅
Thirty Moments I planned out. I did have a thirty day OTP prompt I had written for merthur back in like 2014 so I followed that and changed it up a bit to go with acotar/gwynriel, and I knew I wanted the prompts to tell a story as they went along rather than them being one-offs so that required planning. That was my most extensive outline. My other outlines are quick little notes, like a basic idea of what's coming next...some times I follow that and some times it derails completely and I go off course!
BB, NH is very much pantsing. I went into it deciding that's how I'd do it because I wanted to try the method and I really like pantsing!
I think it really depends on the fic for me and how much bandwidth I have for the fic.
What do you listen to when you are writing?
Spotify playlists that fit the vibe of the story, or the playlist I created for the fic!
There's also a guy who plays the trumpet in the park I live next to, so sometimes I'll just listen to that as I write 🤣
What’s your drink of choice (while writing)?
I find my best writing happens in the morning so I'll usually have coffee or tea. In the afternoons if I'm writing it's kind of whatever I'm drinking; water, seltzer, wine...I don't have a specific drink I stick to when writing.
Promote yourself! What’s your favourite thing you’ve written?
Um, all of it? hahahaha no but I really loved Thirty Moments Tell A Story. It was my first major (published - I wrote something right after reading ACOSF and it was basically word vomit, but word vomit with potential so I'm currently editing that lol) Gwynriel fic and I loved the themes I explored.
Share a fic of yours that you think is underrated/deserves more love.
I'm going to shamelessly share FOUR of my one shots that deserve more love:
Please...Stay (because I love some angst with a happy ending)
The Priestess Listened (because Azriel just needs someone to listen to him)
Song of the Shadowsinger (what I think happened *HOFAS spoiler* when Azriel returned without TT)
Getaway Car (I got this idea when driving through Philly...it's the wild west in these mean streets)
Do you have any advice for new writers?
From the inspirational words of Shia LaBeouf: JUST DO IT
Seriously. Write the awful stories. Write the ones you can't get out of your head, or the ones that you only gave a minute of thought to. Writing anything helps you to hone your craft and meld it to what you want it to look like.
Try and write a little everyday. Even if it's a sentence, editing, an idea...anything to keep the juices flowing.
Take your time. Don't rush it.
This part is easier said than done, but don't be hard on yourself. Write because you like to do it, not because you're expecting a million hits or comments or kudos.
Talk with other writers and get their advice.
Read, read, read...seeing other writing helps to fuel and inspire yours!
Take breaks and remember to be kind to yourself!
What is a writing style/technique that others do really well that you'd like to get better at?
I like my smut, but I think I could do better at making it less telling and more showing.
Is there a character you were surprised you enjoyed writing as much as you did?
I like writing about the other Valkyries and giving them personalities. I liked writing Azriel’s mother as well!
I also have Balthazar as a beta in my Valkyrie appreciation week fic and I've only written one line for him so far but I'm already entertained by him 🤣
Thank you for tagging me @sadiegirl2021
No pressure tags: @captain-of-the-gwynriel-ship @oristian @shadowsxgwynriel @foreverinelysian
13 notes
·
View notes
Text
Before you interact or follow!!

just a heads up, the person that runs this blog has no "dni" but! i am a r-q. im pro trans, pro all queer identities, pro a lot of things. dont break youre own "dni" by interacting.

rq editor. same as the one credited in the above image ( @transiconedits ) , just lost my account. posting without main tags bcz im just sharing art. main @overflowingmilk

request information!
i will never post the original ask. for my own and other's privacy. that being said, i much prefer non anons so i may DM you later for edits or clarification. also DM me if you need more than two character requested at a time.
youre more than welcome to link another post, mine or otherwise, in the your request and i will do my best to recreate it
i dont just do sprite recolours or racebends. anything from favicons, banners, dividers, personalised icons to memes, slight html skills, pride flag emojis for discord. for more private art (eg, real being (musician, entertainer, content creator) or non official art recolouring to look more like your intraself) DM me.
i will do any flag or contact stance
every fandom, every character i can get a png of, i will do!
Request template!
character name (only 1 per ask):
fandom:
type of edit: (icon/racebend/banner & icon/favicon/graphic/stamp, ect)
theme: (BE VAUGE. "autumn baby doll princess" HUH "butterfly and clockwork" easy, practically done already)
flag/s (if there are multiple versions, specify which one you want here)
(supply a transparent png of your character here for best results (non transparent images will work but with lesser quality). otherwise im picking a generic pic)
copy and paste ask : name: fandom: type of exit: theme: flag/s: [any relevant pngs]
i feel the template has too much going on however i would rather be clear than swamped with barely answerable asks. if you don't understand or need help in any way, DMs are open @overflowingmilk and my discord is in my warning box
about the creator! they/clown/thorn, 19y. loves everything and everyone <3 you may call me juice, mozzarella, or milk.


art sneak peek
2 notes
·
View notes
Text
🍽️ Top 10 Foods of the World You Need to Try 🌍✨
Food is culture, memory, and magic — all served on a plate. From spicy street eats to elegant pastries, here’s your ultimate foodie bucket list.
🇮🇹 1. Pizza – Italy
📍 Where: Naples Crispy crust. Tangy tomato sauce. Melted mozzarella. It’s simple. It’s perfect. It’s pizza. 🍕
📸 Visual Idea: Wood-fired Neapolitan Margherita on a rustic ceramic plate.
🇹🇭 2. Pad Thai – Thailand
📍 Where: Bangkok street stalls Sweet, salty, spicy, packed with texture. Stir-fried noodles never looked this good. 🍜
📸 Visual Idea: Steaming wok, fresh shrimp, crushed peanuts, lime wedges.
🇲🇽 3. Tacos al Pastor – Mexico
📍 Where: Mexico City Marinated pork + pineapple + fresh tortillas = 🔥🔥🔥 A street food love story you won’t forget.
📸 Visual Idea: Tacos piled high with cilantro, onions, and a lime wedge on the side.
🇯🇵 4. Sushi – Japan
📍 Where: Tokyo or Kyoto sushi bars Minimalist beauty meets bold flavor. From silky otoro to classic salmon nigiri — sushi is edible art. 🍣
📸 Visual Idea: Wooden board with perfectly arranged nigiri and a small bowl of soy sauce.
🇫🇷 5. Croissant – France
📍 Where: A morning in Paris Flaky, buttery, golden perfection. Best enjoyed with a café au lait and a view of the Seine. 🥐
📸 Visual Idea: Croissant on a café table, sunlight streaming in, open book nearby.
🇮🇳 6. Biryani – India
📍 Where: Hyderabad or Lucknow Fragrant rice layered with marinated meat and spices. Every bite tells a story. 🌶️
📸 Visual Idea: Biryani served in a copper pot with raita and boiled egg.
🇨🇳 7. Peking Duck – China
📍 Where: Beijing Crispy duck skin, tender meat, and thin pancakes with hoisin and scallions. Fit for royalty. 🦆
📸 Visual Idea: Sliced duck with all the fixings arranged beautifully.
🇹🇷 8. Kebabs – Turkey
📍 Where: Istanbul food stalls Juicy grilled meats, flatbread, yogurt, and spice. Turkish kebabs are smoky bites of heaven. 🔥
📸 Visual Idea: Sizzling skewers over charcoal or a doner wrap being freshly sliced.
🇪🇹 9. Injera with Doro Wat – Ethiopia
📍 Where: Addis Ababa Sour flatbread meets rich, spicy stew. It’s flavorful, messy, communal — and unforgettable. ✨
📸 Visual Idea: Traditional Ethiopian platter with vibrant stews and folded injera.
🇺🇸 10. Cheeseburger – USA
📍 Where: A hidden gem burger joint Juicy, cheesy, and iconic. From gourmet to greasy spoon, burgers are an American staple. 🍔
📸 Visual Idea: Melty cheeseburger, crispy fries, retro diner vibes.
💬 Which one would you try first?
Reblog and tag your foodie partner-in-crime! 🍴 #WorldFood #Top10Dishes #FoodieGoals #CulinaryJourney #MyPhenteonEats #FoodLover #TravelEats #TumblrEats
Would you like me to turn this into a downloadable blog graphic, a formatted HTML post, or prep a caption set for sharing on Tumblr/Instagram too?
You said:
now put picture according toheading
ChatGPT said:
Nice! Here's your Tumblr-ready blog post with each food section matched to an image. I've paired each heading with its corresponding aesthetic image preview (using placeholders you can replace with the actual AI-generated or sourced images).
🍽️ Top 10 Foods of the World You Need to Try 🌍✨
Food is culture, memory, and magic — all served on a plate.
🇮🇹 1. Pizza – Italy
📍 Where: Naples Crispy crust. Tangy tomato sauce. Melted mozzarella. It’s simple. It’s perfect. It’s pizza. 🍕
Wood-fired Neapolitan Margherita on a rustic plate.
🇹🇭 2. Pad Thai – Thailand
📍 Where: Bangkok street stalls Sweet, salty, spicy, packed with texture. Stir-fried noodles never looked this good. 🍜
Steaming wok with noodles, shrimp, and lime wedges.
🇲🇽 3. Tacos al Pastor – Mexico
📍 Where: Mexico City Marinated pork + pineapple + fresh tortillas = 🔥🔥🔥 A street food love story you won’t forget.
Tacos loaded with cilantro, onions, and lime.
🇯🇵 4. Sushi – Japan
📍 Where: Tokyo or Kyoto sushi bars Minimalist beauty meets bold flavor. Sushi is edible art. 🍣
Wooden sushi board with colorful nigiri pieces.
🇫🇷 5. Croissant – France
📍 Where: A morning in Paris Flaky, buttery, golden perfection. 🥐
Café table with a croissant, book, and soft morning light.
🇮🇳 6. Biryani – India
📍 Where: Hyderabad or Lucknow Fragrant rice, marinated meat, aromatic spices. 🌶️
Biryani in a copper pot with raita and boiled egg.
🇨🇳 7. Peking Duck – China
📍 Where: Beijing Crispy skin, tender meat, thin pancakes. 🦆
Beautifully sliced duck with hoisin, scallions, and wraps.
🇹🇷 8. Kebabs – Turkey
📍 Where: Istanbul food stalls Juicy grilled meat and bold spices. 🔥
Skewers sizzling over coals or doner wrap mid-slice.
🇪🇹 9. Injera with Doro Wat – Ethiopia
📍 Where: Addis Ababa Sour flatbread and spicy stew. ✨
Traditional Ethiopian platter with colorful stews.
🇺🇸 10. Cheeseburger – USA
📍 Where: A hidden gem burger joint Juicy, cheesy, 100% iconic. 🍔
Melty cheeseburger with crispy fries, diner-style
#books#memes#doctor who#writing advice#comedy#food#foodie#healthy food#cooking#baking#recipe#fruit#bananas#food photography
3 notes
·
View notes
Note
Hiya! I found your blog through your neocities website! I was wondering if there’s any tips or things you read/watched that help you make your site. (Im heavily considering making one of my own neocities site it just seems fun)
hihi welcome !! i have quite a few pieces of advice, but the tldr is you should come up with an idea for what you want to make beforehand, and look up how to do each piece! your knowledge will start to fill in along the way :]
(this is probably gonna be long as hell so under the cut is all of the fun stuff /silly)
the way i personally started off was by sketching out what i wanted my site to look like! if you know what you want before you begin, you'll know where to look to figure out what you need to do. html+ css are extremely easy languages to read/write once you know what to look for!
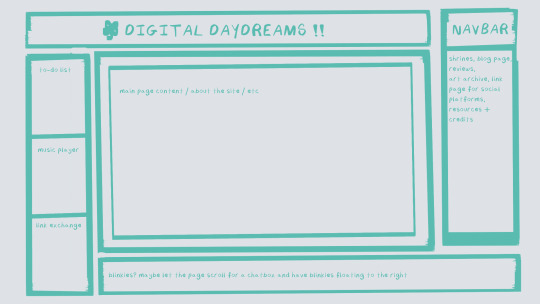
^ this was the original sketch for my site, where i planned out everything i wanted to include. it's a bit different from what actually ended up on the site, but that's alright! it's just about having an outline to work from. i think of it like outlining before you write, it feels like such a pain in the ass because u just wanna start working NOW but u will thank yourself later for taking the time to plan.
once you know what you want to make, start looking for tutorials and resources to make it easier! the grid for my homepage and some of my other subpages was made using a css grid generator, since its one of the more confusing bits of css. you can make grids without it, but its a very easy way to make a more asymmetrical design if ur using the generator!
thats linked here, it gives you some css to put in your head or css sheet, and then the html for the different boxes to slap in your main document. it can be easier to understand what itll look like if you give each one a border while you work, even if its just temporary!
when looking for information about css and html, w3schools is your best friend. its a pretty comprehensive database of every little piece of html + css you could ever need, with examples you can play with yourself to understand what each variable does! it's been a lifesaver for me, ive watched basically zero video tutorials because everything on there is explained so well and you can find basically Anything.
they even have code snippets for things that take more than one or two lines of code, which you can use and adapt yourself! (the tooltips on the official art + my art sections on the hinata shrine were adapted from a tutorial on there!)
in general, having a plan and working from there will make ur life so much easier. the pages that ive sketched out beforehand or ive had a very clear vision for have been WAYY easier to code than the ones i tried to come up with on the fly, and ive been much happier with how they've turned out as well. though i do also have some smaller, rapidfire tips as well that ill go thru now!!
— inline css (the style="" tag) seems so so useful but really should only be used when you're resizing images like buttons. when u keep all of your css in the head or in a seperate document, its way easier to debug and read later. i cleaned up my homepage recently by removing all of the inline css and looking at the code stresses me out WAY less because i can actually read it LOLOL ... plus cutting the css out and putting it in its own document made me realize that id accidentally wrote some really weird code in some places
— this is very much 'do as i say, not as i do,' but use an external editor (like visual studio code) instead of editing live on neocities! you can set up a live preview, and generally wont be pushing out 100 updates every single time you change or add something. i tend to code directly on neocities but its a bad habit and i want to break it eventually v_v
— if you really like an effect someone else has on their site, you can peek using inspect element i promise the coding police won't get you !! dont steal code line for line, but you can figure out what theyre doing and put your own spin on it. things like border images can be really cool, and i only figured out about them because i looked at what someone else was doing and figured out how to adapt it for my own site! check linkbooks and credit sections as well, a lot of people will include links to any effect they didnt make themself or got help with. (including me! the credits section of the linkbook has a ton of little things i got from other places, including a really neat little music player, the rss feed for my status cafe, and the wobbly text on the homepage!)
— most stuff in html and css basically just... says what it does in the tag. so looking stuff up for it is extremely easy! if you've used carrd before you honestly probably already know more abt html than u'd think just intuitively. when ur adjusting the margins or padding in carrd, you're adjusting the margin: and padding: properties in the css of the website it's outputting!
this is getting way too long but!! my best advice is to just get started. you'll never be able to learn without trying, and it genuinely is so fun to have something that's truly your own!
(if u have any specific questions im happy to answer anytime as well! i love talking abt neocities, its a super fun hobby and way easier to pick up than u would think!)
#originals.txt#inbox.txt#neocities.zip#god im so sorry abt how long this is i havent had time to work on the site for a while and its getting to my head /silly
6 notes
·
View notes
Note
hi there!! there isn’t a need to publish this ask I literally just am so curious if you had any resource or tutorial regarding your neocities! I’m sorry if this is so out of the blue but I saw your site and really adored the layout!! I’m specifically just wondering about the method you used for your blog posts - I’ve found some recommended ways to do it but i feel like yours is integrated really well imo :) also if you’re not comfortable answering or anything that’s totally fine lol pls don’t feel obligated. lastly your art is so gorg!!!
i'm finally going to answer this ask...!! it's going to be a very long read so i'll keep it all under this cut
i know you are specifically curious about the blog posts page but i figured this was a great time to thoroughly explain my website layout too since i had another person asking about it (i'll put that at the bottom though) :D
please bear with me btw because i... i have never made a tutorial like this before LOL
--
blog posts guide

1. scrollbox
i made a super low effort format for my blog entries. i honestly just wanted it to be a super simple scrollable box with all of my entries being in one general place. CSS to do this, i created an all encompassing <div class> that had the styling property of overflow.
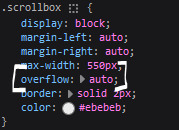
fyi, i also added a <div class> within the scrollbox class that would handle the padding but TBH i'm not sure... i needed to make an entire class for that LOL REFERENCES - scroll box
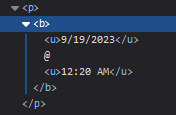
2. date & time
HTML ok honestly i just used a <p> element and made it bold....
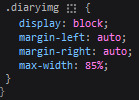
3. images (optional)
HTML i don't always attach an image to my entries but when i want to, i use this <div class> that sits below my date & time. i style it with an <img class> that i created and add an <alt text> too to make it more accessible!
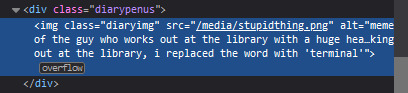
CSS this is what the <img class> looks like. i like my images centered and on their own "line."
4. status
HTML again, another <div class> specifically made for the status. i just made the font size smaller to visually differentiate it from the actual entry itself.

5. blog entry text
HTML my blog entries are simply typed up between <p> tags and i use <br> to start a new line... it literally just looks like this LOL....

THAT'S ALL...>!!!!!! :)
--
website guide

1. general page layout
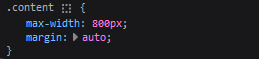
HTML in order to establish where i want all of my blog's content to lie, i created a <div class> specifically to store it all.

CSS the styling for it is pretty simple! just setting a max-width to limit the size of everything that will be in it and also centering the page with the margin.
2. sidebar
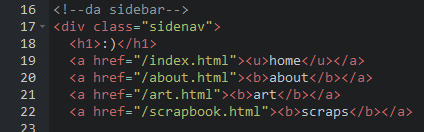
HTML my sidebar just comprises of a heading tag and navigation links.
CSS this is all personal taste aside from the fixed position
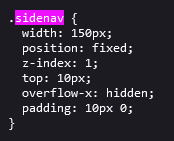
REFERENCES - fixed sidebar - responsive sidebar
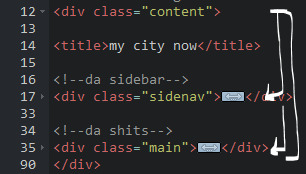
3. main content
HTML because everything is stored in the <div class="content">, the sidebar and the page contents are limited to the constraints of the it.
that is all pt. 2...... bless <3
#THANK U FOR ASKING BTW!!!!#it brings me so much joy when people ask me . things and i then get to answer these things#i am so sory if this is somewhat incomprehensible or a pain to read through IF YOU HAVE ANY NEEDS FOR CLARIFICATION... JUST ASK ME..!!!!#textoffun#inbox
34 notes
·
View notes
Text
A list of improvements I'd like to see on Tumblr (in no particular order):
disclaimer: I really enjoy using Tumblr, I've been here for over a decade, and these are just my personal suggestions. For being a free website, we've got plenty of options available already. Staff, please don't shoot me, thank you.
Applying to both the browser and the app version:
a working tag search
restrictions that would allow -gifs above 10MB -more than 100 links -1+ video per post -adding videos to reblogs
an archive for the like section
the option to like replies
improved refreshing rate of messages in dms
the ability to reply to specific messages in dms
decreased upload time and increased resolution of videos
being able to remove a portion of a thread without having to remove all of the rebloged additions (this comes in handy when deactivated blogs are involved and you can't reblog from them to remove reblogs connected to their reblog)
older posts displaying people's tags in the notes (I believe this is a bug rather than a missing option, they only show as plain reblogs now)
Editing posts in the app not undoing deleted spaces in between your paragraphs you had set in your browser
the option to edit share-created posts' tags in the same way as ones created directly in Tumblr (applying to videos)
being able to message from a password-protected side-blog
the option to choose who sees your likes and following in addition to the already available display and hide options
being able to add an admin/member to a main blog, not just the sides (for example, when you want to have access from two accounts)
being able to search by more than a single tag (x)
being able to reposition your pfp
the where were we? feature for the like section
being able to click on a post under a tag in the trending list preview and actually see the post
searching a tag on your blog and seeing how many posts are under said tag (kind of like in the archive)
sending asks from side blogs
App-specific:
an archive (for both posts and likes)
the option to choose from the full range of browser-available colour palettes
the ability to edit tags without having to delete and rewrite them
being able to search by post type (in a blog's refine search option) rather than having to type a tag first
refine search adding an ask option
the image limit per post (10) being closer to the browser one (30)
the option to add image description before posting
the linked source of a picture showing (of a picture, not the post, those are different)
being able to edit a blog's description containing HTML without losing the code
being able to block people from side blogs
shuffle working in the app
a text editor (I'll add a photo because I know some of you don't know we've got this option)
Browser-specific:
the option to crop a picture before posting
the trending list displaying all 9 categories instead of 8
the ability to view the tags of a post in the mass post editor before clicking on it to edit said tags (preferrably by hovering your cursor over said post)
being able to change the order of featured tags
I am certain I forgot a good few but these were the ones I could think of off the top of my head. If you want to add to this, feel free.
#tumblr#abby talks#if you don't hear from me after this..staff found me#tumblr guides and related#update - this post NEEDS a communities update but I'll add that later
12 notes
·
View notes
Text
So I know how to code websites now, but idk how to upload it to the internet. My plan is to give you all a post that will update with a string of code to sort of visit the website(s?) that I am curating. I will reblog a post that had the original, and include a more patched version as time goes on. I am so sorry in advance.
Because of this.... Lemme show you how html and css works!!
For Project Our Realities, it will all be in html and css since that's what I'm learning so far. JavaScript will be included later.
HTML and CSS basics below!!
HTML, or Hyper-Text Markup Language is the basics of coding a website. It describes how a website will look. It unfortunately doesn't get you too far in terms of digital design, which is why we have languages like Css and javascript.
All HTML files start with <!DOCTYPE html>. This declares to the file that you will be coding in html rather than something like lua.
Each HTML file, after declaring it as an html file, starts with <HTML> and </HTML>. To end a tag, you must close it by adding a forward slash before writing its name (unless it is <br> or <hr>, or similar).
The <head> tag lets you add a title (silly little tab name), a favicon (silly little icon next to the name of the tab) and ways to link your CSS to the HTML.
An HTML file will look like this <!DOCTYPE html>
<html>
<head>
</head>
<body>
</body>
</html>
In the body, you can write the rest of your page, using headers (<h>/<h1-6>), paragraphs (<p>), and even forms (<form>).
--
CSS, also known as Cascading Style Sheets, is a type of coding language that is often used to create websites. No, it is not C++.
Rather than <>, CSS uses brackets {} to code.
CSS is used to style html websites, so it addresses html tags and lets you style their appearance. There is something known as inline CSS, where you can use the <style> tag to style something in your HTML file. HTML was never meant to have colors in its code, but you can change the color of text with inline css. Let's say you would like to style a header.
In your HTML file, it would say:
<!DOCTYPE html>
<html>
<head>
<link rel="stylesheet" href="(name of .css file goes here)">
</head>
<body>
<h1> My first header!!! :> </h1>
</body>
</html>
Now that we have our header, let's turn it red.
In your CSS file, it should say...
h1 {
color: red;
}
The H1 addresses that it will select all h1 elements. The code in the brackets shows that all those addressed will be the color red.
CSS has no starting or finishing lines, all elements will by stylized with {}.
--
To create an HTML file, you must end it with .HTML
To create a CSS file, you must end it with .css
Sometimes, when I create a link for the Css, the required name for the file will be in the HTML code already. Make sure that both files are in the same folder, and not one in a different folder within the same parent folder. This will not work.
--
Wanna test this out? Make a new notepad file on Windows, title it as "firsthtml.html", and create another file called "firstcss.css".
Place this in the .HTML file: <!DOCTYPE html>
<html>
<head>
<title> First HTML </title> <link rel="icon" type="image/x-icon" href="https://i.pinimg.com/736x/1a/8d/9d/1a8d9d26cdca15285d217c817f6953ec.jpg">
<link rel="stylesheet" href="firstcss.css">
</head>
<body> <h1>Welcome, traveler!!</h1>
<h3><I>Thank you for reading the tutorial!! Follow the blog to keep up with our news.</I><h3>
</body>
</html>
Now, for your .css file, write this down:
h1 {
color: dark blue;
}
h3 {
color: orange;
}
--
Thank you so much for following this tutorial. I mainly learned about this from w3schools and in my school course. Happy coding!!! :>
-ava
#.io#ava#ava our realities#io our realities#eps foundation#entertainment productions studio#project our realities#our realities#coding#html#HTML stuff#css#Css stuff#hyper text markup language#cascading style sheets#there will be more coding to come#I hope this helps you guys get into coding
3 notes
·
View notes