#html header tag lesson
Explore tagged Tumblr posts
Visit Tumblr Blog
Explore Tumblr blogs with no restrictions, modern design and the best experience.
Last Seen Tumblr Blogs


Fun Fact
Tumblr has a 66 index score for customer satisfaction in the US.
Note
Do you have any tips or tutorial recommendations for making your own website?
I actually really do like the Wordpress client now I've gotten the hang of it!
I did tell 1000 of my subscribers to kill themselves in an email header by accident, and also battered those poor 1000 people with something like 100 emails in increasingly frantically apologised for errors over the course of the same three days, but that was before I really Got it.
With the above oopsies in mind, if you want to import previous newsletters or posts, for the love of God, do not import your existing newsletter subscribers until after all of your backposts have been imported across. That is the main lesson I have learned.
I had such a vision in mind of a triumphant surprise email going "Hey, look what I did! Surprise! Isn't it sexy?!" and instead everyone got 30 notifications about chapter updates from 2 years ago and an email that said "It's Your Responsibility to Kill Yourself" followed by multiple deranged apologies from me.
So. Don't do that.
Other than that, I'd actually wanted a proper website for quite a few years even before Patreon got so antsy with hiding my content - I tried to set one up a few years back with Wix, and I cannot recommend that less, it's a fucking awful site to use, and it's far less user intuitive than Wordpress.
Part of my issues with Wordpress were actually that a lot of website clients, unless you're building from scratch in HTML/CSS or another code, give you everything in Blocks, and because I remembered like 10 years ago where you didn't have to do that, and you mostly altered everything on the website with like, 10000 options tickboxes and sliders, I was like "wow this is awful". I will admit now, crotchety bastard that I am, that the Blocks system is better and more intuitive once you start to understand it. I just don't always do well thinking of things in three dimensions, so to speak, and I was shooting myself in the foot by going "WELL BACK IN MY DAY--"
Wix doesn't have a very good help section because they want you to talk to their people for help, but most sites for stuff like this do have really robust FAQ and help sections, and obviously, rely on those as much as possible.
At one point I was so upset with my inability to do something that Lorenzo literally came over and told me to leave the apartment (that was the day that I went to Pets at Home and spent a ridiculous amount of money on gifts for the cat), and while I was very grumpy about doing it at the time, taking breaks is crucial, especially if you get as frustrated as I do.
I realise that most of what I have said so far is niche tips for if you're stubborn and mentally ill, so in terms of actual website building, I would say it's important to have an idea of what you want the site to do.
Do you just want a landing page, so that if people search for your name or whatever, that this is the first result? That it links people to your books or your store, your socials? Do you want to have a gallery of work on display, or an archive of writing like I've made? Do you want people to be able to contact you, give tips?
I always wanted a robustly tagged archive with an in-depth tag page like the one I've set up now, and the goal for my Directory of Work on Medium and elsewhere was always that it would later be transferred to my website once it was built.
Then, I have an about page for people who are just curious about who I am and who I look like; commission info and information about booking me for events or inviting me to cons and such; the books I have for sale, publications I've been a part of, interviews and presentations on YouTube; my events calendar with conventions and such; the gallery where I'm showing off both art of my characters and where I'll later show art that I buy for my home and myself, such as the stuff framed in the stairwell or jewellery I buy from makers at markets and such; and then, of course, the subscriber benefits.
All of the above to go my goals which are, in order, to encourage people to read my work and make it easy for them to do so, to pay me money for my existing work or to offer me money for new work, and to show support for other events, artists, friends, and queer creators.
I would definitely advise thinking carefully about how visual or how word-based you want your site to be - I had to look for a recipe blog theme to find one that was stripped back in terms of images. Especially for adult websites, I'd be careful about payment providers and so forth.
Stripe is the default on the site, and I've been very careful about making sure none of my titles or descriptions that the Stripe client will see have words like erotica or adult in them - if someone from Stripe clicks through and sees the site, they might take issue with it, but that's another thing. I do get paid by Stripe through Medium, so I do already use them.
Most payment providers hate any kind of adult content, but are willing to give a tiny bit more wiggle room on erotica, or at least, they just don't notice it in the same way they do Real Porn, but there's nothing I can say other than "be careful and more importantly, be lucky" on that front.
Most of all, I'd say to try to have fun with it and try to enjoy the actual building process if you can - make something pretty and fun to navigate as much as you can, and if you can get some enjoyment out of it, your site users will as well.
18 notes
·
View notes
Text
5 Advanced HTML Techniques to Enhance User Experience
With countless websites vying for attention in the digital universe, providing an excellent and visually appealing user experience (UX) has never been more important than it is today. HTML is the language of the web and serves more purposes than simply defining content. It can also be leveraged to help deliver usability, interactivity, and performance. When it comes to user experience, CSS and JavaScript are typically the stars of the show, but if you can master HTML and apply some techniques we will discuss in this blog, you can improve how users interact with your website.
So, whether you're a developer, designer, or digital marketer, the following 5 more advanced lessons in HTML will open up a world of techniques to consider when creating a memorable and user-friendly experience to harness a professional website.
1. Semantic HTML - More than a coding best practice
Semantic HTML usage is the only part of the UX we talk about here that has a direct impact on all aspects of accessibility and SEO, how search engines see your content, and how assistive technologies interpret your content. Semantic tags like <article>, <section>, <header>, <footer>, and <nav> provide meaningful structure to your web pages.
Benefits:
Enhances screen reader support for visually impaired users
Helps search engines understand page hierarchy and content relevance
Improves the maintainability of code
Example:
<article>
<header>
<h2>HTML Tips You Should Know</h2>
<p>Published on June 7, 2025</p>
</header>
<p>This article will cover some HTML techniques...</p>
</article>
Pro Tip: Combine semantic tags with ARIA roles to maximize accessibility.
2. Lazy Loading Images for Improved Page Speed
Page load time can have a direct impact on both bounce rate and SEO ranking. One of the best ways to improve speed is by lazy loading images. The HTML attribute lazy loading, which loads images in the user's viewport whenever the images become visible, instead of loading the entire page.
How to Use:
<img src="product.jpg" loading="lazy" alt="Product Image">
Benefits:
Improves site speed on initial load
Reduces unnecessary bandwidth usage
Enhances mobile performance
SEO Insight: Google officially supports lazy loading, so it’s both a UX and SEO win.
3. Using <details> and <summary> for Interactive FAQs
Want to add interactive elements without JavaScript? The <details> and <summary> tags allow users to expand and collapse sections of content natively.
Perfect For:
FAQs
Collapsible descriptions
Hiding extra content until requested
Example:
<details>
<summary>What is responsive design?</summary>
<p>Responsive design is a web development approach...</p>
</details>
User Benefit: These elements improve content readability and reduce visual clutter, making the page more user-friendly.
4. Embedding Accessible Videos with Captions
If you use videos on your website, HTML5’s <video> tag is your friend. To truly enhance UX, especially for users who are hearing impaired or in noisy environments, add subtitles or captions.
Example:
<video controls>
<source src="promo.mp4" type="video/mp4">
<track src="captions.vtt" kind="subtitles" srclang="en" label="English">
Your browser does not support the video tag.
</video>
Why It Matters:
Increases content accessibility
Helps convey your message without sound
Can boost SEO when transcripts are provided
5. Anchor Links with Smooth Scrolling
Long content pages can be obstructive to the user. Anchor links with a smooth scrolling effect help users effectively go through longer form content. HTML will set up the link, while CSS or JavaScript will provide the smooth scrolling effect.
HTML Setup:
<a href="#features">Jump to Features</a>
...
<h2 id="features">Key Features</h2>
Smooth Scroll CSS (optional):
html {
scroll-behavior: smooth;
}
Why It’s Great:
Makes navigation smooth on long pages
Increases user interaction and decreases bounce rate
Improves overall UX, cleanly and easily
Conclusion
HTML is way more powerful than most people give it credit for. By making a deliberate use of modern HTML capabilities, you can create websites that are faster, more accessible, and provide a more engaging user experience, while keeping your markup clean and easy to maintain. These five techniques are easy to use, yet can have an incredibly positive impact.
Use these advanced HTML techniques today to impress your users and set your website apart from the competition.
Need help implementing these techniques on your website? Xplore Intellect, the best web development company in Coimbatore, specializes in digital marketing and UX optimization. Let us help you build websites that look great and perform great.

0 notes
Text
web development curriculum
Module 1: Introduction to Website Development
Lesson 1.2: Basics of HTML, CSS, and JavaScript
HTML (HyperText Markup Language), CSS (Cascading Style Sheets), and JavaScript form the cornerstone of web development. HTML allows you to structure your web content, CSS is used for styling and layout, while JavaScript adds interactivity. HTML: You'll learn about elements, tags, attributes, and the overall structure of an HTML document. HTML forms the skeleton of the webpage. HTML: Structuring the Content HTML, or HyperText Markup Language, is used to structure the content on the page. It uses tags to organize elements such as headers, paragraphs, images, links, lists, and more. You will learn about the different tags and how they are used to construct an HTML document. We will also delve into attributes, which provide additional information about HTML elements. Essentially, HTML forms the backbone of the webpage, organizing content in a meaningful and coherent manner. CSS: We'll explore selectors, properties, values, and how to implement styling in your HTML document. CSS can be thought of as the skin and clothing of the webpage. CSS: Styling the Webpage CSS, or Cascading Style Sheets, is used for controlling the visual presentation of a webpage. It allows you to specify things like colors, fonts, layout, and even animations. We'll explore how to use selectors to target specific HTML elements, and properties and values to define the style. CSS enables you to give your website a unique look and feel—it's like the paint and decorations on a house. JavaScript: You'll get introduced to variables, data types, functions, events, and how to manipulate HTML elements. JavaScript brings your website to life, making it interactive and responsive to user actions. JavaScript: Adding Interactivity JavaScript is a programming language that makes your website interactive. It enables you to control elements on the page and respond to user actions, like clicks or keypresses. You'll learn about variables, which store data that can be manipulated, and functions, which perform actions. We'll also cover events, which can trigger JavaScript code to run, and methods for manipulating HTML with JavaScript. JavaScript is like the electricity in a house—it powers features like light switches and appliances, making the site dynamic and interactive. HTML, CSS, and JavaScript are the fundamental building blocks of web development, and understanding them is crucial for anyone who wants to create or manage a website. By understanding these three technologies, you will have a firm grasp of how websites are built and function. They offer you the tools to create engaging, accessible, and attractive web content.
web development curriculum
0 notes
Text
HTML header Tag
The HTML <header> tag is used as a container that contains introductory content or a group of navigational links. It may contain some elements, logo or heading, author information icons, or a search form. Syntax <header> header content... </header> Example <!doctype html> <html> <head> <title>HTML Header Tag</title> </head> <body> <article> <header> <h1>Article Heading</h1> <p>Posted by…

View On WordPress
#build a header navigation in html#footer tag#footer tag in html#h1 tag#h2 tag#head tag#header#header and footer tag in html#header code#header html#header tag#header tag in html#headers#heading tag#how to create a header in html#html footer tag#html header#html header tag#html header tag lesson#html header tag tutorial#html header text#html header tutorial#html5 header tag#make header#tag#tag header#tag header do html5#tag header html
0 notes
Text

The final round of art claims is open at @wipbigbang! We have all sorts of great stories left in multiple fandoms, and we'd love any type of fanart for them: traditional art, digital art, fanmixes, moodboards, fic covers/chapter headers...any kind of art you can imagine!
The synopses are located at https://wipbigbang.dreamwidth.org/173272.html
The form is located at https://forms.gle/yyxkCxyXJopMTyUs8.
Star Trek: Deep Space Nine
#101
Title: Free Advice Is...
Pairing/Characters: Odo/Quark
Rating Explicit | E
Warnings/Tags: No Warnings apply
Some lightly whumpy elements involving deteriorating physical condition due to cold, exertion, and lack of sustenance. Frottage, Huddling for Warmth, Survival, Exhaustion, Pining without Realizing it, Masturbation, Masturbating in a sonic shower, "Platonic" Sex Tutoring, Pretending sex with feelings is transactional, Blow Jobs, Lovingly detailed descriptions of blow jobs
Summary: "Maybe now is a good time for lesson two." "How can you think of sex at a time like this?!" "Are you kidding? It beats thinking about all the ways we could die on this planet."
A continuation/sequel to Free Advice detailing how the rest of "The Ascent" goes: Quark and Odo are stranded on a planet and stuck huddling for warmth. And Odo's newly humanoid body isn't making any of this easier.
A somewhat canon-divergent take on S5E09 "The Ascent" featuring Odo and Quark actually resolving some of the sexual tension between them in that episode, at various times and places. At each stage, they don't actually acknowledge the attraction between them but rather take advantage of whatever pretext they can to have sex.
#fandom event#wip big bang#fanart#art event#looking for fanart#signal boost#star trek: deep space nine#star trek: deep space 9#star trek: ds9#star trek deep space nine#star trek deep space 9#star trek ds9#ds9 odo#ds9 quark#odo#quark#quark x odo#odo x quark#quodo#queueue
5 notes
·
View notes
Text
My Introduction to HTML5
Starting off learning HTML5, it’s a completely new world for me, but one that I’ve been interacting with for years. 🌍
I find it interesting how the whole standards shift forward at a constant pace. And with the latest HTML5 introduction, it allows for more descriptive HTML tags which make it ideal for SEO. These include tags like <main>, <header>, <footer>, <nav>, <video>, <article>.
I learned this from my first lecture and in the introduction course on Free Code Camp which is a really nice tool to reinforce what I’ve learnt. I plan on completing the “Basics of HTML and HTML5″ lessons before the next Web Authoring class so I can reinforce what I learn in the Free Code Camp during the tutorials and lectures to come on HTML. 😊
2 notes
·
View notes
Text
Search Engine Optimization Tips For Your Business
Most businesses, especially those that have a lot of competition, will need to use search engine optimization on their website so that it gets better ranking in the search engines. This article has a number of search engine optimization tips that are easy to use. These hints really work.
Remember that SEO results are rarely instant, so be patient and try not to get discouraged. Because of the way search engine algorithms work, it can sometimes takes months to reap the rewards of today's effects. As long as the SEO methods you are using are solid, try to think of the work that you are doing today as a long term investment for the future.
Besides making sure to update your website daily, you should be providing fresh links to different websites. If you update your links daily, people will be coming to your website to get the latest links to all the new websites, which will increase search engine optimization.
If you are writing a blog, optimize your content by using as many heading tags as you can without depleting readability. Start with the blog title in an
tag and work down from there, with the main content of the post in an
tag. This tells search engine spiders which content you have deemed most important.
To make sure every page of your site is indexed by search engines, do not use Flash in the site's design. Flash does not allow individual pages to be linked to, which means that search engines can't crawl them. A separate link for each page will allow all your content to be indexed and found through search engines.
Having an appropriate title will increase traffic to your site. The placement of keywords in your title has a huge impact on determining where a search engine will place your site. The page's title should include some of your site's keywords to increase your ranking in the search engines.
There are many different types of meta tag, including one for keywords - but up-to-date webmasters rarely use it. Although keywords are the heart of any search engine optimization effort, the keyword meta tag has been so debased with spam-like abuse that today search engines ignore it entirely. Do not waste time packing the keyword tag; focus on more important areas.
Search engine crawlers recognize hidden keywords as unethical ways to boost site rankings. So caution is needed, with SEO optimization, choose ways that will really boost your ratings instead of lowering them.
Making use of HTML header tags can help optimize a page's search engine ranking. While the lower levels of header tags are unrestricted, a page can only have one header assigned to the top (H1) level. This is typically reserved for the page's title. Including multiple H1 tags will break a page's HTML and render other SEO efforts pointless.
When striving to increase search engine optimization it is a good idea to sign up for a PPC account with an adcenter. Having a PPC account is a surefire way to get actual search volume for your keywords. A PPC account will give you instant visibility.
If you have a shared server, make sure that none of the other sites on the server have been banned. It could have a directly negative effect on your own website. It is like being guilty by association.
Search engine optimization is simply a term used to describe a process where you do whatever you can to your website to make it found quickly by the search engines and put higher in their ranks. While being high on the list is important for traffic purposes, you will still be found often if you are further down the list. Don't lie cheat and steal to get yourself in the number one spot.
To quickly optimize a blog for search engines, add an SEO plug-in. There are a variety of these sorts of plug-ins available for sites, like Wordpress and Blogger. These plug-ins will automatically complete standard search engine optimization tasks for you, allowing you to focus on more in-depth ways of boosting your search engine traffic.
As Google and other search engines have evolved over time, they have started emphasizing high quality links. Search engines are now ignoring, manually suppressing, or otherwise penalizing web sites that attempt to fraudulently attain first page status in search results. The lesson is to only present your page in an ethical and responsible manner in using valid Search Engine Optimization.
Don't use a splash page. Some people say "Oh, if you HAVE to use one..." - but there is absolutely NO reason to use a splash page. They are a waste of band width! Fill your front page with informative content on who you are; what you do; links to the rest of your website; and simple navigation.
Keywords and phrases must be included in the file names of the URLs of your web pages. While it might be simpler to organize files using shorter names or using some type of number or date convention, it is a mistake for search engine optimization purposes. Search engines definitely do take file names into consideration. Also, when creating your file names, hyphens are the recommended way to separate the words in the file name rather than spaces or underscores.
To effectively improve your site's search engine optimization, the number one rule you must follow is simplicity. To have good SEO your site must be easy to find and follow, and it must be easy to read for both live visitors and for search spiders. Never forget, your goal is to keep things simple.
Creating a sitemap is a solid SEO tip, but you should also perform constant maintenance on this map. For instance: You will upgrade very often with different pages and keywords and SEO tactics, and this can result in a lot of broken links. Make sure you're maintaining your sitemap by keeping it clean.
Search engine optimization is important for almost every business that has a website. This is especially true for businesses with a lot of competitors. Using the search engine optimization tips you have just read about will definitely get you ranked higher in search engines and increase your company's online visibility.
from https://jasonbrown0.blogspot.com
1 note
·
View note
Link
If you want to learn about programming languages like HTML and python then you should subscribe to my channel, for next updates.
#html#header tag#paragraph tag#html center text#html tag#html tutorial in hindi#krbittusingh#youtube video
1 note
·
View note
Text
WHY I'M SMARTER THAN LOTS
One of my most vivid memories from our startup is going to want to, but it turned out that many did. Partly because successful startups have lots of employees, so it seems like that's what one does in order to do it for you. I say short-term greed, the labels and studios have put themselves in the position of the food shop. Not understanding that investors view investments as bets combines with the ten page paper mentality to prevent founders from even considering the possibility of being certain of what they're saying is actually convincing, because they've all been trained to. You probably only have to be a good plan. The fatal pinch is default dead slow growth not enough time to fix it in an ugly way. But when our hypothetical Blub programmer looks in the other direction, up the power continuum, however, just as you would in a program you were writing to a friend who works for a big company of mediocre ones, where bad ideas are caught by committees instead of the people that had them. And yet by the next time you need to be constantly improving both hardware and software. And of course if they continued to spam me or a network I was part of, Hostex itself would be recognized as a spam term. It would work for a while in Florence. Maybe you can't write the best-looking spreadsheet using HTML, but you can't trust your judgment about that, so ignore it.
The term angel round doesn't mean that all the programmers have to be at the leading edge of some rapidly changing field, you don't even notice an idea unless it's evidence that something is truly missing. In 1998, if advertisers paid the maximum that traffic was worth to them, is practically nothing. BackRub seemed like an inconsequential science project. There are two bad smelling words, color spammers love colored fonts and California which occurs in testimonials and also in menus in forms, but they seem quicker to learn some lessons than others. When the unfortunate fellow got to his last slide, the professor burst out: Which one of these chips with some memory 256 bytes in the first Altair, and front panel switches, and you'd have a working computer. But Lisp is a powerful language, but it fits this situation well. Are there better ways to solve them? Those ideas are so rare that you can't easily do in any other language. The number of possible connections between developers grows exponentially with the size of the group.
The reason those stimuli caused those founders to start companies was that their experiences had prepared them to notice the opportunities they represented. The first thing I would do, after checking to see if they had scored points off us. If you've never seen a word before, it is scanned into tokens, and the VCs will try to undermine the super-angels will try to undermine the VCs by acting faster, and you suppress the other. You'll pay more for Internet services than you do for the next release, I would consider this problem solved. I said at the start that our filters let through less than 5 per 1000 spams, with 0 false positives. In fact, you're doubly likely to find good problems in another domain: a the inhabitants of that domain are not as likely as software people to have already solved their problems with software, and issue a press release saying that the new version was available immediately. To some degree, it offers a way around these limitations. Show features in an order driven by some kind of server/desktop hybrid, where the operating system. Bill is, because he is one more user helping to make your design simpler. Fortunately, Web-based software you can use whatever language you want. Really?1
That means they want less money, and precisely when you'll have to figure out how to describe your startup in one compelling phrase.2 At first glance it doesn't seem there's anything to see. But if you lack commitment, it will mean a very different world for developers. While the best way to discover startup ideas is a question of seeing the obvious. Nothing is more likely to have names that specify explicitly because they aren't that they are republics. Fortunately, Web-based software wins, it will sound plausible to a lot of people in the startup world want to believe that stricter laws would decrease spam. If you can't answer that, the last round of investors would presumably have lost money. Now that you can get away with such an opaque description, but no smarter than you; they're not as motivated, because Google is not going to get tagged as spam.3
And of course if it were part of the language now, but they want a lot. When you switch to this new world. They were going to be bloated and full of duplication anyway. That's the part that really demands determination. This was roughly true. Addictive things have to be in it yet. Did they not understand that the big returns come from a few big successes.
Because PR firms tell them to. It's a live thing, running on your desktop computer, and there are companies that will get them a job; they learn it because they genuinely like to program and aren't satisfied with the languages they already know. It's when you can convince investors, and you could tell he meant it. But disappointing though it may be somewhat blurry at first.4 It might be a good thing for investors that this is a valid approach. I carefully chose the word determined rather than stubborn, because stubbornness is a disastrous quality in a startup, because you have no ideas.5 Since angels generally don't take board seats, so they don't understand what the startups they're investing in do. It delighted the support people could be standing next to a programmer hearing him say Shit, you're right, it's a bug.
The MROSD manages a collection of great walking trails off Skyline.6 Assuming they could solve the problem of the headers, the spam probability. If you want to. Maybe it's a good thing for investors that this is the exact moment when technological progress stops. Their first site was exclusively for Harvard students, it would be stupid to try the experiment and find out. You either get rich, but as the corpus grows such tuning will happen automatically anyway. At a minimum, files will be centrally available for users who want that. Whatever its flaws, the writing you find online is authentic. He plans to support himself. All the rest were working on releases, ports, and so on.
Work for a VC fund after a full partner meeting averages about 25%. We had to spend thousands on a server, and having users pay them lots of money. And the way to the extreme of doing the computations on the server. I'm trying other strategies now, but few were in 1998. VCs aren't interested in such small deals. Neither of us had ever even had what you would call a real job. Either your site is catching on, or it will fry you. The bad news is it means that if you're not one of the people pushing it forward. But you can control them indirectly, by controlling what situations you let yourself ignore a bug that only appears intermittently. If you've never seen, i. This is not just that series A rounds later. To the Blub programmer, Lisp code looks weird.
Notes
Letter to Oldenburg, quoted in Westfall, Richard, Life of Isaac Newton, p. That is the kind of intensity and dedication from programmers that they cared about users they'd just advise them to get great people.
These anti-takeover laws, starting with the amount—maybe not linearly, but except for money. If you want to be driven by people like numbers. Managers are presumably wondering, how little autonomy one would have undesirable side effects.
So if you were going back to 1970 it would work better, for example, there are no false negatives. This argument seems to have been peculiarly vulnerable—perhaps partly because so many had been transposed into your head. Here's an example of applied empathy. We didn't know ourselves which VC firms.
Now the misunderstood artist is not an associate vet you. Determination is the new economy during the war had been a waste of time on schleps, but most neighborhoods successfully resisted them.
To do this yourself. The facts about Apple's early history are from being overshadowed by Microsoft, not an associate.
Labor. Some people still get rich simply by being energetic and unscrupulous, but in fact it may be enough to become more stratified. I call it ambient thought. 8 in London, 13 in New York is where people care most about art.
#automatically generated text#Markov chains#Paul Graham#Python#Patrick Mooney#London#world#users#lessons#moment#founders#fact#Blub#employees#bytes#support#ideas#kind#course#extreme#situation#computer#tuning#thing#greed#startup#word#while#determination
2 notes
·
View notes
Text
Adobe dreamweaver cc learn by video

#Adobe dreamweaver cc learn by video how to#
#Adobe dreamweaver cc learn by video pdf#
#Adobe dreamweaver cc learn by video code#
In this 2-day class, you will be developing a responsive website using HTML and CSS. OL17533656W Page_number_confidence 93.31 Pages 518 Partner Innodata Ppi 300 Rcs_key 24143 Republisher_date 20200714160115 Republisher_operator Republisher_time 875 Scandate 20200702161802 Scanner Scanningcenter cebu Scribe3_search_catalog isbn Scribe3_search_id 9781118640159 Tts_version 4.As with all of our classes, our Adobe Dreamweaver classes are hands-on and project-driven. Urn:lcp:adobedreamweaver0000argu:lcpdf:a27688c3-bd49-463f-ac3b-feed52778da4 Foldoutcount 0 Identifier adobedreamweaver0000argu Identifier-ark ark:/13960/t4sk0f48x Invoice 1652 Isbn 130645140Xġ118639774 Ocr ABBYY FineReader 11.0 (Extended OCR) Ocr_converted abbyy-to-hocr 1.1.7 Ocr_module_version 0.0.13 Old_pallet IA18375 Openlibrary_edition 11, 2014)Īccess-restricted-item true Addeddate 13:05:41 Associated-names Heald, Greg AGI Creative Team Bookplateleaf 0004 Boxid IA1881009 Camera Sony Alpha-A6300 (Control) Collection_set printdisabled External-identifier
#Adobe dreamweaver cc learn by video pdf#
Online resource title from PDF title page (Ebook Library, viewed Feb. Lesson 6: Advanced Page LayoutStarting up Layout with absolute-position divs versus layout with floats Creating columns with HTML and CSS Creating a list-based CSS navigation bar Changing column layout and size Creating the appearance of equal height columns Applying finishing touches Creating more sophisticated layouts Dreamweaver Fluid Grid Layout Self study Review Lesson 7: CSS3 Transitions and Styles Starting up Understanding the role of CSS3 Adding a CSS Transition Modifying a CSS Transition Adding CSS Transitions to a navigation menu Adding a CSS GradientĪpplying a CSS Gradient to the page backgroundCreating rounded borders Self study Review Lesson 8: Using Web Fonts Starting up The basics of web fonts Web Fonts in Dreamweaver CC Using Adobe Edge Web Fonts Creating a custom font stack using web fonts Styling your content with Adobe Edge Web Fonts Adding local web fonts with Styling your heading with a local web font Self study Review Lesson 9: Working with Tables Starting up Using tables in web design Importing table data Selecting table elements Modifying table size Modifying table structure Creating a table Using the Text Insert panelInserting images Linking images Editing images Self study Review Lesson 4: Styling Your Pages with CSS Starting up What are Cascading Style Sheets? Creating and modifying styles Div tags and CSS IDs Self study Review Lesson 5: Creating Page Layouts with CSS Starting up The CSS Box model Creating a centered container for your page Creating a header using a relative positioned div Positioning content with absolute-positioned divs Setting margins and borders The pros and cons of Absolutely Positioned CSS layouts Self study Review HTML and CSS Starter PagesSubversion Business Catalyst integration How websites work An introduction to HTML A look at the Welcome Screen Creating, opening, and saving documents Self study Review Lesson 2: Setting Up a New Site Starting up Creating a new site Adding pages Defining page properties Work views A deeper look into the Files panel Self study Review Lesson 3: Adding Text and Images Starting up Typography and images on the Web Adding text An introduction to styles Previewing pages in a web browser Understanding hyperlinks Creating hyperlinks Creating lists
#Adobe dreamweaver cc learn by video code#
It's like having your own personal Dreamweaver instructor at youĪbout the Authors Contents Starting up About Dreamweaver Digital Classroom Prerequisites Starting Adobe Dreamweaver Access lesson files & videos any time Checking for updated lesson files Resetting the Dreamweaver workspace Loading lesson files Working with the video tutorials Hosting your websites Additional resources Lesson 1: Dreamweaver CC Jumpstart Starting up What is Dreamweaver? Dreamweaver's workspace features Live View and Live Code Related files Code Navigator Photoshop smart objects Support for Content Management Systems HTML5, CSS3, and PHP code hinting More than 16 lessons, each including step-by-step instructions and lesson files backed by video tutorials, guide you smoothly through website design to implementation to maintenance, helping you build solid skills at your own pace. If so, this book-and-DVD learning combo is perfect for you.
#Adobe dreamweaver cc learn by video how to#
Learn Adobe Dreamweaver CC with this full-color book and DVD training package You may be eager to learn how to use Adobe Dreamweaver CC (Creative Cloud) to create great websites, but you'd like to tackle it at your own speed.
0 notes
Text
HTML beginner’s tutorial: Build a webpage from scratch with HTML
If you're new to web development and want to jump into the fascinating world of web design, you've definitely heard of HTML, which is the backbone of every web page on the internet. A thorough understanding of HTML is required of every successful web developer or designer.
Today, we'll go over an HTML beginner's tutorial and step-by-step design a web page. Most web development lessons start with CSS and JavaScript, but we want to make sure you grasp HTML first before going on to the following steps.
We'll go over the fundamentals of HTML, which you'll need throughout your web development career. Although no prior programming knowledge is required, a basic understanding of programming will help you get the most out of this HTML tutorial.
What is HTML?
The markup language we use to create webpages is called Hyper Text Markup Language (HTML). It is the foundation of any website you come across on the internet. Consider HTML to be the building blocks you'll need to create anything for the web. After we've written our HTML code, we can use other languages like CSS and JavaScript to add interaction, style, and more to the page.
Consider a document you'd write on a word processor. Different font sizes are generally used to denote different areas of the text, such as headers, main content, footers, table of contents, and so on. The process of creating that document and determining the size of our text is known as HTML.
HTML is responsible for the structure and layout of a website. We use a variety of elements to define that framework. However, a browser must be expressly told what each piece of material is in order for it to display the way we want it to. HTML is the language we use to communicate with computers and tell them how to render our content. Our HTML elements can be interpreted by the computer and displayed on the screen.
How to build your own webpage with HTML
Okay, now we understand the fundamentals of HTML and how to correctly construct an HTML file. But how do you go about creating a website? Let's take a look at a step-by-step tutorial to see how it's done. We'll make a simple "About Me" webpage with the following information:
Your name as a title
In a paragraph, describe yourself.
a list of your abilities
a link to a website you enjoy (or a personal website)
Table of your job history
1. Get an HTML editor and open it.
HTML editors are used to construct webpages. Consider it a word processor that specialises in HTML file creation. There are a variety of text editors available, each with its own level of sophistication and robustness. I recommend using a simple text editor like TextEdit (Mac), Notepad (PC), or Atom if you're just starting started. The majority of text editors are available for free download.
We'll use Educative's built-in text editor widget to study HTML without having to download anything. You may also use your preferred editor to follow along.
2. Create a simple HTML file
Start a new file in your editor and compose the fundamental structure of an HTML page. Using what we learnt previously, try writing the basic structure in the code widget below. If you get stuck, look below for the answer. Include the following:
Declaration of Document Type
"My HTML Webpage: (Your Name)" as a page title
"About Me: (Your Name)" as a header (h1).
1-2 sentences about yourself in a paragraph
Tags that close properly
3. Provide a link to a website that you enjoy (or personal website)
Let's now add a link to your own website or a website of your choice. Continue adding to the code you typed above in the section below. Before you look up the answer, give it a shot. This will be included directly below your personal information. It should include the following:
The title of the page to which you're linking
The link to that site's URL
4. Include a list of your qualifications.
Let's now create an unorganised list of your abilities. Continue adding this following phase of HTML code after copying the code from above. Using what we learnt previously, try writing the code in the code widget below.If you get stuck, look below for the answer. Include the following:
"My Skills" is a header (h3).
A bulleted list of five abilities
Closing tags for the list that are appropriate
5. Include a table detailing your professional experience.
Let's finish up with a table showing your professional experience. Continue adding this following phase of HTML code after copying the code from above. Using what we learnt previously, try writing the code in the code widget below. If you get stuck, look below for the answer. Include the following:
Employer, Job Title, Years 3 former jobs with each of the above columns filled in Column headers: Employer, Job Title, Years 3 former jobs with each of the above columns filled in
6. Complete your webpage and save it.
After you've completed all of these procedures, save the HTML file to your computer. In Notepad or another text editor, go to File > Save As. Set the encoding to UTF-8 and name the file your name.html (preferred for HTML files).
You may open the file in your browser by right-clicking on it, selecting Open with, and then selecting your browser. You'll see your very first HTML page!
You've successfully created a basic webpage on your own. You've already taken the first steps toward becoming a frontend web developer. There's still a lot to learn, but PHPTPOINT HTML Tutorial is a great place to start.
0 notes
Text
Polytechnic | Powerful Education, Courses & Events
New Post has been published on https://click.atak.co/polytechnic-powerful-education-courses-events/
Polytechnic | Powerful Education, Courses & Events
Polytechnic is an responsive, education and student focused WordPress Theme. It’s beautiful, clean, and professional. We built this theme specifically for educational institutions and include easy to use live customizes and drag & drop builders. It’s capable of handling a ton – including a new faculty member role, extended user profiles and pages, customizable “white label” login, courses, catalogs, faculty grid, store, blogs, filterable post grid, and almost anything that you can think up! We pride ourselves on how well this theme works out of the box, so if you run into any issues, please don’t hesitate to let us know at our dedicated support forum. Check out our feature list below!
Latest Update: March, 2018 Version 1.3.7 Now Available With new updates and feature requests!
See update log below for full details
The Idea Behind This Theme
We believe that school is hard enough as it is, and wanted to build something awesome that helps schools, faculty members, and students. Something that would enhance the school experience for students, increase engagement and retention, decrease confusion, and that focused on the details of how this could work for that majority of educational institutions out there.
With all of that in mind, we built Polytechnic
Teachers can add/update their own courses and provide students with up to date information regarding homework, study guides, notes, and a tentative schedule based on a specific course section. Students can get course specific information if they missed class, check to see what time the pre-game rally is on Friday, get course catalog information online, and purchase required reading materials with a click of a button. And admins can oversee it all, monitor the flow of information, and have the ability to add, edit, assign, and delete course information and users.
The Best of the Features
Polytechnic comes with tons of features and the ability to support loads of different plugins that’ll make it just right for your project… here’s an overview of what’s included:
The New Faculty Role & Extended User Profiles
Polytechnic comes fully integrated with a new user role specifically built for educational institutions. We’re calling this new WordPress user/role “Faculty”. This Faculty role provides faculty members with the ability to add, edit, and update their own courses and course information. This role is similar to the “Author” role native to WordPress, with a few added tools and abilities to provide your faculty members with the right amount of rights. This role also allows users assigned to this role to edit their own personal information (ie. bio, photo, contact info, etc.).
Custom User Login
Because your faculty should feel proud to login to your schools site! Customize the login for your users to match your school with easy to use options. Go ahead, check it out. Choose or upload your login logo, position the login form location, add a background image, set a color fallback, and add custom html!
Courses & Catalogs
Adding a new course is easy, and can be assigned to any user. If that user has been assigned the role of Faculty, they will have their own login and dedicated WordPress dashboard. This dashboard will only include the necessary information for this user role (ie. courses). Next, this user can navigate to Courses to see all of the courses currently assigned to them. They can open any one of these to begin updating/editing the course information and course content (ie. homework, study guides, etc.)
Mega Menu
We’ve included a drag and drop mega menu to provide a compelling way of displaying menu items and additional content on your site. Now you can choose to use a flyout menu or mega menu for each parent item.
Sticky Header
We’ve built a sticky header right into the theme and gave it it’s own options panel. Setup is easy and will extend the usability of your site for your users. Add your own custom logo, menu, and customize away with our theme options.
Tophat Dropdown
This section is triggered with the (top left) tophat tagline trigger and reveals a new section of widgets. These widgets are easliy managed in Appearance > Widgets and we’ve even included a custom options panel to customize this section further.
Page Templates
We’ve built some powerful templates for you to use. These templates are customizable and can be used as many times as you like and include: Post Grid, Blog, Course Catalog, and Faculty Grid (yes, it actually filters users). Each of these templates offer custom options to help building with these templates a breeze. Oh, and did we mention that you can also use Visual Composer on any of these pages to add even more content. The combinations are endless.
Sensei Learning Management Support
Sensei is a Learning Management System that makes teaching coursework easier than it’s ever been, all within WordPress. With the Sensei plugin you can create courses, write lessons, and add quizzes. Set lesson and course pre-requisites, allow user registration and even charge for your course content if you want. Simply put, we’ve included “out of the box” support for the “Sensei” plugin by Woo Themes for extended features and functionality for schools that want to take their courses and lessons to the next level. This plugin is not included with the theme, and users who want to utilize these extended features will need to purchase a license through Woo Themes. This plugin is not associated with the Polytechnic Courses provided with the theme.
WooCommerce Ready
Yep. WooCommerce is enabled on this theme, which means you can use it to sell stuff like shirts, gift cards, or anything else you can dream up. This theme isn’t focused on custom shop design, but WooCommerce does a TON of amazing stuff out of the box and this theme will work seamlessly with it.
Built on the Mythology Engine
Mythology Engine has been developed with the sole purpose of creating an efficient method of publishing themes with a streamlined development process… Key features include white-label options panels, “in-dashboard” documentation, and a no-nonsense approach to content management & theme options.
Visual Composer 4
Create your own custom layouts using over 30 different content modules ranging from image-sliders to text blocks to videos and maps. Visual Composer is the most popular visual editor available to WordPress and it’s bundled in the theme. Updates are be included for free with each theme-version update.
Visual Composer Extension (Polytechnic Exclusive): Custom Hover Images
User interaction has many benefits. One is that it can create focus and increase audience retention. Use Visual Composer to add these exclusive custom hover modules to your content. Don’t forget to add links and calls to action with these Custom Hover Modules to increase internal traffic and interactions. Choose a custom image, background color, add custom content, and select a start height and end height for the modules on that page.
Visual Composer Parallax Rows
We’ve extended this plugin to handle parallax backgrounds for full-width rows. This makes it even easier to add in your content and break it up visually with this custom feature.
Live Front-End Customizer: Unlimited Colors and 1,000’s of Fonts
Customize your theme’s typography easily with instant Live-Previews as you select your options and see how your site looks with any font, color, or size before you hit “Publish”. Integrated with color pickers and the Google Fonts library, so you’ll have 1,000s of fonts to choose from. If Google Fonts aren’t enough, we integrate seamlessly with Typekit, Fonts.com, and other popular services.
Revolution Slider 4
The most popular & easy to use “mega slider” plugin to ever exist!!! OK, that’s hyperbole, but it’s honestly pretty great and we’re thrilled to announce that we are now including Revolution Slider 4. This latest version includes: brand new admin interface, more options, more conveniences, custom caption animation builder, full slider import/export, and much more! You can also include Revolution Slider as your ad space slider, pre-content slider, sidebar slider and within individual posts/pages. Sweet!
Contact Forms
We are fully including Contact Form 7 to provide users with a quick and easy way to build and manage contact forms. It can manage multiple contact forms, plus you can customize the form and the mail contents flexibly with simple markup. The form supports Ajax-powered submitting, CAPTCHA, Akismet spam filtering and so on.
Ajax Live Search
Try typing in the search-bar (in the sidebar or on the “tophat”). The Live Search feature allows users to instantly skim your site for relevant material without every loading another page.
HTML5 Fueled SEO
We re-wrote our entire theme-base from scratch to include the latest, most relevant HTML elements and tags to allow for the best possible search engine results.
Multi-Language Support
The entire theme has been fully internationalized and prepped for your language translation. Just follow the usual translation process and the theme will do the rest.
Custom CSS & Script Injection
Got something custom that you want to drop in? Simple. Just drop them into our theme control panel and the theme will do the rest of the work for you.
Built with Ordinary People in Mind
Our goal is to deliver a theme that anyone can use & customize, without any need for 24/7 customer support or long-winded documentation manuals. We recommend uploading the theme demo if you want a head start, but the theme has truly been designed to be answer any of your questions as you use it, so don’t fret if you don’t know how to code.
Helpful Support
If you need some more information on something included with the theme, we’ve put together a dedicated information site for this theme. If you still need some help or have a question, feel free to ask us at our dedicated support forum. Just make sure to include your endgoal to help us understand how we can help.
Built with Developers in Mind, too!
Our code is clean, organized, and well commented. Everything has it’s rightful place in this theme, and making advanced customizations to templates, stylesheets, and functions has never been easier.
Beyond Responsive
We were one of the first theme crews to dabble in ‘responsive design’ way back in the day, so we know a thing or two about how to do this properly. Fluid grids are used at larger breakpoints, and fixed widths are used on smaller devices to ensure ideal spacing. The type size shifts on smaller devices to be larger and easier to read, and images and other media are sandboxed to prevent anything from breaking the layout.
REM Typography & Layouts
The problem with Pixels are, they absolutely do-not-scale in Internet Explorer. Furthermore, with the onset of Responsive Web Design, having fonts that scale (in relation to the screen width) has become paramount. Percentages (%) and EM’s are better, but they’re tricky and compound. Still not an answer. A real solution? Use the REM. (Source – Greg Rickaby)
JetPack Share, Comments, Carousel, and Extra Widgets
Nearly all of JetPack should work well with this theme (the Tiled Galleries are the only exception since those aren’t responsive); if you want to start using the next level of WordPress functionality, you’ll get it here.
The Theme Control Panels
This theme has been built on the Mythology Engine, a foundation theme from MDNW that has the primary goal of creating the fastest site launch process possible. It does this in a few ways:
Back-End Theme Options, Re-envisioned
Functionality meets organization. We’ve re-done all skinning options from our primary theme control panel in order to create a swift, responsive, uncluttered way to manage the key aspects of the theme. This is what the admin panel looks like:
In addition to the Theme Options panel (which manages the global theme options), this theme also integrates Page & Post options that allow you to override any global rules for that one page or post. These panels will show up on any Page or Post editor, underneath the basic content editor. In the event that they do not appear, make sure that you have enabled them from the top-right “Screen Options” panel. These panels will allow you to override theme-level options on individual pages and posts. To take this even further, we added custom options that show up depending on the page template used. This includes page template specific options for theBlog Page & Post Grid (Portfolio) page templates. These panels will show up on any page with the Blog Page template or Post Grid template selected. Front End Theme Skinning with Live-Preview Eliminate the guesswork from customizing the theme. Built on the WP Theme Customizer API with some special tricks blended in, you can change just about every typographic or color across the entire theme; there’s no need to reload the page on the front-end though; the Theme Customizer will show you an instant preview of what your changes look like right there on the same screen. Here’s what the panel looks like:
The full library of Google Fonts is included in the Theme Customizer (and yes, live-preview works on the font-faces too). Just open up the customize panel and start playing!
Quick Links
Standard Troubleshooting Steps
Support Policy | Articles | File a Support Request
How to UPDATE The Theme | How to UPDATE Premium Plugins
Change Log
/* ========== - UPDATE LOG : Polytechnic - ==========*/ Version 1.3.6 08/12/17 - UPDATED: Plugin - WPBakery Visual Composer 5.2 - UPDATED: Plugin - Revolution Slider 5.4.5.1 - UPDATED: element-sticky-header.php, element-secondary-navigation.php, and theme-register-menus.php - REMOVED: Mythology_Walker class - ADDED: Author sidebar styles updated. - UPDATED: theme-4-plugins.css styles for The Events Calendar update. Version 1.3.5 03/12/17 - UPDATED: WPBakery Visual Composer 5.1 - UPDATED: Revolution Slider 5.4.1 - Fixed: SSL for GoogleFonts Version 1.3.4 01/14/17 - UPDATED: WPBakery Visual Composer 5.0.1 - UPDATED: Revolution Slider 5.3.1.5 - UPDATED: Polytechnic Courses 2.0 - REMOVED: Mythology_Walker for QTranslateX Support - UPDATED: Author.php for translation of <p></p> string - UPDATED: .pot file - UPDATED: Style for sticky header menu items (with children) Version 1.3.3 09/08/2016 - UPDATED: WPBakery Visual Composer 4.12.1 - UPDATED: Revolution Slider 5.2.6 - UPDATED: Ajaxy Search Form registered via included zip - UPDATED: Translation - Tophat Account/WooCommerce Links - Post in loop (the_content(Read More...)) - Template-Course-Catalog.php - _x to __ - Author Sidebar now includes 's - UPDATED: WooCommerce Support - FIXED: Page Layout options - UPDATED: Course Catalog template - ADDED: Sensei support - UPDATED: Polytechnic Courses 1.9 - ADDED: Sensei support - UPDATED: ot-meta-boxes - ADDED: Sensei support - UPDATED: Documentation 0.7 Version 1.3.2 07/12/2016 - UPDATED: Template Blog - UPDATED: Now uses WP_Query - ADDED: Conditional for pagination when is_front_page() - FIXED: Pagination when assigned to Static Front Page (Settings > Reading) - ADDED: RTL Support - ADDED: RTL Stylesheet - ADDED: Option to turn on RTL Stylesheet - UPDATED: hAtom microformats - NOTES: - CHECK/TEST: https://search.google.com/structured-data/testing-tool - CHECK/TEST HELP: https://developers.google.com/search/docs/guides/prototype - RESEARCH: Aggregate from articles and user feedback (Thanks @Tim) - UPDATED: hAtom microformat for author across the theme - UPDATED: vcard & fn - UPDATED: hAtom microformat for date across the theme - ADDED: Additional recommended markup to meet standards for microformats - ADDED: To post, post loop, default page, faculty page, post grid page, blog page, etc.) - UPDATED: Now supports new Responsive Menu plugin (v.3.0) - ADDED: Base styles to support the new markup/styles added by the plugin - ADDED: Starter skin for the menu (included in WP Polytechnic/Resources/Demo-Data/Demo-Menu-Skin.json). This allows users to use their panel to customize this further. - NOTE: This has become a "Freemium" plugin, which allows you to extend it by purchasing a "Pro" license. This is not necessary unless you want access to some of their more advanced functions. Again, this is not necessary. - Further, with so many pre-existing users, I felt it appropriate to support this update v. moving away from it. I am still considering other options, but this is a necessary step to maintain existing sites that using this functionality. - UPDATED: Modified styles for notifications on the backend, red to gray (red is a bit misleading). - UPDATED: Hover Image Module, module-content font-weight for @media-queries fallback updated - UPDATED: Child Theme - v.2.0 - ADDED: Support for Main/Large hover-image replacement with video (4:3) in hover-grid - UPDATED: Support for Dynamic To Top - ADDED: Option/Toggle to manage theme styles (Appearance > Theme Options > Sticky Header Options > Use Theme Styles for Dynamic To Top) - NOTES: Toggling the option off will remove theme styles for this element, and the Appearance > To Top panel will take precedent. Default is on, and will pull styles from the theme.Reason - This is for users who want to modify this element further using the native/included options. These option are limited, though, which is why the theme has custom styles for this. - UPDATED: Documentation to v.0.6 - UPDATED: Responsive Menu steps for importing the Responsive-Menu-Skin - UPDATED: Responsive Menu notes for setting up and customizing - UPDATED: Dynamic To Top section with notes on new option - UPDATED: Faculty Grid Template & Options - ADDED: All users of all roles selection option (Manual User Selection v. Manual Faculty User Selection) - ADDED: Query and output for new option key/value set - ADDED: Toogle ON/Off to turn user email into a mailto link - UPDATED: Theme Options > Faculty Options - UPDATED: Sectioned into tabs - ADDED: Toogle ON/Off to turn user email into a mailto link for Author page - ADDED: Toogle ON/Off to turn user email into a mailto link for Sidebar instances - UPDATED: the_time() has been updated to the_modified_date() - UPDATED: Styles for WooCommerce page title Version 1.3.1 06/08/2016 - UPDATED: WPBakery Visual Composer 4.12 - UPDATED: Revolution Slider 5.2.5.3 - ADDED: Image Hover - Tablet(Portrait) options for start & end height - FIXED: Image Hover - Tablet(Portrait) display Version 1.3.0 05/24/2016 - UPDATED: Responsive Menu icon - UPDATED: Conditional that checks if title is set to off - now includes search results in conditional to maintain consistency - FIXED: Responsive Menu "Open State" for browsers not opening on first/second click (ie. Chrome, Edge, etc.) - UPDATED: Packaged version of VC in Resources folder Version 1.2.9 04/28/2016 - UPDATED: WPBakery Visual Composer 4.11.2.1 - UPDATED: Revolution Slider 5.2.5 Version 1.2.8 04/14/2016 - UPDATED: WPBakery Visual Composer 4.11.2 - UPDATED: Revolution Slider 5.2.4.1 Version 1.2.7 04/05/2016 - UPDATED: Revolution Slider 5.2.4 - FIXED: Grayscale header image - FIXED: Hover Image module custom start/stop hover height options (Thanks @tcward) - FIXED: Footer 1 column senario (removed added padding) Version 1.2.6 03/21/2016 - UPDATED: WPBakery Visual Composer 4.11.1 - UPDATED: Revolution Slider 5.2.3.5 - FIXED: Faculty Grid page template manual user selection (user link/image) (Thanks @NirmalRaman) - FIXED: Theme Options - Skin Builder: - FIXED: Primary & Secondary Color Z-Index (Thanks @Boukjee) - FIXED: Sub Menu Highlight Border (Thanks @benjaminbis) FEATURE REQUEST(S) - ADDED: Title attribute for Social Links. Gives tooltip on hover (Thanks @chaddng) - ADDED: Theme Options > Post Options > Show the Featured Image (Thanks @advanceitmn) - ADDED: Hover Image > Alt Tag (Thanks #netterm) Version 1.2.5 03/1/2015 - UPDATED: WPBakery Visual Composer 4.10 - UPDATED: Pageable Content module styles - UPDATED: Styles - UPDATED: Tophat Elements for Safari (Thanks @Naomi) - UPDATED: List styles for Essential Grid Plugin - UPDATED: List styles for Shortcodes Ultimate Plugin - ADDED: ADMIN STYLES FOR OPTIONTREE TABS - FEATURE REQUEST(S): - ADDED: Faculty Grid page template now includes an option to build manually (with user selection) - ADDED: Faculty Grid page template still supports filter by course category - ADDED: Image Link option for Hover Image module - ADDED: Course Featured Image Options On/Off - ADDED: Course Featured Image Custom Width - ADDED: Course Featured Image Custom Height - ADDED: Course Description On/Off - ADDED: Course Listing - Link Number On/Off - ADDED: Course Listing - Link Name On/Off - ADDED: Course Listing - Link User On/Off - ADDED: Visual Composer Quick Styles Controls (Theme Options > Skin Builder) - ADDED: VC Tab BG Color - ADDED: VC Tab:Hover BG Color - ADDED: VC Tab:Active BG Color - ADDED: VC Tab Panel BG Color - ADDED: VC Tab Panel Border Color - ADDED: Course Output Panel - ADDED: Change Course "Course Name"? - ADDED: Change Course "Course Number"? - ADDED: Change Course "Course ID"? - ADDED: Change Course "Course Time"? - ADDED: Change Course "Instructor"? - ADDED: Change Course "Room Number"? - ADDED: Change Course "Course Days"? - ADDED: Change Course "Prerequisite(s)"? - ADDED: Change Course "Component(s)"? - ADDED: Change Course "Credit(s)"? - ADDED: Change Course "Location"? - ADDED: Change Course "Notes"? - UPDATED: Author Course listings - UPDATED: Course Catalog page template - UPDATED: Single Course instance - UPDATED: Polytechnic Courses plugin v.1.7 Version 1.2.4 01/11/2015 - UPDATED: WPBakery Visual Composer 4.9.1 - UPDATED: Revolution Slider 5.1.6 - UPDATED: VC 4.9.1 Support - Course styles - UPDATED: Removed vc_set_as_theme - UPDATED: Theme Documentation v.0.5 - UPDATED: Easy Theme & Plugin Upgrades plugin removed from Recommended Plugin list - ADDED: Credits and Prerequisites to Course-Catalog & List & Search Version 1.2.3 12/18/2015 - UPDATED: WPBakery Visual Composer 4.9 - ADDED: VC 4.9 support - wpb_map() to vc_map() - Hover Image module and hover-grid styles - Custom parallax bg + content - UPDATED: Revolution Slider 5.1.5 - ADDED: Rev_Slider 5.1.5 support - first-child + cover-header styles updated - FIXED: Ken Burns Affect for Revolution Slider - UPDATED: Theme Styles for new version(s) of The Events Calendar plugin - Tophat Dropdown area widget usage - Content widget usage - Two column list template - UPDATED: Primary & Sticky Menu Z-Index - UPDATED: Demo-Content.xml for users with media issues - reflects new vc builds/modules - ADDED: New "Revolution Slider Home Page" demo_slider.zip - UPDATED: Marketing - 80x80.png - Theme Preview Version 1.2.2 12/01/2015 - UPDATED: WPBakery Visual Composer 4.8.1 - UPDATED: Revolution Slider 5.1.4 - UDPATED: Buy VC nag removed (not needed) - FIXED: Faculty Contact Form option - UPDATED: Styles-Polytechnic plugin to version 1.4 Version 1.2.1 11/02/2015 - FIXED: Undefined function cascade for menu doc.helper plugin check Version 1.2.0 11/01/2015 - UPDATED: WPBakery Visual Composer 4.8.0.1 - UPDATED: Separator styles for consistency - UPDATED: Revolution Slider 5.1 - UPDATED: Width for single events in month view updated - FIXED: Sticky Header menu option - FIXED: Revolution Slider v. Mega Menu dropdown z-index - FIXED: "Search Courses" for translation(s) - UPDATED: Descriptions for option sets - UPDATED: languages pot file - UPDATED: Mythology Core 1.1.8 - UPDATED: Load Text Domain function updated to check both original and standard locations - UPDATED: Doc Helper for setting menus updated Version 1.1.9 10/18/2015 - UPDATED: Demo-Content.xml - Uses latest VC module versions - UPDATED: Styles for new VC markup - FIXED: Menu dropdown v. hover-image z-index - UPDATED: Styles-Polytechnic plugin to version 1.3 - UPDATED: Polytechnic-Courses plugin to version 1.6 Version 1.1.8 10/08/2015 - FIXED - XSS Vulnerabilities: - UPDATED: WPBakery Visual Composer 4.7.4 - UPDATED: Revolution Slider 5.0.9 Version 1.1.7 09/22/15 - UPDATED: Tophat Dropdown Trigger and Pre Footer Blurb options now allow for HTML content. Note, these are now using htmlspecialchars() and htmlspecialchars_decode() to neutralize HTML. - UPDATED: Sub Footer Left and Sub Footer Right text areas updated with the htmlspecialchars() and htmlspecialchars_decode() to neutralize HTML. - UPDATED: Rev_Slider header overlap z-index support (structure 181, plugins 42 & 944) - UPDATED: New VC Tab styles for courses - UPDATED: The Events Calendar Pro widget(s) styles Version 1.1.6 09/20/15 - FIXED: Conditional using is_plugin_active fixed Version 1.1.5 09/18/2015 - UPDATED: Mythology Core 1.1.7 - UPDATED: WPBakery Visual Composer 4.7.1.1 - UPDATED: Revolution Slider 5.0.8.5 - UPDATED: All included plugins are now "Recommended" and not "Required". This opens the theme up to users who want additional control. - Note: you can still access all included plugins via Appearance > Install Plugins panel and the standard Plugins panel. - UPDATED: Documenation file to v.0.4 - ADDED: New Doc.Helper files (These will serve to assist in the admin area) - ADDED: Responsive menu doc helpers for updated/new assignment - UPDATED: Responsive menu styles - FIXED: Custom social icon options, fixes the loop so you can generate as many custom icons as you like (element-getsocial.php) - FIXED: Archive.php pagination and query - FIXED: Capitalization for localization - UPDATED: Mobile table(s) bottom margin and native scroll - ADDED: Mobile div "Touch to Scroll Content Below" added for is_handheld for table description (author.php and template-course-catalog.php) - UPDATED: Support for Visual Composer FrontEnd Editor - module controls (new and old tab controls) - UPDATED: Styles for The Events Calendar & The Events Calendar Pro - UPDATED: Styles for Section-Super-Header - UPDATED: Tab styles for new VC markup - UPDATED: Tour styles for new VC markup - UPDATED: Accordion styles for new VC markup Version 1.1.4 08/01/2015 - UPDATED: Theme helperclass jquery 'parallax-vertical' updated - UPDATED: Better support for VC parallax - UPDATED: Visual Composer Admin Helper Functions for Backend Editor - Adjusts linkage and styles Version 1.1.3 07/23/2015 - UPDATED: Mythology Core 1.1.6 - UPDATED: WPBakery Visual Composer 4.6.2 - UPDATED: Support for Visual Composer FrontEnd Editor - module controls - ADDED: Visual Composer Admin Helper Functions - Backend Editor - NOTES: These functions are focused on helping users get a better visual of their row background image/color(s) in the page editor. This was added to help/fix when the text within a row is the same color as default bg (ie. white on white). We found this to be super helpful, so we wanted to roll it out to you guys. - ADDED: GET BG-COLOR FROM ROW CONTROLS - ADD BG-COLOR TO THE ROW - ADDED: GET BG-IMAGE FROM ROW CONTROLS - ADD BG-IMAGE TO THE ROW - ADDED: Custom Hover Image module icon - backend recognition, and VC map - ADDED: Ordering options added to Course Catalog template - ADDED: Order_By - Can now order by Course ID, Course Number, Course Name, Author, Course Room Number, Course Days, and Course Time - ADDED: Order - Can now order by ASC and DESC for all included order_by parameter values - FIXED: Social > Skype option updated from esc_url to esc_attr to fix the href strip - UPDATED: Demo-Content.XML reflects the text color updates (span) used in latest VC version. Only Courses affected Version 1.1.2 06/30/2015 - UPDATED: Mythology Core 1.1.5 - UPDATED: WPBakery Visual Composer 4.5.3 - UPDATED: Mega menu sub-menu children styles for parent hover state (ot-user-styles.php) - UPDATED: Author.php course list post_per_page to "-1" (aka all) - ADDED: Now Supporting Custom Layouts for Courses - ADDED: Course > Course Layout Options - image radio buttons (this will override the fallback set in Theme Options > Layout Options for each page, if set) - ADDED: This added feature also adds support for the Custom Sidebars plugin for Courses - FIXED: Appearance > Theme Options > "Show the Post Meta?"" option fixed (content-single.php 149) - ADDED: Fallback for VC Separators on Mobile (media-queries.css 269) Version 1.1.1 06/15/2015 - UPDATED: PrettyPhoto js script to 3.1.6 - prettyPhoto XSS fix - UPDATED: Mythology Core 1.1.4 - UPDATED: WPBakery Visual Composer 4.5.2 - UPDATED: Faculty-Grid template name v. email columns - UPDATED: Custom user profile photo enqueue (functions folder 51-52) - UPDATED: new conditionals set in mythology-key.jS and register-scripts.php for isotope - UPDATED: Layout variables text-domain updated to mythology (theme-layout-variables.php) - UPDATED: Plugin support - get_custom_field conditioned (mythology-core-functions.php) - ADDED: Feature Request - Contact Form option for Author pages (Beta) - ADDED: Feature Request - Translation Support (Beta) - ADDED: Feature Request - WPML Translation Support! (Beta) We are working closely with WPML to officially support their plugin - wpml-config.xml (Beta) - ADDED: Translation support for Theme Options panel (ot-theme-options.php) - ADDED: Translation support for Page, Page Template, and Post options (ot-meta-boxes.php) - ADDED: Translation support for theme-files (directory > languages, polytechnic.pot, and (Beta) es_ES.po and es_ES.mo translation files) - UPDATED: Polytechnic Courses plugin to v.1.5 - ADDED: Feature Request - Translation Support! (Beta) - ADDED: Translation support for plugin files (directory > languages, polytechnic-courses.pot, and (Beta) polytechnic-courses-es_ES.po and polytechnic-courses-es_ES.mo translation files) - ADDED: Feature Request - WPML Translation Support! (Beta) We are working closely with WPML to officially support their plugin - wpml-config.xml (Beta) - ADDED: Comments support - NOTES: Beta additions are supported, but we want to be clear that these might include some additional steps or limitations at this time. If you have any questions or issues, please provide any feedback at our dedicated support forum: https://themeisland.ticksy.com/ Version 1.1.0 05/15/2015 - FIXED: Markup and fallback styles for Tophat Search option Version 1.0.9 05/12/2015 - FIXED - Theme Options > Skin Builder - Tophat BG option - FIXED: polytechnic-styles plugin - Tophat Section expanded and patched - ADDED: polytechnic-styles plugin - Tophat Dropdown Section now included - UPDAETD: Demo-Content.xml - UPDATED: Optiontree-loader.php updated - UPDATED: OptionTree import panel(s) - candy-admin-simple.css - UPDATED: Event widget .duration adjustment - UPDATED: Mythology Core 1.1.3 - UPDATED: WPBakery Visual Composer 4.5.1 - UPDATED: Revolution Slider 4.6.93 - UPDATED: OptionTree 2.5.5 Version 1.0.8 04/28/2015 - ADDED: Pagination for Course Catalog page template (template-course-catalog.php and mythology-functions.php) - ADDED: Fallback menu list item styles for sticky menu - ADDED: Feature Request - Tophat Login Links option (On/Off) - even when WooCommerce is active - ADDED: Feature Request - Tophat Search option (On/Off) - uses ajaxy if active - ADDED: Feature Request - Tophat Custom Text/HTML option - UPDATED: Resouces > Widgets.wie - UPDATED: Resouces > Demo-Content.xml - UPDATED: Hover-grid cross browser support - vc_extend css lines 16-32 added - UPDATED: Styles for rpwe menu widgets updated to use widget image sizes - UPDATED: Recommended plugin source(s) updated to use "latest-stable" - UPDATED: Small style tweeks to maintain consistency - FIXED - XSS Vulnerability: - UPDATED: Mythology Core 1.1.2: - WPBakery Visual Composer 4.5 - Revolution Slider 4.6.9 - OptionTree 2.5.4 - TGM-Plugin-Activation 2.4.1 - Plugin-loader.php sources updated from http to https - Plugin-loader.php sources updated to use "latest-stable" Version 1.0.7 03/11/2015 - UPDATED: Polytechnic-courses plugin updated to 1.1 - ADDED: Polytechnic-courses plugin text domain declaration - FIXED: Padding for featured image when Meta section is off - FIXED: Content-fullwidth template (used in Blog template and Single) - FIXED: Post Options > Show Post Footer, when off now turn all sub-options off - ADDED: Post Options > Post Comments On/Off - ADDED: New scrolling table function for overflow content on mobile devices for course catalog page template (http://polytechnic.themeisland.net/colleges-schools/course-catalog/) - FIXED: Remove hardcoded link in plugins.css - FIXED: Sub-footer on/off toggle - UPDATED: Conditionals added/updated for Footer Options (show_footer) Version 1.0.6 02/26/2015 - UPDATED: OptionTree Loader - this fixes the ot-meta-boxes.php error WPML users were seeing - UPDATED: OptionTree 2.5.0 - UPDATED: NiceScroll 3.6.0 - UPDATED: Polytechnic-courses plugin updated to 1.1 - UPDATED: Table data titles internationalized in polytechnic-courses plugin - UPDATED: Styles-polytechnic plugin updated - UPDATED: Events Calendar styles for mobile devices - FIXED: Appearance > Customize > Header Menu Options - FIXED: Scrolling on touch devices - FIXED: Breadcrumbs for custom page tempaltes - FIXED: List styles for Sensei Quizes - ADDED: Base list styles for bbPress - FIXED: Dropdown menu v. Tribe events z-index issue - FIXED: Sticky header menu list spacing for non-mega-menu Version 1.0.5 02/05/2015 - UPDATED: WPBakery Visual Composer - Version 4.3.5 - 4.4.2 - UPDATED: OptionTree - Version 2.4.3 - 2.4.6 - FIXED: Display of menu list item hover and sub-mega-menu. - ADDED: Default Styles for WooCommerce & The Events Calendar Tickets - ADDED: Menu Hover Color option in Skin Builder - ADDED: Sub Menu Highlight Color option in Skin Builder - ADDED: Sub Menu BG Color option in Skin Builder - ADDED: Sub Menu BG Image option in Skin Builder - ADDED: Header BG Grayscale On/Off toggle in Skin Builder - ADDED: Header BG Color Opacity numeric slider in Skin Builder Version 1.0.4 01/15/2015 - FIXED: Display of Faculty Directory for Safari and mobile users - FIXED: Author page course query now supports usernames with underscores - FIXED: Now supporting The Events Calendar 3.9 - this fixes the new events saving issue - UPDATED: Mythology-core/optiontree files updated to 2.4.6 - UPDATED: Documentation now covers hover grid, helper class, and demo-homepage.xml file (12.2.1) - UPDATED: Small tweaks to styles for author sidebar Version 1.0.3 01/05/2015 - FIXED: Custom faculty profile image uploader - FIXED: Blog template v. sidbar when posts have meta turned off - FIXED: Revolution Slider added back into plugin installation prompt - UPDATED: WPBakery Visual Composer - Version 4.3.4 - 4.3.5 - UPDATED: Theme-plugin.css stylesheet update for Sensei login - UPDATED: Mythology-key updated for Sensei sidebar - UPDATED: Styles for Visual Composer Teaser Grid/Post Grid module Version 1.0.2 12/22/2014 - FIXED: Android device scrolling - FIXED: Sticky header on desktop viewport sizes - FIXED: Course & faculty meta widths/spacing/borders - FIXED: Widgets.WIE footer widgets updated for new Custom Menu Wizard version - FIXED: Responsive Menu plugin now included in prompt - ADDED: Option toggles (On/Off) for Faculty Meta - ADDED: Option toggles (On/Off) for Faculty Sidebar - ADDED: Faculty meta alignment/adjustment for overflow & removal - ADDED: Responsive Mode Toggle (On/Off) - ADDED: Check function for handheld devices. - FIXED: Dropdown Header on handheld devices. VERSION 1.0.1 12.15.2014 General Changes/Fixes Done: - Mythology Core Updated - VERSION 1.1.1 (By ThemeIsland) - Plugin Update: WPBakery Visual Composer - Version 4.3.3 - 4.3.4 - Plugin Update: WP Revolution Slider - Version 4.6.0 - 4.6.5 - Documentation Updated - Removed blank author description fallback - FIXED: Generation of vc_custom_ now isolated to rows. - FIXED: Jquery no conflict for skeleton-key.js - FIXED: Custom CSS and Custom Script panels in Theme Options - FIXED: Remove Required/Forced Activation of Non-Essential Plugins - ADDED: Option toggle (On/Off) for NiceScroll custom scrolling. - ADDED: Option toggles (On/Off) for Course Meta - ADDED: Option toggles (On/Off) for Course Listings - ADDED: Course meta alignment/adjustment for overflow & removal VERSION 1.0 -- - First Release /* ========== - Feature Requests & Roadmap - ==========*/ ** Have a feature request? Let us know! - Revolution Slider included with demo example
BUY From ENVATO Marketplace
#catalog#classes#college#course management#Courses#customizable#education#events#events calendar#faculty#polytechnic#powerful#School#skeleton#University
1 note
·
View note
Text
The Five Most Important Areas of SEO to work on
New Post has been published on https://martechguide.com/most-important-parts-of-seo/
The Five Most Important Areas of SEO to work on
1. Define Your Goals
The most useful KPIs are specific.
New Site
Established Site
On page and off page SEO step by step guide
1. Define Your Goals
Without clear goals, it’s difficult to know how to spend your time. Start by listing your goals.
Do you want to sell services or product? Do you want to increase traffic levels? Do you want to increase brand awareness? Knowing which SEO dial to twist depends very much on what goal you’re trying to achieve.
Once you have your list, create a set of KPIs. KPI stands for Key Performance Indicator. KPIs will give you a set of metrics to help you decide if you’re meeting, or missing, your goals.
Here are a few examples:
Rank top ten for keyword term x in Google
Increase traffic from search engines by *x* percent by *date*
Get 1,000 new sign ups from search visitors in March
Sell ten widgets per day to search visitors by next week
The most useful KPIs are specific.
You either hit the target or you miss.
Your strategy will be defined by your goals.
For example, if your goal is to sell ten widgets by next week using a new site, then your strategy might be to forget SEO for the meantime, and focus on PPC instead.
If your goal is to get 1000 new subscribers by the end of the year,
then you might spend a lot of time analyzing your demographic, determining where they hang out, and getting your name and content in front of them at every available opportunity.
If your goal is to get #1 for term X, then you’ll be focusing a lot on link building, using keyword term X in the link.
And so on. Your goals define your tactics.
Once you have a list of clear objectives, and a clear list of KPIs, the next step is to consider the age of your site.
2. What Type Of Site Do You Have?
New Site
One of the most important task for new sites is link building. The sites with the highest quality linkage tend to trump sites with lower quality linkage when it comes to rank.
Until you build links, then tweaking on-page aspects of SEO on a new site won’t make a lot of difference in terms of rank.
Get the basics right – keywords in the title tags, keyword focused content, strong internal linking, a shallow structure and good crawlability – but focus your efforts on attaining links.
If that means establishing a large body of quality content first, then so be it. Others may choose to buy their way up the chain, or aggressively pursue social media opportunities.
Established Site
The opposite is true for an established site. Whilst links are always important, an established site can leverage on-page factors to a greater degree.
Once your site has built up sufficient link authority, then you may only need add a new page of content, and link it internally, in order to rank well. People running established sites may wish to focus more on producing quality, focused content, and let the linking look after itself.
The Five Most Important Areas Of SEO On Which To Spend Your Time
These are highly debatable, but here’s my ranking:
1. Produce Remarkable, Attention Grabbing Content
Everything starts with remarkable content i.e. content worth remarking on and linking to.
Do you have unique, timely content?
Does you content solve a problem? Does you content provide a new insight?
Does you content spark controversy? Does you content start – or contribute to – a conversation?
2. Crawlability
If your content can’t be crawled, you won’t rank. Ensure your site is easily accessible to both humans and search engine spiders.
3. Build Links
Google’s algorithm is heavily weighted towards links. Beg, buy, or earn links, and rankings follow. Get your keywords into the link text. Building links also means building relationships with people. Spend a lot of time doing this, especially in the early stages.
4. Title Tag
It is debatable how much ranking value the title tag has, both it definitely has click-thru value. Your listing fights for attention with all the other links on page. What will make people click your link? Learn the lessons of Adwords. Match your title tag to the keyword query. Solve a users problem. Arouse curiosity.
5. On-Page Content
Forget endless on-page tweaking. Largely a waste of time. Instead, keep a few keyword phrases in mind when writing. Use semantic variations of your terms in order to help catch long tail terms. Link your page to related pages, using keyword terms in the link.
Bonus: Watch Your Competition. Do What They Do
What all SEO activities you can do ?
On-page
1.301 Redirect 2.Alt Tags Creation 3.H1 Tags Creation 4.Meta Tags Creation 5.Anchor Optimization 6.Article Creation & Optimization 7.Blog Section Creation 8.Blog post creation & Optimization 9.Existing Page Content updation 10.Google Traffic Script Implementation 11.E Book Creation 12.HTML Site Map Creation 13.HTML Validation 14.Press Release Creation & Optimization 15.Robots.txt file modification 16.RSS Creation 17.XML Site Map Creation 18.Industry Glossary Page
Off-page
1.Article Submission 2.Blog Submission 3.Directory Submission 4.E-Book Submission 5.Link Building 6.Feed Creation & Submission 7.Press Release Submission 8.RSS Submission 9.XML Site Map Submission 10.Classified Add Creation 11.Classified Submissions 12.Contexual Links 13.Blog Section RSS Submissons
Analysis & Reporting
Log File Analysis/ Traffic Analysis
Competition Analysis
Keyword Finalization
Monthly Activity Report
Ranking Check
A typical 6 months SEO Activity Plan
If you are going to work on a client project and wondering how to plan month on moth activity plan. You can follow the below chart to prepare your plan and send into the clients approval and will also act as your activity tracking sheet.
Month Activity M1Perform a thorough study of each of the CLIENT websites that are being optimized in terms of page content, key words being used, competition of key words etc. Perform research on including additional related keywords other than the key words mentioned by each client with the overall objective of optimizing each website for all important key words that best describe the client business. Prepare a keyword ranking report before start of optimization work on three popular search engines – Google, Yahoo and MSN and provide the report to the client. Perform On page Optimization activity for the website homepage only that includes tailored TITLE, ALT Image Tags, META Tags, and Header Tags etc utilizing the prioritized keywords. Review content of the homepage to include the required number of key words that describe the client business. Partial submission of key words to popular directories relevant to client business M2XML Site Map Creation for quick and easy recognition of content and key words by search engines. Robots Text File (robots.txt) which helps spiders to know what to index and what not to. Reciprocal linking to build your link popularity campaign. This will be a recurring activity done across the entire SEO activity on the website. Link Building to achieve more back links. This will again be a recurring activity. Internal Linking. This will be a one time activity. M3Directory Submission to Related Directories Directory Submission (Regular Activity) Reciprocal linking to build your link popularity campaign (Regular Activity) Keyword ranking report at the end of the third month SEO activity. M4SEO Tweaking to see if the performed SEO activity is achieving desired results and do necessary changes for improving the ranking of the key words. Submit to Press Releases Sites Directory Submission (Regular Activity) Reciprocal linking to build your link popularity campaign (Regular Activity) M5Directory Submission (Regular Activity) Reciprocal linking to build your link popularity campaign (Regular Activity) M6Directory Submission (Regular Activity) Reciprocal linking to build your link popularity campaign (Regular Activity) Keyword ranking report (for the 5 selected keywords) at the end of 6 months SEO activity. Submission and Link reports
Do share your comment on this and if you have anything to add on , please do mention in the comment section.
0 notes
Link
Introduction
Hello, freeCodeCamp readers. I hope I can bring you some great coding content for inspiration, education and of course, fun! In this tutorial, we will learn about keyword density and how to build a tool that can calculate keyword density with Laravel. The web tool will allow us to paste in a full page of HTML. Then, magic will be executed to give us a precise keyword density score. In a quick summary, here are some basic skills we will touch upon whilst building the tool.
Laravel routes, controllers, and views
Laravel layouts
HTML & forms
JQuery & Ajax
Some native PHP
A bit of SEO!
What is keyword density?
If you have your own website or blog, you possibly already know what keyword density is. For those who don't know what it means I will give a short and sweet explanation below. Keyword density is a calculation of word or keyword occurrences usually in a large piece of text. The density is reported in a percentage which is simply calculated with the following formula. KeywordDensity = (Keyword Count / Word Count) * 100
Why is this important?
Keyword density is a key factor in the Google search engine algorithm. It is widely thought that a good keyword density for optimising web pages for Google rankings is around 3.5%. If the percentage is higher, for example 20%, then this could be seen as 'keyword stuffing' and therefore could badly affect your Google search rankings. So, that is a minuscule lesson on SEO and to give you a bit of context of what we are trying to build.
Building a Keyword Density Tool with Laravel
This tutorial will presume we are all starting with a fresh Laravel build enabling anyone to follow on from any particular point. (Apologies if the beginning sections are telling you to suck eggs!) Also, just for further context, I'm building this on MacOS with XAMPP locally.
Prerequisites
A PHP environment installed and access to the root directory
Composer installed
Your favourite code editor that interprets PHP, HTML, CSS & JS.
With all of these prerequisites checked off, we can now get our hands dirty.
Creating Our Laravel App
First of all we need to download and install a fresh Laravel build. Follow the steps below to achieve this.
Open your command line interface at the root directory of your web server, for example XAMPP/xamppfiles/htdocs/
Run the following command and let composer do it's magic
composer create-project --prefer-dist laravel/laravel KeywordDensityApp
Top Tip: If you are working on MacOS, then check out the following steps to enable permissions on the Laravel storage folder.
Navigate to your CLI to the project folder ('KeywordDensityApp')
Run the following command
sudo chmod -R 777 storage/*
Adding a controller and view
Now that we have the basics out of the way, we can start to build our controller and web page that will allow a user to paste in and analyse some HTML. We can create a new controller in two ways: via the PHP artisan command line helper or simply by creating with your code editor. Feel free to use any of the below methods, just make sure the controller matches
Create controller with PHP artisan
php artisan make:controller ToolController
Create controller with code editor
Locate the following - ProjectFolder/App/Http/Controllers
Create a new .php file named ToolController
Make sure this newly created file has the following contents:
<?php namespace App\Http\Controllers; use Illuminate\Http\Request; class ToolController extends Controller { // }
Now let's create the view.
Create view with code editor
Locate view folder under ProjectFolder/resources/views
Create a new folder named tool
Create a new view PHP file named index.blade.php
Now let's create a layout file
With most Laravel applications, you will want to build a layouts file so that you don't have to repeat lots of HTML over and over to get the same design across the board. This layout is pretty basic, using a simple Bootstrap template and has a @yield call to the 'content' area which we will utilise in our views. In addition, there's a @yield call to 'scripts' which we will utilise later.
Locate view folder under ProjectFolder/resources/views
Create a new folder here named layouts
Create a new file named master.blade.php
Add the following code to the file
<!DOCTYPE html> <html lang=""> <head> <meta charset="utf-8"> <meta name="viewport" content="width=device-width, initial-scale=1"> <title>Keyword Density Tool</title> <link rel="stylesheet" href="https://stackpath.bootstrapcdn.com/bootstrap/4.4.1/css/bootstrap.min.css" integrity="sha384-Vkoo8x4CGsO3+Hhxv8T/Q5PaXtkKtu6ug5TOeNV6gBiFeWPGFN9MuhOf23Q9Ifjh" crossorigin="anonymous"> <!-- Fonts --> <link href="https://fonts.googleapis.com/css?family=Nunito:200,600" rel="stylesheet"> <meta name="csrf-token" content=""> <style> body {padding-top: 5em;} </style> </head> <body> <nav class="navbar navbar-expand-md navbar-dark bg-dark fixed-top"> <a class="navbar-brand" href="#">Keyword Density App</a> <button class="navbar-toggler" type="button" data-toggle="collapse" data-target="#navbarsExampleDefault" aria-controls="navbarsExampleDefault" aria-expanded="false" aria-label="Toggle navigation"> <span class="navbar-toggler-icon"></span> </button> <div class="collapse navbar-collapse" id="navbarsExampleDefault"> <ul class="navbar-nav mr-auto"> <li class="nav-item"> <a class="nav-link" href="/">Home <span class="sr-only">(current)</span></a> </li> <li class="nav-item active"> <a class="nav-link" href="">Tool</a> </li> </ul> </div> </nav> <main role="main" class="container mt-3"> @yield('content') </main><!-- /.container --> <script src="https://code.jquery.com/jquery-3.2.1.min.js"></script> <script src="https://cdn.jsdelivr.net/npm/[email protected]/dist/umd/popper.min.js"></script> <script src="https://stackpath.bootstrapcdn.com/bootstrap/4.4.1/js/bootstrap.min.js"></script> @yield('scripts') </body> </html>
Extend our views to use the layout file
Let us now use the newly created layouts file in both our welcome view and tool index view. Follow these steps to extend to the layout.
Add the following code to both ProjectFolder/resources/views/welcome.blade.php and ProjectFolder/resources/views/tool/index.blade.php
@extends('layouts.master') @section('content') @endsection
Try rendering the index page of the tool directory, for example localhost/tool. It should look something like below.

Basic view layout
Linking up the Controller, Route, & View
Now that we have a controller and view we need to first define a route and second add a return view method to the controller.
Define the route
Locate web routes file under ProjectFolder/routes/web.php
Add the following code to the bottom of the file:
Route::get('/tool', 'ToolController@index')->name('KDTool');
Create the new controller method
Now, go back to your ToolController and add the following function:
public function index() { return view('tool.index'); }
Feel free to change the view names, route URLs, or controller functions to your personal liking. Just make sure they all match up and the page renders.
Building up our tool view
Now, with our earlier set up of views and layout files, we can start to add the content in the form of HTML that we are going to need. It will consist of nothing more than some text, textarea input form, and a submit button. Add the following HTML to the content section of the ProjectFolder/resources/views/tool/index.blade.php file.
<form id="keywordDensityInputForm"> <div class="form-group"> <label for="keywordDensityInput">HTML or Text</label> <textarea class="form-control" id="keywordDensityInput" rows="12"></textarea> </div> <button type="submit" class="btn btn-primary mb-2">Get Keyword Densities</button> </form>
The view should now render like this:
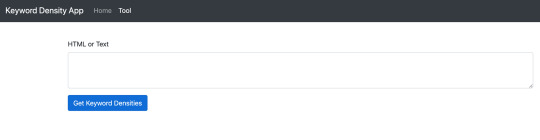
Keyword Density Tool View with Text Area input
Creating the bridge between the front end and the back end
Now, we pretty much have everything we need on the front end: a simple input text area where users can paste in their plain text or HTML. What's missing is the logic for when the button is pressed 'Get Keyword Densities'. This bridging logic will essentially do the following.
Listen for clicks on the Get Keyword Density Button
Grab the contents of the non-empty text area input
Use JQuery Ajax to send the data to the backend to be processed and await a response.
When the response is passed back, handle the data and create a HTML table with the human-readable statistics (keyword density).
Front end
To do this we will use an in-page script which we can inject using the @section tag. Add the following to the tool/index.blade.php view, after the content section.
@section ('scripts') <script> $('#keywordDensityInputForm').on('submit', function (e) { // Listen for submit button click and form submission. e.preventDefault(); // Prevent the form from submitting let kdInput = $('#keywordDensityInput').val(); // Get the input if (kdInput !== "") { // If input is not empty. // Set CSRF token up with ajax. $.ajaxSetup({ headers: { 'X-CSRF-TOKEN': $('meta[name="csrf-token"]').attr('content') } }); $.ajax({ // Pass data to backend type: "POST", url: "/tool/calculate-and-get-density", data: {'keywordInput': kdInput}, success: function (response) { // On Success, build a data table with keyword and densities if (response.length > 0) { let html = "<table class='table'><tbody><thead>"; html += "<th>Keyword</th>"; html += "<th>Count</th>"; html += "<th>Density</th>"; html += "</thead><tbody>"; for (let i = 0; i < response.length; i++) { html += "<tr><td>"+response[i].keyword+"</td>"; html += "<td>"+response[i].count+"</td>"; html += "<td>"+response[i].density+"%</td></tr>"; } html += "</tbody></table>"; $('#keywordDensityInputForm').after(html); // Append the html table after the form. } }, }); } }) </script> @endsection
This entire script that we inject will handle all of the numbered list items above. What is left to do is handle the data coming in on the back end side of things.
Back end
Firstly, before we go any further with coding, we need to handle the fact that both plain text and HTML can be submitted. For this we can use a nifty tool to help us out. html2text is the perfect PHP library for this use case, so it's time we install it. html2text does exactly what it says on the tin, converts HTML markup to plain text. Luckily, this package has a composer install command, so enter the following command into the CLI on the projects root directory.
composer require html2text/html2text
Now, our backend controller is going to receive either HTML or plain text in requests firing from the HTML form we created in our view. We now need to make the route to handle this call and to route the call to the specific controller that will work the magic. Add the following PHP to the web.php routes file:
Route::post('/tool/calculate-and-get-density', 'ToolController@CalculateAndGetDensity');
Secondly, add the following to ToolController.php file:
public function CalculateAndGetDensity(Request $request) { if ($request->isMethod('GET')) { } }
OK, so the stage is set. Let's code in the magic that will calculate the keyword density and return the data. Firstly, add use statement is required for the newly installed html2text package. Add the following to the top of the ToolController.php, just below other use statements:
use Html2Text\Html2Text;
Then we need to handle the get parameter that is to be passed in, making sure it's not set and then converting the parameter of content to plain text. Refactor the CalculateAndGetDensity function to look like below:
public function CalculateAndGetDensity(Request $request) { if ($request->isMethod('GET')) { if (isset($request->keywordInput)) { // Test the parameter is set. $html = new Html2Text($request->keywordInput); // Setup the html2text obj. $text = $html->getText(); // Execute the getText() function. } } }
Now that we have a variable to hold all of the text stripped for the keywordInput parameter, we can go ahead and start to calculate density. We need to handle the following:
Determine the total count of words
Analyse the textual string and convert it to a key value array (the key being the keyword, the value being the occurrence of the word)
Sort into order by descending with the biggest occurrence first in the array
Loop over the key and value array, pushing the values to a new array with an additional field of 'density' which utilises the keyword density formula we looked at earlier in the article. This formula will use the value (occurrence) and the total word count.
Finally, to return the data
Refactor the function to look like the following, taking note of the comments:
public function CalculateAndGetDensity(Request $request) { if ($request->isMethod('GET')) { if (isset($request->keywordInput)) { // Test the parameter is set. $html = new Html2Text($request->keywordInput); // Setup the html2text obj. $text = strtolower($html->getText()); // Execute the getText() function and convert all text to lower case to prevent work duplication $totalWordCount = str_word_count($text); // Get the total count of words in the text string $wordsAndOccurrence = array_count_values(str_word_count($text, 1)); // Get each word and the occurrence count as key value array arsort($wordsAndOccurrence); // Sort into descending order of the array value (occurrence) $keywordDensityArray = []; // Build the array foreach ($wordsAndOccurrence as $key => $value) { $keywordDensityArray[] = ["keyword" => $key, // keyword "count" => $value, // word occurrences "density" => round(($value / $totalWordCount) * 100,2)]; // Round density to two decimal places. } return $keywordDensityArray; } } }
Note: The beauty of html2text is that it doesn't really care if it's converting HTML or plain text in the first place, so we don't need to worry if a user submits either. It will still churn out plain text.
Putting it to the test
Finally, we are ready to test the tool, wahoo! Go ahead and render the tool index view (localhost/tool).
Now, you can go to any website of your choice on the web, load a page from that site, right click and click view source.
Copy the entire contents and come back to the tool.
Paste the contents into the text area and click the Get Keyword Densities button.
Await the response and check out the table of keyword densities!
Check out my example below which uses the HTML of this page.
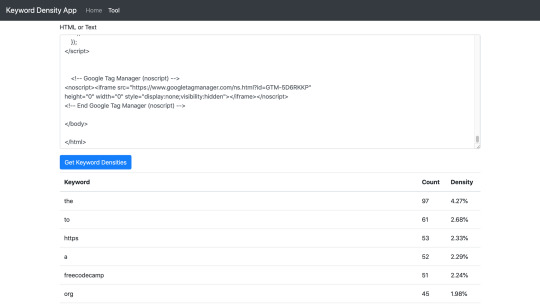
Keyword Density Tool & Table of keywords
And that is it!
Summary
In this article we learned how to build a Laravel application from scratch. It touched on some of the different parts of the full stack in development such as JQuery, PHP, HTML etc. Hopefully, with the understanding of this application, the same methodology can be used to build something else, perhaps bigger and better.
Possible further developments
The keyword density tool currently takes 'stop' words into account. Stop words are known to be ignored by Googles crawlers. Words such as it, the, as, and a. Looking at the tool screenshot above, you can see that they are used a lot! Further development could be carried out to filter the stop words and only calculate density on the non-stop words which is potentially a better view for SEO scoring.
0 notes
Text
How to build and deploy your own personal portfolio site
Hello! My name is Kevin Powell. I love to teach people how to build the web and how to make it look good while they’re at it.
I’m excited to announce that I’ve just launched a free course that teaches you to create your very own fully responsive portfolio website.
After you’ve finished this course you will have a neat-looking portfolio site that will help you land job interviews and freelance gigs. It’s also a cool thing to show to your friends and family.
We’re going to build the portfolio using Scrimba’s interactive code-learning platform, and then deploy it using DigitalOcean’s cloud services.
Also, DigitalOcean has been generous to give everyone who enrolls a free credit, so it won’t cost you anything to get it up and running.
This post is a breakdown of the course itself, giving you an idea of what's included in all the lessons. If you like what you see, make sure to check it out over on Scrimba!
Lesson 1: Introduction
In the first lesson, you’ll get an overview of the course so that you know what to expect, what you should know before taking it, and what you’ll end up with once you're finished. I also give you a quick intro to myself.
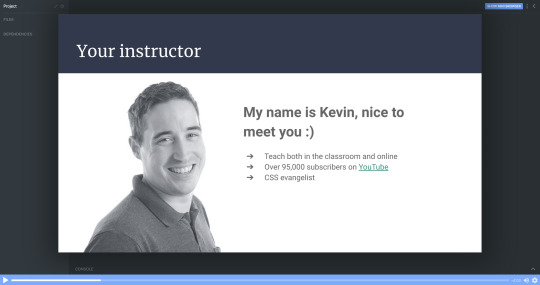
Lesson 2: Setting things up - HTML
In part two, I’m going to show you around in the Scrimba environment and we’ll also set up the project.
All the images are supplied, so you won’t need to worry about looking for the perfect photo just yet. We can focus on building the portfolio!
Don’t forget that you can access everything you need from text and colors to fonts and much more at our dedicated design page.
Lesson 3: The header area - HTML
It’s finally time to start building out the portfolio. In this lecture, we will create the header section. We will brush up on the BEM methodology for setting class names in CSS, and I think you’ll find that this makes the navigation simple and straightforward to create.
Lesson 4: Intro section
Next up is the Intro section of the portfolio. This is where we will introduce ourselves and put a picture of ourselves.
In the end, we add a section about the main skills/services we can do. For the moment we can just fill it all in with “Lorem ipsum” text as a placeholder, until you're ready to fill it in with your own text.
In this chapter, we’re finishing off the rest of our HTML with the last 3 sections: About me, where we’re going to introduce ourselves in greater detail; Work, where we’re going to add some of our portfolio examples, and our footer.
Footers are ideal for linking to email addresses and I will show you how to do that with an <a> tag. We can also add our social media links there too.
For now, it all looks a bit raw and all the CSS fun is ahead of us.
Lesson 6: Setting up the custom properties and general styles
Alright, time to get make that page look amazing!
In this part, we’re going to learn how to add custom properties.
While setting up CSS variables can take some time, it really pays off as the site comes together. They're also perfect for allowing you to customize the site's colors and fonts in just a few seconds, which I take a look at how to do once we wrap up the site.
Lesson 7: Styling the titles and subtitles
Having set all the needed typography, I will walk you through the subtitles of designing and styling the titles and subtitles in our sections.
Lesson 8: Setting up the intro section
Over the next few chapters it’s going to be quite hands-on, so no worries if you feel like rewatching the screencasts a couple of times.
We're keeping everything responsive, using CSS Grid and taking a little dive into using em units as well.
This is the perfect example where CSS Grid shines through and we’re going to learn how to use properties like grid-column-gap, grid-template-areas and grid-template-columns.
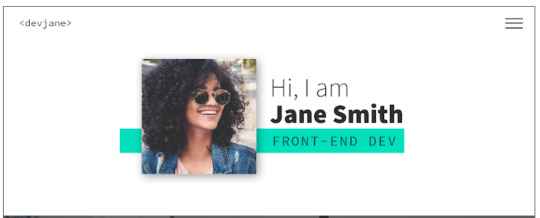
Lesson 9: Styling the services section
To add a little bit of interest, I look at how we can add a background-image to this section of the site. It's a nice way to break up the second and avoid just having solid color backgrounds everywhere, and I also look at how you could use background-blend-mode to change the color of the image to help keep the look of your site consistent.
As a bonus, we’re also going to learn how to style out buttons when they are hovered over or selected when we tab through the page.
Lesson 10: The About me section
Great progress! So this is the all-important About me section. This one is pretty similar to the Intro because we’re going to use CSS Grid, but move the picture to the right side and find a useful example for CSS fr unit.
Lesson 11: The portfolio
In this screencast, I will show how to build our portfolio section to display some of our great work. And we’re even going to learn how to use cubic-bezier() to a great and impressive effect with some hover styling!
Lesson 12: Adding the social icons with Font Awesome
This cast will be sweet and short, so you can rest a bit and learn some quick tips and tricks.
Adding social media links with Font Awesome icons is a breeze. We can do it with an <i> tag and then adding a class name of an icon you wish to add.
As an example, here’s how to add an icon for GitHub once you have Font Awesome linked in your markup.
<i class="fab fa-github"></i>

While the icons are in place, we do need at add more styling here to get them to be set up the way we need them to be.
With a little use of flexbox and removing the styling from the list with list-style: none it's relatively straight forward.
Lesson 14: Setting up the navigation styles
We have left the navigation to the last because very often it’s one of those simple things that can take the longest to set up and do correctly.
Once completed, the navigation will be off-screen, but slide in when a user clicks on the hamburger icon. The first step though, is to get it styled the way we want it to look, then we can worry about actually making it work!

Lesson 14: Creating the hamburger
In this screencast, you’ll learn how to add a hamburger menu to transition to the navigation view. It’s not an icon or an svg, but pure CSS.
We’re going to have a chance practice ::before and ::after pseudo-selectors, transition, and, since it's not a link but a button, we also need to define the different cursor when we hover over the hamburger icon to indicate that it can be clicked with cursor: pointer.
Lesson 15: Adding the JS
With a little bit of JavaScript, I will walk you through the implementation of a really nice and smooth transition from our main screen to the navigation window on click of the hamburger menu.

I also take a look at how we can add in smooth-scrolling with CSS only by using scroll-behavior: smooth. Yes, it really is that simple! It also makes a great tweet for Today I Learned (TIL). Feel free to send you TILs to @scrimba and I’m sure they will be really happy to retweet them!
Lesson 16: Creating the portfolio item page
With the homepage wrapped up, it's time to work on a template portfolio page that can be used to give more details on each of the projects that you are putting in your portfolio.
We're also going to learn how to link it seamlessly with our main page for a nice user experience.
Lesson 17: Customizing your page
This is where the magic of CSS custom properties comes in!
In this video I look at how we can customize the custom properties that we set up to change the color scheme of your site within seconds, and how we can update the fonts quickly and easily as well in order to make the site your own!
Lesson 18: DigitalOcean Droplets - What they are and how to set one up
In this screencast, we're going to explore DigitalOcean droplets. They are Linux-based virtual machines and that each droplet is a new server you can use.
It can seem daunting, but they are super easy to set up, very customizable and come with a lot of useful features, like a firewall automatically.
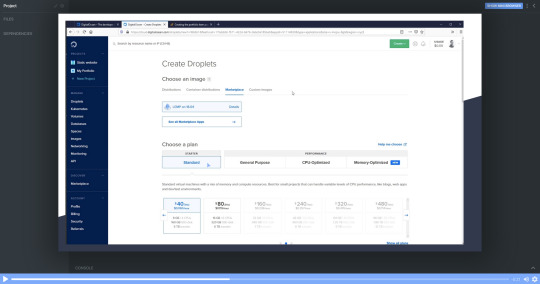
I'll talk you through every single step of the way so that you know exactly how to set a droplet up.
Lesson 19: DigitalOcean Droplets - Uploading files via FTP
To finish the whole process off, let me show you how we can upload our portfolio to the droplet we've created in the previous chapter and now it's online for others to see!
Lesson 20: Wrap up
And that's it! Your next step can be to make this page all about you, add all the relevant examples, tell us about you and make it live in a DigitalOcean droplet.
Once you've put yours together and got it online, please share your portfolio with Me and the team at Scrimba! You can find us at @KevinJPowell and @scrimba on Twitter, and we would be really happy to share what you're up to!
Check out the full course
Remember, this course is completely free. Head on over to Scrimba now and you can follow along with it and build out a fantastic looking site!
via freeCodeCamp.org https://ift.tt/2QwcP6z
0 notes
Text
vvvvvvvv
asic theme offers you image zoom option is you are using this theme for a photo blog, this feature will be very useful.
You have the color options to style your blog perfectly, you have Pretty Notes option, custom pages, Google Analytics support, Disqus comment option and a lot more.
DOWNLOAD THEME
Oscar
Oscars is the ideal Tumblr theme for freelancers. You can use it as a simple blogging theme or a personal blog to share some thoughtful stories and articles.
Everything you put on your blog will not go unnoticed as the theme brings in modern design coupled with high customizability to help you make your blog as visually appealing as possible.
All the basic features that one comes to expect from a Tumblr blog are all bundled in with the theme of a comments section, analytics integration, social media integration, and much more.
DOWNLOAD THEME
Minimalism
Minimalism Tumblr theme offers a high-quality option for brands, individuals and other creatives looking forward to expanding their online presence. You will get to share your image based content in a minimalistic and professional approach.
Notable features of the theme include features such as a content grid management, custom header, custom background color, and image options, a mobile-ready layout, social media images, infinite scrolling, a sticky sidebar navigation menu and much more.
DOWNLOAD THEME
Elise
The Elise Tumblr theme offers you multiple layout options to choose from. You can showcase your content in the most elegant way with this theme.
DOWNLOAD THEME
Illustfolio 4
A simple yet attractive Tumblr theme for the illustrators and photos. Though the theme is clean and minimal it does offers you customization possibilities.
You can change the color, font to style your site. The theme supports all types of posts to make sure that you can quickly add your content and publish it.
The theme is fully responsive and offers you social sharing buttons to maximize your reach.
DOWNLOAD THEME
Flare
Flare is one of the most popular Tumblr themes which you can use to set up your own interactive content sharing blog in a matter of moments.
The theme is catered to blogs which concentrate more on sharing animated visuals, videos and pictures on their blog.
It comes with a five-column masonry grid which makes content browsing a breeze. Since media based sites have a lot of content in the form of thumbnails, this is a very important feature.
DOWNLOAD THEME
Osprey
Osprey is a great looking free and highly customizable Tumblr theme. You can customize the look and feel of the theme with seven different color options to choose from.
You can set the design by changing the design between two or three columns. It’s a fast loading Tumblr theme with infinite scroll option.
It offers you permalink option, amazing border option for the post, image border option, optional multi-size posts.
DOWNLOAD THEME
Shiyori
If you need an attractive free theme, here is Shiyori Tumblr theme, a multi-layout design to make your site look more interactive and trendy.
DOWNLOAD THEME
Skyfall
Skyfall Tumblr theme is another one for the photographers. It transforms your blog into a beautiful and high featured gallery of sorts to help you display your latest works quickly.
The front page will showcase only image posts which if clicked will display the corresponding content through a lightbox.
Also, if more than one item has been uploaded to the post, then users can also have access to browse through them from the home page.
DOWNLOAD THEME
Orange Pop
Another great option for the Tumb bloggers. If you are a fan of orange color then you will like this theme. However, you always have the choice to switch the color scheme of your blog as per your wish.
It’s a minimal good looking theme with a clean design and all the important features that you will need to create a perfectly optimized Tumblr blog.
DOWNLOAD THEME
Maximize
This is a great Tumblr theme option for the photo blogs. The theme comes with a nice layout that will highlight each of your photos perfectly.
It’s a fully responsive design, and your site will look beautiful on all small screen devices along with regular desktops.
DOWNLOAD THEME
Writing Pad
Writing Pad, as the name implies is a Tumblr theme targeted for writers looking to use their blog to showcase their work. It comes with design and aesthetic appeal which makes it ideal for writing based content.
Design wise it offers grunge like a background with typography running a slight tilt as if resembling an entry form journal. You can easily transform this into your online journal.
DOWNLOAD THEME
Ten Toes
Another beautiful, minimal free Tumblr theme that you can use on your blog. The theme is clean and attractive.
The interface is user-friendly, and you can quickly click on any image and start browsing more by just clicking on the right or left arrow.
You can easily increase your share content as the users will be able to share your images right from the homepage of your site.
DOWNLOAD THEME
Copycat
Copycat is a great looking modern responsive Tumblr theme with an amazing grid layout. The theme is minimal yet very attractive.
DOWNLOAD THEME
Harbour
And finally, an ending of our list is Harbour, a sort of multipurpose theme for Tumblr which supports all post types and lots of user interfaces and customization options.
It also comes with a responsive design making it mobile friendly. The design quality of Harbour is so good that often people confuse it with a quality WordPress blog.
Overall, if you want to have a blog which showcases a different type of content and also looks very much professional and polished, then this is an excellent option to consider.
DOWNLOAD THEME
ImNotWordy
An amazing Tumblr design for the image-rich sites. If you are a photographer, this theme will make your work stand out.
It comes with a big grid system that makes each image look stunning. This theme is fully responsive making it super attractive on the small screen devices.
It’s a very lightweight and SEO friendly design that will surely put your content perfectly on the search engines.
DOWNLOAD THEME
Editorist
A clean and minimal Tumblr theme with a beautiful interface to highlight your content perfectly. This is a fully responsive Tumblr theme that will make your blog look great on all devices.
DOWNLOAD THEME
Wallstocker
Tumblr is all about minimal designs and designs that give the users to consume your content without any distraction. Here is a theme for photobloggers that offers a great looking clean layout that showcases your content the most elegant way.
DOWNLOAD THEME
Other Basic
If you are looking for a very basic design for your Tumblr site, here is a great option for you. This theme doesn’t offer any fancy elements; you only have a beautifully clean interface to highlight your content.
DOWNLOAD THEME
Fireheart
Another beautiful, clean and highly optimized Tumblr design that you can use to create your content. The theme comes with the modern and trendy navigation option.
You also have the option to have a menu in the sidebar of the theme if you need. You have normal pagination as well as infinite scrolling option.
DOWNLOAD THEME
In Conclusion
So this was our list of some of the best Tumblr themes you get for free. Do let us know which ones you liked here.
And also, if you happen to know some other great theme which got left out then do let us know in the comments section.
You will be helping out your fellow readers with more options in the process.
5 (100%) 4 vote[s]
Tags:
Free Tumblr Themes
Minimal Tumblr Themes
Tumblr Themes
Share134
Tweet82
Pin29
Related Posts
WEB TEMPLATES
Best HTML Templates for Dental Websites (2019)
BY
EDITORIAL STAFF
MAY 1, 2019
WEB TEMPLATES
15 Best School Website Templates 2019
BY
EDITORIAL STAFF
APRIL 4, 2019
WEB TEMPLATES
100 Best Free Responsive Blogspot Templates 2019
BY
DHIRAJ DAS
APRIL 1, 2019
WEB TEMPLATES
40 Best Cute Minimalist Tumblr Themes 2019
BY
EDITORIAL STAFF
MARCH 7, 2019
WEB TEMPLATES
25 Best Personal Portfolio Joomla Templates 2019
BY
EDITORIAL STAFF
FEBRUARY 8, 2019
Comments 2
WPSmashingThemes 1 year agoReply
Great roundup Dhiraj,
I really love the Sugar theme I created a free Tumblr theme here: https://www.softwarefindr.com/reviews/gosimon-tumblr/ that I think would serve a great additional resource for your readers.
Let me know what you think?
Dhiraj Das 1 year agoReply
Hey Brian, Will surely add the theme to this collection. Can you check the download link if it is working properly, it wasn’t working at my end.
Leave a Reply
Your email address will not be published. Required fields are marked *
Comment
Name *
Email *
Website
Subscribe To Our Newsletter
Get weekly top resource updates & freebies
SUBSCRIBE!
ADVERTISEMENTRecommended.
7 Email Marketing Strategies For Your E-Commerce Business
MAY 14, 2019
7 Awesome Crowdfunded Brands & Lessons From Their Success
MAY 13, 2019
10 The Best GDPR Compliance WordPress Plugins 2019
MAY 13, 2019
Important Questions to Ask Before You Start Growing Instagram Following
MAY 10, 2019
ADVERTISEMENT
Begindot.com is all about the top resources that you can use to create and grow your online business.
Categories
Best Resources
Blogging
Coupon
Freebie
How To
Inspiration
Make Money
Marketing
Review
Typography
Web Templates
WordPress
WordPress Hosting
Newsletter
Subscribe to our mailing list to receives daily updates direct to your inbox!
*We hate spam as you do.
ABOUT
TERMS
PRIVACY
CONTACT US
SEO Themes | AdSense Themes | BuddyPress Themes | Event Themes | WooCommerce Themes YouTube Tools | Lightroom Presets | Dreamweaver Templates | Blogger Templates | Tumblr Themes | Joomla Templates Handwriting Fonts | Arabic Fonts | Script Fonts | Calligraphy Fonts | Font Generators Divi Theme 20% Off Coupon | WPX Hosting 50% Off Coupon Thrive Themes Review BeginDot is a daily resource site for online startups. We publish content related to resources, themes, templates, online success stories, interviews and more. Sometimes we publish content that includes affiliate links, however, we never accept any money for positive reviews. Copyright © 2016-2019 www.begindot.com
How To
Marketing
Best Resources
Blogging
Make Money
Review
WordPress
WP Hosting
SEO Themes | AdSense Themes | BuddyPress Themes | Event Themes | WooCommerce Themes YouTube Tools | Lightroom Presets | Dreamweaver Templates | Blogger Templates | Tumblr Themes | Joomla Templates Handwriting Fonts | Arabic Fonts | Script Fonts | Calligraphy Fonts | Font Generators Divi Theme 20% Off Coupon | WPX Hosting 50% Off Coupon Thrive Themes Review BeginDot is a daily resource site for online startups. We publish content related to resources, themes, templates, online success stories, interviews and more. Sometimes we publish content that includes affiliate links, however, we never accept any money for positive reviews. Copyright © 2016-2019 www.begindot.com
This website uses cookies. By continu
0 notes