#html registration form
Explore tagged Tumblr posts
Visit Tumblr Blog
Explore Tumblr blogs with no restrictions, modern design and the best experience.
Last Seen Tumblr Blogs


Fun Fact
Tumblr.com is the 103rd most visited website in the world.
Text
Don't know if you guys have already heard of it or not, but people in China have begun to speak of a certain "happy family of three":

Yeah, "Lele's (that means Pan Zhanle's) family", consisting of Lele's Dad, a.k.a Sun Yang, and Lele's Mom, a.k.a Wang Shun.
"How did it come to this?" well,
1. OGG (= Olympic Games Gold) Sun Yang, Wang Shun and Pan Zhanle are the only three olympic gold medalists 🥇 on the Chinese men's swimming team (for now). So as far as their abilities are concerned (and because of the OGG exclusivity), they "form a unit/family".

2. Pan Zhanle's Idol


I mean, one cannot blame him, those stats are impressive:

(Though he looks up to Wang Shun as well.)

3. The "Zhejiang ABC"
Now, what do those Chinese vehicle registration plates have to do with these three men?
The answer is easy: Sun Yang comes from Hangzhou (A), Wang Shun from Ningbo (B), and Pan Zhanle from Wenzhou (C).
(People are predicting, that the next olympic gold medallist most probably is going to be somebody hailing from Shaoxing (D).)
4. Similar "record-breaking experiences"
Pan Zhanle and Sun Yang both have similar "record-breaking experience". Both of them first set new records in the world championships before doing so for the second time in the Olympics.
(5. the most important point [according to Chinese netizens]
Sun Yang and Wang Shun never denied the "accusation" that Pan Zhanle is their child.

You see the similarities. DO YOU SEE THEM?)😏😝
Whatever the case is, Sun Yang took it with good humor (or more like he tried not to break out in laughter) when he was being confronted with this on a live stream.
And the netizens have already mapped out the whole family by now:


...or more like the "four great families".
And yes, Mr. Balenciaga is the older brother.
....
Now,


PS: there is now a translated version of the somewhat confusing relationship chart.
Sources:
https://weibo.com/7797545096/OqqXOg9Vz
https://weibo.com/7405411647/OqSvPuveH
https://weibo.com/5516423116/OqRsMqVlg
https://super.sina.cn/shequn/post/detail_961365383284023297.html
(FYI, they are entirely in Chinese.)
#乐乐爸乐乐妈#Lele's family#pan zhanle#wang shun#sun yang#swimming#male swimmer#olympics#team china#qin haiyang#chinese swimmer#chinese swimming team#chinese team#paris olympics#paris 2024#shipping#crackship#crack
102 notes
·
View notes
Text
Web designer in Jodhpur
Creative Web Design
We are a web designing company that has a team of skilled and experienced web designers and developers who can create stunning and functional websites for any type of business or domain. We offer a variety of web designing services, such as custom web design, web development, web hosting, SEO, and maintenance. We also provide you with a free web design consultation, where we can discuss your goals, needs, and preferences, and provide you with a web design proposal that suits your requirements and expectations.
What we do in Web Design
Our web designing services are the services that provide web designing solutions for clients who want to create or improve their online presence. It involves the use of various elements such as colours, fonts, images, graphics, animations, and interactions to convey the message and purpose of the website to visitors. Web designing services can help clients with various aspects of web designing, such as Consultation: Our web designing services can help clients understand their goals, needs, and preferences, and provide them with expert advice and guidance on how to achieve them . Strategy: Our services can help clients develop a clear and effective web design strategy that aligns with their brand identity, target audience, and business objectives.Design: We help clients create a unique and attractive web design that reflects their vision and personality, and that engages and impresses their visitors.Launch: Our services can help clients launch their website to the public, and provide them with web hosting, domain registration, and security services.
Our Design Technology
At Web Farm House, we understand that web design is not just about making a website look good. It is also about making it work well, communicate effectively, and provide value to the users. That is why we use the latest web design technology to create websites that are:
Visually appealing: We use web graphic design to create stunning and consistent visual elements for your website, such as colours, fonts, images, icons, and animations.
Easy to use: We use user interface design to create intuitive and interactive elements for your website, such as buttons, menus, forms, and navigation.
Functional and reliable: We use web development to code and program your website, using languages such as HTML, CSS, JavaScript, PHP, and others. We follow the principles of web standards, web accessibility, web performance, and web security, to ensure the quality and reliability of your website.
Our Work Process
At Web Farm House, we follow a systematic and collaborative work process to create your website. Our work process consists of four main phases: Discovery, Design, Development, and Delivery:
Discovery: This is the phase where we get to know you and your project. We will ask you some questions about your goals, needs, preferences, budget, and timeline. We will also conduct some research on your industry, competitors, and target audience. Based on the information we gather, we will create a project proposal and a contract for you to review and approve.
Design: This is the phase where we create the visual and interactive elements of your website. We will start by creating a sitemap and a wireframe, which are the blueprints of your website’s structure and layout. We will then create a mockup, which is a prototype of your website’s appearance and functionality. We will present the mockup to you and ask for your feedback and approval. We will make any revisions as needed until you are satisfied with the design.
Development: This is the phase where we code and program your website. We will use the latest web development technology to create a website that is functional, reliable, and compatible with different devices and browsers. We will also test and debug your website to ensure its quality and performance. We will show you the progress of the development and ask for your feedback and approval.
Delivery: This is the final phase where we launch and maintain your website. We will upload your website to your chosen hosting service and domain name. We will also provide you with a user manual and a training session on how to use and update your website. We will also offer you ongoing support and maintenance services to keep your website running smoothly and securely.
We will also listen to your feedback and suggestions and make any changes as needed. We will work with you as a partner and a friend, not just as a client and a vendor. we value your input and satisfaction throughout the work process. We will communicate with you regularly and keep you updated on the status of your project.
Our Web Designing Services
Our is provides web design services for clients who want to create or improve their online presence. We help clients with various aspects of web designing, such as consultation, strategy, design, development, testing, launch, and maintenance:
Static web design
Liquid web design.
Adaptive web design.
Dynamic web design.
Responsive web design.
Single-page web design.
Why Choose Us?
We are a One-Stop Solution for delivering the best web design and development services. We render customized and affordable web design facilities to suit your requirements. Choose the best plans for building a responsive web design according to your needs:
Excellent technical support
Core PHP &Codeigniter + MySQL.
Secure and Reliable coding.
Satisfactory Customer Support.
SEO-friendly web development.
33 notes
·
View notes
Text
🧑💻 What Is Full Stack Development?
Full Stack Development refers to building both the front-end (client-side) and back-end (server-side) of a web application. A Full Stack Developer can handle everything — from designing web pages to managing databases and deploying servers.
Think of it as building a house where you're both the architect (front-end) and the plumber/electrician (back-end).
🧩 What’s Included in Full Stack?
✅ Front-End (Client-Side)
What the user sees and interacts with in the browser.
Languages: HTML, CSS, JavaScript
Frameworks/Libraries: React, Vue, Angular
Tools: Figma, Bootstrap, Tailwind CSS
✅ Back-End (Server-Side)
Handles logic, data storage, authentication, etc.
Languages: Node.js (JavaScript), Python, Java, PHP, Ruby
Frameworks: Express (Node), Django (Python), Spring Boot (Java)
Database: SQL (MySQL, PostgreSQL) or NoSQL (MongoDB)
Authentication: JWT, OAuth, sessions
✅ DevOps / Hosting / Tools
Deploy and maintain your application online.
Version Control: Git, GitHub
Deployment: Vercel, Netlify, Render, AWS, Heroku
CI/CD: GitHub Actions, Docker (advanced)
🧠 Full Stack Developer Skills Map
Skill AreaKey Tools / TechnologiesHTML/CSSHTML5, CSS3, Flexbox, Grid, SassJavaScriptDOM, ES6+, Fetch API, AJAXFront-End FrameworksReact.js, Vue.js, AngularBack-End FrameworksNode.js + Express, Django, Flask, SpringDatabasesMongoDB, MySQL, PostgreSQLAPIsREST, GraphQLAuthenticationJWT, bcrypt, OAuth2Version ControlGit + GitHubHosting/DeploymentNetlify, Vercel, Render, AWS, Heroku
🧭 Full Stack Learning Roadmap
🔰 1. Foundations
HTML, CSS (layout, media queries)
JavaScript fundamentals (functions, loops, arrays, objects)
Build a basic responsive website
⚛️ 2. Front-End Development
Learn React.js (or Vue, Angular)
State, props, components, hooks
Consume APIs with fetch() or Axios
Build a project (e.g., weather app, blog UI)
🔙 3. Back-End Development
Learn Node.js and Express
Build REST APIs
Connect to a MongoDB or MySQL database
Perform CRUD operations
🔐 4. Authentication & Security
Create user registration/login
Use JWT tokens or session cookies
Protect routes and handle form validation
☁️ 5. Deployment
Push code to GitHub
Deploy front-end on Netlify or Vercel
Deploy back-end to Render, Railway, or Heroku
🛠 Popular Full Stack Tech Stacks
Stack NameFront-EndBack-EndDatabaseNotesMERNReactNode.js + ExpressMongoDBJavaScript full stackMEVNVue.jsNode.js + ExpressMongoDBVue-based stackLAMPPHPApache + MySQLMySQLTraditional PHP stackDjango StackHTML/CSS/JSDjango (Python)PostgreSQLPython-based full stackSpring BootHTML/JS or ReactSpring Boot (Java)MySQL/PostgreSQLJava-based stack
📦 Projects You Can Build (Ideas)
ProjectConcepts CoveredBlog AppCRUD, Auth, REST APIE-commerce SiteCart, payment, product DBPortfolio WebsiteStatic hosting, responsive designChat App (Socket.io)Real-time messaging, WebSocketsTask Manager (To-Do)CRUD, MongoDB, React frontendMovie Search AppExternal API integration, filtering
0 notes
Text
JSP Tutorial Guide: Everything You Need to Know About Java Server Pages

Java Server Pages (JSP) is a technology used to create dynamic web pages using Java. It helps developers build web applications that can display changing content based on user interaction. This JSP Tutorial is designed for beginners who want to learn how JSP works in a simple and clear way.
JSP is a part of Java EE (Enterprise Edition) and runs on the server side. It allows you to embed Java code into HTML pages. When a user requests a page, the server processes the Java code and sends back the result as a regular HTML page. This helps create interactive websites that can change according to the user’s input.
One of the biggest benefits of using JSP is that it separates the design part (HTML) from the business logic (Java), making it easier to manage large applications. It is widely used for making login pages, registration forms, and dashboards.
In this JSP Tutorial, you will learn about important topics like JSP lifecycle, directives, actions, and implicit objects. You will also understand how JSP works with servlets and how it helps in building Java-based web projects.
Even if you are new to Java, you can start learning JSP with basic knowledge of HTML and Java. With regular practice and a good learning source, JSP becomes easy to understand.
To explore detailed concepts with examples, visit the complete JSP Tutorial.
0 notes
Text
best WordPress course in Jalandhar
TechCADD presents the best WordPress course in Jalandhar, Punjab. Excel in website development and management with expert support for all skill levels!
https://techcadd.com/best-wordpress-course-in-jalandhar.php
A WordPress course offers a comprehensive pathway for individuals interested in creating, managing, and optimizing websites without needing deep coding knowledge. As the world’s most popular content management system (CMS), WordPress powers over 40% of all websites on the internet, making it an essential skill for web developers, bloggers, entrepreneurs, and digital marketers. A well-structured WordPress course introduces learners to the fundamentals of website creation, beginning with domain name registration, hosting selection, and WordPress installation—either manually or through a hosting provider’s one-click setup tools. From there, students explore the WordPress dashboard, learning how to navigate menus, customize themes, and install essential plugins to enhance site functionality. These courses typically cover both WordPress.com (hosted) and WordPress.org (self-hosted), explaining the pros and cons of each so learners can choose the best option for their goals.
As learners progress, they’re guided through designing pages and posts using the block-based Gutenberg editor or classic editor, with hands-on exercises on formatting content, embedding media, creating menus, and using widgets for added interactivity. Understanding how to structure a website for both user experience (UX) and search engine optimization (SEO) is a core focus, with tutorials on permalinks, categories, tags, and metadata. Many WordPress courses also introduce learners to theme customization, where they can explore both free and premium themes, and learn to adjust colors, fonts, layouts, and logos to match their branding or design goals. Some advanced courses even include lessons on using page builders like Elementor or Beaver Builder for drag-and-drop website creation, making the design process accessible to non-designers.
Beyond design, a strong WordPress course dives into functionality—teaching students how to install and configure plugins to expand their site’s features. This includes plugins for SEO (like Yoast or Rank Math), security (such as Wordfence), backups (like UpdraftPlus), contact forms, social sharing, eCommerce, and analytics. By using plugins effectively, learners can add professional-level features to their websites without writing a single line of code. Additionally, courses often touch on performance optimization, covering techniques like caching, image compression, and mobile responsiveness to ensure websites load quickly and perform well on all devices.
For those interested in online business, many WordPress courses offer dedicated modules on setting up eCommerce stores using WooCommerce, the platform’s most popular online store plugin. Learners get step-by-step guidance on how to list products, set prices, manage inventory, configure payment gateways, calculate taxes and shipping, and manage customer orders. They also explore marketing integrations, such as email list building, customer reviews, coupons, and abandoned cart recovery—all crucial for building a successful online business.
Another important aspect covered in WordPress courses is website security and maintenance. Students are taught best practices to protect their websites from malware, spam, and unauthorized access. Lessons typically include how to keep WordPress, themes, and plugins updated, use secure passwords, install SSL certificates, and schedule regular backups. Additionally, students learn about GDPR compliance and how to ensure their sites meet privacy regulations by incorporating cookie notices, privacy policies, and data handling practices.
Many modern WordPress courses also address basic HTML, CSS, and even introductory PHP for those who want to move beyond pre-built tools and gain more control over customization. This allows learners to make specific changes to theme files or child themes, troubleshoot errors, and create custom functionality. While not mandatory, this knowledge enhances the learner’s confidence and opens the door to freelance web development or offering client services.
The flexibility of WordPress means that learners can use their skills in a wide range of projects, from blogs and portfolios to business websites, nonprofit platforms, and educational sites. A good WordPress course encourages project-based learning, where students build real websites from scratch, apply new concepts, and receive feedback. These hands-on projects not only reinforce learning but also help students build a portfolio they can use to showcase their skills to potential clients or employers.
In addition to technical skills, many WordPress courses offer guidance on launching and maintaining a career or freelance business. This includes tips on pricing web design services, managing client relationships, creating contracts, and using platforms like Fiverr, Upwork, or personal websites to attract business. With WordPress development in high demand, completing a course can be the first step toward a rewarding and flexible career in tech or digital entrepreneurship.
WordPress courses are available in various formats—self-paced video tutorials, instructor-led classes, bootcamps, or even university-affiliated certifications. Platforms like Udemy, Coursera, LinkedIn Learning, Skillshare, and local training centers offer a wide selection of WordPress courses catering to beginners through to advanced users. Some courses include certification upon completion, which can be added to resumes or LinkedIn profiles to validate one's skills.
In conclusion, a WordPress course equips learners with the tools and knowledge needed to build professional, functional, and attractive websites—without requiring deep programming experience. It covers everything from setting up a basic blog to launching a full-fledged online store, all while emphasizing usability, performance, and scalability. Whether you're a student, entrepreneur, freelancer, or career changer, learning WordPress opens the door to countless opportunities in the digital space, offering a valuable and future-proof skillset in an increasingly online world.
#WordPress#WP#WordPressSite#WordPressBlog#WordPressDeveloper#WordPressDesign#WordPressThemes#WordPressPlugins
0 notes
Photo

Jun 28, 2025 11:43 AM IST CSIR NET 2025 software correction window will probably be open from June 28 to June 29, 2025, at csirnet.nta.ac.in. The direct hyperlink is given under. The National Testing Agency (NTA) will permit software correction for CSIR UGC NET 2025 from Saturday, June 28, 2025. Candidates who want to make corrections/modifications on their purposes for Council of Scientific and Industrial Research- University Grants Commission National Eligibility Test can achieve this on the official web site at csirnet.nta.ac.in CSIR NET 2025 software correction window will open as we speak at csirnet.nta.ac.in. Candidates can click on on the direct hyperlink given under to make edits/modifications. As per the revised schedule, candidates could make corrections until June 29, 2025, as much as 11:59 PM. The NTA stated that when correction window closes, no communication for additional corrections can be entertained. Also learn: CBSE asks college students to use for Central Sector Scholarship scheme, this is what you want to know The company had additionally acknowledged that info comparable to title, contact particulars / deal with, class, PwD standing, academic qualification particulars, date of delivery, selection of examination cities, and so forth. supplied by the candidate within the on-line Application Form will probably be handled as last, and any request for change in such particulars after the closure of correction interval won't be thought-about. Also learn: TS EAMCET Counselling 2025: Registration begins; direct hyperlink, vital dates, paperwork required Previously, the window to make software corrections was scheduled from June 25 to June 26, 2025. Direct hyperlink for CSIR UGC NET 2025 Application Correction Notably, CSIR NET 2025 is scheduled to be performed from July 26 to twenty-eight, 2025, in bilingual (English and Hindi) medium. The examination will probably be held in computer-based check (CBT) mode, and include three elements with objective-type, multiple-choice questions (MCQs). Also learn: RRB Technician registration for 6238 vacancies begins, hyperlink to use CSIR NET 2025: How to make corrections on purposesVisit the official web site at csirnet.nta.ac.in.On the house web page, click on on the login hyperlink for the CSIR UGC NET June examination 2025.Enter your credentials to log in, and submit. Go to your software, and make the corrections as required. Review fastidiously, and submit Download the affirmation web page, and hold a printout of the identical for future reference. For extra particulars, candidates are suggested to go to the official web site of CSIR UGC NET 2025. Get newest information on"RRB">https://www.hindustantimes.com/education/competitive-exams/rrb-ntpc-admit-card-news-2025-live-exam-city-slip-date-news-official-website-sarkari-result-future-com-101748750935102.html">RRB NTPC Admit Card together with Board Exam, Competitive Exam and Exam Result at Hindustan Times. Also get newest Job updates on Employment News, NEET UG Answer Key Get newest information on"RRB">https://www.hindustantimes.com/education/competitive-exams/rrb-ntpc-admit-card-news-2025-live-exam-city-slip-date-news-official-website-sarkari-result-future-com-101748750935102.html">RRB NTPC Admit Card together with Board Exam, Competitive Exam and Exam Result at Hindustan Times. Also get newest Job updates on Employment News, NEET UG Answer Key See Less Read More: https://news.unicaus.in/examinations/csir-net-2025-software-correction-window-opens-as-we-speak-at-csirnet-nta-ac-in-direct-hyperlink-to-make-edits/
0 notes
Text
How to Build a Website and Application from Scratch
In the modern digital landscape, a professionally crafted website or application is no longer a luxury—it’s a necessity for businesses, brands, and startups alike. Whether you're a solo entrepreneur or managing a growing company, understanding how to build a website and application from the ground up can empower you to bring your ideas to life and reach a wider audience.
Define Your Goals and Requirements
Before you start designing or coding anything, it's critical to clearly define your objectives:
What is the purpose of the website/app?
Who is your target audience?
What features are necessary?
Will it be a static website, dynamic platform, or full-stack web app?
Pro Tip: Create wireframes or sketches of the user interface (UI) to visualize your idea.
2) Choose the Right Tech Stack
Depending on your project, select the technologies that suit your needs. Some popular stacks include:
Frontend: HTML, CSS, JavaScript (React, Vue, Angular)
Backend: Node.js, Python (Django), PHP, Ruby on Rails
Database: MySQL, MongoDB, PostgreSQL
Mobile App: Flutter, React Native, Swift (iOS), Kotlin (Android)
Tip: For startups, using open-source tools or low-code platforms can reduce costs and time.
3) Register a Domain and Choose Hosting
Your domain name is your digital identity. Choose a name that reflects your brand, and register it through a reliable provider like GoDaddy, Namecheap, or Google Domains.
For hosting, consider:
Shared Hosting for small websites
Cloud Hosting (like AWS, Azure, DigitalOcean) for scalable applications
4) Design the User Interface (UI/UX)
An intuitive, mobile-responsive design increases user engagement and conversions. Tools like Figma, Adobe XD, or Sketch can help you prototype the layout before development.
5) Begin Development: Frontend and Backend
Start with building the frontend using frameworks like React or Vue.
Develop the backend API to handle business logic, databases, and server interactions.
Ensure proper data validation, security, and error handling.
6) Integrate Features & APIs
Add features like:
User registration/login
Contact forms
Payment gateways (Stripe, Razorpay, PayPal)
Third-party APIs (Maps, SMS, etc.)
7) Test Thoroughly Before Launch Conduct:
Unit Testing (for individual components)
Integration Testing (for connected modules)
User Acceptance Testing (UAT) to get feedback from real users
Tools: Jest, Selenium, Cypress, Postman
8) Launch and Monitor
Deploy your app/website using tools like:
CI/CD pipelines (GitHub Actions, Jenkins)
Monitoring tools (Google Analytics, Hotjar, Sentry)
Announce your launch across social media, email lists, and digital forums.
9) Market Your Product
Use SEO, content marketing, paid ads, and social media to promote your new platform. Don’t forget to collect user feedback and iterate.
Conclusion
Building a website or application Development from scratch may sound complex, but with the right plan, tools, and mindset, it becomes a structured process. Whether you choose to DIY or hire expert developers, understanding each phase helps ensure a smooth journey from idea to launch.
#Website development from scratch#App development guide#How to build a web application#Full stack development#Custom website development services#business solutions software#custom software development#development of software#full stack developer#ios app development services#it consulting#it services & consulting#mobile app development#software consulting#software development company
0 notes
Text
PHP is the hypertext preprocessor
PHP is the hypertext preprocessor Coding Bit . It is a server-side scripting language mainly designed for the web. The actual PHP code gets executed on the server and only the result (usually HTML) gets sent back to the client's browser. Originally created by Rasmus Larder in 1994, PHP has developed into a powerful full-fledged programming language. PHP is an interpreted language, so it executes code line by line during runtime. It is usually used along with HTML, CSS, Java script, and databases like MySQL to make dynamic websites and web apps.
🔹 Core Concepts
Server-side execution:
PHP runs on the server side, and only output in some form like HTML is sent to the browser.
The user never sees the PHP code.
Dynamically typed:
You don't declare the variable types PHP figures this out at runtime.
Loosely coupled with HTML:
PHP code can be embedded directly within the HTML using the following tag: <?php ... ?>.
🔹 Common Applications of PHP
Dynamic websites: Content is adjusted based on user input or database data.
Form handling: Login systems, user registration, contact forms, file downloads.
Database operations: Reading from and writing to databases such as MySQL using PDO or My SQLi.
Content Management Systems (CMS): WordPress, Joomla, and Drupal are all implemented in PHP.
API development: RESTful APIs built with either plain PHP or using various frameworks.

#HTML#Javascript#CSS#WebsiteBoundingClientRect#Cookies#InternetPrivacy#FrontEnd#BackEnd#Database#Server#Aesop'sFables#BooProgramming
0 notes
Text
Email Marketing: The Powerhouse of Digital Communication
In today's digital landscape, email marketing remains one of the most effective ways to connect with your audience. With an impressive ROI of $36 for every $1 spent (according to DMA), it's no wonder businesses continue to rely on email marketing to drive engagement and sales.
Why Email Marketing Works
Unlike social media algorithms that limit reach, email marketing puts you directly in your subscribers' inboxes. Key benefits include: ✔ High Conversion Rates – 59% of marketers say email drives more revenue than other channels ✔ Personalization at Scale – Segment audiences for tailored messaging ✔ Complete Ownership – You control your subscriber list (no platform risks)
Essential Email Marketing Strategies
1. Build a Quality List
Focus on permission-based opt-ins through:
Lead magnets (free guides, discounts)
Website signup forms
Event registrations
2. Craft Compelling Content
Effective emails include:
Clear subject lines (keep under 50 characters)
Mobile-friendly designs (over 60% opens happen on mobile)
Strong CTAs (one primary action per email)
3. Automate for Efficiency
Set up automated workflows for:
Welcome series (74% of consumers expect these)
Abandoned cart reminders
Re-engagement campaigns
4. Test and Optimize
Improve performance by A/B testing:
Send times (Tuesday/Thursday mornings often perform best)
Email formats (plain text vs. HTML)
CTA placement and wording
The Future of Email Marketing
Emerging trends include:
AI-powered personalization
Interactive email elements
AMP for emails (dynamic content)
Pro Tip: Always focus on providing value first – promotional content should never exceed 20-30% of your sends.
Final Thoughts
When executed strategically, email marketing delivers unmatched results for customer retention and revenue growth. Start small, track your metrics, and continually refine your approach.
1 note
·
View note
Text
What Is PHP

What Is PHP, and why is It Still Essential in Web Development
PHP (short for Hypertext Preprocessor) is one of the most widely used scripting languages for building websites and web applications. It’s open-source, free to use, and runs on the server, meaning it processes tasks before content reaches your browser. Whether you're logging in to a website, filling out a form, or browsing dynamic content, chances are PHP is working behind the scenes.
In this post, we’ll break down what PHP is, what it’s used for, and why it continues to be a key part of modern web development.
What Is PHP?
PHP is a server-side scripting language that runs on web servers like Apache or Nginx. It helps developers build dynamic websites, meaning the content can change based on user input or data from a database.
Instead of just showing static pages, PHP allows for things like:
Displaying personalized user dashboards
Submitting and processing forms
Handling logins and registrations
Connecting to databases and fetching content
Key Features of PHP:
Server-Side Execution: Code runs on the server and sends the result to the browser.
Database Friendly: Easily connects with databases like MySQL, PostgreSQL, or SQLite.
Form Handling: Collects and processes data from HTML forms.
Session Management: Tracks users across pages (great for logins and shopping carts).
Platform Independent: Works on Windows, macOS, Linux—pretty much anywhere.
Large Community & Resources: Tons of tutorials, tools, and frameworks like Laravel.
What Is PHP Used For?
PHP is used for building all kinds of websites—from small personal blogs to full-scale eCommerce platforms. Let’s look at the common ways developers use PHP:
1. Dynamic Website Content
PHP helps create websites that change depending on who is visiting or what they’re doing. Think of personalized greetings, product recommendations, or updating shopping cart totals without refreshing the page.
2. Working With Databases
Need to store user data, products, or blog posts? PHP connects smoothly with databases like MySQL to save and fetch information, making it easy to manage large websites.
3. Handling Forms
When users fill out a form—say, to sign up or contact you—PHP processes that data. It checks if everything’s filled out correctly and then stores or emails the info.
4. User Sessions
PHP helps websites remember who you are as you move between pages. This is essential for things like staying logged in or remembering items in your cart.
5. Security and Automation
PHP allows you to add basic security layers, like input validation, data encryption, and access control. It’s also used for sending emails, generating PDF invoices, or even auto-posting to social media.
Is PHP Frontend or Backend?
PHP is strictly a backend language. While it works alongside frontend tools like HTML, CSS, and JavaScript, PHP runs on the server. It handles all the logic behind the scenes—things like checking passwords, fetching data, or updating user info.
Why PHP Still Matters Today
Even with new languages and frameworks entering the scene, PHP remains highly relevant. It powers big names like Facebook (originally built on PHP), WordPress, and Wikipedia. Plus, frameworks like Laravel have modernized PHP, making development faster and cleaner.
In short, PHP is still a reliable, powerful choice—especially for developers building secure, data-driven websites.
Conclusion
PHP might not always be in the spotlight, but it's still the backbone of the web. It’s fast, flexible, and works well with almost anything. If you're planning to build a dynamic website or web application, learning PHP is a solid first step—and it’s not going anywhere anytime soon.
0 notes
Text
PHP Form Builder Nulled Script 6.0.4

Unlock Seamless Form Creation with PHP Form Builder Nulled Script Looking for a powerful yet easy-to-use solution to build web forms without writing endless lines of code? The PHP Form Builder Nulled Script is your go-to tool for creating professional-grade forms with speed and simplicity. Whether you’re a developer or a website owner, this tool is designed to make your life easier by simplifying the process of building responsive and dynamic forms for any purpose. What is PHP Form Builder Nulled Script? The PHP Form Builder Nulled Script is a robust, feature-rich script that allows you to generate custom web forms using PHP and Bootstrap frameworks. It eliminates the need for manual HTML coding, offering a drag-and-drop interface and an intuitive builder that streamlines form development. This nulled version gives you full access to all premium features for free, allowing you to experience its full potential without paying a dime. Technical Specifications Framework Compatibility: Bootstrap 3, 4, and 5 Language: PHP (compatible with PHP 7 and 8) Integration: MySQL, SMTP, Ajax, jQuery Validation: Built-in client and server-side validation Security: CSRF protection, XSS prevention, spam filters Outstanding Features and Benefits With the PHP Form Builder , you can create everything from simple contact forms to complex multi-step registration forms. Here are the top features that set it apart: Drag-and-Drop Builder: Build forms in minutes without writing a single line of HTML or CSS. Multi-Step Forms: Engage users with forms split into logical steps, increasing completion rates. Pre-Built Templates: Save time with dozens of ready-to-use templates tailored for different industries. Advanced Validation: Ensure data accuracy and prevent spam with real-time validations. AJAX Support: Seamless form submissions without page reloads enhance user experience. Email Integration: Configure SMTP to send form responses directly to your inbox. Why Choose PHP Form Builder Nulled Script? This nulled script delivers unmatched functionality and ease of use, empowering you to create forms that are not only functional but also visually appealing. Save time, reduce development costs, and improve user experience—all without compromising quality. Ideal Use Cases The PHP Form Builder Nulled Script is perfect for a wide range of applications: Contact forms for business websites Survey forms for market research Registration forms for events or memberships Quotation request forms for service providers Newsletter sign-ups with double opt-in support How to Install and Use Download: Get the nulled script from our website and extract the ZIP file. Upload: Upload the script files to your web server using FTP or cPanel. Configure: Edit the config.php file with your SMTP, database, and form settings. Build: Use the form builder interface to create your custom forms. Embed: Copy the generated form code and paste it into your website. That’s it—you’re ready to launch stunning forms with zero effort! Frequently Asked Questions Is this script safe to use? Yes, the PHP Form Builder Nulled Script comes with built-in security features such as CSRF tokens and spam protection mechanisms to keep your forms secure. Can I customize the form layout and design? Absolutely! The script offers full support for Bootstrap classes and custom CSS, allowing you to tailor the look and feel of your forms. Is there any limitation in the nulled version? No, this version gives you complete access to all premium features without restrictions. You get the same functionality as the original licensed version. Where can I find related tools? If you're looking for themes to match your newly built forms, check out the Porto NULLED theme—perfect for building fast, responsive websites. And for social media automation, don’t miss the powerful FS Poster NULLED Plugin, an ideal companion for scheduling and auto-sharing your content. Final Thoughts The PHP
Form Builder Nulled Script is a game-changer for anyone who needs to develop dynamic, responsive, and secure forms without the hassle of hand-coding. Whether you're managing a small business site or a large enterprise platform, this tool offers the flexibility and power you need—all available for free from our site. Download it today and start building smarter, faster, and better forms!
0 notes
Text
How to Build an Instagram Clone App and Website using PHP and MySQL

This comprehensive blog post serves as a step-by-step guide to building an Instagram-style social networking platform using PHP and MySQL. It emphasizes not just replicating Instagram’s core functionality but also understanding and customizing it for your unique project or brand vision. Aimed at developers eager to expand their full-stack skills, the tutorial walks through creating a complete backend system while allowing room for front-end creativity.
An Instagram clone, as defined in the blog, replicates basic features such as user registration, photo uploads, comments, likes, and feeds. While it doesn’t match the full scale of the original app, building a clone provides a strong foundation in web development and architecture. The main advantage lies in saving time and resources - developers don’t have to code core functionalities from scratch, which makes for a faster launch and more room for custom features.
The blog outlines 10 essential steps to building the app:
Development Environment – Set up using tools like XAMPP or WAMP.
Database Creation – Design scalable tables for users, posts, likes, and comments.
User Authentication – Build secure login and registration forms with password hashing.
User Profile System – Enable photo uploads, bio edits, and privacy controls.
Post & Feed System – Implement photo uploads and display them in a dynamic feed.
Interaction Features – Add comment and like capabilities.
Front-End Design – Use HTML, CSS, and JavaScript to build a responsive UI.
Search and Tagging – Add hashtag and user search functionality.
Testing & Debugging – Use PHP tools to fix bugs before launch.
Deployment – Host the app on a scalable live server.
For those wanting faster results, the blog also recommends using ready-made Instagram clone scripts, particularly highlighting SocialEngine and phpFox. SocialEngine stands out as a scalable, professional solution with rich customization options, mobile plugins, SEO optimization, and robust API support.
Key benefits of using SocialEngine include:
Insta Clone Theme for a sleek UI
Cross-platform mobile support with Android and iOS plugins
SEO-friendly architecture for better visibility
Developer-friendly modular framework
Built-in analytics to monitor engagement
Third-party API integrations for added functionality
In conclusion, whether building from scratch or using a script like SocialEngine, creating an Instagram clone is an excellent real-world project for mastering social app development. It equips developers with critical skills in both back-end infrastructure and front-end design. The guide encourages experimentation and growth, and it also recommends exploring additional tutorials like building LinkedIn or Twitter clones using similar technology stacks.
For more details, kindly visit:- How to Build an Instagram Clone App and Website using PHP and MySQL
Mail us at [email protected] to schedule a quote and become the owner of your Insta Clone app and website.
0 notes
Text
Top Use Cases for ContactFormToAPI: From Webhooks to CRMs
In today’s fast-paced digital world, building and managing websites often comes down to finding tools that save time, cut complexity, and work seamlessly with your existing stack. One area where this is especially true is handling form submissions on static sites or headless front-ends. Traditionally, developers relied on server-side scripts or form handlers like PHP, but now there's a better way.
ContactFormToAPI is a modern, no-backend form submission tool that connects your HTML contact forms to any REST API—instantly. Whether you’re a developer, marketer, freelancer, or solopreneur, ContactFormToAPI gives you the freedom to send data anywhere you need it with minimal setup.
In this blog post, we’ll explore the top use cases for ContactFormToAPI, from integrating with CRMs and automating marketing workflows to triggering webhooks and sending Slack notifications. Let’s dive in.
1. Send Form Data to a CRM (Customer Relationship Management)
One of the most popular use cases for ContactFormToAPI is sending contact form submissions directly to a CRM system like HubSpot, Salesforce, or Zoho.
Why It Matters:
CRMs are essential for tracking leads, automating sales outreach, and managing customer relationships. With ContactFormToAPI, you can skip the backend development and send form data directly to your CRM’s API.
Example Use Case:
A real estate agent adds a “Schedule a Viewing” form on their static website.
Submissions are sent to HubSpot via ContactFormToAPI.
The lead is automatically created and added to a workflow.
Benefits:
Seamless lead tracking
Instant data sync
No server-side code or middleware
2. Trigger Webhooks for Real-Time Automation
Another powerful feature of ContactFormToAPI is its ability to send data to webhooks, which can then trigger downstream actions using tools like Zapier, Integromat (Make), or n8n.
Why It Matters:
Webhooks make automation fast and real-time. By sending form submissions to a webhook URL, you can kick off virtually any process—notifications, database updates, report generation, etc.
Example Use Case:
A user fills out a feedback form.
ContactFormToAPI sends the data to a Zapier webhook.
Zapier sends an email to the product team and stores the feedback in Google Sheets.
Benefits:
Automate repetitive tasks
Improve response time
Integrate with hundreds of apps
3. Collect Leads in Google Sheets
Many small businesses and solopreneurs still rely on Google Sheets for managing lead data. ContactFormToAPI makes it incredibly simple to populate spreadsheets with contact form submissions.
Why It Matters:
Not everyone needs a full CRM. Google Sheets offers a familiar, flexible, and shareable interface for tracking contacts, feedback, or sales inquiries.
Example Use Case:
A freelancer sets up a project inquiry form on their portfolio site.
Submissions are routed to a Google Apps Script webhook.
Each entry populates a row in their lead tracking sheet.
Benefits:
Cost-effective lead management
Easy to share and analyze
No need for additional software
4. Send Notifications via Slack or Discord
Need real-time alerts when someone submits a form? ContactFormToAPI can send data directly to Slack or Discord via incoming webhooks.
Why It Matters:
Keeping your team in the loop is easier when form responses appear where you already collaborate. This is ideal for support forms, team registrations, or bug reports.
Example Use Case:
A SaaS startup uses ContactFormToAPI to handle bug reports.
When a user submits a report, the data is sent to a Slack channel.
The product team sees it instantly and can follow up quickly.
Benefits:
Real-time alerts
Team collaboration
Fast customer support
5. Integrate with Email Marketing Tools
Want to grow your email list? You can connect forms to email marketing platforms like Mailchimp, ConvertKit, or ActiveCampaign using their APIs or webhooks.
Why It Matters:
Automated email list building ensures your marketing funnel stays active. ContactFormToAPI lets you push sign-ups directly from your site into your email tool—no backend required.
Example Use Case:
A blog has a newsletter subscription form.
ContactFormToAPI sends the email address to Mailchimp’s API.
The subscriber is added to a welcome campaign automatically.
Benefits:
Build your email list fast
Enable instant follow-ups
No integration headaches
6. Support Static Site Generators (SSGs) like Jekyll, Hugo, and Eleventy
Static site generators are popular for their speed and security, but they lack backend capabilities. That’s where ContactFormToAPI shines.
Why It Matters:
ContactFormToAPI turns any static form into a dynamic one—without breaking your architecture.
Example Use Case:
A developer builds a portfolio with Hugo.
They use ContactFormToAPI to handle form submissions without server-side logic.
Data is sent directly to a webhook or API.
Benefits:
Works with any static site
No need for backend hosting
Keeps your workflow JAMstack-friendly
7. Connect to Airtable for Visual Data Management
Airtable blends the familiarity of spreadsheets with database-like functionality. ContactFormToAPI can send form data directly into Airtable bases.
Why It Matters:
This is perfect for managing job applications, registrations, or project pipelines in a visually organized way.
Example Use Case:
A nonprofit collects volunteer sign-ups via a form.
ContactFormToAPI sends the data to Airtable’s API.
Volunteers appear as new entries in a kanban board.
Benefits:
Visual organization of form data
Easy collaboration
Lightweight CRM alternative
8. Trigger Backendless Workflows with Firebase or Supabase
If you're using tools like Firebase or Supabase for your backend, ContactFormToAPI can push data directly into their endpoints or cloud functions.
Why It Matters:
You can maintain a serverless architecture while still handling complex workflows.
Example Use Case:
A startup uses Supabase for user data.
ContactFormToAPI sends contact form data to a Supabase REST API.
A row is added to the database, and a confirmation email is sent.
Benefits:
Backend power, frontend simplicity
Supports real-time workflows
Scales easily with your project
9. Create Instant Support Tickets in Help Desk Tools
Connect ContactFormToAPI to platforms like Zendesk, Freshdesk, or Help Scout to generate support tickets automatically.
Why It Matters:
This streamlines customer support workflows and reduces response time.
Example Use Case:
A customer fills out a “Report an Issue” form.
ContactFormToAPI sends the data to Zendesk’s API.
A support ticket is created with the customer’s details.
Benefits:
Automate support intake
Improve team efficiency
Centralize issue tracking
10. Send Conditional Logic-Based Submissions
Though ContactFormToAPI itself is backendless, you can use it with frontend logic or no-code tools to route form data conditionally.
Why It Matters:
You may want different form submissions to go to different APIs based on form values.
Example Use Case:
A form asks users to choose a department (Sales, Support, Billing).
Based on the selection, the form routes the data to different webhook URLs using JS + ContactFormToAPI.
Each department gets only the relevant data.
Benefits:
Smarter form routing
Reduce manual sorting
Works with minimal code
Final Thoughts
ContactFormToAPI is more than just a form handler—it’s a powerful bridge between your website and the tools that power your workflows. Whether you're sending data to a CRM, triggering automation, or logging submissions in a spreadsheet, it offers a fast, secure, and code-light solution for modern developers.
If you're building static sites, headless frontends, or simply want to eliminate backend overhead, ContactFormToAPI is the tool you’ve been waiting for.
Ready to integrate your first form? Visit ContactFormToAPI.com and start connecting your HTML forms to the tools you already use—no backend required.
0 notes
Text
Html New Account Registration Form
•Work out Problem and solve with html coding:- Name:________________ Address:_______________ Phone No:______________ E.Mail:________________ Password:______________ Gender: •Male •Female Operator Names Retailer Corporate Partner Distributor Submit Δ Name(required) Email(required) Website Message Δ Html codes to solve the above Registration Form:-
0 notes
Text
The Lost CSS Tricks of Cohost.org
New Post has been published on https://thedigitalinsider.com/the-lost-css-tricks-of-cohost-org/
The Lost CSS Tricks of Cohost.org
You would be forgiven if you’ve never heard of Cohost.org. The bespoke, Tumblr-like social media website came and went in a flash. Going public in June 2022 with invite-only registrations, Cohost’s peach and maroon landing page promised that it would be “posting, but better.” Just over two years later, in September 2024, the site announced its shutdown, its creators citing burnout and funding problems. Today, its servers are gone for good. Any link to cohost.org redirects to the Wayback Machine’s slow but comprehensive archive.
The landing page for Cohost.org, featuring our beloved eggbug.
Despite its short lifetime, I am confident in saying that Cohost delivered on its promise. This is in no small part due to its user base, consisting mostly of niche internet creatives and their friends — many of whom already considered “posting” to be an art form. These users were attracted to Cohost’s opinionated, anti-capitalist design that set it apart from the mainstream alternatives. The site was free of advertisements and follower counts, all feeds were purely chronological, and the posting interface even supported a subset of HTML.
It was this latter feature that conjured a community of its own. For security reasons, any post using HTML was passed through a sanitizer to remove any malicious or malformed elements. But unlike most websites, Cohost’s sanitizer was remarkably permissive. The vast majority of tags and attributes were allowed — most notably inline CSS styles on arbitrary elements.
Users didn’t take long to grasp the creative opportunities lurking within Cohost’s unassuming “new post” modal. Within 48 hours of going public, the fledgling community had figured out how to post poetry using the <details> tag, port the Apple homepage from 1999, and reimplement a quick-time WarioWare game. We called posts like these “CSS Crimes,” and the people who made them “CSS Criminals.” Without even intending to, the developers of Cohost had created an environment for a CSS community to thrive.
In this post, I’ll show you a few of the hacks we found while trying to push the limits of Cohost’s HTML support. Use these if you dare, lest you too get labelled a CSS criminal.
Width-hacking
Many of the CSS crimes of Cohost were powered by a technique that user @corncycle dubbed “width-hacking.” Using a combination of the <details> element and the CSS calc() function, we can get some pretty wild functionality: combination locks, tile matching games, Zelda-style top-down movement, the list goes on.
If you’ve been around the CSS world for a while, there’s a good chance you’ve been exposed to the old checkbox hack. By combining a checkbox, a label, and creative use of CSS selectors, you can use the toggle functionality of the checkbox to implement all sorts of things. Tabbed areas, push toggles, dropdown menus, etc.
However, because this hack requires CSS selectors, that meant we couldn’t use it on Cohost — remember, we only had inline styles. Instead, we used the relatively new elements <details> and <summary>. These elements provide the same visibility-toggling logic, but now directly in HTML. No weird CSS needed.
These elements work like so: All children of the <details> element are hidden by default, except for the <summary> element. When the summary is clicked, it “opens” the parent details element, causing its children to become visible.
We can add all sorts of styles to these elements to make this example more interesting. Below, I have styled the constituent elements to create the effect of a button that lights up when you click on it.
This is achieved by giving the <summary> element a fixed position and size, a grey background color, and an outset border to make it look like a button. When it’s clicked, a sibling <div> is revealed that covers the <summary> with its own red background and border. Normally, this <div> would block further click events, but I’ve given it the declaration pointer-events: none. Now all clicks pass right on through to the <summary> element underneath, allowing you to turn the button back off.
This is all pretty nifty, but it’s ultimately the same logic as before: something is toggled either on or off. These are only two states. If we want to make games and other gizmos, we might want to represent hundreds to thousands of states.
Width-hacking gives us exactly that. Consider the following example:
In this example, three <details> elements live together in an inline-flex container. Because all the <summary> elements are absolutely-positioned, the width of their respective <details> elements are all zero when they’re closed.
Now, each of these three <details> has a small <div> inside. The first has a child with a width of 1px, the second a child with a width of 2px, and the third a width of 4px. When a <details> element is opened, it reveals its hidden <div>, causing its own width to increase. This increases the width of the inline-flex container. Because the width of the container is the sum of its children, this means its width directly corresponds to the specific <details> elements that are open.
For example, if just the first and third <details> are open, the inline-flex container will have the width 1px + 4px = 5px. Conversely, if the inline-flex container is 2px wide, we can infer that the only open <details> element is the second one. With this trick, we’ve managed to encode all eight states of the three <details> into the width of the container element.
This is pretty cool. Maybe we could use this as an element of some kind of puzzle game? We could show a secret message if the right combination of buttons is checked. But how do we do that? How do we only show the secret message for a specific width of that container div?
In the preceding CodePen, I’ve added a secret message as two nested divs. Currently, this message is always visible — complete with a TODO reminding us to implement the logic to hide it unless the correct combination is set.
You may wonder why we’re using two nested divs for such a simple message. This is because we’ll be hiding the message using a peculiar method: We will make the width of the parent div.secret be zero. Because the overflow: hidden property is used, the child div.message will be clipped, and thus invisible.
Now we’re ready to implement our secret message logic. Thanks to the fact that percentage sizes are relative to the parent, we can use 100% as a stand-in for the parent’s width. We can then construct a complicated CSS calc() formula that is 350px if the container div is our target size, and 0px otherwise. With that, our secret message will be visible only when the center button is active and the others are inactive. Give it a try!
This complicated calc() function that’s controlling the secret div’s width has the following graph:
You can see that it’s a piecewise linear curve, constructed from multiple pieces using min/max. These pieces are placed in just the right spots so that the function maxes out when the container div is 2px— which we’ve established is precisely when only the second button is active.
A surprising variety of games can be implemented using variations on this technique. Here is a tower of Hanoi game I had made that uses both width and height to track the game’s state.
SVG animation
So far, we’ve seen some basic functionality for implementing a game. But what if we want our games to look good? What if we want to add ✨animations?✨ Believe it or not, this is actually possible entirely within inline CSS using the power of SVG.
SVG (Scalable Vector Graphics) is an XML-based image format for storing vector images. It enjoys broad support on the web — you can use it in <img> elements or as the URL of a background-image property, among other things.
Like HTML, an SVG file is a collection of elements. For SVG, these elements are things like <rect>, <circle>, and <text>, to name a few. These elements can have all sorts of properties defined, such as fill color, stroke width, and font family.
A lesser-known feature of SVG is that it can contain <style> blocks for configuring the properties of these elements. In the example below, an SVG is used as the background for a div. Inside that SVG is a <style> block that sets the fillcolor of its <circle> to red.
An even lesser-known feature of SVG is that its styles can use media queries. The size used by those queries is the size of the div it is a background of.
In the following example, we have a resizable <div> with an SVG background. Inside this SVG is a media query which will change the fill color of its <circle> to blue when the width exceeds 100px. Grab the resize handle in its bottom right corner and drag until the circle turns blue.
Because resize handles don’t quite work on mobile, unfortunately, this and the next couple of CodePens are best experienced on desktop.
This is an extremely powerful technique. By mixing it with width-hacking, we could encode the state of a game or gizmo in the width of an SVG background image. This SVG can then show or hide specific elements depending on the corresponding game state via media queries.
But I promised you animations. So, how is that done? Turns out you can use CSS animations within SVGs. By using the CSS transition property, we can make the color of our circle smoothly transition from red to blue.
Amazing! But before you try this yourself, be sure to look at the source code carefully. You’ll notice that I’ve had to add a 1×1px, off-screen element with the ID #hack. This element has a very simple (and nearly unnoticeable) continuous animation applied. A “dummy animation” like this is necessary to get around some web browsers’ buggy detection of SVG animation. Without that hack, our transition property wouldn’t work consistently.
For the fun of it, let’s combine this tech with our previous secret message example. Instead of toggling the secret message’s width between the values of 0px and 350px, I’ve adjusted the calc formula so that the secret message div is normally 350px, and becomes 351px if the right combination is set.
Instead of HTML/CSS, the secret message is now just an SVG background with a <text> element that says “secret message.” Using media queries, we change the transform scale of this <text> to be zero unless the div is 351px. With the transition property applied, we get a smooth transition between these two states.
Click the center button to activate the secret message:
The first cohost user to discover the use of media queries within SVG backgrounds was @ticky for this post. I don’t recall who figured out they could animate, but I used the tech quite extensively for this quiz that tells you what kind of soil you’d like if you were a worm.
Wrapping up
And that’s will be all for now. There are a number of techniques I haven’t touched on — namely the fun antics one can get up to with the resize property. If you’d like to explore the world of CSS crimes further, I’d recommend this great linkdump by YellowAfterlife, or this video retrospective by rebane2001.
It will always hurt to describe Cohost in the past tense. It truly was a magical place, and I don’t think I’ll be able to properly convey what it was like to be there at its peak. The best I can do is share the hacks we came up with: the lost CSS tricks we invented while “posting, but better.”
#2022#2024#ADD#advertisements#amazing#animation#animations#apple#Art#Articles#attributes#background#background-image#Blue#border#burnout#buttons#change#checkbox hack#Children#code#Color#Community#comprehensive#container#continuous#creators#CSS#css animations#css-tricks
0 notes
Text
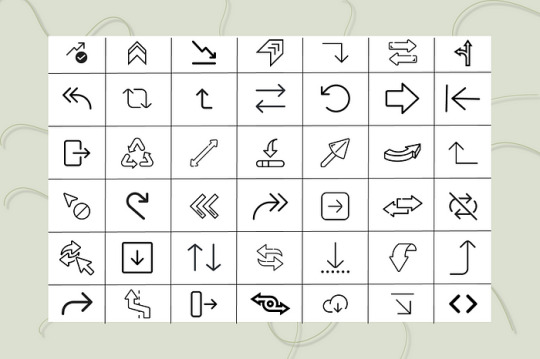
🚀 Arrow Interface Icon Pack — Elevate Your UI with Free Icons from Iconadda
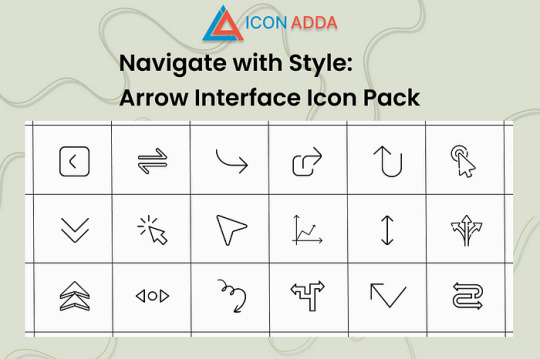
Make it easier to navigate. Enhance the experience. Make wisely. We understand in Iconadda how little pieces like icons could make a great difference to the user experience. We are glad to introduce the pilgrimage section package with pilikon intended for contemporary digital interfaces, a free, condition -art and user -friendly collection.
Regardless of whether you are a front-end developer, Ui/UX designer or creative agency, these icons are suitable for the purpose of the project and clarity enhancement.
🎯Arrow Interface Icon Pack: What’s included? This free icon set contains numerous various poil designs that suit any application: 🔙 Backward and front arrows 🔼 Arrow to scroll up and down 🔄 Update and load again 🧭 icon for direction navigation ➡ Bold, outline and minimum styles 🔲 Extension, collapse and minimize the icon
This icon pack is perfect for web and mobile applications since both are pixel perfate and fully scalable.
✨ Key advantages of arrow interface ✅ No cost to use: It does not have any charges or license issues while downloading and utilizing it. ✅ Supports Adobe XD, Photoshop, Illustrator, Figma and Sketch among other big design tools. ✅ SVG, PNG, ICO and PDF are some of the numerous available file forms. ✅ Shift: You are able to easily alter the width, color and form of the stroke. ✅ Web ready: Optimize the performance by reducing the file size. ✅ Regular updates — all packages at Iconadda are kept up to date and enhanced on an ongoing basis.
Response to common questions Is it gratis using these pil icons for business? Actual! Only free icons are included in Arrow interconnection packages that can be used for personal or business use. Though appreciated, it is not required.
Can I resize and colorize? Yes! Since the package is SVG based, you may adjust stroke, color and shape in your editor or code.
What do I need to register for iconadda download? No registration is required. Simply visit iconadda.com , Finn Arrow Interface Icon Packs and click the download.
Can I use this package with my design tool? Yes! These icons can also be used directly in HTML/CSS or React components -i Figma, Adobe XD, illustrator and Sketch.
📥How to download the Arrow Squeeze Package Visit iconadda.com . Visit the section with a free icon package. Arrow connection packages, search or scroll and find. Tap “Download” and head over to work design!
🧲More iconadda freebies Don’t just stay with the arrow! Dozens of and icon packs including animated icons, filled and outline sets, e-commerce icons and social network icons are available gratis.
Be creative. Propose. Your design arsenal is always stocked when working with Iconadda .
Final comments Pure and simple design bloated user is more important in a world filled with interface and dull loading sites than ever. You only get free pil icons when using Iconadda’s Arrow Interface Icon Pack; You also get design power on your fingers.
👉 Get it now to search for a more elegant, smart and intelligent way to guide.
#ArrowIcons#InterfaceIcons#UIIcons#ArrowPack#NavigationIcons#ArrowDesign#MinimalIcons#WebIcons#LineIcons#FlatIcons#UserInterfaceAssets#DirectionIcons#UXDesignAssets#IconSet#ArrowVectorPack
0 notes