#i'll add an explanation for a couple base commands to this later
Explore tagged Tumblr posts
Visit Tumblr Blog
Explore Tumblr blogs with no restrictions, modern design and the best experience.
Last Seen Tumblr Blogs


Fun Fact
The total number of visits Tumblr.com received during January 2021 is 327 million.
Text
i'd also like to recommend Bread On Penguins's channel for when you've gotten the hang of your new distro a little and want to get into the nitty gritty of linux in general.
also, this post has started to attract a "(distro that ISN'T kde based) SUPREMACY!!!"-crowd (i'm only surprised it took this long) and i again wanna say that it all boils down to user preference. this post is geared towards freshly migrating linux beginners and so is kubuntu. don't come yapping to me about performance in the comments. whatever you want to say: i am aware, bro, trust me. this post isn't for you and you're being annoying. learn how to read. try it some time. i hear it's good for your soul.
in wake of yet another wave of people being turned off by windows, here's a guide on how to dual boot windows and 🐧 linux 🐧 (useful for when you're not sure if you wanna make the switch and just wanna experiment with the OS for a bit!)
if you look up followup guides online you're gonna see that people are telling you to use ubuntu but i am gonna show you how to do this using kubuntu instead because fuck GNOME. all my homies hate GNOME.
i'm just kidding, use whatever distro you like. my favorite's kubuntu (for a beginner home environment). read up on the others if you're curious. and don't let some rando on reddit tell you that you need pop! OS for gaming. gaming on linux is possible without it.
why kubuntu?
- it's very user friendly
- it comes with applications people might already be familiar with (VLC player and firefox for example)
- libreoffice already preinstalled
- no GNOME (sorry GNOME enthusiasts, let me old man yell at the clouds) (also i'm playing this up for the laughs. wholesome kde/gnome meme at the bottom of this post.)
for people who are interested in this beyond my tl;dr: read this
(if you're a linux user, don't expect any tech wizardry here. i know there's a billion other and arguably better ways to do x y and/or z. what i'm trying to do here is to keep these instructions previous windows user friendly. point and click. no CLI bro, it'll scare the less tech savvy hoes. no vim supremacy talk (although hell yeah vim supremacy). if they like the OS they'll figure out bash all by themselves in no time.)
first of all, there'll be a GUI. you don't need to type lines of code to get this all running. we're not going for the ✨hackerman aesthetics✨ today. grab a mouse and a keyboard and you're good to go.
what you need is a computer/laptop/etc with enough disk space to install both windows and linux on it. i'm recommending to reserve at least a 100gb for the both of them. in the process of this you'll learn how to re-allocate disk space either way and you'll learn how to give and take some, we'll do a bit of disk partitioning to fit them both on a single disk.
and that's enough babbling for now, let's get to the actual tutorial:
🚨IMPORTANT. DO NOT ATTEMPT THIS ON A 32BIT SYSTEM. ONLY DO THIS IF YOU'RE WORKING WITH A 64BIT SYSTEM. 🚨 (win10 and win11: settings -> system -> about -> device specifications -> system type ) it should say 64bit operating system, x64-based processor.
step 1: install windows on your computer FIRST. my favorite way of doing this is by creating an installation media with rufus. you can either grab and prepare two usb sticks for each OS, or you can prepare them one after the other. (pro tip: get two usb sticks, that way you can label them and store them away in case you need to reinstall windows/linux or want to install it somewhere else)
in order to do this, you need to download three things:
rufus
win10 (listen. i know switching to win11 is difficult. not much of a fan of it either. but support's gonna end for good. you will run into hiccups. it'll be frustrating for everyone involved. hate to say it, but in this case i'd opt for installing its dreadful successor over there ->) or win11
kubuntu (the download at the top is always the latest, most up-to-date one)
when grabbing your windows installation of choice pick this option here, not the media creation tool option at the top of the page:

side note: there's also very legit key sellers out there who can hook you up with cheap keys. you're allowed to do that if you use those keys privately. don't do this in an enterprise environment though. and don't waste money on it if your ultimate goal is to switch to linux entirely at one point.
from here it's very easy sailing. plug your usb drive into your computer and fire up rufus (just double click it).

🚨two very important things though!!!!!!:🚨
triple check your usb device. whatever one you selected will get wiped entirely in order to make space for your installation media. if you want to be on the safe side only plug in the ONE usb stick you want to use. and back up any music, pictures or whatever else you had on there before or it'll be gone forever.
you can only install ONE OS on ONE usb drive. so you need to do this twice, once with your kubuntu iso and once with your windows iso, on a different drive each.
done. now you can dispense windows and linux left and right, whenever and wherever you feel like it. you could, for example, start with your designated dual boot device. installing windows is now as simple as plugging the usb device into your computer and booting it up. from there, click your way through the installation process and come back to this tutorial when you're ready.
step 2: preparing the disks for a dual boot setup
on your fresh install, find your disk partitions. in your search bar enter either "diskmgr" and hit enter or just type "partitions". the former opens your disk manager right away, the latter serves you up with this "create and format hard disk partitions" search result and that's what you're gonna be clicking.

you'll end up on a screen that looks more or less like in the screenshot below. depending on how many disks you've installed this might look different, but the basic gist is the same. we're going to snip a little bit off Disk 0 and make space for kubuntu on it. my screenshot isn't the best example because i'm using the whole disk and in order to practice what i preach i'd have to go against my own advice. that piece of advice is: if this screen intimidates you and you're not sure what you're doing here, hands off your (C:) drive, EFI system, and recovery partition. however, if you're feeling particularly fearless, go check out the amount of "free space" to the right. is there more than 30gb left available? if so, you're free to right click your (C:) drive and click "shrink volume"

this screen will pop up:

the minimum disk space required for kubuntu is 25gb. the recommended one is 50gb. for an installation like this, about 30gb are enough. in order to do that, simply change the value at
Enter the amount of space to shrink in MB: to 30000
and hit Shrink.
once that's done your partitions will have changed and unallocated space at about the size of 30gb should be visible under Disk 0 at the bottom like in the bottom left of this screenshot (courtesy of microsoft.com):

this is gonna be kubuntu's new home on your disk.
step 3: boot order, BIOS/UEFI changes
all you need to do now is plug the kubuntu-usb drive you prepared earlier with rufus into your computer again and reboot that bad boy.
the next step has no screenshots. we're heading into your UEFI/BIOS (by hitting a specific key (like ESC, F10, Enter) while your computer boots up) and that'll look different for everyone reading this. if this section has you completely lost, google how to do these steps for your machine.
a good search term would be: "[YOUR DEVICE (i.e Lenovo, your mainboard's name, etc.)] change boot order"
what you need to do is to tell your computer to boot your USB before it tries to boot up windows. otherwise you won't be able to install kubuntu.
this can be done by entering your BIOS/UEFI and navigating to a point called something along the lines of "boot". from "boot order" to "booting devices" to "startup configuration", it could be called anything.
what'll be a common point though is that it'll list all your bootable devices. the topmost one is usually the one that boots up first, so if your usb is anywhere below that, make sure to drag and drop or otherwise move it to the top.
when you're done navigate to Save & Exit. your computer will then boot up kubuntu's install wizard. you'll be greeted with this:

shocker, i know, but click "Install Kubuntu" on the right.
step 4: kubuntu installation
this is a guided installation. just like when you're installing windows you'll be prompted when you need to make changes. if i remember correctly it's going to ask you for your preferred keyboard layout, a network connection, additional software you might want to install, and all of that is up to you.
but once you reach the point where it asks you where you want to install kubuntu we'll have to make a couple of important choices.

🚨 another important note 🚨
do NOT pick any of the top three options. they will overwrite your already existing windows installation.
click manual instead. we're going to point it to our unallocated disk space. hit continue. you will be shown another disk partition screen.
what you're looking for are your 30gb of free space. just like with the USB drive when we were working with rufus, make sure you're picking the right one. triple check at the very least. the chosen disk will get wiped.

click it until the screen "create a new partition" pops up.
change the following settings to:
New partition size in megabytes: 512
Use as: EFI System Partition
hit OK.
click your free space again. same procedure.
change the following settings to:
New partition size in megabytes: 8000 (*this might be different in your case, read on.)
Use As: Swap Area
hit OK
click your free space a third time. we need one more partition.
change the following settings to:
don't change anything about the partition size this time. we're letting it use up the rest of the resources.
Use as: Ext4 journaling system
Mount Point: /
you're done here as well.
*about the 8000 megabytes in the second step: this is about your RAM size. if you have 4gb instead type 4000, and so on.
once you're sure your configuration is good and ready to go, hit "Install Now". up until here you can go back and make changes to your settings. once you've clicked the button, there's no going back.
finally, select your timezone and create a user account. then hit continue. the installation should finish up... and you'll be good to go.
you'll be told to remove the USB drive from your computer and reboot your machine.
now when your computer boots up, you should end up on a black screen with a little bit of text in the top left corner. ubuntu and windows boot manager should be mentioned there. naturally, when you click ubuntu you will boot into your kubuntu. likewise if you hit windows boot manager your windows login screen will come up.
and that's that folks. go ham on messing around with your linux distro. customize it to your liking. make yourself familiar with the shell (on kubuntu, when you're on your desktop, hit CTRL+ALT+T).
for starters, you could feed it the first commands i always punch into fresh Linux installs:
sudo apt-get update
sudo apt-get upgrade
sudo apt-get install vim
(you'll thank me for the vim one later)
turn your back on windows. taste freedom. nothing sexier than open source, baby.
sources (mainly for the pictures): 1, 2
further reading for the curious: 1, 2
linux basics (includes CLI commands)
kubuntu documentation (this is your new best friend. it'll tell you everything about kubuntu that you need to know.
and finally the promised kde/gnome meme:

#linuxposting#i'll add an explanation for a couple base commands to this later#i think i focused on this being a lot like windows too much#in case someone's interested in poking around linux the way most linux users do i suppose they should be mentioned on here as well#ngl there's a thousand docs on the net tho#or if you've installed linux already you can check out the man pages
122 notes
·
View notes
Text
Things from Archie Sonic that I would love to see return in the Mainline Games and/or IDW Sonic!!

Recently, I decided to read some of the Archie Sonic Comic, from like issue 186ish up until the first MegaMan crossover and the reboot, mainly because there were some gaps in my knowledge of those stories. Mainly Issues 198 till 235, which I never got to read as a kid and, I have to say, there were a lot of really interesting concepts during Ian's run of comics before the reboot that I really loved. There was a lot of really interesting concepts I love after the reboot too. I wanna celebrate that. A lot of these concepts and story idea I feel really deserve another chance.
So I wanna make this list of stuff I wanna see return in either for stories in the Mainline Games or the IDW Sonic comics. Before we start, I do wanna add somethings. This post isn't meant to be shitting on IDW and being like "IDW would be better if they did this". I really love the IDW comics and universe. I also know that some of these concepts likely can't be done due SEGA Mandates and I'm not gonna include stuff like "Bring back the Freedom Fighters" because I feel asking to bring back characters isn't gonna be very productive, as much as I would like to see their return. Anyways, let's begin.
The Fate of the ARK
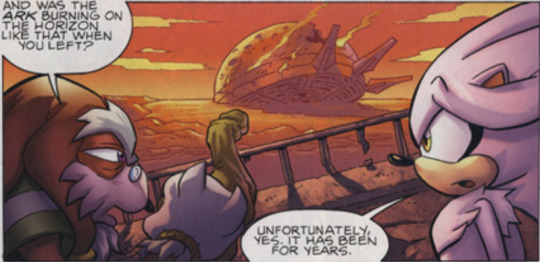
One thing that really inspired this list was this scene right her. We'll talk more about Silver's Future later but for now, let's focus on the ARK. I'm gonna assume anyone reading this knows the story of the ARK from SA2 and Shadow. Sadly, the ARK hasn't really been revisited in the main canon since Shadow, despite how iconic of a set piece it is. In the Archie Comics, we get a look at Silver's future and one of things that may have been the cause of how bad things are is the ARK crashed. Sadly, Archie got rebooted before the writers could go more into it but, from SA2, we know that the ARK was set to crash into the planet if all 7 Chaos Emeralds are placed into it, wiping out all life on the planet. This could be an excellent premise of another Silver adventure, whether it be in the comics or games, where Sonic, Silver and some friends have to stop someone from making the ARK crash into the planet.
Expanding the Eggman Empire/Egg Bosses

Something I've always found a bit lacking in the game canon is how the Eggman Empire itself has been presented. In the games, the Eggman Empire is usually just made up of Eggman, Metal Sonic, Orbot, Cubot, a bunch of robots and (recently) Infinite. It's not really an Empire if it's just one guy and a bunch of robots. The main goal is the conquer the world but we hardly see Eggman actually see what happens when Eggman conquers a place, like what happens to the people who used to live there, besides like Colours and Forces, where the Wisps and Mobians are usually just seen being imprisoned. The Egg Bosses are the perfect solution to this and adds so much to Sonic's World.
The Egg Bosses are Mobians who, either willingly or unwillingly, aligned themselves up with Eggman for whatever reason, becoming commanders of the Eggman Empire. This usually comes about when Eggman has taken over a part of the region and the people living in that region have no choice but to join the Eggman Empire, for their own safety. Not only does this make the Eggman Empire feel more than just one person but it also makes Eggman more a villain himself. It able to portray Eggman as someone to be feared and, I mean, this is a dictator and genocider who is pretty much declaring war against the world.
It also brings up some interesting thoughts about the world. Characters like Maw, Thunderbolt and even Nephthys to a degree joined up with Eggman because they felt it was the right thing to do for the sake of the world, or in Nephthys case, to stop things getting worst later on, meanwhile characters like Grand Battle Kukku are plotting to usurp Eggman, with Clove and Beauregard only working for Eggman to protect family or close ones.
As I said before, having these Egg Bosses also makes Eggman look more threaten, both because he's able to look like a "bigger bad" next to these villains he has command of and, because almost all the Egg Bosses hate Eggman's guts, they are cyberized, a terrifying process in which those who work for Eggman are focus to have parts of their body replaced with cybernetics, with either bombs which will blow if they decide to leave or a locking mechanism that will paralyze their entire body, ready to be locked up.
If either in the game or the IDW comic, I would like to see the Egg Boss concept return. It doesn't even need to be the same characters or use the name "Egg Boss." It would help expand the army of the Eggman Empire, as well as provide some fun bosses for the games I think.
Mobians and Humans living together
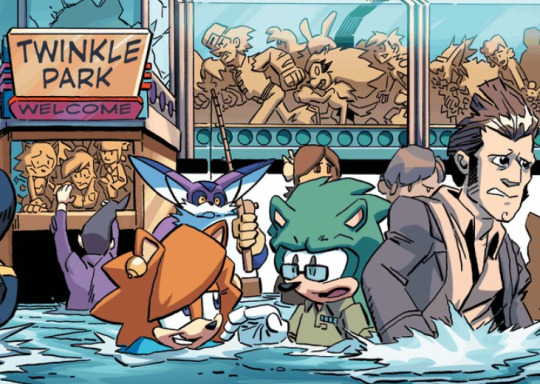
This was always a weird hangup I felt the series had. In the case of games between Sonic Adventure & Unleashed, Sonic and friends were the only Mobians, humans made up the NPCs while Mobians were reserved for main characters. Then in Forces and IDW, Mobians made up the background characters, so then Eggman is the only human. I really prefer it when they have the two living together, it makes it seems more normal and, honestly, a better solution than the whole "Two Worlds" explanation.
Eggman Seemingly Defeated

Can I just that I love Issues 198-200? In these 3 issues, Sonic and friends Eggman's main base, the Egg Dome. This including fighting on the outside of the base, involving fighting hoards of the Dark Egg Legion soldiers and Eggman in the Egg Phoenix. After dealing with the outside, Sonic and friends raid the Egg Dome itself, taking different directions, with the Dark Egg Legion seemingly retreating, until they reach the center of the base, where they are blocked off by a barricade, which only Sonic can pass through, giving a "Point of No Return" vibe, Dark Egg Legion soldiers lining up and saluting Sonic. Then Sonic reaches the center and finds Eggman in the Egg Tarantula, starting their final battle which Sonic wins. This defeat is enough for Eggman to lose his sanity, seemingly ending the war Sonic and the Freedom Fighters have been fighting their entire life.
Of course Eggman returns but, god, it's just such a memorable couple of issues. There's a real sense of finality to it. I would a sequence like this in the games, something that feels like truly ending the Eggman Empire and defeating them once and for all. Of course, it wouldn't be the end, Sonic games are always needing to be made which would lead to...
The New Rulers of the Eggman Empire

In the comics after the defeat of Eggman, the Eggman Empire is taken over by some of it's Commanders, the Iron Queen and Iron King, who rules the Empire as their own until they are defeated and Eggman's return.
I love the idea that even if the Eggman, there will always be someone there to take his place. The games could do this by having Neo Metal or Infinite take his place. Hell, IDW did have Neo Metal take over but I think what made that less interesting was that Neo Metal wasn't doing it for himself, he was doing it for Eggman. I think this would work well if a concept like the Egg Boss was introduced in the games, maybe have one of the characters part of that group take over OR have a lot of the more ambitious Egg Bosses war against each other to take command, until eventually Eggman returns and puts them in line.
Silver's Future
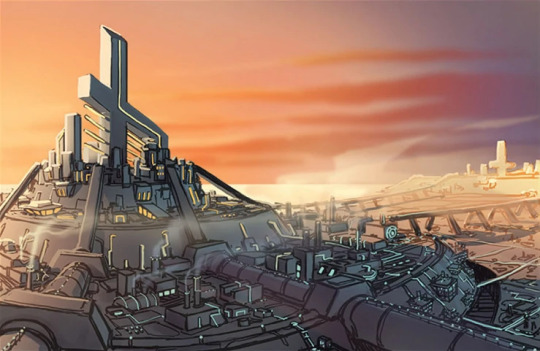
Silver is one of the most recurring characters, who always joins the gang when his future is in trouble. The problem is that we never see his future besides 06. We have no idea what Silver's future is currently until it's in danger and, even then, we never see it.
We see Silver's Future in both continuities of the Archie Comic, with two different takes. Pre-SGW has a destroyed city vibe, like 06 but less lava. Post-SGW brought a whole new take where people are ruled by a corrupt council where people are put into class groups, and security robots will arrest if you are not at your job at the right time. They even re-contextualize Silver's bracelets as cuffs that the robots can activate. With Silver being my favourite character as a kid, I remember being obsessed with this new world and story, wanting to know more.
I'm not saying they would need to copy this world exactly but it would be nice if they gave us a concrete and consistence look for Silver's Future.
The Heroic Metal Sonic

Right before the SGW, we were introduce to Shard the Metal Sonic. His story is that he was the original Metal Sonic, the one that raced Sonic in Stardust Speedway. He appeared later in the comic, where Sonic made him realized there was more to life than just being Eggman's killing machine. He seemingly died, but was rebuilt to serve as a member the Secret Freedom Fighters.
This one would be tricky to be included. It worked in the Archie comic as they had been many Metal Sonics throughout the series, each one getting destroyed. Meanwhile, there's only officially been one Metal Sonic in the games made by Eggman (two if we count Classic and Modern). Admittedly, Gemerl fits Shard's personality and does need to be used more in the games but having it be Metal Sonic is just a cooler concept.
I think a solution to this is that we have Metal Sonic 1.0 made by Eggman and, in Rivals 2, we have Metal Sonic 3.0 by Eggman Nega from the future. But what about Metal Sonic 2.0? I think we could have a game where after Metal Sonic fails, Eggman builds a replacement, being 2.0, which would give reason to Metal Sonic wanting to revolt, which could lead to a redemption? While I am loving the IDW comics, I do really miss a lot of what both Archie continuities offered. I haven't mention the some other concepts and stories I liked that really focused on certain characters such as Naugus, Geoffrey St. John, Dimitri etc. Maybe I'll talk about that another day...
#Sonic#sonic the hedgehog#archie sonic#idw sonic#pre-sgw#post-sgw#sega#eggman#eggman empire#egg bosses#shard the metal sonic#silver the hedgehog
111 notes
·
View notes
Text
ROBINSON PROJECTION MENTIONED !!!!!1!!!!!!! I have always loved the way it looked, good choice 😊👍👍👍😎👍😊👍👍😎
I do actually have a good solution for you, in the form if GIS programs, more specifically the freeware version of it QGIS (Here is the site for download) - It should be able to run on basically any computer, especially if you aren't doing complex stuff in it
I'll include a demo for GIS stuff below the cut, if you need more explanations, feel free to ask! A couple of the sketch maps I've done with QGIS have been included as examples before that.


Once you have downloaded/installed it, select create new project, and save that project within its own dedicated folder, this will be important later since the map will generate a large amount of files.
Firstly, and this will be a bit circuitous, you need to download the file found from ESRI (The people who make the the main paid GIS software) that you can find Here. Once you have done that, move that file into the same folder as the project was saved.
Open the file in 7-Zip now (Here if you don't already have it) by right clicking on it while it is selected, then select "Open Archive". Click into the V10 folder, and right click the latlong.gdb, then select the Copy to command and click ok, creating a folder in the project folder.


Now, back in QGIS you should go to Layer - Add Layer - Add Vector Layer, followed by Directory as the Source Type, OpenFileGDB, and then select the FOLDER not anything in it that is labeled latlong.gdb


Selecting Add at the bottom right will open up a box, allowing you to select the thing in it and then hit Add Layers

At this point a grid will be in place which we will deal with for the time being, but it is currently set to the Equirectangular map projection, which I will show you how to change.
Go to Project - Properties, and then the CRS tab, where you can enter the Sphere_Robinson coordinate reference system by entering it into the filter bar at the top. Once it is selected, click OK at the bottom left.
This is to set up the map projection which you can change through this tab once everything is in place.


In the layers tab on the left, double click on the layer, taking care not to select the line between it and its checkbox.
You should then go to the symbology tab, the third from the top, where you can change the top bar from Single Symbol to Categorized. Once you have done this, enter DEGREE 15 into the Value box at the top, and hit classify.


By hitting the check boxes of the "N" and "all others" lines, this leaves behind only the lines which are at 15º intervals, which you can confirm by hitting OK at the bottom. The map on the right should be similar to the end result, although colors will be different, I would suggest messing around a little bit in the Symbology tab to make it look Fun.


Next, go to Plugins - Manage and Install Plugins and search Freehand Raster Georeferencer, then install it, and search for the tool icons which can be seen at the bottom of the images below, click the AD icon, then select the file for the map you had in the original post, or whatever the original map is.


Use the tools in that bar while the new image is selected to move it to align with the latitude and longitude lines visible on the map, in particular MO (The move tool) and ADJ (adjusting the image based on single edges).
A pro tip is to crop the map to its edges before this step, to make it scale and handle much better.

At this point, it will look like this likely (although mine is a bit off of some of the lines) at which point we can start drawing lines!
First, go to Layer - Create Layer - New Shapefile Layer, then select the ... icon on the top right and navigate to the project layer and select Polygon as the Geometry type. Click OK to confirm and then look for the icons on the top bar which look like those at the bottom of the images and select the pencil icon to begin editing. (Maybe change the symbology and placement of the continents layer in the dialog box on the left too if you want)


The Green Oblong shape will allow you to place polygons now, which you can do to start tracing the landmasses. I would suggest against attempting to do an entire continent at once, since that is likely to have a couple of mistakes, instead simply focus on the coasts, making sure the polygons overlap in the middle. A pro tip is to digitize the entire thing at the same scale, that way they are at the same level of detail.
My Incredibly rough draft is below, along with a series of selecting icons, by selecting all of the component pieces of a landmass and using the merge icon all the way to the right of the second row, all of those parts are combined into one.


At this point, you can use the steps all the way at the start to set the projects projection to any that you would like, as an example I have done the North Pole Azimuthal projection.
(CAUTION - Doing this will mess up the placement of the reference map, so do not do this until everything is placed, or you are willing to exit without saving)

That is honestly just the beginning, but it is midnight and I am swiftly approaching the image limit tumblr places on posts.
If you are going to go further with GIS, enjoy and feel free to ask me questions if you can't figure something out. And Remember, Always Hit Ctrl+S!

Not posting this on my art account since this technically isn't finished yet. I'm thinking of changing a few things around, like maybe changing some of the shapes of the land masses. Also adding arctic/ice masses up at the poles potentially. I do also plan on making more detailed maps later with the rivers & mountains + names of places.
Main question I have for cartography/world building side of tumblr; is there a way/how do you go about translating a map between different projections? Or even potentially mapping this onto a globe? I specifically chose to do a robinson projection because I thought it looked nice but curious about other potential interpretations of the map-
I could probably also just redraw it with gridline translation too tho lol
21 notes
·
View notes