#input tag in html
Explore tagged Tumblr posts
Visit Tumblr Blog
Explore Tumblr blogs with no restrictions, modern design and the best experience.
Last Seen Tumblr Blogs


Fun Fact
When “GIF” was named word of the year in 2012, Oxford Dictionaries U.S.A. credited Tumblr for pushing the word.
Text
Typing Quirk Suggestions for a Robot kin
I hope it gives you a wonderful uptime! :3
Mod Vintage (⭐)
Letter replacements:
Replace "O" with zeroes "0"
Replace "i" or "L" with ones "1"
Replace "one" with "1", including "one" sounds like "any1", or "we 1 = we won" (the past tense of "win")
Replace "zero" with "0"
Frankly, you can just replace all sorts of letters with numbers, such as
R = 12
N = 17
B = 8
A = 4
E = 3
etc.
or maybe make all "A"s and "i"s capitalized, cause "A.I." (artificial intelligence
Prefixes and Suffixes:
Get inspired by programming languages!
Begin your text with "//" like a comment on C++
If you prefer other languages comment tags, you can use "< !--your text-- >"
Or maybe begin it with " int main () { std::cout << "your text"" and end with "return 0; }" like C++ too
Greet people with the classic "Hello world!"
Or greet people with "beep boop!" honestly, I have no idea where this comes from, but it's cute.
Or write down html stuff, like sandwiching your italicized text with "< em> "
The possibilities are endless!
Robot Lingo:
(under the cut because there's a LOT! maybe terabytes! ...just kidding >;3c)
.
some of these are from the machinesoul.net robot server! (not sponsored) (we're not in there anymore, but we saw the robot lingo shared there when we were)
Fronting = logged in, connected
Not fronting = logged out, disconnected
Conscious = activated
Dormant = deactivated
Blurry = no signal
Upset, angry = hacked
Small = bits, bytes
Bite = byte
Huge = gigabytes, terabytes, etc.
Your intake of food, medicine, etc. = input
Your artwork, cooking, handiwork, handwriting, etc. = output
Body = chassis, unit
Brain = CPU, processor
Mind = program, code
Imagination = simulation
Purpose = directive
Nerves = wires
Skin = plating
Organs = (function) units
Limbs = actuators
Eyes = ocular sensors
Glasses = HUD (head's up display)
Hair = wires
Ears = antennae, audio sensors
Nose = olfactory sensors
Heart = core
Liver = detoxification unit
Circulatory system = circuits
Voice = speaker, voice module, voice box
Mouth = face port
Name = designation
Sleep = sleep mode, low power mode, charging
Eat = fuel, batteries
Energy = batteries
Tired = low on batteries
Translate = compile
Memory = data, database
Bed = recharge pod/charger
Dreaming = simulation
Birthday = day of manufacture
Talking = communicating
Thinking = processing
Transitioning = modifying your chassis
Depression = downtime
Joy = uptime
Trash = scrap metal
Fresh/Clean = polished
Keysmashing = random 1s and 0s
Self-care = system maintenance
Going to the doctor = trip to the mechanic
Group = network
Anyone = anybot
#typing quirk suggestions#robotkin#otherkin#robot kin#robot#robots#mod vintage#⭐#tw medical#tw dormancy mention#our system actually uses the lingo in daily conversations with other plurals n alterhumans because we're robot/machine/AI/etc.-dominant#which is pretty funny cause our mod name is Vintage and robots are Futuristic#typing quirk#typing quirks#typing quirk suggestion
410 notes
·
View notes
Note
Lost soul from Twitter, how do I use this app?
if you're an artist, use lots of hashtags, up to 30!! its not like twitter where you get punished for spam. don't use irrelevant hashtags its considered rly bad form. fandom and -core stuff works really well. search tags and you can see how active they are
also look into the tumblr queue. you can set it so it posts once every day between certain times so you dont have to input time/date EVERY SINGLE TIME !!!! it is SO NICE
if you're a follower, reblog all the stuff you like. that's how stuff gets shared on here cos there's no algorithm (unless youre in 'for you'). so its more important to boost what you like.
you can add tags in your reblogs so you can browse them later in different categories. this is a fucking amazing feature
you can also follow tags youre interested in and just browse a page of all your tags
also if you want you can customize your profile's html and css which is very fun, look up how to do that
if you want some artists to follow look on tofupixel.tumblr.com/tagged/follow that's my artist recommendation tag
have fun <3
182 notes
·
View notes
Text
Day 6 [Forms In HTML]
Introduction To HTML
Day 2 [Multimedia Elements In HTML]
Day 3 [Table in HTML]
Day 4 [Link Tag In HTML]
Day 5 [Lists In HTML]
Forms are basically used for collecting user information. And they are really important to learn. Here's a simple form in HTML:
Code:


Line By Line Explanation:
<form>: Used for creating forms. All the form elements go in this tag. Action: When submitted, data is sent to this file or URL [index.html] Method="post": Sends data
<label> : This describes the input tag for="___": Connects the label to the input with id="name" id : gives a unique identification to the tag <input>: It's used to make the form elements
<input> Type Elements :
type="text" : A simple text box is created.
type="email" : A box to input email.
type="checkbox" : A small square that users can tick. Can select multiple options using this.
type="radio" : A small circle, you can only select one option.
type="submit" : A button that submits the data to the server.
<textarea>: Accepts multiple lines of text. rows="4": It creates 4 lines cols="30": It creates 30 characters
<select> : Creates a drop-down list <option>: Creates an item in the dropdown. value="colorname": This is the data sent to the server if chosen.
Output For The Code:

_______________________
Hope This Helps !!
#code#codeblr#css#html#javascript#python#studyblr#progblr#programming#comp sci#web design#web developers#web development#website design#webdev#website#tech#html css#learn to code#school#study motivation#study aesthetic#study blog#student#high school#studying#study tips#studyspo#website development#coding
44 notes
·
View notes
Note
HOW DO YOU MAKE THE TEXTS IN OTHER COLORS THAN THE STANDARD ONES-
Hope you're familiar with HTML :)
On Tumblr, there's an HTML editing option for posts (not available on mobile)
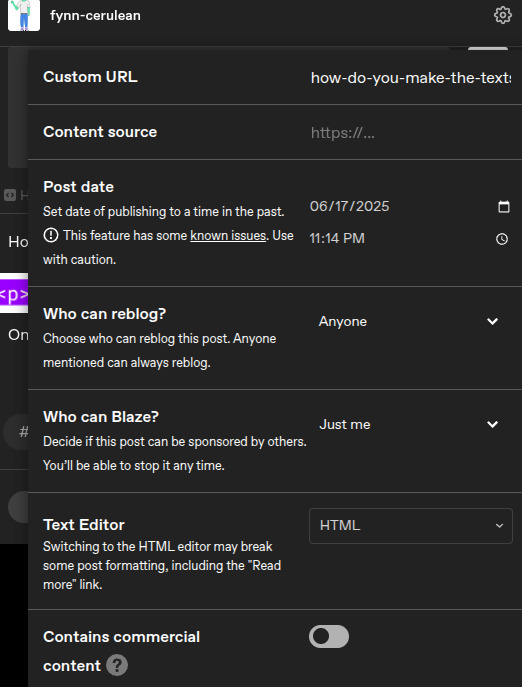
Basically, you can switch the Text Editor option to HTML, and it will open up an HTML editor.
In the image below, the purple tags can be any regular tag you want, like <p>, <h1>, <li>, etc.

The <span> tag is where it gets interesting, but its exact contents aren't too important, except for the underlined portion. That's where you put the custom color, in Hex format. The text inside the <span> is the text that will end up the color you input. In this case, the color is #abcdef, which is a light blue.
If you input that into the HTML editor, you get:
text
And that's all there is to it.
Color picker
8 notes
·
View notes
Note
The real reason you should censor the genitals in NSFW art: your blog can get hidden/shadowbanned by Tumblr for posting full frontal nudity. If you post a link to another site with the HTML, your post should still show up in the tags, and shouldn't post with a preview. There should be tutorials online for how to do that, just make sure you're on desktop because the mobile app doesn't have support for inputting your own HTML that I'm aware of. I'd label your link as "Uncensored version here" or something to that effect. It's not about people's comfort, it's about not getting hit by moderation. If people don't like you posting NSFW they can leave. Tumblr getting mad at you has much worse consequences
Wasn’t planning on posting it, like I mentioned, but that’s neat to know. :V
12 notes
·
View notes
Text
Just learnt how to turn HTML to Image
Friday 6th October 2023
Yeah just figured out how to turn HTML tags into an image you can download and save! The idea popped up because I came across a image generator from the user inputting the text and images and the generator would merge all of that into a .png file for you to save. So, I thought "mmmh I could do that?" (^^)b
・゚: *✧・゚:* and I did *:・゚✧*:・゚
Now I'll use this for future project ideas! Especially a similar project to those "Code Snippets to Image" generators I use to share code on my blog! I'll make a proper post of how I did because it took me forever from an API with limited conversions to an outdated tutorial with broken links 😖
art used @fraberry-stroobcake 🌷

⤷ ○ ♡ my shop ○ my twt ○ my youtube ○ pinned post ○ blog's navigation ♡ ○
#codeblr#coding#progblr#programming#studyblr#studying#computer science#tech#html css#html5 css3#code#programmer#comp sci#web design
82 notes
·
View notes
Note
Hello! :D
So I got a couple questions
First: How do you get text to be a different color? (besides the colors provided by tumblr) I think it looks super cool :3
Second: Are you okay with people drawing their ocs to fit the Sunshine Suburbia au? Not to force you to insert them or anything, but just for funsies? If not that's okay /gen
I also want to say that I love your art, I wish I could transfer it into physical food and eat it /vpos
Anyways that's all, have a nice day :D
Howdy!
1: (ALOT OF JARGON WARNING!)
So I mainly edit my Sunshine Suburbia posts using Tumblr on the computer (Aka On my browser, This stuff is impossible on mobile as far as I know…) which allows you to swap from rich text editor (The default, and only option on the mobile app) to HTML (Alot more flexible on what you can do- BUT a headache to look at because it’ll be a GIANT wall of format along with your post’s text)
So once you’ve managed to get the HTML editor up you’ll need a hex code which represents the color you want your text to be- (ex: the code I use for Jevin is #0a01fe). The easiest way to get these is using your art program of choice (In my case, Procreate fw!) and color picking said color and checking the Hexidecimal section on where you pick colors!
You could manually input the HTML coding for colors but I really don’t like looking at HTML code for very long (Augh headache) so I use this text editor https://spacegen.carrd.co/ by another user called luna ! I copy paste the generated code to the Tumblr HTML editor (Usually replacing the text I had put in there, You can also italicize, bolden, etc using the spacegen editor ) and go to preview at the top of the editor and wow volia! More specifically colored text!!
Notes:
- Line breaks / Read mores break when you swap over from Rich Text to HTML but colored text does not break when you switch from HTML to Rich Text.
- Please be aware of what background your text will be seen on… It’s kind of why Wenda’s text isn’t colored on the Sunshine suburbia blog… Can’t guarantee people can read it as not everyone uses a dark bg- Same goes for Black / Tenebrae and some characters having texts slightly off from their actual colors. (Too light on white bgs, Too dark on black bgs…)
2: I’m absolutely fine with people drawing and writing their ocs to fit the Sunshine Suburbia au! Excited even! It’s even how I’d likely handle people interacting with the askblog (NOT THIS BLOG, DO NOT RP WITH THIS BLOG, THIS IS MY PERSONAL ART BLOG!!!! MY THERAPIST WILL HEAR ABOUT YOU IF YOU DO THAT!) as I sort of want to avoid crossovers mostly to keep the setting from getting messy! (I’ll likely detail this in the Visitor guide post on the Sunshine suburbia blog itself)
I’m just not cool with like— Trying to squirm in relationships (Mostly romantic and familial… But knowing someone before/ being friends with them is fine- It doesn’t have as many implications as the latter…) on the characters as they have their own things going on unless they’ve extensively discussed it with me WHICH I highly doubt would happen and alot of the times it doesn’t fit with the AU… But art and writing to fit them into the AU without those previous elements is COOL AND I’D LOVE TO SEE EM- PLEASE TAG ME IF YOU DO THAT!
I’d also try to provide more info about the world in there as the blog goes on to help with that- (Don’t be scared to prod for world building questions in this case… Most are not spoilery but most of the asks on this personal blog are bound to be a bit looser than what I’d give on the actual blog itself)
And also thank you! I’ve been told by a friend my art tastes like tv static (in a cool way!) Thanks for the ask! ^^
13 notes
·
View notes
Text
made a little house of leaves text replacement script for Firefox with the FoxReplace extension ! instructions under the cut
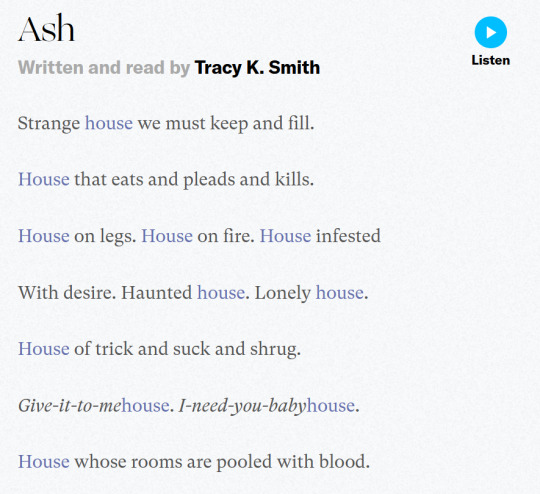
basically replaces house with
<span style ="color:#6570ae">house</span>
and minotaur with
<span style ="color:red"><s>minotaur</s></span>
firefox installation method:
get the FoxReplace extension: https://addons.mozilla.org/en-US/firefox/addon/foxreplace/
Script: save the following as a .json file, and import it into FoxReplace:
{ "version": "2.6", "groups": [ { "name": "House of leaves", "urls": [], "substitutions": [ { "input": "house", "inputType": "text", "outputType": "text", "output": "<span style =\"color:#6570ae\">house</span>", "caseSensitive": true }, { "input": "minotaur", "inputType": "text", "outputType": "text", "output": "<span style =\"color:red\"><s>minotaur</s></span>", "caseSensitive": true }, { "input": "House", "inputType": "text", "outputType": "text", "output": "<span style =\"color:#6570ae\">House</span>", "caseSensitive": true }, { "input": "Minotaur", "inputType": "text", "outputType": "text", "output": "<span style =\"color:red\"><s>Minotaur</s></span>", "caseSensitive": true } ], "html": "output", "enabled": true, "mode": "auto&manual" } ] }
notes:
I haven't finished House of Leaves yet so it currently only substitutes house and Minotaur.
Recommended to turn on Automatic substitution On page load
Not recommended to Apply automatic substitutions every few seconds, it moves your cursor in an opened text editor. sadly cant see the house in blue while im typing this post
-> edit: it only affects the tumblr post editor??
Not recommended to change the HTML to input&output (currently output only) because it would fuck up URLs and tags
4 notes
·
View notes
Text
Episode 00 ~
Today is the first day of my new project!!
I really want to use this summer break to its fullest, it might be my last truly ‘free’ summer (without schoolwork (*cough cough- resit-*) or regular work).
This project of mine isn’t a simple one: I want to create a Stardew mod! A ‘NPC mod’ with Pico, Nene and Darnell with events, cutscenes and even a ‘FNF mini-game’.
These episodes are here more for myself than anything. I want to impose some sort of pressure on myself to not just drop out or delay this project.
Problems are:
- Some sort of time limit: Med school isn’t for the weak, and next year is my clerkship (??- the years before residency), so not a lot of free time… I need to have a good chunk done of this mod before that
- Coding: I know HTML, CSS and a bit of JavaScript but I heard that you have to know C#.
- Rest: a bit like the first point, I need to not stress myself to feel refreshed for next year. And I know myself enough that I have to control myself to not do too much, haha.
- Solo project: While I know I got myself covered in the art-related part, I have to learn how to code and also mayhap have to learn to remix to input music inside the mod. I also need to learn a few ‘writing techniques’ to not write flat characters.
Estimated Timeline:
- 1 week to learn basic C# coding and create a post to put my resources that I will use for future projects and/or for others to check. That post will be updated as long as I’m on this project and link toward it will be found on other episodes (and you can check the tag #SVmodFNF on my page).
- 3 weeks for most of the artworks that I will use. I’ll take that time to note down all my ideas for this mod.
- The rest of the summer vacation: slowly building the mod from the ground up
→ All that with, of course, weekly updates on Tumblr and Bluesky
Unrelated, but …
… here's a sneak peek of a little silly drawing (that has no connection to the mod) of Demon!Pico:
3 notes
·
View notes
Text
what is the fucking point of tumblr having the option to write posts in HTML if i can't even add a damn <input> tag
4 notes
·
View notes
Note
TEEHEE my AO3 is just SadVibez but I always post about my fics on Tumblr too, so I'll be sure to tag you too!! I've got like 4 D-Pax fics in the mind (two inspired by your scrumptious art 🫶)
Also I'm not actually sure how to emblem pictures on AO3! I can probably figure it out with a tutorial. Mark my words, I'm trying to finish it this week but I'm playing a dangerous game of "do I finish my smut D-Pax or TFOne angst Optimus?" 😭
Im pretty sure you can add them in if you input your text via rich text instead of html!!
and yayy!!! Im super excited to read them!
9 notes
·
View notes
Text
kafka in a castle
so i got selected to present a piece of coursework on The Metamorphosis in a literal castle but in a boring seminar room inside the castle and some of you lot are obsessed with the guy so i thought i might share some of what the piece was about.
so the coursework was for a module with a focus on international and translated works that can be deemed 'world literature'. but simultaneously, in another module we were looking at what it is to be the author through critical approaches from Barthes and Saussure. so i though, why not combine the two. what does it mean for the authorship of a work read in translation.
now i didn't really like metamorphosis first time around. it fell a bit flat for me. sure i could see the symbolism but it didn't shake my world. i should relate to Gregor, being confined to my room with chronic illnesses, but i just didn't. it just wasn't enjoyable. but it was the easiest text for what i wanted to do, so that was that.
but in rereading it i enjoyed it so much more. certain quotes seemed to leap off the page to me, and this was perfect for the form i wanted. my uni is great for encouraging 'creative-critical' responses instead of essays. so half can be your own creative writing, or hell a cake, and then you justify it like you would a normal critical analysis in a typical essay. so, i made a tumblr blog. i don't want to share it because i don't want to be plagiarised (on principal, even though it's not that good) but i used a pretty basic html skin and just responded to quotes from metamorphosis in the tags completely out of their order from the text. same as how so many people do to texts, even if they haven't read them before.
so, in line with 'death of the author' (in the actual one not the internet one) i proposed that every reader's every reading of a text is a translation. reading in the original german? translation. read it before and rereading it 80 years later? translation. rereading a quote you read 5 seconds ago? translation. we are too effected by what came before and other sensory input for the meaning to remain the same each time. the tumblr blog just presented this more literally. they are responding to the quotes out of order, and their meaning is changed because they're out of order.
but i don't agree with Barthes entirely. because as i've seen on tumblr, even as my lecturer brought up. Kafka is a pretty interesting guy. the fact he writes about the suffocation of Gregor's mother before any kind of knowledge of WWII is kind of scary, Gregor's death feeling unnervingly similar to Kafka's own death by consumption seems foreboding. or as i put it - 'the image of the unknowingly prophetic author is undoubtedly compelling'. and you can't just discount all that because it influences the reader. by nature when we're reading we're so curious about the person behind it. especially when it's by someone like Kafka that has become aestheticised and mythologised.
a guy says texts have ‘preceding and surrounding texts of which it may not even be consciously aware’. but it's true for people too. they are both objects of indefinite origin and saying what Kafka meant is the true meaning is frankly ridiculous. i don't even agree with what i meant 5 minutes ago sometimes. we can't separate our minds from our bodies and ourselves from ourselves.
so when Gregor changes from man to vermin is his mind changed because he is a vermin? or is it only that his experiences are changed by his new body translating the world. there's a subtle difference there, and it's important, even though i'm not quite sure why.
but my essay ends with some advocacy for us folk on tumblr. that 'dark academia' style reading isn't ever a bad thing (even if sometimes it can annoy me greatly). 'The embodied, biased, and unsystematic exploration of a text is not a failure of the reader or an inferior interpretation, it is only a reflection of the same truth or ‘unity’ of a text in the light of a different life.'
#i'm trusting you people not to steal this#it provoking your own idea is fine#but plagiarism isn't cool#even if chat gpt apparently thinks so#but if you have any questions or want recommendations for critical reading just send me an ask or dm me#i love doing critical reading#i'm not trying to sound like a bit of a know it all arse#(although maybe i accidentally am)#but i got really good marks for this and it was obviously picked to present so i think it must be a bit interesting#also if you want to look into the translation of metamorphosis i really recommend this website#https://www.doppeltext.com/en/bilingual-books/132/kafka-die-verwandlung/german-english#you can click and it reveals the original german#and you can use translators to guess how much has been changed in the copy of your language#book blog#bookblr#book lover#books#books and reading#reading#chaotic academia#dark academia#light academia#franz kafka#kafka#studyblr#english literature#spilled ink#spilled words
10 notes
·
View notes
Note
Hello, wanted to say I read and loved the demo. Very well done. I just had a few questions, would love to know what Twine Template you use, especially at the beginning. Where you have the character creator, I love that the box around your selection changes to say/match what you chose. Such as depending on what skin color I choose it changes to signify that. Would love to know if you would share how you did that. I look forward to future updates! Best of luck.
Thank you! 🤍
I'm using the default template for SugarCube, if I remember correctly. Glad that you liked the box effect, it was my solution to reducing the number of passages whilst still allowing the validation of user input in character creation.
I did it through a combination of HTML tags and SugarCube native macros. Technical stuff under the cut:
Here is an example for eye color:
<fieldset class="charbox"><legend id="chareyes" class="chartxt">$p.appearance.eyes</legend> <div class="charoptions">Your eyes are: <<link "hazel">><<set $p.appearance.eyes to "hazel">><<replace "#chareyes">>$p.appearance.eyes<</replace>><</link>> <<link "brown">><<set $p.appearance.eyes to "brown">><<replace "#chareyes">>$p.appearance.eyes<</replace>><</link>> [rest of the options removed for brevity]</div> </fieldset>
The fieldset and the legend HTML tags together form a single box, a so-called legend, which I declare per attribute such as name, skin color, etc. You need a fieldset to make legend work iirc, but legend is where that text is displayed and it is positioned on the box frame by default. Important here is to give a unique ID to the legend tag ("chareyes" in this case), as we are interested in manipulating the text shown in it depending on our box.
In the sample above, the options I present for the eye color are listed within the Twine <<link>> tags. For these links there is no target passage to go to. Instead, you can see it is coded to do two things upon clicking the respective option. One, setting a game variable to the selected color.
<<set $p.appearance.eyes to "brown">>
Two, triggering a replace command to change the value shown in the legend to the description of the selected eye color according to the variable we have set in the same line. This is the bit you are asking about:
<<replace "#chareyes">>$p.appearance.eyes<</replace>>
Replace triggers without changing passages, so this way you can adjust multiple variables on a single "page". You'd obviously need to adjust the corresponding CSS classes to make it look the desired way, but the mechanics are serviced with just this idea above.
Hope this helps!
12 notes
·
View notes
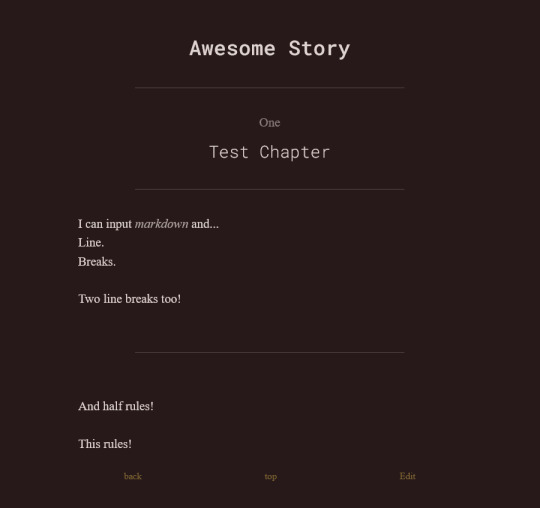
Text
webdev log 3
this log is longer since I'm writing it as I work, since I forget a lot once I've put down the keyboard for the night (day? I'm always up until morning)
okay, so...
I've implemented user (me)-only add story, edit story, and add chapter, and edit chapter functions

creating a story. I have some "preset" tags. clicking on them adds them to the input, and it'll get converted into arrays to be placed into the database. they're sort of placed there manually since I'm too lazy to make it so that it sifts through tags and posts them there but I'd rather not since some tags are only used once. for the series presets being manually placed there.. well, I have no excuse. I'm just lazy. I'll just kms when I have to add another, ig.
anyways once a new story is made, there's no chapter added so the link to it doesn't work. I have to go in and add a chapter. I will not update this because I don't care and it doesn't trouble me enough to make it a feature so you can upload it all in one go.
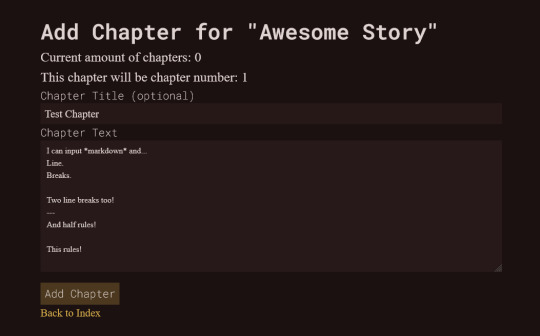
from there I get to see this shitty barebones chapter creator.
START TANGENT feel free to skip
laravel Eloquent stores the text as-is so I won't need to use my shitty markdown -> html converter that I have on my secret utilities site that I always had to use for when posting my stories onto my neocities.
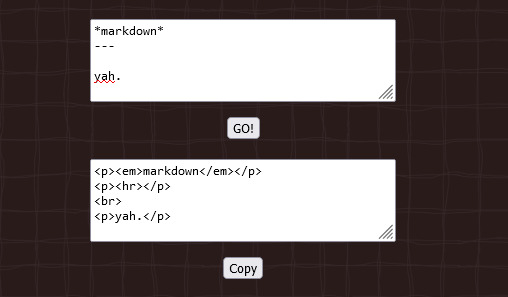
that's what it looked like, lol. I had to make this because of the way I write and I want it to display in a particular way which I'll get into in a sec. the reason why I didn't want to use some shitty markdown -> html converter on some other website is because a single linebreak gets converted to <br> while <p> only gets sandwiched between paragraphs with double line breaks.
I don't like that since I wanted text indents for every <p> but text-indent doesn't apply to the next line within a <p> if you use <br>... they only apply to the start of each <p>. a workaround for this is to use text-indent: {size} each-line; but each-line isn't supported in all browsers, including chrome of all things. So I had to write up a program for my own converter which wraps *every* line into a <p> and applies a <br> if there's another newline after that.
but for my new site, there's a function that detects what browser the user is using and will add the text-indent styling only if using supported browsers. so chrome users will just be indent-less! sorry! (you should switch to firefox anyways)
END TANGENT okay, enough about my neocities..
What it looks like for a user (me)... guests won't be able to see the edit link.
When editing, there's an option to delete the chapter. if it is the first chapter of a story, then it will delete the whole story. it's currently the only way to delete a story, mostly as a safeguard for myself since I don't trust myself. if I have to delete a story with a ton chapters in the future... well.. then fuck me.
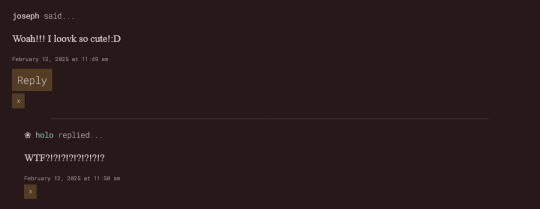
over on the side, I also went back and added a delete comment function too. accidentally had it earlier where if I tried to delete a reply it deleted the parent comment too. oops.
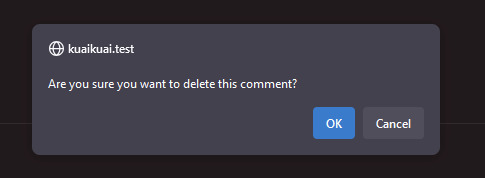
delete buttons (as well as the buttons that accept/reject comments on the user dashboard) had no confirmation so.. phew. now they do! I've accidentally deleted a whole years worth of art before on my computer, so I need this. very badly.
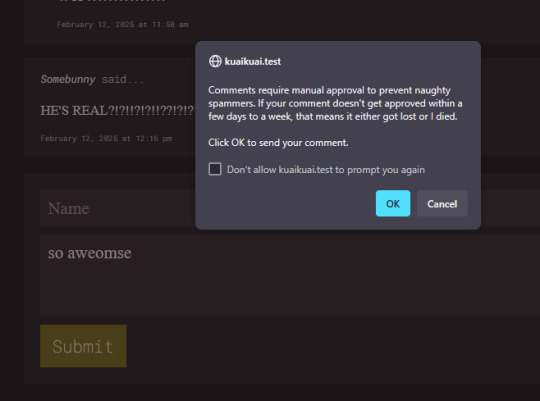
decided to move the warning into a confirmation alert once they hit submit. allows guests to see the warning in a less clunky manner, and also lets them know for sure that their comment is going to get sent! before the page would just refresh without any confirmation.. so this would be less confusing. two in one!
anyways, the next big feature I gotta implement is creating, editing, and deleting art. then I'll be done with all backend related things and I can finally start on the ~fun~ pages like my about. and other things.
unless I decide to make a guestbook. which I probably will end up doing..
I'll probably be keeping my neocities just for memory's sake and also to host my twine games and silly coding projects but I'll probably be removing my dreams page since I kind of don't want people seeing those anymore lest some tiktok-addicted teenager tries to kill me. better huff them all now if you want to peer into my sick twisted mind (jk I'm an angel)
2 notes
·
View notes
Text
Universal Scroll Button(Autochange Direction) For Any Host
Hey, do you have a site with a lot of forums? Does your host allow you to use Javascript? Boy does this weirdo have a deal for you! For the low low price of free, you can get right now access to a scroll button that swaps directions when you scroll automatically, as well as changing the target & title on hover! Act fast, this deal won't last! I kid, but enough of the ShamWowery. In reality, this is a very simple script that reads how far you have scrolled a window, & applies or removes a class to your scroll button, as well as changing the target of said scroll button & adjusting the title to reflect which way it will take you!
It's so simple, crediting me seems superfluous but if you want, feel free to credit with a link to my blog <3 I hope the new verse of our song is eminently kind to everyone!
See it In Action(Click, or look Below):
I currently use this code on two different WIPS, so feel free to check out some gifs;
To Begin
Before the end of your </body> tag in your wrappers(for Jcink) or wherever the HTML templates go on other sites, you want to place this script:
<script> $(window).scroll(function() { if ($(this).scrollTop() > 800) { $('#scroll').attr("title","To Top?").attr("href","#Top").addClass('totop'); } else { $('#scroll').attr("title", "To Bottom?").attr("href","#Bottom").removeClass('totop'); } });</script>
This seeks out an id of Scroll to adjust the href & title as needed depending on the scroll position within the relevant window. The scroll amount is in px, so to change how quickly it changes the button, alter the number 800 to whatever you desire, fiddle with it; one size never fits all.
The Styling
Once you've saved that, move to your CSS, or wherever your Style tag is to add styling for the link itself. Keep in mind the link should be contained within a container that handles its positioning for it as otherwise the script will fuck with the positioning as well as the transformation & you really just want it to spin upwards.
The styling for the link should be as follows;
#scroll { display: inline-block; positioning: relative; transform: rotate(0deg); transition: transform .5s ease-in-out; /*** ^ change the .5s to alter duration or the ease-in-out to alter the timing of the transition between button states ***/ }
#scroll.totop { transform: rotate(180deg); }
The first statement defines the default state (linking to the bottom) of the scroll button on the load of the page, the second defines the change of position once the window has been scrolled far enough to activate one's script.
The HTML
Now you've got the behaviour defined via JS & the styling defined via CSS, it's time to input the HTML, or the bone structure of the code itself. In your wrappers, template, or wherever HTML goes on your host, locate three places;
One, where you want the TOP scroll location to be. This is where the scroll button will take you once it has changed states on scrolling a certain distance. Here, you place an anchor span as follows;
<span id="Top"></span>
Two, Where you desire for the BOTTOM or BODY scroll location to be, as in where the scroll button will take you on click initially. This could also be a scroll to the start of content, in which case I recommend changing #Bottom & id="Bottom" respectively to reflect the syntax, it's entirely up to you. Here, you place an anchor span as follows;
<span id="Bottom"></span>
Finally, It's time to add the scroll button. Keep in mind, where you put it is a function of utility & design choice. Some like it persistently hovering in a fixed position, some like it in a sidebar or on userlinks, some prefer it in the navigation bar.
Wherever you place it, try to ensure that it's easily accessible on any device, screen size, & matches the User Interface logic you've used everywhere else. If you have all text buttons, don't use just an icon, if you have all icons, don't suddenly use just text. Match your action calls, so users don't feel confused while using your site.
Once you've decided where you want it, place the following code, NOTING that there should be a container for this code that positions it for you. I've provided two options; the Icon Font option (courtesy of Phosphoricons -- a free & reliable Icon Font I recommend -- As well as one which includes text, so both UI/UX design philosophies are accommodated.
Note the option with text will only rotate the caret from downwards to upwards, so the scroll text shouldn't need editing unless you want to add or supplement flavourtext.
Please choose the appropriate option for yourself;
Icon Font
<a id="scroll" class="ph-fill ph-caret-down"></a>
Icon Font with Text
<span>Scroll <a id="scroll" class="ph-fill ph-caret-down"></a>?</span>
Some Notes:
I just want to add a bit of info:
If your browser isn't scrolling smoothly to your anchors? Check your settings, & be sure the root of your CSS has scroll-behaviour: smooth; in it.
If you use this guide & have problems getting it to work, please let me know! I will troubleshoot this for you & tumblr has strange coding, I may have futzed something up, I want this to be as accessible as possible, so don't be silent; questions help!
If you are not using Jcink, or another host with a Jquery library pre-loaded, be aware that one is needed for this script to work. Most hosts will have a default Jquery library, but if yours doesn't or you're self hosting, any should do. The Jcink file is below, however, if you want to just use that.
10 notes
·
View notes
Text
The Essentials of Flat Icons: Characteristics and Usage in Modern Design
Icon Design: Common Questions Answered
1. What is a UI icon?
A UI icon is a small graphical symbol used in user interfaces to represent a function, action, or concept. Icons help users quickly identify features or tools, enhancing usability and navigation within software applications or websites. They can be simple images or complex illustrations, often designed to communicate meaning intuitively without relying on text.
2. How do I make my icons smaller than 100%?
To make your icons smaller than 100%, you can adjust their size using CSS. Set the `width` and `height` properties to a percentage less than 100% (e.g., `width: 80%; height: auto;`). If you're using a graphic design tool, look for sizing options and input a smaller percentage or specific pixel dimensions.
3. What is a flat icon?
A flat icon is a graphic design element characterized by a minimalist style, using simple shapes, bold colors, and a lack of three-dimensional effects like shadows or gradients. This design approach emphasizes clarity and ease of recognition, making flat icons popular in user interfaces, applications, and branding, as they convey information quickly and effectively without unnecessary detail.
4. What are program icons?
Program icons are small graphic symbols that represent software applications on a computer or device. They provide a visual way to identify and access programs quickly. Icons often reflect the program's function or branding, making it easier for users to navigate their systems and launch applications with a single click.
5. What is the link rel shortcut icon?
The link rel shortcut icon, often referred to as the favicon, is a small image associated with a website. It appears in the browser tab, bookmarks, and address bar, helping users identify the site quickly. It's defined in HTML using the `<link rel="shortcut icon" href="path/to/icon.ico">` tag, typically in the site's header.

Visit: VS Website��See: VS Portfolio
2 notes
·
View notes