#log into linksys router
Explore tagged Tumblr posts
Visit Tumblr Blog
Explore Tumblr blogs with no restrictions, modern design and the best experience.
Last Seen Tumblr Blogs


Fun Fact
Women make up for the other 50% of Tumblr’s audience.
Text
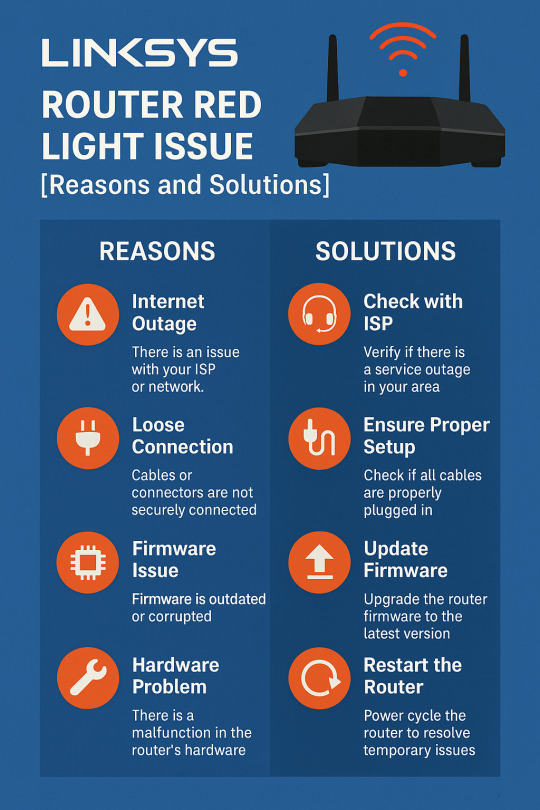
The red light on a Linksys router typically signals issues like no internet from your ISP, loose cables, outdated firmware, or internal faults. To fix it, check your internet connection, ensure all cables are secure, reboot the router, and update its firmware via the router’s settings. If the issue persists, perform a factory reset by holding the reset button for 10 seconds. Contact Linksys support if the problem continues.
0 notes
Text
Login to Linksys Router Using 192.168.1.1 or linksyssmartwifi.com

For the Linksys router login, connect to your router's network and open a browser. Enter http://192.168.1.1 in the address bar. Log in using your Linksys Smart Wi-Fi account credentials to manage network settings, connected devices, and security options. If you need further assistance, feel free to ask!
0 notes
Text
An Elaborative Guide on Linksys Router Login

The Linksys Router is known for its exceptional features and high performance, making it easy to access the device. It provides a durable yet secure internet connection. To fully utilize these networking devices, you first need to execute the Linksys Router Login process. It’s essential to secure and customize your router network after logging in.
In this blog post, we will provide comprehensive details on how to access the admin panel of the router with ease. We will discuss the key prerequisites, the effective method to complete the login process, and solutions for any issues you may encounter while logging in. Let’s take a closer look at the detailed procedures outlined below:
How To Perform Linksys Smart WiFi Login?
Hereon, you can log in to the networking device using two methods: the web GUI method and the Linksys app. Below are the steps for both techniques. For this, you require a stable internet connection, ethernet cables, a laptop/Computer, admin credentials, etc.
Linksys Router Login Through the Web Interface
To begin with, make sure that the device is powered ON.
Now, connect the device to the present home eWi-Fi network.
Then, open the web browser and type the linksyssmartwifi.com web address in the browser bar.
Later, enter the default username & password on the login window that appears on the screen.
After that, you reach the smart home page of the Linksys device.
Next, proceed with the Basic Settings>Wireless>Edit the SSID name and pre-shared field.
Hereon, mention the chosen network name here and the complicated password to secure the network.
After that, tap on Apply to conduct and save the modifications.
At last, the login process of Linksys Router is complete.
Linksys smart WiFi login Using the App

First and foremost, confirm that the mobile phone is connected to Linkdsys’s network.
Then, install the modernized version of the Linksys app on your smartphone by reaching the App/Play Store.
Now, open the app and then create a new account or use your email to register on the app.
Next, you visit the smart home dashboard of the Linksys Router.
Hereon, navigate the Basic>Wireless>Wi-Fi settings of the device to edit the network name and password fields.
After that, mention the unique name and intricate password in the altered field.
Finally, tap on Save/Apply to complete the login process for Linksys Wi-Fi Router.
Final Thoughts
On the whole, the above-discussed details to Linksys Router Login help you to access your networking device effortlessly. Also, we are equipped with requirements as well as elaborated methods to login to the device.
1 note
·
View note
Text
Steps to Linksys Router Password Change?
For the Linksys Router Password Change, first, open the web browser and mention the linksyssmartwifi.com web address, and then, access the home dashboard using valid login credentials. Once logged in, you will reach the Dashboard. Now, go to the Router settings>Connectivity>Basic Tab, and change the Password. For more information, get in touch with us!

0 notes
Text
How do I Setup Linksys Mesh Router?
For the Linksys Velop Mesh Router Setup, you can use either a web browser or a mobile app. Using the My Mesh app, download or update it first. Then, log into your account using your valid admin details. Afterward, visit the smart setup wizard of the router to configure it accordingly. For the complete process, approach us!

0 notes
Text
A Quick Guide For Linksys WiFi Extender Login
Connect to the Linksys network and launch a web browser to access the Linksys WiFi Extender Login. Enter the IP address of the extender or "http: //extender.linksys.com." After logging in with your credentials, adjust the password and SSID. For best results and smooth signal extension, make sure the extender is within range of the router. It would be appropriate to visit our website if you have any questions. If you need any help with it, you can also speak with our professionals.
0 notes
Text
How to perform the Linksys Router Login in different ways

In terms of networking devices, Linksys routers are known to be the most efficient networking devices. However, to make the most of it, you need to carry out the Linksys Router Login. It is an important step as it enables you to access the functionalities of your device.
Additionally, before proceeding to the login process, it is necessary to have all the essential things like a stable internet connection, computer/phone, accurate IP/web address, Linksys app, correct login credentials, ethernet cables, etc. Generally, you can do the Linksys Smart WiFi Login using the web GUI and the app method. To know further, read below:
How to Login into Linksys Routers in different ways?
There is no doubt that login is the main step to accessing the device and can’t be skipped. As mentioned in the above section, login can be done using the web interface as well as the app. So, to understand them in detail, walk through the below-section:
Linksys Smart WiFi Login using the web interface
To begin with, power on the Linksys router first.
Next, connect the router network to your computer/laptop.
You can also use an ethernet cable for the wired connection if you face issues with the wireless network.
Further, browse “http://192.168.1.1” or “myrouter.local” to initiate this procedure.
Afterward, you need to enter the administrative login credentials on the login window to access the Linksys account login page.
After logging in, the home dashboard of the Linksys Router will appear on the screen.
You can also change the SSID name as well as the password (WPA2-Personal) by visiting the Basic Wireless Settings >Security mode.
Lastly, click on ‘Apply’ and all the changes made will be saved.
Login into Linksys Router via the app
Initially, connect the smartphone to the Linksys network.
Next, download the Linksys app on your phone from the App/Play Store.
Now open the app, and a login page prompts in front of you.
Then, tap on the ‘Create Account’ option or use your email to register on the app.
Additionally, if you are an existing router, then you can log in using your admin credentials.
Once logged in, you will reach the smart Dashboard of the router.
Here, visit the Basic Settings to modify the default network name and password.
Further, type a unique and new SSID and password in the given fields under the WPS2-PSK fields.
At last, click on ‘Save/Apply’ to amend the settings.
Your Linksys router login default process is finished
All in all, the Linksys Router Login is easy after you apply the above-discussed methods. Likewise, our guide will also help you to resolve the common errors that arise during the login process. If you need further assistance with the Linksys devices, then get in touch with our professionals here!
0 notes
Text
Quick And Easy Setup Process For All Linksys Extenders
Do you want to enjoy full connectivity throughout your home or office space but your router isn't allowing you to do so? If yes, then it is a clear indication to buy a Wi-Fi range extender. A good quality Wi-Fi range extender will remove all your connectivity issues and will provide you with full signals, fast internet speed and seamless connectivity. One of the best networking brands that makes high-performing range extenders is Linksys. They have vast options for every need, so you can select the one that fits your preferences, budget and network needs. So, if you choose to buy from them, here's the common easy and simple setup process for you to get started. We will provide three options for the setup process, so you can choose the one, which is easier and more convenient for you.
Before you begin, the first and foremost step which is common for all methods is to place the range extender in a central location of your home which should be near to your existing router. Connect the router and extender with the help of an Ethernet cable. Plug the range extender into an electrical outlet with the provided power adaptor and switch on the entire setup. Wait for a few minutes, so that all the devices are stable and ready for further setup. Now let's see the different methods.
Method 1: Setup With Linksys App
✓ First open the Wi-Fi settings of your device, and connect to the extender's wifi network.
✓ The next step is to download and install the Linksys App. If you are an Android user then download from the Play Store and if you are an iOS user then download from the App Store.
✓ Open the app, create your Linksys account or if you already use the app then login using the set username and password.
✓ Once you log in just follow the instructions to set up and configure the extender. The app will guide you through selecting your Wi-Fi network and entering the necessary details.
And that's all for the app-based setup. Wasn't it super easy and quick?
Method 2: Web Browser Based Setup
We will use extender.linksys.com for this setup method.
✓ Choose any device, and go to its Wi-Fi settings. In the list of all the available networks look for a network named Linksys, upon finding click on Connect. If there is no name as such then refresh the page and the name will appear automatically.
✓ Now, on the same device open a browser. You can use any browser like Google Chrome, Edge, Safari or any other of your choice.
✓ In the address bar of the browser enter extender.linksys.com and press enter. This will take you to the login page. If extender.linksys.com doesn't work then try adding http:// in front or you can also use the default IP address which is 192.168.1.1.
✓ Once you enter the login page, you have to enter the default login details. The username and password are both admin or sometimes it's admin for username and password for password. So if one doesn't work try the other combination. For accurate details always check the user manual that came along with your specific Linksys Extender model.
✓ Once you log in successfully, you have to select the name of your current network whose reach you want to extend and enter its password. Now the screen will guide you to complete the whole process, so keep following all the instructions carefully.
✓ Once done, you can now change the extender's settings as per your wish.
That's all for web browser-based setup. We hope you found it easy and straightforward.
Method 3: WPS Method
One of the easiest and quickest methods to set up Linksys Extenders is using the WPS method. So here's how you can perform this method:
✓ Firstly you need to ensure that your router supports WPS (Wi-Fi Protected Setup).
✓ Now, locate the WPS button on your router and press it. Usually, the WPS button can be found by moving the router upside down.
✓ Within two minutes, press the WPS button on your Linksys Extender.
✓ As soon as you press the button on the extender the light on it will start blinking to indicate that it is connecting to the router. Once it stabilizes, it means the setup is successfully done.
Bonus Points To Enhance The Working Of Your Linksys Extenders
Choose a less crowded Wi-Fi channel by visiting the settings of your extender for a better experience.
Regularly check for firmware updates, if found install them immediately for improved performance and better security.
Make sure the place where you have kept the range extender doesn't have any electronic devices or any metal objects as it can disturb the signals of your extender.
Consider changing the default username and password to something difficult and unique so that your network is protected from hackers.
Use Qos settings for Prioritizing bandwidth for critical applications.
1 note
·
View note
Text
Linksys Extender Not Connecting To WiFi. Quick Guide Here!
If your Linksys extender not connecting to WiFi, first verify its placement; it should be within range of your router. Restart the extender and router. Use the WPS button to connect quickly, or log into the extender's web interface to re-enter your WiFi credentials. If the problem persists, try resetting the extender to factory settings and reconfiguring it. Visit our website for more information about Linksys extender not connecting to wifi. You can contact our specialists for more assistance.
0 notes
Text
How to Troubleshoot Calix Router? Find the Quick Tips Here!
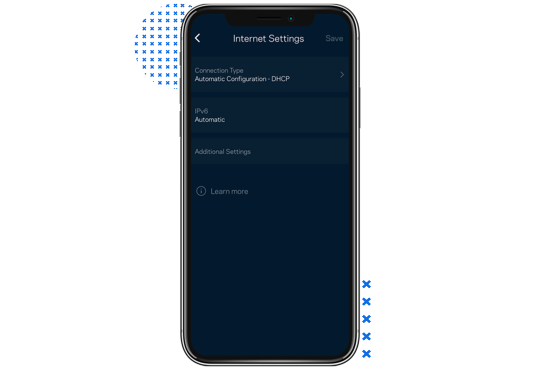
To perform the Bridge Mode Linksys Velop Setup, you can choose the app method.First, log in to Linksys app and tap on the menu. Then go on advanced settings ,and select internet settings.Next ,tap on connection type and select bridge mode .Now click save and enable the bridge mode. To know more, visit our site!
0 notes
Text

Linksys Velop Mesh
Traditional WiFi systems include a router connected to the modem. If you own a small home, then a single router can help you get internet connection on all devices. But if one has a bigger home, with multiple rooms and storeys, a single router fails to meet one’s internet needs
0 notes
Text
0 notes
Text
Steps to Linksys EA6350 Router Setup?
For the Linksys ea6350 router setup, enter the linksyssmartwifi.com web address in the URL bar. Next, enter the valid admin details in the required fields as shown on the login window. Once logged in, visit the Home Dashboard and access the Advanced Settings. Further, follow the instructions or get in touch with us for the full procedure!
0 notes
Text
If you want to log in to the Linksys Router, then proceed with the linksyssmartwifi.com web address. To begin with this, open the web browser and type the above-mentioned URL in the browser bar. Now enter the default admin credentials on the login window. For complete info, approach us!
0 notes
Text
what is vpn passthrough linksys
🔒🌍✨ Get 3 Months FREE VPN - Secure & Private Internet Access Worldwide! Click Here ✨🌍🔒
what is vpn passthrough linksys
VPN passthrough functionality
VPN passthrough functionality is a crucial feature for routers in today's interconnected world. It enables VPN (Virtual Private Network) traffic to pass through the router seamlessly, facilitating secure communication between devices on a network and external VPN servers.
Essentially, VPN passthrough allows devices connected to a router to establish VPN connections without any hindrance. This feature is particularly important for users who rely on VPNs to encrypt their internet traffic for enhanced privacy and security.
Here's how VPN passthrough works: When a device within a network initiates a VPN connection, the VPN passthrough feature on the router recognizes the VPN protocol being used (such as PPTP, L2TP, or IPSec) and allows the encrypted VPN packets to traverse the router's NAT (Network Address Translation) without interference. This means that the router doesn't block or restrict VPN traffic, ensuring that the encrypted data reaches its destination securely.
Without VPN passthrough functionality, routers may inadvertently block VPN traffic or fail to properly handle VPN connections, leading to connection errors or dropped packets. This can be frustrating for users who rely on VPNs for accessing geo-restricted content, maintaining anonymity online, or securing sensitive data.
In summary, VPN passthrough is a vital feature for routers that enables seamless communication between devices and VPN servers. By allowing VPN traffic to traverse the router without impediment, VPN passthrough ensures that users can enjoy the benefits of VPNs without encountering connectivity issues.
Linksys router configuration
Sure! Here is the requested article:
Setting up and configuring your Linksys router is essential to ensure a smooth and secure internet connection in your home or office. Follow these step-by-step instructions to configure your Linksys router effectively.
Connect your Linksys router: Begin by unplugging your modem and then connecting the Ethernet cable from the modem to the WAN port on your Linksys router. Power on the modem, router, and computer.
Access the router interface: Open a web browser on your computer and enter the IP address of your Linksys router (usually 192.168.1.1 or 192.168.0.1) in the address bar. Log in using the default username and password provided in the router’s manual.
Configure basic settings: Once logged in, you can customize the wireless network name (SSID) and password under the Wireless settings. Ensure you choose a strong password to secure your network from unauthorized access.
Set up security features: Enable WPA2 encryption to protect your network from security breaches. You can also set up a guest network to provide internet access to visitors without compromising the main network.
Update firmware: Check for firmware updates regularly on the Linksys support website and install them to ensure optimal performance and security for your router.
Save settings: After making changes, don’t forget to save the settings to apply them. Reboot the router to finalize the configuration.
By following these simple steps, you can successfully configure your Linksys router and enjoy a reliable internet connection throughout your home or office.
I hope you find this article informative and helpful. Let me know if you need more information.
VPN tunneling protocols
VPN tunneling protocols are essential components of Virtual Private Networks (VPNs), playing a crucial role in ensuring secure and private online communication. These protocols establish a secure connection between a user's device and the VPN server by encapsulating the data transferred through the tunnel.
One of the most popular VPN tunneling protocols is the Point-to-Point Tunneling Protocol (PPTP). PPTP is widely supported across various platforms and devices, offering fast connection speeds. However, its security features have been questioned, making it less favored compared to other protocols.
Another commonly used protocol is the Layer 2 Tunneling Protocol (L2TP). L2TP is often combined with IPsec (Internet Protocol Security) to enhance its security features. This protocol is highly secure, making it a preferred choice for many users concerned about their online privacy.
Internet Key Exchange version 2 (IKEv2) is another robust VPN tunneling protocol known for its stability and ability to quickly re-establish a VPN connection when a device switches networks. This makes it ideal for users who frequently move between different Wi-Fi networks or switch between mobile data and Wi-Fi.
OpenVPN is an open-source VPN protocol that offers high levels of security and is known for its reliability. It supports various encryption algorithms, making it a versatile option for users looking for a highly secure VPN connection.
In conclusion, choosing the right VPN tunneling protocol is crucial for ensuring a secure and private online browsing experience. Users should consider their security and speed requirements when selecting a protocol that best suits their needs.
Network security features
Title: Enhancing Digital Defense: Key Network Security Features Explained
In today's hyper-connected digital landscape, network security stands as a paramount concern for individuals and organizations alike. With cyber threats evolving in sophistication and frequency, it's crucial to understand the essential features that fortify network defenses. Here are some key network security features elucidated:
Firewalls: Acting as the frontline defense, firewalls monitor and control incoming and outgoing network traffic based on predetermined security rules. They serve as a barrier between trusted internal networks and untrusted external networks, safeguarding against unauthorized access and malicious activities.
Intrusion Detection and Prevention Systems (IDPS): IDPS continuously monitor network traffic, identifying and responding to potential security threats in real-time. These systems detect anomalies, such as unusual traffic patterns or known attack signatures, and take proactive measures to thwart attacks before they cause harm.
Virtual Private Networks (VPNs): VPNs establish secure, encrypted connections over public networks, such as the internet, enabling users to access private networks remotely. By encrypting data during transmission, VPNs ensure confidentiality and integrity, protecting sensitive information from interception or tampering by unauthorized parties.
Access Control Lists (ACLs): ACLs dictate what network resources users are authorized to access and what actions they can perform. By implementing granular access controls based on user identities, roles, and permissions, ACLs minimize the risk of unauthorized access and insider threats.
Encryption: Encryption scrambles data into a ciphertext format, rendering it unreadable to anyone without the appropriate decryption key. By encrypting sensitive information both in transit and at rest, organizations mitigate the risk of data breaches and maintain data confidentiality.
Security Information and Event Management (SIEM): SIEM systems aggregate and analyze security event data from various sources across the network, providing insights into potential security incidents and facilitating rapid response and remediation efforts.
By incorporating these essential network security features into their infrastructure, organizations can bolster their defenses against cyber threats and safeguard their valuable assets and information in an increasingly digital world.
Virtual Private Network (VPN) setup
Title: A Comprehensive Guide to Setting Up Your Virtual Private Network (VPN)
In an era where online privacy and security are paramount, setting up a Virtual Private Network (VPN) has become essential for individuals and businesses alike. A VPN encrypts your internet connection, ensuring that your online activities remain private and secure from prying eyes.
Setting up a VPN is a relatively straightforward process, and here’s a step-by-step guide to help you get started:
Choose a VPN Service Provider: Begin by selecting a reputable VPN service provider that meets your needs in terms of security, speed, and geographical coverage. Consider factors such as server locations, encryption protocols, and pricing plans before making your decision.
Sign Up and Download the VPN Client: Once you’ve chosen a VPN provider, sign up for an account and download the VPN client software onto your device. Most VPN providers offer applications for various operating systems, including Windows, macOS, iOS, and Android.
Install and Configure the VPN Client: Follow the installation instructions provided by your VPN provider to install the client software on your device. Once installed, launch the application and log in using your account credentials.
Connect to a VPN Server: After logging in, you’ll be presented with a list of VPN servers located in different regions around the world. Choose a server location based on your specific needs, such as bypassing geo-restrictions or optimizing for speed.
Enjoy Secure Browsing: Once connected to a VPN server, your internet connection is encrypted, ensuring that your online activities remain private and secure. You can now browse the web, stream content, and access online services with peace of mind.
By following these simple steps, you can set up a VPN and enjoy a safer and more secure online experience. Remember to choose a reliable VPN provider and regularly update your VPN client for the best possible protection.
0 notes
Text
Quick Steps For Linksys Velop Login
Enter "http //myrouter.local" or your Linksys Velop router's IP address into a web browser to log in. To log in, use the admin credentials. If you don't choose a unique password, "admin" will be used by default. Use the Linksys app, which is compatible with iOS and Android, for more control. To learn more about Linksys Velop login, visit our website. You may talk to one of our experts if you need more assistance.
0 notes