#maximum amount of starters is like 6
Explore tagged Tumblr posts
Visit Tumblr Blog
Explore Tumblr blogs with no restrictions, modern design and the best experience.
Last Seen Tumblr Blogs


Fun Fact
After the announcement of the deal with Yahoo!, there were 170K signatures of unhappy Tumblr users petitioning to prevent the sale in 2013.
Text
you can edit maxis cells through the sporepedia if you edit one of your own cells from sporepedia in the main menu, then open sporepedia in the cell editor and double click any of the maxis cells. this also works on any other cells with hidden cell editor parts, including eyeguy, and any usermade ones (though you cant save them while it they have those parts)

so heres some oddities you can see with the maxis cells
-
as you can see on that screenshot this flagella part that Shyster has is lit weirdly in build mode, though its normal in paint mode


other cells use the same parts and i recall the flagella being invisible outright before, but i guess its just transparent this time?
-
as you may know, the only cells you can make normally have 6 vertebrae. all the cells you can start cell stage with, and all the default cell editor bodies (which are also in the hidden cell editor) have 6 vertebrae
but some maxis cells have more or less vertebrae. Buzzy (shown with parts removed because the eye was obscuring them) has 5

whereas Squirty has 8!

the early squiggly design would have had even more vertebrae than that

eyeguy is the only cell with only 4 vertebrae

anyway, curiously most maxis cells (aside from starter cells) have 5 vertebrae (even squiggly!). it makes me wonder if they planned the player cells to max out at 5 vertebrae too

it might be worth noting that the three non-starter maxis cells with 6 vertebrae Booster, Grubby and Pokey might have all been added fairly late in development, as none of these three are in that beta cell designs concept art thats on spore wiki unsourced
what a difference it is in sizes of cells with the same amount of vertebrae too, though mostly thanks to the other parts they have


you can edit any of the maxis cells with the weird vertebrae amounts and just strip all the parts to make another cell with the same amount of vertebrae, like these guys here


-
i heard that the middle vertebra on puffish is scaled bigger than spore would allow. its not, its actually slightly smaller than maximum, but the weird part here is that the middle vertebrae is scaled to near-maximum and the other four vertebrae are near-minimum. which would be very difficult if not impossible to replicate due to the fact that scaling a vertebra will scale two adjacent vertebrae on both sides along with it


-
Squiggly's flagella, alongside using this same transparent flagella part, also has them clip into the floor in a 3d space a bit

if you enter the cell editor test drive with squiggly, you can actually see the flagella are placed on the bottom half of the cell and angled downwards, though the camera makes it really hard to tell


the flagella is also placed kind of low on Ducky, kind of Junior and Maa too, but that might be normal since its also that way on Kkroot. it might just be that the game places them low vertically sometimes

this is unrelated but enjoy shyster from the front

edit: oops misplaced something
36 notes
·
View notes
Text

Long Horn Steakhouse is a well-liked restaurant chain with more than 600 locations nationwide, renowned for its reasonably priced steaks and filling menu. This steakhouse offers a wide variety of dishes to suit every palate, including hearty mains like Redrock Grilled Shrimp and Cowboy Pork Chops, as well as decadent starters like Texas Tonion and Firecracker Chicken Wraps. As you browse the LongHorn menu, you might be drawn to their renowned steaks, but it is important to understand that not every option is in line with a health-conscious dining philosophy. Although it may be well known that a fatty steak is not always the healthiest choice, you might be surprised at how unhealthy some of LongHorn's selections can be. In order to determine the most unhealthy item on the LongHorn Steakhouse menu, we examined all of the nutritional information for this article. Since our mission is to empower you to make informed decisions when dining out, we have also selected a different steak order that might be more in line with your health objectives.6254a4d1642c605c54bf1cab17d50f1e The #1 Unhealthiest Order at Long Horn Steakhouse: Long Horn Porterhouse LongHorn Steakhouse Nutritional values per 22-ounce serving:1,280 calories67 g of fat (27 g of saturated fat)2,450 mg of sodiumSugar: 1 g, Fiber: 2 g, Carbs: 1 g150 g of protein The largest steak on LongHorn's menu, weighing in at a substantial 22 ounces, is the Porterhouse. This cut of steak combines a sizable portion of filet with a bone-in strip. Some of the most popular and tender cuts of beef are found in the area below the backbone of the cow, which is where the porterhouse cut originates. The Porterhouse has a significant drawback despite its allure: its enormous size. When cooked, 3 to 4 ounces of beef is the recommended serving size. Even with the bone-in portion taken into account, this 22-ounce steak is larger than a reasonable serving size. Because porterhouse is also known for being a marbled cut, it contains a lot of fat—in this case, 135% of the daily maximum amount of saturated fat that can clog arteries. Its sodium content, which is 110% of the recommended intake, also exceeds daily guidelines. Furthermore, even though 150 grams of protein might seem impressive, your body will not probably benefit fully from it. This protein overload is more than your body can use at one time because the body absorbs proteins best when they are in the range of 25 to 30 grams per meal. Eat This Instead: Renegade Sirloin (6 ounces) Longhorn Steakhouse Nutrition (For a 6-ounce serving):320 calories15 g of fat (5 g of saturated fat)530 mg of sodium2 g of carbohydrates (0 g of fiber and 0 g of sugar)36 g of protein It is time to eschew the eating habits of the 1980s—a single, enormous 22-ounce steak should not be the only thing on your plate! For a satisfying 6-ounce serving of sirloin steak, opt for the Renegade Sirloin menu item instead of the Porterhouse; even the 9-ounce option is still superior. Arrange your plate so that half of it is made up of fruits and/or vegetables, one quarter is made up of starches, and the other quarter is made up of protein. To balance out your meal, choose healthier, lower-calorie sides like salad, steamed asparagus, or broccoli. Avoid foods high in calories and saturated fat, such as macaroni and cheese and fries. Instead, share a baked potato with a dining partner; a whole potato with a steak is simply too much.
#FoodandCooking#article#freelance#healthyeating#LongHorn#restaurantchains#steakhouse#Unhealthiest#unhealthy
0 notes
Text
youtube
Do Flying Mounts and Fast Travel BREAK IMMERSION in Persistent World Games? Coming off of my YouTube video about optimizing the fun out of MMORPGs, someone asked me to do a video on Do Flying Mounts and Fast Travel break the immersion in Persistent World Games? The poll is here if anyone hasn’t added their vote or you want to add in some more feedback: https://www.youtube.com/post/UgkxX1p7V6lRotjeHrp2ubDkOTmgbfXM5M6f
One of the biggest problems with persistent world (MMORPG) worlds as we know them now is that there isn’t any danger from the environment/world. As it is now the only real danger in most of these games are the few zones that happen to be “max level” zones or from PVPers in games where non-consensual PVP is allowed. Some games that are due out in the future like Throne and Liberty basically operate on a zone-level concept where you know if the mobs in the area are going to be a threat. This has been repeated in other games like FFXI, FFXIV, WoW, Archeage, Eve Online (security system) and most other games. I am still hopefully for Ashes of Creation, because one of the biggest selling points is their node system, which doesn’t create zone that have a fixed level content in them, but instead creates a world where there is a range of content from starter content to a maximum level as determined by the level of the Node.
Still I think another game in development, Eternal Tombs, is taking this risk or threat of an open world to a new level. Eternal Tombs plans on having events run by live staff so that you aren’t ever really sure if you are safe since an event can spawn off anywhere. If you’ve not seen this topic, I did a video on it here: https://youtu.be/Dx_B6RNP4LM
I would agree with most of the respondents to the poll that Flying Mounts and Fast Travel do break the immersion of persistent world games, however, from the Massively OP article that started this optimization discussion, Sam Kash wrote “as if the fun was in screwing around for an hour waiting for the actual game you want to play to begin.” If you’ve not had a chance to check out that article you can do so here: https://massivelyop.com/2024/03/07/massively-overthinking-are-we-optimizing-the-fun-out-of-mmos/
I would argue that Sam is right. Players, the average players not the college students or high school students on summer break, have on average about 3 hours per night for play sessions and more on the weekends. A player who only has 3 hours doesn’t necessarily want to trek 90 minutes to do content, especially if the content is going to take an unknown amount of time. As much as I hate to say it, I think gone are the days of 6 hour power gaming sessions on a nightly basis, so unfortunately that is where fast travel comes in unless you make the trip meaningful.
If you either have meaningful events pre-planned into the trek, or the dungeon can only be done as part of a story chain and not just on farm, or if you have random world events that can spawn at any time (which also have to be of a risk/reward. Content for the sake of content isn’t good, neither are cheesy rewards for the rewards.
This will lead into the next question, what kind of open world content is good?
0 notes
Text
Portable car battery jump starters are must-have devices for any driver. These compact tools allow you to start a dead battery without requiring another vehicle or external power source. This guide covers everything you need to know about choosing, using, and maintaining portable jump starters. What Are Portable Jump Starters? A portable jump starter is a device that contains its own battery and cables to connect to a vehicle's battery terminals. This allows you to "jump start" a car with a dead battery by delivering enough power to the battery to start the engine. Jump starters provide a convenient way to start your car anywhere, without relying on access to another vehicle for a jump. Their compact size also makes them easy to store in your vehicle's trunk or glove compartment so they're handy in an emergency. Key Features Internal battery - Typically lithium-ion or lead-acid, which provides the power to jump start a vehicle. More power equals more jump starts per charge. Cables - Heavy duty cables with clamps to attach to battery terminals. Cable length can range from 2-20 feet. Peak amps - The maximum amperage the device can provide for short bursts when starting. More is better for larger engines. Safety features - Reverse polarity warning, spark protection, auto shut off. Portability - Compact sizes around 10 x 5 x 5 inches. Weights 2-20 pounds. Benefits of Portable Jump Starters Using a jump starter has a number of advantages over jumper cables connected to another vehicle: Convenience You can start your car battery wherever you are, without relying on another vehicle being available. Storing one in your car means help is always at hand. Compact Size Jump starters are small enough to keep in your trunk, glovebox, or even backpack. Jumper cables require another vehicle. Multi-Use Many jump starter models can charge phones, tablets, and other USB devices in addition to jump starting cars. Independence You don't have to wait for another person to help you with jumper cables. Quickly jump start yourself. Safety Jump starters include safety features like reverse polarity protection. Battery explosions are a risk when improperly connecting jumper cables. What to Look for When Buying a Jump Starter There are a few key factors to consider when choosing a portable jump starter: Peak Amps Peak amps relate to the maximum amount of power the jump starter can provide. This determines how large of an engine it can start. More peak amps enable starting larger, fully drained batteries. Small size jump starters range from 300-1000 peak amps, good for 4-6 cylinder engines. Medium units go up to 2000 peak amps for larger vehicles and trucks. Heavy duty options over 3000 peak amps can jump start tractors and large diesel engines. Battery Capacity Battery capacity determines how many jumps you can do per charge. Larger batteries allow more jump starts between charges. Look for 10-30 jumps from a single charge. Cable Length Longer cables give you more flexibility on where you can place the jump starter relative to the car battery. 10-20 foot cables are ideal to easily reach batteries under the hood or trunk. Safety Features Reverse polarity warning alerts you if incorrectly connected. Auto shutoff turns the unit off after a set time to prevent overcharging. Over-voltage protection prevents damage to the car's electrical system. Types of Jump Starter Batteries There are three main types of internal batteries used in portable jump starters: Lithium Ion Most popular type due to light weight and compact size. Hold a charge for many months when not in use. Charge fully in 2-3 hours. Can provide hundreds of jumps per battery lifespan. More expensive but longer lasting. Lead-Acid Traditional battery type, heavier but more affordable. Can't hold a charge as long - needs recharging every 30-60 days. Provide around 100 jump sta
rts when well maintained. Takes 8-12 hours to fully recharge after use. Ultracapacitors Newer battery technology charges in seconds. No chemical reactions so can charge thousands of times. Downside is high self-discharge - loose charge in days/weeks. More expensive currently. Best for frequent quick charging needs. Top Portable Jump Starter Models NOCO Boost Plus GB40 NOCO Boost Plus GB40 Up to 20 jump starts on a single charge. 1000 peak amps from compact lithium battery. Spark proof technology. 10 foot cables. Multi-function for phone charging etc. Around 1.2 pounds. Stanley J509 Stanley J509 500 instant starting amps, 1000 peak amps. Built in 120 PSI air compressor for tire inflation. Heavy duty clamps with reverse polarity alarm. LED light and USB port. 8 foot cables. Clore Automotive JNC660 Clore Automotive JNC660 1700 peak amps, 425 cranking amps. Heavy duty lead-acid battery. Full sized jumper clamps for diesel trucks. Built-in charger and hazard light when in use. 20 foot cable length. Avapow Lithium Car Jump Starter Avapow Lithium Car Jump Starter 2000 peak amps can start 8L gas or 6L diesel engines. Portable and compact at 1lb 7oz. Safely jump starts up to 30 times per charge. Intelligent clamps detect battery health status. Multi-function as a flashlight and phone charger. Tacklife T8 Tacklife T8 800 amp compact lithium jump starter. Budget option good for most vehicles. Built-in alarm and LED light. Provides up to 30 jump starts per charge. Cigarette lighter for charging devices. Using Your Portable Jump Starter Safely While portable jump starters make starting your car much more convenient, there are some safety precautions to follow: Read the Manual Read the instruction manual completely before using your jump starter. Follow all warnings and connection procedures. Make a Secure Connection Attach the clamps tightly to clean, bare metal spots on the battery terminals. This ensures good electrical contact. Avoid Sparks Sparking can occur if the connection is interrupted when current is flowing. Turn the jump starter off before removing the clamps. Don't Overcharge the Battery Most models automatically shut off when the car engine starts. Always disconnect shortly after. Check Battery Levels Many jump starters have built-in battery level indicators. Recharge after each use and check levels every 3-6 months. Store Properly Keep your jump starter cool and dry in temperatures between 40°F and 80°F when not in use to maximize battery life. Maintaining Your Portable Jump Starter With proper care and maintenance, a portable jump starter can deliver reliable service for years: Recharge After Each Use Fully recharging the internal battery after every use will maximize the lifetime of lithium-ion jump starters. Inspect Cables and Clamps Check for any wear and tear over time on the cables and connectors. Replace clamps if they aren't tightly grabbing or making good contact. Clean the Exterior Use a damp cloth to clean the outside of the unit and prevent dirt buildup on the connections. Avoid submerging the jump starter in water. Replace Batteries Lithium-ion jump starters may need a new battery after 3-5 years if holding less charge. Replacing lead-acid batteries every 1-2 years extends lifespan. Check Before Winter Ensure your jump starter has a full charge before winter temperatures set in, when the cold can sap battery charge. Store in a warmer area. By selecting the right portable jump starter for your vehicle, using it properly, and performing regular maintenance, you can count on fast and convenient starts whenever you need them. The ability to quickly recharge your battery anywhere provides confidence and security. FAQs How long does a portable jump starter battery last? Most lithium jump starters will last 3-5 years or 200-300 charge cycle
s if properly maintained. Lead-acid batteries last 2-3 years. Can a portable jump starter damage your car? When used properly, a jump starter will not damage your vehicle. Always follow safety precautions to avoid issues. How many amps do I need in a portable jump starter? For most sedans and small SUVs, a minimum of 400 peak amps is recommended. Larger vehicles may need 800-2000+ peak amps. What size battery can a portable jump starter start? Compact portable units can typically start batteries up to around 5-6 liters gas or 4-5 liters diesel. Larger jump starters are needed for V8s, heavy duty trucks. Are portable car battery jump starters better than jumper cables? Jump starters are more convenient as they don't require another vehicle. However, jumper cables are useful in certain situations when a second car is available to provide power. #Wiack #Car #CarInsurance #CarRental #CarPrice #AutoLoans
0 notes
Text
Rampardos for Pokemon Unite!

Season 1
Prev: Torterra - Scrafty - Starmie - Luvdisc - Boltund - Tinkaton
Now, I’m not really a dinosaur kind of guy. I wasn’t one of those kids that loved and revered dinosaurs for what they were and what they could’ve been like. That said, Rampardos fills me with a sense of nostalgia and familiarity when I see it. Maybe because I used one all the time back when I played competitively, using it as the ace for my Trick Room teams. I always loved using it to one-shot everything to win the battle. And even beyond that, it appeals greatly to me as a big lovable dino with a head case of hard headed bravery.
And now, it’s time for me to return the favor to one of my Gen 4 favorites. Let’s bring this ancient creature back from the Cretaceous era and into Pokemon Unite!
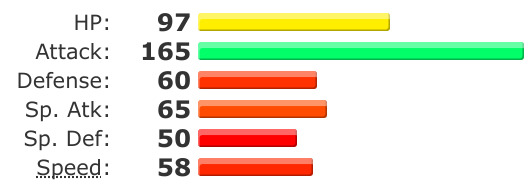
In all of the years of Pokemon, an extremely sparse few have ever had a stat totaling more than 150. There are the well known giants such as Mewtwo with its high Sp. Atk, or Blissey with her super high HP. But choice among them is Rampardos, having an Attack stat so high, it is the 4th highest Attack stat of all the pokedex, having only been beaten out by Deoxys Attack introduced in the generation before it.
Granted, the rest of its stats aren’t that great. A modest HP stat of 97 makes it kind of bulky, but its defenses are extremely low. Low Sp. Atk and Speed are also a burden on its ability to use moves, so a lot of what Rampardos can do is rather limited aside from hitting things really hard. Instead, let’s figure out Rampardos’s archetype by process of elimination. As an Attacker, Rampardos lacks the Sp. Atk needed to fire off strong hits, and I don’t think shooting rocks is Rampardos’s style. It doesn’t have the defenses to be an All-Rounder or a Defender, and there’s no way it can be expected to play the role of a Supporter. And so, with nothing else for it, Rampardos has gained the role of a...
Speedster
Basic Attack - Melee/Attack
A stamping stomp romp that deals damage to enemies close by. Can be used while the pokemon is moving, but deals less damage and has reduced range. Powers up the next hit of Headbutt, Zen Headbutt, or Head Smash when used.
The range of the basic attack is above average when standing still. The range of the basic attack while running is below average.
When mashed or held, the basic attack deals damage once every 0.5 seconds.
Each hit powers up Headbutt, Zen Headbutt, and Head Smash by 50%, to a maximum of 300%. Damaging multiple enemies accelerates the boost, 50% for each enemy hit. The boost expires even if the attack misses.
With the role of a Speedster, Rampardos has high expectations for its damage and mobility options. For starters, its basic attack is a wide ranged stomping attack that damages all nearby enemies. And this attack range is far reaching too, which makes Rampardos dangerous to be near. And for good reason, each hit powers up the damage of Headbutt, Zen Headbutt, or Head Smash when that attack is used, and can boost the move’s damage by as much as triple!
Now, of course, Rampardos cannot afford to take many hits, so the basic attack operates more as a risk vs reward, but the risk tapers off if you have allies nearby. One notable effect is that Rampardos can keep stamping the ground even while it's moving, but the range is reduced in exchange. The ability to keep attacking while moving is something all other Speedsters struggle with, including Gengar. While Rampardos loses out on range, each hit does still power up your head attacks, which results in a huge payout should you land that attack.
Now, the attack boost accelerates if you damage multiple enemies with one stomp, but the risk is not worth it. DO NOT engage multiple enemies unless you have sufficient backup that can stun the enemy long enough to get those multiple stomps in. Hitting one enemy 6 times is enough to power up the head attacks to max, but hitting 2 enemies 3 times achieves the same thing in a shorter amount of time, and hitting 3 enemies two times does this as well. The problem is, no opposing player will let that happen if they can help it, and this kind of brashness is a good way to put a giant target on your back.
You’re playing as a Rampardos, that’s already risky enough. Use your head, metaphorically and literally.
Ability: Mold Breaker
When an enemy is hit from this pokemon’s attack, it will not activate that enemy’s ability.
Abilities that activate when the pokemon’s HP reaches a certain threshold are exempt, as they use the HP percentage as a trigger rather than receiving damage.
The Slow Smoke item (and other hindrance inducing battle items that have yet to be made) is not affected by Mold Breaker. Items like Razor Claw, which inflict a movement speed debuff on hit, do bypass abilities with Mold Breaker, however.
For such a straightforward ability, Mold Breaker is one of the most powerful. Rampardos already has a tough time dealing with the stunning options the enemy team has, so putting a stop to their abilities is one way it can smash through unopposed.
The effect is simple. If Rampardos attacks and deals damage to an enemy with an ability that will react to that attack, it simply won’t activate. The easiest example is Espeon’s Magic Bounce or Duraludon’s Heavy Metal. Both abilities grant the pokemon a protection from hindrances one time before going on cooldown. But if Rampardos inflicts a hindrance through one of these moves, the hindrance is overruled by Rampardos’s Mold Breaker. The hindrance protection is still there and will kick in when another enemy damages them with a hindrance inducing attack, but not if it comes from Rampardos.
A short list of all abilities and their interactions (not including pokemon from my own posts); Blissey’s Natural Cure will not cure the pokemon of hindrances inflicted by Rampardos, but it’s cooldown doesn’t activate. Cramorant’s Gulp Missile will not counterattack. Dragapult’s Clear Body doesn’t reduce the duration of debuffs inflicted by Rampardos. Dragonite’s Multiscale will not block damage received but it will not go on cooldown afterwards. Duraludon’s Heavy Metal will not stop the pokemon from being shoved or thrown. Likewise, Espeon’s Magic Bounce will fail to block hindrances. Garchomp’s Rough Skin will not deal counter damage. Gardevoir’s Synchronize will not inflict the same debuff or damage over time effect on Rampardos. Glaceon’s Snow Cloak will not block hindrances and will not make the pokemon invisible. Greedent’s Cheek Pouch will not produce a berry on hit. Machamp’s Guts do not increase attack when hit by a hindrance. Pikachu’s Static will not cause a counter stun to all surrounding enemies. Slowbro’s Oblivious will not store HP and cause the pokemon to receive full damage from Rampardos’s attacks. Sylveon’s Pixilate will not increase it’s Sp. Atk and Sp. Def, but the ability still triggers when it deals damage to Rampardos. Wigglytuff’s Cute Charm will not force Rampardos to approach the pokemon, but will still activate if another pokemon triggers the ability and Rampardos is in range. And lastly, Zeraora’s Volt Absorb do not generate an electric charge and will not boost its Attack.
Now, there are some pokemon I did leave out and whose abilities are in fact affected by Mold Breaker. However, they belong to the unevolved forms of pokemon whose abilities change after evolving. Larvitar’s Guts and Kubfu’s Inner Focus are negated by Mold Breaker, but these pokemon tend to evolve early on during the game, so the interaction is negligible most of the time.
The other abilities I left out seem to be the most notorious ones, such as the various boosting abilities like Torrent and Blaze. The devil is in the details, and Mold Breaker doesn’t stop these abilities from activating because they don’t respond to attacks or damage. Rather, if the pokemon’s HP falls below a certain threshold, they activate, and it doesn’t matter what causes it. Basically, the pokemon’s HP is the activator for these abilities, not necessarily the attacks that reduced the HP to that amount in the first place. So, unfortunately, Cinderace’s Blaze will kick in when you reduce it’s HP down, making it possible to retaliate with extremely quick feet flashes.
All you can do is deal more damage than the ability can handle. The pokemon can’t abuse it’s low HP powered ability if its HP is set to 0 (finger to brain gesture).

At the start of the game, Rampardos will start out as Cranidos. You can choose between Leer and Headbutt as your first move. By Level 3, you will have learned both.
Move 1: Leer
Gives all enemies in range a nasty look, stunning them briefly and reducing their Defense for 4 seconds. 8s cooldown.
Affects all enemies in a fan shape in front of the pokemon. Reduces defenses by 50%.
Leer stuns enemies for 0.5 seconds.
Reducing the defenses of your enemies is a powerful opening play, especially since the Mold Breaker ability prevents the debuff from being reduced or nullified. The range is limited and you only have 4 seconds to take advantage of the debuff, but it’s a great move to lead with against the bulky Defenders or All-Rounders you meet in the middle of the lane.
While 8 seconds of cooldown doesn’t give you much flexibility, it’s a matter of skill in how you use the move. Did you manage to get two or three enemies in one Leer? Good, now go buck wild. Oh, did you miss? Too bad, now you have to wait for the cooldown to come off of its timer before you can try again. Hope you don’t get KO’d in the meantime because of your itchy trigger finger.
Move 2: Headbutt
Charges forward head first, shoving enemies caught in the attack. Dealing damage to an opposing pokemon resets this moves cooldown. 8.5s cooldown.
Cranidos stops dashing at the point of impact. Enemies are shoved a fair distance away and are unable to act while being thrown.
If the enemy is immune to hindrances, the move will still have its cooldown reset if it successfully deals damage.
With reckless abandon, Cranidos charges head first, rudely shoving away any and all enemies along the path. While Headbutt is a simple and straightforward attack, in more ways than one, it does get a massive boost from your basic attack, which drastically increases its potential to KO. Not only that, its stun and shove effect cannot be blocked by abilities thanks to Mold Breaker, which makes it easy to throw the attack around with little repercussion.
Speaking of percussion, Headbutt resets its own cooldown when damaging an enemy from the opposing team, which is very powerful. Since the stun effect cannot be blocked, this means Cranidos can very easily bully an enemy into submission, KO’ing them with little counterplay. Now, it should be noted that Headbutt’s Shove effect is still blocked by protections such as Full Heal or Safeguard, which can give the enemy enough time to retaliate. Moreover, if the enemy you’re bullying has backup, don’t expect to last long, as Headbutt has limited range and you’re likely to be KO’d in return.
Also, this only works against enemy players. Wild Pokemon will not trigger the cooldown reset, so if you somehow mess up your aiming, you’ll have to deal with the long cooldown. Don’t get it wrong, Headbutt is a powerful move to use against your foes, but there’s a reason for that, and that’s because Cranidos has very little survivability when challenged.
I’m going to be saying this a lot, but use your head. Literally and metaphorically.
At Level 4, Leer becomes either Stealth Rock or Ancient Power.
Move 1a: Stealth Rock
Unleash a volley of floating rocks in random directions directly forward. Each individual stone targets an enemy and deals damage, reducing their movement speed and increasing the damage they receive from your next attack. The more hits Stealth Rock deals to an enemy, the greater the movement speed reduction and increased damage they receive. 9.5s cooldown.
At Level 11, Stealth Rock becomes Stealth Rock+.
More rocks are thrown. Extends the duration of movement speed reduction and increased damage.
One hit from Stealth Rock reduces movement speed by 10% and increases damage dealt by 10% for 5 seconds. Subsequent damage adds 10% more to each factor, but the duration of the effect is reset to 5 seconds. The effect caps at 75% reduction. The rocks disappear after dealing damage.
8 rocks are thrown with Stealth Rock. Stealth Rock+ throws 12 rocks and extends the duration of its debuff to 7.5 seconds.
If the debuffs are cleared by effects or by the timer running out and then reapplied, the debuff power starts over at 10%.
Stealth Rock and Stealth Rock+ linger in an area for 6.5 seconds before disappearing. The cooldown starts when the move is used.
Most Speedsters manage by constantly dealing damage while on the move. They don’t really have a penchant for laying traps like Rampardos here, but it does help in covering a large area to take advantage of.
First of all, you’re still a Cranidos when you learn Stealth Rock, or Ancient Power, and you don’t evolve until a little later, but I will be referring to little Cranidos as Rampardos from here on out.
Now, giving up Leer for Stealth Rock is a matter of expanding your influence. While the ability to reduce defense is greatly weakened, Stealth Rock also reduces the movement speed of all affected enemies, making it easier to chase them down. Don’t forget, these debuffs aren’t blocked by abilities thanks to Mold Breaker, which makes it easy when dealing with one trick Attackers like Glaceon. The attack is also difficult to dodge, as each will home in and attack any enemy within range. This activation range is very small, but Stealth Rock throws a lot of little stones that’s impossible to maneuver through.
Against opposing enemies, Stealth Rock is best used to deal with mobile Attackers and Speedsters, as they tend to zip around out of reach and attack when you leave yourself wide open. Stealth Rock casts a wide net not only to slow these jittery enemies down, but also drastically increases the followup damage. If you manage to get a few hits in with your basic attack, the subsequent Headbutt or its upgraded moves will surely One-Hit KO the enemy. It’s also a great plus for your teammates in that it makes these enemies easier to deal with. Stealth Rock increases damage received, not necessarily reducing their defense, meaning that any attack type will deal increased damage and secure the KO reliably.
However, Stealth Rock offers very little protection for Rampardos, as it doesn’t reduce their attack or limit their offense in any other way, making you prone to counterattacks, especially if they have hindrance protection. If you’re fast enough, you don’t have anything to worry about, but if your opponent has even the slightest edge, you might be on the receiving end of the respawn timer.
Move 1b: Ancient Power
Summons a force field of skull fossils to surround you, damaging nearby enemies. When damage is received, a skull fossil disappears in exchange for nullifying the damage. Each skull fossil that disappears in this way boosts the attack power and movement speed of the pokemon. 9.5s cooldown.
At Level 11, Ancient Power becomes Ancient Power+.
Increases the amount of fossils generated and prevents hindrances from affecting the pokemon when blocking damage.
6 Skull Fossils are generated when Ancient Power is used. Ancient Power+ makes 9 fossils.
Before Ancient Power is upgraded, damage is nullified but hindrances aren’t. Blocking damage increases movement speed and attack power by 10% for each Skull Fossil consumed. These boosts last for 5.5 seconds and reset each time the boost increases.
Ancient Power creates a damaging effect around Rampardos that deals small amounts of damage very rapidly. The rate of damage decreases the less fossils you manage to keep.
Ancient Power and Ancient Power+ last for 4.5 seconds before disappearing.
Rather than investing in a projectile option, Ancient Power augments Rampardos’s defensive capabilities by granting it great protection. When used, it summons a force-field of Skull Fossils to surround and protect it (are these fossils its dead relatives? Oooh, don’t wanna think about that).
The field of fossils damages nearby enemies, increasing its offensive capabilities when engaging in melee combat with other pokemon. However, this isn’t the main draw of the move, though it is very handy against Wild Pokemon. The real boon of Ancient Power is the ability to nullify damage completely, in exchange for losing one of these fossils. Losing fossils in this way does reduce the damage you deal to nearby enemies, but in return, it grants Rampardos a small Attack and Movement Speed boost. Not only that, it stacks with each fossil lost to blocked damage, drastically increasing Rampardos’s destructive potential when all fossils are lost.
Ancient Power makes 6 fossils that protect you, resulting in a possible 60% attack and movement speed boost if all fossils are used up. Ancient Power+ makes 9 fossils, bringing up the possible power boost to an insane 90% attack and speed boost. Not only does Ancient Power protect Rampardos, but it also rewards it for being reckless in this way. What’s the counterplay?
Patience. Both attacks only last for 4.5 seconds, so a smart opponent will wait until the fossils disappear before reengaging Rampardos. This is really bad for it, because afterwards Rampardos has to wait 9.5 seconds of cooldown before it can use the move again. And even if it manages to get the boost, it only lasts for about 5 seconds before the boost goes away. Granted, this boost time resets each time a fossil is lost, but it’s a lot less time than you would think, especially given Rampardos’s frailty and lack of protection.
Using Ancient Power to dive into team fights is also not without its risks, as the Ancient Power boost only provides a limited number of protection against hits. In the heat of battle, it’s very easy to lose all of those fossils and then get KO’d before accomplishing anything meaningful. Also, until the move upgrades to Ancient Power+, it doesn’t block hindrances from effecting you, which can make the mid-game a difficult endeavor.
Even so, the move is very useful in handling opposing All-Rounders, Defenders, and Supporters. All-Rounders and Defenders will not want to risk engaging Rampardos if it has Ancient Power fortifying it, and Supporters will have very little counterplay to challenge Rampardos even if it uses up all of its fossils and is vulnerable to damage again.
Now, keep in mind that most of this applies to Cranidos as well, as the little butt head learns all of these moves before evolving. But once it evolves into the mighty Rampardos, its stats gain a huge spike in power, greatly boosting its power level.

At Level 7, Cranidos becomes Rampardos. At the same time, Headbutt becomes either Zen Headbutt or Head Smash.
Move 2a: Zen Headbutt
Harnesses psychic power into your head before charging forward. While charging, you are resistant to hindrances and your defenses increase. Upon impact with an enemy, reduces your cooldown by half and stuns the enemy briefly. 8s cooldown.
At Level 13, Zen Headbutt becomes Zen Headbutt+.
Increases speed and travel distance. Reduces cooldown by 6 seconds on hit with an enemy.
Zen Headbutt and Zen Headbutt+ increase your defense by 60% while charging the move. The extra defense and hindrance resistance carry over when the attack comes out.
It takes a full second for the move to fully charge and attack. You can turn and aim while charging Zen Headbutt, but turning speed is very slow. Aiming before the move comes out is unaffected.
Zen Headbutt stuns enemies for 1 second.
Your cooldown is reduced when you damage an enemy. The damage range is similar to that of an explosion and can stun multiple enemies. However, the cooldown doesn’t reduce any further if you damage multiple enemies.
Eject Button can be used to change Rampardos’s location while charging the move.
Rampardos forfeited a lot of brain power in evolving, but that doesn’t seem to have stopped it from learning the big brain move of Zen Headbutt. Not only is the range greater than Zen Headbutt, but it’s also much stronger and even more unstoppable thanks to the power of harnessing the mind.
The ability to become resistant to hindrances while charging the attack grants Rampardos the ability to break through conventional means of hindrance, allowing it to bypass moves like Mr. Mime’s Confusion or Snorlax’s Yawn, all of which would have stopped the dinosaur in its tracks. The extra defense is a great plus too, though it doesn’t do much considering Rampardos’s frailty.
One downside is that the move doesn’t automatically refresh itself when it deals damage, but the extended travel distance and ability to stun multiple enemies is a fair trade-off. Also, that is a full second of stun dealt on hit, giving you just enough time to get off two basic attacks. If you hit multiple enemies, your next Zen Headbutt will practically triple in damage, and that extra stun basically reduces your cooldown down to 3 seconds instead, basically!
Combined with Stealth Rock or Ancient Power, Rampardos suddenly becomes a formidable Speedster to watch out for. Stealth Rock reduces the enemy’s ability to escape while Ancient Power makes it nearly impossible to counter Rampardos’s aggression before it gets to attack again. And do not forget, Mold Breaker is able to stun enemies regardless of their ability, making the attack much safer for Rampardos.
It should be noted, though, that the attack is easy to dodge. While Rampardos is charging, it takes a full second for it to reach full power before attacking. It’s designated direction is easy to guess as Rampardos faces which way it’s going to run at, and turning is drastically reduced while charging. If Rampardos misses, you’ll have to wait 8 seconds before using Zen Headbutt again, and you might not survive that time if the enemy is really aggressive.
Zen Headbutt+ increases the travel distance and attack speed, the two combined means that Rampardos runs further in the same amount of time as regular Zen Headbutt. It’s great to use when engaging enemies sooner, but the attack might send you further into enemy territory than you intended. The major upside though is the drastically reduced cooldown if you get a hit in, which brings Zen Headbutt+ back to the effectiveness of Headbutt, back when you were a little Cranidos.
This must be what they mean when they say brain over brawn. Use your brain power to beat your enemies to death!
Move 2b: Head Smash
Charges forward head first recklessly, running in a straight line. You are completely immune to hindrances while charging. Any enemy you collide with are picked up and dragged along. Upon collision with a wall, the attack explodes, dealing damage to all enemies caught in the move as well as those nearby. If you reach the maximum distance before the move ends, you will stop charging and be stunned briefly while any enemy you caught will be thrown a short distance. Reduces the cooldown of this move by 2.5 seconds for each enemy on the opposing team you damage with this move. 15s cooldown.
At Level 13, Head Smash becomes Head Smash+.
The attack will keep going until you run into a wall.
Picked up enemies are incapacitated and cannot use moves or items to escape. However, if the enemy has hindrance protection before colliding with the move, they will be damaged but will not be picked up by the attack.
If you fail to hit a wall with Head Smash, Rampardos will be left unable to act for 0.5 seconds while any picked up enemies will be shoved a bit from the stopping point. The cooldown of the move kicks in when the move ends by hitting a wall or failing in this way.
The impact deals damage equal to 4.5x Rampardos’s Attack stat.
In life, there are three things that you absolutely do not want to be hit by; a lawsuit, a hospital bill, and Rampardos’s Head Smash, which incidentally you can get all three if you own a Rampardos, constantly.
With what might possibly be the longest cooldown timer for a move in the game (so far), Rampardos’s Head Smash counts down to an agonizingly long wait time of 15 whole seconds. That’s a quarter of a minute! There’s only 10 of those in a whole match! For such a long wait time, you’d think the move would be worth using, and it is. Instead of a nauseating recoil factor, Rampardos only has to deal with the timer, which is a fantastic trade-off.
Like a bulldozer, when Rampardos uses Head Smash, it picks a direction and prays. It prays that it will pick up an unfortunate victim and carry them off to a brand new world, unless it hits a wall, in which case the only world they’re going to is the Distortion World, because of how hard Head Smash hits. Head Smash doesn’t deal damage until the attack lands on a wall, in which case a massive shock wave is released and deals damage to all in range, including the unfortunate passenger. Not only does Head Smash deal legitimately bonkers damage, it gets its own cooldown reduced for each enemy you picked up. If you’re lucky enough to pick up the entire enemy team, Head Smash’s cooldown is reduced by 12.5 seconds, giving you roughly 2 seconds of wait time until you can use the attack again.
Using this move to deal damage requires using it properly. If you aim in a direction where there is no wall, Rampardos will keep running until it tires out. When this happens, any enemy is thrown weakly and Rampardos stops moving for a bit before it can act again. Missing the wall in this way actually causes you to miss out on the big damage at the end of the move, and chances are you’ll be left alone, all by yourself, with half of the opposing team ready to rip into you. Head Smash+ fixes this by forcing the move to keep running until a wall is found, but it doesn’t increase the damage and any survivors will immediately retaliate. Because of the extra distance you can run, you’ll most likely end up far away from your team, devoid of backup squaring off against a bulky All-Rounder or Defender (the most likely to survive your Head Smash, if they were at full HP).
However, if you’re playing for the team, you’ll just have to accept that it is a great sacrifice that can be made on your part. I mean, Talonflame, another fellow Speedster, literally plows and runs over their enemies for the greater good. Though it should be stated that Talonflame has better escape options than Rampardos, utilizing Fly, Flame Charge, or Brave Bird to either finish the job or make a quick getaway. When Rampardos charges, it’s to deal great damage and KO the enemy in one go, regardless of what comes after.
Rampardos does have a slight advantage, though, and that’s the fact that the move is powered up by your basic attack, just like Zen Headbutt. If you can bring up the damage, you can KO just about anything. And barring hindrance protection, your Mold Breaker ability will grab just about anyone and limits their counterplay.
When you mess with the bull, you get the horns. When you mess with a Rampardos, you get a free ride to the underworld. Watch yourself.
Unite Move: Rampaging Rocker
The pokemon’s movement speed drastically increases and forces the pokemon to run. While running, the pokemon is resistant to hindrances and any enemy the pokemon collides with are damaged and shoved to either side of the pokemon. In addition, any obstacles made by pokemon from either team are destroyed upon collision. The enemy receives increasing damage each time they are attacked again.
Rampardos’s movement speed increases by 2.75x.
Repeated attacks increase the damage dealt by 25%.
The Unite Move lasts for 8.5 seconds.
When the ground starts rumbling and trees and walls are falling, left and right, it’s not a natural disaster that’s causing all of this, it’s Rampardos, pure destruction given form. Rampaging Rocker unleashes the fully fury of the ancient era of dinosaurs, letting Rampardos run wild, destroying everything in sight.
When activated, your movement speed nearly triples, which is already scary enough, but Rampardos then starts charging head first at everything and everyone. Getting hit by Rampardos in this state sends the enemy flying, but it doesn’t hurt that much at first. But then, getting hit a second or third time will result in the damage slowly increasing, and by the fourth hit, half of your HP is already gone, and the fifth hit threatens to take it all away!
Not even putting a wall in front of Rampardos is enough to stop its rampage, as the Unite Move grants it the power to destroy walls and obstacles made by the opposing pokemon. It’ll break the walls made by your teammates too, but more importantly, it just means that literally nothing can stop Rampardos from running through the entire enemy team. (Heracross, whom I made a moveset for, had this same ability with the move Brick Break, so this is an intentional callback)
If that wasn’t bad enough, the Unite Move is backed by Mold Breaker, which prevents pokemon from using their abilities to escape damage dealt by this move. It also stuns and shoves enemies freely, meaning it can be used to knock enemies away from points of interest, such as Regieleki or Rayquaza. In drastic examples, it can be used to knock away enemies defending their home Goal Zone, putting them at major risk of being KO’d while your teammates score a sneaky goal.
The one major downside to this move, as with all of Rampardos’s moves, is that, barring Buddy Barrier, Rampardos has no defensive buffer when using this Unite Move. It is completely possible to get KO’d while attacking or approaching the enemy menacingly, especially given Rampardos’s weak defenses. Granted, this is extremely difficult for the enemy to do, as Rampardos gains a massive movement speed boost while using this Unite Move, and also it is resistant to hindrances, so only an opposing Unite Move can really stop its rampage. Still, the objective for the enemy is to survive and evade until the Unite Move wears off, in which case it becomes safe to engage Rampardos again. Having teammates hold the enemy down with their own hindrances can make this difficult, and opposing Attackers and Speedsters shouldn’t be expected to last very long against this battle plan.
Even so, Rampardos has the edge when engaging in a team fight with this move, as your teammates can cover your weaknesses while you single out the weak and weakened enemies to secure the point. They’re gonna feel that one in the morning.
Holowear
Dinosaurs have no sense of style or fashion, but even Rampardos knows it can’t rock a fancy hat. It would obscure that magnificent dome and would be difficult to take seriously. Rest assured, the clothes are completely holographic, so there’s no danger to bashing its head against a wall and ruining an expensive looking hat.
Firstly, there’s Sporty Style, putting Rampardos in a jersey and body armor and some athletic shorts. No helmet though, as Rampardos doesn’t need one. Then there’s Conductor Style, giving it a scarf, a whistle, a fancy shirt and tie, and a train master’s hat. Matador Style gives Rampardos an exotic looking shirt, a red cape, and one of those fancy hats bull fighters wear. With Demolition Style, Rampardos puts on an orange bright vest, a tool belt, and a pair of safety goggles that rest on its neck. And finally, Delivery Style puts Rampardos in a brown worker’s shirt and shorts and a small cap and a satchel full of packages and presents.
The general idea is that Rampardos will be using these holowear to express itself while running over its enemies, just with more personality.
Strategy
Rampardos’s fight starts at the loading screen, where you can see which pokemon are on the opposing team and what they’re running. Against multiple Attackers, Rampardos has the edge, especially if you employ ambush strategies to stop a team fight before it begins. Opposing Speedsters will be tricky, as they’re more agile than you, but all the same, you can take them out in a couple of hits with the element of surprise. It’s the Defenders and All-Rounders you have to worry about, as being underleveled when you engage them means your attacks aren’t as strong as they could be, and you’ll be on the receiving end of the respawn timer more often than not, unless you step up your EXP farm game.
At the start of the game, farming will be a little difficult, as Headbutt’s cooldown reset effect only works on pokemon from the opposing team, not wild pokemon. You’ll have to work with Leer until you reach Level 4, where it becomes either Stealth Rock or Ancient Power. Stealth Rock is useful against long range Attackers that like to keep their distance with hit and run tactics. It also works well against Speedsters who like to dive in and deal high burst damage before escaping. Stealth Rock sets up a No Trespassing Zone that’s too risky for them to cross, limiting their available range and weakening them greatly if they get caught in the field of floating rocks. Ancient Power, on the other hand, is useful for dealing with melee attackers who employ rapid fire attacks to deal damage, such as Defenders or All-Rounders. It makes it difficult for them to approach you and also rewards you for their aggression, as each hit powers up Rampardos through Ancient Power’s protective effect.
At Level 7, you evolve from Cranidos to Rampardos, and then you’d have to choose between Zen Headbutt or Head Smash. While Head Smash is capable of ludicrous damage, Zen Headbutt is for reserved smashing. It makes team fights a little safer as it boosts your defense while charging and makes you resistant to hindrances, making it very difficult for the enemy to stop. It’s best used when you are rushing into battle as backup, stopping the enemy dead in their tracks with a well placed Zen Headbutt, threatening them with another, and pushing them back. With Head Smash, though, you can crash the party and carry off the offenders, running them over and crashing into a wall to deal great damage. The more you got in one go, the better, as Head Smash will also reduce it’s own cooldown as a reward for smart aiming. Missing with Head Smash is really bad, as it means you failed to get multiple enemies in one charge and you’ll have to deal with the high cooldown afterwards. The attack is to be used smartly, as it can literally make or break a team fight for your side. And it cannot be overstated that both moves are powered up by your basic attack, dealing triple damage with a maximum of 6 hits on any enemy.
The real problem is Rampardos’s lack of bulk. While it’s not the frailest of the Speedsters (it’s actually bulkier than Gengar, Zoroark, and Dodrio stat wise), it doesn’t hold up to repeated stray hits, and it lacks elusive or self-sustaining abilities. Literally it’s whole game plan is to just hit things so hard, they can’t counterattack, because they’ll be in respawn resting off a killer headache. Cranidos and Rampardos are really effective at this too, but the problem is handling multiple enemies in one go. Sure, moves like Head Smash, Stealth Rock, and its basic attack do help a bit in dealing spread damage, the attack is spread too thin and makes Rampardos very vulnerable to counterattacks. Stealth Rock is great at slowing the enemy down and limiting their retreat, unless they choose not to retreat and confront you. Sure, Head Smash hits like a train, but bulkier enemies will survive the attack and will be poised to counterattack, especially if they have backup. Your basic attack will dramatically increase the power of your headbutting attacks, but engaging just one enemy will be risky, and it’s all lost if you get KO’d before you can use the attack.
What Rampardos can do really well is opening up holes in the opposing team’s fortifications. Many pokemon rely on their abilities to shrug off hindrances and damage, but that protection is ignored thanks to the Mold Breaker ability. Espeon and Glaceon rely on their abilities to shake off surprise hits and respond appropriately, but they are defeated by enemies that can apply multiple hindrances in one loadout. Rampardos doesn’t give them that chance and can ruin their day with just one attack, removing them from the fight via blunt force trauma. In other cases, Rampardos can deal such a huge amount of damage, it leaves the entire enemy team weakened, even if it gets KO’d too early. This huge chunk of HP it takes away gives the team just enough of an opening to capitalize and break through.
Playing Rampardos requires dealing big damage not for yourself, but for the team. It requires recognizing problematic opponents and eliminating them from the fight before they can meddle with your teammates. The rest of the opposition can be held off with a well aimed Head Smash or Zen Headbutt, and even after being KO’d, your team is in such a good position they can afford to press on even with 1 less player.
In this sense, Rampardos has earned the title of a Speedster, using its high damage to poke Skull Fossil shaped holes in the enemy’s defenses, reducing their ability to respond to the opposing team’s aggression. Smashing.
-
And that’s Rampardos for Pokemon Unite! I know I’ve been churning out these posts really fast, but really, I’ve just found myself some extra time on my hands. Don’t expect this to last, but do consider this as an apology for my late uploads early on in the season.
The next post is probably going to be a Defender, one of my personal favorites from Gen 4. Who’s it gonna be? Follow and find out!
1 note
·
View note
Text
#mintopoly-explainer

My co-creator hotel has mentioned Mintopoly! a lot (see here, and here for starters) in the short while this blog has been a thing, so I wrote a bit of an explainer on it.
Mintopoly! is a crypto-themed online NFT game akin to idle games of old, like Cookie Clicker and A Dark Room, wherein you invest virtual Mintopoly! money into crypto world stuff (rigs, nodes, oracles, bots) to make more Mintopoly! money to invest into more crypto stuff (and so on) until you win (or get pretty close, anyway). The game takes place over rounds of 30,000 "blocks"— increments of 15 seconds — and the player with the highest amount Mintopoly! Money (₼) wins the round. Round winners will typically receive one of many types of Mintopoly! cards via airdrop, each of which provides valuable bonuses to your in-game investments, like a 10% bonus to one investment's production, or a 6% discount to the cost of another. Those cards can be bought, sold, traded, burned, or whatever else because they're NFTs and you own them and you can do whatever the hell you want with them because they're NFTs and you own them and you can do whatever the hell you want with them because they’re NFTs and and and.
Also, the top 200 scoring players at the end of the round get a specific-to-their-final-spot amount of the in-game MM token, also via airdrop.
So what's the draw? Fundamentally, it's fun to compete, and even more fun to win. Even further than that, there are plans to let you use your MM winnings to craft/mint Mintopoly! cards.
Even further than that, the game itself is... kind of addicting? It's got a Formula One-esque gameplay cycle to it, with ruthless optimization and maximum efficiency being the keys to success. It's a game of equilibrium and opportunity cost; misjudging when to stop buying Mining Rigs and move onto Validator Nodes, for example, could cost you an early-game lead. Buying Decentralized Exchanges until the marginal ROI is too low will put you behind other players in the mid-game. And, as I've so painfully learned, you can throw away an easy top-20 finish by hard forking too early (and/or too late).

We've all heard the buzz about how NFTs are going to be huge for gaming, but what exactly is the endpoint of their application? Well, let me tell you — if I could have sold my League of Legends and Fortnite skins safely and for real money after growing out of those games, I'd have done it in a second, but locked behind/within a centralized system, I never actually owned any of the in-game assets I paid for. NFTs offer a way out of that mud and into real ownership of digital assets, a market for which has been bubbling for years just waiting to be enabled. I mean, gold farmers for games like Ultima Online and WoW have been a thing for 20+ years. Venezuelan RuneScape players generated multiple times their country's average annual income from selling accounts during economic crisis (and had such a profound effect on the game's economy that when Venezuela suffered a nationwide electrical blackouts, RuneScape's trading market underwent a small crisis due to the lack of supply of in-game items). NFT games like Axie Infinity are just now realizing the potential for multi-million dollar virtual economies that have existed in games like EVE Online for years. All this demand has been pent up, hindered by market friction and terms of service regulations, but NFT and cryptocurrency tech might now provide a path to salvation.
Back to Mintopoly! All in all, we like to think it's one of many great first steps towards reaching the full potential of NFT technology within the video game space. Tokenizing digital assets with an open standard and allowing them to be traded easily and trustlessly blows the top off of a gigantic underground economy that's been in the shadows for decades.
We await eagerly to see what the industry borne by these early forefathers has in store for gaming worldwide.
— rrn
#nft#nfts#mintopoly#idle game#idlegame#idle games#idlegames#a dark room#cookie clicker#fortnite#league of legends#runescape#venezuela#ultima online#world of warcraft#wow#axie infinity#axie#crypto#cryptocurrency#eth#ether#etherium#f1#formula 1#formula one#video game#videogame#video games#videogames
6 notes
·
View notes
Text
🦈 Mod Furoido’s Alt Account Adventures 🦈
NRC Exams award you 1 Crowley Medal every time your support is used by a friend, the maximum amount a day being 10, yet it’s not always people will use your support a total of 10 times. After all, why pick a Lv.80 maxed character if you can get a Lv.85/90/95/100 one that’s also maxed instead?
That’s why Mod Furoido decided to start a brand new account to feed medals to the main one~
This was the starting roll, the starter SR of choice being Deuce:

I could’ve rerolled for Leona or Riddle, who are known as the heavy bonkers (as Mod Jeido would say), by pressing the left golden button. But I like Trey + got both Tweels SR after rerolling a bunch of times for a combination I liked, so I decided to keep this one.
Next, I rushed through Story Mode with only those 4 + my Main Acc’s support and beat both Prologue and Heartslabyul chapters, all to unlock the Test tab and be able to take part in the event.
All this on the first night before Exams started, without rolling the gacha again for more cards, using only underleveled characters (they were all under Lv.10) and changing my Main’s support accordingly (always Magic 10/10 and Buddies 10/10/10).
The new account is just 1 week old, so you must be thinking that my scores are probably not that good, right? After all, Exams are difficult if you don’t have a full SSR roster with both magic and buddies maxed and—
Well...
Here are my current scores:

I managed to get a B on the very last day.
Did I level up a lot? Used a lot of AP refill and maybe even gems?
Nah, Trey aside, they’re all around level 20:

As you can see, I got Vil’s and Cater’s R (as well as a few others) from Sam’s shop. I needed them to partner up with my Main’s Dorm Leona and Trey and use their DUO. Almost all buddies and magic are at lv.1, with a few exceptions.
This is the magic of good team building and strong support~
Here are the teams I used for each exam, all on Normal difficulty, ending the battle in 4 turns for Basic and 5 turns for Defense (the explanations are gonna get very repetitive):
Fire Exam

Buddies List:
Trey-Deuce ATK S (Lv.1)
Trey-Idia HP S (Lv.1)
Jade-Trey HP M (Lv.4)
Deuce-Trey HP M (Lv.6)
Rook-Trey HM S (Lv.10)
Rook-Jade HM M (Lv.10)
Dorm Trey is here for his HP and HEAL, magic level 4/5 (unfortunately, I couldn’t get his heal to Lv.5 on time);
PE Idia is mostly here for his Fire/Water magic and to give HP S to Trey (I would’ve used School Uniform Cater for HP M if it wasn’t for the fact that he’s Tree/Fire);
Robe Jade for his HP buddy with Trey and he’s also Birthday Rook’s DUO partner;
Robe Deuce also has HP buddy with Trey and his magic is Water/Fire, making him good for fire test;
Birthday Rook has DAMAGE DOWN L (1 turn) on his Null magic and his DUO is Water with Jade + he has HP buddies with both Trey and Jade (I would’ve used Dorm Azul if I had him on my Main).
Water Exam

Buddies List:
Trey-Cater HP M (Lv.7)
Cater-Trey ATK M (Lv.1)
Rook-Vil HP M (Lv.1)
Leona-Vil ATK S (Lv.10)
Dorm Trey is my only SSR and his DUO is Tree element, so I got his Magic 2 to Lv.5 to unlock it;
School Uniform Cater is Dorm Trey’s DUO partner and his M1 is Tree, so it goes well with the DUO;
School Uniform Vil is here to DUO with Dorm Leona and give him ATK S;
School Uniform Rook is a good card to have around, he has high ATK and can HEAL;
Dorm Leona is one of the best supports for this test, all I had to do was make sure Azul’s ATK DOWN didn’t fall on him.
Tree Exam

Buddies List:
Trey-Cater HP M (Lv.7)
Cater-Trey ATK S (Lv.1)
Malleus-Cater HP M (Lv.7)
Jade-Trey HP M (Lv.4)
Floyd-Jade HP M (Lv.10)
Dorm Trey, as you must already know by now, is great for defense tests, his DUO is tree and can be used for neutral damage, but what truly matters here is his HP buddy with Cater and his HEAL that can be used on turn 5;
School Uniform Cater is mostly here to activate Trey’s and Malleus’ HP M buddy;
PE Malleus is Null/Fire, with HEAL on his magic 1 (Lv.5) + his HP M with Cater gives him a nice boost, making him good for defense tests (another nice R card to use for Tree Defense is PE Floyd, but I didn’t get him with my starter roll):
Robe Jade has HP M with Trey, is Dorm Floyd’s HP M buddy as well as his DUO partner + his magic is Null/Fire;
Dorm Floyd has ATK DOWN M (3 turns) on his Magic 1M and it’s also Fire, making him a great debuffer choice for Tree defense test and, despite being an ATK Card, his HP stats is pretty good if Jade is with him.
Null Exam

Buddies List:
Malleus-Cater HP M (Lv.7)
Cater-Trey ATK S (Lv.1)
Trey-Cater HP M (Lv.7)
Trey-Cater HP M (Lv.10)
PE Malleus, School Uniform Rook and Dorm Trey are all HEALERS, I believe there’s nothing much to say here;
I’ve already said this before, but Dorm Trey has a lot of HP and his HEAL is good;
I like to call this team “Cay-kun is everyone’s cheerleader~♪” (except Rook’s).
All Exam

Buddies List:
Jade-Trey HP M (Lv.4)
Deuce-Trey HP M (Lv.6)
Trey-Deuce ATK S (Lv.1)
Leona-Deuce HP S (Lv.10)
Leona-Vil ATK S (Lv.10)
Robe Jade and Deuce are mostly here because they’re my strongest cards in terms of ATK;
School Uniform Vil is here for Leona, explanation is the same as before: ATK buddy + DUO partner;
Dorm Trey is for his high HP, so it’s always nice to have him around in case rng decides to give you only neutral or disadvantage;
Dorm Leona is the one that’s gonna get the other team’s HP to zero.
This is my Main’s score btw:

29 notes
·
View notes
Text
Pfizer Bullies Nations to Put Up Collateral for Lawsuits

As reported by New Delhi-based World Is One News (WION),1Pfizer is demanding countries put up sovereign assets as collateral for expected vaccine injury lawsuits resulting from its COVID-19 inoculation. In other words, it wants governments to guarantee the company will be compensated for any expenses resulting from injury lawsuits against it.
WION reports that Argentina and Brazil have rejected Pfizer’s demands. Initially, the company demanded indemnification legislation to be enacted, such as that which it enjoys in the U.S. Argentina proposed legislation that would restrict Pfizer’s financial responsibility for injuries to those resulting from negligence or malice.
Pfizer rejected the proposal. It also rejected a rewritten proposal that included a clearer definition of negligence. Pfizer then demanded the Argentinian government put up sovereign assets — including its bank reserves, military bases and embassy buildings — as collateral. Argentina refused. A similar situation occurred in Brazil. Pfizer demanded Brazil:
“Waive sovereignty of its assets abroad in favor of Pfizer”
Not apply its domestic laws to the company
Not penalize Pfizer for vaccine delivery delays
Exempt Pfizer from all civil liability for side effects
Brazil rejected Pfizer’s demands, calling them “abusive.” As noted by WION, Pfizer developed its vaccine with the help of government funding, and now it — a private company — is demanding governments hand over sovereign assets to ensure the company won’t lose a dime if its product injures people, even if those injuries are the result of negligent company practices, fraud or malice.
youtube
Don’t Expect Compensation if Injured by COVID-19 Vaccine
In the U.S., vaccine makers already enjoy full indemnity against injuries occurring from this or any other pandemic vaccine under the PREP Act. If you’re injured, you’d have to file a compensation claim with the Countermeasures Injury Compensation Program (CICP),6 which is funded by U.S. taxpayers via Congressional appropriation to the Department of Health and Human Services (DHHS).
While similar to the National Vaccine Injury Compensation Program (NVICP), which applies to nonpandemic vaccines, the CICP is even less generous when it comes to compensation. For example, while the NVICP pays some of the costs associated with any given claim, the CICP does not. This means you’ll also be responsible for attorney fees and expert witness fees.
A significant problem with the CICP is that it’s administered within the DHHS, which is also sponsoring the COVID-19 vaccination program. This conflict of interest makes the CICP less than likely to find fault with the vaccine.
Your only route of appeal is within the DHHS, where your case would simply be reviewed by another employee. The DHHS is also responsible for making the payment, so the DHHS effectively acts as judge, jury and defendant. As reported by Dr. Meryl Nass,7 the maximum payout you can receive — even in cases of permanent disability or death — is $250,000 per person; however, you’d have to exhaust your private insurance policy before the CICP gives you a dime.
CICP will only pay the difference between what your insurance covers and the total payout amount established for your case. For permanent disability, even $250,000 won’t go far. The CICP also has a one year statute of limitations, so you have to act quickly.
This too is a significant problem, as no one really knows what injuries might arise from the COVID-19 vaccine, or when, and this makes tying the injury to the vaccination a difficult prospect. Employers that mandate the COVID-19 vaccine will also be indemnified from liability for side effects. Instead, claims will be routed through worker’s compensation programs.
If the COVID-19 vaccines are as safe as the manufacturers claim, why do they insist on so much indemnification? Do they suspect or know something they’re refusing to admit publicly?
Side Effects Are Inevitable
Of course, those of us who have been looking at the science behind the mRNA technology used to create these novel “vaccines” have long since realized there are tremendous risks involved. For starters, mRNA vaccines are most accurately referred to as gene therapies, as this is what they are.
They effectively turn your cells into bioreactors that churn out viral proteins to incite an immune response, and there’s no off-switch.8 Based on historical and preliminary evidence, significant short- and long-term side effects are, quite frankly, inevitable.
For starters, your body sees the synthetic mRNA as “non-self,” which can cause autoantibodies to attack your own tissues. Judy Mikovits, Ph.D., explained this in her interview, featured in “How COVID-19 ‘Vaccines’ May Destroy the Lives of Millions.”
Free mRNA also drive inflammatory diseases, which is why making synthetic mRNA thermostable — i.e., slowing the breakdown of the RNA by encasing it in lipid nanoparticles — is likely to be problematic. The nanoparticles themselves also pose a risk. COVID-19 vaccines use PEGylated lipid nanoparticles, which is known to cause allergic reactions and anaphylaxis.9,10
What’s more, previous attempts to develop an mRNA-based drug using lipid nanoparticles failed and had to be abandoned because when the dose was too low, the drug had no effect, and when dosed too high, the drug became too toxic.11 An obvious question is: What has changed that now makes this technology safe enough for mass use?
As detailed in my interview with Mikovits, the synthetic RNA influences the gene syncytin, which can result in:
Brain inflammation
Dysregulated communication between the microglia in your brain, which are critical for clearing toxins and pathogens
Dysregulated immune system
Dysregulated endocannabinoid system (which calms inflammation)
1 note
·
View note
Text
Portable car battery jump starters are must-have devices for any driver. These compact tools allow you to start a dead battery without requiring another vehicle or external power source. This guide covers everything you need to know about choosing, using, and maintaining portable jump starters. What Are Portable Jump Starters? A portable jump starter is a device that contains its own battery and cables to connect to a vehicle's battery terminals. This allows you to "jump start" a car with a dead battery by delivering enough power to the battery to start the engine. Jump starters provide a convenient way to start your car anywhere, without relying on access to another vehicle for a jump. Their compact size also makes them easy to store in your vehicle's trunk or glove compartment so they're handy in an emergency. Key Features Internal battery - Typically lithium-ion or lead-acid, which provides the power to jump start a vehicle. More power equals more jump starts per charge. Cables - Heavy duty cables with clamps to attach to battery terminals. Cable length can range from 2-20 feet. Peak amps - The maximum amperage the device can provide for short bursts when starting. More is better for larger engines. Safety features - Reverse polarity warning, spark protection, auto shut off. Portability - Compact sizes around 10 x 5 x 5 inches. Weights 2-20 pounds. Benefits of Portable Jump Starters Using a jump starter has a number of advantages over jumper cables connected to another vehicle: Convenience You can start your car battery wherever you are, without relying on another vehicle being available. Storing one in your car means help is always at hand. Compact Size Jump starters are small enough to keep in your trunk, glovebox, or even backpack. Jumper cables require another vehicle. Multi-Use Many jump starter models can charge phones, tablets, and other USB devices in addition to jump starting cars. Independence You don't have to wait for another person to help you with jumper cables. Quickly jump start yourself. Safety Jump starters include safety features like reverse polarity protection. Battery explosions are a risk when improperly connecting jumper cables. What to Look for When Buying a Jump Starter There are a few key factors to consider when choosing a portable jump starter: Peak Amps Peak amps relate to the maximum amount of power the jump starter can provide. This determines how large of an engine it can start. More peak amps enable starting larger, fully drained batteries. Small size jump starters range from 300-1000 peak amps, good for 4-6 cylinder engines. Medium units go up to 2000 peak amps for larger vehicles and trucks. Heavy duty options over 3000 peak amps can jump start tractors and large diesel engines. Battery Capacity Battery capacity determines how many jumps you can do per charge. Larger batteries allow more jump starts between charges. Look for 10-30 jumps from a single charge. Cable Length Longer cables give you more flexibility on where you can place the jump starter relative to the car battery. 10-20 foot cables are ideal to easily reach batteries under the hood or trunk. Safety Features Reverse polarity warning alerts you if incorrectly connected. Auto shutoff turns the unit off after a set time to prevent overcharging. Over-voltage protection prevents damage to the car's electrical system. Types of Jump Starter Batteries There are three main types of internal batteries used in portable jump starters: Lithium Ion Most popular type due to light weight and compact size. Hold a charge for many months when not in use. Charge fully in 2-3 hours. Can provide hundreds of jumps per battery lifespan. More expensive but longer lasting. Lead-Acid Traditional battery type, heavier but more affordable. Can't hold a charge as long - needs recharging every 30-60 days. Provide around 100 jump sta
rts when well maintained. Takes 8-12 hours to fully recharge after use. Ultracapacitors Newer battery technology charges in seconds. No chemical reactions so can charge thousands of times. Downside is high self-discharge - loose charge in days/weeks. More expensive currently. Best for frequent quick charging needs. Top Portable Jump Starter Models NOCO Boost Plus GB40 NOCO Boost Plus GB40 Up to 20 jump starts on a single charge. 1000 peak amps from compact lithium battery. Spark proof technology. 10 foot cables. Multi-function for phone charging etc. Around 1.2 pounds. Stanley J509 Stanley J509 500 instant starting amps, 1000 peak amps. Built in 120 PSI air compressor for tire inflation. Heavy duty clamps with reverse polarity alarm. LED light and USB port. 8 foot cables. Clore Automotive JNC660 Clore Automotive JNC660 1700 peak amps, 425 cranking amps. Heavy duty lead-acid battery. Full sized jumper clamps for diesel trucks. Built-in charger and hazard light when in use. 20 foot cable length. Avapow Lithium Car Jump Starter Avapow Lithium Car Jump Starter 2000 peak amps can start 8L gas or 6L diesel engines. Portable and compact at 1lb 7oz. Safely jump starts up to 30 times per charge. Intelligent clamps detect battery health status. Multi-function as a flashlight and phone charger. Tacklife T8 Tacklife T8 800 amp compact lithium jump starter. Budget option good for most vehicles. Built-in alarm and LED light. Provides up to 30 jump starts per charge. Cigarette lighter for charging devices. Using Your Portable Jump Starter Safely While portable jump starters make starting your car much more convenient, there are some safety precautions to follow: Read the Manual Read the instruction manual completely before using your jump starter. Follow all warnings and connection procedures. Make a Secure Connection Attach the clamps tightly to clean, bare metal spots on the battery terminals. This ensures good electrical contact. Avoid Sparks Sparking can occur if the connection is interrupted when current is flowing. Turn the jump starter off before removing the clamps. Don't Overcharge the Battery Most models automatically shut off when the car engine starts. Always disconnect shortly after. Check Battery Levels Many jump starters have built-in battery level indicators. Recharge after each use and check levels every 3-6 months. Store Properly Keep your jump starter cool and dry in temperatures between 40°F and 80°F when not in use to maximize battery life. Maintaining Your Portable Jump Starter With proper care and maintenance, a portable jump starter can deliver reliable service for years: Recharge After Each Use Fully recharging the internal battery after every use will maximize the lifetime of lithium-ion jump starters. Inspect Cables and Clamps Check for any wear and tear over time on the cables and connectors. Replace clamps if they aren't tightly grabbing or making good contact. Clean the Exterior Use a damp cloth to clean the outside of the unit and prevent dirt buildup on the connections. Avoid submerging the jump starter in water. Replace Batteries Lithium-ion jump starters may need a new battery after 3-5 years if holding less charge. Replacing lead-acid batteries every 1-2 years extends lifespan. Check Before Winter Ensure your jump starter has a full charge before winter temperatures set in, when the cold can sap battery charge. Store in a warmer area. By selecting the right portable jump starter for your vehicle, using it properly, and performing regular maintenance, you can count on fast and convenient starts whenever you need them. The ability to quickly recharge your battery anywhere provides confidence and security. FAQs How long does a portable jump starter battery last? Most lithium jump starters will last 3-5 years or 200-300 charge cycle
s if properly maintained. Lead-acid batteries last 2-3 years. Can a portable jump starter damage your car? When used properly, a jump starter will not damage your vehicle. Always follow safety precautions to avoid issues. How many amps do I need in a portable jump starter? For most sedans and small SUVs, a minimum of 400 peak amps is recommended. Larger vehicles may need 800-2000+ peak amps. What size battery can a portable jump starter start? Compact portable units can typically start batteries up to around 5-6 liters gas or 4-5 liters diesel. Larger jump starters are needed for V8s, heavy duty trucks. Are portable car battery jump starters better than jumper cables? Jump starters are more convenient as they don't require another vehicle. However, jumper cables are useful in certain situations when a second car is available to provide power. #Wiack
0 notes
Text
Thelreads, Vigilantes 6, Replies Part 1
1) “Alright, whoever that is it definitely is a villain, this speech even had a evil laugh.”- Even more so in an actual world of Superhero’s and villains, you’ve got to be careful about using an evil laugh to punctuate your impending victory or superiority over your fellow man- I’ve seen enough anime and manga to recount several example off the top of my head- mostly upper-class snobby schoolgirls- but here it’s just asking to get mobbed by about 5 different heroes aiming to score their ‘villain a day quota’….. actually, on second thought, maybe those girls should keep it up, let Darwin sort them out.
2) The Title is an interesting one- from the Panty Bros at the beginning being all about unleashing their desires without restraint, Koichi Trying to get Knuckle to stop holding back, Kuin being told to Restrain herself in pre-emptivly eliminating the Vigilante trio because their actions Benefit the Trigger mastermind, The Junkie injecting himself with a triple-dose to Rampage with the maximum amount of destruction he can cause to satisfy himself, to Knuckleduster holding nothing back for once in taking him out, A lot of characters in this chapter are all about restraining themselves or casting off their shackles to act wild as they please.
3) “WASN’T THAT ASSHOLE TRIO AT THE BEGINNING ENOUGH WE HAVE TO REVISIT THIS TYPE OF SITUATION?”- Well, Furuhashi went for a more ‘softcore’ fake out this time, but it’s certainly a more skeevy kind of crime to be committing, especially when instead they could go for something more respectable, like purse-snatching, but wierdos gonna be wierdos I guess- or at least, only as long as they keep out of Old Man Knuckle’s way at any rate.
4) “WE HAVE A TOTAL OF 5 PEOPLE SO FAR WITH THE SAME TYPE OF QUIRK, WHAT ARE THE ODDS?! AND SO FAR, 4 OUT OF 5 PEOPLE WITH SLIDING QUIRKS WERE ABSOLUTE MONSTERS, I DON’T LIKE WHAT THIS IS IMPLYING TOWARDS KOICHI”- Well, I don’t know if we’d label these guys as ‘monsters’ given the extent of their criminal activity boils down to mass sexual harassment, but it’s certainly up to Koichi to start spreading the image of the sliding quirk as the power of a hero of justice, and not the sign of a criminal in the making- though it fits with his luck to have his power-type wind up being commonly-used by those in opposition to the official laws.
5) “YOU KNOW WHAT, I’M GLAD THAT IT WASN’T WHAT I FEARED, BUT EVEN SO, IT ISN’T EXACTLY A GOOD THING WHAT JUST HAPPENED
ALRIGHT, SO THREE PERVERTS THAT GO AROUND STEALING HIGHSCHOOL GIRL’S PANTIES AND WEARING THEM…”- I have to assume one variation of their quirk that differs from Koichi’s usage is that ‘Glide and slide’ allows them to ‘slip’ objects closely entangled together off or on without them catching, allowing them to somehow ‘phase’ that girl’s panties straight off of her without her feet leaving the ground, and allow Fat Boy Slim in the back to put them on with minor difficulty whilst moving at high speeds on what amounts to super-powered rollerblades.
6) “I feel relief over the fact that we aren’t going that dark again, I really am, but I’ll be even more relieved once knuckleduster comes around to beat the shit out of them. If the tittle of the chapter is anything to go back, it will be a pretty satisfying lesson the one he’ll teach them…”-
Knuckleduster: Lesson 1, Punks. This is a Goddamn Hard-Boiled Superhero drama story we’re running here, and there ain’t no room in it for your anime Pantywaist antics, Capiche?
Brother 1: What do you know about our glorious Hunting tactics old timer? For Starters, it’s not ‘Pantywaist’ it’s…BBBWWWFRFFF(is cut off by Knuckleduster’s fist) Brothers 2 and 3: What the hell was that for!!!? Knuckleduster: Lesson 3. Never interrupt the teacher when he’s in the middle of class, and always mind Lesson 2.
Brother 3: (nervously) what’s….uh….which one is that aga-
Knuckleduster: DODGE!!!!!
7) “You guys have no way of matching his speed, he’ll get you, and he’ll make you pay for your transgressions.”- Not least because Koichi’s putting his quirk to use in life or death situations, necessitating a deeper handling of his powers to survive by the skin of his teeth, whereas they guys have only ever dealt with ‘panties or jail’ situations, hence their powers aren’t nearly as refined as Koichi’s are getting.
8) “OH MY FUCKING GOD NO
THEY THOUGHT HE WAS WITH THEM WHY
POOR KOICHI”-
In fairness, part of their beatings might be motivated by the fact than none of them currently have panties on, and Koichi’s acceleration positioning puts him at the perfect angle for an up skirt shot, should he turn around and look. Thankfully, Koichi is too best boy to stoop that low, but it would be just his luck to have his moniker changed to ‘The Peeper’ whilst in the line of duty.
9)”I know that I joked about the r/niceguys before, but good lord this is TRULY some neckbeard, whiteknight-like bullshit of sorts, and I’m really glad that they’ll be the next targets for out favorite trash-diving dad.”-
Brother 1: Hah! You Fool!! We are wolves, and you are by mere sheep before u-BGGGUHHH!!!( Gets punched from Offscreen) Brothers 2 + 3: GGGYAHHH!!! BROOOO (turns to see Knuckleduster standing beside them in the shadows) wha- who…who the hell are you!!?
Knuckleduster: (Remains silent, then fishes out a cigarette and lighter from his pocket, lights up and takes a nice, deep drag on it, breathing out the smoke around his nice, Friendly, smile, illuminated weakly by the cigarette glow)
…. The Hunter
10) “I feel like we suddenly got to know Mineta’s extended family, and I’m not sure what to feel about it besides repulse and the will to kill.”-Thank god Mineta’s quirk is the exact opposite- based on sticking objects together- on her run rampant with a quirk that allows you to slip things off other people, like their clothes.
11) “I know that Koichi is the neutral type, that likes to talk things over before and solve everything as peaceful as possible, but unfortunately the only answer to their existence is violence. A lot of violence.”- Interestingly, it does match his temperament and role in the team- Pop’s anti-conflict/involvement, and so her quirk allows her to separate herself from the situation and get the hell out of dodge, and she’s not interested in understanding the other person’s POV, Koichi’s neutral, so his quirk allows him to zip to a location super-fast, but he currently lacks any offensive moves besides tripping, so he instead tries to diffuse conflict non-violently, and Knuckle’s all about getting involved in dangerous situations, and his lack of a quirk means he has to get up close and personal to put down these clowns.
12) “Oh hey, Pop showed up, and my god now I realize how glad I am that the author didn’t used her as the target for once, I was starting to get a bit salty over that, to be honest. I’m also glad that she’s on my side that there’s no talking with them, they deserve to get the lights punched out of them.”-Perhaps the majority of criminals the Vigilante trio have been encountering turning out to be perverts and wierdos or drug-using junkies was Furuhashi’s way of alleviating our concerns about how morally right it was to beat their teeth out with brass knuckles and leave them tied up for the official authorities to clean up afterwards.
13) “And as expected, they aren’t drug users. But then again, its not like they wasted their time, those were some people that were in serious need of a beating.”- Not shown was the further beatings the trio received off panel when their targets reclaimed their panties and took the opportunity to get some stomps of justice in before the police arrived on the scene.
14) “OH MY GOD YES
KOICHI IS LEARNING HOW TO THROW A PUNCH
AFTER THAT HE’LL LEARN HOW TO KICK, THEN HE’LL GET THE GUN HE DESERVES
WE’RE GETTING THERE”- Well, I dunno about the kicking part, since Koichi kinda needs his feet to propel himself around and his manoeuvrability around an opponent is pretty much his one and only strength right now…. Though I wonder how he’d do with adding come Capoeira to his arsenal…. Either way, it seems the focus of the training right now is to prepare and ease Koichi into getting more comfortable with close-quarters combat against opponents that he can’t trip up, thus allowing him to last longer even without Knuckleduster’s direct help, although there is definitely going to come a day that Koichi has to fight an opponent that he will need to attack to win, and not just hold the line until Knuckleduster comes running.
For now, though, leaving it to the punching master works out well enough for them- and lets Knuckle blow off some stress in the bargain to boot.
15) “And right on target that was. It wasn’t something Knuckleduster wanted them to know apparently, even telling the X-Clone kid was an accidental, “heat of the moment” thing that he wasn’t supposed to talk about.”- And this shows how Knuckleduster is, for all his badassery, still a flawed and human mentor archetype. He’s doing his best to fight crime, hunt down the trigger ring, and raise these kids, but even he can’t be 100% successful at everything he’s trying to do. Keeping his new protégée in the dark from his ‘dark past’ and connection to the bee user would have been ideal, but once he got a clue as to her hereabout, he ended up throwing caution to the wind, a decision he now regrets because it means Koichi’s picked up on his concerns when he’s nowhere near ready to do anything to help him with them.
16) “I KNOW YOU DON’T WANT TO TALK ABOUT IT, BUT NO NEED TO PUNCH HIM THAT HARD”- Actually, that was a slap. If he’d punched him- or put his back into it- Koichi head could have come clean off. That was basically the equivalent of a Knuckleduster love tap- and also a valuable lesson, since you can’t expect one side in a fight to always be attacking, therefore, you should be prepared for a counterattack at any moment.
17) “No Koichi, you definitely needs to learn how to punch, this is merely another step on your path towards getting a gun.”-If I was to compare styles, I’d say Knuckleduster is more of an ‘inboxer’ getting close and personal and tanking/deflecting blows to allow himself to get inside the opponents guard and hammer at their vulnerable parts, whereas Koichi’s more of an ‘outboxer’- using speed and manoeuvrability to dodge strikes at medium range and lashing out with quick, precise blows that target brief openings in the enemies guard.
The problem is- outboxers don’t tend to have a lot of raw strength behind them, so they make up for it in flurries of blows or on tiring out the opponents via skilful dodging and lashing harsh counterattacks when they start to slow down mid-fight. Koichi may have the speed, and the reflexes but it’s the hitting part that’s going to be a sticking point for him going forward. Actually, thinking about it, both Koichi and Izuku are fascinating in the way they contrast each other’s approach to violence.
Izuku struggled to use his powers to attack people at first, but only because he lacked the fine control to avoid turning them into red stains on the ground. Once he mastered full-cowling and could go full throttle without physically killing anybody, he was ripping open Gran Torino’s cheek and decking Stain’s head in within the day. Koichi, meanwhile, lacks any kind of offensive capability in his quirk, but also lacks the ‘intent’ to hurt somebody at all, preferring to negotiate and getting satisfied when two opposing parties turn their ire on himself instead of each other.
Koichi’s main problem with fighting seems to be that he’s not in the same kind of mind-set as Izuku where he’s comfortable attacking other people- but then again I guess Koichi just has to be put into a situation where attacking means saving somebody, just like with Izuku and the 0-point robot, or vs Muscular to save Kota, or pulling Iida’s ass out of the fire with Stain.
18) “Oh wow, Knuckleduster that was kind of dickish, you know?”- I read that as more of a ‘there’s some things only I can do. And here’s some things that only you can do. I’ll do the parts you can’t. In exchange, you go do whatever it is that I can’t!’ exchange, albiet a bit gruffer and hard-boiled coming from knuckleduster. Koichi’s got the speed and negotiation skills to make first contact with villains, but no muscle to make a difference when things de-escalate into violence. Knuckleduster’s got the moves, but he’s too slow to catch up before people get hurt. Only by combining their skillsets can they be effective.
19) “THANK YOU POP, FOR CHANGING HIS PAIN FROM THE PHYSICAL ONE TO A EMOTIONAL ONE.
NOT THAT HE HEARD IT ANYWAY, I THINK KOICHI’S FUCKING DEAD AT THE MOMENT”-
Koichi: ….I… I can’t call this an absolute win…but I’ll settle for a tie instead….
20) “But, I understand where you’re trying to get to, Knuckleduster could kill those people back there, but he’s not. He’s violent, but he’s not evil. he goes a little overboard, but he doesn’t wish to actually end their lives, although there are a few of them that certainly deserved to be killed…”- For that reason, knuckleduster gets more fired up and bloodthirsty the bigger and more imposing the enemy gets- it means he has less reason to hold back initially, and fine-tuning his blows to not cause permanent skull damage or concussions is a pain in the ass, but with guys like the Hulking Junkie later one, it’s more obvious how harder he’ll need to hit to take them down, and if he does go overboard and cause permanent damage, it’s justified by how much more powerful than him they are
21) “Data is important, but for that they need the right targets to get the information they lack. There’s no need to make the same type of testing with people of similar quirks, they already know how it will react anyway.
…
Why am I complaining about the inefficiency of her methods as well? “-
look, it’s one thing to be an evil villain, but an inefficient villain? That’s just a disgrace.
We’ve got genuine bona-fide heroes in the making matched up against Vanessa, we don’t want them winning because she made things easy for them through carelessness.
22) “They want to see what angry, violent criminals will do with all that power, how much it will boost them, not random doll-collecting weirdos or innocent aquatic-dwelling kids.”- In a way, since Kuin is now actively tracking violence-prone people to test the drugs on, she’s keeping the city’s jail and justice system well-supplied with fresh new villains to document and record, even if these people would rather not have been dragged into the whole mess in the first place. But at least she keeps the police and lower-level heroes around the city in a job.
23) “Yeah see, I was right on the money. She needs actual villains as her testing targets, not petty criminals, “- Interestingly it seems that said villains must also be ‘loners’ or at least not belonging to any affiliated Criminal gangs. It’s one thing to test random people on the outs with society, but test the wrong person in the underworld and you’ve earned the ire of his fellow gang members, who will be putting out word on the street that your head’s now got a price on it, bringing bad business when you further try to test the product, meaning Kuin can’t just pick at random, but has to run careful background check on her targets as well before she makes her move.
Ironic, considering where the trigger drugs and their various knock-offs wind up by the present day.
24) “Oh yeah, this one seems like the perfect test subject alright. Hopefully he can try beating the shit out of her as soon as he gets the drug as well.
I wish. He probably will just rampage while ignoring her.”- Well, yes and no. Kuin seems to have mastered the art of ‘teleports behind you’ and It makes sense for somebody like her- who seems to be a primarily long-distance fighter- to be speedy enough at managing to extricate herself from immediate danger. She’s basically the embodiment of that playground kid who goes ’you’re not gonna take that are you?’ to get two others fighting, then skips out in the background whilst things escalate behind her.
25) “But, I think there’s one person that he won’t hold back, the Bee queen herself. I’m sure that if there’s one person he wishes to kill, its going to be her.”- Actually, it’s junkie Casey Jones here who grabs three vials and injects himself with all of them at once- Kuin was probably taken aback at that as well, but she had to peace out before his mutation punch obliterated her, so we didn’t get to see her reaction. If anything, the fact he’s been such a hard-line drug abuser might have forced his body to adapt to the drug intake, meaning he’s actually better equipped than others to avoid OD’ing on trigger- through given what a normal dose does, an overdose might result in you melting into a puddle of slurry from so many rapid mutations.
26) “APPARENTLY THE DRUG ISN’T ENOUGH TO KILL HIM LIKE I FEARED, BUT IS ENOUGH TO MAKE HIM GO PLUS ULTRA, OR PERHAPS PLUS PLUS ULTRA.
REGARDLESS, ITS GOING TO SUCK FOR OUR HEROES, A LOT”- I prefer to think of this as ‘Plus Omega’- reaching a state of Power similar to Plus Ultra- going beyond your limits- but not reaching it through your own efforts, thus stopping short of where your actual full potential could go to if you tried and worked hard at improving yourself, thus leaving you still stuck inside the limits you’ve set upon your body, just one step short of going beyond.
@thelreads
8 notes
·
View notes
Text
100m Sprint Men Finals Usain Bolt in Berlin 2009, A Sport Video Review
Court Dimensions
For the court dimension, the court was as how it is for the recommended dimensions of the IAAF as the Standard Competition Area where field events can be equally distributed all over the arena without experiencing congestion and it satisfies the needs of the spectators. It is an oval running track which includes eight lanes and safety zones perfect for the 100m sprint that was held.
Equipment
From the video, they used starting blocks for each runner which serves as resistance for when the sprinters push off to take the first step in the race, they get to thrust forward with more power in order for them to have a faster take off. For their footwear, they wore shoes with track spikes which are running shoes worn by sprinters during practices and races. These shoes are very important as they are lightweight which in turn makes the sprinter run faster. In addition, the spikes at the bottom are pointed and thus dig into the ground in every step. Now the use for the spikes is to give the runner traction when rounding corners therefore allowing each step to be more efficient. Last one is the technical running clothes which are lightweight and moves with the body so it won’t bother them as they sprint.
Basic Skills
The basic skills for the sprinters are endurance, pacing, sprinting, and recover. Endurance is one of the basic skills because one must establish a base level of endurance in order for them to effectively compete with other sprinters/runners like them. The level of endurance that is required for each sprinter/runner depends upon the distance of each event they must run or sprint which is why the longer event are such as miles, two miles, and more, they are required to have higher endurance so that finishing the race becomes quite simple for them.
Next is pacing, pacing is a basic skill since runners or sprinters must they must be able to run fast in a given mile. For example, running half a mile in just 90 seconds. Moreover, pacing is usually a small section of your overall distance, run at an ideal interval time, combined with subsequent intervals, to produce an overall ideal race time.
Moving on, one of the basic skills is sprinting which is important in order to move up the ranks in competitive races and finishing strong. Sprinters running events in distances of 400 m or less will want to focus more on increasing overall speed and high-capacity endurance (Scott, n.d.).
Lastly, recovery is one of the basic skills since it is one of the most essential skills of an event runner. It includes cooling down, stretching, proper care and rest. Cool down with a 5-to-10-minute jog after any running event. Once your heart rate has decreased, begin stretching. Thoroughly stretch your legs, including your hamstrings, calves and quads. If you have any soreness, ice the affected muscles and minimize strain until the pain subsides.
Technical and Tactical Skills
· The Acceleration Phase
This phase involves blasting out of the blocks by pushing off the rear and front leg hard. Here, you want to pull your rear leg through quickly whilst the body leans forward. Then extend the leg on the front block at the knee and hip upon completion of the drive. It’s important that the front foot is driven back onto the ball of the foot for the first stride whilst maintaining a forward lean.
· The Transition Phase
After exploding from the blocks, you want to increase velocity and make an efficient transition to an upright sprinting action. After you leave the blocks, try and increase your stride length and frequency with each stride as you come into the upright position over the first 20-30m.
· The Gliding Phase
This phase begins once the torso is upright. Here you will use your leg strength to maintain a wide but comfortable stride length. At this point you should be completely relaxed, low shoulders, jelly jaw and glide to the finish line.
· Acceleration and Maximum Velocity
Track sprinters will accelerate from a dead start where they are not moving. During the 100m an athlete will begin the race by accelerating until he reaches (or comes very close to) maximal sprinting velocity. At this stage it is no longer possible for the athlete to continue accelerating. The focus switches to trying to maintain maximum velocity through sound technique, which will help limit the rate at which deceleration occurs during the remainder of the race.
· Ground Contact During Accelerative Sprinting
For faster sprint times it is important to limit the amount of time that your foot spends in contact with the ground during each stride. This is why sprinters run on the balls of their feet and sprinting spikes all have the spikes positioned on the forefoot. Force production is another important aspect to generate speed when making contact with the ground. The greater the force you apply into the ground, the greater return of impulse production, which creates greater speed. Longer foot-to-ground contact times will allow for greater force generation and impulse production.
Another thing to consider when accelerating is the point of foot-to-ground contact in relation to the athlete’s center of mass. You want the point of contact to be behind your center of mass so that there will be less ground contact time. This is why it’s important to stay low and drive out the blocks, rather than immediately transfer into an upright position. Take care not to overextend your stride as you will not be able to produce as much force during ground contact and will be more susceptible to injury.
· Maximum velocity sprinting
During maximum velocity, as with the acceleration phase, shorter contact times are linked with better performance. This can be achieved through applying optimal vertical forces during ground contact. This will lead to increased speed because you will be able to generate a great enough force impulse to overcome gravity and bound off the ground more rapidly.
In the acceleration phase it is beneficial to have the foot behind the center of mass. Bringing the foot back during maximum velocity may only be beneficial to a certain point, after which it will become detrimental to performance and increase deceleration by causing the upper body to lean forward. A good tip is to make sure that when the foot makes contact with the ground, it’s placed under the hip.
· The Stride Cycle
The stride cycle begins at the touchdown phase. At the point of touchdown, a sprinter loses momentum and slows down due to the braking effect. This is simply where the foot makes its initial contact with the ground. In addition, this is where the ground contact time and then ends after the toe off phase where force is produced when pushing off the surface. This then leads to the flight phase where neither foot is in contact with the ground, and ends with the second touchdown as the rear leg becomes the lead.
Rules of the Game
· Race Basics
The 100M sprint (or 100M dash) takes place on the straightaway of a track. From start to finish, the 100M sprint is a total distance of 100 meters (109.36 yards). The racer that reaches the finish line in the shortest amount of time wins. In general, if more than eight runners participate in a race, qualifying heats are run with the eight fastest runners advancing to the finals. Different organizations may vary the maximum number of runners allowed in each heat and the number of "rounds" until the finals.
· Lanes and Equipment
Before each 100M race heat, runners will learn in which lane they will run. Runners must remain in their assigned lane for the entire race. If a runner crosses into another runner's lane and is caught, officials will disqualify him from the race. Runners may not obstruct other runners' paths with any parts of their bodies.
Runners wear special shoes with short spikes that must not exceed 9mm (.35 inches). At the start of the race, runners crouch and place their feet on devices known as starter blocks. Once in the ready position, runners must keep their feet on the blocks until the starter's gun goes off.
· Starting on Time
100M sprints begin when the starter fires a starter pistol that sets off the automatic timers. If a runner starts before the pistol, it is a false start and the race is halted and re-started. Although the International Association of Athletics Federations proposed instant disqualifications for false starts in 2008, as of 2009 runners are still allowed a warning "false start." Upon the second false start, a runner is disqualified. False starts are measured by apparatuses in the runner's starting blocks. If pressure is released from the blocks too early, a false start is charged.
· Finish
Time is kept with automatic scoring clocks. A runner finishes the race only after his trunk crosses the finish line. For this reason, 100M sprinters often lean forward at the finish of the race. To ensure the most accurate placings, a digital line-scan camera will remain focused on the finish line. Linked to the overall timing system, these cameras are highly accurate and can differentiate between thousandths of seconds.
How to Officiate the Sport
To officiate the sport, one must:
· Meet Referee
· Finish Line Logistics
· Starters
· Clerks, Umpires and Hurdle Crew
______________________
Bibliography:
Athletics. (n.d.). Retrieved from Department of Local Government, Sports and Cultural Industries: https://www.dlgsc.wa.gov.au/sport-and-recreation/sports-dimensions-guide/athletics-track-events
Coultman, L. (2018, April 6). Sprinting Technique: The Key To Increasing Your Speed. Retrieved from Track & Field News: https://trackandfieldnews.com/track-coach/sprinting-technique-the-key-to-increasing-your-speed/
Grouch, A. (2009, July 30). 100M Sprint Rules. Retrieved from SportsRec: https://www.sportsrec.com/100m-sprint-rules-5242103.html
Scott, M. (n.d.). Basic Skills Involved in Running Events. Retrieved from Living Strong : https://www.livestrong.com/article/484287-basic-skills-in-running-events/
2 notes
·
View notes
Photo

I hopped on the bread-baking bandwagon and made Hokkaido milk bread! It was an excellent choice: this fluffy, tender white bread is basically the ultimate sandwich and toast bread, and I found the dough fabulously cooperative.
What makes it unique is that it uses a tanghzong, which is flour and liquid cooked together to form a gel. This 1) slows the evaporation of water during the baking process and afterward, making the bread stay fresh and tender for longer and 2) inhibits the development of gluten, letting the bread rise extra-high for maximum fluffiness.
Recipe transcribed below the cut, with a few notes from me... Feel free to message me if you need additional advice!
IMPORTANT NOTE: This recipe makes enough tangzhong for two loaves of bread -- because trying to make a smaller amount would likely result in scorching the mixture -- but the rest of the ingredients are measured for one loaf. Either double everything but the starter and make two loaves, discard your leftover tangzhong, or chuck the leftover in your fridge for a couple days ‘til you bake your next loaf (not sure how well it keeps but I’m giving it a shot).
LESS-IMPORTANT NOTE: If you have a kitchen scale, USE IT when baking bread. Volumetric measurements just aren’t as accurate!
Ingredients
For the starter
⅓ cup/45 grams bread flour OR all-purpose flour ½ cup/120 milliliters whole milk (substitutes here)
For the dough
2 ½ cups/325 grams bread flour 1/8- ¼ cup (30-60 grams) sugar (depending on how sweet you like your bread) 2 teaspoons/7 grams active dry yeast (1 packet) 1 teaspoon/4 grams salt 1 egg ½ cup/120 milliliters warm whole milk, plus extra for brushing on the unbaked loaf 4 tablespoons/60 grams unsalted butter, cut into pieces and softened at room temperature, plus extra for buttering bowls and pan
Method
Step 1 Make the starter: In a small heavy pot, whisk flour, milk and 1/2 cup water (120 milliliters) together until smooth. Bring to a simmer over medium-low heat and cook, stirring often, until thickened but still pourable, about 10 minutes (it will thicken more as it cools). When it’s ready, the spoon will leave tracks on the bottom of the pot. Scrape into a measuring cup and lightly cover the surface with plastic wrap. Set aside to cool to room temperature. (You will have about 1 cup starter; see note below.)
Step 2 Make the dough: In the bowl of a stand mixer fitted with a dough hook, combine the flour, sugar, yeast and salt and mix for a few seconds, just until evenly combined. (NOTE: If you don’t have a stand mixer, you can knead by hand on a floured surface -- it’ll just take a while!)
Step 3 Add egg, milk and 1/2 cup starter. Turn the mixer on low speed and knead 5 minutes.
Step 4 Add soft butter and knead another 10 to 12 minutes (it will take a few minutes for butter to be incorporated), until the dough is smooth and springy and just a bit tacky. (For me, it was pretty loose at this point -- don’t despair or give into the temptation to add extra flour!)
Step 5 Lightly butter the inside of a bowl. Use your hands to lift dough out of mixer bowl, shape into a ball and place in prepared bowl. Cover with a kitchen towel and let rise in a warm place until doubled in size, 40 to 60 minutes.
Step 6 Punch the dough down and use your hands to scoop it out onto a surface. Using a bench scraper or a large knife, cut dough in half. Lightly form each half into a ball, cover again and let rise 15 minutes.
Step 7 Heat the oven to 350 degrees. In the meantime, generously butter a 9-by-5-inch loaf pan.
Step 8 Using a rolling pin, gently roll out one dough ball into a thick oval. (By this time, the dough should be moist and no longer sticky. You probably will not need to flour the surface, but you may want to flour the pin.) First roll away from your body, then pull in, until the oval is about 12 inches long and 6 inches across.
Step 9 Fold the top 3 inches of the oval down, then fold the bottom 3 inches of the oval up, making a rough square. Starting from the right edge of the square, roll up the dough into a fat log, pick it up and smooth the top with your hands. Place the log in the buttered pan, seam side down and crosswise, nestling it near one end of the pan. Repeat with the other dough ball, placing it near the other end of the pan.
Step 10 Cover and let rest 30 to 40 minutes more, until the risen dough is peeking over the edge of the pan and the dough logs are meeting in the center. Brush the tops with milk and bake on the bottom shelf of the oven until golden brown and puffed, 35 to 40 minutes.
Step 11 Let cool in the pan 10 minutes, then remove to a wire rack and let cool at least 1 hour, to let the crust soften and keep the crumb lofty. (If cut too soon, the air bubbles trapped in the bread will deflate.)
7 notes
·
View notes
Photo

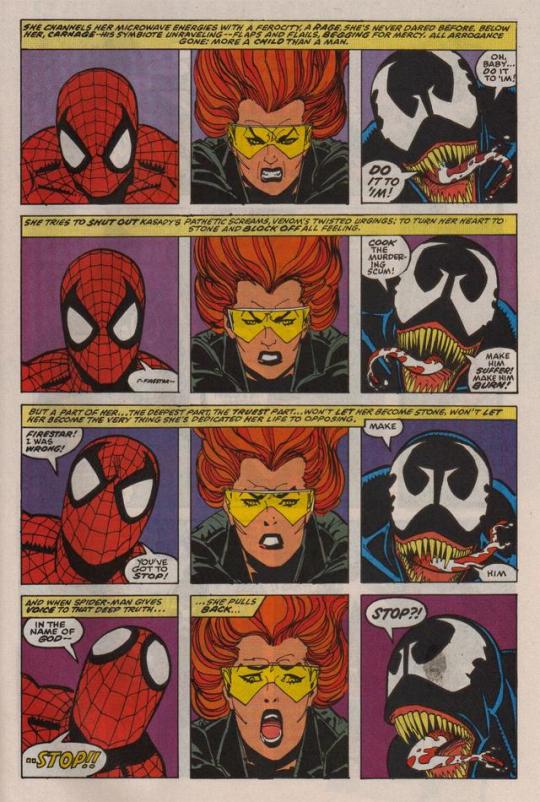
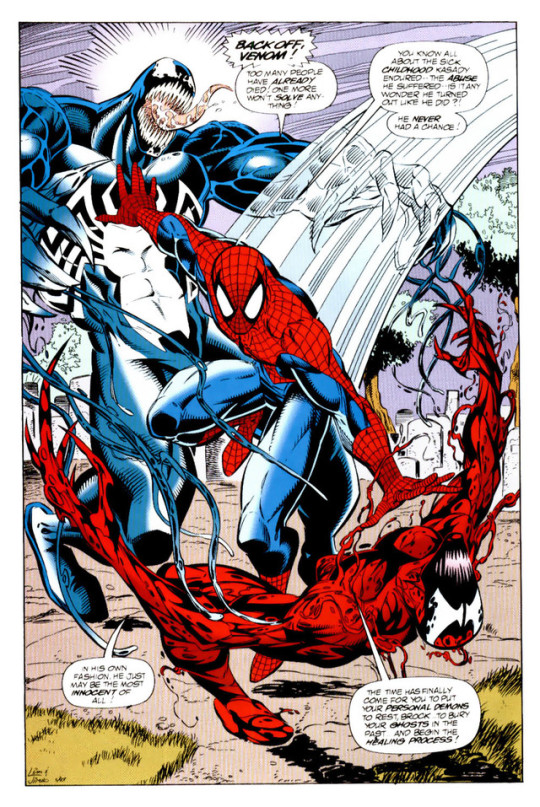
These pages from Maximum Carnage have historically rubbed some people the wrong way as it depicts Spider-Man expressing sympathy for an unrepentant mass murder, Cletus Kasady/Carnage.
I’ve already written defences of the first page in the past but I’m going do so again and also tackle the second page too .
The main contentions are that Spider-Man is not allowing Carnage to die and indeed defending him as innocent.
I trust I don’t need to give you context for who Carnage is and thus why the latter is such a, shall we say, hot take?
Given the unbridled slaughter Carnage had and would go on to perpetrate it’s not unreasonable to argue Spider-Man was very wrong on this one.
Was he absolutely unreasonable in his actions and arguments? Was he in fact being written out of character?
When you put things into context there is actually a fair bit of material to defend Spider-Man’s attitude at this specific moment.
Regarding what he says to Venom about burying his demons this can be argued as being in response to seeing how Venom has clearly changed (how organically may be debated) since their early encounters. Not only has Venom backed up Spider-Man throughout Maximum Carnage and fought to defend innocent life, but at this point in time Spider-Man has seen Venom act in an unquestionably heroic way in Venom: Lethal Protector #6.
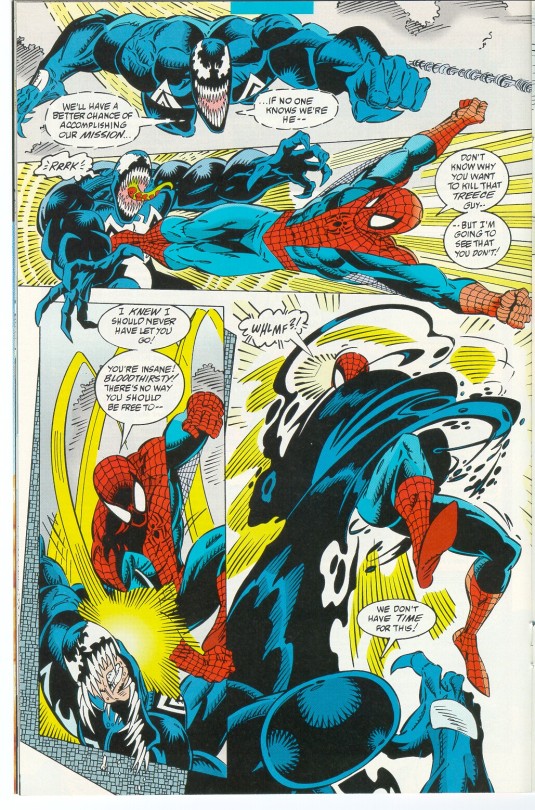

Even earlier than that in the Trial of Venom one shot (not to be confused with the Venom On Trial mini-series) Daredevil raised the very real possibility that Eddie Brock’s more violent actions were a direct result of the symbiote’s influence.


This is important context for two reasons.
For starters Venom was himself a homicidal maniac (albeit of a lesser degree) and changed to be at least LESS bad.
Secondly from Spidey’s POV at this point in time it is very much a possibility that Kasady, whilst not guiltless by any means, might not be wholly responsible for the actions he’s perpetrated as Carnage and if cured of the symbiote might have a shot at rehabilitation.
We can debate the effectiveness of rehabilitation for people like Cletus Kasady in the real world, but it is important to remember that comic books rarely reflect the accurate realities of life (especially the sciences) and thus adhere to their own brand of logic. It’s a logic which has changed over time and was different in the early 1990s than it is today. Not to mention Spider-Man himself is no expert when it comes to psychology and doesn’t even know Kasady’s full medical history. But he has seen people go down dark paths and find redemption. Hell Vermin was a cannibalistic serial killer almost entirely due to childhood abuse and he witnessed him get better right before his eyes.
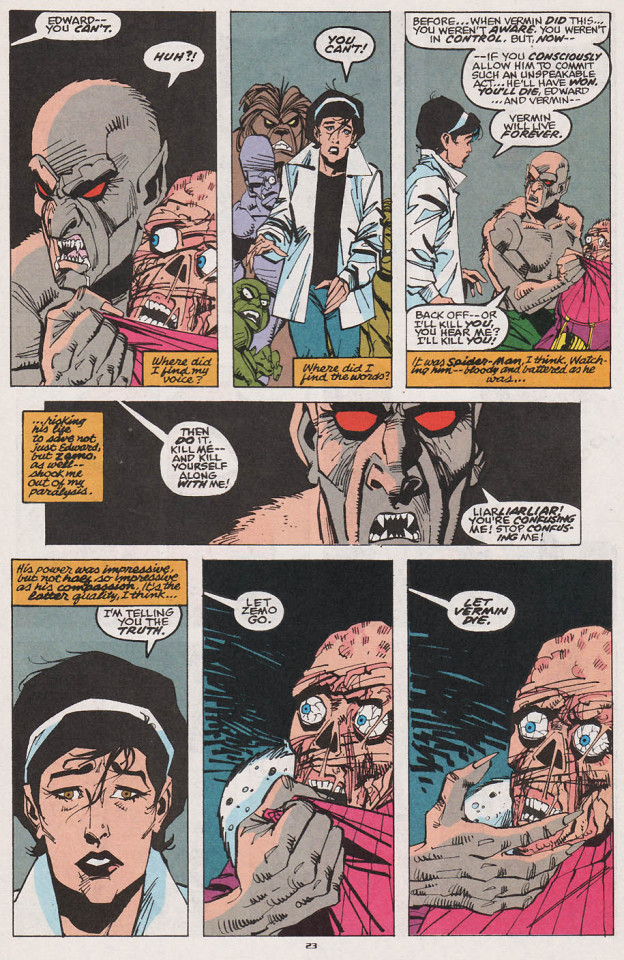
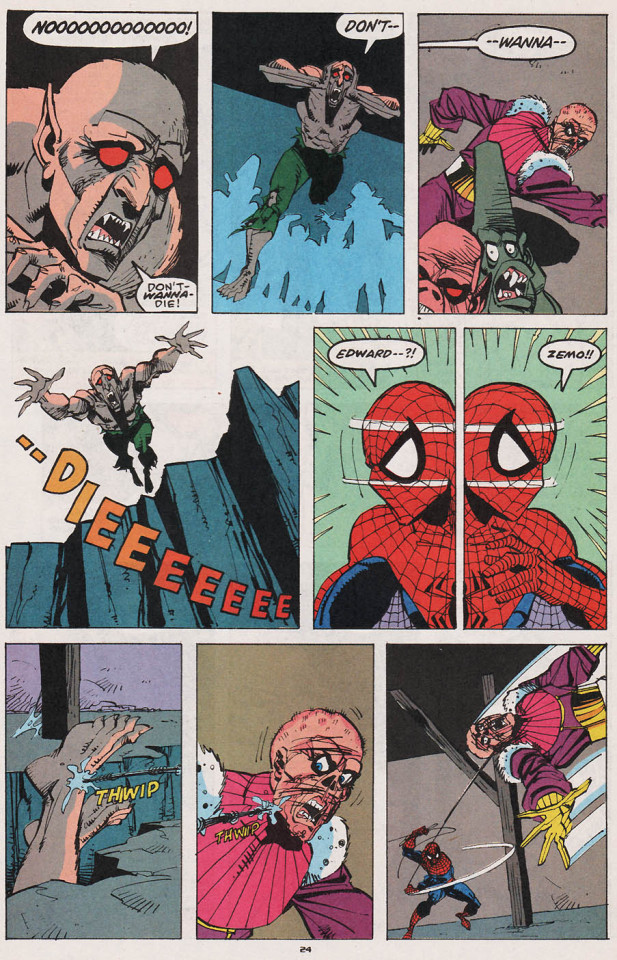
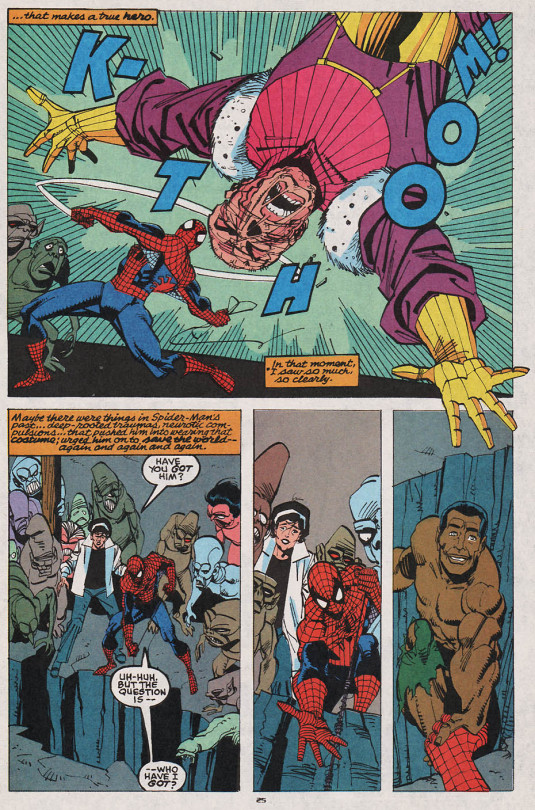
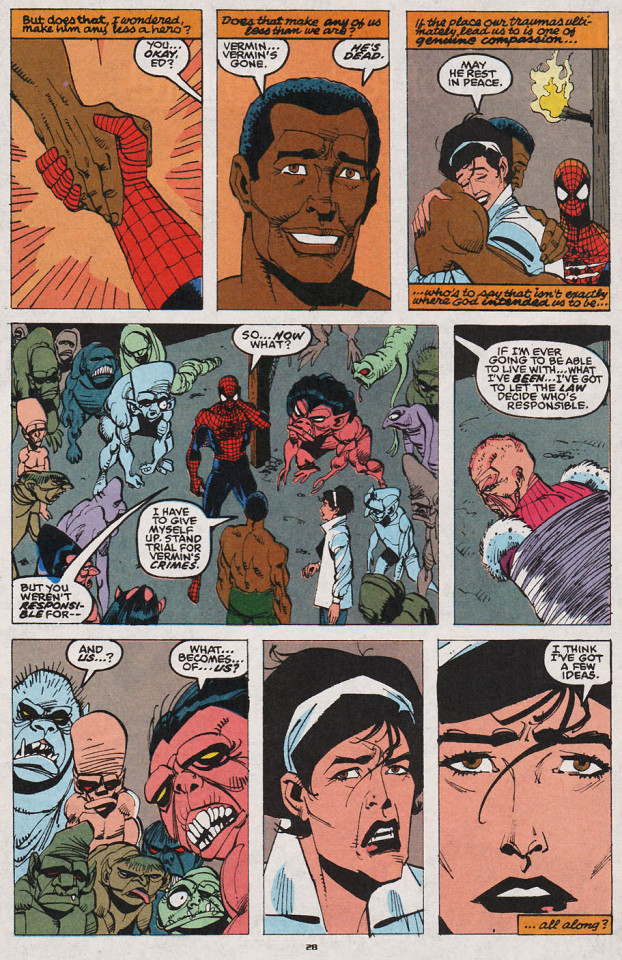
Furthermore Maximum Carnage itself began with Kasady escaping custody before any serious attempts were made to try and treat him. He was locked up in general population (which by rights he shouldn’t have been) before getting his symbiote and then kept in the Vault with other super villains (which doesn’t try to treat the inmates at all to my understanding). The story begins with his transfer to Ravencroft but no serious attempt to treat him has been made at this point in time.

All these factors together mean that from Spider-Man’s point of view it’s not unreasonable to hold the possibility that Kasady might be receptive to treatment.
Furthermore an important element of Maximum Carnage, really the thing attempting to give the whole mess any substance, is that Spider-Man refuses to kill anyone on principle. He refuses to be like Carnage or Venom in any way by deliberately taking life. Even ignoring the very dark stories preceding Maximum Carnage that pushed Peter to the limits of his mind and soul (like Harry’s death), he saw an incredible amount of violence and destruction in Maximum Carnage alone.
It’s very possible for a human being’s resolve to break in such a situation, for them to in a sense adopt a kill or be killed attitude, fight fire with fire. Or if you want to get more pretentious ‘He who fights with monsters should look to it that he himself does not become a monster . . . when you gaze long into the abyss the abyss also gazes into you.’
However it is also not unrealistic for someone to react to such violence and in essence reject it. I think that’s what Spider-Man was doing in the top pages and in fact in the event in general. It went beyond simply not wishing to add to the body count. I think he felt that to cross the line and deliberately murder Carnage or allow him to be murdered in cold blood would’ve been tantamount to losing at least a part of his own soul; maybe even losing some more of Venom’s too.

He wasn’t willing to do it if there might be another way. And it wasn’t unreasonable for him to believe he could find another way. Putting aside his history of doing exactly that in this story alone he found a peaceful solution to stopping the unrepentant mass murderers allied with Carnage.
In their case they even expressed a possibility of redemption.
Tied in with this, and perhaps more importantly, is a question I think fans of Spider-Man and superheroes in general often ignore or fail to ask.
Who exactly is Spider-Man, or whichever hero you want, to decide who lives and who dies?
Don’t get it twisted.
I’m not saying it’s immoral to take life in self defence, or defence of your family or defence of other people when there is a clear and present danger to people’s lives.
But even in situations like that, which most people would agree is the most morally justifiable scenario for taking life, the legal system (in theory) still investigates and scrutinizes. It isn’t treated lightly by any means.
Even members of the legal system (again in theory) who are allowed to take life have to be scrutinized first before that allowance is granted and drilled in when to exercise that power.
There are checks and balances in play to hopefully ensure accountability in regards to people using that power appropriately and penalties for anyone who exercise them unethically, let alone everyone who doesn’t have the right to kill granted to them but does so anyway when it’s not self-defence.
And that’s all because the taking of another person’s life, the ultimate sanction as it were, has to be something treated with care. Individuals should never have the right to exercise it however they individually see fit for obvious reasons.
All of which is me trying to say Spider-Man has not got the right, be it legal or ethical, to take anybody’s life unless it’s a clear cut case of defence. In Renew Your Vows #1 when he killed Venom, that’d be a pretty clear cut case as Venom posed a very direct threat to himself, his wife, his child and the fire fighters outside the building.
In both of the top 2 situations the scenario’s were very very different.
#Carnage#Cletus Kasady#Maximum Carnage#Spider-Man#Shriek#Venom#Eddie Brock#venom symbiote#Peter Parker#Daredevil#Matt Murdock
33 notes
·
View notes
Text
OC’s Spell List - Kita Lavellan
In an attempt not to overpower my Inquisitor in battles and fights, (since it’s the easiest thing in the world to overpower a magic-user character), I spent several hours figuring out which spells she knew, pulling from all the games, making any small edits for my Inquisitor’s backstory, and deciding when and under which circumstances she learnt them. WIP but I wanted to show my friend what I had so far...[Edit: This is taking forever to work out and type up *sobs*]
Natural Inclinations/Starter Spells
A) Veilfire - Age 6
Kita learnt Veilfire as her first spell by conversing with Spirits in the Fade. She only stopped speaking to the Spirits when the Keeper of her Clan finally realised the girl had magic, and began warning her of the dangers of Demons, forbidding the girl from interacting with the creatures of the Fade if she wished to stay with Clan Lavellan and her family.
She knows how to write with Veilfire, a skill thought lost to the ancient elves, but after her Keeper’s reaction to finding out she even knew how to cast the comparatively simple Veilfire flames, Kita has kept that piece of information a secret from everyone except her mother, and later her sister.
1) Winter’s Grasp - Age 7
The caster locks their target in a thin sheet of frost and ice. Some targets can be frozen solid, the smaller the target the higher the chance of it being frozen. The target gives off waves of cold that can cause discomfort in other nearby enemies. A frozen target takes additional shattering damage from a melee blow.
This was the first spell Kita cast outside of the Fade. Her mother would tell stories of how, when her daughter’s porridge was too hot, a small shower of snowflakes and frost would settle across it’s surface.
2) Cone of Cold - Age 9
Cone of cold produces a blast of ice in a 90 degree angle, with the caster as the point of origin, reaching out 4 meters (13ft). Cone of Cold is more effective against larger targets than Winter’s Grasp, but similarly to Winter’s Grasp, Cone of Cold can freeze targets causing them to give off waves of cold that cause discomfort to nearby enemies, and take additional shattering damage from melee attacks. Cone of Cold can also be used to freeze environments such as stones, puddles or put out fires.
Kita used to use this spell to create paths across ponds, or to create small area’s covered in snow for her baby sister, Nel, to play in.
3) Chain Lightning - Age 11
A bolt of lightning hits a target of the caster’s choice within 2 meters (6ft). It then splits into two (2) bolts, each jumping to another target, within 2 meters (6ft) of the First Target, and doing half the original amount of damage. Each of those secondary bolts then splits into two (2) more bolts, jumping to different target, within 2 meters (6ft) of the Second Targets, and doing a quarter of the original damage. Overall, Chain Lightning can hit a maximum of seven (7) targets, and 300% of the base spell damage.
Kita learnt this spell instinctively after watching a bolt of lightning hit a tree in the Emerald Graves during a summer storm. The hot and muggy weather that followed the rainfall brought many biting insects to the clan’s camp, and after growing tired of batting the offending creatures away from herself and her sister, she sent small sparks of chain lightning at the insects.
4) Hand of Winter - Age 13
Hand of Winter sends of a blast of ice and snow in every direction for 7.5 meters (24ft), with the caster as the point of origin. Since this direction also includes up and down, this spell can be used to partially freeze lakes, or create a floating glacier-like structure. It is almost guaranteed to freeze any living target in it’s path, unless the target is a magic user of exceptional will themselves, able to resist and overcome the spells effects through sheer willpower.
When Kita was twelve (12) years old, she fell through the ice on a lake and drowned. Her five (5) year old sister, Nel, summoned spirits that lifted her sister from the icy lake, and resurrected her by guiding her departed spirit back to her body from beyond the veil. For almost a full year after the event, Kita practiced her ice based spells over and over. They grew stronger, but not enough that she felt safe enough to use them crossing lakes and ponds as she had as a child, until her mana exploded in a wave of ice cold. She learnt Hand of Winter through practice and determination, and with a stubborn desire to no longer be afraid of the water. While her spellcasting was a success, Kita still doesn’t love water above her waist, or swimming in water where her feet can’t reach the bottom.
5) Telekinetic Burst - Age 15
A simple defensive spell, Telekinetic Burst sends out a wave of magical energy, with the caster as the point of origin. Anyone within 1.5 meters (5ft) of the caster is either stunned and left staggering, or physically knocked back by up to 3 meters (10ft). The strength of the blast is determined by the spellcaster’s willpower, and the amount of mana thrown into the spell.
Kita and Nel often explored the area’s near where the Clan camped, running off alone in the Brecilian Forest or exploring the grasslands of the Exalted Plains. On one such occasion, they stumbled upon a group of hunters who didn’t take kindly to the teenage elf or her eight (8) year old sister, threatening to cut off their ears or send them to the nearest Alienage. Desperate to get the grown men, with weapons, away from herself and her sister, Kita’s will manifested in the form of a Telekinetic Burst, giving the two girls the chance to run and lose the hunters in the wilderness. She had to tell her grandmother, Keeper Deshana, about the encounter and the Clan moved on quickly, but it did bring about the Keeper’s decision to officially name Kita as her First.
Keeper Taught - Learned as the Clan's First
Chosen to be the Keeper’s First at Age 16, Kita spent a year learning how to use a Mage Staff correctly. The Keeper refused to teach her any new spells until she could manipulate a staff as a weapon in it’s own right as well as being able to pass her small repertoire of spells through the wood correctly. Kita shattered many training staves, before learning to regulate the flow of her mana.
B) Arcane Bolt
One of the first lessons Deshana gave Kita was how to use a staff to form an Arcane Bolt. An Arcane Bolt can be used even when a caster’s mana is near depleted because it relies less on the caster’s mana, and more on the power infused in whichever Rune is crafted into the Mage Staff. While it needs a mage to activate the Rune, it draws power from the energy infused in it’s crafted form, not the mages abilities. Because the spell doesn’t draw from the caster’s mana, it’’s ability to cause damage is weak, but it’s range is exceptional. Able to hit a target up to 30 meters (100ft) away, the Arcane Bolt is best used on either a retreating enemy, or as a way to redirect an enemies attention away from an injured companion. Arcane Bolt is also useful in teaching a young mage accurate aim, casting techniques and staff movements, because there is little chance of them causing damage with a miscast Arcane Bolt.
1) Spellbloom - Age 18
Spellbloom creates a sphere of revitalizing energy that can span up to 10 meters (32ft) in diameter, with the caster as the point of origin. When touched by this restorative energy, mages find their mana pool replenishing faster, and fighters find their stamina bolstered, while the weary traveller might find the strength to continue their trek for several more hours.
One of the first spells Keeper Deshana taught Kita, this spell is a staple of Dalish Clan life. Sometimes the Clan is not in a position to stop and make camp when the Halla are tired, or their warriors begin to flag, and the Spellbloom spell allows the Clan to continue on until they can find a safe place to spend the night.
2) Energy Barrage - Age 20
This spell sends a group of small orbs of magical energy at up to four (4) targets. Energy Barrage produces no less than eight balls of energy that attack either a single target, or up to a maximum of four random targets, depending on the caster’s intention. The maximum number of energy sphere’s created is determined by the strength of the caster, and the amount of mana poured into the spell making this a potentially draining cast. For a Circle Trained mage, the magical energy takes the form of whichever elemental type their staff is crafted to best attune to. In the case of a Dalish Elf or an Apostate Mage, whose (often makeshift) staves have no such elemental alignment, the energy takes it’s type from the power-type that the mage is most proficient in.
In Kita’s case, this spell takes the form of a mixture of lightning & ice blasts. This is unusual, and after spotting the puzzled expression on her grandmother’s face at the sight of the two elements mixing, Kita limits this particular spell to Lightning only. It uses more of her mana to limit it in this way, but to the teenager, it was worth the additional effort to avoid standing out.
3) Fist of the Maker aka Veilstrike - Age 22
This spell, known as the ‘Fist of the Maker’ among Circle Trained Mages, is taught primarily in the Circles located in the Free Marches. An elf who escaped the circle taught Deshana, and Kita, the spell in exchange for being allowed to stay with the Clan. Fist of the Maker draws energy from the veil, and uses the force to slam enemies against the ground. The spell can target a single enemy for massive damage, or span an area 4 meters (13ft) in diameter to stun all targets caught in the area of effect.
Kita first used this spell in battle when the Clan stumbled across a nest of corrupted spiders in the Brecilian Forest a couple of years after the end of the 5th blight. In an attempt to stop the spiders overwhelming the Clan’s warriors, and potentially infecting them with the blight, she used Fist of the Maker to crush the arachnids, the force of the spell shattering the creature’s legs and stopping their advancement. Once Kita begins discussing magic with Solas post-Conclave, she discovers that, among Apostates, and Rift Mages, this spell is also known as Veilstrike. Since Kita has no affiliation with the Andrastian faith, she begins referring to the spell by the much more neutral name.
4) Stinging Swarm - Age 24
Stinging Swarm summons a cloud of stinging insects that converge in an area of approximately 2 meters (6.5ft) in diameter, attacking any enemies within that space. If the mages will falters, the swarm will disperse harmlessly.
Another staple of Dalish Keeper’s, this spell is often used to fend off local wildlife, such as wolf packs or gurguts. Most animals will leave an area where a wasp nest resides for a few days before venturing back, and this often allows a Clan to camp safely without having to put the clans hunters at risk. Once Kita meets, and gets to know, Sera she often helps the young elf play pranks by summoning swarms of bee’s for Sera to bottle up. When Sera claims not to remember how she got bee’s inside of Commander Cullen’s training dummy, it was to keep Kita’s involvement in the prank a secret.
5) Fade Shroud - Age 26
Fade Shroud is an advanced version of the spell Arcane Shield. While the Arcane Shield uses mana to deflect incoming attacks, increasing a mages chances at avoiding weapon attacks and projectiles, Fade Shroud allows the mage to briefly become spirit-like and incorporeal.
Kita finds this easier than funnelling her magic into a physical barrier that deflects attacks, and when Deshana questions her about the unusual technique, Kita describes it as pressing up against the sail of a ship that is blown full with a strong breeze. You can press against it, and into it, but the veil is constantly pushing back to force you out again, which is why Fade Shroud can only be used in short bursts of up to five (5) minutes at a time. While active, however, the rush of energy from the Fade energizes the mage and replenishes their pool of mana.
6) Nature’s Blades - Age 29
Vines grow up from the ground, wrapping around the caster’s ankles and immobilizing them for the duration of the spell. Additionally, thorny vines then sprout from the ground for 4.5 meters (15ft) in all directions, with the caster as the point of Origin. Enemies caught within this field can be knocked back up to 10 meters (32ft). Any enemies not knocked away from the caster by this spell have to contend with reduced maneuverability, and the constant slicing attacks of the sharp thorns as the vines whip at and wrap around enemies within the spell’s range.
This is a spell that Kita created herself. It is a blend of the ‘One With Nature’ and ‘Thornblades’ spells that Keeper Deshana attempted to teach her. To this day the Keeper still believes that Kita simply casts the two spells in quick succession, and only Nel is aware that her sister crafted an entirely new spell to merge the two magical attacks.
7) Lightning Bolt - Age 31
A powerful lightning strike arcs down from the sky striking a single target, causing massive damage and paralysing the target for up to a minute. Up to four enemies within 2 meters (6.5ft) of the target can be blasted away from the target by up to 4 meters (13ft) from the force of the Lightning Strike.
When news reached the Clan about the Chantry of Kirkwall being blown up by an apostate mage, Keeper Deshana encourages Kita to study the Lightning Bolt spell. In addition to causing damage, and stunning an enemy, Lightning Spells also drain a warrior’s energy (stamina) and the Keeper wanted her First to be able to defend against potential attacks from Templars or Town Guards now on the lookout for Apostate Mages.
Learned Throughout Inquisition
1) Barrier - Age 32
3) Fireball/Flashfire - Age 32
4) Crushing Prison - Age 34
5) Lightning Cage - Age 34
Specialization Spells - Rift Mage & The Anchor
1) Stonefist/Fadefist - Age 32
2) Pull of the Abyss/Devouring Veil - Age 32
3) Mark of the Rift (Open Small Rifts in Inquisition/Parts the Veil post Trespasser) - Age 32, 34 & 36
4) Aegis of the Rift - Age 36
5) Magical Discharge (Weaker post Trespasser/Uses Mana not the Mark) - Age 36
Post Trespasser/Arbor Blessing
1) Blizzard - Age 36+
2) Tempest - Age 36+
3) Firestorm - Age 36+
4) Custom Spell - foci based magic TBD - Age 36+
5) Custom Spell - foci based magic TBD - Age 36+ Link to Kita’s Masterpost
#Dragon Age#Dragon Age Inquisition#DAI#RPG#Roleplay Stuff#Arbor Blessing#kita lavellan#Kita#Lokita#Lokita Lavellan#Mage#Rift Mage#Inquisitor#Female Inquisitor#Inquisitor Lavellan#Spells#Magic#Keepers First#Faerelden#Fairelden#Skekiss
10 notes
·
View notes