#netgear firmware updates
Explore tagged Tumblr posts
Visit Tumblr Blog
Explore Tumblr blogs with no restrictions, modern design and the best experience.
Last Seen Tumblr Blogs


Fun Fact
Tumblr has 4 main sources of revenue.
Text
Steps for Netgear Orbi firmware update!
Wondering how to update Netgear Orbi firmware? Keep your router running smoothly with the latest updates for better performance and security. Follow our step-by-step guide to update your Orbi firmware hassle-free. Need help? Chat with our experts now for instant assistance and get your network optimized in no time!
#orbi login#netgear orbi login#orbilogin.com#how to update netgear Orbi firmware#update netgear Orbi firmware#netgear Orbi firmware update
0 notes
Text

To update the Netgear Orbi Router Firmware, open the web browser and enter the 192.168.1.1 IP address in the browser bar. Now, enter the login details and you will reach the setup wizard. Here, click on Advanced>Administration and then follow the on-screen instructions for the further procedure. For the complete update procedure, reach out to us!
0 notes
Text
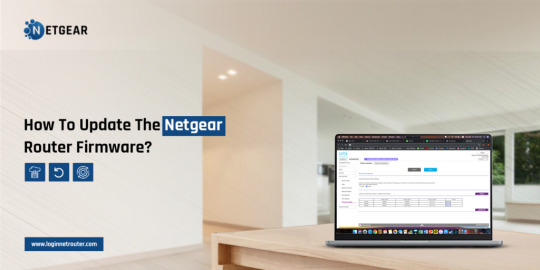
To Update The Netgear Router Firmware, open the web browser and type the routerlogin.net web address in the browser bar. Now, type the username & password on the login window. Hereon, select Advanced > Administration>Firmware Upgrade and follow the on-screen instructions to complete the Firmware update or connect with us!
0 notes
Text
How to Update Netgear Router Firmware?
To Update Netgear Router Firmware, open the web browser and type the routerlogin.net web address in the browser bar. Here, type admin details on the login window. Further, click on Advanced>Administration>Router/Firmware Update>Check>Yes. Download the compatible firmware version and upload it. For more info, get in touch with us!
0 notes
Text
How To Safely Update Your Netgear Router Firmware?
You must Update Netgear Router Firmware whenever a newer version is available. Updating the firmware is crucial for the router to enhance its functioning. You just need to download the latest firmware version, access your Netgear router’s admin panel, and upload the firmware there. Check out our website now to know the complete firmware updating process.
0 notes
Text
How To Reslove The Issue Of Netgear Router Firmware Not Update?
Is your Netgear router firmware not updated to the latest version? Well, log into the “Netgear” app, visit the “Check for Update” section, and upload the latest firmware version. It will eliminate all bugs & glitches within your router. Check out our website if you are unable to update your Netgear router's firmware version. Visit our website for more information.
0 notes
Text
How to Execute the Orbi Firmware Update?
The Orbi router is the topmost mesh WiFi system known for its impeccable functionality. This router is known for its high-speed internet connection and flawless network coverage. The Orbi router doesn’t require much maintenance except for the occasion Orbi firmware update. Updating the firmware of the Orbi router is very crucial.
To update the firmware of the Orbi router, you need to access the user interface of the device. Updating the firmware of the Orbi router is essential. The firmware update of the router enhances the router’s performance. It also eliminates all flaws and faults within the router.
If you want to know the process for the Orbi firmware update, we’ve got you. We are here with this post to help users understand the firmware process. This post will cover the complete process for the firmware update. So, keep reading ahead to figure out the complete instructions.
Steps for the Orbi Firmware Update
To update the firmware of the Orbi router, you need to log into the router’s web interface. Whenever you are facing issues within the Orbi router, you can try updating the firmware. Updating the firmware will eliminate all glitches and bugs within the router. The steps for the firmware update are as follows:
To begin with, connect your device to the router’s network.
Now, open a web browser and enter orbilogin.net in the address bar.
When the login page appears, enter the login credentials.
Hereon, from the web interface, click Menu and go to the Router Settings.
From this page, click the Check for Updates option.
If a firmware update is available, you will see the Update Now option.
Finally, click on it and the firmware update will be completed.
These are the steps for the Orbi firmware update. Follow these steps carefully to update the firmware correctly. Once the firmware update is successful, you can start using the router accordingly. If you face any issues, connect with us.
0 notes
Text
Netgear EX6400 setup
The Netgear EX6400 setup is the process of configuring and installing the Netgear EX6400 WiFi extender, a device designed to enhance and extend the coverage of an existing WiFi network. It is especially helpful in large houses or workplaces where the Wi-Fi signal could not fully cover every area.
Netgear EX6400 setup Using Web browser
Follow these steps for Netgear EX6400 setup through Web browser:
Plug in your Netgear EX6400 extender and wait for the green power LED to shine brightly.
Establish a connection between your device and the extender by utilizing an Ethernet cable.
Launch a web browser on your device.
Enter "mywifiext.net" into the address bar and hit Enter.
Access the system by employing your default login credentials.
Choose the WiFi network you wish to amplify.
Proceed by following the prompts displayed on the screen to finalize the setup.
We hope that by following the steps outlined above, you will be able to configure your Netgear EX6400 WiFi range extender. If you get stuck at any point, please contact our experts.
Netgear EX6400 setup Using WPS Method
Utilizing WPS represents the simplest method for setting up the Netgear EX6400 Extender. You can set up your Netgear EX6400 wifi range extender in just two minutes.
Follow these steps for Netgear EX6400 setup through WPS:
The power source should be connected to the Netgear EX6400 wifi extender.
Wait until the power LED transitions to a solid green light.
Note that the WPS setup for the Netgear EX6400 Wi-Fi extender works best when it's in close proximity to your router.
Begin by pressing the WPS button on the Netgear EX6400, followed by the corresponding button on your router.
This process will create a connection between the extender and your standard Wi-Fi network.
This is the procedure for establishing a connection to your existing internet using the WPS method.
Netgear EX6400 Extender Firmware Update
Firmware is a type of software that controls the internal operations of a device. In the case of a wifi range extender, the firmware controls the way the extender communicates with the router, the way it amplifies the wireless signal, and many other functionalities.
Steps to Update Firmware Of Netgear EX6400 extender :
Power up your Netgear EX6400 extender.
Connect a device to the extender.
Open a web browser and enter "192.168.1.250" in the address bar.
Log in with your username and password.
Navigate to the menu and choose "Firmware Update."
Select "Check Online" to determine if a newer firmware version is available.
If an update is available, click to update.
Your Netgear EX6400 extender's firmware is now up to date.
Common Issues during Netgear EX6400 setup
Mywifiext.com and mywfiext.net are no longer operational.
The WiFi extender is connected to the router, but there is no internet access.
I am unable to access mywifiext.local.
Mywifiext password is incorrect.
The WiFi extender is constantly disconnecting.
The WiFi extender is unable to connect to the network.
I forgot the default Netgear extender password.
Netgear EX6400 cannot be accessed.
The Netgear EX6400 is not operational.
EX6400 cannot be reset.
Troubleshooting Tips for Netgear EX6400 extender configuration
If you're experiencing issues with your extender and it's affecting your Wi-Fi device's performance, follow the troubleshooting steps provided below to quickly resolve the problems and have your EX6400 functioning optimally within minutes.
Verify whether your Netgear EX6400 extender is securely connected and receiving sufficient power.
A high-speed internet connection is required for your device.
Check that all of the wired connections are secure.
Keep your extender away from cordless phones, Bluetooth devices, metal objects, room corners, microwave ovens, and other devices that could interfere with your WiFi signal.
If mywifiext.net is not functioning, ensure that you have accurately entered the correct web address in your browser's address bar.
Check that your Netgear EX6400 is running the most recent firmware version. If not, update your device to the most recent version right away.
If the preceding troubleshooting suggestions prove ineffective, reset your extender to its factory default settings and then proceed with the reconfiguration process.
#Netgear EX6400 setup#Netgear EX6400 setup Using Web browser#Netgear EX6400 setup Using WPS Method#Netgear EX6400 Extender Firmware Update#Common Issues during Netgear EX6400 setup#Troubleshooting Tips for Netgear EX6400 extender configuration
1 note
·
View note
Text
How to Update Netgear Ex6110 Ac1200 Firmware Version? Netgear Extender Software Update
youtube
___________________________________________Netgear Ex6110 Ac1200 Extender #Firmware Update can be done by logging in to the netgear extender web management page. So, first connect your computer/laptop to netgear ext network name and then type mywifiext.net into the url. In case you cant update netgear extender firmware then follow our step by step guide to complete #ex6110 firmware update.Do Like And Subscribe If The Video Was Useful To Support My Channel!!!Our Official website for Technical help:- https://devicessetup.comDownload Netgear Extender Latest Firmware File From here :- https://downloadcenter.netgear.comNetgear Wifi Extender Setup SCAM :- https://youtu.be/Mr4zMKXhLBcNetgear Ex6110 setup guide :-How to Login Into Wifi Extender Using Its Ip Address:- https://youtu.be/Iszz2Oyna4EHow to reset netgear ex6110 extender :- https://youtu.be/c8i3ryUpyCQHow to setup netgear extender as access point or using ethernet cables :- https://youtu.be/uxce3UpK3uoHow to turn Netgear Extender Leds On or Off? :- https://youtu.be/5LWIo9NlsqM----------------------------**FAIR USE**Copyright Disclaimer under section 107 of the Copyright Act 1976, allowance is made for “fair use” for purposes such as criticism, comment, news reporting, teaching, scholarship, education and research.Fair use is a use permitted by copyright statute that might otherwise be infringing.Non-profit, educational or personal use tips the balance in favor of fair use.--------------------#netgearextenderfirmwareupdate #netgearex6110#ex6110ac1200 #netgearextenderex6110 #netgearexthelp #wifiextender #wifirepeater #diy #technicalhelp #netgear #devicessetup
1 note
·
View note
Text
192.168.1.250 Netgear Setup: A Beginner’s Guide
The netgear extenders are widely used by many of the networking users to create a reliable network. Netgear extender devices are known for their performance and stable network. Setting up the extender device is not a daunting task if you are aware of the setup process. In this article we are going to elaborate in detail how you can perform 192.168.1.250 Netgear Setup using the web. Web based setup method is the most reliable way to add the netgear extender into your existing network. Gather the important details and configure any model of netgear wireless range extender device. Scroll up the page and read the information till the last to boost up your network.
Unboxing The Extender
Unboxing the wireless range extender is the first step of the 192.168.1.250 Netgear Setup. In the box you will find an extender along with power adapter, user guide and ethernet cable (optional). You need all such items for the setup process. In addition to these items you also need host router network details, working internet connection, electric power socket, and computer/ laptop device.
Placement
Second step is placement of the device. Proxy placement is needed for the setup. Put the device closer as possible. Also there is no signal interface closer to the router & extender device.
Boot Up
Next step of the process is boot up. For booting up you have to use the power adapter you got with the extender. In case your device is a wall plug compact design device then you have to directly connect it with a wall outlet. Boot process might take around 1 to 2 minutes. Before proceeding further towards 192.168.1.250 Netgear Setup using the web, wait for LED lights to stabilize.
Connect To Extender Network
Step ahead and connect the extender device to the client device using any of the given methods:
Ethernet: Use the ethernet cord you got with the range extender and connect the extender with the client device. Inject the cord’s one end into the ethernet port of the extender and other in the client device ethernet port. Make sure the connection is secured.
Wireless: Using the wireless network of ethernet you can establish a connection. Check out the device label to know the default SSID & password. Use your client device and run a scan for available wireless networks. Enter the details and connect the devices.
Access 192.168.1.250 Netgear Setup Page
Now you have to access 192.160.1.250 netgear setup page by follow the given steps:
Launch google chrome or any other similar browser.
Thereafter, mention 192.168.1.250 IP in the URL bar.
A new page appears where you have to provide default information.
Enter admin and password in the fields.
Further press login and netgear installation assistant will guide you.
Configure Extender
Once you get access to the configuration page, choose the language first and then your router’s network name. Choose next and enter the password on the screen. Further click on connect option and then next.
Secure Network
Now you have to secure the wireless network by creating an SSID & password for your extender network. Also make changes in the admin account user details. This step is important to keep your existing network secure.
Update Firmware
Afterwards, you need to look for the firmware version. In case the firmware is outdated then you should install the latest version. For installation you can opt for an online update option and follow the prompts. You can update the firmware manually also by downloading it from the official portal of netgear.
Finalize Setup
Finalize the setup by choosing the submit button once you made all the important changes in the network. Review the changes you made to verify every step. Note down the extender security details you have created and keep them secure. Submit the changes and then you can step further to reposition the device.
Reposition The Extender
Repositioning the extender is a very important step to optimize the network performance. Unplug the extender from the proxy position. Search for a midway position (from the router and the area where the dead spot was). Then plug it in again to the power at the new position. Wait for the device to boot up and monitor the router LED on your extender device. If it’s green then the position is perfect. On the contrary if it turns amber or red then relocate it.
Test New Network
Lastly, test the new network using a wireless handset. Using the new SSID & password connect the device with the extender network and browse, stream or play online to check speed.
Conclusion
Lastly, I would like to rest my words by saying that the 192.168.1.250 Netgear Setup process is a super easy task. By following the above mentioned step by step breakdown of the extender setup process, anyone can configure the extender easily without a tech expert. Setting up an extender device will boost your existing network signal strength and terminate the dead spots from your home or office area.
2 notes
·
View notes
Text
Netgear Orbi Login: Manage Your Home Network
Netgear orbi devices are very popular among users for their robust network delivery, coverage and performance. Most of the people use the orbi device in their home networking. Managing the orbi network is very simple if you know how to access the Netgear Orbi Login page. The device can also be configured from the start via the login portal. Need help accessing the Orbi login page? No issues, we specify the Step by step guide to have access to the login page. Also you will be able to get several other important information in this article. Read the specified content in full by scrolling to the bottom of the page.
Netgear Orbi Login Steps
Login to the netgear orbi admin account is a very convenient process to follow. Let’s walk through the login process one step at a time:
Connect To Orbi Network
First of all you have to connect your client device with the orbi network. If your client device is connected to the host network then you will not be able to access the login page. So, initiate the process with connecting the computer/ laptop whichever you are using to access the login page. There are two methods of connection, you should proceed with any of them to get connected:
Wired Connection
Wired connection required an ethernet cable. For connecting the device make sure the cable you are using is the new one or working properly. For connection,
Link the device by inserting one end of the LAN cable into the LAN port.
Other end of the same cable should be injected into the netgear orbi device.
Verify the connection is done on your computer/ laptop device.
Wireless Connection
Wireless connection is not a difficult task if you are aware of your orbi device network name and password. For connection,
Open to the settings in the computer/ laptop/ smartphone.
Search for wifi settings or wireless network & internet options.
Then you have to turn on WiFi and let the available network come up.
Choose the network and enter the password.
If using it for the first time then check the label for the information.
Don’t forget to select the connect button to complete the connection.
Launch A Browser
Step ahead in the netgear orbi login, you should launch a web browser. Any web browser can be used to access the login page. Whether use google chrome, mozilla firefox, safari or any other, make sure to use the latest version. Also clear the cache and cookies of the browser to avoid interruption in access.
Reach Login Page
In the launched browser you have to mention the IP or web address to open the netgear orbi login. The portal is accessible through the web addresses orbilogin.com and orbilogin.net. You can also use IP instead of web address which is 192.168.1.1.
Enter Login Credentials
When your search completes, the portal appears on the screen. To access the admin panel you need to enter the login credentials. If you are a new user and using the portal for the first time then you have to enter the default login information. Default login requires admin as the username. Enter password in the password field.
On the contrary, if you are an existing user then you have to use the login credentials you changed. Be careful while entering the information, even a single mistake in entering the details, leads to failure in the process.
Submit & Access The Page
Click the login button at the end to complete the process and access the page. As you submit the information, the admin account will display on the screen. Now you can easily manage the device network, setup the new device, reset the orbi and even boost the performance.
Why Is Netgear Orbi Login Important?
Netgear orbi login access is very important to manage the device network and keep an eye on the network. By accessing the login page you can easily manage following settings:
Setup new device
Reset the device
Update firmware
Change admin password
Change Wireless network password
Create a guest network and many more.
Conclusion
In the end I would like to say that the netgear orbi login page will not only allow you to manage your network but also important to configure the device. In case you are facing any trouble with the network then you need login access to troubleshoot the issue. Accessing the page is not a hard task to perform, if you follow our above mentioned guide. Each part of the process is explained in easy, step-by-step instructions. In case you encounter any trouble then call technical experts who can help in resolving the issue. Technical experts can guide you with the orbi login steps, manage the network, boost it and troubleshoot the issues.
0 notes
Text
Methods for Netgear Orbi firmware update!
To proceed with the Netgear Orbi firmware update using the web GUI. For that, open a web browser and type the 192.168.1.1 IP address on the browser bar. Next, log in using the valid credentials. Now, visit the smart setup wizard, and tap on Settings. Further, follow the on-screen instructions to complete the process. To know more, visit us!
0 notes
Text
Orbi RBR50 Setup: Create A New & Stable Network At Home
orbi routers are very famous among the users. The devices are popular for their performance and providing a strong network. Using the Orbi RBR50 Router, you can easily convert your existing network into a more stable and reliable network. Orbi RBR50 setup can be done using two methods. The first set up method is using the netgear orbi app and the other method is by using a web interface. Steps involved under both the methods are almost the same. You can follow any of the methods to configure your home network by yourself.
Confused how to proceed with the setup methods? Don't know how to add the device into your existing network? Why to fear when we are here, scroll the page down and read the further section of the article.
Netgear Orbi RBR50 Installation
Before proceeding towards the Netgear Orbi RBR50 setup you need to install the hardware of the device. Installation of the hardware includes following steps:
First of all you have to unbox the router device and confirm that the box contains everything or not. In the box you will find a router device along with an ethernet cable, power adapter and user manual.
Look for a placement for the device which is ideal. Ideal placement means there should be no network interference. The device is easily getting the signals from the modem device and transmitting it further.
Thereafter you have to unplug the modem from the power first.
Create a link between router and modem using ethernet cable. You have to inject one end of the cable into the router and the other end of the same cable into the modem.
Now you have to turn on the power of the modem device and also power of the router device using the power adapter & power outlet.
Stepping ahead you need to connect the router device with a client device such as a computer/ laptop or smartphone. This connection can be done using the wireless network.
Orbi RBR50 Setup Process
Setting up an orbit network is not a hard task. Performing the setup involves a few steps. After installing the device and performing the initial steps you can proceed with the setup using any of the below given method
Web Based Method
Web based setup method required a web browser. You can use any web browser such as Mozilla Firefox, Safari, internet explorer, google chrome etc. The main thing you have to focus on is the browser is of updated version and has no cache files. Launch the browser and proceed with the steps mentioned here:
Browse the default IP or orbilogin.com web address.
The web page will appear on the screen where you have to enter the default login details to reach out the setup page.
Once you get access to the admin panel, proceed with the setup further.
Secure the admin access by creating the username and password for the admin account.
Thereafter for your orbi’s network, create a name.
Create a password to connect with the network. While choosing a password you should choose a strong combination of alphabet numeric and special character.
Review the changes you made and check the version of firmware.
Update the firmware if needed and then apply the changes you made by submitting the details.
Perform a network test using your smartphone device and check the coverage along with the speed.
Aap Based Method
App based orbi RBR50 setup method requires a smartphone in which you can install the Netgear orbi app which is available on both Google Play Store and app store. After installing the app in the device you can proceed with the setup. Before proceeding with the below mentioned step you should perform the installation of the hardware by following the above mentioned step.
Create an orbi account by clicking on the option “create an orbi account”
Provide all the necessary information which is required.
End up the details and let the app find your orbi router.
Now you need to enter the details of the host modem.
Link your modem device with the router device.
Thereafter for your orbi’s network, create a name.
Create a password to connect with the network. While choosing a password you should choose a strong combination of alphabet numeric and special character.
Review the changes you made and check the version of firmware.
Update the firmware if needed and then apply the changes you made by submitting the details.
Perform a network test using your smartphone device and check the coverage along with the speed.
Conclusion
At last I would like to conclude that the orbi RBR50 setup is not a daunting task. Anyone can perform the setup with the above guide help. If you are new to networking then carefully check the setup process.
0 notes
Text
Netgear Router Setup Using Nighthawk App: Step By Step
Netgear router devices can easily be set up using the nighthawk app. Now you can manage the network from your smartphone very conveniently. Confused how to do it? Don’t know where to start? No worries, check out the further section of this article to get detailed information about the Netgear Router Setup Using Nighthawk App. Also in the next segment you will get installation information and troubleshoot common errors. Just scroll the page and configure your router now without any technical expertise.
Netgear Router Installation
Installation of the netgear router is a very easy task. First step is unboxing the router. Look for the placement closer to the host modem. Connect the router with the modem using ethernet. Must cut the power of the modem device before connecting the ethernet cable. Make sure the connection is secured. Then connect the modem and the router with the power. Wait for the LED light on the router device to get stable and then proceed with the netgear router setup process as specified below.
Netgear Router Setup
Begin the setup by using a smartphone, modem and working internet connection. Check out the steps you need to follow:
Download The Nighthawk App
Embark with the downloading of the nighthawk app on your smartphone device. You can use either android or iOS system devices. Open the store on your smartphone. Search for the nighthawk app. Then click on the install button and let the application download and install in the smartphone device. Before initiating the download make sure your device is connected with a stable internet connection.
Connect Smartphone With Router
After downloading the app you have to connect the same device with the router’s wireless network. Use the default SSID & password details mentioned on the device label.
First of all you have to go to the settings in your smartphone.
Next, you have to go to the WiFi option and turn it on.
Scan the router’s network name and choose it
Mention the password as on the label of the router.
Click on the connect option.
Let the device connect to the network.
Launch The App
Now, launch the nighthawk app you recently installed and follow the on screen instructions to proceed with the network configuration.
Configure Your Router
Initiate the configuration by choosing the language. After that you have to follow the on screen guide. Create a password for your wireless network. Also perform firmware updates, make additional security settings, and many more. After making all the important changes, submit the changes by clicking the apply option.
Troubleshoot Common Issues
Is your netgear router troubling you? Don’t know what the issue is? Don’t know how to resolve the problem? No worries, just follow the troubleshoot guide mentioned here:
No Internet Connection
One of the most common problems users face with the netgear router is a lack of internet access. If your netgear router is connected to the router but there's no internet then try following troubleshooting:
Restart your router and modem. Unplug both devices from power. Wait for about 30 seconds. Plug the device back again and wait for it to boot up.
Check the ISP connection. Many times the issue lies with your ISP. Try connecting directly via modem to confirm.
Update the firmware. Log in to your router via the Netgear web interface (usually 192.168.1.1) and check for firmware updates under the settings.
Slow Internet Speeds
In case your router network speed is slow then you should try following:
Reposition the router. Place it in a central location away from network troublers including walls, electronics, heavy metal objects etc.
Limit connected devices. Too many devices can strain bandwidth. Disconnect those not in use.
Use the 5GHz band. If your router is dual-band, switch to 5GHz for faster speeds (ideal for streaming or gaming).
Router Keeps Disconnecting
Facing sudden disconnections? Is your router keep disconnecting then follow below troubleshoots:
Check cables and connections. Loose or damaged Ethernet cables can cause drops.
Change the channel. WiFi interference from nearby can cause issue. Login to your router’s admin panel and switch the wireless channels to resolve the issue.
Factory reset. If issues persist, perform a factory reset by pressing and holding the reset button for 10 seconds.
Can't Access Router Login Page
If you are unable to access the router’s login page then follow these instructions:
Check the IP address. The default is often 192.168.1.1 or 192.168.0.1. Confirm it's correct.
Use a wired connection. Sometimes Wi-Fi won't allow access, connect your PC via Ethernet and try again.
Clear browser cache or use a different browser.
Forgot Wi-Fi Password
Lastly if you forgot the password of your wireless network then you can proceed with these troubleshootings:
Login to the router settings using any browser.
Navigate to Wireless Settings and view/change your Wi-Fi credentials.
Conclusion
Hope the above sanctioned information related to the netgear router setup is very useful for you. You can follow the steps to configure your router using the nighthawk app. Also you can easily troubleshoot the common errors by following the above tips.
0 notes
Text
The Ultimate Guide To Netgear Router Firmware Update.
For the Netgear router firmware update, you need to log into the router’s user interface. Once you are logged in, you can easily update the router's firmware. Updating the firmware is necessary, as it enhances the router’s performance & functionality. Moreover, it also eliminates any bugs & glitches within your Netgear router. So, it is crucial for you to update your router’s firmware version whenever it is available. If you face any difficulties, connect with our team anytime.
0 notes
Text
Uplift Your Home Network With Netgear EX6150 Setup
A single networking device is not enough to create a reliable network. If you are facing signal issues at your home or office then you can add netgear range extender to your network. Uplift your home network with netgear EX6150 range extender, a dual band device especially created to eliminate WiFi dead spots. Netgear ex6150 Setup helps you in forming a better network at home or office. Way to set up this range extender is super easy to follow by anyone. Even those who don't have technical knowledge can add this device into their existing network very conveniently.
Gather the detailed information from this article about the setup of netgear EX6150 range extender device. Further we mentioned step by step setup guides that help in uplifting your network without any technical help. So, what are you waiting for! Scroll down the page and read the article till the end.
Netgear EX6150 Setup Step By Step
Embark with the netgear EX6150 setup process using web UI or WPS button based methods. Both the methods are very efficient. WPS method allows you quick connection whereas Web based method allows you several customizations in the network. Check out the further specified step by step guide to add the extender in your home network and uplift your current network.
Placement & Power Up
Placement is the first step of the setup process. Adequate placement of the extender is mandatory for the smooth setup. You need to keep the extender closer to your host router device. Also you have to eliminate heavy metal objects or radio frequency devices placed around where you wish to keep the extender. Remember no to keep the extender in the corner as it interrupts signal transmission. As it is a wall plug based compact device, you don’t need additional space to place it. Once placement is decided plug-in the device into the wall outlet. Turn on the power and monitor the LED.
Configuration
Embark the setup process with any of the specified methods. Follow the guide as given:
WPS
WPS based netgear ex6150 setup is a simple method of configuring. In this method you just have to push the WPS button on the extender following which on the router. The whole setup process is 8-10 minutes out of which you need to hit the button within 2 minutes on both the extender and router. Once the connection is done successfully, the LED turns solid green.
Web
Web based netgear extender setup is not a difficult task but it's time consuming and allows you to make several changes. Check out the steps you have to follow:
Firstly take a computer/ laptop device.
Connect it with the extender’s network.
Open google chrome or other browser.
Search for www.mywifiext.net web address.
Choose a new extender setup and follow the screen.
Step next you have to connect the extender with the router using SSID & Password of the host router.
Create a password for a new network of extenders.
Check for firmware updates and make other changes.
End the setup by pressing the submit button.
Test Network
Testing the new network is very simple by using a smartphone or tablet device with WiFi enabled feature. Connect the device to the new network and then you have to surf the internet. You can watch online videos, play online games and more from different locations of your home. If needed then you have to relocate the extender strategically.
Troubleshoot Common Errors
Even with the best gadgets like netgear ex6150 extender you face trouble. If at your home you have a netgear ex6150 setup then you might experience slow network, sudden connection drop and other issues occasionally. Resolving all these errors is very simple if you know how to troubleshoot them. Here are few tips to resolve the common errors with netgear extender:
Firstly verify the host device network & then if there is an issue connect your ISP.
Thereafter check the hardware setup and if there is any damaged cable then replace it.
Relocate the extender strategically so it keeps in the range of the router and also expend signals across your space.
Further try rebooting the device to eliminate temporary issues.
Next you can try out firmware updates by accessing the extender’s login page.
Lastly you can try factory resetting the device by using the reset button. Erasing the configuration and set it up again will definitely help.
Conclusion
We conclude that the netgear ex6150 setup will uplift your existing network performance and create a network on which you can rely. There are two ways following which you can add the extender to your existing network. Netgear extender will eliminate dead zones by amplifying your router’s signals and rebroadcasting to the area where you were facing the issue. Hope the above information about the netgear range extender setup is useful for you.
0 notes