#netgear range extender setup
Explore tagged Tumblr posts
Visit Tumblr Blog
Explore Tumblr blogs with no restrictions, modern design and the best experience.
Last Seen Tumblr Blogs


Fun Fact
Tumblr was created by web developers David Karp and Marco Arment.
Video
youtube
Netgear Range Extender Setup & Unboxing | AC750 | AC1200 |EX3700|
0 notes
Text
Step-by-Step Guide to Setting Up Your Netgear Extender!
For easy Netgear extender setup, open the web browser and type the mywifiext.net web address in the browser bar. Now, enter the login details and you reach the smart setup dashboard of the repeater. Here, visit the basic and advanced settings to configure the further settings accordingly. To know more information regarding the same, get in touch with us!

0 notes
Text
How To Setup WiFi Range Extender Netgear, plug it in, connect to the default WiFi network, and launch a web browser. Visit mywifiext.net, connect to your existing WiFi network using the setup wizard, and then configure the extender's SSID and password. Once set up, insert the extender halfway between your router and the desired coverage area.
#How To Setup WiFi Range Extender Netgear#How To Setup#WiFi Range Extender Netgear#Netgear WiFi range extender
0 notes
Text
Netgear Wifi Extender Setup

"Netgear WiFi Extender Setup is simple: plug it in, connect to its network, and use the web browser setup guide or Netgear Genie app for easy configuration. Extend your WiFi coverage effortlessly."
1 note
·
View note
Text
192.168.1.250 Netgear Setup: A Beginner’s Guide
The netgear extenders are widely used by many of the networking users to create a reliable network. Netgear extender devices are known for their performance and stable network. Setting up the extender device is not a daunting task if you are aware of the setup process. In this article we are going to elaborate in detail how you can perform 192.168.1.250 Netgear Setup using the web. Web based setup method is the most reliable way to add the netgear extender into your existing network. Gather the important details and configure any model of netgear wireless range extender device. Scroll up the page and read the information till the last to boost up your network.
Unboxing The Extender
Unboxing the wireless range extender is the first step of the 192.168.1.250 Netgear Setup. In the box you will find an extender along with power adapter, user guide and ethernet cable (optional). You need all such items for the setup process. In addition to these items you also need host router network details, working internet connection, electric power socket, and computer/ laptop device.
Placement
Second step is placement of the device. Proxy placement is needed for the setup. Put the device closer as possible. Also there is no signal interface closer to the router & extender device.
Boot Up
Next step of the process is boot up. For booting up you have to use the power adapter you got with the extender. In case your device is a wall plug compact design device then you have to directly connect it with a wall outlet. Boot process might take around 1 to 2 minutes. Before proceeding further towards 192.168.1.250 Netgear Setup using the web, wait for LED lights to stabilize.
Connect To Extender Network
Step ahead and connect the extender device to the client device using any of the given methods:
Ethernet: Use the ethernet cord you got with the range extender and connect the extender with the client device. Inject the cord’s one end into the ethernet port of the extender and other in the client device ethernet port. Make sure the connection is secured.
Wireless: Using the wireless network of ethernet you can establish a connection. Check out the device label to know the default SSID & password. Use your client device and run a scan for available wireless networks. Enter the details and connect the devices.
Access 192.168.1.250 Netgear Setup Page
Now you have to access 192.160.1.250 netgear setup page by follow the given steps:
Launch google chrome or any other similar browser.
Thereafter, mention 192.168.1.250 IP in the URL bar.
A new page appears where you have to provide default information.
Enter admin and password in the fields.
Further press login and netgear installation assistant will guide you.
Configure Extender
Once you get access to the configuration page, choose the language first and then your router’s network name. Choose next and enter the password on the screen. Further click on connect option and then next.
Secure Network
Now you have to secure the wireless network by creating an SSID & password for your extender network. Also make changes in the admin account user details. This step is important to keep your existing network secure.
Update Firmware
Afterwards, you need to look for the firmware version. In case the firmware is outdated then you should install the latest version. For installation you can opt for an online update option and follow the prompts. You can update the firmware manually also by downloading it from the official portal of netgear.
Finalize Setup
Finalize the setup by choosing the submit button once you made all the important changes in the network. Review the changes you made to verify every step. Note down the extender security details you have created and keep them secure. Submit the changes and then you can step further to reposition the device.
Reposition The Extender
Repositioning the extender is a very important step to optimize the network performance. Unplug the extender from the proxy position. Search for a midway position (from the router and the area where the dead spot was). Then plug it in again to the power at the new position. Wait for the device to boot up and monitor the router LED on your extender device. If it’s green then the position is perfect. On the contrary if it turns amber or red then relocate it.
Test New Network
Lastly, test the new network using a wireless handset. Using the new SSID & password connect the device with the extender network and browse, stream or play online to check speed.
Conclusion
Lastly, I would like to rest my words by saying that the 192.168.1.250 Netgear Setup process is a super easy task. By following the above mentioned step by step breakdown of the extender setup process, anyone can configure the extender easily without a tech expert. Setting up an extender device will boost your existing network signal strength and terminate the dead spots from your home or office area.
2 notes
·
View notes
Text
How to Add WiFi and Internet to a Classic Camper
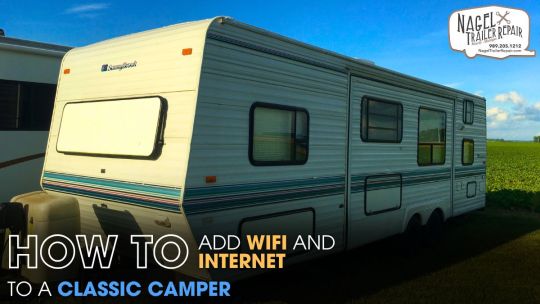
Staying connected while traveling in a classic camper has become more of a necessity than a luxury. Whether you're working remotely, navigating unfamiliar areas, or simply streaming your favorite show at a campsite, a reliable internet connection enhances your experience on the road. Adding WiFi and internet to a classic camper isn’t as complex as it sounds. With the right gear, setup, and technical know-how, you can transform your retro rig into a connected home on wheels.
Understanding the Basics of Camper Internet Setup:
Before diving into the hardware and configuration, it’s essential to understand how internet connectivity works on the road. Campers can access the internet through three primary methods: cellular data, public WiFi, and satellite connections. Each has its advantages and drawbacks.
Cellular internet is the most popular and accessible option. You use a data plan with a SIM card, typically inserted into a mobile hotspot or router. This setup lets you connect multiple devices to the internet simultaneously. Coverage depends on your location and carrier, so investing in signal boosters can help in rural or wooded areas.
Public WiFi is available at many campgrounds, cafes, libraries, and gas stations. While free, it's often slow and unreliable. It also raises security concerns. If you depend on public WiFi, using a WiFi extender and a VPN becomes vital.
Satellite internet works almost anywhere, but it’s costly and often slower than cellular options. It's best for remote adventurers who go far beyond cell service zones. For most classic camper travelers, combining cellular and public WiFi options creates the most effective setup.
Choosing the Right Equipment for a Classic Camper:
Adding internet to your classic camper requires specific tools tailored to your travel needs. The most important piece of gear is a mobile router or a dedicated mobile hotspot. A device like the Netgear Nighthawk or a Pepwave Max Transit Duo allows for strong, dual-band internet access using SIM cards from major carriers. These routers can support multiple users, ensuring smooth streaming, video calls, and online navigation.
A roof-mounted external antenna can dramatically improve your signal reception, especially if your camper’s shell is metal or insulated. Mounting the antenna properly involves routing cables through the roof and sealing any openings with weatherproof silicone. Pairing the antenna with a cellular booster, like the weBoost Drive Reach RV, strengthens your signal and reduces dropped connections.
Power supply is another crucial element. Your WiFi system should run off your camper’s 12V system or an inverter connected to your solar setup or generator. Make sure to include a fuse for safety and prevent voltage spikes from damaging your equipment.
For those using campground or café WiFi, installing a WiFi extender like the Alfa WiFi Camp Pro 2 increases your range. This device captures weak signals and redistributes them inside your camper, giving you better speeds and stability.
Installation Tips and Configuration Steps:
Start by selecting a suitable location for your router inside the camper. Choose a central spot away from heat and moisture, ideally near your power supply. Mount the router securely, ensuring good airflow around it. Connect the power cable to your 12V fuse panel or inverter, and insert the SIM card into the designated slot.
Next, install your external antenna. Drill a clean hole through the camper’s roof and route the cable inside using a rubber grommet and silicone sealant to prevent leaks. Attach the cable to your router’s external antenna port. If you’re using a cellular booster, connect the booster’s indoor antenna in a high-use area inside the camper, like near your dining table or workstation.
Power on the system and configure the router through its web-based interface. Access it from your laptop or smartphone and log in using the default credentials. Set your network name (SSID) and password, choose your carrier settings, and test signal strength. Position the camper or adjust the antenna direction if needed to optimize connectivity.
For public WiFi, plug in your extender, log into its control panel, and scan for nearby networks. Select the strongest one, enter any required passwords, and broadcast your own private network inside the camper.
If your setup includes a VPN, install it on all connected devices or configure it directly within the router. This extra step protects your personal data on public networks and prevents unauthorized access.
Maintaining Connectivity While Traveling:
Even with the best setup, you may face occasional connectivity drops. To maintain strong signals while traveling through Michigan’s beautiful yet remote routes, always keep your firmware updated. Check your router's admin panel for updates, and install them regularly to patch security flaws and improve performance.
Monitor your data usage if you’re on a limited plan. Some routers have built-in tracking tools. You can also use third-party apps to avoid overages. Carry SIM cards from multiple carriers in case one provider lacks service in a particular area. Having backups helps when coverage becomes spotty.
If you’re parked under heavy tree cover or inside a metal shelter, move your camper slightly or reposition the antenna. Environmental factors impact signal strength more than most users expect.
When technical issues arise, consult your device manuals or search for online forums dedicated to camper connectivity. For physical repairs or advanced wiring concerns, contact a trusted technician in your area. If you’re based in Michigan, you can rely on Classic Camper Repair Michigan for expert help with antenna mounting, electrical integration, and roof modifications. Their deep experience with retro camper wiring ensures safe and functional installs every time.
Conclusion:
Installing WiFi and internet in a classic camper is no longer an optional luxury but a practical necessity for today’s connected travelers. With the right combination of mobile routers, antennas, boosters, and extenders, you can achieve stable internet access whether you’re camping lakeside, driving through scenic routes, or parked at a rest stop. This upgrade not only enhances your travel experience but also opens up possibilities like remote work, digital nomadism, and streaming entertainment from the comfort of your rolling home.
While the setup process requires technical effort and precision, the benefits of staying connected on the road make it well worth the investment. If you ever run into technical hiccups or need structural adjustments, experts at Classic Camper Repair Michigan can help retrofit your vintage camper to modern standards. With their help, your internet installation will be both professional and durable, giving you peace of mind. Whether you're streaming from the woods or attending Zoom meetings on the road, your classic camper will now be fully connected.
0 notes
Text
Enjoy Uninterrupted Connectivity With Netgear Extender Setup
Want to eradicate dead zones from your home or office space but do not know how to conduct the Netgear wifi extender setup process seamlessly? If the answer to this question is yes, then you have found the right post. In this post we'll be sharing three different setup methods for your Netgear extender. Each method has its own advantages, so you can pick one which you find easier to conduct and serves your needs well. So let's start with the first Netgear wifi extender setup method which is done using the WPS button.
Quick Setup: WPS Method
Before you carry on with this setup method, ensure one important aspect. It is that your existing router must support a Wifi protected setup method. In case it doesn't, then you skip this one and move directly to the next head. Now let's check out the steps one by one for the WPS setup method:
✓ First if your Netgear extender has a mode switch button, then ensure it is set to extender.
✓ Now thoughtfully plot the wifi signal repeater in close proximity to your router. With the help of its adapter, activate it.
✓ Once the Netgear wifi range extender boots up properly, you can press the WPS button on it.
✓ While the WPS light on the repeater is flickering, press the wifi protected setup switch on the router.
✓ After you successfully complete the above Netgear wifi extender setup steps, you need to wait for the WPS LED as well as for the router LED to turn green or blue.
✓ When you get the above indication, you can unplug the Netgear range extender and locate it in an area where you require coverage. Turn it on.
Note: Do not move it to an area where the signals from the router are less than 50 percent. Because effective communication between the router and the Netgear wifi repeater is crucial for the seamless connectivity.
✓ Finally, enjoy the Netgear wifi extender setup by connecting your smart gadgets to the new network. The network identity remains similar to that of your router but it has EXT in the end.
Deep Configuration: Using Web Browser
Users who want to configure their Netgear wifi range extender deeply, can pick the web browser setup method. So the steps for it are:
First strategically plot the Netgear wifi extender in an area which is halfway from the router and the area where you require extended connectivity.
Now, ensure your router is linked to the Internet. As well as note down its details like password and the SSID as well.
Moving further, power on the range extender. Allow it to start up properly.
Thereafter, bring your smartphone or you can also use your laptop. Enable its wifi. From the list, link to the network “Netgear_EXT”. Although it is an open network, so you do not have to input any password. But if prompted then use the term “password” for the password. Tap on Connect.
Now comes the most important step for Netgear wifi extender setup. So what you need to do is, open an internet browser. Go to its address field. In it, without any error input, mywifiext.com. Press Enter.
As you click enter, a major window opens up. Tap on the New Extender Setup option. Read various terms and after that tap on I Agree.
Now you'll be prompted to fill up a few details. After you do that, answer security questions and tap Next.
Finally, select the network that resonates with your router. Tap Next. Input the password. Tap Next. Lastly, follow the directions one by one to wrap up the Netgear wifi extender setup using a web browser.
Do not log out of the setup panel, until you see a green or blue light on both router LED as well as the power LED of your Netgear range extender.
Hassle-free Setup Using Nighthawk App
If you want an alternative to both the above-written Netgear wifi extender setup methods then this is the one for you. The steps for it are:
First ensure the linkage of your router to the Internet source. Additionally note down its SSID and password.
Now open the Nighthawk application on your mobile phone. Don't have access to it? If yes, no issues. Install it from nighthawk-app.com. Alternatively you can fetch it down from the Play Store. Also available on the App Store.
Moving further, as you open the application, select the Menu option. From it tap on the “Set Up A New Nighthawk System”. Then click on “Get Started”. Thereafter, on the “Range Extender”.
Finally, turn on the range extender. Ensure its mode switch button is turned towards extender.
After your range extender turns on successfully, revisit the app and hit Next. Now to wrap up the Netgear wifi extender setup without any error, all you have to do is follow the Nighthawk app instructions one by one. Do not skip any step because this will lead to incomplete setup.
In case of any query or you need expert assistance for the setup, then you can connect to us through phone call, live chat or write to us through email.
0 notes
Text
Uplift Your Home Network With Netgear EX6150 Setup
A single networking device is not enough to create a reliable network. If you are facing signal issues at your home or office then you can add netgear range extender to your network. Uplift your home network with netgear EX6150 range extender, a dual band device especially created to eliminate WiFi dead spots. Netgear ex6150 Setup helps you in forming a better network at home or office. Way to set up this range extender is super easy to follow by anyone. Even those who don't have technical knowledge can add this device into their existing network very conveniently.
Gather the detailed information from this article about the setup of netgear EX6150 range extender device. Further we mentioned step by step setup guides that help in uplifting your network without any technical help. So, what are you waiting for! Scroll down the page and read the article till the end.
Netgear EX6150 Setup Step By Step
Embark with the netgear EX6150 setup process using web UI or WPS button based methods. Both the methods are very efficient. WPS method allows you quick connection whereas Web based method allows you several customizations in the network. Check out the further specified step by step guide to add the extender in your home network and uplift your current network.
Placement & Power Up
Placement is the first step of the setup process. Adequate placement of the extender is mandatory for the smooth setup. You need to keep the extender closer to your host router device. Also you have to eliminate heavy metal objects or radio frequency devices placed around where you wish to keep the extender. Remember no to keep the extender in the corner as it interrupts signal transmission. As it is a wall plug based compact device, you don’t need additional space to place it. Once placement is decided plug-in the device into the wall outlet. Turn on the power and monitor the LED.
Configuration
Embark the setup process with any of the specified methods. Follow the guide as given:
WPS
WPS based netgear ex6150 setup is a simple method of configuring. In this method you just have to push the WPS button on the extender following which on the router. The whole setup process is 8-10 minutes out of which you need to hit the button within 2 minutes on both the extender and router. Once the connection is done successfully, the LED turns solid green.
Web
Web based netgear extender setup is not a difficult task but it's time consuming and allows you to make several changes. Check out the steps you have to follow:
Firstly take a computer/ laptop device.
Connect it with the extender’s network.
Open google chrome or other browser.
Search for www.mywifiext.net web address.
Choose a new extender setup and follow the screen.
Step next you have to connect the extender with the router using SSID & Password of the host router.
Create a password for a new network of extenders.
Check for firmware updates and make other changes.
End the setup by pressing the submit button.
Test Network
Testing the new network is very simple by using a smartphone or tablet device with WiFi enabled feature. Connect the device to the new network and then you have to surf the internet. You can watch online videos, play online games and more from different locations of your home. If needed then you have to relocate the extender strategically.
Troubleshoot Common Errors
Even with the best gadgets like netgear ex6150 extender you face trouble. If at your home you have a netgear ex6150 setup then you might experience slow network, sudden connection drop and other issues occasionally. Resolving all these errors is very simple if you know how to troubleshoot them. Here are few tips to resolve the common errors with netgear extender:
Firstly verify the host device network & then if there is an issue connect your ISP.
Thereafter check the hardware setup and if there is any damaged cable then replace it.
Relocate the extender strategically so it keeps in the range of the router and also expend signals across your space.
Further try rebooting the device to eliminate temporary issues.
Next you can try out firmware updates by accessing the extender’s login page.
Lastly you can try factory resetting the device by using the reset button. Erasing the configuration and set it up again will definitely help.
Conclusion
We conclude that the netgear ex6150 setup will uplift your existing network performance and create a network on which you can rely. There are two ways following which you can add the extender to your existing network. Netgear extender will eliminate dead zones by amplifying your router’s signals and rebroadcasting to the area where you were facing the issue. Hope the above information about the netgear range extender setup is useful for you.
0 notes
Text
Netgear EX3700 Setup | AC750
Trying hard to enjoy internet in every corner of your home? Well, Netgear EX3700 setup can save you from the hassle. The WiFi range extender helps in increasing your WiFi range, improving its speed, and reducing interference. By configuring the device at your home, you can turn the dead zones into fun zones. The WiFi device is capable of covering up to 100 ft of distance. If you want to know how to setup Netgear EX3700, then walk through the steps below.
0 notes
Text
0 notes
Text
Amplify Your Existing Network With Netgear
Having a router in today's households is very common but users still face the issues of inconsistent speed and poor connectivity in certain corners of the home. Now what is the solution that can solve all your connectivity issues? The answer is a good and reliable WiFi range extender. You might have heard this name before, so today let's know what exactly it is and why it is used. A Wi-Fi range extender is also known by many other names like Wi-Fi repeater and WiFi booster. As the name itself suggests it amplifies and boosts up the signals of your existing network. This amplification of signals helps in kicking out all the dead zones from your abode. Wi-Fi range extenders are the perfect networking devices for modern households that have multiple devices running simultaneously and have a larger area with multiple rooms and floors.
Now the market is flooded with so many range extenders, choosing the one for your home or office space can be a little difficult task but do not worry as we have got you all covered. So, today we will explore one of the best sellers in the Wi-Fi extender category which is none other than Netgear AC1750 Wifi Range Extender.
What Makes Netgear AC1750 Setup The Bestseller?
The various reasons that are listed below are what makes the Netgear AC1750 Setup stand out from other range extenders:
✓ High-Speed Performance
The Netgear AC1750 setup has the ability to remove all the dead zones from your home effectively. It provides its users with a combined speed of up to 1750 Mbps. Thus making it ideal for every modern need. It won't disappoint you in any circumstances, whether you are playing high-intensity games, watching high-definition videos, downloading heavy files or having an important work meeting. It will only provide a seamless and buttery smooth internet experience at every step that you take in your home.
✓ Extended Coverage
Now you do not need to sit in front or near your networking device to get full coverage because the Netgear AC1750 setup can extend its reach to every single corner of your home. Be it your balcony, terrace, basement or your rooms on the second floor you will get full signals without a single drop.
✓ Feature Set
The Netgear AC1750 range extender offers its users multiple features and this is what makes it the number one choice.
Its dual-band technology makes it ideal for both near and far-away devices.
It comes equipped with two external antennas that enhance signal strength and overall coverage.
Its fast-lane technology makes your networking experience more fun.
It also comes with ethernet ports, so you can directly connect your wired devices to the extender.
Further, its auto-connect feature automatically connects to the best Wi-Fi band and extends the network thus simplifying the whole management process.
Netgear AC1750 setup supports WPA/WPA2 security protocols to protect your network from unauthorized access which is very important in today's digital era.
✓ User-Friendly Setup Process
Unlike other technical devices that take hours to set up, Netgear has made everything super user-friendly so even non-tech users can easily and independently set up this magical range extender. The availability of a user manual with the extender makes it very convenient to know all the details. The extender can be easily set up via the Netgear app or you can also use the WPS button to set the extender in under two minutes. Yes, it's that easy to set up Netgear AC1750.
✓ Brand Reliability
Netgear is a well-known and trusted brand when it comes to networking equipment and one of the major reasons why more and more people are buying Netgear AC1750 wifi range extenders is due to their trust in Netgear's commitment to quality.
✓ Universal Compatibility
You do not need to worry about whether the extender will be compatible with your existing setup or not because the Netgear AC1750 range extender comes with universal compatibility. It works amazingly with any standard router thus making it a versatile option for every user. Further, its extremely small size doesn't take up much space and sits amazingly well with your interiors.
✓ Price-To-Performance Ratio
The Netgear AC1750 WiFi range extender provides you with good performance at a relatively affordable price. Thus offering value for money as compared to some higher-end models. So if you want a deal that is highly qualitative yet easy on your pocket then surely the Netgear AC1750 setup should be your go-to choice.
So, if you are also looking for a device that can provide you with smooth and super fast internet speed and coverage then look no further and just invest your money in Netgear’s range extender as they will make you forget what poor connectivity, and dead zone looks like.
1 note
·
View note
Text
How To Setup WiFi Range Extender Netgear
Learn How to Setup WiFi Range Extender Netgear, plug it into a power outlet within the range of your existing WiFi network. Wait for the power LED to light up solid green. Connect to the extender's WiFi network on your device. Open a web browser and enter "www.mywifiext.net in the address bar. Follow the on-screen instructions to complete the setup process, including connecting the extender to your existing WiFi network.
#How To Setup WiFi Range Extender Netgear#How To Setup WiFi Extender Netgear#How To Setup Extender Netgear#Extender Netgear Setup
1 note
·
View note
Text
What to Do When 'mywifiext.net' Refuses to Connect?
If mywifiext.net refused to connect then, this happens when there is a power outage, wrong admin credentials, browser issues, network interruptions, and more. To fix this, ensure to have an adequate power supply, enter the correct login details, fix the browser issues, and remove the network obstacles. To know more troubleshooting steps regarding the same, reach us here freely!
0 notes
Text
Netgear EX2800 Setup to Boost Your Home WiFi
Netgear EX2800 WiFi range extender is the device you need, If you’re facing weak WiFi signals in certain corners of your home or office. Designed with dual band technology and offering pets up to AC750, this compact device helps exclude dead zones and ensures flawless internet content throughout your space. While the idea of extending your WiFi might sound complicated, the Netgear EX2800 setup process is incredibly straightforward when you follow the right way. Whether you’re a freshman or someone with introductory tech knowledge, this companion will walk you through everything from powering on the device to logging in after installation.
Step by Step Netgear EX2800 Setup Instructions
The Netgear EX2800 works by entering the signal from your primary WiFi router and rebroadcasting it to areas where your signal is generally weak or drops out. This process bridges the gap between your host device and WiFi- enabled bias located out of your router’s direct range. Once the Netgear EX2800 setup is complete, you’ll enjoy briskly pets, smaller connection drops, and extended content.
Power On the Extender
The first step in the Netgear EX2800 setup process is powering up the device
Netgear EX2800 should be unpacked first
Plug the extender into a power outlet near the main router for initial setup.
Press the power button on the extender to turn it on.
Stay for the Power LED to come solid green. This indicates that the device has successfully boggled up.
Once the light stabilizes, you’re ready to move on to the factual configuration.
Choose WPS or Web Grounded Method
You can complete the Netgear EX2800 setup using either the WPS system or the web- grounded setup. Both are effective, but the web- grounded system gives you further control over settings and customization.
WPS Method (WiFi Protected Setup)
This system requires that your router has a physical WPS button.
Press the WPS button on the Netgear EX2800 extender.
Within two minutes, push the WPS button on your main router.
The WPS LED on the extender will blink and also turn solid green once the connection is successful.
Connection to your primary WiFi network is complete.
Web- Grounded Setup( Recommended for Customization)
If your router does n’t support WPS or you want advanced settings.
Connect your smartphone, tablet, or computer to the NETGEAR_EXT network (the dereliction SSID of your extender).
Open any streamlined web cybersurfer and enter http:// www.mywifiext.net in the address bar.
When the login screen appears, use the dereliction credentials to subscribe in( these are published on the marker of your extender).
You’ll be guided through the Netgear EX2800 setup by the on-screen Netgear installation wizard.
Select your WiFi network from the list.
Enter your WiFi word when urged.
Choose a name and enter a password for your extended network to complete the setup.
Click Apply to finalize the setup.
Once the setup is completed, your extender will reboot. You can now connect your bias to the new extended WiFi network.
Optimal Placement of the Extender
After completing the Netgear EX2800 setup, the coming step is changing the right position to place the extender for the stylish content. Keep these tips in mind
Avoid placing the extender near broilers, cordless phones, or other sources of hindrance.
Do not install the extender in tight or cornered spots, as it may limit signal strength.
Choose a spot roughly interior between your router and the area with weak WiFi.
Ensure it's within the router’s range and that the signal LED on the extender shows a strong connection.
Optimal placement guarantees efficient coverage and high-speed, uninterrupted internet across your entire area.
Logging After Installation
Once your extender is configured and placed rightly, you might want to pierce the settings in the future for updates or changes. Then’s how to log in
Open a cybersurfer and go to http// www.mywifiext.net.
Enter your admin username and word.
You’ll now have access to the extender’s dashboard where you can modernize firmware, change network names, or tweak security settings.
Logging into your extender allows you to cover connected bias, manage performance, and even reboot the extender if demanded.
Troubleshooting for Netgear EX2800 Setup
Indeed though the setup process is generally smooth, you may sometimes run into issues. Then are quick fixes
Can’t pierce mywifiext.net? Make sure you are connected to the NETGEAR_EXT network.
LED not turning green? Power cycle the extender and confirm it’s positioned within the effective range of your WiFi router.
WPS not working? Try the web- grounded setup system rather.
Slow internet after setup? Budge the extender or reduce hindrance from near bias.
Final Words
With this complete companion, performing the Netgear EX2800 setup should be easy and stress-free. Whether you conclude for the WPS system or the web- grounded approach, extending your network content takes just a few minutes. Once everything is in place, you will enjoy presto, dependable WiFi across your home or office. Netgear’s support platoon is always available, If you need backing during the process. For the stylish performance, don’t forget to periodically log in and check for firmware updates.
0 notes
Text
Wi-fi Antanna In Chennai
WiFi antennas in India come in various types and are used to extend the range and improve the signal strength of wireless networks. Here’s an overview of some common WiFi antenna types available in India and their typical uses:
Types of WiFi Antennas
Omnidirectional Antennas
Description: These antennas radiate signals in all directions (360 degrees horizontally).
Use Cases: Ideal for general-purpose WiFi coverage in homes, offices, and small outdoor areas.
Directional Antennas
Description: These antennas focus the signal in a specific direction, providing longer range and better performance in that direction.
Use Cases: Used for point-to-point connections, such as between buildings or for targeted coverage in large open areas.
Yagi Antennas
Description: A type of directional antenna with a high gain, often used for long-distance communications.
Use Cases: Suitable for rural areas where the WiFi source is far from the user, such as connecting to distant WiFi hotspots.
Parabolic Grid Antennas
Description: These antennas have a parabolic shape, providing very high directional gain.
Use Cases: Used for very long-distance point-to-point links, often in combination with outdoor WiFi systems.
Panel Antennas
Description: Flat antennas that can be mounted on walls or poles, offering moderate to high gain.
Use Cases: Ideal for point-to-multipoint setups, covering a specific area with stronger signal.
Popular Brands and Models in India
TP-Link
Models: TP-Link TL-ANT2408C (omnidirectional), TP-Link TL-ANT2415D (directional)
Known for: Reliability and good performance for home and small business use.
Ubiquiti
Models: Ubiquiti NanoStation (directional), Ubiquiti AirGrid (parabolic)
Known for: High-performance antennas suitable for professional and enterprise use.
Netgear
Models: Netgear AC1200 WiFi Range Extender (includes antennas for extended range)
Known for: Easy-to-use solutions for home and small office networks.
D-Link
Models: D-Link ANT24–0700 (omnidirectional), D-Link ANT24–2100 (directional)
Known for: Affordable and effective WiFi solutions.
Buying Considerations
Range and Gain
Higher gain antennas provide better range but may have a narrower coverage area.
Consider the environment (indoor vs. outdoor) and the distance you need to cover.
Compatibility
Ensure the antenna is compatible with your router or access point.
Check for connectors (RP-SMA, N-Type) and ensure they match your equipment.
Usage Environment
Indoor antennas are typically less rugged than outdoor models.
For outdoor use, look for weatherproof and durable designs.
Regulations
Be aware of local regulations regarding the use of high-gain antennas and frequency bands.
Where to Buy
Online Retailers: Amazon India, Flipkart, Snapdeal, etc.
Electronics Stores: Reliance Digital, Croma, Vijay Sales, etc.
Specialized IT Shops: Local computer and networking equipment stores.
Tips for Optimal Use
Position antennas in a central location for omnidirectional coverage.
Elevate antennas to reduce obstructions and improve line-of-sight.
Use quality cables and connectors to minimize signal loss.
By considering these factors, you can choose the right WiFi antenna to improve your network’s performance in India.
#UWB antenna in India#RFID antenna in India#IoT antenna in India#SMD antenna in India#GPS antenna in India#Antenna design in India#Antenna simulations in India#Chip antenna in India
0 notes
Text
0 notes