#paint room visualizer behr
Explore tagged Tumblr posts
Visit Tumblr Blog
Explore Tumblr blogs with no restrictions, modern design and the best experience.
Last Seen Tumblr Blogs


Fun Fact
Tumblr Inc. is using 66 technologies for its website.
Text
Interior Painters Near Me Raleigh NC Color Consultation and Premium Paint Triangle Pro Painting
Interior Painters Near Me Raleigh NC – Color Consultation and Premium Paint – Triangle Pro Painting https://trianglepropainting.wordpress.com/2025/05/16/interior-painters-near-me-raleigh-nc-color-consultation-and-premium-paint-triangle-pro-painting/ Choosing the right colors for your interior spaces is more than just a design choice—it’s an opportunity to influence mood, highlight architectural features, and create a cohesive look throughout your home or business. Professional interior painters in Raleigh NC offer expert color consultation to help you find the perfect shades for every room. Color Psychology Colors have the power to shape how a space feels. An experienced color consultant can guide you through the psychology of color to achieve the desired ambiance: -Calming Blues and Soft Greens: Ideal for bedrooms and bathrooms to promote relaxation and tranquility. -Warm Neutrals and Earth Tones: Perfect for living rooms and common areas to create a welcoming and cozy atmosphere. -Vibrant Reds and Deep Oranges: Great for dining rooms and kitchens where energy and warmth are appreciated. -Crisp Whites and Light Grays: Excellent for home offices and studios to encourage focus and clarity. Digital Color Visualization To help you envision the final result, digital color visualization tools are available. These tools allow you to see how different colors will look in your specific space before any paint is applied. This process reduces uncertainty and helps you make confident design decisions. High-Quality Paint Options For lasting beauty and durability, only top-tier paint brands are used, including: -Sherwin-Williams: Known for its long-lasting finishes and wide range of colors. -Benjamin Moore: Offers premium coverage with rich pigments and exceptional durability. -Behr: A trusted brand for its stain resistance and fade-proof formulations. These brands are selected for their superior quality, smooth application, and resilience against fading, peeling, and scuffing, ensuring that your walls look flawless for years. Eco-Friendly Options If indoor air quality and environmental impact are priorities, low-VOC and non-toxic paint options are available. These paints release fewer volatile organic compounds, making them safer for families, pets, and the environment without sacrificing durability or color vibrancy. Custom Color Matching Achieving the perfect color match is crucial for seamless design. Professional painters in Raleigh can custom match paint colors to existing decor, whether it’s a favorite piece of furniture, a fabric swatch, or an accent wall that needs refreshing. This precision ensures harmony across your interiors, delivering a cohesive and polished look. From expert color selection to high-quality finishes, interior painting in Raleigh NC is designed to elevate your space with style and durability. Learn more about professional interior painters near me in Raleigh, NC, and explore other specific painting services that Triangle Pro Painting offers: trianglepropainting.com/interior-painters-near-me-raleigh… from Flickr https://flic.kr/p/2r4Xkq8 via Triangle Pro Painting via Triangle Pro Painting https://trianglepropainting.wordpress.com May 16, 2025 at 10:32AM
0 notes
Text

Choosing the right colors for your interior spaces is more than just a design choice—it’s an opportunity to influence mood, highlight architectural features, and create a cohesive look throughout your home or business. Professional interior painters in Raleigh NC offer expert color consultation to help you find the perfect shades for every room. Color Psychology Colors have the power to shape how a space feels. An experienced color consultant can guide you through the psychology of color to achieve the desired ambiance: -Calming Blues and Soft Greens: Ideal for bedrooms and bathrooms to promote relaxation and tranquility. -Warm Neutrals and Earth Tones: Perfect for living rooms and common areas to create a welcoming and cozy atmosphere. -Vibrant Reds and Deep Oranges: Great for dining rooms and kitchens where energy and warmth are appreciated. -Crisp Whites and Light Grays: Excellent for home offices and studios to encourage focus and clarity. Digital Color Visualization To help you envision the final result, digital color visualization tools are available. These tools allow you to see how different colors will look in your specific space before any paint is applied. This process reduces uncertainty and helps you make confident design decisions. High-Quality Paint Options For lasting beauty and durability, only top-tier paint brands are used, including: -Sherwin-Williams: Known for its long-lasting finishes and wide range of colors. -Benjamin Moore: Offers premium coverage with rich pigments and exceptional durability. -Behr: A trusted brand for its stain resistance and fade-proof formulations. These brands are selected for their superior quality, smooth application, and resilience against fading, peeling, and scuffing, ensuring that your walls look flawless for years. Eco-Friendly Options If indoor air quality and environmental impact are priorities, low-VOC and non-toxic paint options are available. These paints release fewer volatile organic compounds, making them safer for families, pets, and the environment without sacrificing durability or color vibrancy. Custom Color Matching Achieving the perfect color match is crucial for seamless design. Professional painters in Raleigh can custom match paint colors to existing decor, whether it’s a favorite piece of furniture, a fabric swatch, or an accent wall that needs refreshing. This precision ensures harmony across your interiors, delivering a cohesive and polished look. From expert color selection to high-quality finishes, interior painting in Raleigh NC is designed to elevate your space with style and durability. Learn more about professional interior painters near me in Raleigh, NC, and explore other specific painting services that Triangle Pro Painting offers: trianglepropainting.com/interior-painters-near-me-raleigh... from Flickr https://flic.kr/p/2r4Xkq8 via Triangle Pro Painting
0 notes
Text
Transform Your Kitchen with a Fresh Coat of Paint
DAVID A. LAND
Are you building a new house and planning your dream kitchen? Or maybe you’re craving a fresh, new look for your existing kitchen. It’s true what they say: The kitchen is the heart of the home. It’s where you and your family will spend lots of time, and where your guests will likely end up congregating. It should be a space that feels inviting and relaxing and also delivers the style and personality you want your home to reflect. Do you want a light and airy kitchen? A happy and whimsical space? Or a cozy, rustic kitchen? No matter the look, your starting point should be in establishing the color palette. An all-white kitchen will always be a classic, timeless look, but don’t be afraid to bring in some color, even in a small kitchen. The paint color—even the exact shade of white—you choose for the walls will instantly set the tone.
You're reading: Transform Your Kitchen with a Fresh Coat of Paint
One of the ways to make the biggest impact is to paint your kitchen cabinets. Whether it’s painting a dark wood a bright white to lighten your space, or taking white cabinets to a deep, saturated hue that creates a warm, cozy kitchen, or even a new coat of a bright yellow or blue to add a punch of personality, changing the color of your kitchen cabinets will instantly transform your room. (If you’re planning to go the DIY route, read this article for tips on how to paint kitchen cabinets. Yes, even laminate cabinets!) For even more inspiration, check out some of our favorite kitchens for many more kitchen decorating ideas, including kitchen island ideas, hardware inspiration, lighting, and even some ways to use wallpaper.
1 of 31
Pale Blue and White
This blue and white combination brings us all the cool, calm coastal vibes in this kitchen designed by interior and textile designer Heather Chadduck Hillegas.
3 of 31
Blue-Black
This moody hue is making us crave a rainy day indoors with a cup of tea while bread bakes in the oven. It is the perfect dull blue that still feels warm and rich.
4 of 31
Historic Blue
This timeless blue is be a part of Benjamin Moore’s historic collection. It feels traditional but fresh in this kitchen designed by Grace Mitchell, especially off of the copper and bronze lighting.
Get the look: Kitchen cabinets: Philipsburg Blue by Benjamin Moore
5 of 31
Green and White
The white walls of this kitchen designed by James Farmer feel fresh and bright off of the rich green cabinets and pair perfectly with the natural wood shelves and oven hood.
6 of 31
Dark Teal
These dark cabinets work beautifully off of a bright white marble sink and earthy green tiles.
7 of 31
Gray and White
We love gray in any room and especially in this kitchen designed by Sara Davis. The soft gray cabinets pop against the dark brown wood floors, creating a modern yet simple combination.
11 of 31
Canary Yellow and Blue
Read more: Hell’s Kitchen, Manhattan – Wikipedia
Look no further than the classic yellowware bowl for proof that blue and yellow make for a timeless country combo, as seen here in this 98-square foot galley kitchen that features canary-yellow cabinets and quilt-like cement tiles. The petite 20-inch range maximizes cabinet space in the small kitchen.
Get the Look: Cabinetry Paint Color: Honey Bees by Sherwin-Williams. Backsplash Tile: “Tangier Primero” by Villa Lagoon; wayfair.com
12 of 31
Pure Black
When homeowner Bailey McCarthy moved into her century-old Texas farmhouse, the wall were a boring beige and the cabinets, which vary in height, were white. “Painting everything black seemed like a good way to make the cabinets blend in with the wall,” says Bailey. She balanced the dark statement color with butcher block countertops and brass hardware and lighting.
Get the Look: Cabinetry Paint Color: Pitch Black by Farrow & Ball
13 of 31
Soft Taupe
When you want to add little color but don’t want it to overwhelm, look to a soft taupe. The appealing neutral adds a warm, but airy, swathe of color. It’s a color that also pairs well with stained wood cabinets.
Get the Look: Kitchen Cabinetry Paint Color: Smoky Ash by Benjamin Moore
14 of 31
Bright Blue
One Kings Lane designer Sarah Blank opted for a calming blue for the shelves, brackets, and walls, of this kitchen, lending more cohesion to the space.
Get the Look: Cabinetry and Wall Paint Color: Lulworth Blue by Farrow & Ball
15 of 31
Sunny Yellow
Designer Alison Kandler and homeowner Jenn Chiarelli found the perfect sunny shade for the kitchen island in Jenn’s bright California farmhouse by pulling paint chips of colors that simply made Jenn feel happy. Then they found ways to incorporate the hues into the kitchen to create a look that is as colorful as it is cheerful. The black woven stools add a grounding element to the candy-colored space.
Get the Look: Island Paint Color: Tropical Moss by Dunn-Edwards Paints
16 of 31
Gray Green
Designer Heidi Caillier chose a soothing green—that is a little bit gray and a little blue—for the Shaker-style cabinets. “It changes with the light,” Heidi says. “It also feels traditional to me, which is what I really wanted.” The color pairs particularly well with soapstone countertops and unlacquered brass bail pulls and knobs. Six-inch terra cotta hex tiles add distinct richness to the artfully layered kitchen.
Get the Look: Cabinetry Paint Color: Oil Cloth by Benjamin Moore. Hardware: unlacquered brass bail pulls and knobs; classic-brass.com.
17 of 31
Off-White
When you have a lot of natural wood in your kitchen, pure white walls can feel too stark, especially if you’re going for a rustic kitchen look. Instead, choose a warm white that has just a touch of gray in it for a color that complements wood tones and works well with other warm neutral colors.
Get the Look: Wall Paint Color, Fleur de Sel by Sherwin-Williams
18 of 31
Turquoise Blue
You couldn’t pick a better blue than the color of the original paint found on these salvaged tongue-and-groove boards. The turquoise tone compliments the buttery-yellow appliances, knotty pine floors, and barn wood cabinets to create a charming rustic farmhouse-style kitchen.
Get the Look: Appliances: bigchill.com
19 of 31
Pure White
There is nothing more timeless, yet completely fresh, than an airy all-white kitchen. The look works especially well with kitchens that have varying textures (both literally and visually), such as the shiplap planked walls and open shelving in this dreamy kitchen, which keep an all-white space from feeling stark and sterile.
Get the Look: Wall and Cabinetry Paint Color, White Dove by Benjamin Moore
20 of 31
Washed Turquoise & Buttery Yellow
To give her kitchen cabinets a slightly weathered look, Jolie Sikes of the Junk Gypsies first coated the cabinets with blue interior oil stain, then used a rag to apply and partially rub off a layer of wood stain. “Embrace color,” says Jolie. “Just because kitchens are utilitarian rooms doesn’t mean they should be quiet, sterile, or boring.” The buttery walls, combined with the natural wood stain on the windows, trim, and beams, create a warm backdrop for the room’s bold cabinetry and accents such as Jolie’s barstool mix—a pair of swiveling red tractor seats plus a vintage vinyl-covered number.
Get the Look: Cabinetry Stain: Aquarius by Sherwin-Williams plus Provincial Wood Finish stain by Minwax. Wall Paint Color: Canyon Cloud by Behr. Wood Trim Stain: Pecan by Minwax
22 of 31
Read more: Hell’s Kitchen: What Happened To Head Waiter Jean-Philippe Susilovic After Season 12
Bright Green
In her South Carolina home, homeowner Lauren Northup looked down for her color play. Taking her color cue from the grass green floors at Thomas Jefferson’s Monticello, she choose to paint the kitchen floors a striking green. “Blues and greens mean rest, home, and happiness to me,” says Lauren. “This color on my kitchen floor is a good balance with the bright white walls and cheerful checked curtains.”
Get the Look: Floor Paint Color, Arsenic by Farrow & Ball
23 of 31
Sky Blue
In their cozy converted schoolhouse project, designers Jason Oliver Nixon and John Loecke of Madcap Cottage looked outside for the kitchen’s color inspiration. They removed the small room’s drop ceiling and installed tongue-and-groove rafters, now swathed in a dreamy shade of sky blue—a design trick seen on Southern porches. “The color draws the eye up,” says Jason, “which makes the room feel like it stretches to the sky.”
Get the Look: Ceiling Paint Color, Blue Ground by Farrow & Ball
25 of 31
Crisp White
Don’t feel badly if you’re a bit picky. Marsha Ahearn, the owner of this summer retreat in Martha’s Vineyard, painted her kitchen with a 50/50 blend of two shades to get her ideal white. It’s the perfect backdrop to let your brightly colored accessories pop.
Get the Look: Wall Paint Color, 50/50 blend of China White and Linen White, both by Benjamin Moore
26 of 31
Cheery Yellow
This sunny kitchen proves there is no such thing as too much of a good thing. Its Shaker-style cabinetry, as well as its walls and those of the adjoining breakfast nook, are all awash in a bright and cheery yellow. Glass cabinet fronts and white trim, fixtures, and appliances add a punch against the solid color and help keep the space feeling light.
Get the Look: Cabinetry Paint Color, Convivial Yellow by Sherwin-Williams
27 of 31
Forest Green
Most people opt for white in the kitchen, but this rustic kitchen is bathed in moodier hues. The paneled cabinets are painted in an earthy forest green while the fir beadboard is a golden brown—giving the 75-square-foot small kitchen a jewel box feel. An ivory apron-front sink offers a burst of brightness.
Get the Look: Cabinetry Paint Color, Mohegan Sage by Benjamin Moore
28 of 31
Celadon Green
In this Massachusetts beach house kitchen, the Wood-Mode cabinetry is painted a pretty celadon green that is crisply set off by a white subway tile backsplash. It’s a pairing that brings a kitchen pretty color without overpowering. Cape Cod artist Tim Dibble custom-carved the kitchen’s slate apron-front sink to incorporate local icons: a windmill, whale, lighthouse, and the word “riptide.”
Get the Look: Cabinetry Paint Color, Coastal Plain by HGTV Home for Sherwin-Williams; lowes.com
29 of 31
Bright Yellow and Blue
There’s nothing more appealing than a blue-and-white kitchen. And you can’t beat a yellow kitchen for a happy setting. We say combine the two for a true win-win. This Kentucky kitchen proves the point beautifully with its pairing of a warm blue-and-white quilt-patterned tile backsplash and a light and bright yellowy-green painted island. White wall cabinets and butcher block countertops keep things balanced.
Get the Look: Tile Backsplash: Snowflake in Azul; cubantropicaltile.com. Island Paint Color, Sweat Pear by Benjamin Moore
30 of 31
Pale Pink
If you want to bring some color to your kitchen, but aren’t quite ready to fully commit, keep the backgrounds timeless and white, and then turn to appliances and accessories to add punches of color.
Get the Look: Wall Paint Color, Ultra Pure White by Behr. Refrigerator, SMEG; wayfair.com.
Source: https://livingcorner.com.au Category: Kitchen
source https://livingcorner.com.au/transform-your-kitchen-with-a-fresh-coat-of-paint/
3 notes
·
View notes
Text
Beautiful Homes of Instagram: Rental Home
Hello, my wonderful friends! It’s really great to start this week with a new Beautiful Homes of Instagram and I know this one will inspire many readers.
Dani Ferretti of @GoldCoastCanvas is talented, brave and she is here to show us that we can make of our home a “home-sweet-home” wherever we are, regardless if it’s our forever home or a rental.
Please, make sure to follow her on Instagram (it will make her day!) and take notes on how she decorated her beautiful rental home!
Hey friends, Dani of @goldcoastcanvas here! I’m so humbled that Luciane reached out to me and it is truly an honor to be featured among such incredibly talented designers here on HomeBunch. I never would have imagined that our once plain-jane rental home would someday be worthy of this. I am feeling excited and grateful (and maybe a little bit like the new girl at the lunch table!).
My boyfriend Brad and I both grew up in South Florida and we are true barefoot, ocean-loving Florida kids at heart. We’ve both bounced around the country (and the globe) quite a bit since leaving home. We most recently moved to Austin, Texas where we’ll stay until it’s time to make the permanent move back home to Florida.
As you can imagine, being away from family and the ocean takes some adjusting to. This is why it was so important that our home in Austin, no matter how temporary, still have space for guests and still reflect that breezy lifestyle we love most. We chose a modern, new-construction home in South Austin not far from downtown. It was the perfect jumping off point for the activities we love most: hiking the greenbelt with our chocolate lab Soko, hitting up our favorite taco truck, or catching some waves at the surf park (yes, you can surf in the middle of Texas!)
I have always loved coastal decor, but it took me years to hone in on my true design aesthetic. Once I started focusing on how I wanted our home to feel rather than how I wanted it to look, everything clicked into place. For this house, I really wanted to create a home that felt like a sanctuary and that was easy to live in – where spaces felt organic and nothing was too precious. I think that is what makes coastal homes so appealing to me. They are meant for the happy messes of sandy feet and salty hair.
Beautiful Homes of Instagram: Rental Home
This is the talented homeowner, Dani, with her adorable dog. I am so proud of how she made of this rental a real home.
Home Location: Austin, Texas
Home Specs: Modern, 3 bed / 2.5 bath, 2000sqft
Entryway
I have always loved coastal decor, but it took me years to hone in on my true design aesthetic. Once I started focusing on how I wanted our home to feel rather than how I wanted it to look, everything clicked into place.
Front Door: Custom ETO Doors 5-Lite Quinque door – similar here & here.
Chandelier: Existent – similar here, here, here & here.
Rug: World Market – similar here.
Flooring
Flooring: 5” Hickory Celebration in Honey Spice by Shaw Flooring.
Wall & Trim Color: Custom formula by Sherwin Williams.
Console Table
For this house, I really wanted to create a home that felt like a sanctuary and that was easy to live in – where spaces felt organic and nothing was too precious. I think that is what makes coastal homes so appealing to me. They are meant for the happy messes of sandy feet and salty hair.
Console Table: Here in Distressed Grey – similar here & here.
Faux Stems: Pottery Barn.
Vase: Target (no longer available) – Others: here & here.
Similar Baskets: here, here & here.
Living Room
I continued the neutral palette into the living room so as not to overwhelm the open space. I grounded it with an amazing collection of pillows from my favorite shops and an earthy, warm coffee table that everyone can gather around. We are just weeks away from getting a brand new custom sofa. I wish it had come in time for pictures but I’ll definitely be sharing it on my feed when it does arrive – so stay tuned!
Beautiful Sectionals: here, here (on sale), here & here.
Tree
Tree: Arbequina Olive Tree – similar here (faux).
Tree Basket: World Market.
Large Basket: here – similar.
Art Print: Deb Presutto.
Pillows
Block Print Pillow: McGee & Co.
Denim Stripe Pillow: one-of-a-kind – Others: here, here & here – similar.
White Pillow: here – similar.
Marble Tray: Terrain.
Coffee Table
Coffee Table: Eclectic Goods – similar here, here & here.
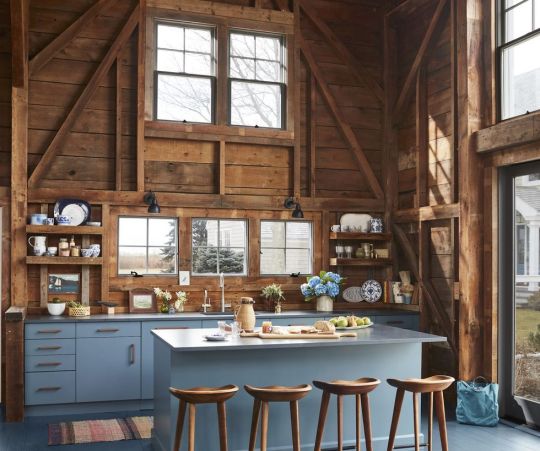
Kitchen
The thing that sold me most on this house was the kitchen. As serial renters, we were used to dealing with suboptimal cooking spaces (our kitchen in our San Francisco apartment had about two feet of counter space!) This one felt like a long-awaited luxury to us. I softened the modern finishes with more organic selections like the vintage-inspired rug, aged cutting boards and handmade ceramic dishware.
Wall Color: Dolphin Fin by Behr.
Kitchen Island Dimensions
Island Dimensions: 42” x 94”.
Faucet: Moen.
Kitchen Rug: McGee & Co – Other Beautiful Runners: here, here, here, here, here & here.
Wall Paint Color
Wall paint color is Dolphin Fin by Behr.
Kitchen Cabinet
Cabinets are 42” Armstrong Sienna Cabinets in Alpine White.
Kitchen Hardware
Hardware: Amerock Bar Pulls in Sterling Nickel.
Vintage Painting: McGee & Co.
Fruit Basket: Shoppe Amber Interiors – similar here.
Countertop & Backplash
Counters are Black Pearl granite.
Similar Cutting Boards: here.
Crock: West Elm.
Bud Vase: McGee & Co.
Backsplash: 8.5” x 2” subway tile – similar here – Other Beautiful Tiles: here, here, here & here.
Kitchen Lighting
Light pendants are the 16” Waikiki from MyBaliLiving – similar here & here.
Beautiful Counterstools: here, here, here, here & here.
Dining Area
Our dining room is small but I knew we needed a sizable table for big dinner gatherings. To make it work, I opted for benches that could be pushed under the table when not in use. I love how it created a cozy little nook on the wall side. The photos above the table are actually sketches of the different homes we’ve made memories in: Brad’s apartment in Sydney, the St. Louis bungalow my father grew up in and the 120 year old Victorian we lived in in San Francisco.
Wall Color: Dolphin Fin by Behr.
Table: Pier 1.
Chairs (beige): Overstock.
Wide Mat Frames (gray): Pottery Barn.
Vase: Areo Home Clay Water Pots – also available here.
Laundry Room
A small hallway leads to a laundry room and powder room.
Laundry Basket: No longer available – Other Options: here, here, here, here & here.
Brass Frame: World Market.
Basket Tray: Kouboo.
Rug: Loloi.
Powder Room
Dani did such a great job with the decor!
Gallery Frame: West Elm.
Pedestal Sink: here – similar.
Bud Vase: McGee & Co.
Faucet: Moen.
Home Office
Upstairs, we have an open loft area that looks out over our living room. I work from home full-time and knew immediately that this would make a great office because it’s a defined space that still feels open to the rest of the house.
Rug
DIY
I wanted to do something unique with the alcove so we opted for some large, diy floating shelves and a gallery wall featuring some of our favorite pieces.
Desk: World Market – Also seen on these “Beautiful Homes of Instagram”: here & here.
Colors & Textures
While I stuck with earthy neutrals, I used this space as an opportunity to be a little more playful with color and pattern.
Desk Chair: Joss & Main.
Pillow: McGee & Co.
Brass Planter: World Market.
Kumquat Print: Nancy Noreth.
Loft
The oversize armchair on the opposite side of the room is a great place for reading (or napping!)
Chair
Chair is from Ashley Furniture – similar chair with ottoman.
Side Table: West Elm.
Lamp: World Market.
Button Pillow: West Elm – similar here.
Wide Mat Gallery Frame over armchair: Pottery Barn.
Guest Bedroom
Down the hall is our guest bedroom. I reupholstered an existing bed to give it a clean linen look like the one in our own room. This room really challenged me to flex my creative muscles and I love the unexpected combination of old and new. The aged metals, rugged handmade nightstands and modern decor accents all come together to create a space that I hope any guest can appreciate.
Sconces: Visual Comfort – Others: here, here, here & here.
Bedding
Bed Blanket in Cool: Coyuchi.
Quilt: here & here – similar
Pillows
Blue Throw Pillows: McGee & Co.
White Pillow: here & here – similar.
Rug
Rug is from McGee & Co.
Paint Color
Walls: Dolphin Fin by Behr.
Curtains: Pottery Barn.
Desk
Desk is from Joss & Main.
Mirror: here – similar.
Chair
Chair: McGee & Co.
Desk Lamp: Wayfair.
Vase: Areo Home Clay Water Pots – also available here.
Clock: McGee & Co.
Panoramic Painting (in closet): McGee & Co.
Guest Bathroom
I extended this same theme of old and new into the guest bathroom.
Rug: Loloi.
Wall Paint Color
Hardware: Amerock Bar Pulls in Sterling Nickel.
Prints by Marcelle Calder.
Counters: Cultured marble.
Faucets: Moen.
Master Bedroom
I took my time designing our master bedroom and it is my absolute favorite room in the house. I wanted to keep this room clean and simple, while still giving it enough layers to feel cozy. I stuck with two main colors – a blue/grey and cream – and brought things to life with lots of different textures. From the driftwood nightstands to the chunky cotton quilt to the faded rug, everything in this room is meant to feel a bit organic and weathered, yet still refined.
Paint Color & Bedding
Wall Color: Silver Drop by Behr.
Sunset Painting: McGee & Co.
Quilt: West Elm (I highly recommend bedding by West Elm).
Striped Bed Blanket in Gray: Evangeline Linens Pinstripe Blanket 100% Cotton – similar here & here.
Blue Throw Pillows: McGee & Co.
Bed & Rug
Bed: Skyline Furniture – also here (without nailhead).
Beautiful Throws: here, here, here, here, here & here.
Rug: Surya.
Nightstand
Nightstands are from Pottery Barn.
Nightstand Decor
Basket Tray (with books): here.
Vase: West Elm.
Table Lamps: Pottery Barn.
Master Bathroom
In our master bathroom, the contrast of the dark tiling and the white finishes adds a touch of drama. I kept decor simple with some minimalist palm prints and a faded vintage-inspired runner.
Rug: No longer available – similar here.
Cabinetry
Cabinets: Armstrong Sienna Cabinets in Alpine White.
Tile: 16 x 24 – existing – similar here, here & here.
Towels: Parachute Home.
Beautiful Hampers: here, here, here & here.
Countertop
Counters: Cultured Marble.
Vase: McGee & Co.
Hand towels: McGee & Co – similar here.
Hardware: Amerock Bar Pulls in Sterling Nickel.
Faucets: Moen.
Backyard
Having usable outdoor space was really important to us. However, when we moved in, our backyard was just a plain patch of grass. Since we’re renting, we worked with our landlord to come up with an affordable solution. With my dad’s help, we built this raised gravel patio ourselves!
Bistro Set: Ikea.
Outdoor Furniture
Outdoor Sectional: No longer available – Others: here, here, here, here, here, here & here.
Umbrella: here – similar.
Stool / Side Table: Safavieh.
Home-Sweet-Home
The new raised gravel patio ended up being a hit in the neighborhood and inevitably, all of our gatherings end up out here. I’m so glad we went for it! It serves as a reminder that no matter where you’re living at the moment, it’s always worth a little investment to make it feel like home. You don’t have to wait for your dream house!
Many thanks to Dani for sharing all of the details above.
Make sure to follow her on Instagram to see more of her beautiful home!
Blog: Gold Coast Canvas.
Best Sales of the Month:
Thank you for shopping through Home Bunch. I would be happy to assist you if you have any questions or are looking for something in particular. Feel free to contact me and always make sure to check dimensions before ordering. Happy shopping!
Serena & Lily: 20% off Dining Event. Use code: ENTERTAINING
Wayfair: Up to 75% OFF – President’s Day Huge Sales on Decor, Furniture & Rugs!!!
Joss & Main: End of Season Sale: Up to 85% Off!!! Free shipping with code: STARS
Pottery Barn: 20% off + Free Shipping. Use Code: WEEKEND
One Kings Lane: High Quality Design Decor for Less – Save 20% Sitewide Puls and Extra 10% with code: OKLPRES19
West Elm: 20% Off your entire Purchase + Free Shipping: Use Code: WINTER
Anthropologie: Take an extra 40% off all sale items! See Joanna Gaines Exclusive line here!
Urban Outfitters: Hip & Affordable Home Decor.
Horchow: High Quality Furniture and Decor. Up to 30% off the entire site!
Nordstrom: Up to 40% OFF!
Arhaus: Up to 60% OFF!
Posts of the Week:
Beautiful Homes of Instagram: Fixer Upper.
Colorful Coastal Interiors.
Beautiful Homes of Instagram: Horse Farm.
Modern Coastal Shingle Home.
Empty Nester Kitchen Renovation.
Kitchen Renovation with Before & After Pictures.2019 New Year Home Tour.
Full-scale Home Remodel Inspiration.
Beautiful Homes of Instagram: How to Build your own Home.
Interior Design Ideas: Grey Shingle Home.
Connecticut Beach House.
Interior Design Ideas: Colorful Interiors.
New England Home.
Interior Design Ideas: Home Renovation.Classic Colonial Home Design. Family-friendly Home Design.
New Year, New Beautiful Homes of Instagram.
Grey Kitchen Paint Colors.
Follow me on Instagram: @HomeBunch
You can follow my pins here: Pinterest/HomeBunch
See more Inspiring Interior Design Ideas in my Archives.
“Dear God,
If I am wrong, right me. If I am lost, guide me. If I start to give-up, keep me going.
Lead me in Light and Love”.
Have a wonderful day, my friends and we’ll talk again tomorrow.”
with Love,
Luciane from HomeBunch.com
Come Follow me on
Come Follow me on
Get Home Bunch Posts Via Email
Contact Luciane
“For your shopping convenience, this post might contain links to retailers where you can purchase the products (or similar) featured. I make a small commission if you use these links to make your purchase so thank you for your support!”
from Home http://www.homebunch.com/beautiful-homes-of-instagram-rental-home/ via http://www.rssmix.com/
2 notes
·
View notes
Text
A Comprehensive Guide to Choosing the Best Paint for Your Home
There's nothing quite like a fresh coat of paint to revitalize your home. Not only does it enhance the aesthetics, but it also protects surfaces and sets the tone for your living spaces. With an overwhelming number of options available, selecting the right paint for your home can be a daunting task. In this article, we will provide a comprehensive guide to help you choose the best paint for your home, considering factors such as surface type, paint varieties, quality, and color selection. Additionally, we will highlight some reputable paint manufacturers to assist you in making an informed decision.
Evaluating Surface Types : Before delving into the world of home paints, it's crucial to assess the surfaces you intend to paint. Each surface, such as walls, ceilings, wood, or metal, requires specific paint types. For example, interior walls benefit from paints with high durability and easy washability, while exteriors demand weather-resistant and long-lasting options. By understanding the characteristics of each surface, you can choose the appropriate paint that will result in a durable and visually pleasing finish.
Exploring Paint Varieties : Home paints come in various types, each offering unique advantages. The most commonly used types include latex, oil-based, and enamel paints. Latex paints are water-based, dry quickly, and are easy to clean, making them ideal for most interior applications. Oil-based paints provide a durable and smooth finish, suitable for high-traffic areas and wood surfaces. Enamel paints, known for their glossy appearance, are often used on furniture or decorative elements. Consider the specific requirements of your project, such as durability, ease of application, and desired finish, to determine the best paint type for your home.
Emphasizing Quality : To achieve a long-lasting and professional-looking finish, prioritize the quality of the paint you select. Investing in high-quality paints will save you time, effort, and money in the long run. Renowned paint manufacturers such as Benjamin Moore, Sherwin-Williams, and Behr offer a wide range of options that have proven to deliver excellent results. These manufacturers invest in research and development, ensuring their paints are formulated to withstand various conditions, provide superior coverage, and exhibit excellent color retention. Opting for trusted paint manufacturers can provide peace of mind and guarantee a successful painting project.
Mastering Color Selection : The color you choose can significantly impact the atmosphere and mood of your home. While personal preference is crucial, consider other factors when selecting colors. Take into account the natural light in your home, the size of the room, and existing decor. Darker colors can make a room appear smaller, while lighter shades create an illusion of spaciousness. Online tools and paint samples can help you visualize the final result and make an informed decision. Many paint manufacturers offer color consultations or virtual tools to assist homeowners in choosing the perfect shades for their living spaces.
Selecting the best paint is essential for achieving a beautiful and long-lasting finish when painting your home. By considering factors such as surface type, paint varieties, quality, and color selection, you can make an informed decision that suits your specific needs and preferences. Trusted paint manufacturers like Benjamin Moore, Sherwin-Williams, and Behr provide a wide range of high-quality options for various applications. Whether you're embarking on a DIY project or hiring professional painters, investing in the right paint ensures that your home will look stunning for years to come.
0 notes
Text
How to Decorate a Gray Bathroom
Revitalize your gray bathroom with a few stylish hacks. Kick that dull look by installing natural stone in deep hues for a foundational element. For more dimension, incorporate mismatched patterns and textures on the walls, curtains, and accessories. You can turn a monochromatic palette into an eye-catching space with bold decisions.
Update the baseboard trim to create more definition around the walls and floor. Paint them in the same hue as the rest of the room for seamless continuity, or go for unexpected pops of colour for added visual interest. To liven up neutral grays and whites even further, add pops of vibrant accent pieces, such as artwork, to draw attention around your space.
Bring in elements of nature by installing plenty of green plants – they make a great living- colour statement! If you’re looking to update your shower area fast, try replacing an outdated showerhead with a modern one guaranteed to give invigorating water pressure like no other! And if you’re feeling adventurous – replace plain white tile borders with patterned tiles from ground to ceiling — it’s sure to be one stylish statement!
Choosing the right shade of grey
Many shades of gray are available for your bathroom, and choosing the right one will depend on your specific needs. If natural light is minimal, you will want to choose a gray with warm undertones, while a cool grey will be perfect for a bathroom that receives a lot of sunlight. If natural light is plentiful, you can be less picky when choosing a shade of grey. If you can’t decide, consider ordering several samples to ensure you’re getting the right one.
One of the best things about grey is that it can be easily combined with other colours. It’s easy to match it with soft, neutral hues and warm and bold colours. How you mix grey with other colours depends on the shade of gray you choose and the look you’re going for. Generally speaking, a warmer shade of grey should be paired with warmer hues, and a cooler shade should be paired with cooler shades.
Grey is an excellent choice for bathrooms because it is timeless and versatile. It works with any interior style and can be mixed and matched with different colours. Grey is versatile so you can use it for bathroom fixtures and tiles. Whether your bathroom is small or large, grey will fit in beautifully.
Grey is also one of the most popular colours for bathrooms and can add a pop of colour without being overwhelming. You can use a shade of orange for accents, as orange has been gaining popularity in modern bathrooms. The colour adds a pop of brightness and life to the bathroom and can be a great way to make it feel warmer.
Gray is a popular colour for residential interiors but can feel sterile if used alone. A warm wood tone or another shade of gray will help balance the coolness. However, it’s not a good choice if your bathroom receives a lot of natural light, making the room look cramped.
You can use a dark accent wall to decorate a large bathroom. For example, BEHR MARQUEE Starless Night is an excellent choice for the vanity and the tub cabinet. Combining this shade with a white roll-top bath will create a soothing spa environment.
Choosing a material
Grey is one of the most popular and versatile neutral colours available today. It can be used in various ways and add depth, drama, or warmth to a bathroom. Choosing the right shade of gray for your bathroom can be tricky, but there are some tips to make the task easier.
Consider the type of lighting in the room. In areas with low natural light, warm undertones are best. For rooms facing north or east, choose cool greys. If there is a lot of natural light, you can be less fussy about grays, but you’ll need to order lots of samples.
Marble is another great option for a gray bathroom—some types of marble feature natural gray veining. You can use marble for counters and backsplashes, but it’s important to remember that too much marble can overwhelm a gray bathroom. You can also use accessories to add colour and texture to a gray bathroom.
Choosing the right towels is another critical aspect of gray bathrooms. It’s important to choose towels that contrast the gray colour nicely. For example, a light gray towel may look best against a cool gray bathroom. However, a dark gray towel may be more appropriate for a dark gray bathroom.
A grey bathroom can be made brighter with accent colours and artwork. You can also choose a lighter shade of grey paint for the walls. A wood vanity will add warmth and comfort to the space, and a geometric backsplash tile can add a focal point to the room. You can add a decorative item, such as a wall mirror, to make it even more appealing.
Choosing a style
You can add visual interest to a gray bathroom by using accent colours. Light-coloured paint works well to create a focal point in the room. Softer colours are more relaxing and create a more serene atmosphere. If you’d prefer a more neutral style, try wallpaper or other pattern-based materials.
If you’re unsure what colour to use in your bathroom, wear a neutral shade for the walls. This will make the space appear bigger. However, it would be best to remember that a dark shade can make the room look smaller. For this reason, it’s best to use light gray for the walls.
When choosing gray tiles, think about how you want the bathroom to feel. If you want to create a relaxing, airy feeling, consider adding accents in various shades. You can also opt for marble ceramic tiles or natural stone tiles. They will add a touch of texture to a gray bathroom.
While gray tile is a classic option, it’s also important to consider other elements, such as the grout. The type of grout used can make a huge difference, so make sure you choose the right one. A contrasting grout makes your tiles stand out more, while a matching grout creates a minimalist look.
Grey tiles can create a stunning backdrop in a contemporary bathroom. A modern grey bathroom includes a wood vanity and a geometric tile backsplash. You can also choose gray bathroom plumbing fixtures to create a more modern look. A wooden vanity also adds warmth to the bathroom’s ambience.
Towels are another essential part of a gray bathroom. You should choose grey towels that match the style of the bathroom. White towels are a classic option that blends well with other colours, but you may want to add some flair to your bathroom by selecting grey towels. You can also use black towels to create a more sophisticated look.
Choosing a colour scheme
If you’re decorating a bathroom in gray, one of the best ways to incorporate colour into your design is by choosing complementary shades. You don’t need to match adjacent rooms, but you don’t want the colour to clash with other rooms. Choose a colour scheme that includes three or more shades of visible colours. You can also add black accents for extra boldness.
When deciding on a colour scheme for a bathroom, you can use the colour wheel to help you choose the most appropriate shades. Complementary colours balance each other on the colour wheel, and analogous colours are close to each other. The best colour schemes include at least one neutral and one bold colour. For instance, if you choose a neutral paint colour, you can mix it with a bold colour like Kelly green to bring out the room’s features.
The colour gray is a popular neutral for residential interiors. However, it can appear sterile if it’s used alone. Adding warm wood tones and gray shades in other rooms of your home will counteract the coolness of the gray paint. In warm climates, a predominantly gray bathroom can be soothing.
Orange is a good choice for a gray bathroom. It was considered a risky choice until recently but is now being used extensively in contemporary bathrooms. It can change the look of a bathroom completely. Orange is cheerful and energetic, contrasting with a neutral colour palette.
Another popular shade of gray is taupe, a brown-gray shade. Taupe has a traditional feel but can also have a modern edge. You can choose between light and dark versions of this shade. A taupe with a heavy base is more earthy, and dark shades add a moody look. You can also use a light shade of taupe with a purple base to splash the colour.
A more sophisticated alternative to soft gray is charcoal. Charcoal is a darker shade than gray and contains warm elements. It adds a cozy feel to the bathroom without making it feel too girly. It also works well with metallic accents and natural wood tones.
.video-container {position: relative;padding-bottom: 56.25%;padding-top: 1px; height: 0; overflow: hidden;} .video-container iframe, .video-container object, .video-container embed {position: absolute;top: 0;LEFT: 0;width: 100%;height: 100%;}
youtube
The bathroom is often the last room people consider renovating, which makes sense since it’s usually the smallest space in the house. With Vancouver Kitchen Renovation, you can expect a spa-like bathroom that feels luxurious and is built to last. We’ll create a custom bathroom design based on your preferences and budget and handle everything from demolition to installation.
We understand that to be successful is to stay ahead of the curve. That means staying current with the latest technology and design trends. We always want to improve our products or services without breaking the bank. That’s why we stay connected to the latest technologies of NKBA, National Kitchen and Bath Association. In addition, at Vancouver Kitchen renovation, our primary focus is providing sustainable bathroom design and renovation packages, and we believe in sustainable living. Sustainable living is a way of life in harmony with nature. It is a lifestyle which focuses on the preservation of our environment. Sustainable living is a philosophy emphasizing respect for the environment and concern for its well-being. This means we should take care of the planet and treat it as if it were our home. We should try to preserve what we have and protect it from destruction. If we do this, we will enjoy the benefits of the earth’s resources for many generations. Whether you’re planning a major remodel or adding finishing touches to your current bathroom, we’d love to discuss your project. Book your showroom consultation online.
Main Areas of Service in British Columbia:
Vancouver
North Vancouver
West Vancouver
Burnaby
Coquitlam
Squamish
Whistler
Frequently Asked Questions
What will be the most popular bathroom design in 2023
The bathroom industry is changing rapidly as consumers demand higher-quality products at lower prices.
Bathroom design trends will be driven by sustainable and safe materials that are also healthy.
This includes waterless toilets, low-flow toilets and dual flush technology.
This trend will also promote health and wellness, by offering access to shower heads or other devices that improve hygiene.
How do you beautify your bathroom?
It’s possible to make your bathroom look great without spending too much money. Here are some tips to help you get started.
Paint Your Bathroom Walls. This will give your space a fresh, clean feel.
Add some Mirrors – A bathroom can be enhanced with mirrors. Mirrors can also reflect light into dark areas. Mirrors are an inexpensive way to make your bathroom more beautiful.
Use Simple Accessories – Use accessories to create a stylish appearance. To make the tub look more stylish, you can hang a basket of towels above it. For a decorative element, add a few candles to the mirror.
Hang Up A Picture – If you want to change up the decor of your bathroom, try hanging a picture. The theme of your bathroom should be chosen. If you are surrounded by nature, then choose a photo of a mountain scene.
Stenciling Gives Your Bathroom An Artistic Look. Simply use stencils or a cutter to make shapes on your walls. Before you start to paint another shape, be sure to give it several coats.
Buy a new toilet seat covering – Toilets are often overlooked in the process of remodeling a bathroom. Toilet seats can be easily replaced and aren’t too expensive.
You can change the colour of your sink faucet. You can create an original style in your bathroom by changing the colour of your faucet.
Install a laundry hook – Laundry hooks can transform bathrooms. You can hang items like clothes or shoes from the ceiling and not put them away in drawers.
Add Plants – Plants can help to purify the air in your house. You can conceal unsightly objects with them. Plant plants near windows so you can take in the view.
Towels that are old should be replaced with baskets. This will make it easy to avoid making a mess for guests when they arrive.
Add Storage Space – Storage space can help keep your bathroom tidy. Consider installing shelves above the sink, under the countertop, and along the wall.
Improve Your Lighting – Lighting fixtures can make your bathroom appear more spacious. Consider installing recessed lights underneath the vanity instead of track lighting.
Use Tile Designs to Create a Unique Bathroom Design. This technique can be used to create a variety of textures and patterns.
You Can Create A Quiet Bathroom. Remove everything from the counters and cabinets. Make sure to clean all surfaces.
Update Lighting – Replace old bulbs and fixtures with newer ones. This will give your bathroom a fresh look.
Paint Walls They can also be used to create a stunning backdrop for artwork.
Mirrors on Cabinets – Mirrors can add light to your bathroom without taking up too much space. They can also reflect natural light into dark areas of your bathroom.
Hang Pictures and Artwork – Hanging photos and artwork can add beauty to your bathroom. Find pieces that go together and compliment each other.
How much does a bathroom remodel increase home value?
Bathroom remodels offer a return of investment (ROI), which is typically between 60% and 70%. They are a good choice if your goal is to add value to your house. The amount your bathroom remodel will increase the value of your home will depend on many factors including the scope of the project, the quality and location of your home. An example: A luxurious bathroom remodel in a desirable area is more likely to yield a higher ROI than one in a less expensive neighborhood.
What is the average time it takes to renovate a bathroom in Vancouver, British Columbia?
A bathroom renovation can take anywhere from four to five months. It is possible for the project to take longer if you need permits or inspections. Bear in mind that the timeline may also be affected by the size and complexity of your renovation.
How do you do a facelift in a bathroom?
It’s not enough to replace fixtures and fittings when renovating a bathroom. It’s also about creating an atmosphere that makes people feel at home. If you want to create a relaxing environment for yourself and your guests, think about how to make your bathroom more inviting.
Here are some examples:
Consider adding plants. They help cleanse your air and add natural beauty. You can choose among a variety of indoor plants such as succulents or mosses.
Lighting is important. Lighting plays a big part in creating an attractive and welcoming space. Consider using indirect lighting sources in place of direct. These will give soft, diffused illumination.
A comfortable seating area should be created. This could be a small table or a bench. To display artwork or photos, you could mount shelves to the wall. To brighten your room, you can add a mirror to reflect the light.
A bathrobe hook can be used to hang your robes or coats.
We have lots of information about bathroom designs, remodelling services, and accessories. Our experts are happy to help you plan your next renovation. Give us a ring today!
How can you remodel a bathroom while keeping your budget tight?
The first step would be to take an inventory of what you have available. This includes everything, including toilets and sinks, mirrors, towels racks, lighting fixtures, and even toilets.
After you have completed the list, you must determine if any items can be salvaged. If they aren’t, then they should be replaced.
Next, you need to decide how much each item is worth. Once you have a rough idea of how much you want to spend on each item you can start shopping for replacement parts online.
After you have purchased your new bathroom parts, you can make your bathroom more modern. You may want to paint your walls, tile the floors or replace the old fixtures. You should stick to your budget, no matter what route you take.
Statistics
Keep in mind: they advise that, all told, your bathroom project should cost no more than 5 to 10 percent of your home’s value. (remodelista.com)
Glass tile is one of the greenest bathroom flooring options because it can be 100% recycled. (caddetailsblog.com)
I can’t tell you the number of times I’ve had someone call and say they have an existing old tub (which, 99% of the time, is 60” wide once they’re pulled out) and want to convert the bathtub to a shower. (blog.innovatebuildingsolutions.com)
2023 bathroom design trends: 82% of those surveyed revealed bathrooms are now designed for two-person use. (https://nkba.org)
The average midrange bathroom remodels costs $27,164, according to the latest Remodeling Cost versus Value report, and it’s projected that you will recoup 58.9% of that cost when reselling your home. (architecturaldigest.com)
Outdoor showers can dramatically increase the value of your home—according to a 2018 report from Realtor.com, homes with outdoor showers tend to list for nearly double the asking price of other homes! (housebeautiful.com)
2023 bathroom design trends: Large format tiles were favoured by 59% of those surveyed.mSlab surfaces were favoured by 40% of those surveyed. (https://nkba.org)
2023 bathroom design trends: Chromotherapy, which uses coloured lights to stimulate relaxation, was chosen by 25%. Preset lighting schemes for different times during the day were favoured by 29%. (https://nkba.org)
2023 bathroom design trends: Heated floors were favoured by a substantial 75% of those who responded to the survey.(https://nkba.org)
According to a 2019 remodelling report from the National Association of Realtors, 70 percent of consumers “have a greater desire to be home” after a bathroom renovation, so read on and soak up the secrets. (housebeautiful.com)
NKBA estimates that broken down, most of this cost comes from fixtures and plumbing (about 29 percent), followed by counters and surfaces (21 percent), labour (20 percent), and cabinetry and hardware (16 percent). (remodelista.com)
2023 bathroom design trends: Digital showering allows users to program their preferred flow rate, and the temperature was a 23% preference. 44% wanted the ability to start their showers with their phones. (https://nkba.org)
External Links
nkba.org
Home – NKBA
Real-World Budgeting for Bathroom Remodeling
bhg.com
How to paint bathroom cabinets for an easy vanity upgrade
How To
How to Design your Bathroom (DIY Project)
It is important to plan carefully for a bathroom remodel. There are many decisions to be made, including choosing the right materials and finding the right contractor. It is important to think about how long the project will last before you start any major home renovation. So you can budget accordingly.
Before you begin your bathroom remodeling project, consider how much time it will take to complete. If you only have a couple of weekends, you may prefer to focus on cosmetic improvements. However, if you have the time to complete more substantial projects such as replacing the tub or installing new tiles, it is possible.
Now it is time to plan. Start by making a list with the changes that you want to make. You can also look online or in magazines for ideas. Once you’ve decided what you want, it’s time to start looking at materials and comparing prices.
It is crucial to get a licensed contractor if you intend on making large-scale changes like adding a bathtub. Not only can they help with the installation, they can also give advice on what materials to use. They can also handle any permits that may be required.
Before you start your bathroom renovation project, measure and take photographs of the area. By doing this, you can have a guideline to help you as you make adjustments. Take your time and work slowly. If you need help, don’t hesitate to ask.
The following costs can be added to calculate the cost for your bathroom renovation:
Materials – This covers everything, from paint and tiles to cabinets. You will most likely have to purchase these items separately as they are often sold in sets.
Labor – Hiring a professional contractor to perform the plumbing, electrical, and drywall installation required for a bathroom remodel is an investment that could save you thousands of dollars in future repairs. There is a wide range of prices depending on the location and size of your project.
Other Costs – The final cost category includes permits and taxes. These fees will depend on where you live as well as the type and extent of your renovations.
Remember that your home’s value will affect the cost of your bathroom remodel. You will want to ensure that your renovations add value to your property if you intend to sell your house in the near future. A home appraiser can help you determine how much your bathroom remodel will increase the home’s market value.
The post How to Decorate a Gray Bathroom first appeared on Vancouver Kitchen Renovation.
source https://vancouverkitchenrenovation.com/bathrooms/how-to-decorate-a-gray-bathroom/?utm_source=rss&utm_medium=rss&utm_campaign=how-to-decorate-a-gray-bathroom
0 notes
Text
Instructions to Choose Interior Paint Colors
Make a Color Scheme That Matches Your Home's Furniture In our current reality where many tones can be yours for just $25 a gallon, it pays to consider the advice of structural shading advisor Bonnie Krims."Always recall that while there are huge number of paint chips at the store, there are just seven tones in the paint range," says Krims, alluding to red, orange, yellow, green, blue, indigo, and violet (what Color Theory 101 understudies are frequently educated to recollect by the mental aide, "Roy G. Biv"). "I generally propose disposing of a couple even before you go to the paint store." To know more, click here for a studio apartment for rent in Abu Dhabi.
Settle on the Finish to Create an Appealing Visual Effect When you have your tones close by, consider the completion you'll utilize. However, the present level paints have expanded stain opposition. The customary way of thinking has since a long time ago held that a silk (likewise called eggshell) finish is best for dividers since it is scrubbable and doesn't cause noticeable blemishes. Semi-sparkle and serious shine completes, it was thought, were best passed on to the trim, where they could emphasize the bends of an embellishment profile or the boards of a door.Today, be that as it may, completes are additionally being utilized to make enhanced visualizations on the whole divider. Paint one divider in a level or silk finish and the contiguous divider in a semi-gleam, both in a similar shading, and "when the light reaches the stopping points, it makes a corduroy or velvet impact," says Doty Horn. Also, you can paint the divider level and the roof semi-shine to accomplish a matte and sheen contrast. (The roof will feel higher the more light-intelligent it is.) Keep as a main priority that the higher the shine, the more sheen and the more consideration you attract to the surface. Utilized deliberately, shading and gleaming together can accentuate your inside's best resources. Get to know more about Sharjah villa for rent.
Match The Color To The Feeling You Want In The Room The brain science of shading is a minor obsession among paint experts. Many say you ought to pick a shading put together essentially to a limited extent with respect to how a room is utilized and the temperament you need to establish.Maxwell Gillingham-Ryan, prime supporter and supervisor of the blog apartmenttherapy.com recommends, painting social rooms (lounge areas, kitchens, family and living areas) warm tones like daffodil-yellow, coral, or cranberry, and give private rooms (work spaces, powder rooms, rooms) cooler tones like sage-green, violet, or sky-blue.Keep at the top of the priority list, with regards to passionate impacts, obviously, one individual's welcome-home orange will be someone else's sign to scream.Debbie Zimmer, for one's purposes, pronounces that "red will build your craving—and your pulse; blues and greens are naturelike and quieting; purple is adored by youngsters however not really by grown-ups; yellow is welcoming; and orange can be inviting yet additionally somewhat annoying, contingent upon the color, tone, or shade."Research done by Behr shows that yellow can animate the mind, so it very well may merit considering for rooms where schoolwork is done; yet stay away from yellow in rooms, where the objective is for the most part to relax. All things being equal, investigate these quieting tones in the room to assist you with resting better. Click to know more villas for sale in ras al khaimah.
Know Your Whites Whites arrive in a stunning assortment. Unadulterated, "clean" whites are defined without colored suggestions. These are supported by fashioners looking to grandstand work of art or goods and are regularly utilized on roofs to make an unbiased field overhead.Most different whites are either warm—with yellow, rust, pink, or earthy feelings—or cool, with green, blue, or dim connotations. Behr's Mary Rice says: "Utilize hotter whites in rooms without a great deal of regular light, or to cause bigger spaces to appear to be cozier." Cool whites, on the other hand, can assist opening with increasing space. Test a few without a moment's delay to see which one works best with different tones at play in the room. Make Flow in Open Plan Spaces Coherence is significant on the ground floor, however shading can help "zone" a major open space, isolating the eating region from the TV room, for example. There's no compelling reason to adhere to a solitary tone or even a solitary shading range that is either all warm (reds, oranges, yellows) or very cool (blue, greens, dazzling whites). However, "by utilizing quieted, dustier qualities, there's a superior possibility the tones you pick will stream into each other," says Tami Ridgeway, a shading beautician for Valspar. She suggests really inclining toward colors mellowed by a touch of dim; these are often found in chronicled ranges. Splendid tones can be infused in little dosages as accents—in goods, floor covers, even blossoms. Get a villa for rent al barsha.
0 notes
Photo
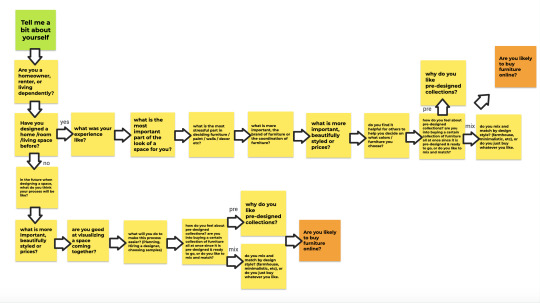
Nafisa Khan
I am a college student in my senior year, studying design. I tutor students and sometimes I tutor art students
Living dependently, mom is homeowner
Yes, I designed the house I’m currently living in
Designing is stressful, having to make sure everything matches and fits in the room, the sizing of everything, not too crowded. It took me 3 months time to do everything, a week for furniture to arrive.
I think the most important part is for it to look modern but still comfortable to live in, having it be a space that she actually would like to live in.
Hoping everything matches, the right shades, cohesiveness.
Cohesiveness/coordination (unsure, hard question)
Beautifully styled, my sister's room had a drawer that had a price difference of 200 something and we went with that one because we wanted it to coordinate.
I like to go by my own instinct, but also including the opinions and ideas of other people in my house.
I like pre designed collections. For the living room I’d buy a whole set but for the bedroom it's different, I decided to mix and match because I didn’t like the whole set. The living room was two sofas, pillows, and a coffee table. I would buy a whole collection but everything would have to match perfectly.
What I like about pre-designed sets is that it's convenient, fast, takes stress away from designing a room, and making sure everything matches.
Yes I would buy online, and also collections online.
Fav brands: Ashley furniture. Tahari. Martha stewart. behr paint.
Tina Gomes
I’m a nurse in nicu. 24 years old. Just bought a house in massapequa, full time, night shift, recently engaged.
Homeowner.
No never designed, I’m in the process of building and designing my home right now.
Right now, fixer upper, very old , refurnishing, new floors, evening out the walls, repainting, new furniture , starting from scratch, no interior designer, fixing the yard.
Super stressful experience, first time designing anything, never done anything before. It’s hard because you have to be stuck with it for a while at least, it’s expensive. When you rent it's easier since its usually a lease, but a house is hard because you have to like it. Has her dad's help who is a construction worker.
To feel like comfortable, easily wind down, natural lighting, openness, light colored furniture, open comfortable living space
Now that I’m in the process, before I would be compromising with prices but now sometimes I gotta just spend money and spend more to look nicer than always take the cheaper route, it ends up costing you more in the end because then you’re not satisfied, style is more important.
Cohesiveness, because I can like something but it wont go with the style.
No I’m not good with visualizing at all. I think next time I would definitely hire a designer to help me.
Coordination, not a big brand person.
It depends on who, my boyfriend not really, women's advice is helpful, i'd rather go to a female, having other people input is helpful.
Hiring a designer, to guide me, it's hard to recreate, I need direction.
I'm not big on collections, I like mix matching.
I go by design style, I always have a vision of what I would like, but recreating it is hard.
I would buy online, I don't like going to a store. Maybe the sofa and stuff I would go in person.
If there's a discount online, I’d definitely buy online.
Fav brands: sharron williams paint accessible and easy, ikea they're not too expensive, tjmaxx, homegoods,
Alessia Maldonado
I am hardworking, ambitious, likes to achieve her set goals, RN at winthrop, NICU nurse
Renter
Yes I designed my rooms, not the wall paint or flooring.
A Little stressful trying to put my vision together but it was fun to buy items and design the way you like it.
To make it feel comfortable for you, you want to come back to your own space after work and to relax.
Having to choose between what goes well together, to make sure nothing clashes
Coordination
Beautifully styled, because you can buy a type of furniture that goes with ur space instead of going cheaper and buying ugly items
I find it helpful because they may have different ideas and to open up your mind to different choices
I feel neutral, because it may be easy for some people but it can be annoying if you just want one piece of the whole. Not into pre-designed collections.
I buy whatever I like, although I may have a set style but I’m not afraid to buy other items outside of my initial vision or theme.
Yes I’m good at visualizing
If I wasn't so indecisive and if I could choose quicker. It would be nice to have a place to look at everything at once and not have to go from store to store and then finally deciding on one place to get something from.
I'd rather not buy something online because I like to feel and see it in person. I would like to buy discounted prices online.
Nancy Martinez
I work as a senior client specialist full time.
Living dependently
No I have never designed anything but I will be buying a house soon so that is coming up for me. I plan to get a fixer upper.
I think my process would be to look online for inspiration, and shop online for the furniture. I would maybe like to see things at a store but I’m a big online shopper. I also think I’d look for swatches and samples of things before buying them.
Prices are more important to me.
No, I'm not good at designing or visualizing.
I wouldn’t hire a designer. I think it would be really nice to have samples from a bunch of stores to visualize things. Maybe if there's a book of swatches and colors, I would buy that to help me.
I feel good about pre designed collections. I would like to be able to mix and match. I would not just buy a whole collection all at once though. I think it could be easier, but I don’t think I would go that route. So I guess I’m more of a mix and match kind of person.
I would like to go for a theme but I know that I will just end up buying what I want. 7/10 sticking to a theme is important.
Coordination of furniture is more important.
The most important part is that it be comfortable, not too busy and cramped. Where I currently live there's a bunch of stuff everywhere and I think that really plays into how I don’t want that in my future home. I want to feel relaxed when I go home.
Yes, I would buy furniture online.
Ikea, amazon
Samantha Mendes
I am a receptionist at a hospital. I just finished school.
I am living dependently.
I have never designed anything before, I am in the process of designing my patio though so that’s something small.
In the future when designing things, I would like to look on pinterest for ideas. I want to stick to a theme and look for things that I like. Moodboards.
Depends, if you don’t have a budget. If you don’t then style is more important for sure. In my case I would probably have a budget so maybe I can DIY things. I think that if I really liked something that is pricey I might buy it.
I am good at visualizing I think.
To make my process easier, I would probably plan really well. Make a process of what needs to get done first, what’s more important. I think that accessories and smaller decor things would go last on my process list. I probably wouldn’t hire a designer.
I’m not a fan of pre-designed collections, I think that they’re usually boring. I like to be creative and mix and match everything to create something that’s super unique and pretty for myself and my own taste. Designed collections seem to confine you.
I mix and match by style I think. But sometimes mixing styles can make something look even more unique. Like boho and farmhouse mixed.
If i had detailed info and trustworthy sources of the product then I would definitely buy online. Like dimensions, reviews, free shipping. Maybe if there’s a points system in place.
0 notes
Text
Top 5 Home Design Trends for a New Decade

Whether you’re planning a simple refresh or a full-scale renovation, it’s important to stay up-to-date on the latest trends in home design. Sellers who make tasteful updates can generate increased buyer interest and, in some cases, a premium selling price. And buyers should consider which features of a home will need updating immediately (or in the near future) so they can factor renovation costs into their overall budget.
Even if you have no immediate plans to buy or sell, we advise our clients to be thoughtful about the colors, materials, and finishes they select when planning a remodel, or even redecorating. Choosing over-personalized or unpopular options could hurt a home’s value when it does come time to list your property. And selecting out-of-style or overly-trendy elements could cause your home to feel dated quickly.
To help, we’ve rounded up five of the hottest home design trends for 2020. Keep in mind, not all of these will work well in every house. If you plan to buy, list, or renovate your property, give us a call. We can help you realize your vision and maximize the impact of your investment.
1. IN: Sustainability / OUT: Fast Furniture
Consumers have become increasingly eco-conscious. Many are shunning the mass-produced, “fast furniture” popularized by retailers like IKEA, opting instead for higher-quality pieces that are built to last. And the availability of non-toxic, environmentally-friendly furniture and decor options is set to grow in 2020 and beyond.
At the same time, there’s been a noticeable shift toward individuality in today’s interior design. Instead of following the latest fad, more homeowners are opting to embrace their personal style and invest in items they believe will “spark joy” (à la Marie Kondo) for years to come.
To incorporate this trend, designers recommend layering old and new pieces for a curated look that you can build over time. Instead of purchasing a matching furniture set from a big-box retailer, buy one or two sustainably-sourced pieces that complement what you already own. Try searching estate sales and Craigslist for vintage classics or well-built furniture that can be refinished. And to accessorize your room, mix sentimental items with newer finds to create a truly personalized space.
2. IN: Cozy / OUT: Cold
Designers are moving away from cool grays, industrial finishes, and stark modernism. In 2020, there’s a big emphasis on creating warm and cozy spaces through color, texture, and shape.
Gray has dominated the color palette for the past decade. This year, expect to see a move toward warmer neutrals, earth tones, and nature-inspired shades of blue and green. Warm metals, like gold and brass, will also continue to trend. And hardwood floors are heating up, as cool gray and whitewashed finishes fade in popularity. Expect to see a rise in classic choices like walnut, mahogany, and oak in richer and darker tones.
Furniture will also get cozier—and curvier—in 2020. From rounded sofas and curved-back chairs to oval dining tables, softened-angles are dominating the furniture scene right now. And designers expect softly-textured fabrics—like velvet, shearling, and mohair—to be big this year, as homeowners strive to add a touch of “hygge” (the Danish concept of calming comfort).
Want to warm up your home decor? Try one of the top paint colors for 2020: Benjamin Moore’s First Light (soft pink), Sherwin Williams’s Naval (rich blue), or Behr’s Back to Nature (light green).
3. IN: Bold / OUT: Boring
Bold is back! After years of neutral overload, vivid colors and prints will take center stage in 2020. Expect to see geometric designs, color blocking, and floral and botanical patterns on everything from pillows to rugs to wallpaper.
The hottest trend in interior paint right now is bold trim and ceilings. Monochromatic rooms (e.g., walls, ceilings, and millwork painted the same color) will be big this year, as well as high-contrast pairings, like white walls with black trim. Color is coming back to kitchens, too, and two-toned color schemes continue to gain steam. In 2019, 40% of remodelers chose a contrasting color for their kitchen island.[1] While white was still the top choice for cabinets, blue and gray are increasingly popular alternatives.
If you’re ready to “go bold,” separated spaces like laundry and powder rooms are great places to start. It’s easier to incorporate busy wallpaper or a bright wall color in an enclosed area because it doesn’t have to flow with the rest of your decor.
Of course, clients always want to know how design choices could impact their home’s value. The reality is, neutral finishes are still the safest bet for resale. If you’re prepping your home to go on the market, stick with non-permanent fixtures—like artwork and accessories—to brighten your space.
4. IN: Nature / OUT: Industrial
Biophilic design has been big the past few seasons, and it isn’t going anywhere in 2020. It centers around the health and wellness benefits of connecting with nature, even while indoors, and it’s impacted the latest trends in color, prints, and materials.
As we mentioned previously, floral and botanical patterns are hot right now, along with nature-inspired hues, like blues, greens, and earth tones. We’re also seeing a heightened use of organic shapes and sustainable materials in furniture and furnishings, including wood, wicker, rattan, and jute. This infusion of nature coincides with a decline in the popularity of urban-industrial fixtures. Designers predict that concrete floors and Edison light bulbs are on the way out.
Want to bring in elements of biophilic design on a budget? Houseplants are a great place to start. But you can also enhance your home’s natural light and create a visual sightline to the outdoors by removing heavy curtains and blinds. And when the weather is nice, open your windows and enjoy the breeze, sounds, and smells of nature. These simple acts are scientifically proven to help reduce stress, boost cognitive performance, and enhance mood![2]
5. IN: Functional / OUT: Fussy
In 2020, homeowners want design that’s beautiful, but also liveable. With the rise in remote workplaces, online shopping, and virtual exercise classes, many of us are spending more time at home than ever before. Cue the growing appeal of multi-functional spaces, like a combination kitchen/office or gym/playroom. Real life—and rising housing prices—necessitates creative use of limited space.
Durable, low-maintenance materials will also surge in popularity this year. Engineered quartz—which is more stain, heat, and chip-resistant than natural stone—is now the #1 choice for kitchen countertops.[1] Waterproof, wood-look luxury vinyl is the fastest-growing segment in the flooring industry.[3] And improvements to water and stain-resistant performance fabric has made it a mainstream option for both indoor and outdoor upholstery.
Now that functional is hot, what’s not? Designers say that mirrored furniture, open shelving, and all-white kitchens are too impractical for today’s busy families.
So how can you start enjoying the time and energy-saving benefits of this design trend? Begin by structuring each room so that it best suits your needs. And when purchasing furniture or fixtures, choose options that are durable and easy-to-clean. The truth is, design fads come and go. But a comfortable and relaxed home (that you don’t spend every spare minute maintaining!) can help create memories to last a lifetime.
DESIGNED TO SELL
Are you contemplating a remodel? Want to find out how upgrades could impact the value of your home? Buyer preferences vary greatly by neighborhood and price range. We can share our insights and offer tips on how to maximize the return on your investment. And if you’re in the market to sell, we can run a Comparative Market Analysis on your home to find out how it compares to others in the area. Contact us to schedule a free consultation!
Sources:
1. Houzz
2. Terrapin Bright Green
3. Remodeling Magazine
4. Elle Decor
5. Forbes
6. Wall Street Journal
7. Good Housekeeping
8. Architectural Digest
9. Los Angeles Times
Reposted from LinkedIn
0 notes
Text
Agilenano - News: The Design That We’ll Never Get to See in Person – AT’s Small/Cool Event + 5 Renter Hacks for a Small Space

Remember back at the beginning of March (what now feels like a year ago) when we showed you a Sneak Peek Into Our Current Design Projects? Well, today is the day to show you the “final results” of one of them. No, this isn’t our typical room reveal. A lot has shifted between then and now. And other things take priority as they should. But our ultimate goal here at EHD is to try to bring a little joy to your day and since it’s Monday morning fingers crossed this does the trick. This “room reveal” is one where neither you nor I will ever see a real photograph of but that’s okay since I stayed up late trying to recreate the space as realistically as possible for us all to enjoy by using my trusted confidante, SketchUp.
I bet by now you are asking yourselves, “Which project are you talking about?” If you didn’t already guess from the snippet above it’s our Eclectic English space for Apartment Therapy’s Small/Cool Event which officially went live (virtually, that is) last Friday. The event showcases 20 current home trends by 20 designers for the year 2020. Very clever AT team.

The trends range from Art Deco Influence by Gabriela Gargano to Maximalist Boho by Jessica Bringham and everything in between. Ok so let’s start with the design inspiration for our room!
The Trend: Eclectic English

photo source | 1 | 2 | 3 | 4 | 5 | 6
I was very excited to take lead on this bedroom design project after all I know a thing or two about designing a small bedroom after my own MOTO. When the AT team asked us which trend we would want to showcase it was a no brainer. Emily had just written about her current love affair with this New (Old) Trend that was going to help her get her color/quirk back into her life and I was so on board to oversee the design. This trend is the metaphorical fresh-design-air that we have all been waiting for and like I’ve stated before I am ready to trade in the neutral world for a multi-colored one.
The Space
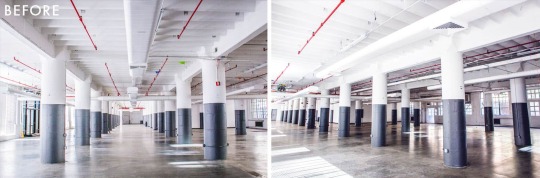
This all sounded great in theory until I saw the photographs for the original space where the event was to be held in Brooklyn, NYC. Talk about a design challenge. This warehouse didn’t invoke that eclectic old world at all that we wanted the expected 12k+ visitors to feel as they walked into our space. I started to think, “Why didn’t we choose postmodernism? That’s also cool right now.”
But this type of challenge is what drew me to interior design in the first place, working within a set parameters of a building to find those creative solutions that will ultimately transform a space into something new. Challenge accepted.
Emily also wanted me to point out the fact that we were designing this space from 3,000 miles away which is a challenge in itself but since starting at EHD almost 3 years ago this is nothing new to me. The two main projects that I have worked on – the Portland Project (961 miles) & the Mountain House (84 miles) – weren’t exactly distances that screamed let’s just go “swing by” for a site check-in today. Working solely based off of a few measurements and online shopping was okay by me especially for just one small room. The real challenge was creating a space that looked curated over a long period of time in the span of a few weeks from a handful of online vendors.
Yeah, you could say I was slightly stressed.

The AT team was so great and sent through this very thorough SketchUp drawing of our space including all the dimensions I could need plus the very elusive NYC fisherman. His name is Gary and he was super helpful to clue me in on the exact scale of the space we were working with. Thanks, Gary. Bye, Gary.
Now that I had a better idea of the exact measurements for the space, Emily and I did our initial brainstorm of how to add that “cozy factor” we knew it desperately needed. Let’s just say our hopes were as high as the NYC skyline: “Maybe they can add a ceiling so people don’t see the exposed ceiling”, “Could we add wood floors?”, “Some added millwork would help transform the space”, or “An overhead diffused light to make the space feel cozier”… there was some wishful thinking but one worked out in our favor. One thing I have learned in the past couple of years is that you’ll never know what your options are until you ask. And ask I did, thank you again to the AT team for answering my endless emails. I love an email. Especially those who respond quickly and they did, thank you.
You’d think that creating a space from a blank slate would be a designer’s dream. But when combining that with the fact that it also has no fourth wall and everything in the space has to “work/look good” from one angle it shifted my mindset of how I’d typically design a room. Function still played a role but in a new showcase-y kind of way that I wasn’t familiar with. So, instead of thinking about the room as a 3-dimensional space I looked at it as if it were first a piece of art that you could then jump into and walk around. It had to work as both.
The solution was layers and layers and then some more layers.

Here was my initial paired down mood board that we showed you a few months back. Giving you all a sense of the space without giving it all away. That wicker bed from Serena and Lily was the first piece I picked out that made me believe that this space could work. Followed with a close second & third by the Matrix Chair from Article and the Hay Design Matin Lamp that I think everyone in the office including myself has had heart eyes for once or twice. We’ve loved a pleated lampshade ever since Jess pointed out the newly rising trend way back when.
And this was just the beginning…
The first and probably most important layer was to cover up those stark white walls. This space needed a dose of traditional character and nothing says that more to me than the trusted wallpaper and board & batten combo. Chasing Paper’s Tree Toile in Mono was the quintessential pattern for the space. It adds that layer of depth without being too overwhelming. I’m talking to you art wall. There are two types of texture you can add to a space one is 3D like a shag rug, our millwork, or pattern. I decided to include both with our board and batten walls painted in Behr’s Red Pepper. I’ll be honest, I was a bit nervous to tell Emily that this is the paint color I wanted to use in the space. The lady likes red but more of a bright and happy red of which this isn’t really. But once she saw it on the mood board she was all for it.
There was a fine line of how high was too high or too low the millwork should be. In the end I decided that the height should be based more on the headboard height of the bed more than anything else. At first, I had it at 60″ high on the back wall and 48″ on the other two but something felt off. Then I realized that if it was that high on the back wall there wouldn’t visually be enough breathing room for all the art I had planned to go up there.
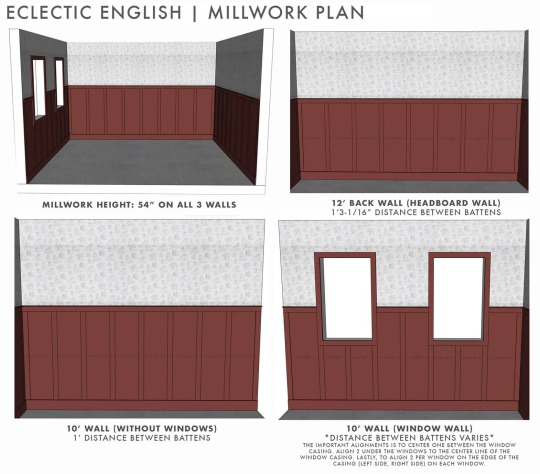
So, after playing around with it for a few hours in SketchUp (love you) I went with 54″ high on all 3 walls. It was a little over halfway up the wall which would’ve felt awkward had I not filled the walls with other visual weight. That is always something you want to consider when determining the height of your millwork and also where it will intersect your light switches (something we didn’t have to think about for our space) or other permanent fixtures along your walls. Be sure they are either included in the millwork or sit above but not half and half.

Above are the profiles I chose, with plenty of help from Charla and Justine, from our favorite vendor Metrie. They are the same two lovely ladies that helped Emily and I to pick out/design all that millwork in the Portland House. For this project, we got our material inspiration from The Gold Hive – Ashley Goldman’s Master Bedroom which included some very thin lattice which would be our flatstock with a low profile. This would take up just a little real-estate in this tiny space.
That isn’t our only small space/renter hack that we have for you today read more below.
But first…here she is our Eclectic English lady!
Side Note: Some of the items in the render like the lounge chair & dresser are not the same as in the mood board. Building detailed furniture in SketchUp can be tedious and extremely time-consuming especially ones with realistic-looking cushions. So I took the easy way out (aka saved hours of on the clock time) and downloaded similar options. It was late. I was tired. And this is a skill I am working on so I think this version is much better than what I could’ve come up with. So imagine that awesome Matrix Chair from Article and this nightstand.

As Emily would describe her she is, “…just a touch senile, with a dirty martini in her hand, perhaps some sort of old Hollywood headpiece, and head to toe in patterned clothes. She freely tells us about her affair with Wes Anderson (a younger man! Grandma!) and maybe she has tons of cash hidden around the house. But she’s a little old world too – she loves a floral print, she’s always ready to put the kettle on and share some well-earned life experience, and her shelves are stuffed with souvenirs from decades of travel. My friends love her, and my kids can’t wait to visit her because surely she will tell them something they are far too young to hear.”
Do you see her? Do you love her? Or is she just a little too much for you? You can be honest cause she would tell you the harsh truth right back to your face. But then I am not her, so I ask of you be constructive in any of your criticism you might have. Thanks

5 Renter Hacks for a Small Space:
Re-think The Gallery Wall – As we all know a gallery wall is a sure-fire way to add that needed dose of personality into those box-like apartments but then you’re stuck with patching up who know how many holes when moving out. Cause I know that for every piece of art that I hang in a gallery wall there are probably 3x the amount of holes necessary behind it. Done is better than perfect around here and I don’t have the patience with templates. So instead, consider a picture hanging rod which will require minimal holes in your wall and you have more freedom to swap out art over time. This idea works well in the space since we added the millwork which projected out from the wall which let us still overlap the art.
Layer Up – If you live in a space with flooring that you wish you could just replace or snap your fingers and make them disappear, then consider getting a rug approx. the size of your space and layer a smaller rug on top. This typically works best if the smaller rug is about two sizes down and is in the same style. Also, be sure that the rug on top has a higher pile than the one below.
When in Doubt Mount It – Want to add a coat rack to your space? Try a 6-arm coat hook instead. Thinking about getting a bookcase? Maybe opt. for some shelves. Anything that you can install on your walls to free up some coveted floor space is golden in a small room.
Double Duty – In a small space it is a great idea for your furniture to serve multiple purposes when you lack the square footage. We made sure our floor lamp had a small table attached and our dresser’s marble top was the perfect place for a martini station. Although, I know I could’ve done a better job on more storage for the space like including a nightstand with a drawer or a bench with a shelf. I choose the more visual pleasing option, form over function and I am okay with my decisions. It is a showroom after all and our hypothetical lady is a maximalist minimalist at heart. Avert your eyes on this fact I just pointed out and let’s move on!
Not Your Average Sconce – Since there wasn’t going to be any overhead lighting in the space due to the lack of a ceiling which is hopefully not an issue any of you are running into in your home… We got a little creative in the lighting department. A floor and table lamp were probably sufficient enough for the space but to bump up the quirk factor I wanted to “DIY” our own plug-in sconce. Using an iron hook and utility bare bulb pendant, the plan was to wrap the cord somehow (Sara and I were going to figure out this little factor when we got there) to create a sconce.
If any of you are interested in this look here are all of the products:

1. Floor Lamp (no longer available) | 2. Accent Chair (the original one) | 3. Blue Lumbar Pillow | 4. Wallpaper | 5. Paint Color | 6. Blue Curtains | 7. Curtain Rod | 8. Endcap Finials | 9. Stool | 10. Utility Plug-In Pendant | 11. Cast Iron Hook | 12. Bar Tool Set | 13. Bar Tray | 14. Cocktail Shaker | 15. Coup Glass | 16. Smaller Red Toned Rug | 17. Bed | 18. Mattress | 19. Green Pleated Table Lamp | 20. End Table | 21. Large Light Blue Rug | 22. Nightstand with Drawers (the original one) | 23. Curtain Hook | 24. Bench | 25. Circle Pillow | 26. Pom Pom Lumbar | 27. Bed Throw | 28. Sheet Set | 29. Blue Sham | 30. Duvet Cover | 31. Curtain Rod | 32. Endcap Finials | 33. Solid-Brass Double Jack Picture Chain | 34. Pair of Heavy Open Asymetrical S-Hooks – 1 1/2″ | 35. Art-Nouveau Picture Rail Hook | 36. Broken Clouds by Stephanie Goos Johnson | 37. Winter Wren by Olivia Kanaley Inman | 38. Semicolon by Alex Isaacs Designs | 39. The Humble Egg by Monica Loos | 40. Antique Yachts Canvas 1 | 41. In The Branches Print | 42. Remember: Lily of the Valley by Renee Anne | 43. Blue Heron Framed Print | 44. Lake Air Canvas Print | 45. Alpine Lake Framed Canvas | 46. Solid Pine Panel Mould | 47. Fingerjoint Pine Stop | 48. Fingerjoint Pine Baseboard | 49. Solid Pine Lattice
There were a lot of accessories that Sara and myself were going to play with once on-site so instead of letting all those sourcing hours go to waste we figured to round them up for all you Eclectic English Enthusiasts. Enjoy!

1. Farm House by Lindsay Megahed | 2. Ribbed Blanket | 3. Natural Hyacinth Noelle Tote Basket | 4. Organic Percale Pleated Sheet Set | 5. Wheaton Striped Napkins | 6. Bunny Trinket Dish | 7. Palomino Alpaca Throw | 8. Nesting Glass Shadow Boxes – Hexagon (Set of 3) | 9. Tomah by Lorent and Leif | 10. Foundations Bowl | 11. Oversize Wool Throw | 12. Antique Florals | 13. Fiber Dye Napkins | 14. Dara Velvet Lumbar Pillow Cover | 15. Creative Women Handwoven Cotton Napkin
In lieu of the original event plan, Apartment Therapy created these adorable illustrations (see below) and animations of all 20 spaces. You can check out our space here!
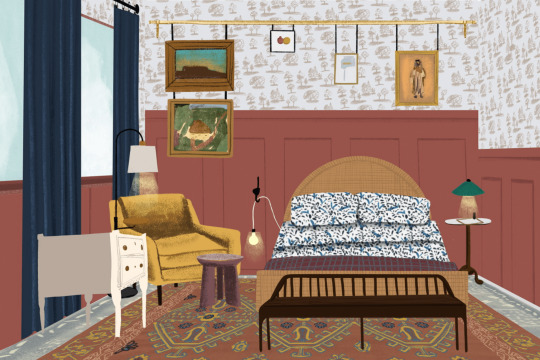
Be sure to peruse all the amazing work by the rest of the designers as well including: Hilton Carter, all-of-our-favorite Orlando Soria, one of the cutest/creative couples Nate Berkus & Jeremiah Brent, one of Caitlin’s Favorites Caitlin Murray plus many many more talented designers.
That’s all she (I) wrote! I hope this brought a bit of sunshine to your Monday morning. And I can promise you that you will one day see a real room reveal again but in the meantime I’ll be practicing my SketchUp skillzzz.
For those of you that are skeptical of the Eclectic English trend, I am curious. Does this design convince you that it is the new cool trend or does it still give you frightening flashbacks?? Let’s talk more about it below!
The post The Design That We’ll Never Get to See in Person – AT’s Small/Cool Event + 5 Renter Hacks for a Small Space appeared first on Emily Henderson.
Agilenano - News from Agilenano from shopsnetwork (4 sites) https://agilenano.com/blogs/news/the-design-that-we-ll-never-get-to-see-in-person-at-s-small-cool-event-5-renter-hacks-for-a-small-space
0 notes
Text
The 14 Freshest Kitchen Cabinet Colors@|what color kitchen cabinets@|https://ift.tt/3BJl9Vq
Selecting the Right Swatch
1/16
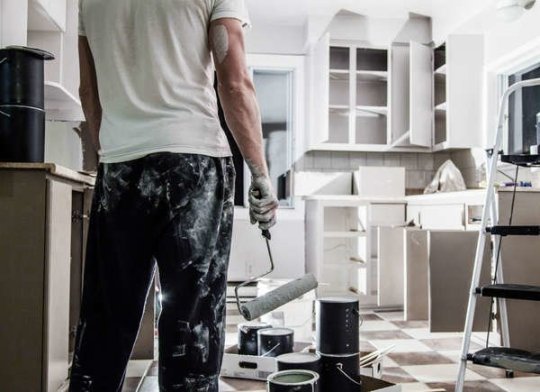
[external_link_head]
While natural wood finishes may be traditional, the popularity of painted kitchen cabinets continues to soar as a great way to spice up a cook space. So whether you’ll be remodeling with a new set of cabinets or considering repainting or re-facing existing ones, color selection is key. To help you pinpoint the perfect hue for your unique kitchen, we’ve identified the 14 kitchen cabinet colors that experts are championing as of-the-moment yet bound to have real staying power. Keep reading to determine the ideal hue for you.
RELATED: 9 Shortcuts to Picking a Paint Color
istockphoto.com
Blueprint (S470-5) from Behr Paint
2/16
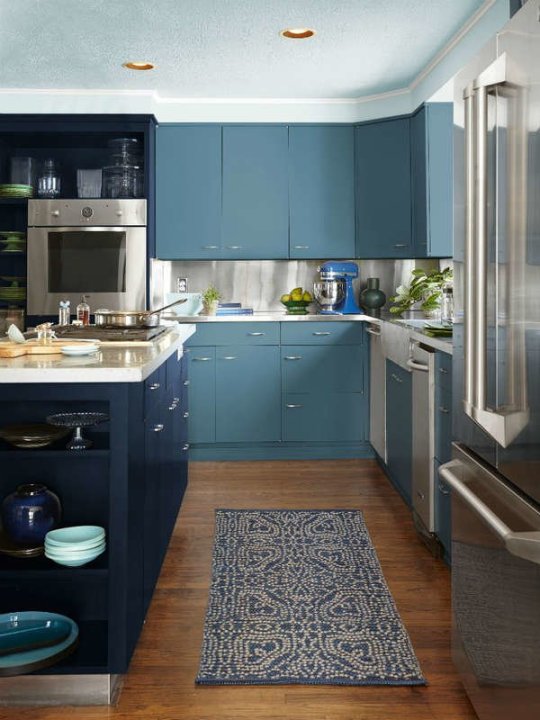
Behr’s Color of the Year for 2019 is a striking yet soothing twist on slate blue that evokes calm in a high-traffic kitchen. Combine Blueprint upper and lower cabinets with a navy island as these homeowners did to achieve a modern, monochromatic look, or pair it with a complementary cool tone like gray, violet, or black for visual variety. Either way, Behr Paint color expert Erika Woelfel forecasts that ”this approachable mid-tone blue is poised to be a classic for years to come.”
behr.com
Refinishing your cabinets?
Get free, no-commitment project estimates from pros near you. +
Ecologica (S380-6) from Behr Paint
3/16
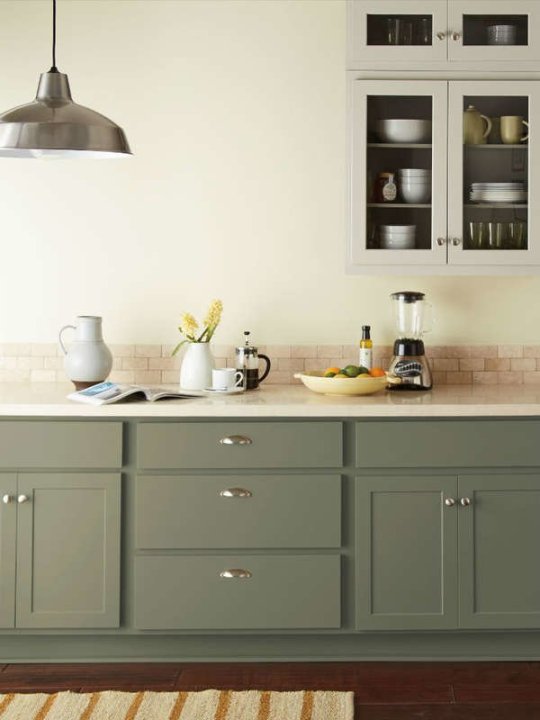
Nature lovers are likely to turn to this subdued green. Earthy yet elegant, Ecologica “provides a welcoming space for entertaining and layers well with other pops of color,” Woelfel says. In this enticing cooking hub, the pale green lower kitchen cabinets with metallic door knobs and drawer pulls bring the outdoors in and lend definition to a muted cream countertop set against a white wall.
RELATED: The New Neutrals: 9 Colors You Can Trust for Today’s Home
behr.com
Pewter Green (SW 6208) from Sherwin-Williams
4/16

Apply this gray-green blend to add a dignified air without detracting from accent lighting and decor. Adorned with miniature gold door knobs, the Pewter Green upper and lower kitchen cabinets here look regal in their own right, while the hint of gray plays up the dark striations in the marble countertops and draws the eye upward to the sleek swing-arm wall sconces.
Emily Henderson for sherwin-williams.com
Garret Gray (SW 6075) from Sherwin-Williams
5/16
[external_link offset=1]
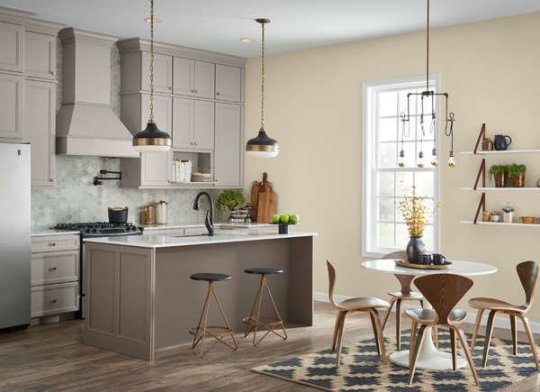
Gray is anything but glum in this galley! Garret Gray, a neutral hue with pink undertones, is classically restrained but not overly somber on upper and lower kitchen cabinets, as well as the island and range hood. He hue also plays up the peach tones in the adjacent wall to achieve a cheery, sun-drenched space for eating and entertaining.
sherwin-williams.com
In the Navy (SW 9178) from Sherwin-Williams
6/16
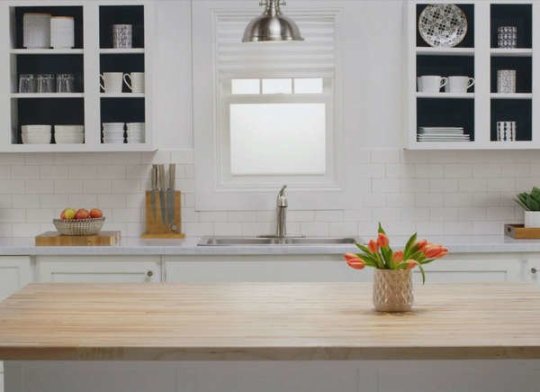
If you’d rather not totally repaint or reface your kitchen cabinets, In the Navy—a cool, dark denim from the brand’s wear-resistant Emerald Urethane Trim Enamel collection—offers maximal impact with minimal paint. The hue makes a splash on the interiors of white or light-colored open shelves, or use it exclusively on island cabinets for a statement-making centerpiece.
RELATED: 10 Tiny Paint Jobs That Make a Big Impact
sherwin-williams.com
Snow White (11-0602 TCX) from Pantone
7/16
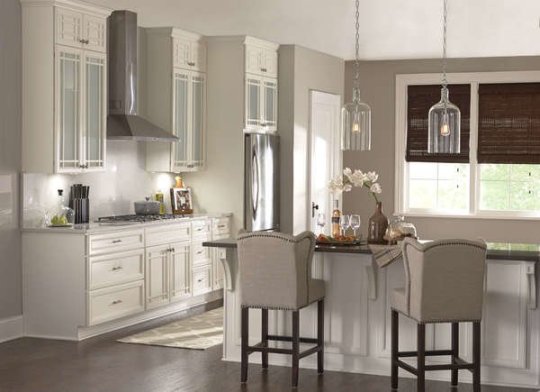
Refacing cabinet doors with white and glass inserts easily brightens a light-starved kitchen—and the starker the white, the brighter the effect. Pure and pleasing Snow White can also be paired with beige bar stool cushions to evoke casual elegance or complement other crisp-white accents for a more polished look. For a new look with little effort look, have your existing kitchen cabinets refaced with new cabinet fronts and drawers in Snow White through a Home Depot Home Services’ Cabinet Makeover.
RELATED: 19 Rooms That Prove Beige Isn’t Boring
homedepot.com
Mood Indigo (19-4025 TCX) and Snow White (11-0602 TCX) from Pantone
8/16
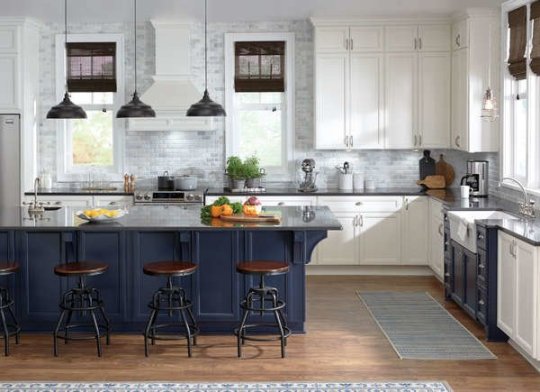
Longing for a seaside view, but the ocean is nowhere in sight? You’ll love the nautical appeal of these bold blue island and sink kitchen cabinets alongside clean and crisp white uppers and lowers, all refaced via a Home Depot Home Services’ Cabinet Makeover. Mood Indigo, with its near-violet depth, lends grandeur, while Snow White lightens the kitchen’s overall atmosphere.
RELATED: 14 White Rooms We Love
homedepot.com
Fountain Frolic (PPG1119-2) from PPG Paints
9/16
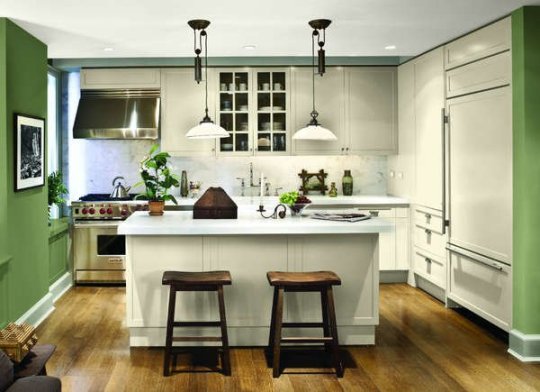
Aptly named Fountain Frolic, this playful, pale chartreuse with electric green undertones quietly energizes the kitchen when paired with deeper greens, charcoal grays, pinks, or whites. The sparing use of the muted color on upper kitchen cabinets adds depth to flat-panel cabinetry and draws the eye to the showpieces behind see-through doors. The complementary olive green wall, potted plants, and wood floors and bar stools contribute to an arboreal atmosphere.
ppgpaints.com
Black Deco from Nuvo Cabinet Paint
10/16
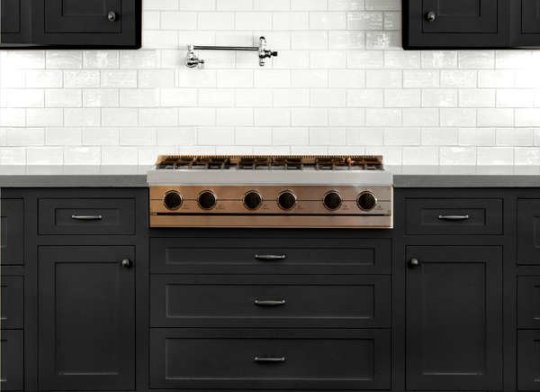
There’s no arguing with the timeless elegance of black, but be choosy about the sheen you choose for kitchen cabinets. Whereas light bounces off of glossy black, drawing attention to divots, cracks, and other imperfections, matte Black Deco masks flaws as it reflects minimal light. The designer behind this kitchen sandwiched milky subway tiles between upper and lower Black Deco cabinets to heighten the drama, highlight the details of the tiles, and hide cabinet defects.
RELATED: 9 Bold Rooms That Will Make You Rethink Black Paint
gianigranite.com
Driftwood from Nuvo Cabinet Paint
11/16
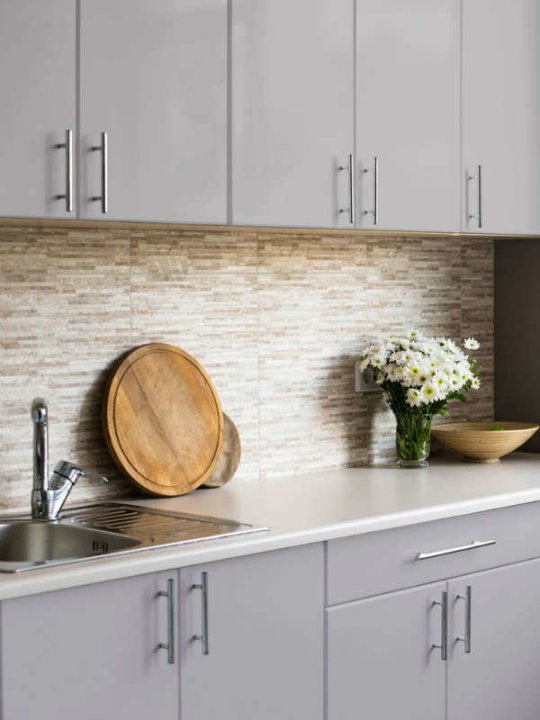
Bring home beachcombing beauty by covering faded or dingy kitchen cabinets with this coastal-inspired neutral gray. While the oversized door and drawer pulls on the Driftwood cabinets add impact, the overall effect is unfussy thanks to a sand-colored mosaic tile backsplash, decorative wooden bowls, and fresh flowers that lend a bohemian sensibility.
RELATED: Editors��� Picks: The 9 Greatest Grays for Your Next Paint Job
gianigranite.com
Tidal Haze from Nuvo Cabinet Paint
12/16
[external_link offset=2]
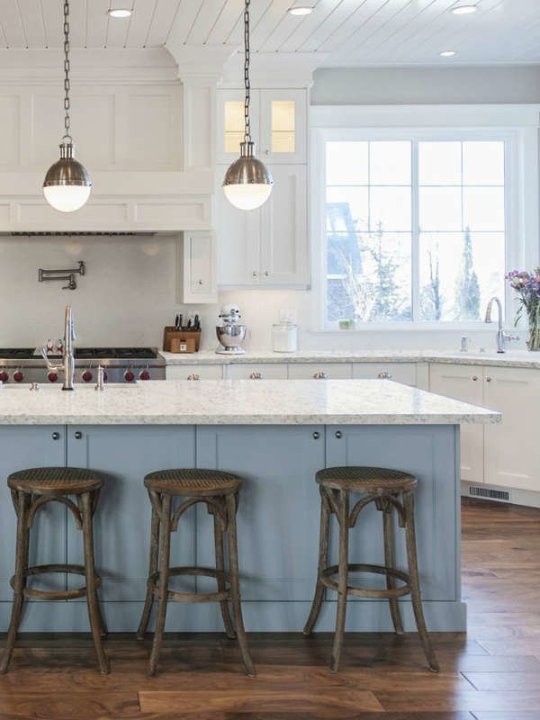
This dusty, pale blue is right at home in kitchens with vintage fixtures and furniture. Here, the charming Tidal Haze island cabinets, distressed bar stools, and twin metallic pendant lights hearken back to the cozy cottage-style kitchens of another era.
gianigranite.com
Sky Space (5001-6B) from Valspar
13/16
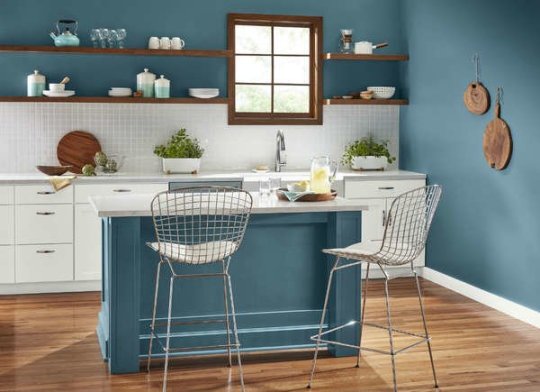
This “nostalgic, versatile blue-green helps a traditional kitchen evolve into a contemporary space,” says Sue Kim, Valspar’s Color Marketing Manager. The teal-inspired tone of Sky Space on both the island cabinet and walls suits this kitchen’s modern farmhouse vibe. The floating wooden shelves and white countertop, tile backsplash, and lower kitchen cabinet contrast nicely with the more subdued surrounding fixtures.
valsparpaint.com
Winchester Green (RG230-02) from KILZ
14/16
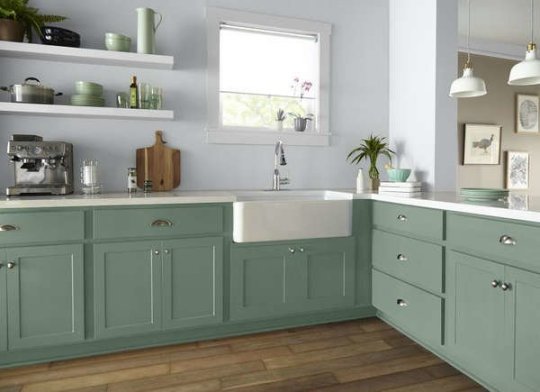
To transform the kitchen into a Zen zone, go for this soft sage green with gray undertones. Bathed in Winchester Green, the lower kitchen cabinets make for a botanical escape. Color-coordinated pitchers, bowls, and plates, sparse living greens, and a window overlooking a real flower garden further immerse you in a plant-inspired paradise.
RELATED: 9 Calming Colors for a Serene Home
kilz.com
Old Lamppost (TB-37) and Contemporary White (TB-02) from KILZ TRIBUTE®
15/16
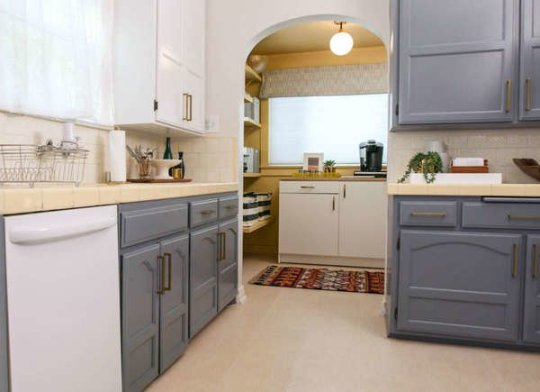
Old Lamppost amps up the intensity with a blue-tinged deep gray that mimics the mystery and magic of a stormy sky. To ensure that the heady hue won’t overly darken the space, complement with clean and fresh Contemporary White kitchen cabinets and light wooden countertops, as in this daring yet still homey culinary corner.
RELATED: If This, Then That: Your Guide to Pairing Paint Colors
kilz.com
Color the Cabinets
16/16
A fresh coat of paint on the cabinets can make your kitchen feel brand new.
bobvila.com
Refinishing your cabinets?
Get free, no-commitment project estimates from pros near you. +
Don’t Miss!
You work hard for your money, so keep more of it in your pocket! Sign up for the Two Cents newsletter to receive money-saving advice delivered right to your inbox.
[external_footer]
source https://livingcorner.com.au/the-14-freshest-kitchen-cabinet-colorswhat-color-kitchen-cabinetshttps-empire-s3-production-bobvila-com-slides-32315-original-the_14_freshest_kitchen_cabinet_colors-jpg155959512725/
0 notes
Photo
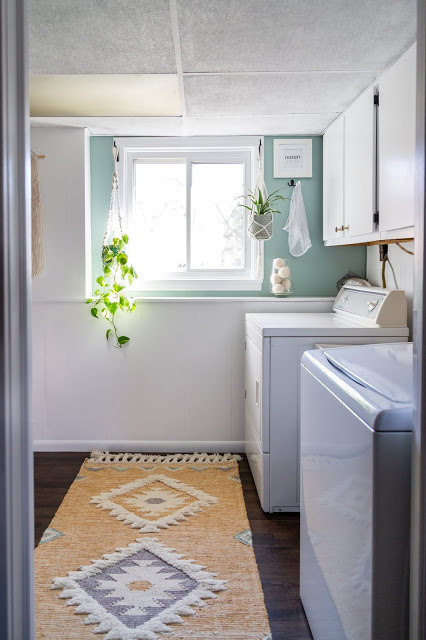
Our ugly laundry room https://ift.tt/3cE2xtp Sara @ Russet Street Reno When we moved in here in 2015, there was one room that didn't get touched at all. No paint, maybe even no cleaning beforehand. It was ugly as hell, and we moved all our junk in and never looked at most of it again. The floor was dated linoleum with bumps and missing pieces, the walls were typical 70s paneling, and the visible drywall was stained and full of drywall nailheads sticking out. Also, the ceiling tiles were browning, uneven, and the track for them was BLACK. Whyyyy? I made it my goal to fix up this room during our stay at home order. Here it is now!
But just to give you a visual, here is what it was looking like on a daily basis. It was bad, real bad. I hated doing laundry in here, and that is mostly because there was just no room. We had that massive steel shelving unit that was mostly loaded up with junk, so we went through it all and threw a ton of stuff away. Mostly old paperwork. Guys, I had pay stubs saved all the way back to the year 2000! I took this photo after I'd already removed a lot from that shelving unit.
I would constantly be tripping over clothes while trying to wash and dry loads, because I didn't have any room in there to store full baskets. It was so embarrassing!
And to get to the furnace was a shimmy situation, so many things needed to go.
My goal for this room was to update it without buying any paint. I thought a fun idea would be to use up some random sample cans of paint to kill two birds with one stone. I knew I didn't have enough to do the whole room with one, so I looked online for a rug that might tie some colors together. I stumbled on this one at Wayfair, and was sold when I saw how my available colors would work with it! I decided to use Wythe blue on one wall, Palladian blue on the other, and some leftover Anew Gray (the color in the boys' rooms) on the biggest wall. The Fusion Mineral paint 'mustard' color looks nice against the rug, but it just looked like baby poo on the wall. I will not buy paint sight unseen online again!
The only bummer is that the sample jars were satin, and I typically hate satin paint on walls. Since it was 'just a laundry room' (that was my mantra throughout this project haha) I am ok with shiny walls. I started by priming all of the paneling, trim, and cabinet boxes/doors with BIN.
** Note the whole two rolls of TP and two rolls of paper towel we had in the house when I was doing this project. Luckily, we hit the jackpot with a whole 12 pack of TP since this photo! **
I rolled the primer on the paneling and it sanded up so nicely. I even rolled BIN onto the black track of the ceiling, since I intended to paint the ceiling tiles and track later.
Next up was the trim paint used throughout our house, Behr Satin Ultra Pure White.
I noticed something after I painted the trim, our vinyl window looked very yellow and ugly next to the fresh white. The people we bought this house from put the most basic builder windows possible throughout this house, and they are all yellow and gross. I decided to try a magic eraser, and it worked surprisingly well!
I am not sure these windows were ever cleaned.
I also used the magic eraser on the laundry tub, which was brand new and sparkling white when we had it put in a year ago. Not bad!
Painting the ceiling was the first time I had an 'oh crap' moment. Obviously, you normally want to remove ceiling tiles before painting them because they aren't attached and just push up when you apply pressure, but I couldn't since they were very brittle and I would 100% break them all trying to remove them.
Rolling worked ok for the first light coat, then I went in with a brush to really get into the crevices. The bonus is that the paint acted as a glue to hold the tiles down and make it easier to paint without it pushing up each time. Dang, those tiles were gross.
After the ceiling was painted, I turned my attention to the floor. I had a few beers last month and decided to order flooring for delivery from Lowes for this room. It is 4x36" long peel and stick tiles that I used in a closet in our downstairs bedroom, and I found it pretty easy to work with.
However, this room had missing tiles, large humps in the flooring, and lots of stuff to cut around. I improvised for missing tiles by spreading some tile mastic in the space and it worked pretty well.
I started initially at the far wall, then realized how dumb that was and started at the doorway instead. Luckily, I was able to pull up the few I'd already done and reuse them under the washer and dryer. It was so annoying to cut around the pipes and water heater, but I did a pretty good job with only a few wasted tiles.
When I got the first large section done, it was very cool to see the change.
The laundry tub isn't screwed down, so I was able to slide the tiles right under the legs. I did have a hard time with getting flooring under the dryer, since we didn't want to disconnect anything. With Shaun's help, I was able to slide it forward and back until all the pieces were in. I was also able to pull up and reposition anything that didn't lay correctly the first time. But by far the hardest part, was the last row. Of course each piece had to be cut lengthwise, which is very difficult. I ended up making a template with pieces of the backing paper and it worked pretty well.
I just had to remember that I wanted the straight edge to be on the bottom, cut edge to the wall, so I had to reverse the template when I put it on the back to mark and cut.
As you can see here, I didn't remove any of the trim because I wasn't sure if it would ruin the paneling. I wanted to preserve as much as possible without making a big disaster out of this room. The last row isn't perfect, but it's actually pretty good. I can always add a small piece of quarter round or caulk to finish it, but *spoiler* I'm definitely not going to.
Notice all the shavings from trimming each board painstakingly to make them fit.
When the floor was all the way in, I turned my attention to the paint for the walls. I did that part last because I still wasn't sure what colors would go where, and the floor is very easy to cover with plastic.
I had JUST enough paint to do the far wall with BM Wythe Blue, the wall with the door BM Palladian Blue, and then I used leftover SW Anew Gray on the wall with the shelving unit. I also had the unpleasant task of trying to fix this mess around our outlets and light switch:
I used a patch kit from Home Depot, and it was super hard to get the results even. With an extra big switch plate cover, it's fine now. After the paint was up, it was time to work on the details for the cabinet doors and get them rehung. I spray painted the brass hinges and screws, as well as an existing hook rack, with Rustoleum Satin black. Side note: do you all have 15 random cans of spray paint in your garage or basement too??
This rack used to be an oil rubbed bronze and I preferred all black. It is the perfect size for this spot, so I got to hang it right back up in it's existing holes.
It was so fun to watch the transformation take place! I wanted to spend as little as possible, but I did want to add a few details to really make it pretty in here. One of those details was these amazing knobs for the cabinet doors. They are only $20 for 4 on Amazon! I was scoping out something similar on CB2 for $13 each, so this was an absolute steal! They are heavy and seem like real stone.
I love the brushed brass base and marbled black top. So chic!
I also found the perfect hooks for some hanging planter holders I already had. I found these hooks on Amazon, and they are just what I needed.
The plant hangers are no longer available from Target, I've had them sitting around for a year or two and finally had the perfect spot for them! I did need a pot for the other one, so I snagged this one on Amazon and it's the exact color I wanted!
I also bought a couple simple robe hooks for hanging stuff to dry from Home Depot. Yeah, it's a little crooked, but so is everything in here.
I wanted to add a little personality, so I reused an old frame and made a little sign in Photoshop. I smile whenever I see it and didn't have to buy anything. It's just a framed piece of paper.
I used an old vase I've had since the Russet street house to hold my dryer balls. Also, dryer balls are pretty useless in my opinion. Oh well, they look cute. I also got a super cute macrame wall hanging to cover the ugly access door to the electrical panel. I'll give you a guess where I got it. Yes, Amazon. I love it!
And here are some full room shots.
The floor and rug were worth the splurge! This flooring is actually very cheap, $1 per piece/sq ft. I bought 85 pieces and I didn't end up needing that much.
So happy with the cuts around the water heater!
The 3x5 rug was $109 on Wayfair and I love it! It's flatwoven, so I plan to put a pad underneath. It does shed a lot, but it's worth it for a wool rug. In this picture below, you can see the hump in our floor where the edge is slightly raised. I'm ok with the way it looks, but hopeful that it won't crack. If it does, I have a lot of extra pieces!
The ceiling turned out pretty good, now I need to replace the yellow light cover.
My favorite spot is the window.
And my favorite part, the before and after photos!
This collage really cracks me up, because it shows what really had to happen to make this room the way it is...lots of decluttering!
I would love to make a DIY laundry basket dresser like this one by Ana White, but it will have to wait until things are more normal and I feel comfortable going out to buy the materials. Here is the cost breakdown for this project including tax: Flooring $88 Rug $116 Wall hooks $2 Planter hooks $15 Cabinet knobs $21 Blue pot $23 New plant $5 Macrame wall hanging $21
Total: $291
Having a pretty laundry room: Priceless!
0 notes
Text
You Can See, Taste, and Even Hear Pantone’s 2020 Color of the Year
Behr
The coming year’s hottest shade isn’t actually hot at all. Nope, it’s the calm, cool Classic Blue—Pantone’s much anticipated 2020 Color of the Year.
Leatrice Eisman, executive director of the Pantone Color Institute, says this solid, still waters-run-deep hue was selected because of—wait for it—the global need for stability.
“We’re living in a time that requires trust and faith, and it’s this kind of constancy and confidence that is expressed by Pantone’s 19-4052 Classic Blue, a solid and dependable blue we can rely on,” she explains. So maybe chalk up all the White House drama and climate change woes for our need to embrace this honest, relatable tone.
And for the first time this year, Pantone’s Color of the Year isn’t just one that can be seen, but heard, felt, and tasted, too: To coincide with this major color announcement, Pantone is releasing a free track inspired by Classic Blue called “Vivid Nostalgia” (developed by audio branding agency Audio UX), as well as for-purchase, color-coordinated berry tea and fabric.
Although Pantone’s Color of the Year is always met with fanfare, this year’s hue seems to be surrounded by a lot more hubbub than usual. And other color experts agree that blue is having a moment.
“Blue is not only trending, but it’ll stand the test of time—and now that many people are looking to nature for inspiration, we’re seeing a full range of blues bubble up,” notes Erika Woelfel, vice president of color and creative services at Behr Paint, whose hue Optimum Blue M540-7 is deemed the closest color match for all of your 2020 home projects.
Want to work this color into your home decor? Check out these gorgeous ways to embrace 2020’s cool blue hue.
Front door
If you’re into feng shui, blue is said to channel peace and a sense of calm. Blue also represents water in feng shui, and it’s an ideal shade if you’re a coastal homeowner, so try a coat on your front door.
Homeowners with blue doors are said to be more trustworthy (who knew?).
Behr
Kitchen island
A fresh coat of blue on your kitchen island is a cheery addition to a more typical beige palette. And this blue can help hide scuff marks when your kids kick the island from their perches.
A blue kitchen island and stove hood mean serene dinners every night.
Behr
Bedroom
For a good night’s sleep, think blue (there’s a reason more bedrooms aren’t painted orange or red). Blue is restful, and the shade has even been shown to slow heart rate and respiration. Sweet dreams!
Tuck in between the sheets in a moody blue boudoir, and dreamland is minutes away.
Behr
Accent wall
Create a fun contrast with an accent wall or half-wall. By painting this way, you’re adding visual interest to your room and mimicking a chair rail or wainscoting with just a little bit of paint.
Highlight your walls with a splash of blue on the lower level.
Behr
Bathroom vanity
Refresh your loo with some cool blue on your bathroom vanity. This blue pops beautifully against walls in a shade of clay and a graphic black and white rug.
Rehab an old vanity with a coat of Classic Blue.
Behr
The post You Can See, Taste, and Even Hear Pantone’s 2020 Color of the Year appeared first on Real Estate News & Insights | realtor.com®.
from https://www.realtor.com/news/trends/pantones-color-of-the-year-for-2020-classic-blue/
0 notes
Text
Arplis - News: Working on the garage mudroom makeover with Clayton Homes was such a huge inspiring moment for me
I wanted to chat with you about some behind the scenes on this project and also share the sources and give you some perspective on what it took to make this special project happen. First – I thought it would be fun to answer some questions that my friends and family had for me…..natural questions that I think show how this job works. Why was this project so inspiring for you Katie? I don’t really know if I can identify WHY…..except for maybe because it was a whirlwind timeline that I can’t expect to repeat anytime soon…so it felt very special. The fact that we drove to Tennessee with a trailer full of paint brushes, pillows and tools, slept in a hotel for three hours, showed up for the makeover at 7am and worked till 6pm (barely taking a break to shove a hoagie in our mouth)….and completed a big makeover…..well it just felt so hurried that I barely got to analyze whether or not I was screwing up. The fact is – I think about that a lot. I think about that with my own home….knowing that repainting a room isn’t impossible…but for whatever reason…it has become a huge source of anxiety and hesitation for me. I will be paralyzed because of fear. Fear of screwing up. Fear of wasting time, money and effort. Fear of sharing failures with the world. I’ve been doing this job for a long time and it never gets easier to hear the critics….especially when I feel like I accidentally fell into this work. I’m so honored to do it. Every.Single.Time. But imposter syndrome is real and I know that there are a million people can do this job better. The joy I get out of it though is so exciting and sometimes balancing the joy and fear is really hard. I know that fear is a major source of delay in my own house and since this project didn’t allow for hesitation, it forced me to trust my gut, move forward and not look back (or sideways or up or down or any other direction). There were no options and when that happens….well…it frees you. At least it did for me. Okay. I know I got a little deep there. Excuse me while I come back to the shallow end. More questions – Why did you choose a garage? Isn’t that meant for tools and yard stuff? Sure! It can be. I view a garage as an undedicated zone. Ever since we turned our 3 car garage into a work out area, a workshop and a sliver of space to park my jeep, I guess I don’t view it the same. I’ve seen so many great designers and home owners turn their garage into everything from man-dens to spin studios to craft rooms to the ultimate party spot….I guess I was inspired by the inside of the Clayton home to make the garage just as beautiful. Also – as I shared before – this is an entirely new class of home – it’s built off site. And I can imagine a lot of people would purchase this as their primary residence but then there is also another group of people that would buy this as a vacation home, a second lake house or a move-in-ready home once they become empty nesters. With the minimalist movement, the housing industry is seeing more and more people organizing and keeping less stuff. That movement will inevitably affect the garage (aka – the place where we keep all the old stuff). I wanted to take that area and make it into something beautiful that felt like the inside was pulled out – but also shared another idea of using this space. What were the parameters of this project? Well, the parameters of this project were a little different than if you were doing this in your own home. This particular home is going to be on the market so we had to work around some specific requests. Since this was a ‘inspirational’ tutorial (meaning the whole point was to inspire you to make a space more beautiful and share practical, easy and affordable ways to improve your own home) some of the things I had to consider were – anything I add to the wall had to be finished (I couldn’t NOT caulk it and make it 100% complete) and also some things had to be removable or easily changed. The wallpaper had to be removable, we weren’t supposed to change the floor, no electrical items were allowed to be added or changed, the pieces couldn’t be ‘built in’. And it also had to leave enough room at the end and the sides for parking cars. What was the end goal? Once I learned of the parameters, I pitched the idea of making the garage more beautiful – and also brainstormed ways to make it be functional. I imagined my in-laws in this house. I saw them standing outside the garage door greeting my kiddos into this home. I visualized the kids needing a spot to drop their shoes and a place where Gramps & Grammy would need a basket for sunscreen and a dog leash. I wanted to add extra storage bins below the bench so that it would still allow for organization. I wanted hooks on the wall because I knew that it would provide a perfect spot for coats, grocery bags and library totes. Combining the practical, the beautiful and the parameters lead us to a place where we decided paint was our best friend and we could add lots of ‘furnishings’ that could easily be moved. Also – everything had to be able to be done in one day! I think it honestly turned out great and I am so proud to put my name on it! Sources? So excited to share these sources with you! Click on any of the photos below to go directly to the item! Turn on your JavaScript to view content You may notice that some items are sold out or out of stock. Sorry about the delay on posting these items but I had to wait. Also the prints above the hook wall….those were painted by me with a bit of black paint on white paper. I loved how they turned out! Paint Color? We primed everything with Kilz Primer. The dark green wall color is Dark Forest Pine by Glidden and we used Behr Marquee paint for the walls. The wallpaper was intended to look like shiplap (great alternative for the look with zero power tools required!) and it is completely removable. Biggest hurdle of this project? Time. We simply ran out of time. We didn’t know that the ceiling would be unprimed when we arrived. None of us thought to even talk about it! I appreciate that the Clayton team asked us so many questions and let us decide so much of the project – they really entrusted us to deliver! Since they were allowing us to take the reigns, we just didn’t even think to ask if the ceiling was finished and that little detail cost us some time in the end. We had to paint it with two coats of primer to get it done and that was about 1 hour of delay. Most nerve-wreaking moment? Well it was probably just in our heads but here we go. We had brought a truck and set up our miter saw on the tailgate. Across the street was an entire crew of builders putting up an entire new house. During their lunch break, Jeremy and I had to cut several pieces of wood…. and we joked that we had a pro audience watching. Neither one of us have triple checked our measurements as many times as that day because we didn’t want to do the walk of shame if the cut wasn’t right! The pressure was ON. Favorite part of the makeover? It has to be that green paint with the wallpaper. That combo looked so so nice together. It was dark enough to hide dirt and scuff marks and still looked so fresh. I think too taking the paint from the floor all the way through the door and the recessed area around the door – it made a huge impact. It looked so good and made a huge difference. I also think that the wallpaper added so much interest in an otherwise ‘dead’ area. It was so flat and texture-less with the white above the green paint and then once we added the wallpaper – it all came alive! In the end – I’ve said it before and I’ll say it again – it was just a thrill to tackle this in someone elses home – and I LOVED getting to do some styling that really was a good representation of my own personal style. That was so refreshing! I hope that you guys all got something out of this garage makeover and I hope that you also feel inspired (despite any fear!) to get out into your house and make it beautiful! The post Garage Mudroom – Behind the Scenes & Sources appeared first on Bower Power. #DIY #HOMEDECOR
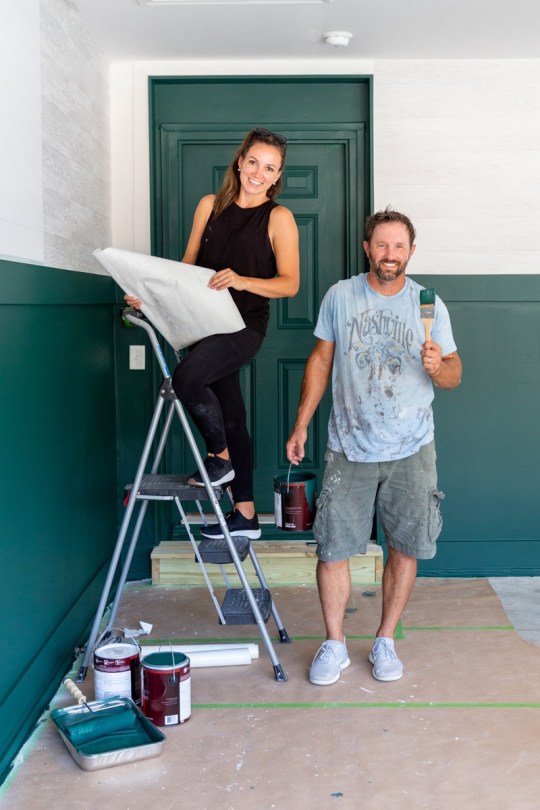
Arplis - News source https://arplis.com/blogs/news/working-on-the-garage-mudroom-makeover-with-clayton-homes-was-such-a-huge-inspiring-moment-for-me
0 notes
Text
Kitchen Cabinets: How to Paint for an Amazing New Look
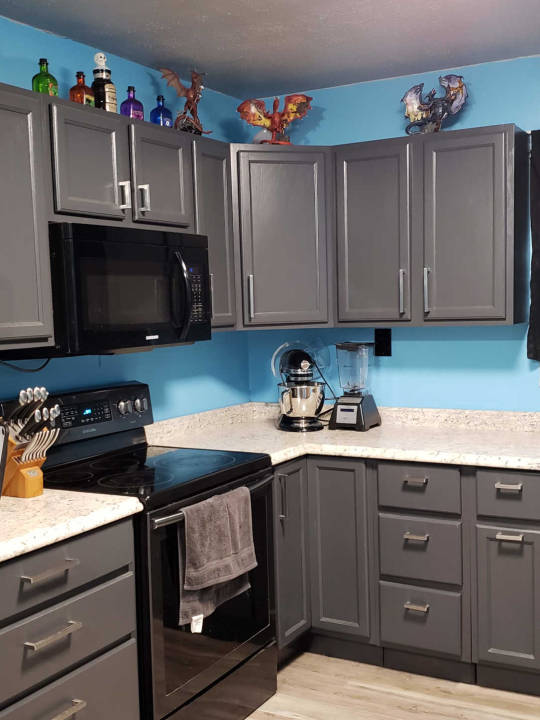
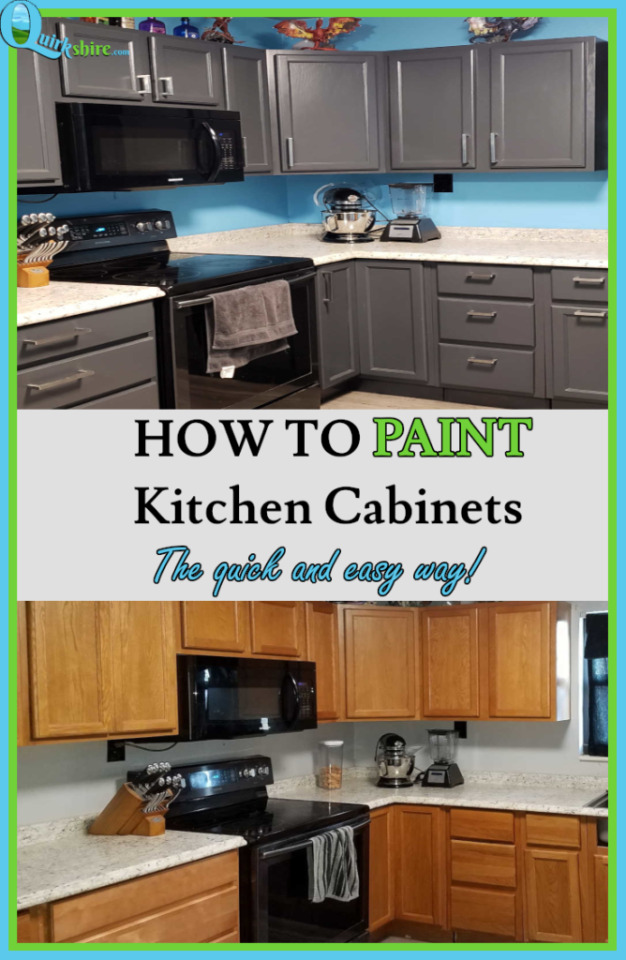
Cheap and Easy Kitchen Update: Paint your Cabinets!
Guys, my kitchen is super ugly, mostly thanks to the outdated cabinets. When we first moved in, we had ugly 1950's white laminate cabinets. We opted to rip those out and put in cheap wood cabinets in "honey oak" shade about 2 years after we moved in. It was better than the super ugly laminate cabinets, but still didn't really make us love our kitchen. After about 10 years of looking at the honey oak cabinets, I had enough and wanted to replace them.
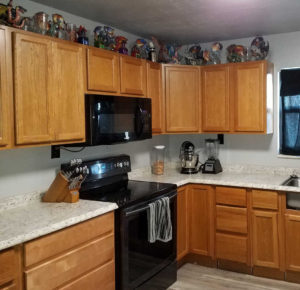
Before: ugly oak cabinets Unfortunately, kitchen cabinets are stupidly expensive and replacement just wasn't an option. This is when I came up with the bright idea to paint them! I was worried about the paint chipping off from wear and tear, so I went on a quest to find the best technique and paint to use. After doing quite a bitch of research, I came up with the easiest, laziest way to paint my kitchen cabinets that would still give results that would last for years.
Choosing the right tools for the job:
The most important part of this project is to choose the right tools before you get started. You'll need some basic things for this project - here's a list: dish soap, water, and a rag or sponge a screwdriver to take the doors off of the cabinets some painter's tape for storing the screws 1 or 2 good quality paintbrushes 1 mini foam roller a 220 grit sanding block (optional for protective coat step) alkyd semi-gloss enamel paint in your color choice (I used Graphic Charcoal by Behr) polycrilic protective finish in your sheen finish of choice (I used Matte)
Clean your cabinets:
I know, it's boring and you're excited to start painting. Unfortunately, this step is very important and shouldn't be skipped. Your cabinets need to be clean so that the paint will stick properly to provide a lasting result. I thought I had a pretty clean kitchen because I wipe my cabinets down somewhat regularly...boy was I wrong! There was a lot of dirt and grease that came off - especially on the cabinets above the stove!
Remove the doors and drawers:
Use your handy-dandy screwdriver to unscrew the hinges from the cabinets. I was lazy and left the hinge on the cabinet door and just painted around the hinge. If you prefer, you could remove the hinges completely to make painting the hinge area easier. Whichever method you choose, make sure that you keep the screws and hinges for each door with that specific door. If you have handles on your doors and drawers, you will need to remove them or carefully tape them so that you can paint around them. If you choose to remove them, make sure that you keep the handle and screws together and label them to make reassembly easier. Be sure to label your cabinets and doors so that you know where the door goes when it's time to put them all back. Trust me on this - the door needs to go back to its original home to avoid problems with hinges and screw holes not lining up. The easy way to do this is use painter's tape to label the cabinet and the door. Wrap the screws for that hinge in tape and tape it to the door hinge or put it inside the cabinet. The blue tape that you see on the hinges is holding the screws for that specific hinge. As you remove the doors, be sure to remove the little pads on the inside of the door. It's really tough to paint around them and totally not worth the effort since you can pick up a big pack of them for a few bucks at the hardware store and just replace them. Don't forget to remove the little pads from the drawers too, if you intend to paint that side of them.
Set up your painting stations:
You'll need space to lay your doors while you paint them and wait for them to dry. I used any flat space I could find - my dining table, washer, a 5 gallon bucket, etc. It works well to use a can or bucket to raise the door above the table that you sit it on, as shown in the picture below. It takes quite a bit of time for the alkyd paint to dry, so be sure that you put the doors in a place that's not going to be in the way. If you're a messy painter like me, it's a really good idea to use a drop cloth or towel to protect whatever you're sitting the doors on. For the drawers, I found it easiest pull them out of the cabinet and empty them. Then, stand them upright so that the drawer front is pointing towards the ceiling. I was able to paint all of them easily like this. It also added the bonus of making the cabinet box easier to paint since I didn't have to worry about the drawer being in the way. Once your doors are all laid out, it's time for the fun part - painting!
Paint your little heart out:
It's finally time to paint! The best way to paint the cabinets is to start with the brush to follow along the edges of indentations or crevices on the doors. Then, take the foam roller and roll the rest of the door. This hides brush strokes best. There's a good chance that after the first coat, you will still see the original color of your cabinets peeking through the paint. That's OK, once the paint is completely dry, just apply a second coat. Something to note about this alkyd paint - it takes forever to dry! Even though the can says it takes a few hours, I waited days between coats because the paint felt tacky. Resist the urge to paint over the tacky coat because it will take even longer to dry if you add a second coat, which will create a big problem in the next step when you use the polycrilic. Paint your drawers the same way - use the brush along the edges and the roller on the rest. The most time-efficient way to paint is to apply the first coat to all doors and drawers, then paint the cabinet boxes. Once the first coat is dry on everything, apply the second coat just like you applied the first coat.
Seal and protect your beautiful cabinets:
Once the paint is completely dry, it's time to apply the polycrilic. This will seal the paint and provide a protective layer to prevent chipping with everyday use. This step is boring and doesn't feel rewarding because the polycrilic is clear and doesn't really add anything visually (especially if you use matte finish like I did). It's very important that you be sure not to miss any spots when applying the coating. It's also a good idea to apply 2-3 coats for extra protection. The directions recommend lightly sanding in between coats. I bought a 220 grit sanding block for this, but didn't use it because I thought it would be tough to sand some areas of the doors and I got lazy by this point. The polycrilic should be applied to everything - doors, drawers, and cabinet boxes. This stuff is very runny, so be careful about drips and wipe them away quickly to get the best finish. If you miss a spot with the polycrilic, it leaves the paint vulnerable to chipping. Also, it's very important that the paint be completely dry before applying the polycrilic. If the paint is tacky and you apply the polycrilic over it, you will get a strange alligator looking texture. You can see these problems from my boo-boos in the picture below.
Put it all back together:
Once the top coat is dry, it's time to put everything back together! Here's the part where the extra effort of labeling your cabinets and doors, and keeping the hardware with the right door really pays off. Use the hinges and screws that belong to each door and put the doors back on. Put your drawers back in and put the stuff back in the drawers. If you're using the same hardware, go ahead and put it back on.
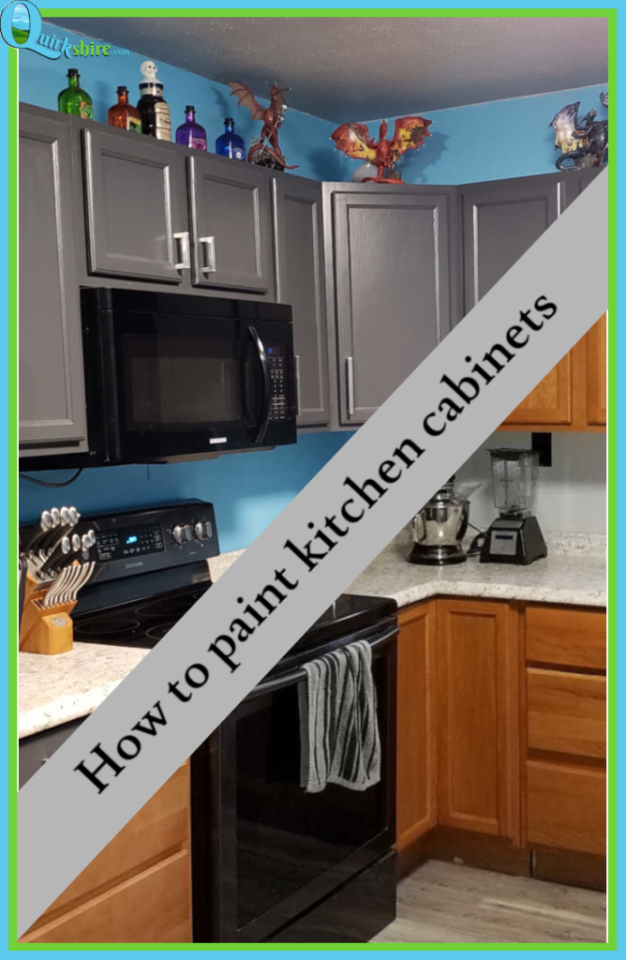
Apply new door and drawer handles:
This is the perfect time to change to a new handle (or add them if you never had them, like me!). We did a lot of searching before we settled on the handles. They were crazy expensive at the hardware store for the style that we wanted, so I ended up searching online. Amazon pulled through again, and I found many big packs of handles for a much cheaper price. I picked up two 25 packs of handles in two different sizes for a fraction of what I would have spent at the hardware store for a similar handle! The hubby used a cabinet handle template to drill the holes in the doors and drawers. Then he screwed the handles on using the screws that were provided in the pack that we bought. Now, stand back and admire your hard work.
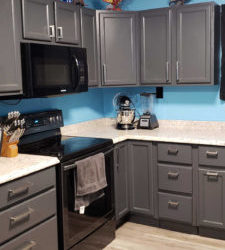
This project wasn't hard, but it definitely turned out to be more time consuming than I expected. What about you? Do you have a cabinet painting adventure to share with us? Did this inspire you to take the plunge and paint your cabinets? I'd love to hear from you! Be sure to check out the rest of our kitchen makeover. We closed off part of the entryway from the living room to the kitchen by building a half wall. Then we added a custom breakfast bar. The result is a beautiful kitchen that we love! Read the full article
0 notes
Text
Making A Light & Airy Living Room (That’s Still Livable!)
Just when you thought the duplex was getting all the action, we snuck in some beach house updates. The backyard is slowly starting to come together (shed! patio! fence! I CAN’T WAIT to show it to you once it gets a little further along!!) but today we’re diving into our lightener & brighter (and much beachier) living room.
Now this place actually looks like it’s a few blocks from the beach! And the bonus is that everything is sand and popsicle friendly – which is a must for us (we pack this place with family and friends and all the kids). So our goal was never to make it too precious. In other words, we were going for a light and airy look… but it had to be durable, wipeable, and as close to worry-free as we could get it!
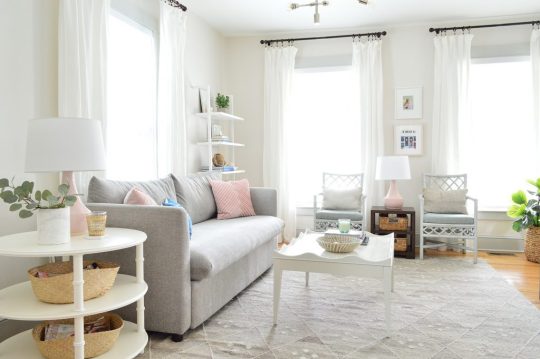
sofa | side table | coffee table | rug | bookcase | lamps | wall: SW White Heron | trim: SW Stone Isle
We wanted to use some of the furniture we designed, including one of our new sofas (performance fabric = all the yesses). So we started with our Mellow sofa. It’s sold out right now, but our other two sofas – the Pivot and the Spiffy – are discounted just for the next few days thanks to a Joss & Main’s flash sale (they’ve got different names on J&M for some reason). A lot of things are at the lowest prices they’ve ever been ($699 for the sofas!) so if you’ve had your eye on one of our designs, it’s a pretty great time to check it out.
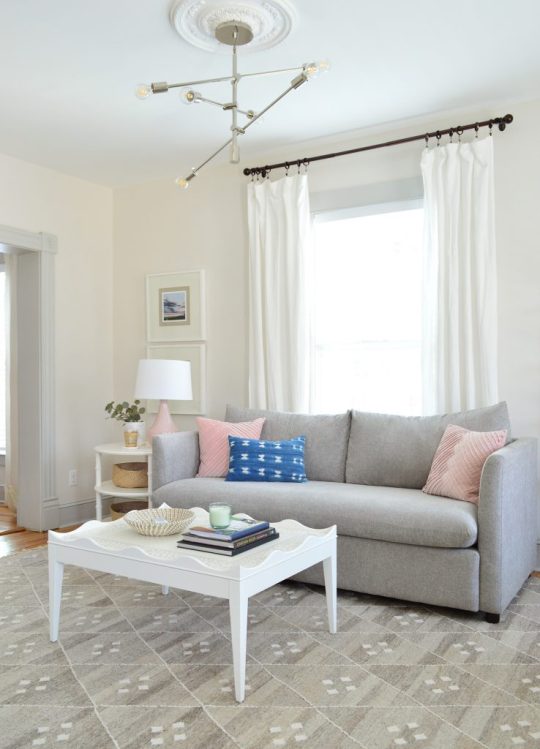
sofa | side table | coffee table | rug | lamp | chandelier| wall: SW White Heron | trim: SW Stone Isle
Sadly, our trusty old Ikea sectional (Karl the Karlstad, remember?) was ready for retirement (aka: donation). The problem with moving a sectional from house to house to house (we moved it from our second house, to our current house, and then to the beach house over the last eight years) is that sometimes the space would be better suited for a sofa… but you have a sectional… so you just sort of keep moving it around and trying to make the best of it.
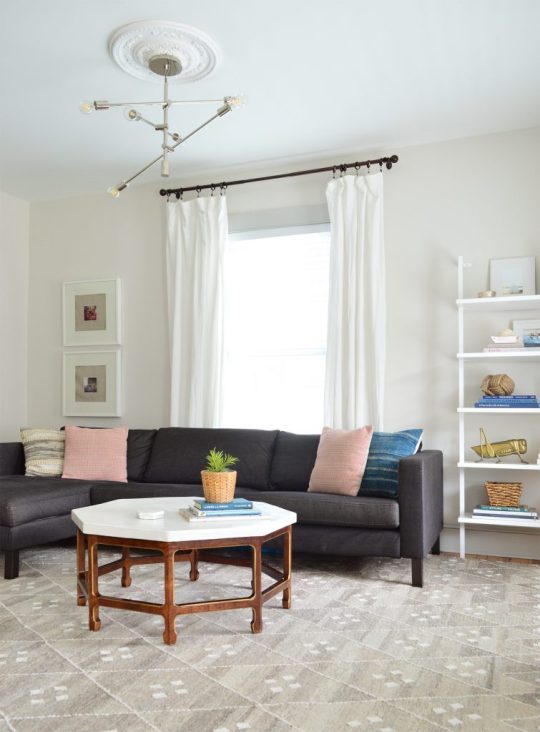
We could kind of make sense of it it photos, but in real life there were awkward things like the chaise cutting into the doorway. We tried putting the chaise on the other end of the living room (it’s reversible), but it wasn’t any better because it meant we couldn’t have the extra seating over there, which really comes in handy and gets used a lot.
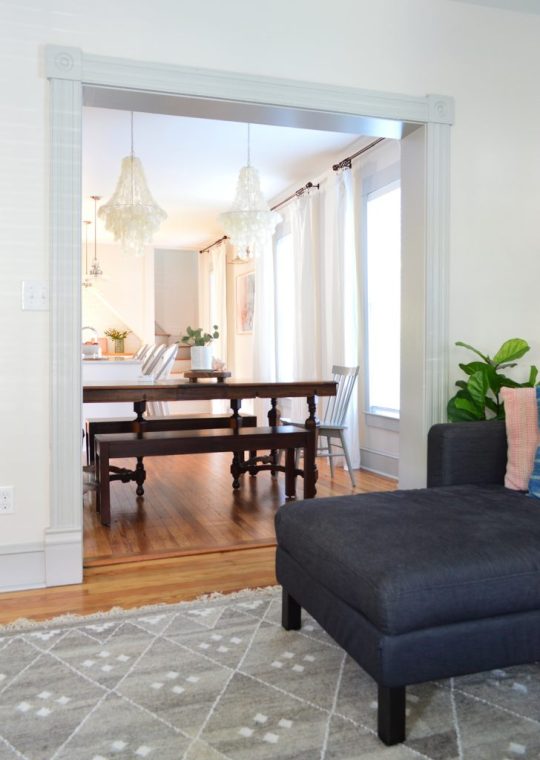
So as we mentioned a few weeks ago on the podcast, after eight awesome years with Karl, we donated him to a local charity that we love, and he’s living it up with a sweet new family. His legacy lives on. (*cue that Celine Dion song from Titanic*).
Another way that we tried to make this room feel lighter and airier was the patterned gray rug that we bought to replace the vintage one below (which happily lives in a bedroom at the duplex now). OMG that was meant to be in there, guys.
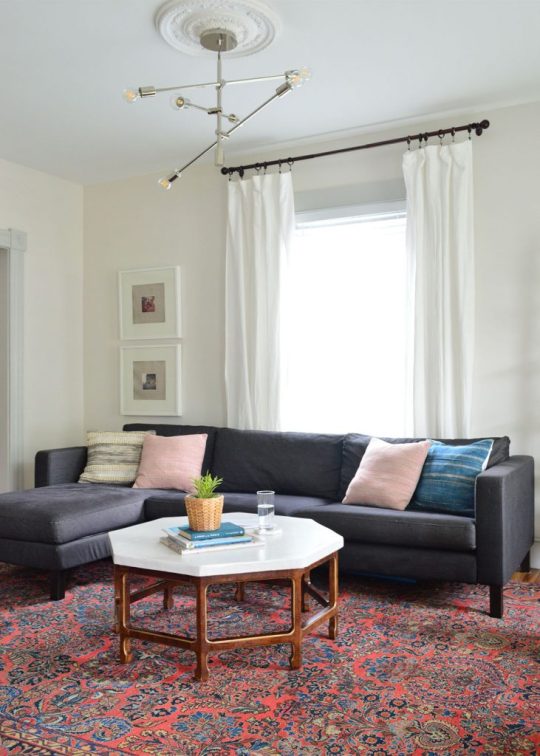
Along with our rug switch, the new sofa is a HUGE step forward in lightening things up. Plus its smaller footprint meant there was room for a few more functional furnishings. Like, momma finally gets a side table on her end of the couch. Hello reading lamp! Hello spot for my tea!

sofa | side table | coffee table | rug | lamp | baskets | bookcase | chandelier
Also, a word about white wood furniture: it’s a GREAT WAY to achieve a lighter look that’s still livable (it’s all wipeable, but it looks so nice and bright). So if you’re staring at a space you’d love to lighten up, sometimes it’s as simple as a $15 quart of white paint with primer built in (we recently tried Behr Marquee and it had great coverage) and you can redo your coffee table and your end tables – or even a bookcase or a shelving unit in an afternoon. Light walls and white (gloriously washable) curtains help too!

The three tiers on our side table = all the spots for magazines, a basket full of legos, or whatever else you like to keep at arm’s length. We actually ordered two more of the same side tables for the duplex because we love it so much. It also comes in a smaller version (which is super marked down right now) and you know I want to make a coffee table version, so stay tuned!
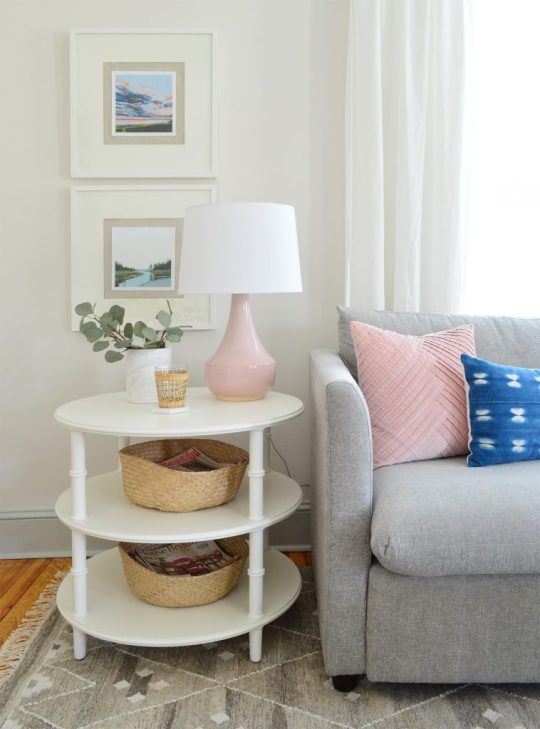
side table | top art | bottom art | vase | lamp | baskets | pink pillow | blue pillow
I also hung some new art that I bought through an artist I found on Instagram. Her name is Sarah Madeira Day and her stuff is just beautiful and so well priced. These two 8 x 8″ canvas prints were $25 each! Printed on canvas with gorgeous vibrant colors! I just love them – and I framed them in simple Ribba frames from Ikea that I already had (with linen-like fabric behind them, which adds some really pretty texture and a double-mat effect).
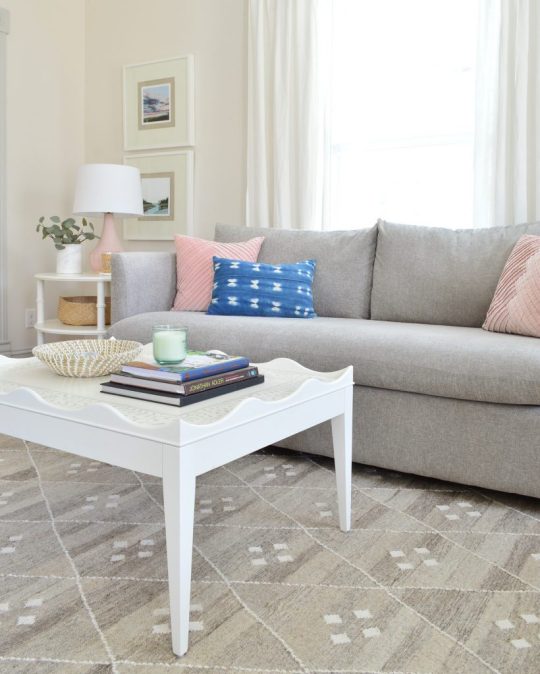
And as much as we liked the coffee table we DIYed last summer, the dark wood legs started to feel pretty busy – especially as the room got lighter. So we carried over one of these coffee tables that we ordered for the duplex. I’m liking how visually airy it is and the size is better for the space, so I may end up ordering another one to make up for the one I yoinked from the duplex.
Also, John and I burst out laughing when we realized that we basically recreated this photoshoot set-up in our beach house. Even the rugs are similar!
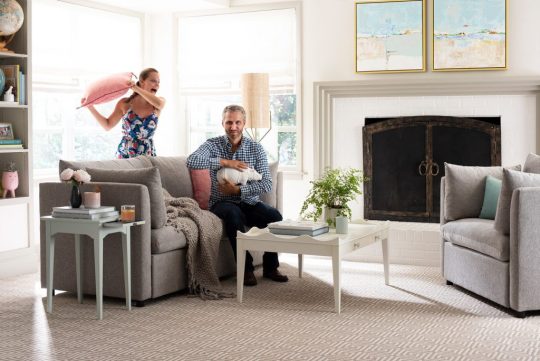
It kind of makes sense that it would happen that way, because we chose some of our favorite stuff for that photo… so I love seeing it living together at the beach house now. Especially mixed with other stuff that we love (that CB2 ladder shelf is so glossy and gorgeous in person, and I feel a deep and meaningful connection to our pretty pink lamp from Target).
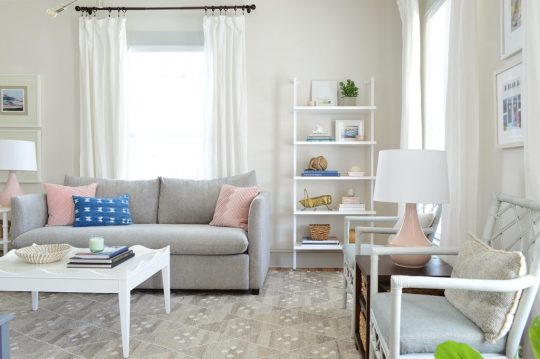
Funny story about this coffee table. A couple weeks after that photoshoot, John shot up in bed nervous that the scallops around the outside were a terrible idea. His concern was that it was going to prevent people from kicking their feet up on it (to which I said: “but not everyone puts their feet on the coffee table, right?”).
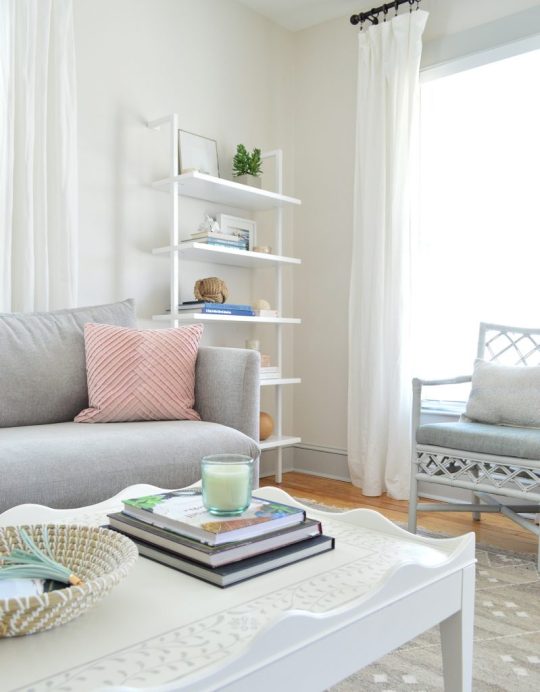
So imagine his palpable relief when he realized that his legs easily fit between the shallow rounded scallops, and he actually proclaimed it to be more comfortable than our coffee table at home (which also has a small lip on top, but it’s sharper and not rounded/smoothed out).

We’re also happy to report that the edge doesn’t get in the way of other tabletop activities like board games (you know we LOVE OUR BOARD GAMES). Actually the border does a nice job of corralling things. You know, if one of your crazy bear creations gets out of hand or you’re rolling dice and don’t want them flying all over the place. So if you DMed me about that, here’s your answer: works great for family board games – the scallops aren’t nearly tall enough to block your arms or anything like that.

I also had someone message me to say “be sure to put a shallow little remote drawer in your next coffee table design!” and the good news is that this one already has one! I love a little hidden drawer to keep that stuff contained.
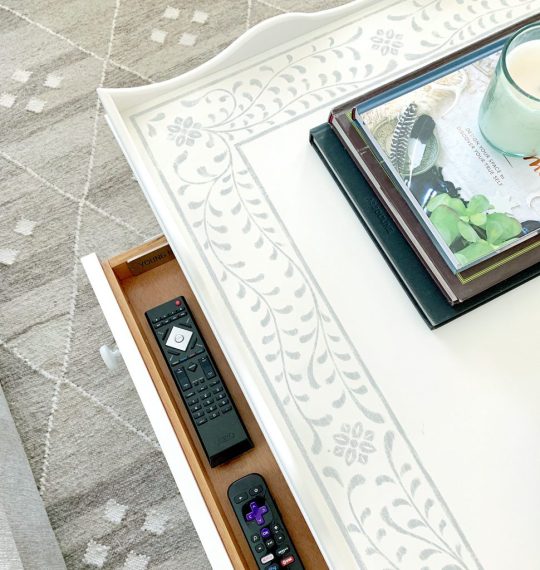
Also a note on living room layouts, because I FEEL YOU OUT THERE. THEY ARE HARD. This room has been evolving for over a year and a half now (I know, it feels like just yesterday that we furnished the beach house!), and we still have plans to mount the TV on the wall, possibly paint the walls, and change out those diamond backed chairs that are living by the windows, but more on that in a second.
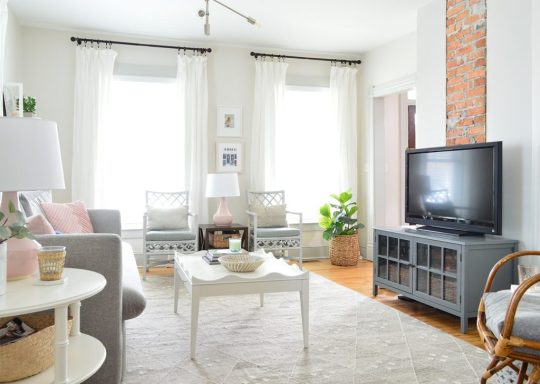
sofa | side table | coffee table | rug | lamps | media cabinet
One of the reasons that living room layouts are tough is because we make assumptions about the way we live or the things we want and then we’re too nervous to try something else. So it’s hard to unlock a fresh solution if we’re stuck in the same thought patterns. Like for example, it sounds counterintuitive to say getting a smaller sofa can create more seating, but we learned last summer that trying to cram all of our guests onto a sectional wasn’t always the most comfortable or the most conducive to conversation.
So we decided to try to “break up” the seating options a little more. With the chaise gone, we could also tuck a chair into the corner by the TV. So the sofa seats about three adults (the four of us fit on it just fine since the kids are smaller), and there are three other chairs in the room now, too. So even though your brain wants to believe that a sectional = the most seating, it’s not always true.
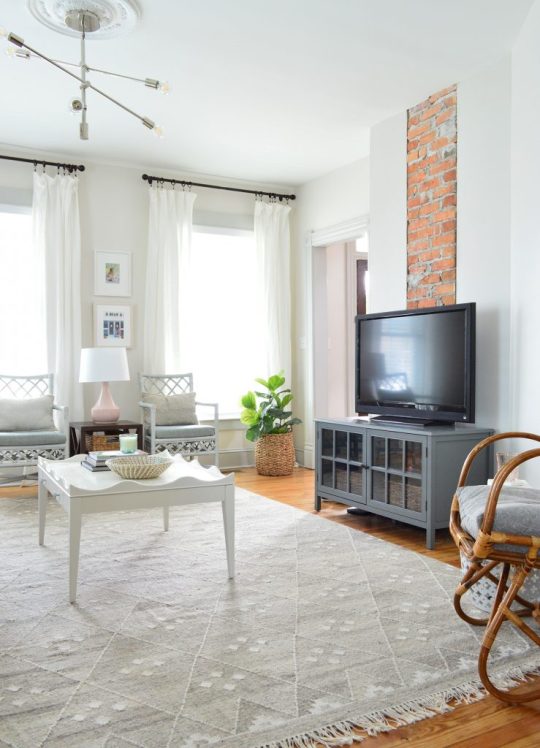
We’re still on the hunt to find some bigger / more relaxed feeling chairs for the window wall, but these thrifted ones (which you may remember from wayyyyy back in our old home office) are doing the trick for now. I spray painted them and recovered the seats to make them a little more neutral – and I always picture them ending up at the duplex because they have that diamond shape like the diamond windows over there.
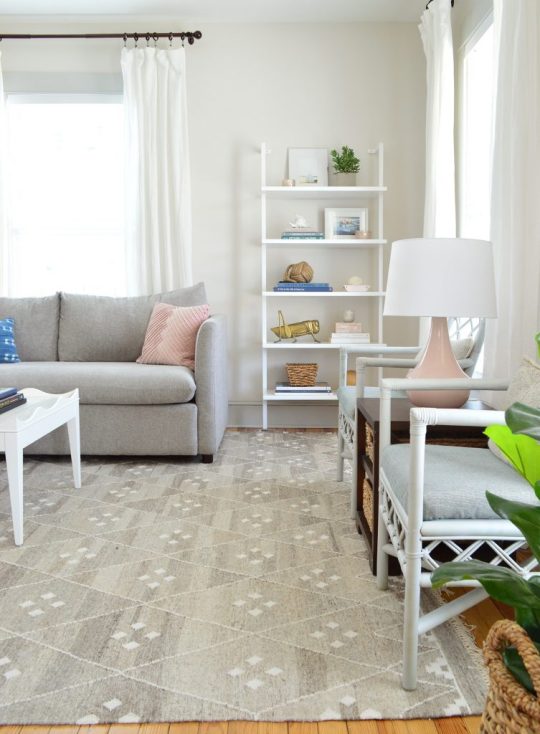
Oh and the rug. Let’s talk about that for a second. We recently had a slime incident. Not just a “slime got on the rug” issue, but a “slime sat on the rug for months under the chaise and I only discovered it when we switched the sofa out and it left a huge grease stain that everyone could see thanks to no longer having a chaise” issue. ARGH!
But…. I got it out! After a lot of googling and some tips from people on InstaStories, the winning removal method was pouring white vinegar on the grease spot, letting it sit, scraping it with a spoon (to remove some leftover slime – it was actually “Thinking Putty”) and after it dried I dabbed it with nail polish remover. That was key in lifting the grease stain and you can’t even see where it was! Plus it gives me a new appreciation that this rug has such a variety of gray tones! Those lighter and darker areas make it much more forgiving.
Between that AND getting an immediate chocolate stain on the new sofa (which came right out dabbing it with water – thanks again, performance fabric!) – we feel like this room can take anything that these kids throw at it – both literally and figuratively. I mean… they might prove us wrong, but they’re gonna have to try harder than slime and chocolate…
The last thing I’ll mention while we’re on the topic of updates at the beach house is our dining room chandeliers. A few months ago in our email newsletter, we showed how we swapped out the old capiz chandeliers for these from our lighting line, but I’m not sure we ever shared a picture on the blog. We love that they’re a little more substantial and the polished nickel details tie into the other light fixtures throughout the living room and the kitchen.
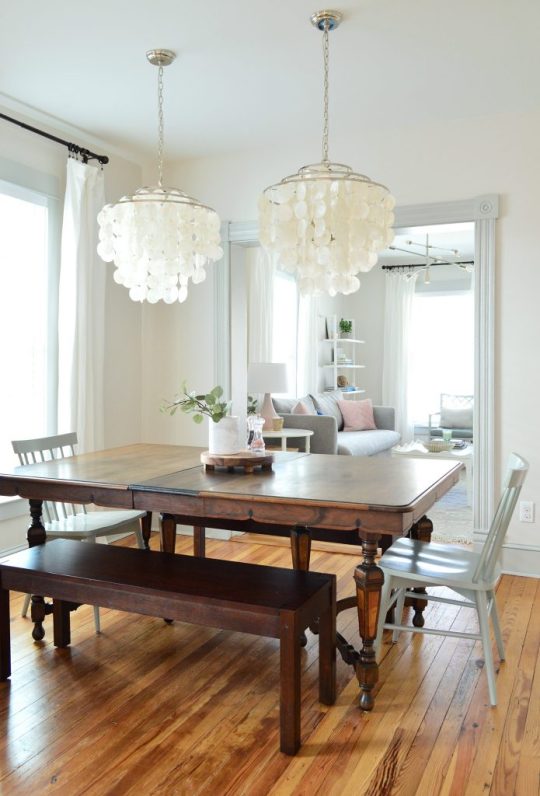
capiz chandeliers | benches | chairs | marble vase
The previous chandeliers are now hanging in the master bedrooms at the duplex because it’s basically in the Sherry Petersik Decorating Handbook that every house we fix up must have a capiz fixture somewhere. And you know I love playing musical furniture & light fixtures! (p.s. this is a TV concept, I just don’t want to actually be on tv – but someone please make a series about switching things you already have around like that old show on HGTV called Freestyle and I’d be SO INTO IT! It goes back to my love of staging houses and being scrappy with things you already have on hand).
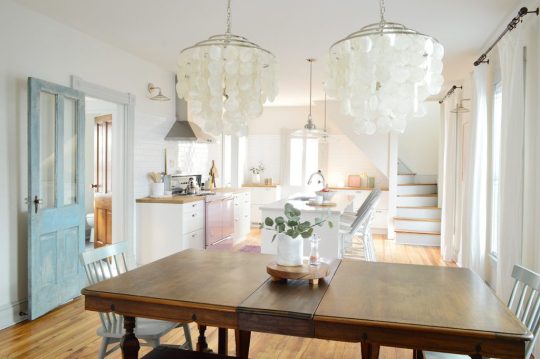
So there are our latest beach house updates – and I hope it’s comforting to hear that sometimes rooms take a little while to figure out, and it’s totally not a failure to move things around and keep experimenting and trying new things. Even in our very first home I used to rearrange stuff all the time! There truly is no better way to get a quick makeover.
If you want to catch some of our furniture while it’s on flash sale, it’s only on Joss & Main this week (actually, like only 3 more days). And if you want to learn more about the whole furniture designing process, here’s a post we wrote all about that. And for more on our (well, mostly John’s) idea of painting the living room walls a new color, that’s on this week’s podcast. We tried out some trendy online paint companies to see if they really would make picking paint colors easier…
*This post contains affiliate links*
The post Making A Light & Airy Living Room (That’s Still Livable!) appeared first on Young House Love.
Making A Light & Airy Living Room (That’s Still Livable!) published first on https://novaformmattressreview.tumblr.com/
0 notes