#raspberry pi pico
Explore tagged Tumblr posts
Visit Tumblr Blog
Explore Tumblr blogs with no restrictions, modern design and the best experience.
Last Seen Tumblr Blogs


Fun Fact
Premium Tumblr themes are available from anywhere between $9 to $49.
Text
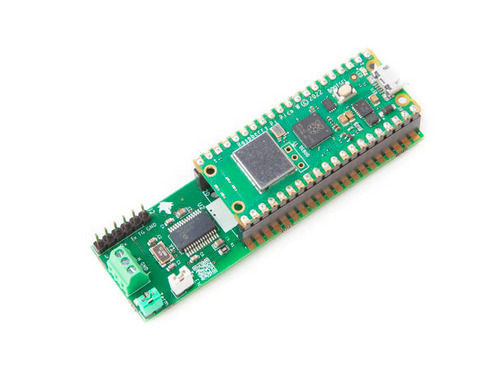
clockwork PicoCalc
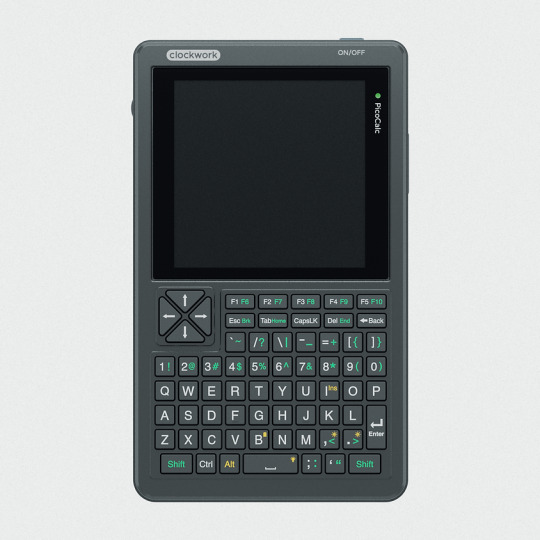
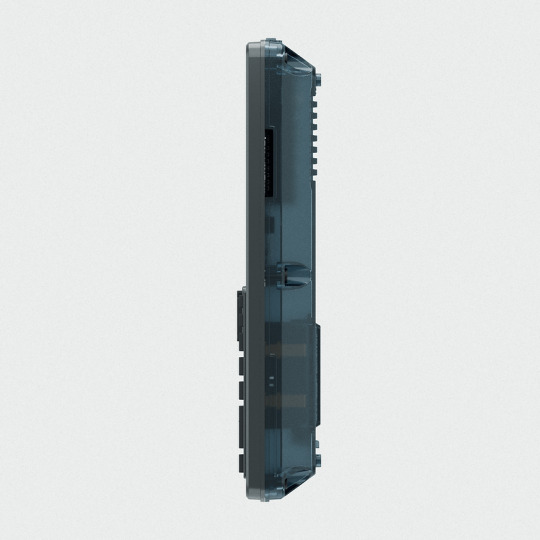
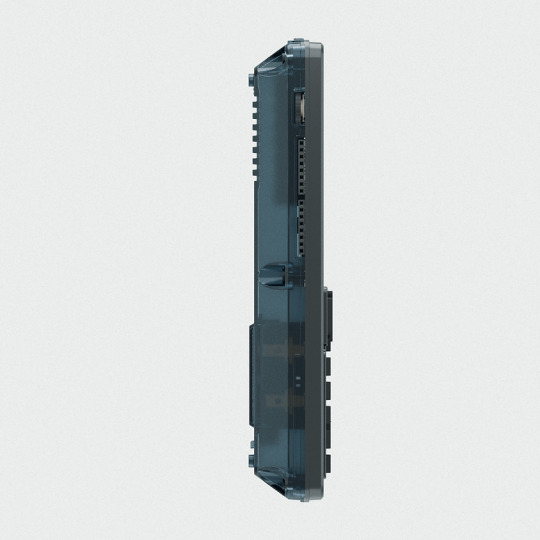


clockwork PicoCalc Back to Basics, rediscover the Golden Age of Computing
Code in BASIC, explore the magic of Lisp, taste the elegance of Unix, play retro games and digital music all in just 260KB memory. Infinite possibilities, inspired by the genius in you!
ClockworkPi v2.0 mainboard
Raspberry Pi Pico 1 H Core module (ARM32-bit Dual-core Cortex M0+, 264KB RAM, 2MB flash)
320x320 4-inch IPS screen (SPI interface)
Ultra-portable QWERTY Backlit keyboard on board (I2C interface)
Dual speaker
ABS plastic shell & 2.5mm Hex key
Tempered glass cover
32GB high-speed SD-card with optimized BASIC firmware
source: clockworkpi.com
8 notes
·
View notes
Note
Hi, I just got into tech (actually 1 year in but I still feel like I don't know anything).
I learnt python, R, SQL, Tableau and concepts in Data Structures, Algorithms.
[Just the Basic level of the listed.]
But I can't write my own programs on python or create anything.
I was hella impressed by your microprocessor project, and when I took up tech (ai and data science) I assumed I would do something like that or at least code.
Now, I am just venting but where do I start, how do I make projects what are some interesting projects, what should I learn? A lot of my seniors tell me to have a wide range of knowledge like focus on one thing by depth but add other things. For example: you can study data analytics in depth but have some knowledge in ethical hacking and web development etc. Like an all rounder.
Wow ok a lot to unpack here, I'll get started
Lots of places recommend that you start with Arduino, as there are a lot of good tutorials out there. I somewhat disagree
I think that raspberry pi is better because it's usually a lot cheaper to buy the stuff you want to play around with
But an even cooler way to do it, go to wokwi.com and start a project on a Raspberry Pi Pico (make sure it's the micropython version) and then you can get started there
Google something like "Blink led with Pi Pico micropython" and there will be a tutorial or two
Then, once you've played around for a while you can buy a Pi Pico for very little money and see your stuff work irl!
If you need any more help or have any questions, feel free to DM me and I'll see what I can do
#micropython#coding#python#raspberry pi#raspberry pi pico#programming#microprocessors#microcontroller#microcontrollers
6 notes
·
View notes
Text
LED control system in progress!!!
12 notes
·
View notes
Text

think i fucked up my pico
#pico#raspberry pi#raspberry pi pico#i have no mouth and i must scream#the AM hate monologue has become an inside joke between me and a friend#we keep quoting it at minor inconveniences
5 notes
·
View notes
Text
PSA
If you want to use a Raspberry Pi Pico as a debug probe to program another Raspberry Pi Pico without the annoying BOOTSEL dance, make sure that when you run CMake on the debugprobe firmware (in the picoprobe repository), you pass DEBUG_ON_PICO=ON as option. As in,
cmake -DDEBUG_ON_PICO=ON ..
This flag is described in the Readme of that repository (also note that the repository and tool have been renamed debugprobe from picoprobe), but it's notably missing from Appendix A of the Getting started with Raspberry Pi Pico guide. That guide is probably older, before the firmware was split and renamed like that, and nobody has bothered to update it yet.
If you don't do that, the firmware will expect the SWDIO and SWCLK data on different pins than what the instructions say, and you will find yourself spending hours checking the cable connections because you keep getting "Error: Failed to connect multidrop rp2040.dap0" errors in openocd. Ask me how I know.
(Also, fuck Raspberry Pi for making so much of their otherwise really good documentation PDFs. There are several places where you need to cross-reference things, and if it were HTML, the navigation between the sections would be so much easier.)
Other tip, while we're here: Install ninja (with brew install or apt install), then when doing the cmake generating step, pass "-G Ninja" in addition. Then build by just typing "ninja" instead of "make -j4" or whatever. It's a little extra typing but it is faster and better at utilising many cores on your host computer.
2 notes
·
View notes
Text
Project isn't working
Connect oscilloscope to check if it's generating the signal you expect
See a signal that makes absolutely no sense
Now you're even more confused than before
2 notes
·
View notes
Text
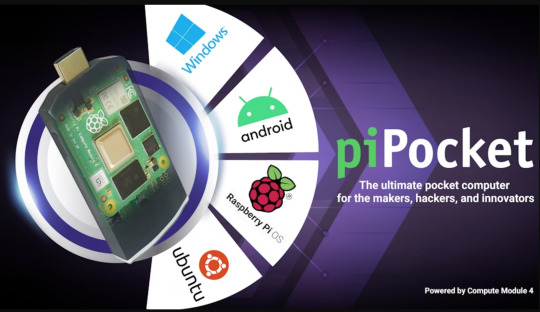
The Ultimate Pocket Computer For Innovators, Coders, Hackers
piPocket is a revolutionary new pocket computer that is perfect for innovators, coders, hackers, and anyone else who wants to create and build amazing things. piPocket is small enough to fit in your pocket, but it is powerful enough to run a wide range of software, including coding environments, development tools, and even full-blown operating systems.
Features
piPocket is packed with features that make it the perfect pocket computer for innovators and creators. Some of the key features of piPocket include:
Powerful processor: piPocket features a powerful quad-core ARM processor that can run even the most demanding applications.
Large memory: piPocket comes with 4GB of RAM and up to 128GB of storage, giving you plenty of space to store your code and projects.
Versatile I/O: piPocket features a variety of I/O ports, including USB-C, HDMI, and micro SD. This allows you to connect piPocket to a variety of devices, including displays, keyboards, and sensors.
Long battery life: piPocket has a long battery life, so you can work on your projects all day long without having to worry about running out of power.
Use Cases
piPocket is perfect for a wide range of use cases, including:
Coding and development: piPocket is the perfect platform for coding and developing software. It comes pre-loaded with a variety of coding environments and development tools, and it is powerful enough to run even the most demanding applications.
Prototyping and testing: piPocket is also a great tool for prototyping and testing new ideas. It is small and portable, so you can take it with you wherever you go, and it is powerful enough to handle even the most complex prototypes.
IoT and embedded systems: piPocket is also a great platform for IoT and embedded systems development. It is small and low-power, making it ideal for battery-powered devices. It also comes with a variety of I/O ports, so you can connect piPocket to a variety of sensors and actuators.
Conclusion
piPocket is the ultimate pocket computer for innovators, coders, hackers, and anyone else who wants to create and build amazing things. It is small, powerful, and versatile, making it the perfect platform for a wide range of use cases.
Check out piPocket on Kickstarter today and learn more about this amazing new product!
2 notes
·
View notes
Text
Combining CAN Bus and Microcontroller Power: The CANPico V2 by Copperhill Technologies
Discover the CANPico V2 from Copperhill Technologies – a powerful Raspberry Pi Pico WH board with built-in CAN Bus support for automotive, industrial, and IoT applications. Compact, reliable, and easy to use.
0 notes
Text
シンセ開発ログ 2025-01-20: ラズパイPico用シンセPRA32-U v3.1をリリース/ラズパイPico 2用シンセPRA32-U2の開発スタート
ラズパイPico用シンセPRA32-U v3.1をリリース
PRA32-Uは、Raspberry Pi Pico(RP2040)を使った、誰でも自由に作れるシンセサイザー(USB MIDI音源)です。
今回のv3.1では、ポリモードでの空きボイス割り当て方法についてのオプション追加(リリースが効果的になるモードがデフォルトに)、簡易FM音源(サイン波の位相変調)の仕様変更、などを行いました。
これでPRA32-Uのメンテナンスは一区切りにして、これからは新作PRA32-U2の開発を進めていく予定です。
作り方:https://fabble.cc/risgk/digital-synth-pra32-u
PRA32-U v3.1での主な変更内容:
Voice Assign Mode [1|2] パラメータの追加(旧バージョンはモード2と同じ)
サイン波の位相変調(簡易FM音源):周波数比の単位を0.25から0.5に変更、周波数比を滑らかに変化
Osc 2 Pitchの範囲を拡張(-5~+7 → -12~+12半音)
EG Osc AmtとLFO Osc AmtのPitchモジュレーション範囲を拡大(-24〜+24 → -30〜+30半音)
PRA32-U with Panel:USB MIDI経由でMIDIクロックとコマンドを送信しない(USB MIDIの送受信を同時に行うとフリーズする問題を回避するため)
PRA32-U with Panel:EGページにもFilter EG Amtパラメータを追加、パラメータ名Seq PatternをSeq Modeに変更
PRA32-U with Panel:メモリ使用量の削減(一部のコンパイルオプションでエミュレートされたEEPROMが動作しない問題を修正)
Arduino-Picoバージョン4.4.1でテスト(147.6MHzの代わりに、153.6MHzにオーバークロック)
ラズパイPico 2用シンセPRA32-U2の開発スタート
PRA32-U2は、Raspberry Pi Pico 2(RP2350)を使った、誰でも自由に作れるシンセサイザー(USB MIDI音源)です。
開発をスタートし、PRA32-U v3.1.0を移植したものをv0.1(プロトタイプ)としてリリースしました。ただし、RP2350-E9 Erratumを回避するため、PRA32-U2 with Panelでは回路を変更してINPUT_PULLUPを使用しています。
CPUやRAMの使用率はPRA32-Uの半分くらいで、リソース的にはかなり余裕がありそうです。とりあえずMulti Saw(Super Saw)を導入予定ですが、他の機能は未定です(ネタは色々あります)。ゆっくり進化させていくつもりです。


0 notes
Text
Apple abbiamo un altro problema: un nuovo baco di macOS Sonoma
— Immagine generata dall’IA di Microsoft Designer. I bachi di Sonoma non mancano mai di sorprendere, e qui descrivo un baco fresco fresco, che per fortuna è stato corretto in Sequoia. Prendete un MacBook Air o Pro nuovo, dove avete appena installato Sonoma, oppure un MacBook dove prima di installare Sonoma avete cancellato il disco di avvio (quello che succede aggiornando semplicemente da una…

View On WordPress
0 notes
Text
Keyboard Jiggler with Python and Raspberry Pi
So I did a pretty simple but amusing little project recently, a bit on a whim. Let’s say, I have a few games that it would be useful to just, let idle for experience or whatever. The problem is, that these games also have built-in idle deterrence. Your character falls asleep, or you just time out of the game after five or ten minutes. I initially start off trying to use AutoHotkey, a program…
0 notes
Text
10 Exciting RP2040 Project Ideas
The Raspberry Pi Pico, powered by the RP2040 microcontroller, has taken the maker community by storm with its affordability and versatility. If you're looking for some exciting project ideas to try with your RP2040, you're in the right place! In this article, we'll explore 10 innovative projects that showcase the capabilities of the RP2040 and inspire your next creation.
Introduction
The RP2040 is a powerful microcontroller that can be used in a wide range of projects, from simple LED blinkers to complex IoT devices. Its dual-core ARM Cortex-M0+ processor and generous amount of RAM make it ideal for multitasking and handling various tasks simultaneously. Let's dive into some exciting project ideas to unleash the full potential of the RP2040.
1. Blinking LED
A classic project for beginners, the blinking LED demonstrates the basic functionality of the RP2040. By controlling the GPIO pins, you can make an LED blink at different rates, creating various patterns and effects.
2. Temperature Monitoring System
Use the RP2040's ADC to read temperature values from a sensor and display them on an LCD screen. You can also set up alerts to notify you when the temperature exceeds a certain threshold.
3. Motion-Activated Camera
Create a motion-activated camera using the RP2040 and a camera module. The RP2040 can detect motion using a PIR sensor and trigger the camera to capture images or videos.
4. Smart Weather Station
Build a weather station that collects data such as temperature, humidity, and air pressure using sensors. Display the data on an OLED screen and upload it to a cloud service for remote monitoring.
5. Home Automation System
Control lights, appliances, and other devices in your home using the RP2040 and relays. You can create a mobile app or a web interface to control the system remotely.
6. Game Console Emulator
Turn your RP2040 into a retro game console emulator by installing emulators for classic gaming consoles. Use the GPIO pins to connect controllers and play your favorite games.
7. MIDI Controller
Build a MIDI controller using the RP2040 and potentiometers, buttons, and sliders. Use it to control music software or hardware synthesizers.
8. Internet Radio
Create an internet radio player using the RP2040 and a Wi-Fi module. Stream music from online radio stations and control playback using buttons or a web interface.
9. AI Voice Assistant
Build an AI voice assistant using the RP2040 and a microphone. Use services like Google Assistant or Alexa to control smart devices, play music, and answer questions.
10. Conclusion
The RP2040 opens up a world of possibilities for makers and hobbyists. With its powerful features and affordable price, it's the perfect platform for experimenting with electronics and programming. Whether you're a beginner or an experienced maker, these project ideas will help you get started with the RP2040 and unleash your creativity.
0 notes
Text
The programming and wiring is finished!!
Now I just have to make a box
4 notes
·
View notes
Text
[Btabtablog #4?] - Future of Btabtablog
Hello, it's been a (little) while since I last posted, or even had the foggiest thought of this blog, and decided it was time to go back to it. After my mental health collapsed and I almost lost my mind and have probably failed my degree 🎉 I realised I needed to do something even mildly productive.
Projects in mind:
I have several projects in mind, nothing too bold in the hacker space. Mainly involving working on a small, compact device made for simple games, something akin to the panic playdate. The project will be a small thing, nothing too extreme, just a screen and some buttons bolted into some microcontroller such as the RPI Pico W. The next project in mind is a simple application that will work in the terminal to help build small games (ideally to also provide a backed for the Unnamed Small Pocketable Device).
When will these be?
Honestly? no idea, none. Maybe I won't do any of these things, maybe I will. I might just abandon these project ideas and do some other super cool thing, who knows? Certainly not me!
0 notes
Text
WiFi-password-stealer - Simple Windows And Linux Keystroke Injection Tool That Exfiltrates Stored WiFi Data (SSID And Password)
Have you ever watched a film where a hacker would plug-in, seemingly ordinary, USB drive into a victim’s computer and steal data from it? – A proper wet dream for some. Disclaimer: All content in this project is intended for security research purpose only. Introduction During the summer of 2022, I decided to do exactly that, to build a device that will allow me to steal data from a victim’s…

View On WordPress
#Exfiltrate Data#Hacking Tools#KitPloit#Python Hacking#Raspberry Pi Pico#Security Tool#Security Tools#Wifi Password#Wifi Passwords#Wifi Stealer#WiFi-password-stealer
0 notes
Text
What type of GPS technology does the iPhone 15 series feature?
The latest iPhone 15 series boasts cutting-edge dual-frequency GPS technology that supports GLONASS, Galileo, QZSS, BeiDou, and NavIC. This means that it can receive signals from both L1 and L5 bands simultaneously, enabling accurate and speedy navigational positioning, even in urban areas with tall buildings or dense forests and canyons.

Most notably, the iPhone 15 series is the first iPhone to support NavIC, which is India's regional navigation satellite system. Hence, the iPhone 15 series can offer more precise positioning in India and neighbouring countries.
Overall, the GPS technology in the iPhone 15 series is one of the most advanced in the market, providing reliable and fast positioning in various environments.

Now the technology that you are going to get is the iPhone 15, the same or I would say the more advanced GPS technology is used in Trekko Pico GPS Logger. I have talked a lot about this genius creation and finally, this is in the market. Trust me you can never go wrong with this product and the best part was it got funded to 100 per cent in just 15 minutes of launch, apart from that the company is also providing free vouchers and goodies.
0 notes