
Hello everyone! My name is Blaze. I want to make this blog my fashion archive of sorts. I‘ve just recently startet sewing my own clothing. You’ll find progress photos, rambles, idea hoarding, finished works, memes and inspiration and whatever goes on in my chaosbrain. Little bit about myself: I‘m 25, Swiss, AuDhD, an Atiny and a Winion. Pretty sure my other interests will infiltrate this Blog a little.
Don't wanna be here? Send us removal request.
Statistics
We looked inside some of the posts by archivesofblaze and here's what we found interesting.
Average Info
Notes Per Post
11
Likes Per Post
9
Reblog Per Post
2
Reply Per Post
0
Time Between Posts
7 hours
Number of Posts By Type
Text
5
Last Seen Tumblr Blogs


Fun Fact
The “We are the 99%” Tumblr blog became the slogan for the Occupy Wall Street movement.
Text
I am drowning in pants-math…
0 notes
Text
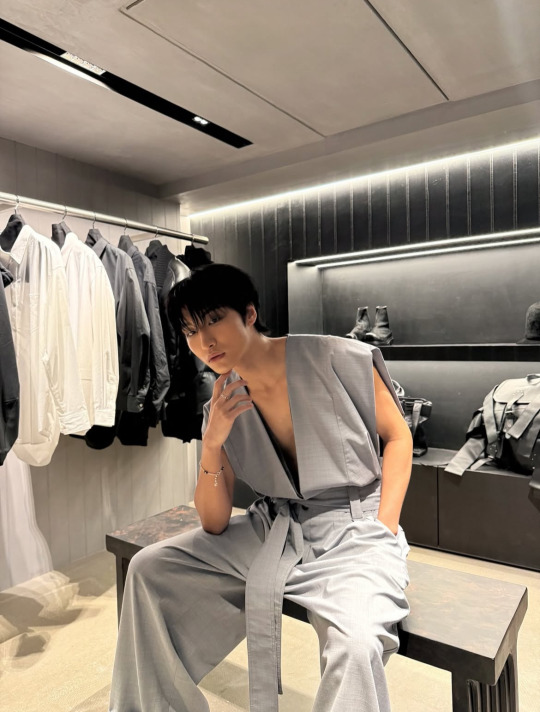
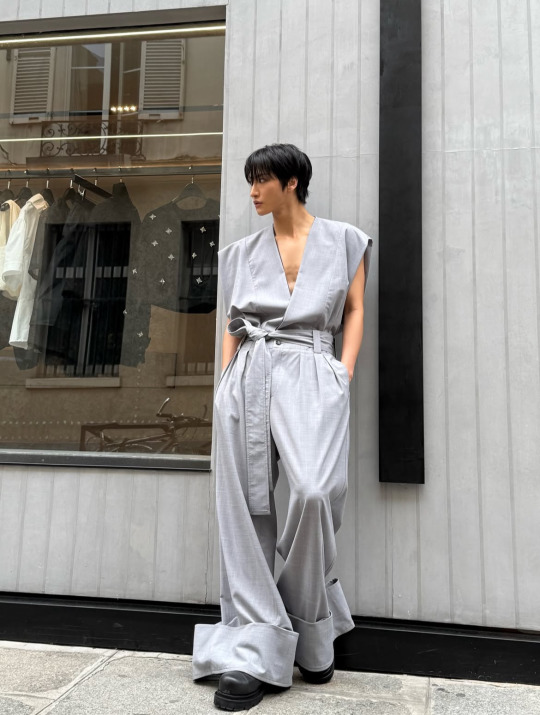
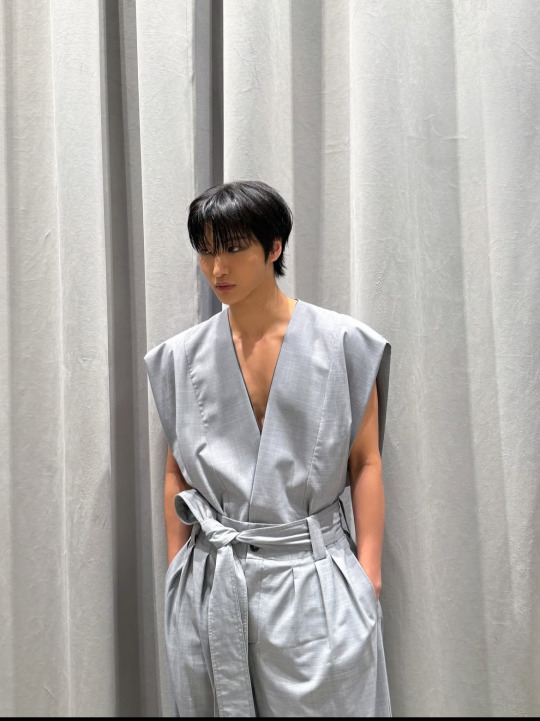
Im really tempted to recreate this look. Im obsessed!! I guess I will tackle how to make pants next…
#seonghwa#sewing#ateez#songzio#inspiration#I need this so bad omg#it’s so gorgeous#please help me#also did you see SEONGHWA??#This man is so gorgeous omg#zippers scare me a little#im off planning
3 notes
·
View notes
Text
Hello everyone
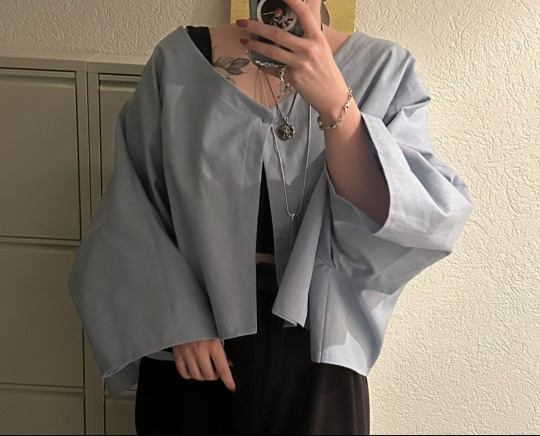
I’ve finished another piece!! And I’m really excited about it. (On Thursday the 25. Of June 2025 I believe.) This time instead of just following a pattern I decided to actually try to clone one of my own items, that I already owned and loved. I used a bit of a thicker fabric than the one from the original so it would turn out a bit stiffer. I really love the look it gives. Alright. Let me give you a short recap on how this went. (Or a long one xD)
Making the pattern:
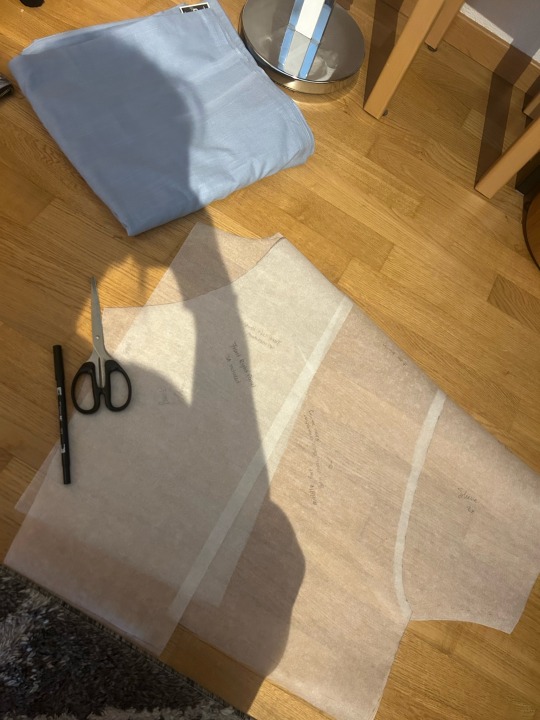
So as I said already, I first had to make a pattern so I could cut the pieces correctly on the fabric. I’ve never done that before but I did watch a few YouTube videos already about pattern drafting and cloning, so I knew a thing or two to be careful of. I started off by ironing, then laying the different panels on parchment paper and tracing them first, to get the rough shape, including a seam allowance where it was needed (I’m kind of surprised that I actually didn’t forget it anywhere. I usually tend to forget stuff like that on the first try xD) After tracing all the pieces and making the lines a bit straighter where I needed to, I matched the parts that would be connecting and looked if they are the same length and would actually work.
I feel like the pattern came out pretty well. I wrote down what’s what, cut it out and the first picture here is what we ended up with.
I realized, that I did two things wrong here:
1. I matched the sleeve curve to the wrong panel when adjusting so quickly redid the sleeve.
2. I forgot to see if the back panel would be matching lengthwise bevor cutting si it was a bit too short. I just added a strip of paper on the bottom so i didn’t have to waste more paper.
Pinning and cutting the fabric:
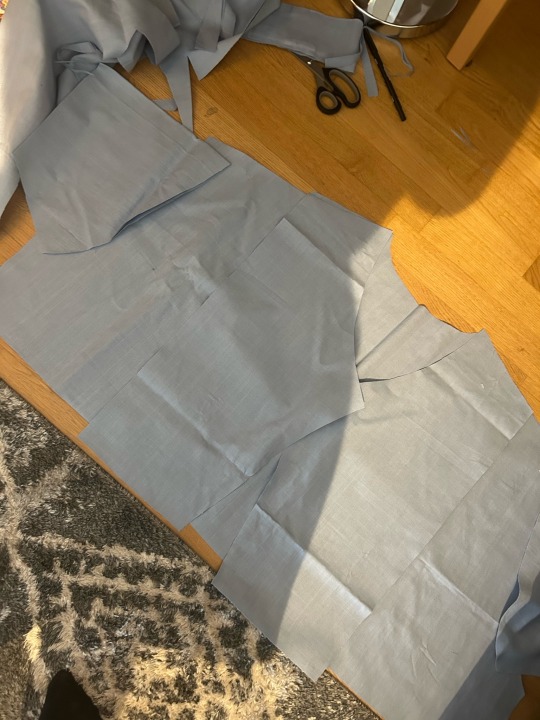
So after that was done I decided to take a break for the day and continued with the pinning and cutting of the fabric the next day. I used another thrifted fabric for this. Used to be a curtain actually xD.
As you can maybe see, I did all of this on my floor which does work but it was a pain in my butt to reach everything correctly. I wish I had a studio with a big table to do stuff like this but alas I don’t.
Yeah, so I cut out the pieces, marked them, so I knew what’s what and laid everything out like in this second picture, to see if I had everything and also if I cut it correctly.
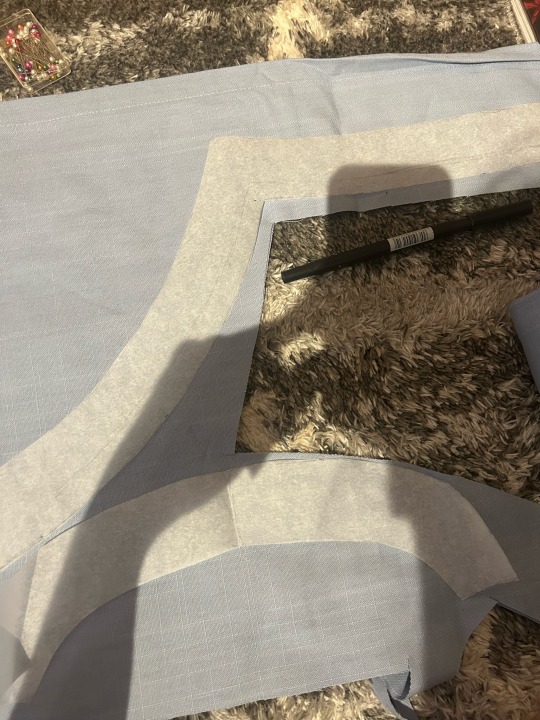
Facings:
I will call them facings. Even if they are tiny facings. And this thing doesn’t have any lining. But you know what I mean.
I saw that my original piece used separate strips of fabric to finish the edges on the collar and down the front where it opens. I first wanted to just make a wider hem until I thought about the curves and realized why they did what they did. So I made patterns for my facings based off of the pattern I made before. It worked out perfectly and I think it looks great and makes it look really high quality.
The sewing:
Alright there’s one big takeaway I have from this project and that is: If I plan to iron the seams flat on the inside I’m going to finish the edges FIRST next time. For one to safe me from the mess of loose threads flying around and secondly, to safe me from the annoying task that is finishing them afterwards. (And at some point I’d love to get a serger) I also realized that I need quite a bit more thread for sewing than I thought I would. Somehow I used to think that a spool just lasts you ages…. Don’t ask me why.
Since I had the arsenal of thread, that my mom had accumulated over the years, to my disposal I actually found a pretty perfect color match for this project. Luckily I had enough for all the visible seams. I did have to use a different blue for some last finishes on the inside tho.
Extra tidbits:
I changed out the needle for the first time just before this project and it was definitely a good Idea. I might also still add a button to the front at some point, we will see.
I think that’s it for this time. If you actually read it this far: I’m impressed, wow!
See you soon with my next project!
#sewing#fashion#design#fashion design#clothing#diy#selfmade#always these damn hashtags#don’t mind me#wip#finished project
3 notes
·
View notes
Text
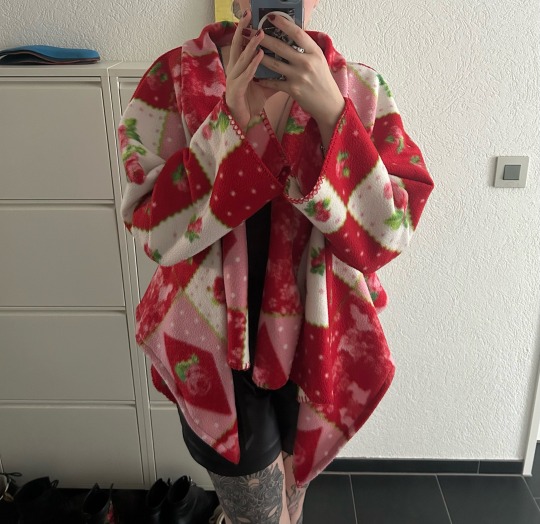
The second piece I made was this blanket coat from a blanket I had just thrifted. I finished this on the 17. of June 2025.
After making my first project (see my last post) I was really excited to make more things. I did just use up the fabric I had at home tho, so my next objective was to get fabric that wasn’t going to break the bank, so that I could learn with it. I was aware that I was most likely going to make mistakes so I set out and visited my local thrift store (I love that place so much!! It’s huge and they have almost everything you could think of). I browsed through the home textiles and fabric section and found a few good picks. Mostly thicker woven fabrics but also a quite thin stretchy fabric covered in stars. And of course I stumbled upon the blanket I used for this project right here.
When I saw the blanket I remembered some videos of people turning old blankets into cosy coats I had watched just a few days before. I also immediately thought of a friend of mine that would probably like it so I picked it up.
Back home I searched for a pattern and stumbled across the “Blanket Coat” pattern from Sasha Starlight.
I did leave out the pockets, since my blanket was almost too small for the pattern but I’m still quite happy with how the finished garment turned out. The pattern was quite easy to follow and besides not being able to iron the seams as well as with other fabric I also finished it without much trouble. So I’d say it’s definitely beginner friendly. Oh and because I love long sleeves to hide my hands in, with cosy things like this I also made the sleeves a bit longer.
Enough of my rambles, see you soon with my next project!
3 notes
·
View notes
Text

My first creation! (Besides the stuff I used to make in primary school… or the skirt in high school) I found this easy pattern for wrap pants and had an old, quite big piece of fabric that I thrifted some time ago, so I decided to make a test version.
I love how they came out - even tho they are not perfect - and I already learned a lot about pressing, how to not want to give up when turning straps inside out (the answer is safety pins), SEAM ALLOWANCE. Will definitely make some in a more flowy fabric for the late summer!
Here’s the pattern I followed (I did change it a little tho).
youtube
2 notes
·
View notes