
Last Seen Blogs

fightdead
THIS WORLD IS TOO CRUEL FOR SUCH A SWEETHEART

fetsh-ish
My Kinky Scrapbook

kendimden-blog
Vera

morbiius-gratis-dublado-pt
ASSISTIR! HD-Morbius (2022) Filme Dublado Online Legendado HD Gr

wongona
wongona_
Photo
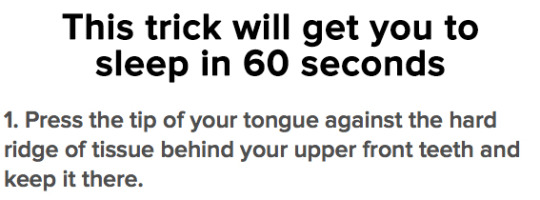


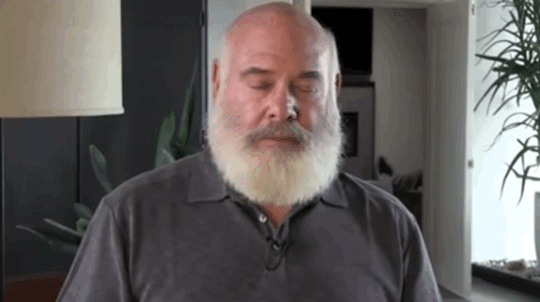

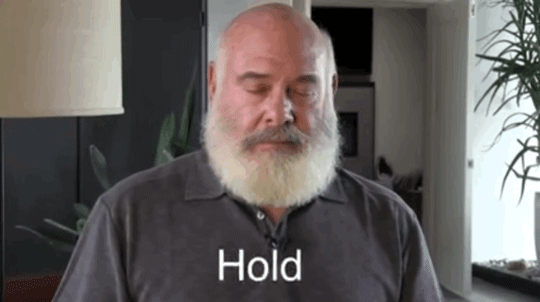

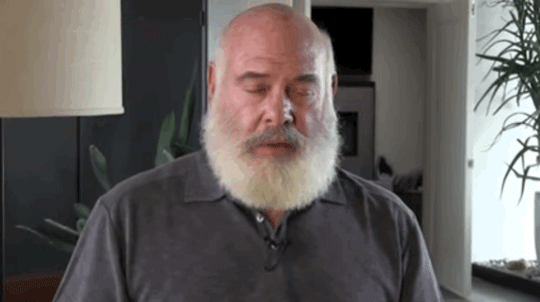
Do this four times repeatedly and you’ll be out. But how does it work? There’s some real brain science behind it.
764K notes
·
View notes
Video
This is simply amazing
instagram
Matt Borgelt’s interactive Pokémon GO Halloween costume.
112K notes
·
View notes
Text
WATER
EARTH

Fire

AIR
Long ago, the four nations lived together in harmony. Then everything changed when the Fire Nation attacked. Only the Avacatar, master of all four elements, could stop them. But when the world needed him most, he vanished. A hundred years passed and my brother and I adopted the new Avacatar, a kittybender named Steve. And although his felinebending skills are great, he still has a lot to learn before he’s ready to save anyone. But I believe Steve can save the world.
409K notes
·
View notes
Text
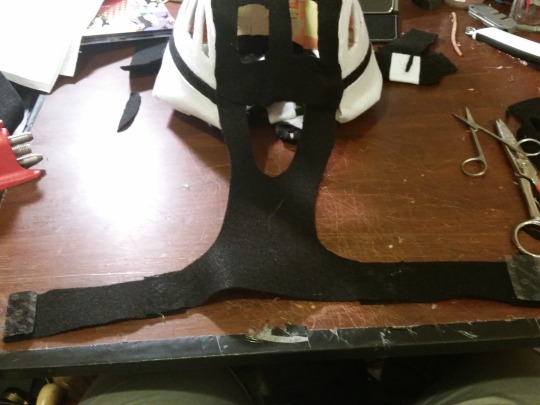
Catbus Pet Costume Tutorial

You asked for it so here it is! An easy No Sewing required lightweight pet costume. This build should take 1-2 hours at most.
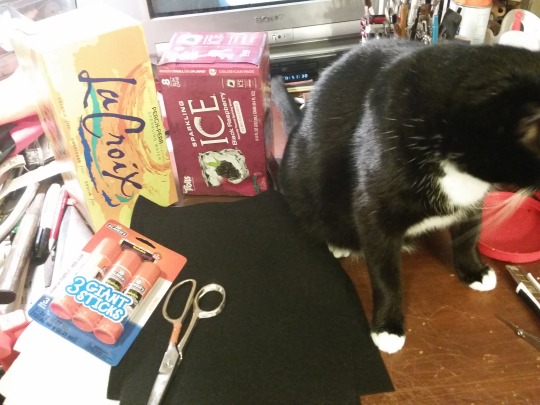
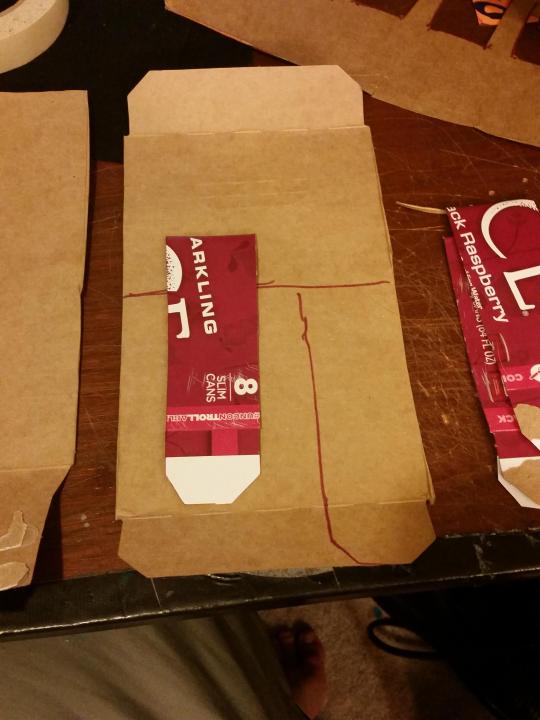
For Supplies you will need Sheets of Felt in colors that match your pet (Our build ended up using 7 total but we bought 5 of each color), Scissors, Glue (We used Hot Glue for our build but almost any will work as long as you are willing to wait on it drying), and 2 cardboard Soda boxes from the recycling, and a Pen.
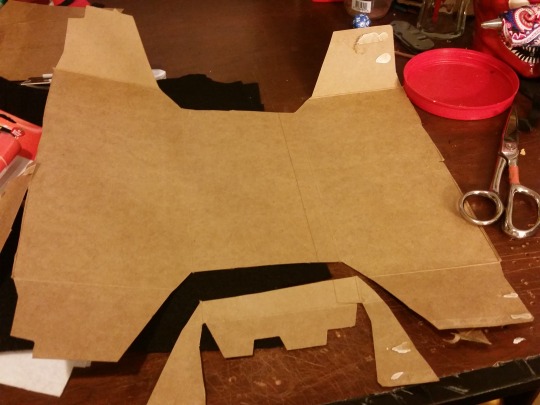
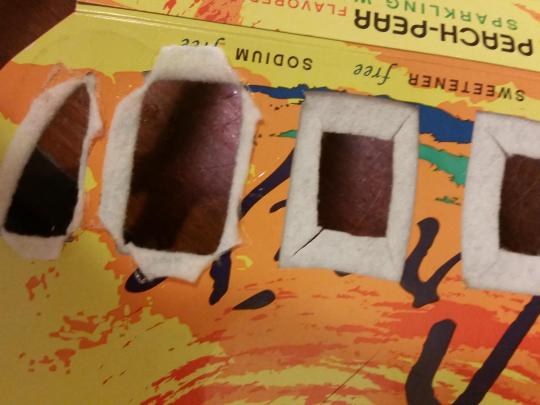
Cut the bottom off one of the soda boxes and then gently unfold it. Trim it to fit your pets size as needed if a long 12 pack box. Then trim the inner corner area’s like so ^. So that when you assemble it later your Catbus will have a rounded top. Also plan to have the brown side facing out so that the soda decorations on the box don’t show up behind the felt.
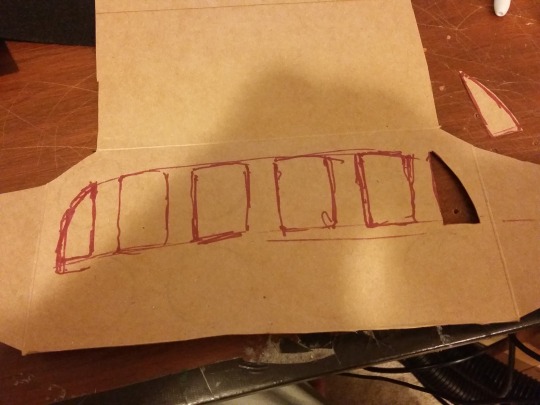
Draw the windows in just under the crease of the box and then cut them out. For uniformity you can trace the cut outs on the other side. But remember that Catbus is fluid in the size, shape, and total number of windows. (Usually it’s 6-7 but can be more or less)
Of you have a razor blade it can speed up the process but scissors are all you really need.
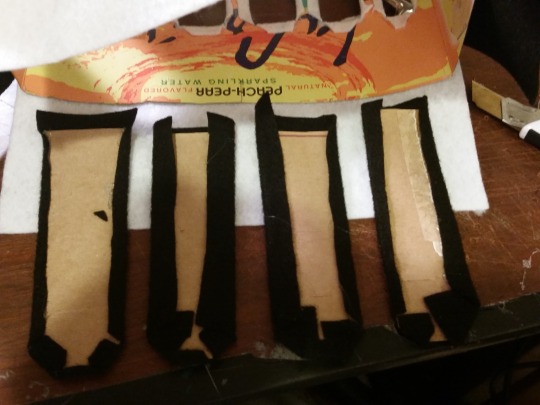
Break down your other soda box and create “legs” by patterning and cutting out a similar shape as shown. We did them between 4-5 inches because of our pets size. Don’t go too short. You can always trim later if you feel you made them too long.

Take a couple pieces of felt and layer the legs on them with plenty of room in between them. I would suggest no more than 6 legs per piece as the more felt you have on the edges the easier it is to roll them for a smooth look.
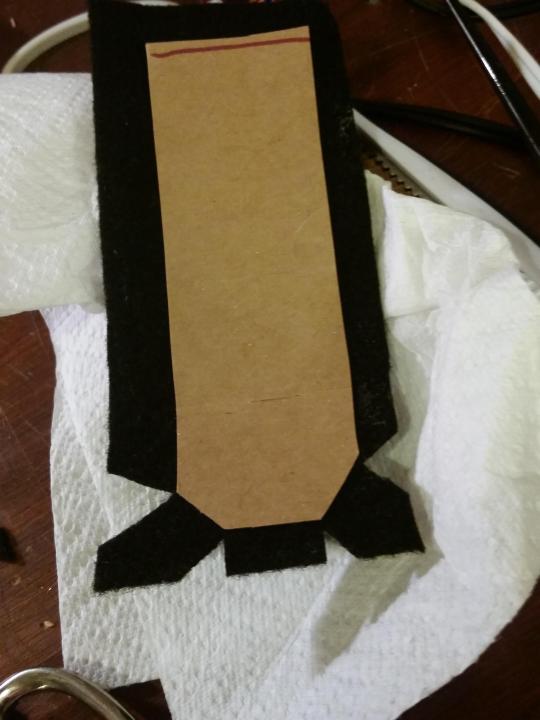
Cut out each leg with plenty of felt on the edges. Then trim that with triangles similar to this. That will allow for easy fold/gluing.
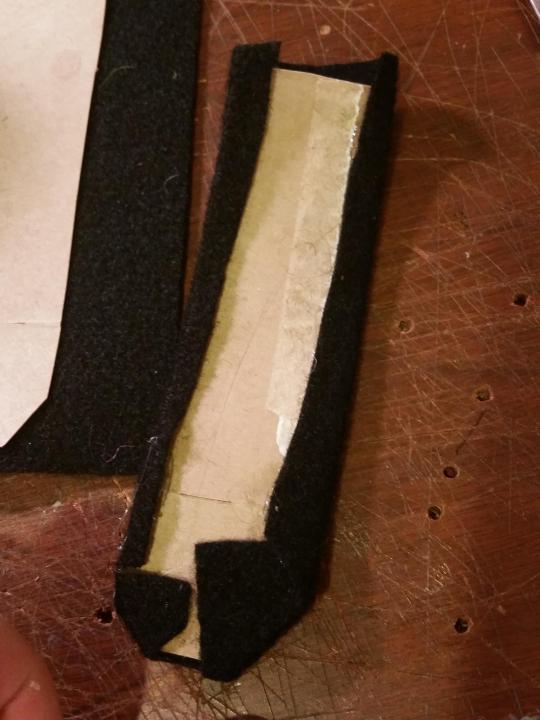
Fold and glue each leg and set aside to dry.
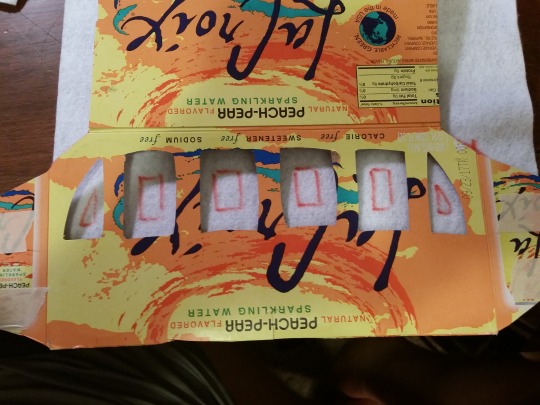
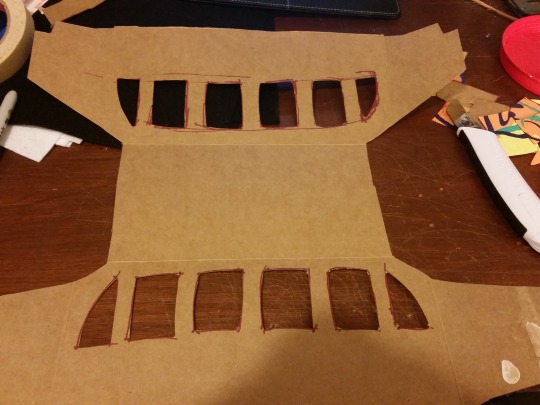
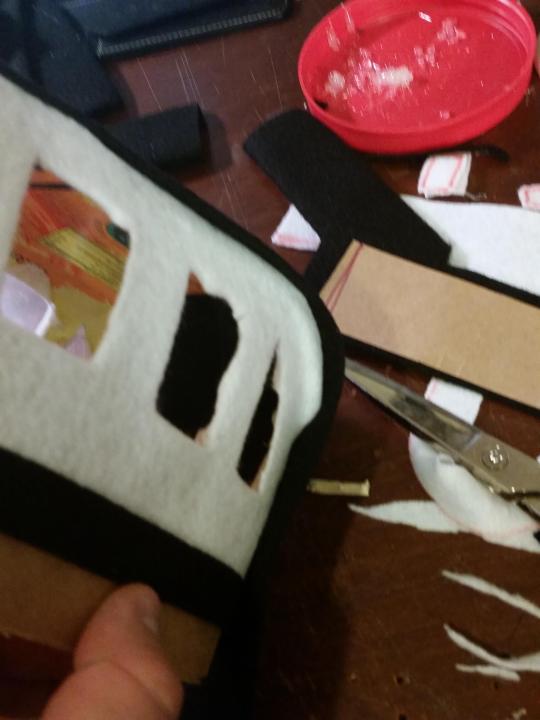
Remember that the Catbus is usually at least 2 tones and pick which colors you want where. There is no wrong way to make your Catbus. Take your cardboard base and trace out the top to the fold, and mark smaller squares inside the windows.
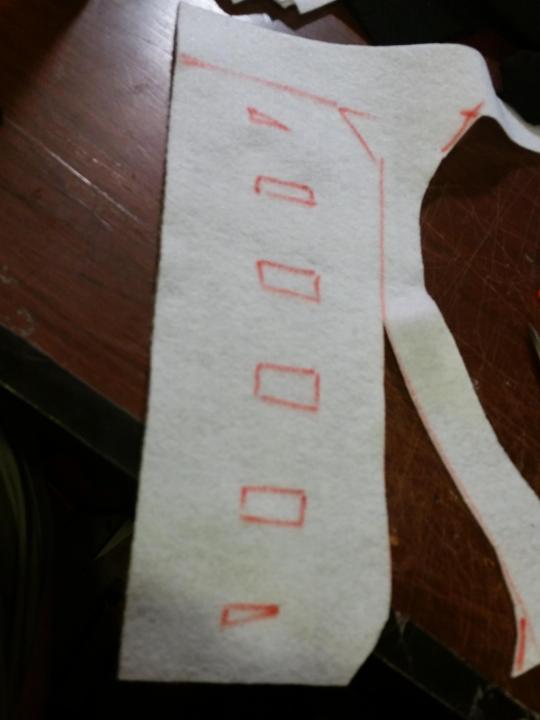
(this is so you can fold the fabric and glue after attaching the felt)
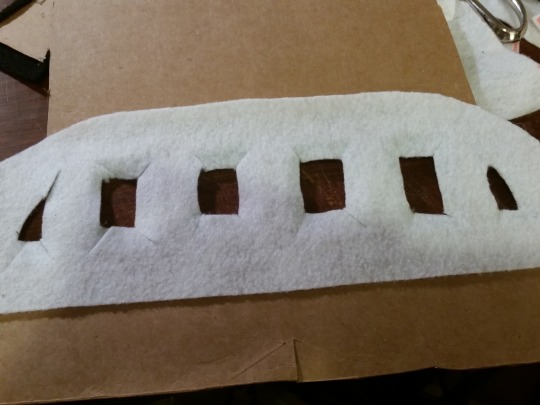
Glue the piece on with the top matching up near the fold and the holes matching the center of the windows.If the top goes a little high you can always trim later. Then cut from the center holes of the felt in the windows out to the edge of the windows in order to fold and glue.
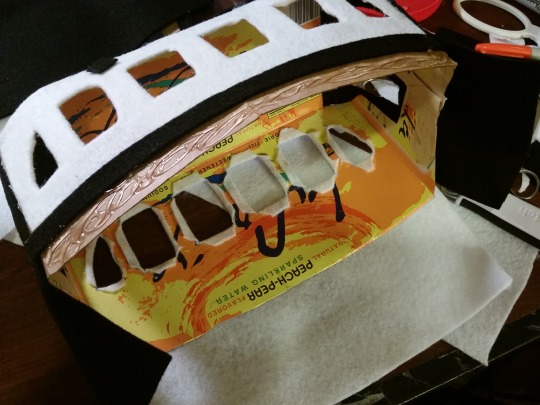
Fold and glue inwards.

Once you’ve finished each window, cut a strip of your other color of felt and glue below the passenger area.

Trim 2 other pieces of felt and glue them in between the passenger windows (and meet at the halfway point of the cabin) so that they dangle downwards on the front and back. It’s at this point that you take the flaps and re-glue or tape them back together to reform the box shape.
Often times you will have overlays of felt. Once everything is dry. Trim these so that the edges meet up.
Take 3 pieces of felt that match the cabin area and trim them to the width of the build then glue them on below the bar on both sides. Its at this time you should cut the Windows in the front and back of the bus and glue the back side down. Leave the front unglued for now
Take your legs and space them out on the felt at whatever length they need to be at to emulate legs on your Cat(Or Dog) turned Catbus. Then glue them down, cut the felt between them, and then glue the cut felt to the edges as you roll it to grip and hold the fake legs solidly. Decorate your legs with the opposite color felt however you wish. We did stripes, the original did pointy ovals.
Now for the attaching part. Cut a big “ U ” the size of your pets neck out of a piece of felt. Hold it up to your pet and make quick note how thin their chest is for trimming it inwards. Towards the end of the felt let it come back to form an upside down “ T “. Glue extensions on the “ T “ so that they will reach back up into the costume. Then glue the 2 parts of the “ U “ in to the edge of the front of the box. Then take that top flap you left unglued before and trim it before gluing it over those 2 straps and Rolling the excess fabric inside and gluing it firmly. (Alternately you can take 2 thin straps and form an “ X “ that will fit across your pets chest between it’s front legs)
If you have Velcro attach one side to each of the “ T “s edges then place the other side on top with a protective surface still on. Slip the U over your pets head and pull the T straps below their legs and slip each T cross inside of the Box and attach the Velcro in a comfortable fit for your pet’s chest.
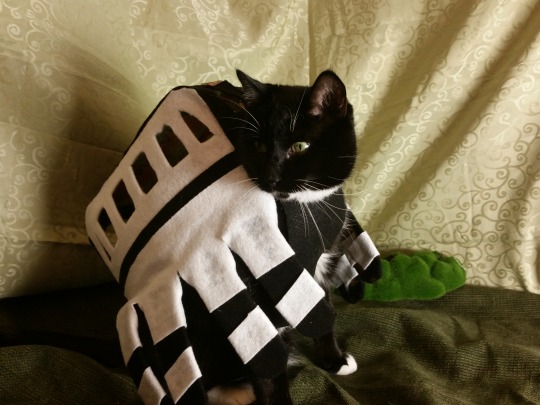
Congrats! You’ve Made an easy to make Costume of the Catbus for your Pet! Feel free to add more details like the sign above the front windows! Print out any characters you would like to see riding the bus, cut them out and glue them in the windows! Get Creative.
Can’t wait to see what you come up with!
3K notes
·
View notes


Text
more people need to appreciate dovekies

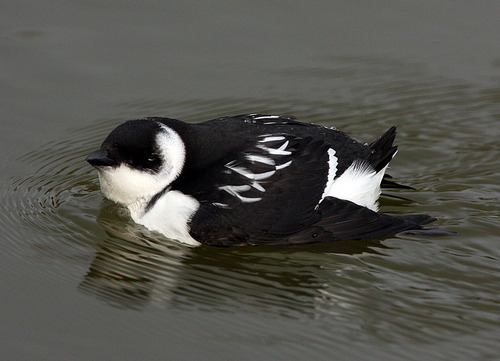
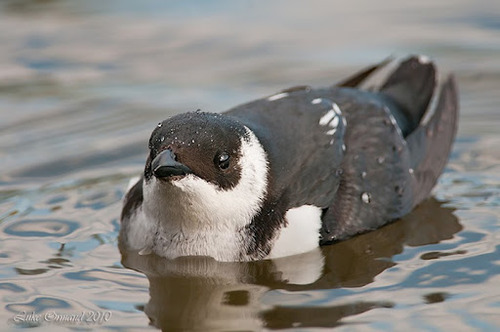
this has been a dovekie appreciation post
185K notes
·
View notes
Text
Ever get to that point where you're physically sick but someone pisses you off so bad that you just say, "fuck it! I'm cleaning this whole house right now!" And then you get shit done so they'll be embarrassed when they see all you accomplished? No? Just me? Kay.
1 note
·
View note