
Don't wanna be here? Send us removal request.
Statistics
We looked inside some of the posts by clamjumper5-blog and here's what we found interesting.
Average Info
Notes Per Post
0
Likes Per Post
0
Reblog Per Post
0
Reply Per Post
0
Time Between Posts
3 days
Number of Posts By Type
Text
17
Last Seen Tumblr Blogs


Fun Fact
Tumblr was named as a finalist in Lead411’s New York City Hot 125 in Aug 2010.
Text
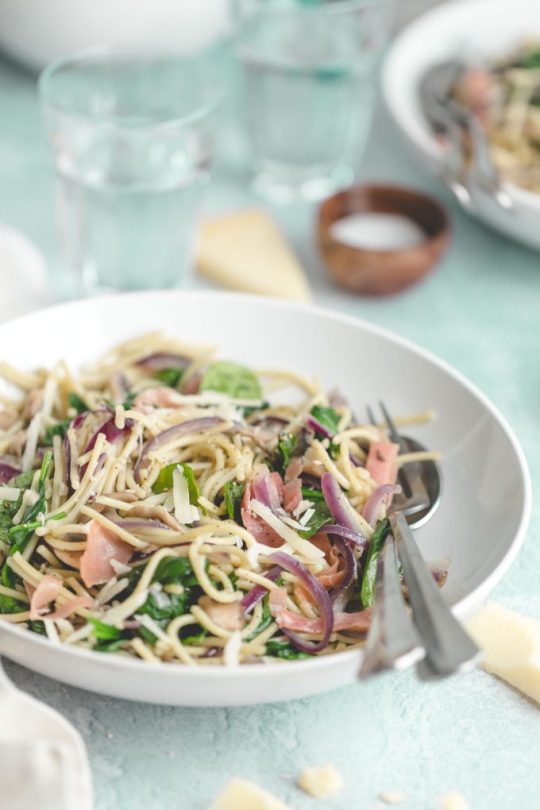
Spaghetti with Garlic, Mushrooms and Prosciutto
<![CDATA[ .tasty-recipes-quick-links text-align:center; .tasty-recipes-quick-links a padding: 0.5rem; ]]>
Make yourself a bowl of spaghetti with garlic, mushrooms and prosciutto in under 30 minutes (and for only 400 calories or 13 WW points)! You don’t need a sauce with all of the flavor from aromatic garlic, fresh basil, salty prosciutto, and rich Parmesan cheese.
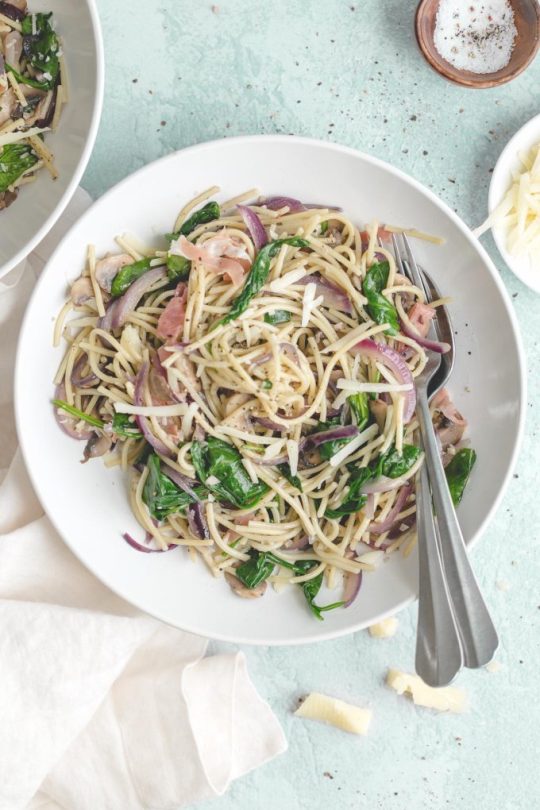
This is one of those easy pasta recipes that comes together quickly and yet comes off as somewhat impressive—a little elegant even. The ingredients aren’t unusual or hard to find, but combined, they create a lot of interest when it comes to flavor. And there’s a lot to love in the mix: the aromatic garlic, the fresh, herbal taste of basil, a strand of salty, savory prosciutto in every bite, and shavings of rich Parmesan.
There is no real sauce to this pasta, which keeps things simple but also means that this is a dish you need to eat immediately. The spaghetti gets lightly coated in the garlicky blend of olive oil and butter that you use to sauté the red onion and mushrooms. It’s enough to keep the spaghetti tender and pliable while still allowing all of the varying flavors to really come through. And this brings me to my first note:
Note #1: Don’t cut down on the oil or butter.
If you’re in the habit of making healthy meals or lightening traditional recipes, I understand why you might be tempted to reduce the amount of oil that I call for, or to skip the butter altogether. But don’t do it. The fats are essential. Beyond helping to properly brown and soften the garlic and veggies, they impart richness and flavor to a dish that doesn’t have any sauce at all.
Note #2: Salt your pasta water.
Salting the water before boiling your spaghetti is a step I didn’t always take. How much flavor could it really add anyway? Turns out, it does make a difference. When we think of table salt, it’s easy to think it only adds saltiness, but it does more. It helps to bring out the OTHER flavors in the dish, too. And don’t worry, not all the salt that you add to the water will be absorbed into the pasta, but the small amount that *does* get picked up will take your spaghetti from being fairly bland to having flavor at all.
With those notes in mind, here’s an overview of how to make your own spaghetti with garlic, mushrooms and prosciutto: Bring a pot of salted water to a boil and cook your spaghetti. While the pasta cooks, heat 2 tablespoons of olive oil and 1 tablespoon of butter in a large skillet or dutch oven and sauté lots of garlic, thinly sliced red onion, sliced mushrooms, and strips of prosciutto. Once the spaghetti is tender, add it to the pan along with a few handfuls of fresh spinach and fresh basil and toss it all together until the spinach wilts. Stir in Parmesan cheese and that’s it! You’re done.
Enjoy.
Print
<![CDATA[ .tasty-recipes-image float: right; .tasty-recipes-print-button background-color: #666677; display: inline-block; padding-left: 1em; padding-right: 1em; padding-top: 0.5em; padding-bottom: 0.5em; text-decoration: none; a.tasty-recipes-print-button color: #fff; a.tasty-recipes-print-button:hover color: #fff; .tasty-recipes-rating.tasty-recipes-clip-10 -webkit-clip-path: polygon(0 0, 10% 0%, 10% 100%, 0% 100%); clip-path: polygon(0 0, 10% 0%, 10% 100%, 0% 100%); .tasty-recipes-rating.tasty-recipes-clip-20 -webkit-clip-path: polygon(0 0, 20% 0%, 20% 100%, 0% 100%); clip-path: polygon(0 0, 20% 0%, 20% 100%, 0% 100%); .tasty-recipes-rating.tasty-recipes-clip-30 -webkit-clip-path: polygon(0 0, 30% 0%, 30% 100%, 0% 100%); clip-path: polygon(0 0, 30% 0%, 30% 100%, 0% 100%); .tasty-recipes-rating.tasty-recipes-clip-40 -webkit-clip-path: polygon(0 0, 40% 0%, 40% 100%, 0% 100%); clip-path: polygon(0 0, 40% 0%, 40% 100%, 0% 100%); .tasty-recipes-rating.tasty-recipes-clip-50 -webkit-clip-path: polygon(0 0, 50% 0%, 50% 100%, 0% 100%); clip-path: polygon(0 0, 50% 0%, 50% 100%, 0% 100%); .tasty-recipes-rating.tasty-recipes-clip-60 -webkit-clip-path: polygon(0 0, 60% 0%, 60% 100%, 0% 100%); clip-path: polygon(0 0, 60% 0%, 60% 100%, 0% 100%); .tasty-recipes-rating.tasty-recipes-clip-70 -webkit-clip-path: polygon(0 0, 70% 0%, 70% 100%, 0% 100%); clip-path: polygon(0 0, 70% 0%, 70% 100%, 0% 100%); .tasty-recipes-rating.tasty-recipes-clip-80 -webkit-clip-path: polygon(0 0, 80% 0%, 80% 100%, 0% 100%); clip-path: polygon(0 0, 80% 0%, 80% 100%, 0% 100%); .tasty-recipes-rating.tasty-recipes-clip-90 -webkit-clip-path: polygon(0 0, 90% 0%, 90% 100%, 0% 100%); clip-path: polygon(0 0, 90% 0%, 90% 100%, 0% 100%); .tasty-recipes-nutrition ul list-style-type: none; margin: 0; padding: 0; .tasty-recipes-nutrition ul:after display: block; content: ' '; clear: both; .tasty-recipes-nutrition li float: left; margin-right: 1em; .tasty-recipes-plug text-align: center; margin-bottom: 1em; display: -ms-flexbox; display: flex; -ms-flex-align: center; align-items: center; -ms-flex-pack: center; justify-content: center; .tasty-recipes-plug a text-decoration: none; box-shadow: none; .tasty-recipes-plug a img width: 150px; height: auto; margin: 5px 0 0 8px; display: inline-block; @media print .tasty-recipes-no-print, .tasty-recipes-no-print * display: none !important; ]]>
Make yourself a bowl of pasta in under 30 minutes (and for only 400 calories or 13 WW points)! You don’t need a sauce with all of the flavor from aromatic garlic, fresh basil, salty prosciutto, and rich Parmesan cheese.
Author: Andie Mitchell
Yield: 4 servings
Category: pasta
Ingredients
8 ounces dried spaghetti 2 tablespoons olive oil 1 tablespoon salted butter 4 garlic cloves, minced 8 ounces button mushrooms, stems removed, sliced ½ medium red onion, thinly sliced ¼ teaspoon salt, plus more to taste ¼ teaspoon freshly ground black pepper 3 ounces sliced prosciutto, cut into strips 3 cups baby spinach ⅓ cup chopped fresh basil ⅓ cup grated Parmesan cheese
Instructions
Boil the pasta in generously salted water according to package instructions. Drain and set aside.
Meanwhile, in a large nonstick skillet, heat the olive oil and butter over medium high heat. When the butter is melted, add the garlic, mushrooms, and onion, and cook, stirring occasionally, until the onions are soft and the mushrooms are soft and lightly browned, about 5 minutes. Add the salt, pepper, and prosciutto and cook, stirring constantly, for 1 minute. Add the spinach and let it sit on top of the hot skillet for 30 seconds. Remove the skillet from heat and add the cooked spaghetti, tossing to mix everything (the spinach will wilt as you mix). Add the fresh basil and the Parmesan, toss again, and serve immediately (with extra Parmesan, if desired).
Notes
13 WW Freestyle Points
Adapted from Better Homes and Gardens 2000
Nutrition
Calories: 403
Sugar: 3g
Sodium: 616mg
Fat: 16g
Carbohydrates: 48g
Fiber: 3g
Protein: 19g
Keywords: pasta, prosciutto, basil, quick
Did you make this recipe?
Tag @andiemmitchell on Instagram and hashtag it #andiemitchell
Source: http://www.andiemitchell.com/garlic-spaghetti-with-prosciutto-mushrooms-spinach/
0 notes
Text
From Russia With Love: How to Make Blini, Two Ways
[Photographs: Vicky Wasik]
More
Pancakes
Serious Eats digs into pancakes around the world.
New Year's Eve isn't a lot of fun when you're cooking in restaurants. As with other holidays, restaurants often offer a special prix fixe New Year's Eve menu ("complete with a champagne toast!") to lure diners. Special one-night menus translate to a lot of extra prep and scrambling for cooks who have to prepare dishes they often haven’t seen before. It’s stressful.
Odds are, you'll still be in the kitchen when the clock strikes midnight, and the best-case scenario is that you'll get to raise a deli container of bubbly with your coworkers. But there is one good thing about working on New Year's Eve in a nice restaurant: There will be caviar.
Caviar is the unofficial food of New Year's, which means restaurants are more or less obligated to offer it. I could always count on being able to swipe a few mother-of-pearl spoonfuls throughout service in the name of "quality control." At the end of the night, chefs share what’s left of the open caviar containers, scooping it up with potato chips that someone ran out and got at a bodega.
While I love the combination of potato chips and caviar, most people prefer to pair them with something a little more sophisticated, like Russian blini. Blini are what I want pancakes to be: more savory than sweet, and traditionally imbued with a good amount of tang thanks to a yeasted batter.
In the States, when we think of Russian blini, we commonly associate them with small buckwheat-flour pancakes, to be paired with smoked fish and caviar. Buckwheat blini are served in Russia, but, according to Anya von Bremzen in Please to the Table, you're more likely to find them made with regular flour there, and they're usually much larger than the silver-dollar versions served in Western Europe and in the US. I wanted to explore the blini possibilities, but with the goal of serving those small pancakes we expect with celebratory caviar.
I started down the blini rabbit hole by ordering a bunch of caviar and mixing up batch after batch of savory pancake batters. I made yeasted batters with 100% buckwheat flour and 100% all-purpose flour. I experimented with a 50/50 blend of the two and several ratios in between. Some yeasted batters I made with active dry yeast, others with instant yeast. I made sponges, and I made batters that required multiple proofing stages. I also made blini with no yeast at all. I tried my hand at Thomas Keller’s famous potato blini (which are, unsurprisingly, delicious) and French-style blini that have not only whipped egg whites but also whipped heavy cream folded into the batter right before cooking.
I held tastings in which we tried all these blini, first on their own and then paired with caviar and crème fraîche. The tricky part about making blini with the purpose of serving them as a vehicle for caviar is that you don’t want the flavor of the blini to overpower the expensive salted fish roe that you've shelled out all that money for. At the same time, you don’t want them to be bland and one-note boring. They need to complement the salinity of the caviar, not compete with it.
Tasters agreed that the blini made with only buckwheat flour were too intense, especially when the batter was yeasted. Even when the buckwheat flour was cut with all-purpose, the yeasted versions tasted too sour, as the yeast drowned out the earthy sweetness of the buckwheat. Once I'd eliminated yeast entirely from the batter, using baking powder and baking soda instead, the nuttiness of the buckwheat was able to shine through, and play the perfect foil to the creamy tang of cultured crème fraîche and the briny pop of caviar pearls.
I still wanted to develop a recipe for yeasted blini, so decided to take on a second version. Many traditional recipes for yeasted blini start with making a sponge, a fermented precursor for doughs and batters that's made with yeast, flour, warm liquid (either milk or water), and often a little sugar. After the yeast has had time to do its thing, the sponge is combined with the rest of the blini batter ingredients, and the batter is set aside again for another stage of fermentation.
This double fermentation means that you're spending upwards of three hours on a pancake batter. There’s certainly nothing wrong with that, if the payoff is big enough. But, as I mentioned earlier, when you're going all out and having blini and caviar, you want the star of the show to shine.
I decided to experiment with a yeasted batter that eliminated the second fermentation step. And it worked! These blini have just the right amount of tang from the sponge fermentation, and just a hint of sweetness for balance.
Both the buckwheat and the yeasted blini go perfectly with caviar and bubbly. Read on for more on how to make them both.
Start by scalding two cups of whole milk in a small saucepan. Transfer the milk to a large bowl, and let it cool until it registers between 105°F (41°C) and 115°F (46°C)—any hotter, and you risk killing the yeast; any colder, and you'll slow down the yeast's activity.
Add a packet of active dry yeast and one teaspoon of sugar, and let that mixture hang out for a few minutes. You should see the mixture begin to foam and bubble. If you don't, there's a good chance your yeast is dead—go buy some new yeast and start again.
Next, whisk in three-quarters of a cup of all-purpose flour, cover the bowl with plastic wrap, and leave the mixture in a warm place until it has roughly doubled in size.
To bring the batter together, I whisk another three-quarters of a cup all-purpose flour into the sponge, along with egg yolks, melted butter, vegetable oil, sugar, and a little salt. Treat the batter as you would a breakfast pancake batter; you don’t want to over-mix it, because gluten development will lead to tough blini. Leave it a little lumpy.
Right before cooking, whisk two egg whites until they hold soft peaks, then gently fold them into the batter.
To cook the blini, heat up a nonstick skillet or electric griddle and brush it with vegetable oil. Traditional blini recipes call for a potato dipped in oil, but as you can see, a paper towel does a much better job of spreading a thin film of oil on a nonstick cooking surface.
Can you use a cast iron skillet instead of a nonstick? Of course you can. But pancakes are one of the few things that I prefer to cook in a nonstick skillet. No matter how well you’ve seasoned your cast iron pan, it really can’t compete when you need to guarantee that nothing will adhere. (Cast iron is also a poor conductor of heat, making it more prone to hot and cold spots and thus more likely to produce unevenly browned pancakes.)
Use a spoon to portion out little silver dollar pancake–sized blini, about two and a half inches in diameter. Because these are yeasted pancakes, you can’t just go by the old rule of flipping them once you see bubbles, because they'll bubble right from the start. When you first drop the batter in the pan, you'll notice that the bubbles on the surface of the blini are reabsorbed into the batter. After a couple of minutes, though, the bubbles will stop collapsing back into the batter and will hold their shape. That’s when you want to flip them, checking first that they're a nice, pale golden brown on the bottom side.
Cook them for a couple minutes on the second side, then get them out of the pan. Wrap them in a clean kitchen towel so that they don’t dry out, and transfer them to a warm oven. Keep cooking and flipping blini until you're out of batter.
The process for making buckwheat blini is a lot simpler. Start by whisking together the dry ingredients: buckwheat flour, all-purpose flour, sugar, salt, baking powder, and baking soda. I settled on a ratio of two parts buckwheat flour to one part all-purpose, which highlights the pleasant, nutty bitterness of buckwheat without making it overpowering.
Because I did away with the yeast in this recipe, I'm using traditional American-breakfast-pancake leavening agents here instead: baking powder and soda.
I then whisk together buttermilk, egg yolks, melted butter, and a little vegetable oil. Buttermilk helps stand in for the tang that's lost without the yeast. Add the wet ingredients to the dry, and stir until just combined. Again, you don’t want to over-mix. Lumps are good.
Right before cooking, whisk a couple of egg whites in a bowl until they form stiff peaks. I go for stiff peaks here, instead of the soft peaks we want in the yeasted blini—buckwheat pancakes are denser and struggle to get the same amount of lift as ones made with all-purpose flour alone, so they need all the help they can get. Gently fold the whites into the batter, and you’re good to go.
Cook these the same way as the yeasted blini: a couple minutes per side in a nonstick pan or on an electric griddle.
With the blini squared away, all you have left to do is pop some bottles, get your fish eggs on ice, and prepare some garnishes. Traditional caviar accompaniments include chopped hard-cooked eggs, sliced chives, perfectly minced shallots (check out my guide to serving oysters at home for a primer on shallot-cutting), and crème fraîche.
As for the caviar itself, there are a lot of options out there, and not all of them are as expensive as you might think. During testing, I got the green light to order a selection of different caviars from Browne Trading Company, one of the top seafood purveyors in the Northeast. They sell caviars that range from $40 to $300 per tin.
Of the caviars that we tried, the Prime Osetra was the consensus favorite. Its salinity is restrained, and it has a hint of sweetness, with well-rounded and balanced flavor. If you like your caviar on the saltier side, then spoonbill caviar might be up your alley; a number of tasters liked its briny pop. To be honest, once you spoon caviar on a blin, or a potato chip, it’s all delicious.
This post may contain links to Amazon or other partners; your purchases via these links can benefit Serious Eats. Read more about our affiliate linking policy.
Source: https://www.seriouseats.com/2018/12/how-to-make-blini-and-caviar.html

0 notes
Text
Rice Noodles with Nuoc Cham, Herbs, & Crispy Tofu
When the heatwave hit earlier this week, I craved these noodles. I first ate them years ago while working at Fork, where the chef, Thien Ngo, would whip them up for lunch almost daily during the hottest weeks of the summer. We would eat them on the little back patio, an oasis of peace and cool, where they disappeared in no time, Thien’s always with a glass of wine “for digestion.”
Those noodles were so. damn. good. This is partly because Thien always used fresh rice noodles, which he purchased from a shop called Ding Ho near Reading Terminal Market, where they were made daily and sold in large sheets, folded and wrapped in oily cellophane to prevent them from drying out. If Thien ever disappeared midmorning, chances were he had snuck out on his bike to pick up the noodles, which he stashed in the plastic take-out bag on the shelf beneath his work station.
I always marveled at how efficiently Thien worked. Before chopping an herb or slicing a vegetable, he would throw a sauté pan over a burner set over low heat to warm up, ready for anything he might need to crisp or cook. And in no time, all of the other elements would materialize: the dressing, nuoc cham, the spicy, sweet, sharp condiment ubiquitous at nearly every Vietnamese meal; the chopped herbs, a mix of cilantro and Thai basil; the julienned vegetables, often cucumbers and carrots; and some sort of meat, often shrimp, which he would throw into his warm pan, heat now cranked to high, with oil, garlic and chilies.
When everything was ready, he unwrapped the noodles, sliced them into wide strips, and piled them into bowls. He then topped each heap of noodles with the various herbs, vegetables and meat, before pouring the dressing over top. He never tossed everything together all at once—we tossed with chopsticks as we ate, which kept the vegetables crisp and the herbs fresh. These noodles made me sweat—Thien made the nuoc cham very spicy—but somehow I always finished feeling refreshed.
With every heatwave we get, I think of these noodles, and Thien, too, who sadly is no where to be found. Thien was often difficult to work for, and he had issues, the extent of which I never learned, but there was so much good, too—good stories, good food, good drink, and really, really good noodles. Here’s to that.
Here’s a visual how-to guide:
Cook the rice noodles for 4-6 minutes or according to package instructions.
Drain and rinse under cold water.
For the nuoc cham, chop garlic and chilies:
Add fresh lime juice…
… along with sugar, fish sauce, and water.
Slice scallions and toss with …
… the cooked noodles, chopped herbs, and julienned cucumbers.
Toss noodles with nuoc cham and protein of choice, see recipe for details.
Print
<![CDATA[ .tasty-recipes-image float: right; .tasty-recipes-print-button background-color: #666677; display: inline-block; padding-left: 1em; padding-right: 1em; padding-top: 0.5em; padding-bottom: 0.5em; text-decoration: none; a.tasty-recipes-print-button color: #FFF; a.tasty-recipes-print-button:hover color: #FFF; .tasty-recipes-rating.tasty-recipes-clip-10 -webkit-clip-path: polygon(0 0, 10% 0%, 10% 100%, 0% 100%); clip-path: polygon(0 0, 10% 0%, 10% 100%, 0% 100%); .tasty-recipes-rating.tasty-recipes-clip-20 -webkit-clip-path: polygon(0 0, 20% 0%, 20% 100%, 0% 100%); clip-path: polygon(0 0, 20% 0%, 20% 100%, 0% 100%); .tasty-recipes-rating.tasty-recipes-clip-30 -webkit-clip-path: polygon(0 0, 30% 0%, 30% 100%, 0% 100%); clip-path: polygon(0 0, 30% 0%, 30% 100%, 0% 100%); .tasty-recipes-rating.tasty-recipes-clip-40 -webkit-clip-path: polygon(0 0, 40% 0%, 40% 100%, 0% 100%); clip-path: polygon(0 0, 40% 0%, 40% 100%, 0% 100%); .tasty-recipes-rating.tasty-recipes-clip-50 -webkit-clip-path: polygon(0 0, 50% 0%, 50% 100%, 0% 100%); clip-path: polygon(0 0, 50% 0%, 50% 100%, 0% 100%); .tasty-recipes-rating.tasty-recipes-clip-60 -webkit-clip-path: polygon(0 0, 60% 0%, 60% 100%, 0% 100%); clip-path: polygon(0 0, 60% 0%, 60% 100%, 0% 100%); .tasty-recipes-rating.tasty-recipes-clip-70 -webkit-clip-path: polygon(0 0, 70% 0%, 70% 100%, 0% 100%); clip-path: polygon(0 0, 70% 0%, 70% 100%, 0% 100%); .tasty-recipes-rating.tasty-recipes-clip-80 -webkit-clip-path: polygon(0 0, 80% 0%, 80% 100%, 0% 100%); clip-path: polygon(0 0, 80% 0%, 80% 100%, 0% 100%); .tasty-recipes-rating.tasty-recipes-clip-90 -webkit-clip-path: polygon(0 0, 90% 0%, 90% 100%, 0% 100%); clip-path: polygon(0 0, 90% 0%, 90% 100%, 0% 100%); .tasty-recipes-nutrition ul list-style-type: none; margin: 0; padding: 0; .tasty-recipes-nutrition ul:after display: block; content: ' '; clear: both; .tasty-recipes-nutrition li float: left; margin-right: 1em; @media print .tasty-recipes-no-print, .tasty-recipes-no-print * display: none !important; .tasty-recipes border: 5px solid #b7cfb2; margin-top: 6em; margin-bottom: 4em; .tasty-recipes-print-button display: none; .tasty-recipes-image-shim height: 69.5px; clear: both; .tasty-recipes-entry-header background-color: #b7cfb2; color: #FFF; text-align: center; padding-top: 35px; padding-bottom: 1.5em; padding-left: 2.5em; padding-right: 2.5em; .tasty-recipes-entry-header.tasty-recipes-has-image padding-top: 0px; .tasty-recipes-entry-header .tasty-recipes-image float: none; text-align: center; transform: translateY(-115px); margin-bottom: 1em; /* Decide if we need this */ .tasty-recipes-entry-header .tasty-recipes-image img -webkit-border-radius: 50%; -moz-border-radius: 50%; border-radius: 50%; border: 5px solid #b7cfb2; height: 150px; width: 150px; display: inline-block; .tasty-recipes-entry-header h2 font-size: 2em; font-weight: 400; text-transform: lowercase; margin-bottom: 0; text-align: center; color: #FFF; margin-top: 0; padding-top: 0; padding-bottom: 0; .tasty-recipes-has-image .tasty-recipes-entry-header h2 margin-top: -115px; .tasty-recipes-entry-header hr border: 1px solid #FFF; background-color: #FFF; margin-bottom: 1em; margin-top: 1em; .tasty-recipes-entry-header div.tasty-recipes-rating text-decoration: none; border: none; .tasty-recipes-entry-header .tasty-recipes-rating:hover text-decoration: none; .tasty-recipes-entry-header div.tasty-recipes-rating font-size: 1.375em; display: block; .tasty-recipes-entry-header .tasty-recipes-rating p margin-bottom: 0; .tasty-recipes-entry-header span.tasty-recipes-rating margin-left: .25em; margin-right: .25em; color: #FFF; .tasty-recipes-entry-header .rating-label font-style: italic; color: #FFF; font-size: .6875em; display: block; .tasty-recipes-entry-header .tasty-recipes-details margin-top: 1em; .tasty-recipes-entry-header .tasty-recipes-details ul list-style-type: none; margin: 0; .tasty-recipes-entry-header .tasty-recipes-details ul li display: inline-block; margin-left: .5em; margin-right: .5em; font-size: 1em; line-height: 2.5em; color: #fff; .tasty-recipes-entry-header .tasty-recipes-details ul li.author, .tasty-recipes-entry-header .tasty-recipes-details ul li.total-time display: none; @media only screen and (max-width: 520px) .tasty-recipes-entry-header .tasty-recipes-details .detail-icon height: .8em; margin-top: .4em; .tasty-recipes-entry-header .tasty-recipes-details ul li font-size: .875em; line-height: 1.75em; @media only screen and (min-width: 520px) .tasty-recipes-entry-header .tasty-recipes-details .detail-icon height: 1em; margin-top: .6em; .tasty-recipes-entry-header .tasty-recipes-details ul li font-size: 1em; line-height: 2.5em; .tasty-recipes-entry-header .tasty-recipes-details .tasty-recipes-label font-style: italic; color: #FFF; margin-right: .125em; .tasty-recipes-entry-header .tasty-recipes-details .detail-icon vertical-align: top; margin-right: .2em; display: inline-block; .tasty-recipes-entry-content padding-top: 1.25em; .tasty-recipes-entry-content .tasty-recipes-buttons margin-bottom: 1.25em; margin-left: 1.25em; margin-right: 1.25em; .tasty-recipes-entry-content .tasty-recipes-buttons:after content: " "; display: block; clear: both; .tasty-recipes-entry-content .tasty-recipes-button-wrap width: 50%; display: inline-block; float: left; box-sizing: border-box; .tasty-recipes-entry-content .tasty-recipes-buttons a text-transform: uppercase; text-align: center; display: block; color: #FFF; background-color: #b7cfb2; font-size: 1em; line-height: 1.375em; padding-top: 1em; padding-bottom: 1em; font-weight: bold; margin-top: 0; border: none; border-radius: 0; text-decoration: none; .tasty-recipes-entry-content a img box-shadow: none; -webkit-box-shadow: none; .tasty-recipes-entry-content .tasty-recipes-buttons a:hover background-color: #979599; text-decoration: none; .tasty-recipes-entry-content .tasty-recipes-buttons img vertical-align: top; .tasty-recipes-entry-content .tasty-recipes-buttons img.svg-print, .tasty-recipes-entry-content .tasty-recipes-buttons img.svg-pinterest height: 1.25em; margin-right: .375em; margin-bottom: 0; background: none; display: inline-block; @media only screen and (min-width: 520px) .tasty-recipes-entry-content .tasty-recipes-button-wrap:first-child padding-right: .625em; .tasty-recipes-entry-content .tasty-recipes-button-wrap:last-child padding-left: .625em; @media only screen and (max-width: 520px) .tasty-recipes-entry-content .tasty-recipes-button-wrap width: 100%; .tasty-recipes-entry-content .tasty-recipes-button-wrap:nth-child(2) padding-top: 1em; .tasty-recipes-entry-content h3 text-transform: uppercase; font-size: .75em; color: #979599; margin-bottom: 1.5em; .tasty-recipes-entry-content h4 font-size: 1em; padding-top: 0; margin-bottom: 1.5em; margin-top: 1.5em; .tasty-recipes-entry-content hr background-color: #EAE9EB; border: 1px solid #EAE9EB; margin-top: 1em; margin-bottom: 1em; .tasty-recipes-entry-content .tasty-recipes-description, .tasty-recipes-entry-content .tasty-recipes-ingredients, .tasty-recipes-entry-content .tasty-recipes-instructions, .tasty-recipes-entry-content .tasty-recipes-keywords padding-left: 1.25em; padding-right: 1.25em; .tasty-recipes-entry-content .tasty-recipes-description p margin-bottom: 1em; .tasty-recipes-entry-content .tasty-recipes-ingredients ul, .tasty-recipes-entry-content .tasty-recipes-instructions ul list-style-type: none; margin-left: 0; margin-bottom: 1.5em; padding: 0; .tasty-recipes-entry-content .tasty-recipes-ingredients ul li, .tasty-recipes-entry-content .tasty-recipes-instructions ul li margin-bottom: .625em; list-style-type: none; position: relative; margin-left: 2.5em; line-height: 1.46; .tasty-recipes-entry-content .tasty-recipes-ingredients ul li:before, .tasty-recipes-entry-content .tasty-recipes-instructions ul li:before background-color: #b7cfb2; -webkit-border-radius: 50%; -moz-border-radius: 50%; border-radius: 50%; height: .5em; width: .5em; display: block; content: " "; left: -1.25em; top: .375em; position: absolute; .tasty-recipes-entry-content .tasty-recipes-ingredients ol, .tasty-recipes-entry-content .tasty-recipes-instructions ol counter-reset:li; margin-left: 0; padding: 0; .tasty-recipes-entry-content .tasty-recipes-ingredients ol li, .tasty-recipes-entry-content .tasty-recipes-instructions ol li list-style-type: none; position: relative; margin-bottom: 1em; margin-left: 2.5em; line-height: 1.46; .tasty-recipes-entry-content .tasty-recipes-ingredients ol li:before, .tasty-recipes-entry-content .tasty-recipes-instructions ol li:before content:counter(li); counter-increment: li; position: absolute; background-color: #b7cfb2; -webkit-border-radius: 50%; -moz-border-radius: 50%; border-radius: 50%; height: 1.45em; width: 1.45em; color: #FFF; left: -1.25em; transform: translateX(-50%); line-height: 1.5em; font-size: .6875em; text-align: center; top: .1875em; @media only screen and (max-width: 520px) .tasty-recipes-entry-content .tasty-recipes-ingredients ol, .tasty-recipes-entry-content .tasty-recipes-instructions ol margin-left: 0; .tasty-recipes-entry-content .tasty-recipes-notes padding: 1.25em; background-color: #EDF0F2; .tasty-recipes-entry-content .tasty-recipes-notes ol counter-reset:li; margin-left: 0; padding: 0; .tasty-recipes-entry-content .tasty-recipes-notes ul margin-left: 0; padding: 0; .tasty-recipes-entry-content .tasty-recipes-notes p, .tasty-recipes-entry-content .tasty-recipes-notes ul li, .tasty-recipes-entry-content .tasty-recipes-notes ol li background-color: #FFF; padding-left: 1.5625em; padding-right: 1.5625em; padding-top: 1.25em; padding-bottom: 1.25em; position: relative; -webkit-clip-path: polygon(20px 0, 100% 0, 100% 100%, 0 100%, 0 20px); clip-path: polygon(20px 0, 100% 0, 100% 100%, 0 100%, 0 20px); margin-bottom: 1.5em; @media only screen and (min-width: 520px) .tasty-recipes-entry-content .tasty-recipes-notes p, .tasty-recipes-entry-content .tasty-recipes-notes ul li, .tasty-recipes-entry-content .tasty-recipes-notes ol li padding-left: 2.5em; .tasty-recipes-entry-content .tasty-recipes-notes p:before, .tasty-recipes-entry-content .tasty-recipes-notes ul li:before content: "i"; display: block; background-color: #b7cfb2; -webkit-border-radius: 50%; -moz-border-radius: 50%; border-radius: 50%; height: 1.3em; width: 1.3em; font-size: .75em; line-height: 1.3em; text-align: center; color: #FFF; position: absolute; left: 1.167em; top: 1.9em; .tasty-recipes-entry-content .tasty-recipes-notes ol li:before content:counter(li); counter-increment: li; position: absolute; background-color: #b7cfb2; -webkit-border-radius: 50%; -moz-border-radius: 50%; border-radius: 50%; height: 1.45em; width: 1.45em; color: #FFF; left: 2em; transform: translateX(-50%); line-height: 1.5em; font-size: .6875em; text-align: center; top: 2em; .tasty-recipes-entry-content .tasty-recipes-notes p:last-child margin-bottom: 0; .tasty-recipes-entry-content .tasty-recipes-keywords background-color: #EDF0F2; padding-bottom: 1em; padding-top: 1em; .tasty-recipes-entry-content .tasty-recipes-keywords p font-size: 0.7em; font-style: italic; color: #979599; margin-bottom: 0; .tasty-recipes-entry-content .tasty-recipes-keywords p span font-weight: bold; .tasty-recipes-nutrifox text-align: center; margin: 0; .nutrifox-label background-color: #EDF0F2; .tasty-recipes-nutrifox iframe width: 100%; display: block; margin: 0; .tasty-recipes-entry-content .tasty-recipes-nutrition padding: 1.25em; color: #b7cfb2; .tasty-recipes-nutrition .tasty-recipes-label font-style: italic; color: #FFF; margin-right: .125em; font-weight: 400; .tasty-recipes-nutrition ul text-align: center; .tasty-recipes-nutrition li float: none; display: inline-block; line-height: 2em; .tasty-recipes-entry-footer background-color: #b7cfb2; padding-top: 1.5625em; padding-bottom: 1.25em; padding-left: 2.5em; padding-right: 2.5em; text-align: center; .tasty-recipes-entry-footer .tasty-recipes-footer-content display: inline-block; .tasty-recipes-entry-footer img width: 65px; .tasty-recipes-entry-footer h3 color: #FFF; font-size: 1.25em; line-height: 2.25em; margin-top: .5em; margin-bottom: .125em; padding: 0; line-height: 1em; .tasty-recipes-entry-footer p margin-bottom: 0; color: #FFF; font-size: .75em; .tasty-recipes-entry-footer p a color: #FFF; text-decoration: underline; box-shadow: none; border-bottom: none; .tasty-recipes-entry-footer:after content: " "; display: block; clear:both; @media only screen and (max-width: 520px) .tasty-recipes-entry-footer h3 margin-top: .5em; margin-bottom: .5em; .tasty-recipes-entry-footer text-align: center; @media only screen and (min-width: 520px) .tasty-recipes-entry-footer img float: left; .tasty-recipes-entry-footer h3, .tasty-recipes-entry-footer p margin-left: 90px; clear: none; text-align: left; /* Print view styles */ .tasty-recipes-print-view font-size: 11px; background-color: #fff; .tasty-recipes-print-view .tasty-recipes-print-button display: inline-block; .tasty-recipes-print padding:0; font-size: 11px; .tasty-recipes-print-view .tasty-recipes margin-top: 1em; .tasty-recipes-print .tasty-recipes-entry-header background-color: inherit; color: inherit; padding-bottom: 0; padding-left: 1em; padding-right: 1em; padding-top: 1em; .tasty-recipes-print .tasty-recipes-entry-header .tasty-recipes-image float: right; transform: none; .tasty-recipes-print.tasty-recipes-has-image .tasty-recipes-entry-header h2 margin-top: 0; .tasty-recipes-print .tasty-recipes-entry-header h2 color: inherit; margin-bottom: .5em; .tasty-recipes-print .tasty-recipes-entry-header hr display: none; .tasty-recipes-print .tasty-recipes-entry-header span.tasty-recipes-rating color: #000; .tasty-recipes-print .tasty-recipes-entry-header .tasty-recipes-details ul padding: 0; clear: none; .tasty-recipes-print .tasty-recipes-entry-header .tasty-recipes-details ul li line-height: 1.5em; color: #000; .tasty-recipes-print .tasty-recipes-entry-header .tasty-recipes-details .detail-icon display: none; .tasty-recipes-print .tasty-recipes-entry-content img max-width: 50%; height: auto; .tasty-recipes-print .tasty-recipes-entry-content .tasty-recipes-ingredients ul li, .tasty-recipes-print .tasty-recipes-entry-content .tasty-recipes-ingredients ol li margin-bottom: 0.25em; line-height: 1.1; .tasty-recipes-print .tasty-recipes-entry-content .tasty-recipes-instructions ul li, .tasty-recipes-print .tasty-recipes-entry-content .tasty-recipes-instructions ol li margin-bottom: 0.5em; line-height: 1.1; .tasty-recipes-print .tasty-recipes-entry-content .tasty-recipes-ingredients ul li:before, .tasty-recipes-print .tasty-recipes-entry-content .tasty-recipes-instructions ul li:before top: 0.3em; .tasty-recipes-print .tasty-recipes-entry-content .tasty-recipes-ingredients ol li:before, .tasty-recipes-print .tasty-recipes-entry-content .tasty-recipes-instructions ol li:before top: 0; .tasty-recipes-print .tasty-recipes-entry-content .tasty-recipes-notes p, .tasty-recipes-print .tasty-recipes-entry-content .tasty-recipes-notes ul li, .tasty-recipes-print .tasty-recipes-entry-content .tasty-recipes-notes ol li padding-top: 0; padding-bottom: 0; background-color: #EDF0F2; clip-path: none; .tasty-recipes-print .tasty-recipes-entry-content .tasty-recipes-notes p:before, .tasty-recipes-print .tasty-recipes-entry-content .tasty-recipes-notes ul li:before top: 0; clip-path: none; margin-bottom: 0.5em; @media print .tasty-recipes-print .tasty-recipes-entry-footer img display: none; .tasty-recipes-print .tasty-recipes-source-link text-align: center; ]]>
Description
These noodles are inspired a dish a chef I worked for in Philadelphia often made for lunch during the summer.
If you like video, you can watch a how-to in Instagram stories.
Notes:
Nuoc cham is a spicy, sweet, sharp condiment ubiquitous at nearly every Vietnamese meal. When using it as a dipping sauce, as here, you can omit the water.
In place of shrimp or other meat (see story above), I made Sarah Jampel’s crispy sesame tofu on Food52 ages ago and absolutely loved it. I adjusted the recipe here slightly for simplicity: instead of using 2 teaspoons soy sauce, I use 2 teaspoons of the nuoc cham dressing, and I omit the sesame oil. If you wish to follow her original recipe, do so here. For some visual guidance on pressing tofu, see this post.
If tofu isn’t your thing, grilled or sautéed shrimp would be delicious as would really any protein you like: I’d serve them with grilled chicken thighs, skirt steak, or pork tenderloin, to name a few.
I like to slice cucumbers on a mandoline, but if that scares you, simply slice them thinly using your knife. Carrots or radish or daikon would all be nice here, too. A sprializer is a good tool for this as well and also less scary than using a mandoline.
Ingredients
for the nuoc cham dressing:
1/4 cup sugar
1/3 cup fish sauce
1/3 cup fresh lime juice, plus more to taste
2 to 3 garlic cloves, sliced or minced
2 red Thai chilies or serrano or jalapeño peppers, thinly sliced
1/2 cup water
squirt Sriracha, optional
for the tofu:
14-oz block extra-firm tofu, pressed if you have time
2 tablespoons oil such as peanut, vegetable or olive
2 teaspoons nuoc cham dressing, see notes
1 tablespoon corn starch
1 tablespoon panko
1 tablespoon sesame seeds
for the noodle dish:
8 oz dried rice noodles
6 scallions, thinly sliced, white and green parts
1 cucumber or carrot or other vegetable, thinly sliced, see notes
herbs: cilantro, mint, Thai basil (if you can find it), thinly sliced
nuoc cham dressing to taste
crispy tofu or other protein of choice, see notes
Instructions
Make the nuoc cham dressing: In a medium bowl, whisk together the sugar, fish sauce, and lime juice until the sugar is completely dissolved. Add the garlic, chilies, and water. Add Sriracha, if using. Taste and adjust flavors if necessary with more lime or hot chilies. Set aside.
To make the tofu: Heat the oven to 400° F and line a sheet pan with parchment paper. Cut the tofu into 1/2-inch cubes and place in a bowl. Add the oil, nuoc cham, corn starch, panko, and sesame seeds, and stir to coat. Spread the tofu onto the baking sheet, leaving excess dressing behind. Bake for 30 to 40 minutes, flipping halfway through, until golden and crisp on top and bottom.
To assemble the noodles: Fill a large pot of water and bring it to a boil. Boil according to package instructions, typically 4-6 minutes. Drain and rinse until cold water. Transfer noodles to a large bowl. Add the scallions, cucumbers or other vegetables, herbs, and dressing to taste. Toss. Add more dressing if necessary. Add tofu or other protein and toss again.

Source: https://alexandracooks.com/2018/08/30/rice-noodles-with-nuoc-cham-herbs-crispy-tofu/
0 notes
Text
Honey Vanilla Glazed Pork Loin
Pork loin is my most favorite cut of pork. It is so moist and tender. Really the only way you can mess it up is by cooking it too long.
This recipe takes just a few ingredients to make a sweet and savory glaze to coat that luscious pork loin with. I paired it with sweet carrots and some garlic brown butter potatoes (recipe coming tomorrow).
This would be a great option to serve for Easter if you have a small group. It is also a great dish to serve for company.
Honey Vanilla Glazed Pork Loin
2 (1 lb each) pork tenderloins
¼ cup honey
2 Tbsp vinegar
1 tsp vanilla
½ tsp paprika
¼ tsp ground mustard
¼ tsp salt
pepper to taste
Preheat oven to 375 degrees.
Place pork loins in a 9 x 13 inch baking dish.
In a bowl, combine all of the remaining ingredients together.
Brush meat with a layer of glaze. Bake at 375 degrees for 45 minutes brushing with glaze every 10-15 minutes. Allow to rest for 5 minutes before slicing. Serves 8,
Recipe adapted from McCormick. Source: https://www.realmomkitchen.com/honey-vanilla-glazed-pork-loin/
0 notes
Text
3 top hot sauces in my kitchen
The hot sauce basket in my refrigerator is loaded with sauces from all over the country. But what are my 3 top hot sauces that I reach for again and again? Today I’m spilling the beans chilies.
My favorite souvenirs on any trip are photographs & food. I can print the photographs, hang them on the wall, and fondly remember my explorations for years to come.
And since my main plan on any vacation is to eat all of the food, bringing home hot sauces, spices, or chocolates from a trip means that I get to extend the gustatory highlights that much longer.
Over the years, I’ve gotten Yellowbird from Austin, Fat Cat from Orlando, Crazy Gringa from Omaha, and Chicaoji from Seattle.
Hot sauce is a must on my vegan grocery list and one of my 25 kitchen essentials. Whenever my other hot sauce-loving friends recommend a sauce, I’m always eager to sample it. And if a restaurant has a hot sauce tray with a selection of sauces, well, it moves way up in terms of my affection.
In the bottom of my own refrigerator, I have a basket for all of my hot sauces. It makes it easy to just pull out the basket whenever I need a squeeze.
(Not all hot sauces require refrigeration, but it doesn’t hurt to store them all in one place. And it helps with optimum freshness, in case it takes a while to use all of them.)
Cheeseless pizza comes to life with a few splashes of hot sauce. Obviously, chickpea tacos and vegan taco pizza are improved by something spicy. An Austin breakfast, platter of vegan nachos, or vegan chili cheese tater tots are all enhanced with a fiery addition.
Top hot sauces
Wildbrine Probiotic Smoky Jalapeño Sriracha
So after promising that I’d share my favorites a couple months back, here are my 3 top hot sauces that I reach for the most often.
The hot sauce that I’m most obsessed with these days is Wildbrine probiotic smoky jalapeño sriracha. It’s sold in the refrigerated section, and it needs to be stored in the refrigerator too.
The ingredients are: cabbage, jalapeño peppers, water, garlic, Anaheim peppers, tomatillos, kale, sea salt, cherry wood smoked salt, and chipotle pepper.
It’s made from a sauerkraut company, and they also use probiotic-rich fermented cabbage as the main ingredient in their hot sauce. It makes for a bright, lively taste. There’s also a strong hit of garlic, which really appeals to me.
In addition to smoky jalapeño sriracha, they have a spicy kimchi sriracha. I always have both on hand, but the jalapeño is my favorite.
Use Wildbrine smoky jalapeño sriracha on:
The only flaw with this hot sauce is the bottle design. It’s a very thick hot sauce, and it tends to get stopped up at the top.
They have already had a bottle re-design to change it from a squeeze mustard-style top to this flat top. However, that hasn’t fixed the problem of it getting backed up at the head. I recommend removing the top and using a spoon instead.
Trader Joe’s Jalapeño Pepper Hot Sauce
My favorite general, all-purpose hot sauce is jalapeño hot sauce from Trader Joe’s.
The ingredients are: red ripened jalapeño peppers, distilled vinegar, and salt.
This has been a pantry staple of mine for probably a decade. It has a nice bit of heat and well-rounded flavor without being blow-your-mouth off hot.
It accentuates the flavors that are already in a dish, which makes it ideal for adding to things like vegan chili cheese dip or vegan three bean chili, when you want it to be part of the layered tastes of an entrée.
At one point in my life, Trader Joe’s jalapeño pepper hot sauce was my go-to popcorn topping along with a few generous sprinkles of nutritional yeast flakes.
Use Trader Joe’s jalapeño pepper hot sauce on:
Frank’s RedHot Sauce
I only use Frank’s RedHot sauce for buffalo-style dishes, but for that, it’s essential.
Frank’s RedHot Sauce ingredients are: aged cayenne red peppers, distilled vinegar, water, salt, and garlic powder.
Use Frank’s RedHot Sauce on:
Depending on how much you want to cut the spiciness of the sauce, adjust the amount of melted non-dairy butter you use in combination with it. (I generally go half & half or 3 parts hot sauce to one part melted butter.) Serve it with cooling vegan blue cheese or ranch dressing.
What are the top hot sauces in your kitchen?
Disclosure: Post includes Amazon affiliate links.
Source: https://cadryskitchen.com/2018/08/21/top-hot-sauces/
0 notes
Text
Top Recipes of 2018!
Where did the time go?! It feels like just yesterday that I was sitting here writing about last year’s top recipes, and here we are again. 2018 was a busy one… we settled into our Chicago home and cooked up a storm of yummy food. We have some exciting things happening in 2019, but before we get there, here are the greatest hits of this past year. I think it’s fun to check our analytics to see which of your favorite recipes were also my favorite recipes… and this list really aligns. So without further ado…
(Click on the titles or photos to go directly to each recipe)
Best Darn Veggie Burgers (pictured above)
I knew this one would make it to this “top” list because so many of you have tagged me on your Instagram photos of this recipe :). These burgers start with an umami-rich mixture of mushrooms, tamari, and balsamic vinegar. There’s some paprika for a little smoky flavor. They’re held together with sticky brown rice, and they have a nice non-mushy texture thanks to the walnuts and panko.
Roasted Vegetable Lasagna
This is my ultimate winter comfort food. It’s hot, it’s saucy, and it’s packed with tons of flavorful, roasted vegetables like fennel, leeks, and mushrooms. It’s hearty, yet healthy (for lasagna). Just writing this post has me craving it all over again.
Creamy Vegan Tomato Soup
I could eat soup every single day – especially this soup. The creaminess in this one comes from chickpeas instead of cream or cashews. It’s so healthy that you won’t feel guilty topping your soup with fun little vegan grilled cheese croutons!
Mango Black Bean Ginger Rice Bowls
When January hits and you crave fresh, vibrant foods – this is your bowl. It’s full of crispy veggies, hearty black beans, and sweet mango. It’s drizzled with a light, tangy tamari lime sauce that I’m obsessed with – the same sauce that’s in the Brussels Sprout & Coconut Rice recipe in our first cookbook, which you should also try!
Cauliflower Turmeric Rice
I’m happy to see that this one was a fan favorite because it’s also one of my personal favorites. I based it on a curried rice dish that I love, but subbed in cauliflower rice, which worked better than I expected! Make it a full meal by serving it with naan bread to dip in the yummy cardamom yogurt.
Chipotle Cauliflower Nachos with Pineapple Salsa
Nacho “cheese” sauce made from cauliflower. Need I say more?
Roasted Cherry Tomato Herbed Couscous Salad
It’s not exactly tomato season right now, but stick this recipe in your back pocket, and make it the second cherry tomatoes show up at your farmers market! This recipe is a celebration of tomatoes with a tasty, contrasting combination of savory roasted tomatoes with bursty fresh tomatoes.
Raw Peanut Butter Cookie Dough Superfood Bars
In the post for this recipe, I wrote “if you make one dessert recipe from this blog, it should be this one…” and you did! I loved seeing all of your photos on Instagram of these delectable bars. 🙂
Butternut Cauliflower Vegetable Curry
Make this punchy, flavorful coconut curry and then freeze the leftovers – you’ll thank yourself later.
Blueberry Lemon Zest Breakfast Cookies
Speaking of freezing things, I regularly make a batch of these and freeze them for a quick on-the-go breakfast. If you don’t have fresh blueberries, they’re super delicious with dried tart cherries.
Wishing you all a happy & healthy new year – as always, let me know if you have any recipe requests for 2019! xo, Jeanine
Source: https://www.loveandlemons.com/top-recipes-2018/
0 notes
Text
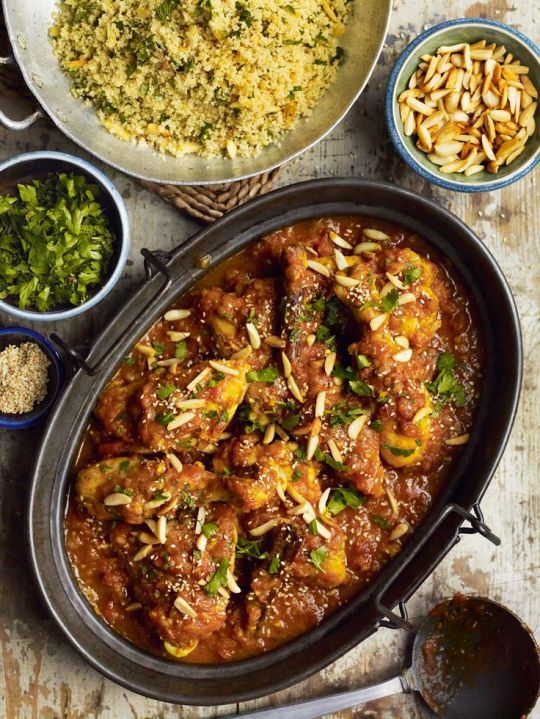
Instant Pot Paleo Chicken Tikka Masala
A deliciously authentic tasting paleo chicken tikka masala recipe made easily in your pressure cooker! This amazing tender chicken stewed in aromatic sauce tastes just like restaurant-style chicken tikka masala.
This post is sponsored by iHerb.
Preparing Indian food at home has been a hobby of mine for years. The aromatic flavors, the scent of cooking with an array of spices, the process of getting a dish to taste just like the authentic version is a beautiful sensory experience – and a very welcome challenge!
If you’ve been following The Roasted Root for many moons, you may even remember my Crock Pot Chicken Tikka Masala, which broke the internet back in its hay day.
Because it’s been a long time since we have Tikka Masala-ed together, I thought I would re-visit the subject paleo-style in the Instant Pot.
The traditional version of Chicken Tikka Masala uses yogurt for marinating the chicken and sometimes calls for heavy cream in the sauce. I replace the dairy using full-fat canned coconut milk and the result is sinfully delicious.
Plus, when all is said and done, this restaurant-style Chicken Tikka Masala tastes remarkably authentic. I’m willing to bet it will become a staple in your household!
To prepare the recipe, I picked up some pantry staples off of iHerb.com.
If you haven’t used iHerb yet, here’s the rundown. iHerb is a global leader in bringing the best overall value in natural products to customers worldwide.
iHerb’s triple guarantee ensures that 1.) You will receive the best overall value in the world for over 30,000 brand name natural products, 2.) Guarantees that all products are authentic brands sold in the U.S. market and are shipped directly from climate-controlled warehouses, and 3.) Guarantees delivery of your order! – They provide free or discounted shipping to over 150 countries around the world.
To make this Instant Pot Chicken Tikka Masala, I used 4th & Heart Ghee, Bionaturae Organic Crushed Tomatoes, Edward & Sons Organic Creamed Coconut, Napoleon Co.Tomato Paste, Simply Organic Garam Masala, Simply Organic Ceylon Cinnamon, and Simply Organic Paprika, all of which I snagged off of iHerb. I enjoy the convenience of getting all my cooking items from one spot, which can be a challenge when you cook using ingredients that aren’t available at all grocery stores.
So let’s do this!
How to Make Instant Pot Paleo Chicken Tikka Masala:
Start by marinating the chicken in coconut milk and and the spices.
While the chicken is marinating, prepare the tikka masala sauce. To do so, start by sautéing the onion in ghee.
Add the spices and continue sautéing another couple of minutes to open up the flavor of the spices. Add the remaining ingredients for the sauce and bring to a gentle boil. Simmer the sauce for at least 15 minutes – you can absolutely simmer for longer to achieve deeper flavor if you have the time!
Use an immersion blender or a regular blender to blend the sauce until it is completely creamy.
Turn on your Instant Pot (or pressure cooker) to the Sauté function and allow it to heat up for a couple of minutes. Add the chicken, including the marinade and brown it for 3 to 4 minutes.
Pour in the tikka masala sauce, secure the lid on the Instant Pot, select the Pressure Cook function and change the power to Low.
Keep the pressure release valve set to Sealing (not Venting). Cook for 35 minutes, then allow the Instant Pot to go into Keep Warm Mode for an additional 20 to 30 minutes.
Release any remaining pressure by using the quick release valve.
And that is it! Serve it up over your choice of white or brown rice, or go full-tilt grain-free by serving it with cauliflower rice.
For those of you who love Tikka Masala but don’t have spare time to make the sauce yourself, iHerb offers options for pre-made sauces (not just Tikka Masala), such as Kitchens of India, Punjabi Tikka Masala. All you would do is use this sauce in place of making your own, following the recipe instructions as normal.
Great news! New and Existing Customers of iHerb get a discount on their order with no minimum purchase by CLICKING HERE.
I hope you love this Instant Pot Paleo Chicken Tikka Masala as much as I do!
Instant Pot Paleo Chicken Tikka Masala
Print
Ingredients
For the Tikka Masala Sauce:
Instructions
Stir together the ingredients for the chicken marinade in a mixing bowl, then add in the chopped chicken. Stir until all of the chicken is saturated in the marinade. Cover with plastic wrap and refrigerate at least 15 minutes (ideally 1 to 8 hours).
While the chicken is marinating, prepare the tikka masala sauce. To do so, start by sautéing the onion in ghee. Saute 5 to 8 minutes, until onion is translucent.
Add the garlic, ginger, and spices and continue sautéing another couple of minutes to open up the flavor of the spices. Add the remaining ingredients for the sauce and bring to a gentle boil. Simmer the sauce for at least 15 minutes – you can absolutely simmer for longer to achieve deeper flavor if you have the time! Use an immersion blender (or transfer to a regular blender) to blend the sauce until creamy.
Turn on your Instant Pot (or pressure cooker) to the Sauté function and allow it to heat up for a couple of minutes. Add the chicken, including the marinade and brown it for 3 to 4 minutes.
Pour in the tikka masala sauce, secure the lid on the Instant Pot, and select the Pressure Cook function. Change the setting to Low, and keep the pressure release valve set to Sealing (not Venting). Cook for 35 minutes, then allow the Instant Pot to go into Keep Warm Mode for an additional 20 to 30 minutes. Release any remaining steam using the quick release valve.
Remove the lid on the Instant Pot and serve Chicken Tikka Masala with choice of rice or cauliflower rice.
Source: https://www.theroastedroot.net/instant-pot-paleo-chicken-tikka-masala/

0 notes
Text
Baked gobi 65 recipe, Indian style baked cauliflower
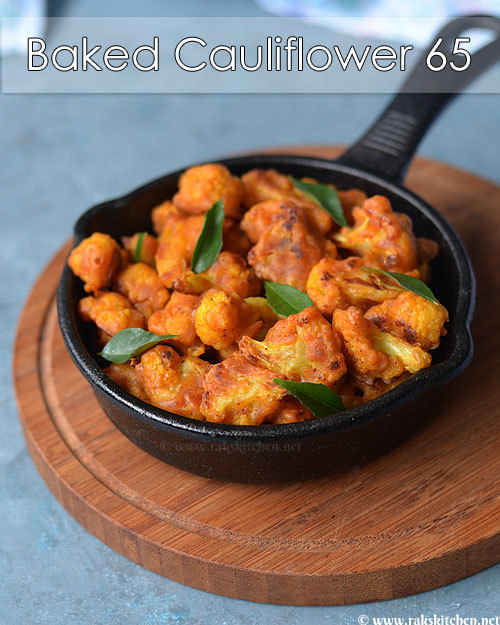
Baked gobi 65, an Indian style baked cauliflower. Learn how to make baked gobi 65 with step by step pictures. I cook cauliflower every week as it is Aj's favorite. I used to make cauliflower fries a lot and used to think it is not good to deep fry, so it is cauliflower curry always. So had baking idea for a long time but never tried as it takes some time to bake while deep frying is really easy and made in jiffy. For me somehow baking is not same as my everyday cooking though baking is easy and simple to follow in terms of recipe. Finally determined to bake cauliflower today and did it. Pretty happy with the results. I referred here for baking temperature and duration. Check my related cauliflower recipes
Crispy cauliflower fries
Gobi 65
Cauliflower pakoras
Baked gobi 65 recipe Recipe Cuisine: Indian | Recipe Category: Lunch Prep Time: 20 mins | Cook time: 20 mins | Serves: 3 | Author: Raks anand Click here for cup measurements Baked gobi 65, an Indian style baked cauliflower. Learn how to make baked gobi 65 with step by step pictures.

Recipe ingredients:
Cauliflower, cut into small florets - 3 cups approx. All purpose flour, Maida - 1/4 cup Corn flour (starch/ white) - 2 tbsp + 1 tbsp Oil - 4 tbsp Curd - 2 tbsp Red chilli powder - 1 tsp Garam masala powder - 1/4 tsp Turmeric - 1/4 tsp Garlic powder - 1 tsp (or) Fresh garlic - 2 Curry leaves optional - 2 sprigs Salt as needed
Method
Cut cauliflower into tiny bite size pieces. Let there be some stalk.
Boil water and add 1 tsp salt, 1/4 tsp turmeric.
Add cauliflower to the boiling water and switch off the flame.
Let it be aside for 10 mins.
After 10 mins, drain water completely.
Add 2 tbsp of corn flour and toss to coat the cauliflower well.
In a mixing bowl, add 1/4 cup oil, red chilli powder, garam masala powder, salt and garlic powder. Mix well.
Add 1/4 cup maida, 1 tbsp corn flour and 2 tbsp of curd. Mix to make a paste.
Add cauliflower florets to this mixture and mix gently to coat all the florets.
If needed sprinkle water so that the batter coats the cauliflower.
Let it be aside for 10-20 mins for marination.
Preheat oven at 200 deg C (400 F) for 10 mins.
In a baking tray, line aluminium foil or baking sheet.
Sprinkle oil and grease the sheet well.
Arrange the marinated cauliflower over the sheet in a single layer without overcrowding.
Make sure no excess batter is spread over the sheet while placing otherwise your gobi will have wings.
Place the tray in middle rack and bake for 16 minutes in total, stirring in between once.
Once done, I baked in grill mode for 4 mins. You can take this as optional step. The grilling time can be increased to achieve more golden/ crisp results.
Notes
I baked at 205 deg C as my oven allows to choose 5 deg. So if you can also do if you can.
I grilled in the same temperature and for just 4 mins as already my cauliflowers were roasted well.
Adding 2 tbsp of corn flour earlier in step 6 is for the batter to stick to cauliflower better.
Tags:cauliflower, baked gobi 65, baking, indian
How to prepare baked gobi 65
Cut cauliflower into tiny bite size pieces. Let there be some stalk. Boil water and add 1 tsp salt, 1/4 tsp turmeric. Add cauliflower to the boiling water and switch off the flame. Let it be aside for 10 mins.
After 10 mins, drain water completely. Add 2 tbsp of corn flour and toss to coat the cauliflower well. In a mixing bowl, add 1/4 cup oil, red chilli powder, garam masala powder, salt and garlic powder. Mix well.
Add 1/4 cup maida, 1 tbsp corn flour and 2 tbsp of curd. Mix to make a paste.
Add cauliflower florets to this mixture and mix gently to coat all the florets. You will need to sprinkle water so that the batter coats the cauliflower.
Let it be aside for 10-20 mins for marination. Preheat oven at 200 deg C (400 F) for 10 mins. In a baking tray, line aluminium foil or baking sheet. Sprinkle oil and grease the sheet well. Arrange the marinated cauliflower over the sheet in a single layer without overcrowding. Make sure no excess batter is spread over the sheet while placing otherwise your gobi will have wings. Place the tray in middle rack and bake for 16 minutes in total, stirring in between once.
Once done, I baked in grill mode for 4 mins. You can take this as optional step. The grilling time can be increased to achieve more golden/ crisp results.
Tastes best when hot, so enjoy hot! Top with curry leaves before serving or while the last baking duration also you can add.
Share:
Source: https://www.rakskitchen.net/2019/01/baked-gobi-65-recipe-indian-style-baked.html
0 notes
Text
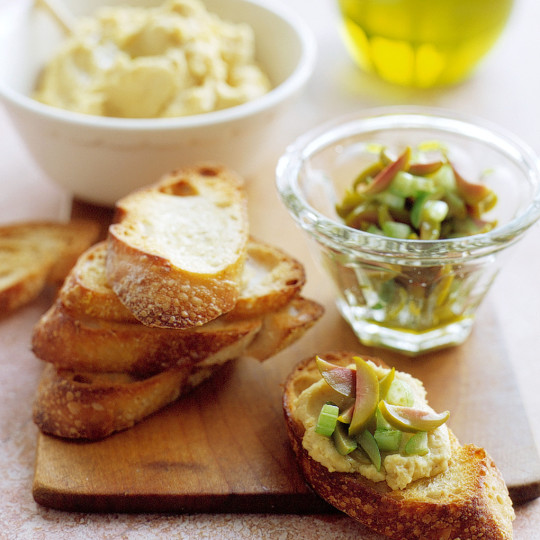
Grilled zucchini salad
I’m a woman of my word. I asked you on Instagram and Facebook whether you are up for healthy or indulgent and savoury or sweet recipes this summer and most of you said ‘healthy and savoury’. So that’s what’s coming to the blog in the next few posts starting with this grilled zucchini salad that’s filling and light at the same time – perfect BBQ and picnic fare!!
To be honest, it’s better for me too, as one of the things I find most challenging when it comes to blogging about food for a living is managing my emotional eating (especially when there is some form of sugar involved). No matter how hard I try, whenever I work on a sweet recipe like the meringue tarts last week, for example, I always end up ‘inhaling’ (yup, I sometimes don’t even know I am doing it) lots of the offending item in the process. And it’s not like I only make them once before I am ready to share the recipe with you, so you can imagine how bad it can sometimes get.
Initially I will just have a little taste, but then I will have a bit more and more because a) I’m frustrated with the light / how my shoot is going b) I’m waiting around = I’m bored c) I’m feeling lonely d) I don’t like food going to waste. You get the gist! Before I know it I eat way more than I originally intended and then feel crap because once again I failed to control myself. It’s a vicious cycle and a pain in the bum! Normally, I would solve the problem by simply not having any of the problematic food in the house, but when I develop recipes that’s not really an option, so now and then I need to take some time out. Like now. Now is good. Don’t get me wrong, I am not on a strict diet or anything and I will still allow myself a scoop of ice-cream or a few squares of chocolate daily if I fancy them, but it’s about feeling that I am in control of what I eat and why.
So this summer salad is a perfect way to use up a glut of zucchini, which I hear is easy to grow and once it starts producing fruit, it could feed a small village. I am only just starting to get into gardening now, but to begin with, I’ve sowed beginner friendly things like rocket, oak lettuce, chard and radishes. If they survive and thrive, I will move to zucchini next year, I think. In this simple summer salad, I paired up charred ribbons of zucchini with cannellini beans, rocket, olives and mint. The dressing is a garlicky olive oil with little pops of freshness from chopped up lemon flesh and the whole thing gets a nice sprinkling of homemade (or shop-bought if you prefer) dukkah. It’s a simple affair, yet filling and delicious, a perfect thing to bring to a BBQ or a summer picnic. Enjoy!!
PS: If you make my grilled zucchini salad, don’t forget to tag me on Instagram as @lazycatkitchen and use the #lazycatkitchen hashtag. I love seeing your takes on my recipes!
serves: 4 as a starter
prep: 10 min
cooking: 10 min
Ingredients
DRESSING
flesh of 1 lemon, chopped finely
1 small garlic clove, grated finely
30 ml / 2 tbsp extra virgin olive oil, divided
fine sea salt, to taste
black pepper, to taste
fine chilli flakes, to taste (optional)
SALAD
2 medium zucchinis / courgettes (approx. 450 g / 16 oz)
250 g / 1½ cups cooked cannellini beans (1 x 400 g / 14 oz can)
25 g / 1 oz rocket / arugula leaves
3 extra large green olives, sliced thinly*
a handful of fresh mint leaves, torn into small pieces
a sprinkle of dukkah**, homemade or shop-bought
Method
Place lemon flesh and garlic together in a small bowl and set aside while making the salad. The lemon will take the rawness out of the garlic.
Slice your zucchini lengthwise into 2 mm slices.
Heat up a grill pan on a medium heat. Brush it with olive oil and place the zucchini slices on a hot pan in a single layer. Allow them to char for 4-5 minutes without disturbing them. Once charred, flip them to the other side and char for another 3 minutes. The exact time needed depends on the intensity of your heat and the thickness of your slices so keep an eye on your zucchini. Season with salt and set aside.
Add 1 tbsp (15 ml) of olive oil to the lemon and garlic, mix well. Season with salt and pepper and a pinch of chilli (if using).
Stir the dressing through drained cannellini beans, rocket and sliced olives.
Arrange on a large plate with grilled zucchini slices. Scatter with torn mint leaves and dukkah (or at least roasted and crushed hazelnuts).
Notes
*If you don’t like olives, grilled artichokes or finely chopped capers also work really nicely here.
**If dukkah isn’t available, top the salad with roasted and coarsely chopped hazelnuts.
If you want more info on some of the ingredients that we use in our recipes, check out our glossary.
Join our mailing list
and get a sweet e-book
Source: https://www.lazycatkitchen.com/grilled-zucchini-salad/
0 notes
Text
9 Easy Ways To Celebrate YOU!
We live in a fast paced world where we are all constantly on-the-go trying to work and do as much as possible and be the best we can. For woman especially, it can be challenging to carve out time to celebrate yourself because you spend some much time looking after and caring for just about everyone and everything else but you. It is important to slow down and celebrate all that you’ve accomplished and the amazing person you are today. After all, we’ve all heard the advice to put on your own oxygen mask before helping others, right?
Celebrating yourself increases confidence and ultimately helps those around you too. A more confident you will achieve more and help you be a better worker, partner, parent, and friend. But also, celebrating you more often will bring more positivity in your life, and happiness–we all can get behind that, right?
Photo by Alejandro Photography
So let’s dive into 9 Easy Ways to Celebrate You, NOW!
Practice gratitude with yourself: Write down three things that you do well! And try to do it every single day for a week. It can be the same thing every single day, or three new ones each day. Using gratitude can help shift your mindset into feeling positively about yourself, instead of focusing on the negative.
Clean up your space: Using the Marie Kondo (or KonMari) approach to organize and declutter can be an amazing and transformative experience, especially if you’re hanging on to belongings that don’t bring you joy. Start in your closet! Get rid of the clothing that doesn’t fit or flatter you anymore, and keep only the clothing that makes you feel amazing (see below)! Then move on to harder and more time consuming decluttering projects.
Wear clothes that fit you: You will feel much happier and more confident if you wear clothes that fit you. This may seem like a small thing, but it will instantly make you feel amazing when your clothes truly fit. Need to go shopping for a few new pieces that truly fit? Do it now!
Write down your dreams, both big and small: It can be as small as wanting to start the day off with a cup of lemon water or as big as solving world hunger! Writing this list and constantly checking back with it can be a great roadmap to where you’ve been and where you want to be. Celebrate your victories both big and small along the way. And be gentle with yourself for the dreams that take longer than you expected to achieve, or the dreams that completely change.
Buy yourself some flowers, a plant, or other self-love gift: Buy yourself something, whether big or small, because YOU deserve it! Flowers instantly bring positivity but also if you’ve been eyeing a new gadget or beauty product, just go for it. If the answer to the question, “will this item bring joy in my life?” is yes, go for it!
When somebody compliments you, hear it and say thank you: Full stop. Take the compliment.
Surround yourself with positive people: Understandably this is no small task. Ridding negative people in your life is hard! But keeping those relationships around is harder, especially if they are people who bust your confidence and make it hard for you to celebrate yourself. You deserve to be surrounded by people who cheer you on and make you smile, inside and out.
Give yourself downtime by saying no a little bit more: Everybody deserves a break. You too. Having some downtime, whether it’s 30 minutes or a full week break can help you reflect on all the wonderful you do everyday and give yourself time to recharge. It can be so hard to say no to an obligation, but go ahead and use no a little bit more for other people so you can say yes a little bit more for yourself.
Take yourself out to coffee or dinner: So many people are afraid to take themselves out but it can be such a confidence booster! All you need is you! Feel nervous to try it for the first time? Take a book to keep you company. Doing this repeatedly can truly help you celebrate yourself as you get used to the idea that you are all the company you need (sometimes)!
For some, the thought of celebrating themselves can bring anxiety or be totally uncomfortable. Start small. Taking pride in yourself can be a new thing for many people, but like anything the more you practice it, the better you get. Tell yourself as many times as you need to hear: you deserve it.
Pin it for later:
Source: https://lexiscleankitchen.com/ways-to-celebrate-you/
0 notes
Text
Dark Chocolate Hazelnut Protein Truffles
Printer-Friendly Version
Have you ever bought a box of artisanal hand-made truffles? You know, the kind that come coated in cocoa, have a luxuriously smooth and deliciously-soft texture that literally melts in your mouth? These Dark Chocolate Hazelnut Protein Truffles are just like that!
The only difference between these and ‘traditional’ handmade truffles, is that these ones are higher in protein, lower in fat, higher in fibre, devoid of sugar, and packed full of healthy ingredients. They’re also gluten-free and vegan so if you’re trying to cut back or avoid dairy/gluten, they’re the perfect little bite-sized treat!
Ingredients
2 (32g) tbsp almond butter (I used this one from Meridian, our all-time favorite) 1/8 (12g) pea protein (I used ours because, honestly, it’s the best-tasting pea protein out there) 1 big tbsp (16.5) Sukrin gold (I used this one by Sukrin – you can get it here in the US and here in the UK!) 2 tbsp (30ml) almond milk 1 (10g) cocoa powder + more for coating 1 tbsp hazelnut butter (or extra almond butter if you prefer) 1-2 tbsp chopped hazelnuts (depending on how nutty you want your truffles) Vanilla stevia drops to taste (I used this one by NutriNicks – you can get it here in the US and here in the UK)
Directions
1. Stick all ingredients in a food processor and blitz until you get a smooth paste. If your paste is too dry/crumbly, add a bit more milk. If it’s too wet and mushy, add a bit more cocoa powder and/or pea protein. Taste your mixture to ensure its sweet enough, if it’s not, add a bit more of the stevia drops.
2. Roll into little truffles and coat in extra cocoa powder. If you want them square, press them into squares after you roll them in cocoa.
3. Keep refrigerated, in an air-tight container, so they’re nice and cold when you eat them!
Macros per truffle (out of 6): 88kcals, 5g protein, 2g carbs (out of which 1.8 is fibre!), 7g fat.
Leave a Comment
Leave a Comment

Source: https://proteinpow.com/2018/07/dark-chocolate-hazelnut-protein-truffles.html
0 notes
Text
Tokyo Shiba Tofuya Ukai – Tofu Kaiseki at the foot of Tokyo Tower
This is the fourth post in the extended Japan Series 2018. Other posts in this series include Totoro, Fall Foliage, and Tofu Kaiseki , Potsura Potsura – Japanese modern izakaya, and Sushi Ya with Takao Ishiyama plus new Sushi Ishiyama
At the foot of Tokyo tower lies an unlikely oasis tucked away from the hustle and bustle of the city.
Nestled inside a stunning Japanese garden complete with a tiny stream, bridge, and perfectly manicured trees, Tokyo Shiba Tofuya Ukai is a Japanese kaiseki restaurant that specializes in tofu, one of my favorite foods in the world. The tofu is homemade using specially chosen high quality soy beans and spring water. Entering this oasis feels like a trip back in time. You are whisked away into the Edo period, experiencing what Tokyo was like 200 years ago. The buildings reflect the era, and the servers all wear traditional dress. The restaurant is located inside of a 200 year old sake brewery (transplanted here from Yonezawa, Yamagata Prefecture) within a samurai-era merchant’s residence. The building is huge, with 55 rooms, and seats over 500 people. Most rooms are private tatami rooms, although there is at least one larger room with several tables, useful for small parties or solo diners like me who don’t need a whole private room. The focus on high quality and impeccable service is characteristic of the Ukai group, who run three other well-known restaurants in Tokyo, including the fantastic Ukai-Tei Teppanyaki in Omotesando (where we had some of the best beef we’ve ever had). There are three tasting menu from which to choose: the Hana (JPY 10,800), the Tsuki (JPY 13,500) and the Shiba Tokubetsu Kaiseki (JPY 16,200). All include the restaurant’s signature homemade tofu, the star of the show. The latter two menus also include grilled Wagyu beef, and the most expensive menu includes additional premium ingredients, such as higher quality Wagyu, ayu fish, and unagi (eel). I chose the “Hana” menu because I wanted something a bit lighter and didn’t feel the need for beef.
I wanted to focus on the tofu. The meal started with an assortment of appetizers. Inside of a hollowed out lemon rind were pickles topped with salmon roe. This perfectly fried rice cracker coated scallop was excellent. A single salmon nigiri sushi came wrapped in a leaf. It was lovely, and probably the first time I have ever had salmon sushi in a restaurant in Tokyo (most high-end sushi places never serve salmon because it is not local). After the appetizers, we moved onto our first course, two flattened pieces of deep fried tofu with a dark miso sauce. Next up we had a few slices of sashimi, which were average at best (compared to the high-end sushi places in Tokyo). Next came steamed yam and surf clam, which was fine but did not blow me away. THIS, on the other hand, was phenomenal. The warm homemade tofu served in a dashi-seasoned soy milk is their signature dish, and deservedly so. The dashi added a fantastic depth to the soy broth, and the tofu itself was so delicate and smooth. Despite the rest of the meal up to this point being only OK, this was stellar.and made it so worth it. The next course, a grilled, braised, and deep fried pork, Shiba style, was delicious as well.
My last savory course was grilled red snapper on seasoned rice. Ha ha, unfortunately I forgot to photograph it, so all I can show you is this short video I took, probably for Instagram Stories at the time. Dessert was simple, a slice of sweet persimmon. The surrounding garden is beautiful and zen-like. I took my time wandering the area after my meal just to take enjoy it at my own pace. It was a refreshing chance to get away from the crowded hustle and bustle of Tokyo and just be still for a moment.
After spending a good 15 minutes in the garden, I finally stepped out into the real world, where I heard laughter, chatter, and saw numerous couples taking selfies with the Tokyo Tower. I very much enjoyed my time of solitude in the garden, but at the same time, I welcomed the diversity and energy that define this amazing city.
General Thoughts – Tokyo Shiba Tofuya Ukai
I love tofu in Japan, and I haven’t had such good tofu since my magical tofu kaiseki experience in Kyoto. The grounds are beautiful here, the service is excellent, and the tofu is unforgettable. The rest of my tasting menu was fine, although it did not blow me away. It’s possible that a more expensive tasting menu would have impressed me more. Sometimes I think I gravitate too quickly towards the smaller tasting menus because I don’t eat much, not taking into account the fact that the nicest ingredients often only come with the larger, more expensive menus. It’s unfortunate that the tasting menu world works that way (for smaller eaters such as I), but thus is the reality.
I loved the tofu here and I would still be willing to come back just for that course. The combination of the unusual location, the excellent service, and the stunning environment complete with a Samurai-era house and exquisite Japanese gardens makes this still a very worthy place to visit overall.
Tokyo Shiba Tofuya Ukai 4 Chome-4-1-3 Shibakoen Minato, Tokyo 105-0011, Japan
Source: http://www.tinyurbankitchen.com/tokyo-shiba-tofuya-ukai-kaiseki-tokyo-tower/
0 notes
Text
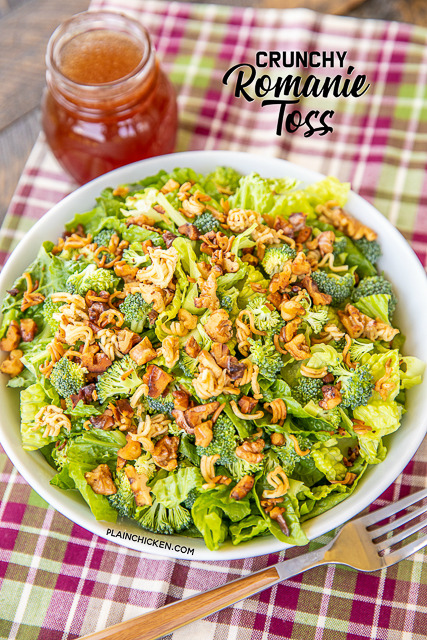
Crunchy Romaine Toss
Crunchy Romaine Toss - CRAZY GOOD!!! Had this at a dinner party and everyone raved about it. I had to get the recipe so I could make it at home. SO easy to make and it tastes DELICIOUS!!! Romaine lettuce, broccoli, ramen noodles, butter, walnuts, red wine vinegar, vegetable oil, soy sauce, sugar, salt and pepper. Great for dinner parties and potlucks! We make this at least once a month! SO good! #salad #sidedish #vegetables #romainelettuce #broccoli

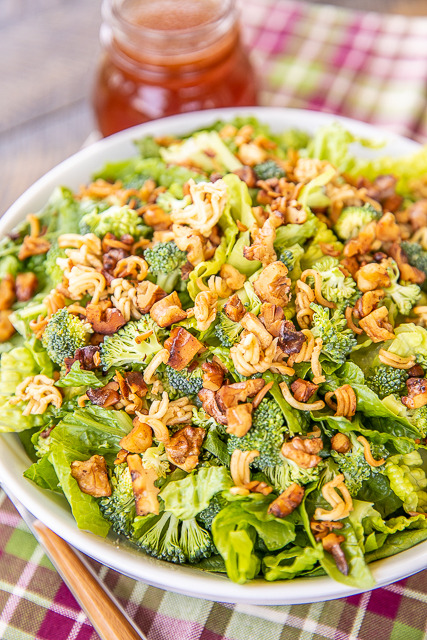
This Crunchy Romaine Toss is incredibly delicious! We had this at a friends house and Chicken Legs LOVED it. He took one bite and said "This salad is DELICIOUS!" He couldn't stop talking about it all night. I made sure to get the recipe so I could make it for him at home.
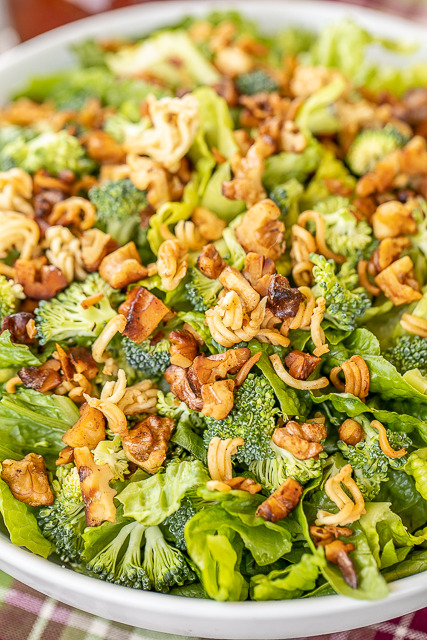
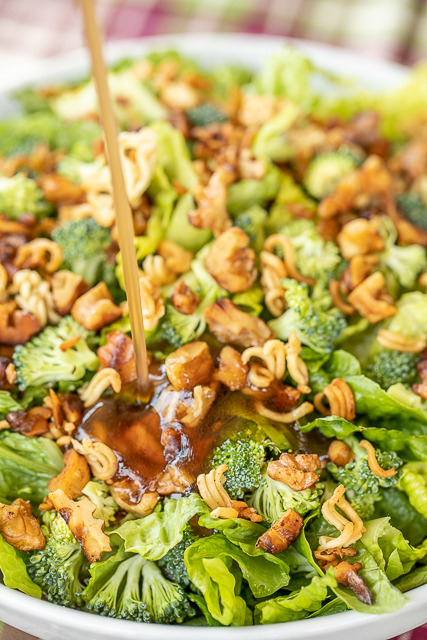
This Crunchy Romaine Toss is super easy to make. Romaine lettuce, broccoli, ramen noodles, walnuts and a sweet and sour dressing that will knock your socks off it is so good! You can prep everything ahead of time and toss it all together right before serving. I kept everything in the refrigerator separately so we could have a salad with lunch or dinner all week.
This Crunchy Romaine Toss is great for dinner parties or tailgating this Fall. We make this at least once a month. It is great with some grilled chicken thrown on top for a quick lunch or dinner too!
Don't forget to follow us on Pinterest for more recipe ideas!


salad, broccoli, romaine, side dish
side dish
American
Yield: serves 10 to 12Author: Stephanie - Plain Chicken.comPrint Recipe
With ImageWithout Image
Crunchy Romaine Toss
prep time: 10 minscook time: total time: 10 mins
Crunchy Romaine Toss - CRAZY GOOD!!! Had this at a dinner party and everyone raved about it. I had to get the recipe so I could make it at home. SO easy to make and it tastes DELICIOUS!!! Romaine lettuce, broccoli, ramen noodles, butter, walnuts, red wine vinegar, vegetable oil, soy sauce, sugar, salt and pepper. Great for dinner parties and potlucks! We make this at least once a month! SO good! #salad #sidedish #vegetables #romainelettuce #broccoli
ingredients:
1 cup walnuts
1 (3-oz) package ramen noodles, uncooked and broken up (discard flavor packet)
4 Tbsp butter
1 bunch broccoli, coarsely chopped
1 head romaine lettuce, washed and chopped
Dressing
1/2 cup vegetable oil
1/2 cup sugar
1/4 cup red wine vinegar
1-1/2 tsp soy sauce
salt and pepper to taste
instructions:
In a small skillet, melt butter. Add broken ramen noodles and walnuts. Cook on medium-low heat until brown. Cool on paper towel.
In a small sauce pan over medium-low heat, combine red wine vinegar and sugar. Cook just until the sugar dissolves. Remove from heat and cool.
Combine browned ramen noodles and walnuts with chopped broccoli, and romaine.
Whisk together red wine vinegar and sugar mixture, soy sauce and vegetable oil. Add salt and pepper to taste.
Pour dressing over romaine mixture and toss.
https://www.plainchicken.com/2018/09/crunchy-romaine-toss.html
All images and text ©Plain Chicken, Inc.
<![CDATA[.recipe-innertext-align:left;max-width:620px;border:6px double #009BFF;padding:20px;background:#f2f2f2;margin: 40px auto;font-family:Lato, sans-serif;.recipe-keywords,.recipe-categories,.recipe-cuisine,.recipe-videodisplay:none;visibility:hidden;.recipe-inner acolor: #4193f0;#recipe .recipe-namefont-size: 21px;#recipe .infoposition:relative;font-size:13px;text-transform:capitalize;border-bottom:2px solid #000;padding-bottom:7px;margin-bottom:20px.info:aftercontent:'';display:table;clear:both#recipe .info span:first-childmargin-right:30px#printbuttonborder:0;margin:0;color:#fff;float:right;background:#555; padding:5px;border-radius:3px;cursor:pointer#recipe .timetext-transform:uppercase;font-size:12px;text-align:center;background:#fff;padding:15px 0;margin-bottom:20px#recipe .time span:not(:last-child)margin-right:12px#recipe .time span:not(:last-child):aftercontent:'';display:inline-block;height:10px;width:1px;background:#000;vertical-align:middle;margin-left:12px#recipe .summaryline-height:1.7;font-style:italic;font-size: 15px !important;font-family:Lato, sans-serif !important;.ingredients,.instructionsline-height:1.7;clear:both;font-size: 15px !important;font-family: 'Roboto','Open Sans', Lato, sans-serif;.ingredients *, .instructions * font-size: inherit !important; font-family: inherit !important; .ingredients h3,.instructions h3,.notes h3font-size:20px !important;font-weight:400 !important;margin-bottom:0;color:#000;text-transform: uppercase;.ingredients ulmargin:0!important;margin-top:5px !important;.instructions limargin-bottom:15px !important;line-height:1.6;text-align:left;.ingredients litext-align:left#recipe .instructionsmargin-top: 30px;#recipe .instructions ol,#recipe .instructions ol li list-style:decimal !important;#recipe .instructions olpadding-left:39px;margin:0!important;margin-top:6px !important;.posturlborder-top:1px solid #ccc;padding-top:10px;.ing-sectionpadding-left:20px;margin: 10px 0;.ing-section > spanfont-weight:700.recipe-creditfont-size:13px;border-top: 1px solid #ccc;padding:10px;text-align:center;background:#ffffff;margin:-20px;margin-top:15px;.recipe-credit acolor:blue;text-decoration:none;.copyright-statementfont-size: 13px;font-style:italic;border-top: 1px solid #ccc;margin-top:15px;padding-top:15px;line-height:1.6;.notes prefont-size: 15px;margin: 10px 0;padding-left: 20px;font-family: inherit;line-height: 1.7;white-space: pre-line;.notes h3margin: 0.nutrition-infofont-size: 0;margin: 20px 0;padding: 10px;background: #fff;.nutrition-info>div display: inline-block;font-size: 14px;width: 20%;text-align: center;.nutrition-info>div:nth-child(5) ~ divmargin-top: 20px;.nutrition-info>div pmargin-top: 0;margin-bottom: 7px;.print-options display:none;position: absolute; top: 0; right: 0; background: #fff; border: 1px solid #ccc;z-index: 1;.show-print-optionsdisplay:block.print-options button display: block; background: transparent; border: 0; cursor: pointer; padding: 10px; width: 100%; text-align: left; .print-options button:hover background: #555; color: #fff;#recipe .imagetext-align:center;margin-bottom:25px#recipe .image imgmax-width:100%#recipe .recipe-nameline-height:1.6;text-transform:uppercase;margin-top:0;letter-spacing:1px;text-align:center;margin-bottom:20px#recipe .timeborder-top:1px dashed #000;border-bottom:1px dashed #000;border-right:0;border-left:0#recipe .summarymargin-bottom:30px#recipe .summary:aftercontent:'';display:block;width:50px;height:2px;background:#000;margin:auto;margin-top:10px#recipe .instructionsmargin-top:30px#recipe .instructions olpadding-left:39px;margin-top:6px]]>


Source: https://www.plainchicken.com/2018/09/crunchy-romaine-toss.html
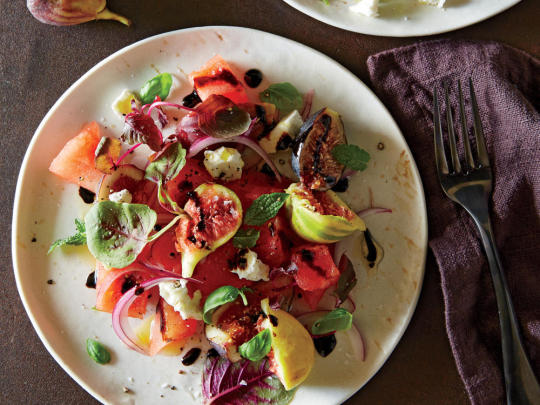
0 notes
Text
Bourbon Shrimp
Bourbon Shrimp are coated in a sweet and salty sauce flavored with bourbon, honey, and garlic. It’s basically the shrimp version of the delicious Bourbon Chicken you get at the mall food court. Only bourbon is actually an ingredient and not just the name.
Bourbon Shrimp can easily be made in less than 20 minutes for a delicious weeknight meal. Serve them over rice with some steamed broccoli for a full meal or they also work great as a party appetizer.
To make Bourbon Shrimp, first mix together all the sauce ingredients in a bowl: bourbon, water, brown sugar, low sodium soy sauce, ketchup, apple cider vinegar, ground ginger, red pepper flakes, garlic, and cornstarch.
For bourbon, I like to use Maker’s Mark. It has a nice, smooth flavor.
Cook some medium shrimp in a tablespoon of oil. Once the shrimp are just cooked, remove from the pan and add the sauce to the pan. Simmer it until thick and add the shrimp back in and toss to coat them. Sprinkle with green onions and serve.
More Shrimp Recipes
Bourbon Shrimp are coated in a sweet and salty sauce flavored with bourbon, honey, and garlic. It's basically the shrimp version of the delicious Bourbon Chicken you get at the mall food court.
1/4 cup bourbon
1/3 cup water
1/3 cup packed brown sugar
1/3 cup low sodium soy sauce
2 tablespoons ketchup
1 teaspoon apple cider vinegar
1/2 teaspoon ground ginger
1/2 teaspoon red pepper flakes
2 garlic cloves minced
1 tablespoon cornstarch
1 tablespoon oil
1 1/2 pounds medium shrimp, peeled and deveined
1 green onion sliced
In a medium bowl, whisk together bourbon, water, brown sugar, soy sauce, ketchup, vinegar, ginger, red pepper flakes, garlic cloves, and cornstarch. Set aside.
Heat oil in a large nonstick pan over medium-high heat. Add shrimp and cook just until cooked through. Remove from pan and set aside.
Add sauce mixture to the pan and cook until thickened. Return shrimp to pan, remove from heat and stir to coat the shrimp in sauce.
Sprinkle the green onions on top.
Disclosure: This post contains affiliate links.
Source: https://spicysouthernkitchen.com/bourbon-shrimp/
0 notes
Text
DIY Painted Pasta Chess Set
This post is sponsored by Plaid Enterprises.
Get ready for the holiday season with this DIY painted pasta chess set! We love making as many homemade gifts as we can, and this one is a really fun one to make together with your kids. Older kids can help with the assembly of the pasta chess pieces, and younger ones will love painting up the pieces. Since this pasta chess set already has a super unique look, we knew right away we should skip the traditional black and white pieces and use a few of our favorite shades from Delta Ceramcoat® Acrylic Paint instead! You can find all 22 shades and 6 Flash Metallic colors in the craft aisle at Target!
Since there are so many pieces to be painted, this is a great craft to set up on a snowy afternoon while watching a Christmas movie with the family. Build the pasta pieces ahead of time, and then spread the pieces, Delta Ceramcoat paints, and brushed out on your coffee table and get started! A coat of colorful paint really gives these pasta pieces a whole new life – we love how untraditional and playful they are! They’re a great kid-made gift to give to family and friends this holiday season, or keep it for yourself and have it out at your next holiday party for guests to play! See the full instructions for this below!
Step 1 Begin by making your pieces – for all the pieces other than the pawns, we started with this base. All you need to do it attach a circle of mini noodles around the base of a piece of rigatoni so that it stands up nicely without wobbling. Make 16 of these.
Step 2 Next, you can get all your pawns made – you’ll need 16 in total. For this, we use a short wide noodle as the base and then attached two orecchiette on top.
Step 3 For the bishop, we attached two orecchiette together and glued those to the top of the base. Then glue a mini noodle on top – you’ll need 4 bishops.
Step 4 For the queen, we attached a star-shaped noodle and a short tube noodle on top to form a sort of crown. Then we found a C-shaped alphabet pasta and glued that on as a mouth. Make two queens.
Step 5 The king is similar to the queen, but make sure to make it different enough that you can tell them apart. For the king’s crown, we glued 4 circle noodles around it, and instead of a mouth we attached a little bow pasta as a moustache.
Step 6 For the rook, we simply glued 4 mini round noodles around the top of the base. Don’t forget to make four rooks in total. Glue 3 pieces of radiator pasta along the face and neck to make the mane.
Step 7 And finally, for the knights, we glued two tube-shaped pasta noodles on top of the base to form the horse’s face.
Step 8 Once you have all your pieces built, it’s time to paint! We picked out fuschia and turquoise for a super colorful set, but you can use whatever colors you like. Let the pieces dry completely, and if desired, apply a coat of Mod Podge to give them a glossy finish.
Step 9 While the pieces are drying, cut a piece of cardboard into a 12” by 12” square. Use a pencil and ruler to make a grid with 8 squares on each side. Each square should be about 1 ½” on each side.
Step 10 And finally, paint your board – we used white and pretty pink on ours. Let dry and you’re reading to play chess!
Find all 22 shades of Delta Ceramcoat® Acrylic Paint at your local Target along with the six new Flash Metallic shades in the craft aisle or at Target.com. We’re betting these painted paper pockets would be even more adorable with some metallic details!!
Keep in the loop about all of Plaid’s new products and DIYs – follow them on Instagram, Pinterest, Facebook, and YouTube.
Happy crafting!

Source: https://www.handmadecharlotte.com/diy-painted-pasta-chess-set/
0 notes
Text
5 Spanish Wines to Sip & Serve this Summer
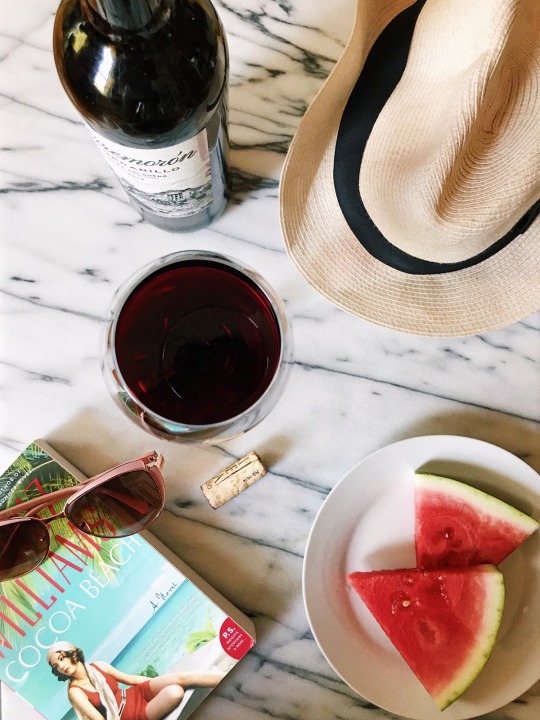
If you're anything like me (and like most people!), you tend to buy and order the same wines over and over again. There's nothing wrong with that, but I think summer should be a time of trying new and different things, and in this case? That means new and different wines!
That's why I pulled together this easy summer wine cheat sheet for you. Whether you're looking to mix things up with something new, or just looking for the best wine to mix in your next batch of party sangria, I've got you covered!
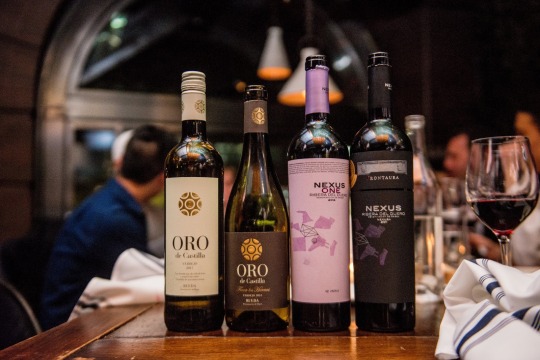
I recently had the chance to join a group of winemakers and importers from Spain who introduced me to an incredible variety of wines from Ribera del Duero and Rueda. These two sister regions are located about two hours north of Madrid in the North-Central part of Spain, and are kind of like the Spanish equivalent to California's Napa and Sonoma Valleys.
But unlike the gorgeous and temperate rolling California hills, the climate in this part of Spain ranges wildly from blazing hot summers to cruel freezing winters. Not great living conditions for humans (or even many animals!), but it does magnificent things to the grapes...and the wines.
Also unlike California wine country, the winemaking tradition here goes back much much further; ancient mosaics depicting wine-loving Bacchus discovered in Ribera del Duero suggest they've been making and enjoying wine in the region for at least a couple thousand years! I guess that means they know what they're doing, right? Here are the wines you'll want to look out for when scrolling down the wine menu over the next few months:

1. Love Sauvignon Blanc (and eating)? Try Verdejo: More full-bodied and aromatic than Sauvignon Blanc, Verdejo is actually Spain’s most popular white grape--and with good reason! It comes from the region of Rueda in North-Central Spain, and is a lovely smooth, citrusy, and refreshing white to enjoy on hot summer days.
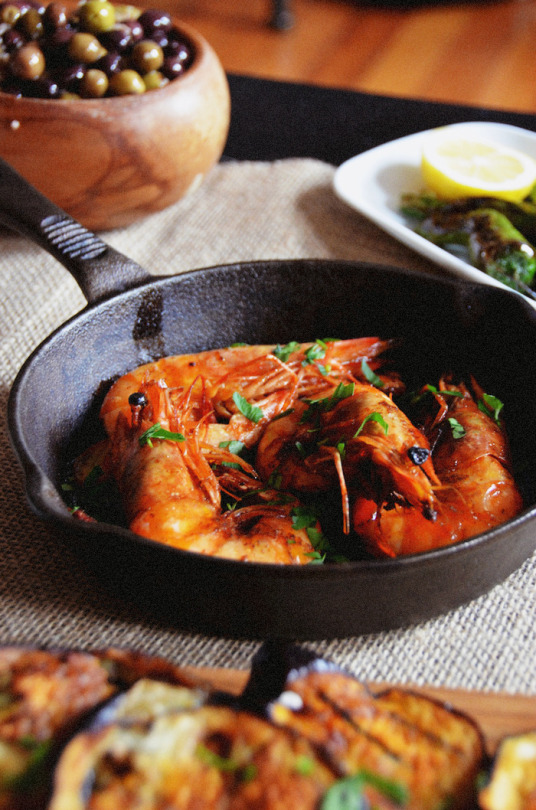
This food-friendly Spanish white pairs beautifully with so many of your summer faves. It's seriously hard to go wrong with this wine.
From seafood like shrimp or cold briny oysters to grilled chicken or marinated veggies hot off the grill to that bowl of spicy salsa you can’t seem to stay away from (Don't even try. It's impossible.), the bright acidity and sharp fruity notes means it can stand up to and complement a wide variety of cuisines and dishes.
This means you can bring a bottle to your friend's BBQ or dinner party safe in the knowledge that it will probably pair perfectly with whatever they serve.
2. Do you always order Cabernet Sauvignon? Try a Tempranillo from Ribera del Duero: I know some people prefer whites in the summer, but come night time I usually still want a glass of something red. If you're like me, give a Tempranillo from Ribera del Duero a try!
At the dinner, one of the winemakers shared a fun fact about Tempranillo. Apparently 95% of people who love Cabernet, also enjoy Tempranillo. These wines have that same boldness as a cab, but with a bit more balance making them another summer food-friendly pick.
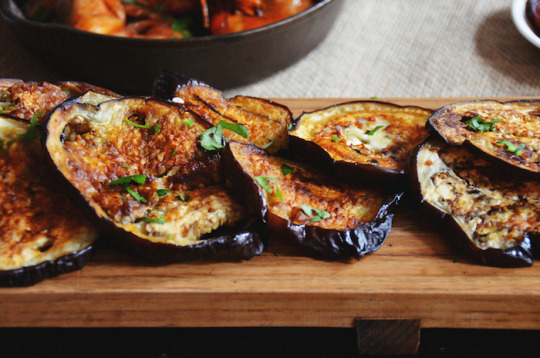
Ribera del Duero wines are categorized by their age from Crianza (1+ year) to Reserva (2+ year) to Gran Reserva (3+ year). Older does not mean better and there's great quality wines at each age, so give them each a try and see what you prefer!
Perfect for Summer Dinners. Tempranillo is great with grilled meats like steak and burgers, roasted pork and lamb, and they also play nicely with a simple cheese and charcuterie board (preferably featuring manchego and jamon, of course!).
It's vegetarian friendly. Grilled portabellos, stewed eggplant, and rich pasta dishes are all fine matches for this wine!
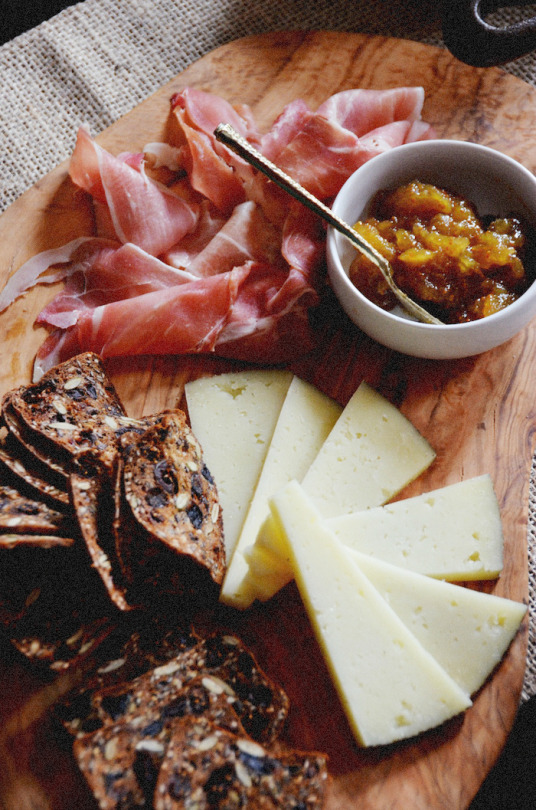
3. Love Champagne? Try Rueda Espumosa: Nothing says celebration better than bubbles, but those good-quality bubbles unfortunately often come with a hefty price tag, right? Nope! Rueda Espumosa is a high-quality, yet affordable, Spanish sparkling wine from Rueda.
Rueda Espumosa get their bubbles via the same “method traditionnelle” (or “metodo classico” in Spanish) as Champagne. It involves having the verdejo wine go through a secondary fermentation process inside the bottle, producing an elegant bubbly that is just as lovely on its own as it is paired with your summer meals.
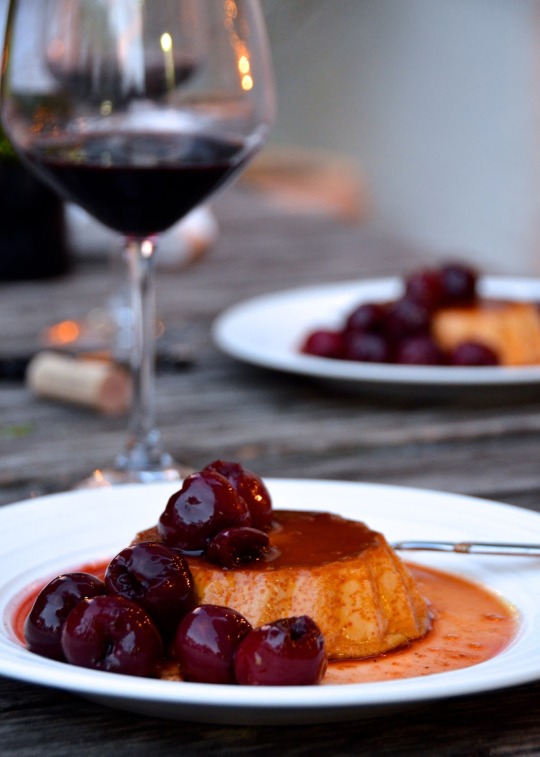
4. Always Order Dessert...and more wine! Your dessert may be sweet, but that doesn't mean the wine you serve or order with it also has to be! Spanish wines are a great match for so many desserts.
Love sweet & salty combos? Pair salty-sweet desserts like salted caramel, sea salt-topped milk chocolate, or caramel popcorn with a crispy white verdejo.
Tempranillo is a great match for desserts made with dark chocolate, cherries, and almonds. If you've never paired a large slice of rich chocolate cake with a glass of bold red, you've been missing out!
We already covered that these wines are amazing with grilled foods, and this goes for dessert, too! Try verdejo with and easy summer dessert like grilled peaches, or pair a thick slice of grilled poundcake with tempranillo!
Want to turn wine into your dessert? Try poaching ripe cherries in tempranillo wine, then serving over ice cream or a simple plain cake. Or add a cup of the dry red to your favorite chocolate cake recipe.
And you can't go wrong with sticking to the region! A traditional caramel custard (like flan!) or even piping hot churros con chocolate will work nicely with the tempranillo as well!

5. Looking to make a great sangria? These are your new go-to sangria wines: Sangria often gets a bad wrap due to the restaurants (or party hosts!) that use it as an excuse to disguise and mark-up their cheapest unremarkable wines with some fruit and sugar, often leaving you with a big bill and a nasty headache. But just like with anything else, when you start with great quality ingredients (aka a fabulous #sangriawine!), the final product will be just as good!
For Red Sangria, start with a bottle of Ribera del Duero Joven or Crianza. These young and juicy tempranillo wines are light, tart, and a great start to a summer-ready sangria. Combine with fruits like red cherries, ripe plums, and strawberries, to bring out the natural fruity notes in the wine. Tuck in a bay leaf or two and let sit overnight in the fridge. Just before serving, add a can or two of naturally-flavored orange or lemon seltzer and serve over ice.
For White Sangria, get a bottle of crisp and fruity white like Rueda Verdejo. Choose fruits that complement the wine’s citrusy and peachy notes like sliced lemons, ripe peaches, and maybe even just a few cucumber slices. Add herbs like fresh basil or tarragon to bring out the natural fennel notes of the wine. I recommend combining all the ingredients the night before you serve, then letting the natural sugars in the fruit infuse the wine overnight.
And there you have it! 5 fabulous Spanish wines to help you mix things up this summer. Cheers!
This post was sponsored by Ribera y Rueda--the organization representing these two wine regions and their winemakers. They provided me with several wine bottles to try at home and compensated me for sharing these tips with you. As always, all ideas and opinions are entirely my own. Please remember to enjoy these delicious Spanish wines responsibly!
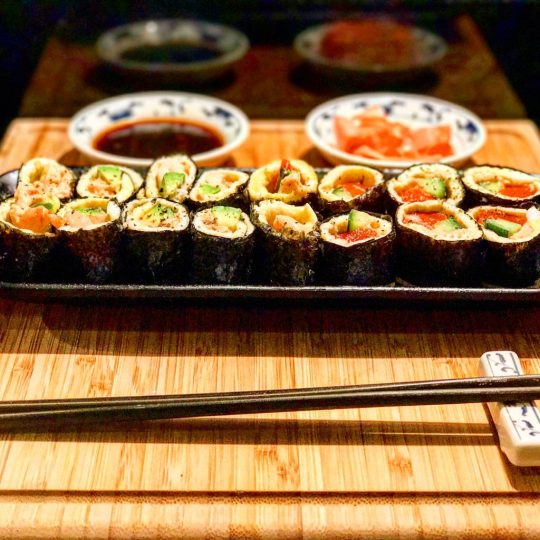
Source: http://www.alwaysorderdessert.com/2018/05/5-spanish-wines-to-sip-serve-this-summer.html
0 notes
Text
A Healthy Hedonist’s Guide to Slovenia
The question I got asked the most this summer (besides why I decided to elope) was what made me choose Slovenia for our big summer trip. (And, er, where is that, again?)
The answer feels a little silly: it’s because of the Netflix show Chef’s Table. When I watched the season 2 episode featuring Ana Ros and her restaurant Hisa Franko, I was blown away by how beautiful the country looked. Sure, the cinematographers on that show could make a dingy back alley seem romantic. But there was something about the place that felt special—a secret oasis of natural wonders untouched by mass tourism, despite it being just a stone’s throw from the Italian border.
A few months later, I saw that one of my favorite Hashi Posse members, Sarah Wilson, had adventured there. Hearing her rave about the diverse scenery, eco culture, and fresh (gluten-free friendly) cuisine, put it even higher on my bucket list.
So when Charlie and I began discussing another European summer road trip earlier this spring, I thought it would be the perfect place to get the best of the mountains, alpine lakes, and Adriatic seashores—all the hot spots of the summer high season—without having to spend 50 euro a person at every meal.
The country surpassed our expectations in every way imaginable, and though we had a full 10 days to explore, it felt like we were only scratching the surface. That said, one of the hallmarks that makes Slovenia worth at least a week of your time is that you can cover so many different landscapes in a short distance.
With less than three hours of driving, you can visit the fairytale capital city of Ljubljana—with a public recycling system that’s even more impressive than its castle—laze by the water in the quaint, postcard-perfect town of Lake Bled, explore the otherworldly underground caves in Postojna, invoke your inner mountain goat in the Julian Alps, raft in the emerald waters of the Socca River, taste countless natural wines in Goriška Brda (Slovenia’s Napa), and float along the salty shores of the Mediterranean in Piran.
With a population of only 2 million, even during the busiest weekends of summer, the country still felt refreshingly empty and undeveloped. We barely heard any English speakers while we were there, and yet, due to its history, most Slovenians speak perfect English, along with several other languages.
Neighboring Italy, Austria, Hungry and Croatia, the country’s borders have been a constant moving target. Until voting overwhelmingly for independence in 1991, the country was the economic breadwinner of Yugoslavia. It was also the only present-day European nation to be completely absorbed and annexed into Nazi Germany, Fascist Italy, and Hungary during World War II.
Despite this tumultuous history (or perhaps because of it?), the center of Slovenian pride and culture is love. There was far more tourist regalia dedicated to the fact that it’s the only country with love literally spelled out in the name than the fact that Melania Trump came from there. More importantly, the combination of being an international nexus, with a rich landscape, and heart-led people, meant truly memorable food.
Read on for my tips on eating gluten-free in Slovenia, the best restaurants we tried, hotels with stayed in, and how to plan an epic road trip itinerary.
With health and hedonism,
Phoebe
How to Eat Gluten-Free in Slovenia
Thanks to the neighboring countries, you’ll encounter a lot of different culinary influences depending on where you are in Slovenia.
There’s the humble Hungarian-influenced peasant food that uses some combination of sausage, sauerkraut, beans and barley. Homemade pastas and Italian-style pizzerias on every corner. And no shortage of beer at the tavern-like Gostilnas across the country.
Farm-to-table local ingredients reign supreme throughout, with specialties including trout from the socca river, game meats like venison and rabbit, and all manner of wild mushrooms. If you’re a truffle lover, you might just pass out eating in Slovenia, where you can get freshly shaved truffles on appetizers that cost less than 15 euro. Take advantage of the porcini and chanterelles too!
Eating gluten-free in Slovenia was fairly easy. While servers aren’t as knowledgeable about cross-contamination and the particulars (so many thought barley was GF) as in Italy, many menus had in depth allergen indexes or icons.
Even at more rustic gostilnas (inn-restaurants), you can find some simple options like grilled trout with a side of spinachy potatoes, baked sausage with sauerkraut, grilled polenta, or a large salad with the oil and vinegar on the side to dress yourself. Plus, one of the most prevalent grains was buckwheat, which was served as risotto or a hardy side in its whole grain form.
10 Days in Slovenia: A Road Trip Itinerary
Our time in Slovenia was designed around two main events: a 3-day trek through the Julian Alps and the Socca Valley, and dinner at Hisa Franko, which we locked in before we even had plane tickets!
Below is a snapshot of our itinerary, with slight modifications for how I wish we had done things. We had a lot of guidance from our travel guru, Miha at SloTrips, and I know we wouldn’t have been able to design such a comprehensive, robust experience without him.
Especially if you’re looking for more than just day hikes, I’d highly recommend working with SloTrips to design your adventure itinerary. They can put together your whole trip for you, including arranging wineries, hotels and restaurant reservations. But if you don’t want to go all in like a traditional travel agent, I would at least recommend having them handle a hut to hut hiking experience for you, which we would have never been able to dream up or execute ourselves from the States.
Charlie and I are not ones for organized group travel. We don’t like spending most of our trip with strangers! So the self-guided option was perfect. Miha handed off a detailed packet of instructions for every stop we made on our trip and directions down to the turn for our hike so we didn’t get lost. He arranged transfers for the bikes, and to bring us back to our car when we finished. He even gave us a local smart phone with all the contacts built in, PDF’s and marked maps to follow.
Since we knew so little about Slovenia before going, it was also a treat to have someone give us a whole rundown on the history and fairytale lore behind each town we visited, and the best restaurant and local artisans to try. Miha put together an insanely comprehensive 40+ page guide for us that was like our own personalized Lonely Planet. I give full credit to him for half of the delicious things we ate listed below!
A few other notes:
We found the cheapest direct flights through Venice, which is about 2 1/2 hours by car to Ljubljana. To connect through another major city by plane would have taken roughly the same amount of time and was more expensive. We opted to design our trip around a few days in Venice on the backend, which was a fun way to round out the trip.
Instead of spending 3 nights in Piran, if we had it to do over again, we would have added a second night upfront in Ljubljana. It’s small enough to do in 24 hours, but also quite a pleasant place to ease into the trip, learn more about Slovenian culture, eat great food, and more importantly, get over your jetlag before more adventurous outdoor activities await.
Day 1: Arrive in Venice and drive to Ljubljana. Wander the canal in the afternoon and enjoy dinner at Spajza.
Day 2: In the morning, visit Central Market and explore the castle. Drive to Bled (45 minutes) in the afternoon. Walk around the perimeter of the lake. Enjoy dinner at Castle Bled Restaurant.
Day 3: Relax by the water and rent a paddle board or canoe to visit the island in the center. Do a nearby hike to visit one of the great overlooks over the water. Another option would be to rent bikes, take the train to Lake Bohinj (25 minutes), and explore that region.
Day 4 – 5: Drive to Kranjska Gora and begin hut to hut hike through the Julian Alps and into the Socca Valley.
Day 6: Finish the hike. Return to your car and drive to Kobarid in the Socca Valley. Go to Hisa Franko for dinner and stay there for the night!
Day 7: Drive to wine country and do a tasting at one of the many fabulous wineries. You can also pop over to Friuli on the Italian side. Another option is to visit the caves in Postojna. Arrive in Piran in the evening.
Day 8: Relax in Piran. Bike through Portorosso to the salt flats and dip in the Adriatic. Enjoy dinner at Pri Mari.
Day 9: Optional day trip to Croatia or unwind again by the sea in Piran.
Day 10: Return to Venice and fly home.
LJUBLJANA
What to Do and Where to Stay in Ljubljana
Though it houses a third of the population, Slovenia’s capital feels more like a town than a city. You can easily explore all the major landmarks in the old quarter in 24 hours. But it might be worth spending a second night there to try more of the fabulous restaurants and experience some of the more idiosyncratic remnants of socialism, like the pay-by-the-kilo art galleries, or cafes where you can hang out all day like it’s your home and just pay for your time when you leave.
For recommendations on great shops, music and art to check out, my friend Bianca’s article is a great guide. For more recommendations on restaurants that we didn’t have time to try, Sarah Wilson’s post is another great resource.
Hotel Cubo
We loved the sleek feel of this boutique hotel and its proximity to the center of old town. Request a room facing the castle!
Where to Eat in Ljubljana: The Best Gluten-Free Restaurants
Spajza
This restaurant on a quaint side street in old town was the perfect mix of old school Slovenian fare and refined farm-to-table cuisine. Make sure to take advantage of the extensive seasonal specials, which during our stay, included a wealth of fresh truffles (for a fraction of the price you’d find in Italy). I had a beautiful appetizer of baked scallops on the half shell with buttery chanterelles, and Charlie enjoyed mixed mushrooms and truffles with eggs. While my duck breast special was a little tough and undercooked, his entree was the real winner: bacon wrapped rabbit over a silky-smooth pea puree. It was good enough to forgive carving up one of my childhood friends alongside my spirit animal, “young horse,” which appeared multiple times on the menu as a specialty.
TaBar
Off the main canal drag, this small tapas bar is a great option for small plates or a light lunch of fresh local ingredients. The menu is well marked for allergies, and I was able to order a beautiful trout crudo with roe and grilled octopus.
Gelateria Romantika
It was a true treat to find gelato on the same level as neighboring Italy, but with inventive flavors like cucumber-lime and strawberry-basil. The former was a tart, refreshing revelation. And needless to say, there were plenty of options for dairy-free folks and vegans alike. Had I risked a little more cream before our hiking trip, I would have had the black sesame – it was insane. Sadly no GF cones, FYI.
Monstera Bistro
We didn’t manage to make it to this modern space with minimal, creative dishes. But heard great things! At dinner time the service is more formal with elaborate tasting menus. Go for lunch if you want a casual a la carte experience.
LAKE BLED
What to Do in Lake Bled
Lake Bled is one of the biggest tourist destinations in Slovenia, and can be swarmed with people during peak summer weekends. That said, it’s a relatively small town that’s mostly dominated by the lake. And since there are very few hotels and villas built around its perimeter, you can almost always find a quiet place to perch for the day.
The lake itself has garnered a lot of folklore over the years (you’ll notice there’s a lot of fairytale speak built into Slovenia’s major landmarks, in general). Besides the fairies who initially inhabited the valley and eventually flooded it to prevent the nearby shepherds from letting their flock feast off its mossy floor, the biggest lake legend involves the gold bell originally intended for the church in the center of the lake, which upon initial transport, sank to the depths, never to be recovered.
In later history, the lake has also been home to Nazi outposts during WWII, and is said to be the final resting place of several intelligence resources, and a large swath of hidden gold. Note to self: don’t leave anything in the lake that you intend to find again.
The perimeter is around 6 kilometers and has a well-groomed flat walkway along the edge that’s perfect for a light stroll. The sidewalk gets a little too congested for a pleasant bike ride during the high season (when we were there) but bikes make for a great way to get to and from dinner, since the roads themselves are even more congested. When we mapped out our journey one night, it was actually faster to walk than drive!
About a 25 minute train ride away from Bled is a second lake that’s equally beautiful and much less crowded. Sadly, we did not make it to Bohinj to confirm this, but if you have trouble finding accommodations in Bled, it would be the perfect alternative for visiting the lake region, or a second option for daytime activities, should you find Bled too mobbed.
Where to Stay in Lake Bled
Garden Village Bled
We chose to glamp at this fabulous matrix of tree houses and tents rather than opt for a traditional hotel. It’s a little pricey for what you get (and compared to some of the more formal hotels in the area), but we wouldn’t have traded the experience of sleeping by a beautiful creek, above an estuary of trout, and getting to relax by their man-made “beach” during the day. The restaurant on site is quite tasty and they source all the produce from the garden on the premises (and fish from those waterways!). Had we done it over again, we would have splurged for one of the larger tree houses cabins or tents versus the pier tents we stayed in (where you couldn’t stand up).
Vila Bled
The old country home of former Yugoslav president Tito, this beautiful villa is on the lake and includes a secluded area of beach chairs right on the water. You can also rent paddle boards and boats straight from their boathouse. We didn’t get to see the rooms, but the prices seemed reasonable given the grounds on offer.
The Best Gluten-Free Restaurants in Lake Bled
Bled Castle Restaurant
You can’t beat the views at this elegant restaurant overlooking the lake. While ordinarily one might expect overpriced and uninspired fare fitting of such a tourist venue (inside the Bled Castle), instead the tasting menu is refined without being fussy. If you let them know in advance, they will also provide homemade gluten-free options, which for me included a gorgeous tart stuffed with pumpkin and fresh local mozzarella, instead of the pasta course. The highlight of an all-around tasty meal was a seared trout served with buckwheat risotto. Sadly, it rained the night we went, so we enjoyed our meal inside the modern, minimalist interior, but ordinarily, there is outdoor seating cliff-side with a perfect vantage point of the island.
Penzion Berc
Despite it being ranked as number 1 on TripAdvisor, we found this restaurant to be hit or miss. The ambiance was beautiful, housed in a courtyard garden (with a live pianist) a kilometer or so from the lakeside. The white glove service was painfully slow, and the food similarly uptight. But there were some nice dishes, including a venison main course, wild mushroom risotto, and a light, cream-free carrot soup.
Ostarijia Peglez’n
Slovenia takes its fine dining seriously, and most of the plates we ate while in the country were carefully composed. But as you know, I’m usually happier in a cozy trattoria environment. Which is one of the reasons I so enjoyed my meal at this little mom and pop fish shop. It’s a great option for a simple lunch or unfussy dinner of reasonably priced seafood. We got a fish for two served in a large roasting pan with mixed vegetables and potatoes.
Restaurant Vrtnarija (at Garden Village Bled)
If you’re looking for an unpretentious farm-to-table (or garden to table) meal, the restaurant on site of Garden Village Bled is a great option. It’s particularly fun for lunch in the daylight since you can sit in the middle of their man-made pool and feast on tables covered in live grass. Make sure to order a side salad with their beautiful fresh assorted greens. The chicken skewers with rice off the kids menu was a safe and satisfying meal after so many indulgent ones at fancier restaurants.
Sova
Unfortunately we didn’t make it to this cute wine bar just a short walk from our glamping site, but I heard great things. I wish we had tried it instead of Penzion Berc!
THE JULIAN ALPS AND THE SOCCA VALLEY
Your jumping off point for all things outdoor adventure is southwest of the capital, in the towns of Kranjska Gora, Bovec and Kobarid. The first was where we begun our hut to hut hike into the Alps, but you can also find some beautiful day hikes. Bovec, where our trek ended, is where you can book other activities like mountain biking, rafting and sky diving.
So many of the pictures you see throughout this post were taken from our SloTrips 3-day adventure. It was an incredible way to see the country as it morphed from densely wooded forests, to craggy peaks, to mossy Fern Gully banks that lined the socca river. A day hike along the river is a must, though the water looks more inviting than it is. We could only stand putting our feet in for 30 seconds before they went numb!
Going from hut to hut also allowed us to taste some humble mountain foods like sausage and sauerkraut stew. As someone with an information-based business myself, I don’t want to give away our hiking itinerary. So make sure to get in touch with SloTrips if you’re interested in designing your own adventure.
We ended our hike in the Socca valley, which is insanely green and dotted with beautiful medieval churches. In Kobarid, we stayed at an AirBNB apiary for the night among the bees, which was a cool experience, before heading to Hisa Franko for our culinary reward.
They offer a small number of moderately-priced rooms above the restaurant, and if you’re going to be eating dinner there, I highly recommend you try to book for the whole night, as the wine pairing was generous and not to be missed!
So, as for the main event…
The meal at Hisa Franko blew me away. As you know, I’m not one for Michelin star, molecularly overly wrought meals. On the surface, this is what you get during your 11 course tasting menu. But Ana Ros’ cuisine is infused with so much more soul than the sum of her foams combined.
Our favorite dishes were among the most simple: her trout in a milky broth with briny beets to cut the fat, and the only substantial meat course, a beautiful venison medallion with anchovy butter and spruce dust that tasted like the forest.
The iconic pasta dish is sadly not gluten-free. Instead, they served me a delicate sardine. But I stole a little taste of Charlie’s ham and hazelnut broth. It was insane. I would recommend all GF folks request a cup of the broth without the pasta. I asked them if I could have it instead of one of the desserts and they laughed politely and said no.
My favorite part of the experience was Ana and Valter’s hospitality. They aren’t present in the dining room or kitchen during service, but since the restaurant is an extension of their home, you can see them having family dinner with their kids and wandering around during the day. They are incredibly friendly and make you feel at home.
GORISKA BRDA WINE REGION
These hills, a stone’s throw from Italy’s Fiuli region, are considered the Slovenian Napa. It’s a small area with lots of producers clustered around, and many have restaurants on the premises that offer tastings along with a tasty meal. There’s a large influence from Italy and much of the meats and cheeses (as well as the tourists) come from across the border.
Since most of these wineries of small family-run operations, you can’t just show up. Email them in advance to set up a tasting session or lunch reservation.
The wineries recommended to us were Klinec Medana for orange wines, Movia for natural whites, Edi Simcic for great reds, and Erzetic to learn from a younger next generation producer. We had a lovely lunch at Klinec Medada with overlooking the grapes with beautiful produce from their neighboring farm. I wasn’t as wild about the orange wines, but they were interesting to try.
The wine pairing at Hisa Franko introduced us to a lot of lesser known producers, and throughout the rest of the trip we tried many of the above wineries off the restaurant lists, so by the time we made it to wine country, we didn’t feel the need to do more than 1 appointment.
In general, the wine in Slovenia is mostly natural, organic and biodynamic. We got to try some interesting grapes I wasn’t familiar with like Malvasia, and generally loved everything we tried. If you find a Slovenian wine on a your menu, order it!
PIRAN
Last but not least, we made our way to the Istrian Peninsula, which is home to Italy, Croatia and Slovenia. In fact, if you lived in Piran for most of your life, there’s a chance that you’ve had citizenship to 4 different countries as the borders changed.
What to Do in Piran
This sleepy seaside village is the perfect place to unwind after a rigorous few days of adventuring. The Adriatic sea is incredibly buoyant, pristine, and perfect for habitual porpoising. You won’t find sandy shores, but the perimeter of town is lined with some pebbly patches to perch, and plenty of small concrete docks to dive off of if a dip is all you’re after.
The high salt content also makes it a hub for sea salt production. If reading by the rocky shore isn’t enough activity for you, try renting bikes and visiting the salt pans 5 kilometers outside town center towards Portorosso, the more commercial stretch of the marina. It’s an easy flat ride along the shore. Otherwise, your best bet for exercise is to hike up to the church at the center of town and take in the view.
Where to Stay in Piran
Hotel Piran
This is the main game in town, and though we found it a little shabby and overpriced for you what you get, you can’t beat the location and view. The rooftop restaurant is a great place for an evening spritz as the sunsets. And the breakfast buffet even had GF bread!
Note that cars aren’t allowed in the town center, but some hotels like Piran offer a shuttle service so you can drop off your bags and then return your car to the lot at the edge of town and get a ride back in. The hotel also offers bikes to rent that were very pleasant for exploring the outlying areas.
The Best Gluten-Free Restaurants in Piran
Pri Mari
We loved this cozy gostilna so much that after a mediocre experience at Pavel (don’t recommend), we decided to go back a second time for dinner. The sea bass baked in sea salt with baked potatoes and spinach is the perfect simple meal. For those who can partake, Charlie raved about his vongole pasta. And I was majorly smitten with my saffron risotto with prawns. Make sure if you’re celiac to avoid the crispy potatoes that come with some of the single serving fish entrees as there’s cross contamination in the fryer. Don’t miss the pannacotta for dessert and ask for a special aperitif to go with it. Whatever bitter anise-y spirit they served was just what we wanted.
Rizibizi
A short walk or bike ride outside town towards Portorosso, this restaurant is one of the more formal in the area, with prices to match. Still, the prawn and truffle risotto was affordable by US and Italy standards. We also had a beautiful beef carpaccio with truffles. Basically, we ate an entire truffle between the two of us and had no regrets.
Pavel
Right in the center of town by the shore, this restaurant is slightly touristy with some mediocre dishes as a result. BUT it was one of the few places with gluten-free pasta in town and the clams did not disappoint. I’d recommend it just for a vongole with a view.

Source: https://feedmephoebe.com/best-slovenia-restaurants-hotels-itinerary/
0 notes