
cocinitadenadia
La Cocinita De Nadia
For the love of food
36 posts
Don't wanna be here? Send us removal request.
Last Seen Blogs

yourgranitbztgranitbzt
Без названия

bananibalthecannibal
bananaman

kanvhana
* / 𝒋𝒆𝒂𝒍𝒐𝒖𝒔𝒍𝒚.

oppai-oppai-licious
oppai-licious

eythiljhinmarkard-blog
Untitled
Text
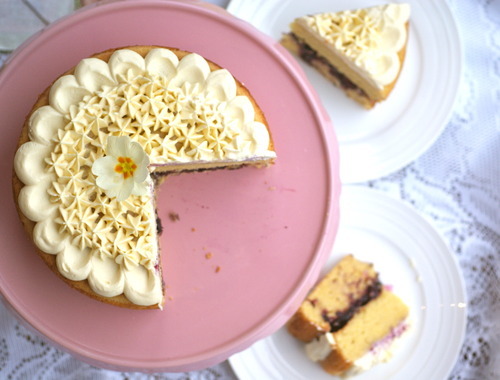
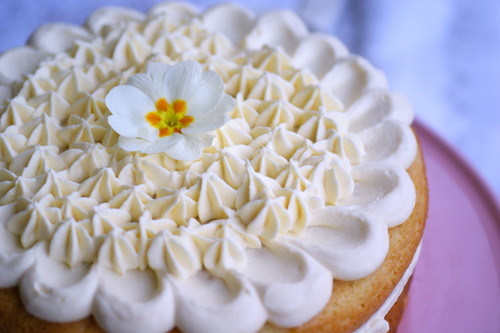
Almond & Blueberry Cake
I've been just itching to make a big ol' beautiful cake for a while.
If you've seen me staring into oblivion with my eyes glazed over and my mouth hanging open sometime in the last few weeks, I was probably dreaming this one up...

(What else are radiology meetings for?)
Golden almond sponge cakes, blueberry filling and a smooth mascarpone cream scented with Manuka honey.
There's no way I can write this post without mentioning two key inspirational-amazing-beautiful bakers:
1) Amy's Secret Kitchen in Ponsonby whose Instagram post inspired the icing pattern. I love the pretty petal look I've been seeing everywhere and it turns out its super easy to do when you have internet tutorials :)
https://www.youtube.com/watch?v=WASVWn4nN6w
2) Lulu's Sweet Secrets: https://lucianaborges.squarespace.com/
Holy sweet mama have you ever seen such glorious dedication to style and handmade sugar flowers and flavour?! I want to wallpaper my room with her photos.
I used her almond cake recipe, made a simple blueberry compote for a filling and whipped up a topping that was creamy enough to offset the sweet nuttiness of the almond cake but still with a hint of floral Manuka honey.

If you have an itch to bake, always scratch it.
Fun fact: to get the right natural lighting I shot these pictures outside on the sheltered part of the verandah, in the midst of a storm. The things I do for a decent photograph.
Ingredients:
2 cups ground almonds
1/2 cup plain flour
5 free-range eggs
5 Tbsp melted margarine
1 Tbsp vanilla extract
1 cup caster sugar
Preheat oven to 170 degrees celsius, grease and line two 8-inch cake tins.
Separate eggs. Whip the egg whites until frothy, then continue to whip to stiff peaks whilst gradually adding 1/2 cup sugar. Set aside.
To the egg yolks, add vanilla extract and remaining 1/2 cup sugar, beat for 5 mins until pale yellow.
Combine the flour and almonds, and gradually add to the egg yolk mixture, folding in between additions. It will be quite thick at this stage but hang in there.
Fold in 1/3 of the egg white mixture to loosen the batter. Then add the remaining egg white, folding gently just until combined.
Incorporate the melted margarine. Pour batter into tins and bake for 25 minutes, or until golden and a wooden skewer inserted into the center comes out clean. Cool slightly before removing from the tin, then cool completely before assembling.
For the blueberry filling: On medium-high heat, cook 1 cup of blueberries with 1/3 cup sugar and a tablespoon of water in a saucepan until the fruit has broken down slightly. Add water/sugar as needed. Cool before spreading onto the first cake layer.
For the cream: Whip 1/2 cup mascarpone cheese with 5 teaspoons manuka honey and 1 cup of cream.
(note: had I had more mascarpone it would've been more of a 1 cup mascarpone:1/2 cup cream ratio, so do that if you have enough!)
Have fun darling friends, and Happy Eating!

3 notes
·
View notes
Text
Vanilla Coconut Cake with Meringue Icing
I've always believed that cooking or baking is simply the best way to show someone love.

Some people are good with words, some with pictures, and some with gestures of other kinds - but for me, putting time and care and thought into making something special and then getting together to share it is my way of expressing how awesome I think you are (so if you've had baking from me in the past - congratulations, you rad individual you).
My little brother falls into the 'rad' category. In my mind, he has always been and probably always will be five years old - so it was a bit bizarre when he turned 17 last week. The little kid with the bob-the-builder backpack and bowl cut is all grown up! If that doesn't call for a special cake, I don't know what does.

Being back home for a couple of weeks, I got the chance to put lots of time and thought into this cake. My brother has this inexplicable love of coconut or anything containing coconut, and predictably asked for a vanilla coconut cake - so I started hunting.
Several hours later (there are a lot of recipes for coconut cake out there) I settled on a recipe that gave me what can only be described as a delicious cloud.
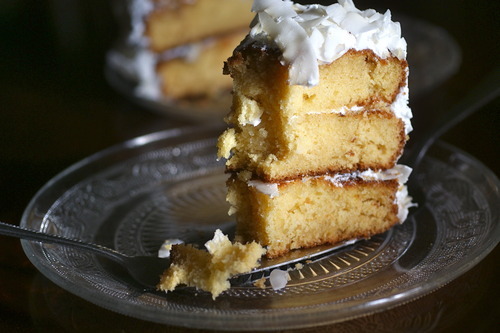
You have layers of fluffy vanilla cake, sprinkled with coconut water and layered with meringue icing and shredded dried coconut...
The best part of this glorious combination was the meringue icing, also called marshmallow icing or '7-minute' frosting. You whip egg whites and sugar over gentle heat and eventually get icing that is akin to spreadable marshmallow. The beauty of it really is the texture but also the fact that it isn't sickly sweet - it even won over my parents who are generally sworn against icing or filling of any kind.

My brother loved the dried coconut flakes, but use whatever you prefer the texture and flavour of - I think I would have preferred dessicated coconut. The writer of the recipe tried to suggest I buy a fresh coconut and go about excavating and grating the flesh myself (ha! no) so if that tickles your fancy go ahead. I do know you can buy sweetened fresh grated coconut at Martha's backyard in Panmure for all you Aucklanders out there. Go with whatever option you like the sound of!
Go on. Gift this to someone super cool this weekend.
Ingredients:
225g margarine
2.5 cups flour minus 5 tablespoons
5 tablespoons cornflour
1 tsp baking soda
1 tsp salt
3/4 cup yoghurt
1/4 cup coconut milk
1 tbsp vanilla extract
2 cups caster sugar
5 eggs
Grease and line 3 x 8-inch cake tins. Preheat oven to 180 degrees celsius.
Cream margarine and sugar until pale and fluffy. Add eggs, one at a time, mix well after each egg.
In a separate bowl, sift flour, cornflour, baking soda, salt. In another bowl, mix yoghurt, coconut milk, vanilla.
Add wet and dry ingredients alternately to the margarine mixture, until all ingredients are blended well.
Divide batter between the three tins and bake for 20-25 minutes, until cakes bounce back to light touch and a wooden skewer inserted in the center comes out clean.
Cool in the tins for ten minutes before removing and cooling completely on a rack. At this stage you can glad wrap each layer and freeze if you want to defrost and assemble the cake later.
Icing:
200g egg whites
320g caster sugar
1/4 tsp vanilla
Put egg whites, sugar and 75ml water in a bowl over a pan of simmering water (make sure the bottom of the bowl isn't touching the water). Beat with electric beaters for 7-10 minutes until stiff peaks form. Remove from heat and mix in vanilla. Use immediately.
To assemble:
Put one cake on a serving plate and sprinkle with a 2-3 tablespoons of coconut water. Spread with icing and some coconut and add the second cake. When all cakes are stacked, ice all around and sprinkle with your chosen form of coconut. Don't skimp on the icing between layers, wish I'd put more!

Happy Eating xx
8 notes
·
View notes
Text
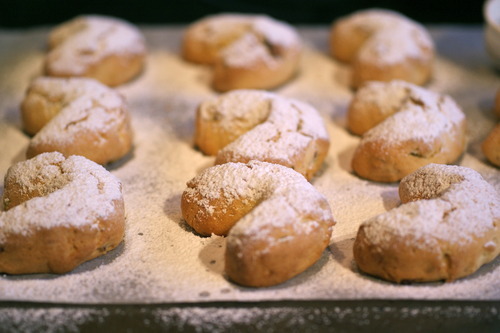
Pistachio Shortbread Crescents
As the leaves colour and fall and the air chills, I find myself turning toward more and more comforting food. While a strong argument could be made for all baking being comforting by definition, there are certain treats that reach out and hug you like an old woolen blanket. They invoke warm feelings of everything cosy and good - home, tea, scarves, and your fluffy penguin hot water bottle.
(what do you mean you don't have a fluffy penguin hot water bottle?)

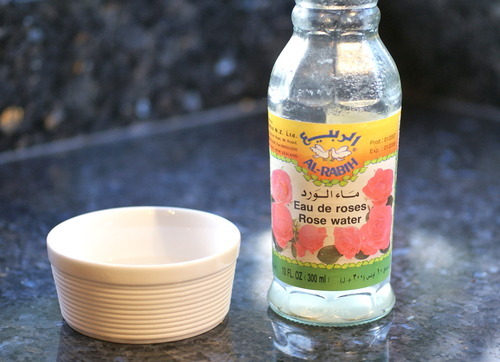
Anywho, these little crescent cookies are something a bit different, and definitely fit the cosy autumn category. I've seen similar cookies branded as being German, Greek and Moroccan, so I can't say I'm entirely sure where they originate. But with flavours like orange, cardamom, pistachios, and rosewater I'm gonna go ahead and claim them as Middle-Eastern.
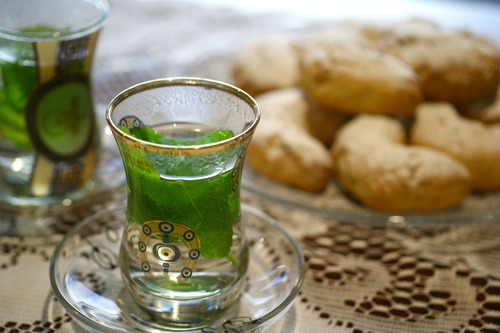
Regardless - they're delicious. Crumbly and buttery as shortbread should be, fragrant and nutty and just sweet enough. They are removed from the oven and immediately painted with rosewater and doused in icing sugar before being devoured, star treatment for crescent moons.
The recipe is from Little and Friday's cookbook - pretty sure I've complained about the lack of home applicability/reliability of its recipes before, but this is one that is easy and works right every time. Only thing is it makes almost twice the number of cookies stated - so below I've posted a half recipe.
Ingredients
125g margarine (or butter, granted this is shortbread)
1/2 cup caster sugar
1 egg yolk
3 tbsp orange juice
2 cups flour
3/4 tsp baking powder
1/2 cup pistachios, roughly chopped
1/2 tsp ground cardamom
rosewater, to brush
icing sugar, to dust
Cream butter and sugar until light and fluffy. Mix in egg yolk, then orange juice. Gently fold in the flour, baking powder, pistachios and cardamom, just until everything is combined.
Roll a tablespoonful of dough into a ball, then shape into a crescent and place on a baking tray lined with baking paper. Leave a few cm between cookies as they will expand while baking.
Bake for 15-20 minutes, check the bottom of the cookies for a nice brown colour to test if they're ready.
Remove from the oven. Brush the hot biscuits with rosewater and dust liberally with icing sugar.
(as if they weren't cute enough - the biscuits are kinda spooning hahaha okay sorry)
These are especially good with fresh mint tea, served in rad little Turkish teacups gifted from rad friends who visited Turkey :)
Happy autumn, and happy eating x
2 notes
·
View notes
Text
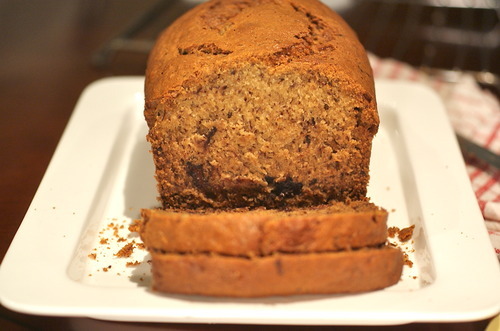
Chocolate Chip Banana Bread
Today was perfect baking weather - the sky was one shade of stay-inside grey, it was cold and drizzly and there were brown bananas begging to made into something on my oh-so-free holiday time.

While I should've taken the perfect baking weather as a sign, I instead went out for morning tea. In my quest to visit every cafe in Auckland worth visiting (I'm getting there), I visited a certain raw-vegan-gluten-free cafe and needed to forget my utter indignation with some real food as soon as I got home. Only the most homely of baking would cleanse the feeling of having bought into the new-age hippie psuedo-food craze.
I digress. In short, chocolate chip banana bread was calling me.
Hummingbird Bakery Cookbook gives me the base for this recipe, which I made less spiced by omitting the ginger and cinnamon and added a little bit of chopped Whittaker's dark chocolate - though the spiced version would be nice to try next time.
I love chopping blocks of chocolate for baking, it gives you chocolate chunks and then pretty little shards that are speckled through the loaf as well. As for the bananas - hit back at those unfair ideals of beauty modern bananas face in the media. Dalmation-spotty brown bananas are best because they promise warm, caramel-toned baking with a richer flavour.
Though loaves do take a while to bake, this one turned out soft, moist and fragrant with the occasional hit of deep earthy dark chocolate. It's a goodie.
P.s. does banana bread make anyone else think of this scene from the Simpsons?

Hehehe
Ingredients:
1.5 cups packed brown sugar
2 free-range eggs
1 cup mashed banana (brown ones are best)
2.25 cups plain flour
1 tsp baking powder
1 tsp baking soda
140g melted margarine
Chopped Whittaker's dark chocolate, as much as you like. I added about 1/2 cup.
Directions:
Beat sugar and eggs until they look light and fluffy. Mix in the mashed banana, then mix in the dry ingredients until everything is incorporated.
Add the melted margarine, and lastly the chopped chocolate. Butter and flour a loaf tin, then pour in the batter. Bake for 1 hour or so in a preheated 170 degree celsius oven.
You know it's done when it bounces back when you press it lightly, and a wooden skewer inserted comes out clean.
Cool in the tin before removing and slicing.

Happy Eating <3
On a side note - does anyone want to teach me to shoot food in the dark? The sunset is getting earlier and earlier and shooting in the dark is the bane of my existence. Thanks internet!
1 note
·
View note
Text
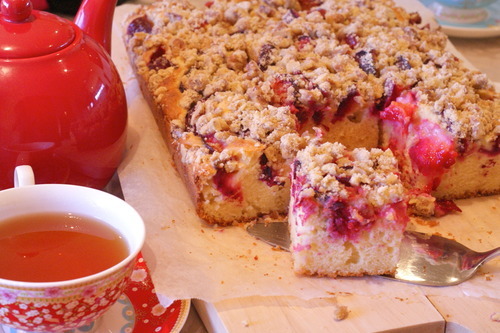
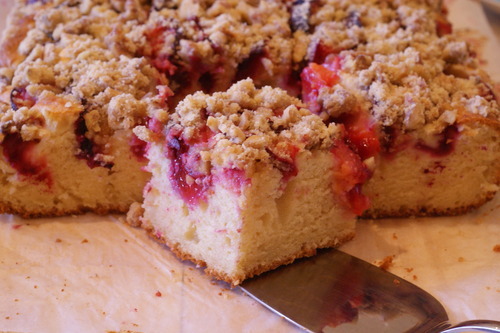
Plum and Walnut Crumble Cake
The past few weeks have been a bit different. We've waved goodbye to the monotony of lectures and exams and set foot in *gasp* real-life hospitals.
With real-life patients!
For some of us, this involves relocating for the year - so its life in Hamilton for 2014. Okay, so its not exactly a long journey to a far-flung foreign land, but regardless - its different. Because the past few weeks have been a little out of my comfort zone, I turned to the most comforting thing I know - baking.
I've said it before and I'll say it again; there is nothing that brings more satisfaction, joy and comfort than taking the time to make something yummy and share it with people you love.
So! With plums at less than $4 a kilo (say whaaat) and Donna Hay's wisdom at hand, I made this plum crumble cake.
You mix up a simple yoghurt cake, lay out fresh plums onto the batter, and sprinkle with a walnutty crumble topping. Because the plums are fresh they add a lovely tart quality to the cake, but you could use tinned plums if you'd like. The cinnamon adds a teeny bit of spice that lends itself so well to the plums and the cake base balances the whole thing beautifully. The result is a sweet, honest cake that could probably serve 30 people despite the recipe saying it serves 10.

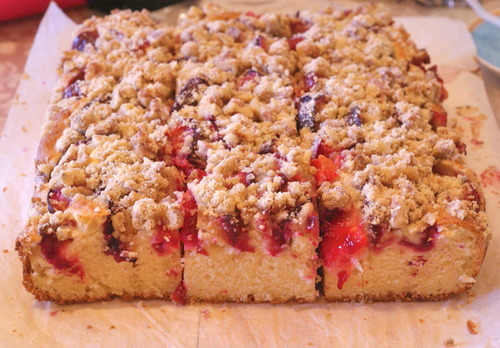
As you know I'm typically a sucker for beautiful food, but would you look at that gorgeous fuschia plum layer melting into the creamy off-white cake...
Needless to say this pretty cake served its purpose for sure, providing therapy in baking it and enjoying it in the afternoon sun.
Give it a go - Happy Eating :)
Ingredients:
Cake:
180g margarine
1 cup caster sugar
1 teaspoon vanilla
5 free-range eggs
2.5 cups plain flour
1.25 cups unsweetened yoghurt or sour cream
12 plums, stones removed and quartered
2 extra tbsp caster sugar
Crumble:
1/4 cup brown sugar
1 cup roughly chopped walnuts or pecans
60g melted margarine
1/2 cup plain flour
1 teaspoon cinnamon
Preheat oven to 160 degrees Celsius.
To make the crumble, combine all ingredients in a bowl and mix well.
For the cake - cream margarine, sugar, and vanilla until light and fluffy. Add eggs one at a time, and beat until well combined. Sift in the flour and baking powder, and add the yoghurt. Mix until just combined. Spoon mixture into a lined 24x34cm baking tray. Toss the plums in the extra 2tbsp sugar and then arrange on top of the mix in the tin.
Sprinkle the crumble mix on top.
Bake for 1 hour or until a wooden skewer inserted into the cake comes out clean or with a few crumbs.
Allow it to cool in tin before removing, slicing, and serving.
The only constants in life are change - and cake.
0 notes
Text
Shakshuka - Moroccan Baked Eggs
Brunch is easily my favourite meal of the day. It's the perfect mid-morning mesh of everything that is wonderful about breakfast, in larger quantities and generally richer than what you'd have having just woken up.
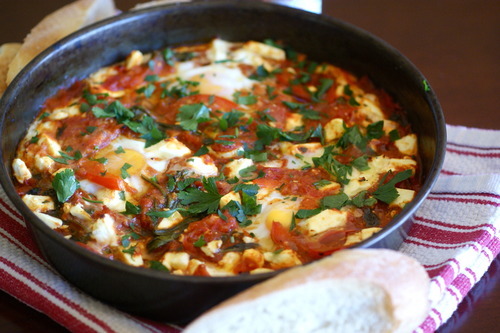
On our recent trip to Melbourne a brunch dish that we both loved was the 'Shakshuka' at Cumulus inc. It was a rich, spiced sauce of tomatoes and capsicum, with eggs nestled in between and blobs of cheese, baked and bubbling happily together - served with crusty bread.
I read over several recipes and kind of figured out what the common bits in all of them were, and which extra bits I thought would be good and ended up with this.
This is comfort food at its best - its delicious and soulful and deserves to be shared around a table on a grey midmorning (or any midmorning for that matter. and any time of day for that matter. It was good okay?)
Have fun with it and add/omit whatever you like, but do keep the basic skeleton of the sauce. I used baby spinach and feta cheese that we had in the fridge - which reminds me, this is really good to use up leftover veges/cheese and turn them into something shiny and new! If all goes well the yolk will slightly run into the sauce and you'll be scooping up warm fragrant bits of egg and sauce onto crunchy bread in no time.
Ingredients: serves 2
1 small onion, chopped
1 clove of garlic, chopped
1 red capsicum, sliced
2 tsp turmeric
2 tsp paprika
chilli flakes, to taste
1 tsp ground cumin
1 can chopped tomatoes (or several fresh tomatoes)
1 Tbsp tomato paste
salt and pepper, to taste
handful or two of baby spinach
4 free-range eggs
bit of feta cheese
2 tbsp fresh parsley, roughly chopped
Crusty bread, to serve
Heat olive oil in a medium pan, over medium-high heat. Add onions, a pinch of salt, capsicum, garlic, and the spices. Cook slowly for 5-10 minutes, until the vegetables are tender.
Add tomato paste, tomatoes, salt and pepper. Simmer on medium heat for 10-15 minutes, stirring occasionally. Taste the sauce at this point and add any more seasoning as you like.
Stir in spinach until it wilts into the sauce. Transfer sauce into an oven-proof dish. Make little hollows in the sauce and crack an egg into each. Dot crumbled up feta into the sauce.
Bake for around 10 minutes at 180 degrees celsius, checking the eggs every few minutes. You want the whites to be cooked and the yolks to still be a little runny. If you find the yolks are cooking faster than the whites, spoon a little sauce over the whites to help them along.
Sprinkle with parsley and drizzle with a little olive oil. Serve with crusty bread and extra hot sauce.
Happy Eating <3
1 note
·
View note
Text
Four foodie days in Melbourne
Four days in Melbourne consisted of two very basic joy-bringing activities - shopping and eating.
I could relay my shopping experiences and purchases with you but that really wouldn't be all too exciting. Especially when you see where we went to EAT!
I'll try my best to keep this brief, but its going to be a mother of a post regardless:
Breakfast on Degraves street - needing a huge breakfast on our first day, got a really yummy 'big vege' breakfast on this street. Plenty of places to choose from all doing delicious breakfast, you can't lose.
Little Cupcakes on Degraves street - you'll see a few cupcake shops around Melbourne, I bought a peanut butter chocolate cupcake from here and there are definitely no complaints!

Dinner on day 1 was a bit of a disaster - we ended up stumbling down Elizabeth street at 11:30pm desperately looking for something to eat. We ended up buying fries from Cone Heads on Elizabeth. While I may be slightly biased, given that fries are one of my (strongest?) weaknesses, damn they were good fries. Perfectly crunchy on the outside and fluffy on the inside, with chicken salt, these fries were exactly what was needed.
Cumulus Inc on Flinders Lane - You know when you show up to a place and its completely full even on weekday mornings that it'll be a winner. Hunted this place down on a recommendation (thanks Jarryd!) and it was so good we went back the next day for our last breakfast in Melbourne.
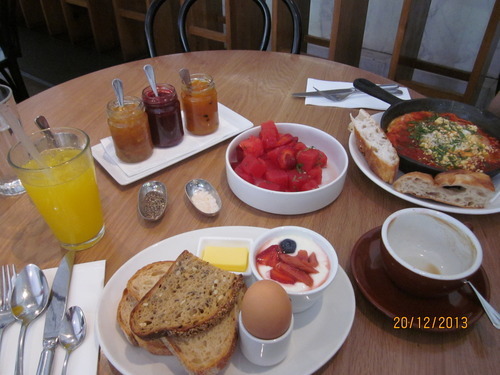
Some of the highlights were the homemade jams and preserves, one of the best coffees I have ever had, the homemade crumpets and the shakshuka. The homemade crumpets came with whipped ricotta and "Rooftop Honey" - honey so good that we demanded to know where the nearest retailer for it was. The beehives are literally in backyards and rooftops around Melbourne and each jar is named after the precinct the beehives came from. We had the 'Kew' and swiftly bought a jar each once we'd found someone who stocked it. Apparently can't bring any honey into NZ and so biosecurity had to confiscate our jars of golden deliciousness :( It still upsets me to talk about. The shakshuka was the baked egg dish that is starting to make appearances in some Auckland cafes (unfortunately none as good as the one we had in Melbourne, as of yet). It consisted of a rich and savoury sauce of tomatoes and peppers with two eggs nestled in between, as well as blobs of some wondrous cheese I forgot to note the name of, all baked and bubbling and served with crusty bread. I think this is definitely an upcoming make-at-home mission.
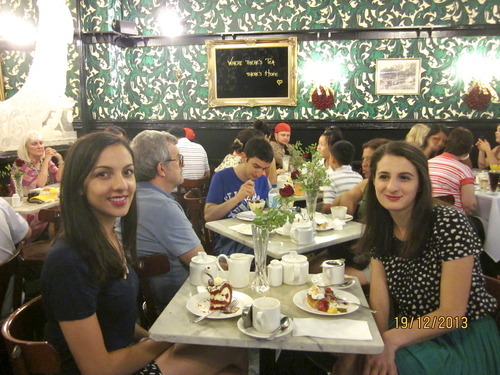
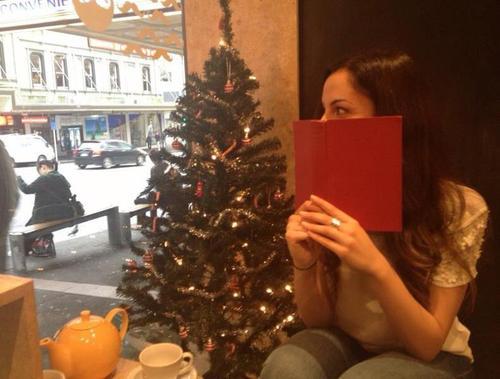
Something you can't pass by is afternoon tea at the Hopetoun Tearoom in Block Arcade on Collins St. Though their high tea was booked out three weeks ahead, we still wanted to experience some afternoon tea goodness. The hardest part (like really, really hard) is choosing what to eat. Have you ever seen such a glorious window display?!


Bento boxes for $7 during happy hour at this Japanese place in a little laneway off Bourke street - late lunch win.
Standout dinner was Pizza at Ca De Vin in the same laneway off Bourke Street. For $20 we got a huge pizza with a perfect crispy crust and grilled zucchini slices, blobs of fresh buffalo mozarella, fresh tomato sauce, rocket, olive oil and another cheese I didn't note the name of!

It was delicious and the atmosphere of this restaurant - all candle-lit in a quaint brick laneway - was adorable.
Haigh's chocolates is a must-visit, they have a few branches around but the one we went to was in Block arcade off Bourke street. Splurge on some fancy chocolate - you deserve it, you must be tired from shopping all day long ;) Just the place to buy Christmas prezzies too!
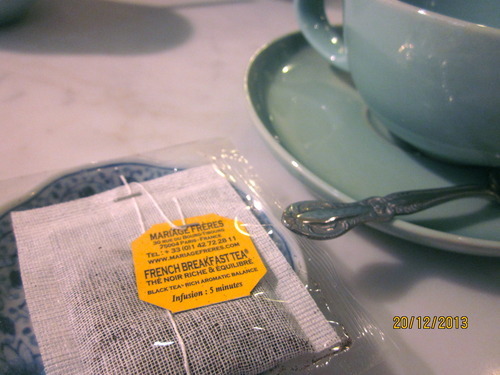
La Belle Miette was another recommendation that we trekked the central city to hunt down, and it was well worth it. A macaron specialty shop, they were super busy in the lead-up till Christmas but were still able to supply us with amazing macarons in a wide range of flavour cominations. My favourites were definitely salted caramel and strawberry & vanilla. The little shop is something to behold, we sat drinking "French Breakfast" tea and trying to resist the urge to run up and buy more macarons; though we ended up succumbing to the pretty little cookies.


The Victoria Park markets were visited on Thursday morning - unfortunately in the 37 degree heat we found it hard to patiently wander the fruit and vege stalls

(by the way: watermelons the size of a small toddler) and ended up getting some ice cold fruit smoothies to cool us down before leaving. We ended up just missing the Wednesday night-markets at Victoria Park so if you get a chance, do give them a go.
On our way up Elizabeth street on the same very very hot day, we passed a sweet shop that advertised Ben and Jerry's Icecream. I first had this icecream when I visited Holland in 2009 and it continues to be my favourite icecream ever which, of course, no one in New Zealand stocks. So off we ran back to our hotel for a siesta, giggling wildly, each with a pint of Ben and Jerry's quickly melting in the cartons. We got my favourite flavour, Strawberry Cheesecake, and a new one to try, Couch Potato. Couch potato was vanilla icecream, rippled with caramel, studded with chocolate covered pieces of crushed potato chips. I don't know how the wonderful people at Ben and Jerry's made it work, but it did, magnificently.
A place that definitely requires a visit on a beautiful day in Melbourne is Ponyfish Island, under the pedestrian bridge, Southbank. This was on a recommendation from a waitress at Cumulus Inc (ask the locals!) and we walked 30 minutes following directions from google maps before realising we were taking the driving directions - and had just done a massive loop to the pedestrian bridge that was about 3 minutes from our starting point. Needless to say our patience was tested and a cool drink was needed. Literally floating on the Yarra river, we got some Blood orange Soho sodas and enjoyed an afternoon break from the shopping. Had we not just had lunch we would've sampled some of their quesadillas as well :) The atmosphere was fun and it seemed everyone was out enjoying the afternoon with us on the Yarra.

Dinner on Brunswick street - a short tram ride from the CBD takes you to the shopping & dining precinct of Brunswick. Though I can't remember the name of the restaurant we ate dinner at, you really only need to wander down Brunswick street and see what takes your fancy. I had an aromatic chicken tagine with minted yoghurt, quinoa and flatbread for dinner with their yummy iced tea special to drink.
Before we said goodbye to Melbourne we had to try Max Brenner Chocolates. It was overrated. That is all.
Speaking of chocolate, our search for Rooftop Honey took us to one of Melbourne's many hipster little delicatessens, where I had the misfortune of spying this vile piece of pretentiousness.


As well as giving us a laugh, it served as a lesson to take care when searching out food adventures; for evil could be lurking among the local honey. I find this sort of thing personally highly offensive and an insult to chocolate. Yeurgh.
Overall, our food experiences in Melbourne were amazing and we went off a lot of recommendations from friends, as well as hotel and restaurant staff. Equally, part of the joy of Melbourne is taking the time to wander and letting yourself be drawn into the sweet little laneways and their secret foodie treats. My only regret is not having known about Urbanspoon.com - a website collating Melbourne's food gems. That being said, we managed to collect a few of our own :)
Happy Eating xxxx
2 notes
·
View notes
Text
Lemon & Chia Seed Cake

Hi Friends!
After saying goodbye and good riddance to exams, I took the customary few days to blob and let the exam hangover wear off (how was I still so tired days later?) and then made this little mental plan:
1) baking - a bookmarks folder and two new cookbooks worth, yey
2) spanish - having understood most of the banter between mexican drug cartels in Breaking Bad, I know that my spanish is still there somewhere, but just needs a little coaxing out. Challenge!
3) reading - for leisure. No textbooks allowed.
4) the classic summer stuff - bbqs, beach, friends, the works!
Anywho on a sunny, lazy afternoon, while getting started on number 3, I made a cup of tea and decided number 1 would go pretty well too.
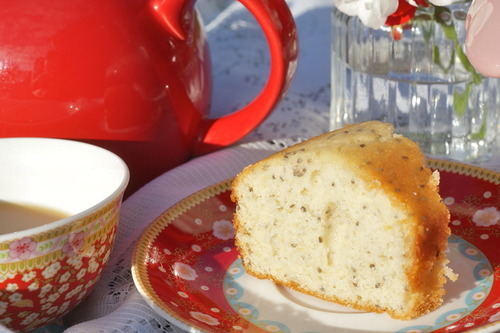
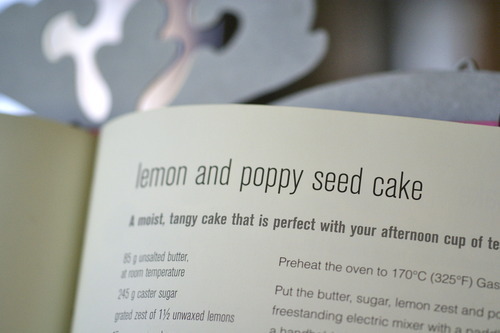
Opened up the Hummingbird Bakery Cookbook - foolproof, reliable as always - and made the lemon poppy seed cake, except with the chia seeds we had lying around.
The cake itself only has egg whites which makes it a fluffy white sponge (and gives you egg yolks for pastry cream!).
The whole thing gets most of the lemon flavour from a stovetop syrup that gets poured over the cake while its still hot in the tin - you see the syrup fill up the tin and then slowly get soaked up by the cake. The cake becomes moist and sticky with lemon-y goodness - it gets just the right balance of tart lemon and sugar. The authors also drizzled lemon glaze on top but I thought that would be a bit much and left it as is :)
Ingredients:
85g margarine
240g caster sugar
zest from 1.5 lemons
handful poppy or chia seeds
165ml whole milk
235g plain flour
2 tsp baking powder
0.5 tsp salt
3 egg whites
Lemon syrup:
zest and juice of one lemon
50g caster sugar
100ml water
Beat margarine, sugar, lemon zest and seeds until well incorporated. Slowly add in milk, continue to beat until all incorporated.
Mix flour, baking powder, salt. Add gradually to the butter mix, mixing in between each addition.
In a separate bowl, beat egg whites till stiff peaks form (can you hold the bowl upside down above your head and not be covered in egg white? Then you're good).
Fold egg whites into the batter just until all incorporated - don't overmix.
Grease & dust a bundt tin with flour. Spoon mix into tin and smooth the top. Bake for approx 30 mins in a preheated 170 degree oven. It should spring back when touched lightly and a wooden skewer stuck into the cake should come out clean when it's done.
For the syrup:
Put all ingredients into a saucepan and bring to the boil over low heat (patience, child). Raise the heat and boil until the syrup reduces by half. Pour into the cake tin while the cake is still hot out of the oven.
Cool for ten mins before turning the cake out of the tin and allowing it to cool completely.
Invite friends over for cake-ing and frolicking
Happy eating x


1 note
·
View note
Text
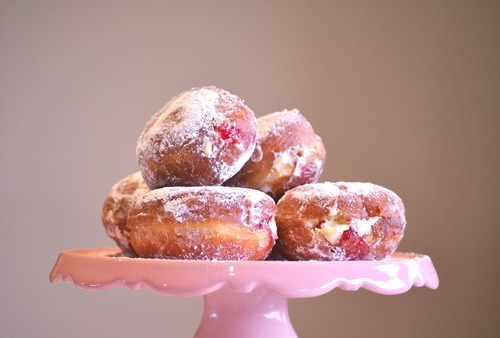
Jam and Cream Doughnuts
Today I decided to take a day off from being so busy.
(yes, thats a thing)
Naturally, I made grand plans to spend the entire day on a ridiculous baking project - and these bad boys are the result.
Little and Friday is the Auckland cafe with a cult following - of which I am a proud member. The store with its communal tables and old-school chairs and mismatched antique cutlery is just the cutest - but the thing that really catches your eye is the cabinet. Its a white-tile-and-glass trophy case of the most exciting noms, you walk up to it wide-eyed and are suddenly faced with the heartbreaking, gut-wrenching decision of choosing just one (or two) bits of baking.
A few weeks ago when I finally decided to deviate from my favourite cakes (all amazing, needless to say) I went for one of their cream and jam doughnuts.
My, oh my.
It really was crazy good. You bite into the pastry and then theres cream and raspberry oozing out everywhere and icing sugar all over your face and hands and clothes and you really should've used utensils but its too good to care. It's dangerous knowing that these exist a mere 10 minute walk (waddle?) from uni.
When you think about it - deep fried brioche dough, filled with crème diplomat and raspberry coulis - was it really going to be anything other than wondrous?

Anywho! Being the stubborn and obsessive baker/fatty that I am I had to try and make these. I'm gonna give it to you straight: they are tedious and time consuming and its going to take a lot of effort. I say, get some music on and enjoy the process :) (Kanye and cream donuts? Jam-in with Jay-Z? hehehe I'm hilarious)
While I'll still be visiting L&F for a sneaky doughnut every now and then, I'd put in the effort for a batch of these for a special occasion or for guests if I love them dearly enough.
Brioche dough:
150ml warm water
1.5 tsp sugar
3 tsp dry yeast
400ml milk
6.5 plain flour (+ more for kneading)
3 tsp salt
0.5 cups caster sugar
3 eggs
140g margarine or butter
Dissolve sugar in warm water and stir in the yeast. Leave in a warm place for 10mins till foamy.
In a (huge) bowl, mix dry ingredients, eggs, milk, and yeast mixture until a sticky dough forms.
Turn out onto a floured bench, knead until you get a smooth, elastic dough (I added a lot more flour as I went). Add little bits of the butter to the dough till its all incorporated. This'll be tricky if you're kneading the ole fashioned way but persevere! You'll get a nice dough, it'll take time and serious muscle #demguns
Put dough in a bowl, cover and keep in a warm place till doubled in size.
Roll out to 3-4cm thick, cut out circles with a mug or cookie cutter and let them rest in a warm place for 10mins.
Heat 2cm oil in a frying pan to 180degrees celsius. Drop in the doughnuts - they'll puff up and float there, its kinda cute - let them cook for 2 mins on each side. They'll be quite dark when they're cooked through.
Remove from pan and allow to completely cool.
Crème diplomat filling:
250ml milk
Vanilla paste/bean
1/4 cup caster sugar
2 egg yolks
2 Tbsp cornflour
150ml cream
In a saucepan, heat milk, vanilla and half of the sugar till simmering. In a bowl, whisk egg yolks and the remaining sugar. Add hot milk mixture to egg yolks, whisking quickly, and return the whole mixture to the saucepan. Bring to the boil on a medium heat, whisk constantly until thickened. Pour into a bowl and chill.
Whip cream until firm. Fold into the chilled custard mixture.
Raspberry coulis filling:
2 cups raspberries
2 tbsp caster sugar
6 tbsp water
1 tbsp cornflour
1 tbsp water
Place berries, water and sugar in a saucepan. Bring to a simmer. In a small bowl mix cornflour and water to make a paste, then add to the saucepan. Cook the mixture for a further five minutes, then cool and pour into a jar.
Assemble: Poke a hole in each doughnut with the handle of a teaspoon. Fill a piping bag of coulis, and one of crème diplomat and pipe to fill the doughnuts. Dredge in icing sugar.
As always; make tea, gather friends round and share them :)
Happy Eating! <3
5 notes
·
View notes
Text
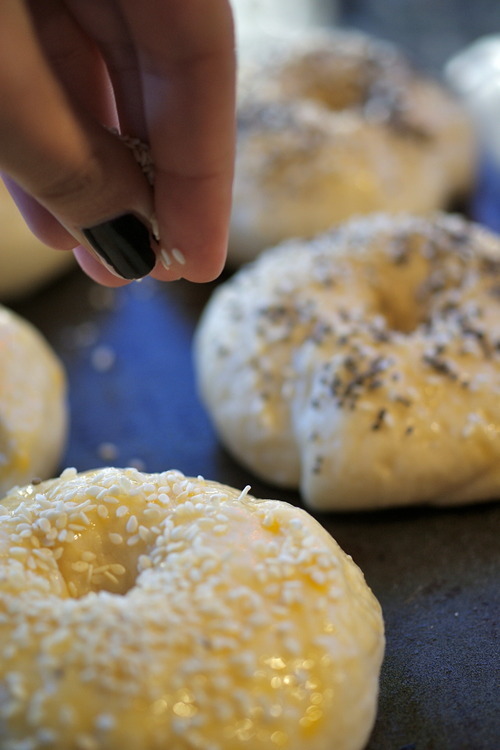
Homemade Bagels
Its been a wee while!
I offer up no other excuse than that uni life pretty much swallowed me up in March and spat me out here in July - I enjoyed every minute of it (minus exams) but I am back here to share some adventures, having eaten my way through the holidays.
I have often tried to describe to friends how the need to bake something particular creeps up on me. Sometimes I will go through a week and feel like everyone and everything around me is somehow hinting to go make X, Y, Z and eventually I give in to fate and make it.
For example - this week, all signs pointed to bagels.

For a week mentions of bagels are everywhere, and finally after a visit to Best Ugly Bagels in town, it hits me that they are in the 'why the hell haven't I made these at home yet?!' category.
And so the ensuing google search leads me to many recipes - some totally ridiculous and calling for two days dedicated solely to producing one batch of bagel deliciousness. Two days? Pffft. Mama didn't raise no fool.
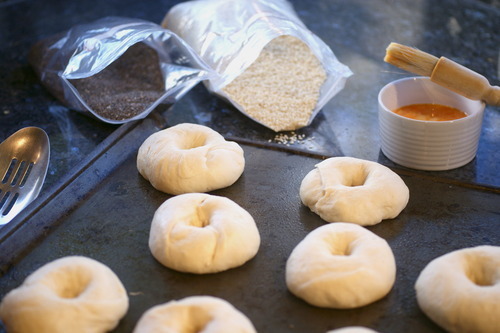
The recipe I ended up using gives just enough resting and raising time to what is really a simple dough, sprinkled with chia and sesame seeds - the product is nothing short of delicious. These were also a lot of fun to make! Though there is always a process involved in bread-making, there's something so satisfying, and almost therapeutic, about spending a rainy day inside baking.
And there really is nothing like the smell of freshly baked bread.
Hot out of the oven the bagels have a crunchy, crispy outside and a soft centre that becomes more chewy on cooling. The contrast you get with bagels comes from the process - the dough is boiled for 2 mins or so before baking, giving you the chewy interior and leaving the oven time for the outside to crisp up.
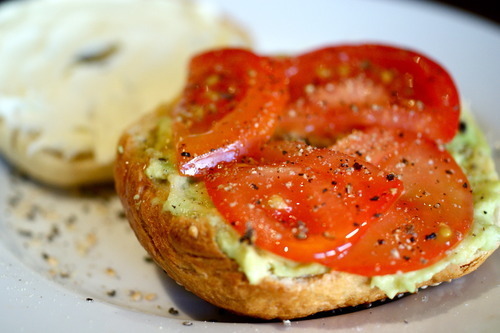
All you need to do with these is slice em open, toast them, and treat them with simple, flavourful toppings. Treat them with love!
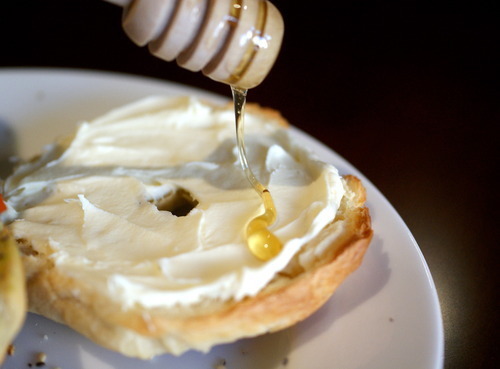
Mascarpone and local honey - so much happy on one bagel.
Note - If you haven't been to Best Ugly Bagels in town, you need to go. There aren't many other places in Auckland that you can get good fresh bagels, and no others that I know of that'll serve em up with yummy toppings, all alongside your coffee. A friend of mine put the secret to their success aptly - they do something very simple, very well. Food philosophy 101. Bagel Love, yo.
Ingredients: makes 8 bagels
2 tsp active dry yeast
1.5 tbsp sugar
approx 1.25 cups warm water
3.5 cups high grade flour
2 tsp salt
Toppings: sesame seeds, chia seeds, poppy seeds, etc. Go nuts.
Dissolve sugar in 1/2 cup of warm water. Add yeast and leave in a warm place for 5 mins to get foamy.
In a large bowl mix the flour and salt. Add the yeast mixture, and enough extra water so that it comes together as a moist and firm dough. Mix with your hands - its easier by far and gives you a good feel of what the dough should be like.
Knead the dough for ten mins on a floured bench, until it becomes smooth and elastic.
Place in a lightly oiled bowl, cover with a damp tea towel and leave in a warm place to rest for an hour. The dough should almost double in size.
Punch the dough down and let rest for a further ten minutes.
Divide the dough into eight pieces and form into little rounds. Poke a hole in the center with your finger and stretch it out to about 2cm or so.

Leave the bagels on a lightly oiled tray and cover with a damp tea towel, let rest for ten minutes.
Preheat the oven to 220 degrees celcius.
Place the bagels, a couple at a time, in a large pot of simmering water. After 1-2 mins, flip them over and cook for another minute or so.

Remove the bagels with a slotted spoon and drain off excess water on paper towels. Brush with a lightly beaten egg and sprinkle with chia and sesame seeds.
Bake for 15-20mins.
Happy Eating <3
Source: The sophisticated gourmet
5 notes
·
View notes
Text
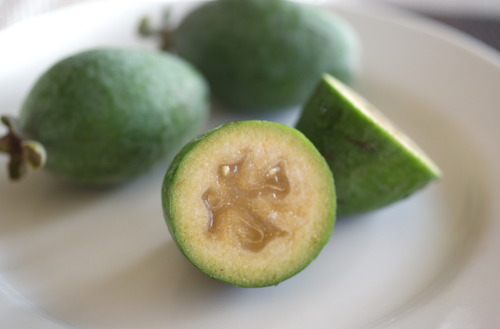
Feijoa Coconut Loaf
It's that time of year. Our fejioa tree, bless it, is spewing forth endless feijoas for the nomming.
This year I decided to give the little guys a chance and lo and behold I've decided I love them! They are a bit cute, aren't they...
Of course my next course of action was to find out if theres some baking I can do with the bucketloads of fruit we have?!
I consulted google and you know what they say, when life gives you feijoas, make feijoa loaf.
Delicious, delicious feijoa loaf.
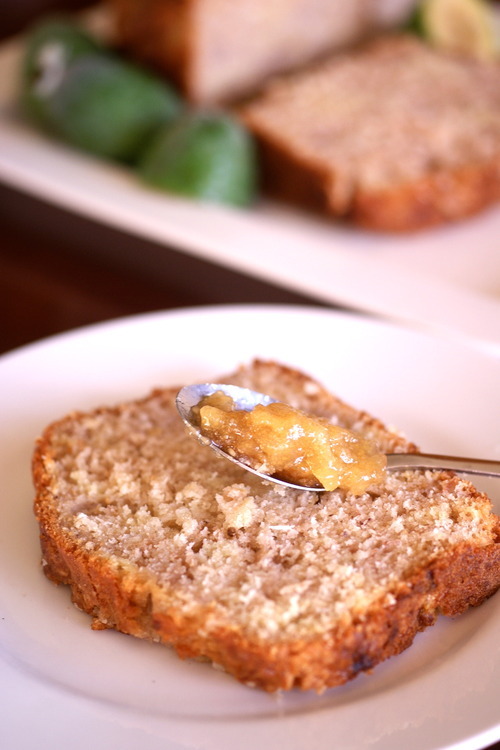
Seriously, this was good. Fragrant and coconut-y and moist and easy to make. I of course love anything that'll sit well with a cup of tea, and this baby does that too!
And because we're feeling all, 'yay feijoas', thought I'd have it with some of mum's homemade feijoa jam.
Bonus: found the recipe on this awesome New Zealand food blog, go have a wander at http://www.bakingequalslove.com/
The only things I'd change would be to have a tad less sugar, and throw in some walnuts, so I've made those changes in the recipe below.
Ingredients: (makes two loaves)
460g flour
pinch salt
1 teaspoon ground ginger
2 tsp baking powder
1 tsp baking soda
1/2 cup roughly chopped walnuts
325ml canola oil
125ml plain unsweetened yoghurt
350g caster sugar
3 free-range eggs
1 cup dessicated coconut
1 cup mashed feijoa flesh
1/2 cup mashed banana
2 tsp lemon juice
Preheat oven to 170 degrees celcius.
In a bowl sift flour, baking powder, baking soda, salt and ginger. Add coconut and walnuts.
In a separate bowl, combine oil, yoghurt, sugar, eggs.
Combine wet and dry ingredients. Add mashed banana, feijoa and lemon juice and stir just until combined.
Bake in a lined loaf tin for around an hour, remove from oven when a wooden skewer inserted comes out clean.
Let cool for ten mins before removing from pan.

Serve with butter, jam or just a dollop of yoghurt.
Happy Eating <3
3 notes
·
View notes
Text
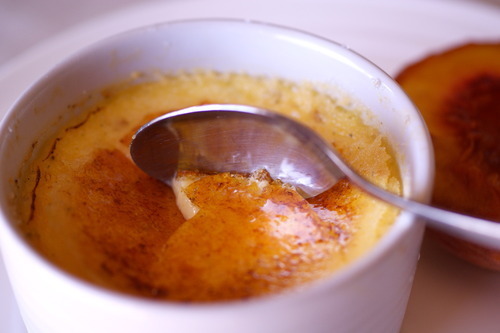
Creme Brulee with Brown Sugar Baked Nectarine
"Amélie is a shy young woman with a pronounced taste for all life's small pleasures : immersing one's hand in a sack of grain, cracking the crust of a crème brulée with the tip of a teaspoon or skipping stones on the Canal St-Martin" - Amélie
Sometimes, I feel bad for vanilla.
It's not really anyone's favourite ice cream flavour. Its name is tainted and its flavour defamed by really really bad artificial essences. In processed products it's usually paired with a ludicrous amount of sugar that can mask its beautiful warm character. It's in a lot of baking without really being the main flavour.
It rarely gets its time to shine. Rarely.
But creme brulee is one of those times. Vanilla is centre stage, and man is it a good show.
Creme brulee is basically a baked custard, divine and gooey and speckled with vanilla seeds, with a beautifully mottled crust of caramelised sugar.

There's nothing better than that little 'crack' when you break through the thin glass of the caramel layer, and reveal the cool, pale yellow custard underneath that turned out just right. And that's before you've even started eating it. Amelie knows where it's at.
The beauty is in the contrast, with each spoonful of gooey vanilla goodness accompanied by little shards of crisp, slightly bitter sugar.
Do you need more convincing?

While the remnants of summer fruit are still around, I thought a baked Nectarine would be a nice accompliament - the baking made it tender, juicy and fragrant and it was nice having something fruity with the creme brulee. All it needed was a little brown sugar and some time in the oven.
This is Alton Brown's recipe, and there's this clip from the tv episode where he made the creme brulee, if you wanna see some technique:
http://www.youtube.com/watch?v=kiRcODBaUN4
Ingredients: (makes 6 large ramekins of creme brulee, or 9 small ramekins)
950ml cream
1 vanilla bean
1/2 cup vanilla sugar, plus more for the crust
6 large free-range egg yolks
Using a small, sharp knife split the vanilla bean lengthways, then use the back of the knife to scrape out the vanilla seeds inside. Place pod and scraped beans in a saucepan with the cream over medium-high heat and bring to the boil.
Remove from heat, cover and allow to sit for 15mins. Remove the vanilla pod, dry off and chuck into the sugar bowl (makes vanilla sugar).
Meanwhile, whisk egg yolks and 1/2 cup sugar until well blended and lighter in colour.
Slowly add the cream mixture to the egg mixture, whisking continually.
Pour the liquid into ramekins.
Place ramekins in a large deep baking dish, and fill the baking dish with hot water so that it comes halfway up the sides of the ramekins. Ta-da, bain marie or water bath.
Place in the oven and bake approx. 40-45mins for larger ramekins, and 30-35 mins for smaller ones in a preheated 160degree celsius oven. The custard mix should be just set, it shouldn't slosh around but it should be wobbly like jelly. It will firm up as it cools so you really don't want to overcook it!
Remove the ramekins and refridgerate for at least two hours, or up to three days.
When ready to brulee, remove ramekins from fridge for ten minutes. Sprinkle a small amount of sugar evenly on the top of the custards and melt using a small torch - OOH FIRE!
(you can get these at the warehouse/stevens/your favourite neighbour loveyoucarrie).
Let sit for 5 mins, and serve.
For the nectarines:
Halve 3 nectarines, removing the stone. Place cut side up on a baking sheet and sprinkle with a teaspoon of brown sugar to each half nectarine. Bake for approx 15-20 mins in a 180 degree celsius oven until the nectarines are tender and all juicy and bubbling from the brown sugar.
Happy Eating <3

6 notes
·
View notes
Text
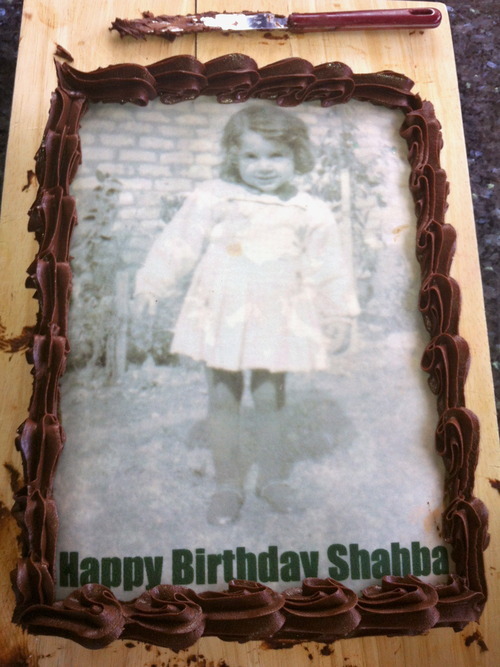
Mama's Birthday Cake
Hello hello! After a super long period of absence (filled with delicious food and summer bliss and wonderful family!) I am back to share with you the only go-to chocolate cake you will ever need.
This cake turns out right every single time. And by right, I mean deeelicious!
Its pretty darn easy and it gives a moist, rich chocolate cake that goes perfectly with ganache. It's less like a mudcake than the chocolate cake I used for Noor's Rose Cake, in that it has more of a spongy texture than a dense one. The coffee in the cake doesn't bring a strong coffee taste at all, but definitely enhances and enrichens the flavour of the chocolate, so don't miss it out!
This also happens to be my mama's favourite cake.
To honour the worlds #1 mama on her 50th birthday, I made this cake, iced with ganache, and used an edible sugar-paper version of this picture of my mama, aged 2!

Wasn't Isn't she a cutie?
The sugar print was ordered online, delivered to my door and was easy to put on the cake. Wins all round :)
As it was a pretty rushed day i didnt have time for anything but a substandard iphone photo, so here ya go. Unfortunately I don't have a pic of the inside of the cake - a birthday party is about the special person, not getting a good cake photo! You'll have to take my word for it when I describe its deliciousness.
Source: Ina Garten (who else?)
Ingredients:
1.75 cups plain flour
1.75 cups sugar
3/4 cup good cocoa powder (seriously, get the good stuff)
2 tsp baking soda
1 tsp baking powder
1 tsp salt
1 cup greek yoghurt
1/2 cup vege oil
2 free-range eggs
1 tsp vanilla
1 cup of hot coffee (instant is fine!)
Sift together flour, sugar, cocoa, baking powder, baking soda, salt. Mix to combine.
In a separate bowl, mix together yoghurt, oil, eggs and vanilla.
Add the wet ingredients to the dry and mix until just combined.
Add the hot coffee and mix until combined.
Pour batter into a lined 30cm x 20cm rectangular tin, (or two 8-inch tins) and bake in a preheated 180degree celcius oven for 35-40 mins. The top of the cake should spring back when touched, and a wooden skewer inserted should come out clean with just a few crumbs when the cake is ready.
Cool on a rack for 10 mins before removing cake from the tin and allowing to cool completely.
Chocolate Ganache:
250g Whittakers dark block, broken up
3/4 cup cream
Place a bowl over a pot of barely simmering water, making sure the bottom of the bowl doesn't touch the water.
Add chocolate and cream and stir until melted together and smooth.
Place in the fridge, checking and stirring every 20 mins until it reaches a spreadable consistency.
Spread over the cake. Apply the sugar-paper picture and smooth down. Hint: If the ganache is a bit stiff, heat your palette knife under boiling water, wipe dry and use it to spread more easily.
Pipe around the edges, I used a 1M tip.
Adding to the rushed-ness of making this cake, was the fact that i was short of icing about two inches away from finishing the border! I had to scrape off the border, add margarine, icing sugar and a bit of hot water to the ganache to have enough to pipe a border, but it turned out well in the end.
Mama, here's to 50 more <3

0 notes
Text
Lemon Tart With Summer Berries

Tis the season to eat, be merry, eat, bbq, eat, be with friends...you get the idea!
Feeling super festive, I threw a little bbq shin-dig to get everyone together and enjoy some sunshine.
Nothing better than sausages, kebabs, burgers, grilled chicken, salads, peppermint truffles and white chocolate rocky road (shot vaughan!), pavlova, brandy snaps, tea, and friends to share it all with :)

I wanted to make something a lil special, maybe not so heavy as a cake - because who has thattt much room after bbq noms - and definitely using summer berries because they're just so darn delicious and beautiful.
So! Tarte au citron using lovely lemons from Caroline's tree, and a big jumble of berries and cherries on top.
The shortcrust is crumbly, the filling itself is tart and smooth and the berries are super fresh and bright. The components of the tart contrast well with each other so it all works quite nicely.
For another variant, you could bake the tart case completely, and then fill the cooled shell with vanilla custard and top with fruit.
This recipe is Rachel Allen's - such a great baker :)
Ingredients:
Shortcrust pastry:
200g plain flour, sifted
1 tbsp icing sugar
100g butter, chilled and cut into cubes
1 egg, beaten
Filling:
3 eggs
125g caster sugar
150ml cream
2 tbsp lemon zest
lemon juice approx 1/3 cup
orange juice approx 1/4 cup
To top:
icing sugar
2 cups mixed fresh berries
Directions:
In a food processor, pulse flour, icing sugar and butter cubes until the mix resembles breadcrumbs in texture.
Add just enough egg so that the mixture comes together.
Shape into a disc and wrap in glad wrap, put in the fridge to chill for half an hour.
Line a 23cm tart tin with a loose bottom with butter and a light dusting of flour.
Remove pastry from fridge and roll pastry out onto a piece of gladwrap, making sure to flour the rolling pin so it doesn't stick.
Lift the pastry and press it into the prepared tin.
Bake blind for 10 minutes at 180 degrees celsius.
Remove the baking weights, brush the pastry with leftover beaten egg and bake for a further 5 minutes.
Mix all the ingredients for the filling until well combined. Skim off any foam that forms on top of the mixture. At this point you can taste a wee bit of the mixture and adjust the citrus flavour with more juice if you like.
Pour into the tart shell and bake at 160 degrees celsius for 30-35mins, or until the edges look set and the center still has a slight wobble. It will firm up more as it cools.
Remove from the oven and cool completely before removing from the tin.
Pile high with raspberries, boysenberries, strawberries, blueberries, cherries before serving!
Dust with icing sugar - it will kinda melt into the berries and make them glossy and syrup-y.
Serve with softly whipped cream.

Happy Eating! Happy Summer! Merry Christmas!
3 notes
·
View notes
Text
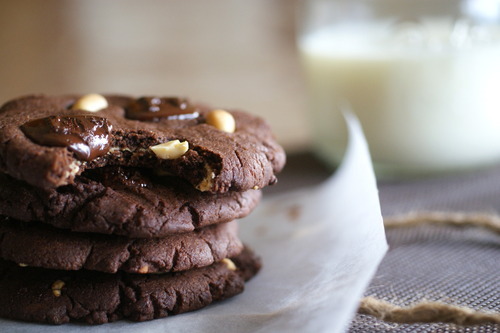
Peanut Butter & Chocolate Overload Cookies
Moustache milk and cookie bar is a fantastic new wee place in town, serving up deeelicious cookies with dunking milk (or Harney & Sons tea, new favourite!).
I had the pleasure of having a catch-up cuppa there a few weeks ago. The store has a full chalkboard wall decorated with little snowflakes, and displaying the Tea on offer as well as the Whittakers chocolate they so proudly use (Can you see how easily they won me over?). A white tiled counter displays the cookies in large glass cookie jars and there are wee wooden stools by the window, next to a cute lil christmas tree, bookshelf, and huge jar of roasted hazelnuts. The place is lit up with lights made out of old milk bottles, hung from the ceiling.
Oh yea, this place can do atmosphere.
Anywho! Though I am not usually a fan of peanut butter nor of sweet-salty baking, their peanut butter chocolate cookies were really, really good. Super respect for winning me over on that one!
How could I not love the rich, almost brownie-like cookie, with crisp edges, studded with roasted peanuts and dark whittakers chocolate, and filled with a surprise bit of peanut butter?
With almost golem-like obsession, I went home to try recreate my precious, these cookies.

Boom! Annie's eats had the perfect recipe. She makes these chocolate cookies and then shoves mini peanut butter cups right into the dough before they bake.
My lovely friend Rachel and I spent a good evening diabolically scheming and experimenting with these. We made thicker cookies, then thinner ones. Filled some with peanut butter, and left some without filling.
In the end my favourite was the thinner, crisper cookie, filled with the thin layer of peanut butter. Just. wonderful.
They are surprisingly easy to make and don't need any time to chill in the fridge before baking. Getting to adorn them with peanuts and chocolate bits is so fun and makes you feel like a little kid again :)
Oh, shall I mention the sheer joy you will experience from eating these?!

Ingredients: makes 16 large cookies. Or you could, y'know, make double.
1.5 cups plus 2 tbsp plain flour
6 tbsp cocoa powder
1/2 tsp baking soda
1/2 tsp salt
85g butter, softened
1/4 cup plus 2 tbsp peanut butter, (and extra for filling)
1/2 cup sugar
1/2 cup brown sugar
1 large free-range egg
1 tsp vanilla
2 tbsp milk
Whittakers Dark Ghana chocolate
Roasted unsalted peanuts
In a bowl, mix together the flour, cocoa powder, baking soda, salt.
In a separate bowl, combine butter, peanut butter, and sugars. Beat until light and fluffy. Add the egg, vanilla, milk and mix until smooth. Mix in the dry ingredients.
Scoop out balls of dough (about a heaped tablespoon per cookie). Flatten out half the dough ball onto the baking sheet, spread with peanut butter, then sandwich with the other half of dough. Use a fork to help flatten the cookie out and press the lil dough sandwich together.
Press bits of dark chocolate and roasted peanuts into the cookies.
Bake at 180 degrees celsius in a preheated oven, for 10-13 mins. Allow the cookies to cool slightly on the tray, then transfer to a wire rack to cool completely. When you first take them out of the oven they'll feel soft but will crisp up as they cool.

Have cold milk ready for dunking.
As always, Happy Eating <3
Oh, and for the love of cookies go and support this wonderful local business! http://moustache.co.nz/
#peanut butter#peanut butter chocolate cookies#chocolate cookies#holiday cookies#whittakers chocolate#moustache#milk and cookies
11 notes
·
View notes
Text
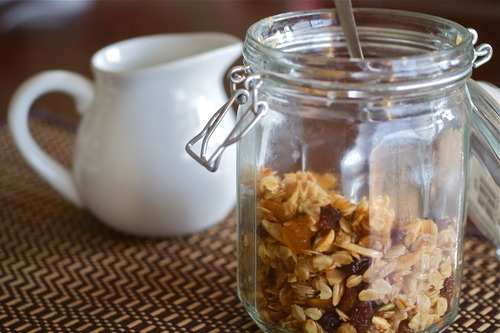
D.I.Y Toasted Muesli
Homemade toasted muesli (a.k.a granola) is really fun to make, super easy, and you can change up the flavours to make your own unique deelicious muesli.

I love making this sort of thing. You add whatever you like and however much you want of it, mix everything up in a big bowl and it becomes your own unique, messy lil creation.
It has a chewy, nutty quality that you don't get from bought muesli. Its addictive as a snack, good with milk for breakfast/midnight snack, on top of icecream, with yoghurt and fruit compote etc etc :)
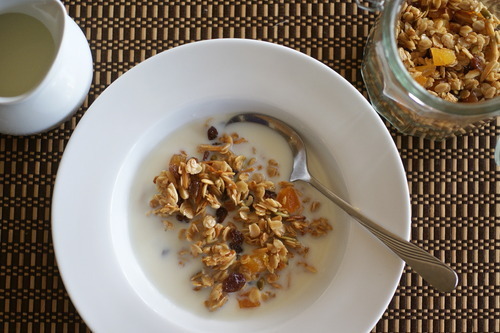
You need to make sure you use 'old fashioned' rolled oats, not the quick-cooking kind. Theres something so satisfying about the clattering sound the oats make when you pour them into a bowl. The quick cook ones have been cut up into smaller bits and will shrivel right up when you cook them and not turn into toasted muesli goodness (or make the pretty clattering sound). If you're stuck look for the biggest looking rolled oats you can see and use those!
Ingredients:
2 cups rolled oats
1/3 cup good New Zealand honey
1/3 cup vege oil
1 teaspoon vanilla extract
1 teaspoon ground cinnamon
a handful sunflower seeds
two big handfuls of slivered almonds
a handful chopped dried apricots
a handful sultanas
In a bowl combine oats, oil, honey, cinnamon, sunflower seeds, almonds.
Spread out onto a baking tray lined with baking paper.
Bake in a preheated 170degree oven for approx 20-25 mins, stirring a couple times during cooking. If you like your muesli chunkier, stir less.
Remove from oven, allow to cool and then add chopped dried fruit. You could throw in some orange zest at this stage too.
Ways to mix it up:
Instead of honey, you could add maple syrup, brown sugar, white sugar
Nice ideas for dried fruit are dried cranberries, chopped dried mango, sultanas, dried apricots, dried cherries
Add almonds, cashews, walnuts, shredded coconut (careful with coconut - add it after you've toasted the oats, otherwise it'll burn)
You could use nutmeg, ground cardamom, cinnamon.
Go crazy - I'd love to hear about your favourite combination of flavours if you give this a go (which you should)!
Happy Eating <3
6 notes
·
View notes
Text
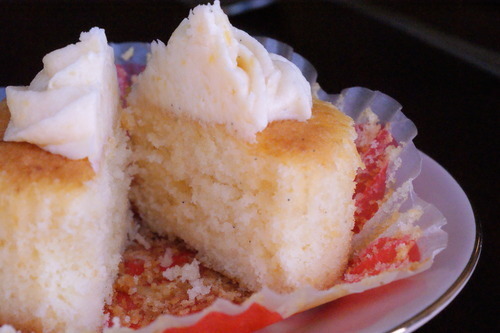
Peach Vanilla Bean Cupcakes
There are these great Peach cupcakes sold at Petal in Newmarket, with a vanilla cupcake base and delicious peach flavoured icing, tart and sweet and flecked with little golden bits of peach. Me being me, I had to go home and try to make my own.

Attempt #1 was problematic. I started off by pureeing tinned peaches and adding them to buttercream icing - but this made it so runny that to be able to pipe I added copious amounts of icing sugar, leaving it too sweet and without that much peach flavour. As well as that, the vanilla cupcake base was too sweet for my liking (sorry, hummingbird bakery cookbook!)
When it came time to bake something for a flat bbq (Hi rach & co!) I decided to tackle these again.
I made Annie's vanilla bean cupcake as a base - the reviews were raving, but it really is the best vanilla cupcake I've had and it is my new go-to recipe! Super fluffy and fragrant with vanilla, it literally melts in your mouth.
I reckon the secret to a good vanilla cupcake is
a) air - spend minutes gradually adding and beating the butter and sugar
b) good vanilla - if you're going to make vanilla cupcakes, do it right. I still have some beautiful tahitian vanilla pods from the french markets - they did very nicely, along with another hit of vanilla extract!
It is more time consuming than other recipes but I tend obsess over the best, not necessarily the quickest to whip up ;)
Now for that tricky icing. I strained tinned peaches, pureed them, and reduced them on the stove until one can of peaches turned into three big tablespoons of concentrated peach puree. Alas, same problem! The icing becomes too wet with peach and ends up being diluted with the resulting sugar additions.
However, it was an improvement on the first go and my friends did enjoy it, though the peach flavour was more subtle than I would have liked. If anyone has better suggestions for a stronger peach icing I'll be glad to hear/try them (short of using essences - I prefer not to use them in my baking).
And they are a nice way to enjoy peaches when they aren't in season just yet :)
Ingredients: yields a ginormous 30 cupcakes
2.25 cups plain flour
6 tablespoons cornflour
1 tbsp baking powder
1/2 tsp salt
1 vanilla bean, split lengthwise
225g margarine
2 cups caster sugar
5 large eggs
1.25 cups greek yoghurt
1 tbsp vanilla extract
In a bowl combine flour, cornflour, baking powder and salt and stir to combine.
In a different bowl, add margarine and the seeds scraped from the vanilla pod. (Throw the empty pod into your sugar tin or your tea leaf tin!)
Beat for 3 mins until light and fluffy.
Add sugar gradually, beating for a good minute after each addition. It will be worth it. Add in eggs one at a time. Remember to scrape down the sides of the bowl between additions.
In a different bowl, mix yoghurt and vanilla extract.
Add the dry and wet ingredients to the margarine mixture alternately, beginning and ending with the dry ingredients. Mix until everything is nicely incorporated.
Fill paper cupcake liners about 2/3 full, and bake for approx 15-20mins or until the cakes spring back when touched and a skewer inserted comes out clean.
Allow them to cool totally before icing.
Peach Icing:
1 x 225g tin peaches
3 tablespoons margarine
3 cups icing sugar
1 vanilla pod, seeds scraped out
Strain peaches and whiz up in a food processor/blender. In a small pot, reduce the peach puree down over a medium-high heat, stirring constantly until the mixture has halved in volume. The result will be a paste-like, thicker puree.
Whip the margarine and vanilla beans until soft, and mix in the peach puree. Sift in the icing sugar gradually and beat until you reach stiff peaks suitable for piping. You can add a drop of pink food colouring if you like.
Happy Eating my lovelies! <3

3 notes
·
View notes