#DIYSafety
Text

Thinking about fortifying your home? 🏡🔒 This guide will help you install a security system effectively!
Key Points:
Choose Wisely: Select a system that fits your needs, budget, and preference for DIY or professional monitoring.
Strategic Layout: Plan your security around key entry points with a mix of sensors and cameras for full coverage.
Test & Maintain: Regular testing, network security, and smart device integration are crucial for reliability.
Follow these steps to ensure your home’s safety!
0 notes
Text
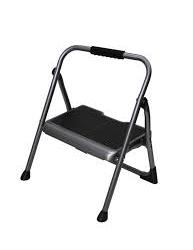
Step Up to Safety: A Comprehensive Guide to Step Ladder Use
Step ladders are a household staple, offering a quick and easy way to reach those out-of-reach areas. However, their seemingly simple design can mask potential hazards. Every year, thousands of people visit emergency rooms due to step ladder-related falls. This guide delves into the safe use of step ladders, empowering you to tackle tasks confidently and safely.
Understanding Your Step Ladder
Types of Step Ladders:
Single Step Ladder: A basic design with a narrow profile, ideal for minor height increases.

Double Step Ladder: Features two platforms, providing more height access.
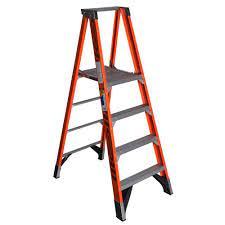
Step Ladder with Platform: Includes a wider platform at the top for increased stability when working for extended periods.

Multi-Position Ladder: Offers multiple configurations, including step ladder and leaning ladder options. Ensure all locking mechanisms are secure before use in any configuration.
Anatomy of a Step Ladder:
Steps: The flat surfaces you stand on to ascend and descend. Look for slip-resistant treads.
Rails: Vertical supports you grasp for balance while climbing.
Spreaders: Horizontal bars at the base that stabilize the ladder when open. Ensure they are fully locked before use.
Top Cap/Platform: The uppermost flat surface of some step ladders. Not all step ladders are designed for standing on the top cap.
Weight Capacity: Every step ladder has a maximum weight limit. Never exceed this limit for your safety. The weight capacity is typically labelled on the spreader or rails of the ladder.
Safe Set-Up and Use
Setting Up Your Step Ladder:
Choose the Right Ladder: Select a step ladder with the appropriate height to reach your desired work area. Avoid overreaching.
Find Level Ground: Place the ladder on a flat, stable, and slip-resistant surface. Uneven surfaces can cause the ladder to wobble and tip over. Avoid using the ladder on carpets or rugs, as they can bunch up and compromise stability.
Open the Spreader Locks: Ensure the spreader bars at the base are fully extended and locked securely. A loose or unlocked spreader can cause the ladder to collapse.
Inspect the Ladder: Before each use, check the ladder for any cracks, loose parts, or damaged steps. A compromised ladder can be a serious safety hazard.
Safe Climbing Practices:
Maintain Three Points of Contact: Always maintain three points of contact with the ladder – two hands and a foot, or two feet and a hand. This provides better balance and reduces the risk of falls.
Face the Ladder: Ascend and descend the ladder while facing it. This allows you to see where you are placing your feet and maintain a firm grip on the rails.
Use the Rails: Keep a firm grasp on the rails while climbing or descending. Never climb with tools or materials in your hands. Use a tool belt or hoist materials separately.
Center Your Body: Stay close to the center of the ladder to avoid tipping it over.
Don't Climb Too High: Most importantly, never stand on the top two steps of a step ladder unless it's specifically designed for that purpose. These steps are often smaller and less stable than the lower steps. If you need more height, consider using a different type of ladder or scaffolding.
Additional Safety Tips:
Don't Lean the Ladder: Step ladders are designed to be free-standing. Never lean a step ladder against a wall or other object for support. This can cause the ladder to slip and collapse.
Secure the Work Area: If working near a doorway or walkway, barricade the area to prevent others from bumping into the ladder.
Be Aware of Electrical Hazards: Avoid using a metal step ladder near power lines or electrical equipment.
No Buddy Boosting: Don't use a step ladder as a platform for two people. The ladder's weight capacity is designed for a single person.
Step Ladder Maintenance
Regular Inspections: Inspect your step ladder regularly for any signs of damage, such as cracks, loose rivets, or bent parts. Discard a damaged ladder and replace it with a safe one.
Cleaning: Keep your step ladder clean by wiping it down with a damp cloth. Avoid using harsh chemicals or abrasive cleaners.
Proper Storage: When not in use, store your step ladder in a dry, protected location away from extreme temperatures.
When to Replace Your Step Ladder
Here are some signs that your step ladder may need to be replaced:
Cracks or splits in the rails or steps
Loose rivets or bolts: Over time, the connections on a step ladder can loosen. Check for any loose rivets, bolts, or screws at the connection points between the steps, rails, and spreaders. A loose connection can compromise the ladder's sturdiness.
Bent or deformed parts: Even a minor bend in a step or rail can significantly weaken the ladder's integrity. Inspect the ladder for any bent, warped, or dented parts.
Missing or damaged feet: The slip-resistant pads on the bottom of the legs are crucial for stability. Replace any missing or worn-down feet to prevent the ladder from slipping.
Difficulty locking or unlocking the spreaders: The spreaders need to lock securely to keep the ladder stable. If you have trouble locking or unlocking the spreaders, it's a sign that the mechanism may be damaged and the ladder should not be used.
Corroded or rusted metal components (for metal ladders): Metal ladders can develop rust over time, especially if stored in humid conditions. Rust weakens the metal and can lead to cracks or breaks. Inspect for any signs of corrosion and replace the ladder if necessary.
Worn or damaged treads: The steps (treads) should be slip-resistant and in good condition. Replace any treads that are cracked, grooved, or worn smooth, as they can increase the risk of slipping.
Paint or stickers (excluding warning labels): Thick layers of paint or added stickers can obscure cracks or other damage on the ladder. Avoid painting your ladder and remove any non-essential stickers.
If you notice any of these signs, it's best to err on the side of caution and replace your step ladder. A damaged ladder is a safety hazard and can lead to serious injuries.
Advanced Step Ladder Techniques (For Specific Ladder Types)
While the core safety principles apply to all step ladders, some advanced techniques come into play with specific ladder types:
Step Ladders with Platforms:
Platform Use: These ladders feature a wider platform at the top, designed for standing and working for extended periods.
Exiting the Platform: When exiting the platform, always face the ladder and use a three-point contact to descend safely. Never step off the back of the platform.
Multi-Position Ladders:
Locking Mechanisms: Double-check that all locking mechanisms are secure before using the ladder in any configuration, whether as a step ladder or a leaning ladder.
Leaning Ladder Configuration: When using the leaning ladder function, ensure the ladder is securely angled against a stable wall and tied off at the top according to the manufacturer's instructions.
Specialized Step Ladders
Extra-Wide Step Ladders: These ladders offer increased stability due to the wider base and steps. They are ideal for users who require additional stability or who plan on carrying tools or materials while climbing.
Fiberglass Step Ladders: Fiberglass ladders are non-conductive and can be used safely near electrical hazards. However, they can be heavier than aluminum ladders and require extra care to avoid damaging the fiberglass rails.
Step Ladder Safety and Common Misconceptions
Misconception 1: Step Ladders are One-Size-Fits-All
Not all step ladders are created equal. Choose the right ladder for the job by considering the height you need to reach, and the weight capacity required for yourself and any tools or materials you might be carrying.
Misconception 2: A Step Ladder Can Replace a Scaffold
Step ladders are designed for temporary, short-duration tasks. For extended projects or working at significant heights, consider using scaffolding, which offers a more secure and stable platform.
Misconception 3: Step Ladders with Wide Bases Eliminate the Need for Proper Set-Up
Even with a wide base, proper set-up procedures remain essential. Always ensure the ladder is on level ground, the spreaders are locked, and you maintain three points of contact while climbing.
Conclusion
Step ladders, when used correctly, can be a valuable tool for household tasks and reaching those out-of-the-way places. By following the safety guidelines outlined above, you can minimize the risk of falls and ensure a safe and productive work experience.
Remember, prioritizing safety is paramount. If a task requires a level of stability or height that a step ladder cannot provide comfortably, don't hesitate to use a more appropriate tool, such as a scaffold or a different type of ladder.
#ladder safety#stepladder safety#workplace safety#homesafety#fallprevention#DIYsafety#construction safety#accidents#injuryprevention
0 notes
Text
Enhancing Home Safety: A Guide to Bathroom Grab Bar Installation
#SupreGear#homecare#senior assistance#elderlycare#old age home#senior living#DIYSafety#diy home projects#bathroomsafety
1 note
·
View note
Text
How to conduct electrical safety inspections.

Did you know that electrical hazards are among the leading causes of property damage and personal injury in homes and workplaces?
This alarming fact underscores the critical need for regular electrical safety inspections. These inspections are not just a routine check-up; they are a vital part of ensuring the safety and functionality of your electrical systems.
Whether it's a residential building or a commercial complex, staying ahead of potential electrical risks can save lives and prevent costly damages.
Understanding how often to conduct these inspections can be puzzling. But don't worry, a handy guide can be found at How Often Should You Have An Electrical Inspection?, providing valuable insights into the frequency of electrical safety checks.
Preparation
When it comes to preparing for an electrical safety inspection, knowledge and the right tools are your best allies. First, familiarize yourself with the type of electrical system you have.
Is it a modern, complex setup or a simpler, older system? Each type demands a different approach. You'll need essential tools like a voltage tester, a non-contact voltage detector, and a reliable flashlight.
Don’t forget to review important electrical codes and safety standards, such as the National Electrical Code and local regulations.
Scheduling is key. Plan your inspection at a time that allows complete access to all electrical components without interruptions. This planning ensures a thorough and efficient inspection process.
Inspection Procedure
Visual Inspection
Exposed Wires and Insulation: Check for exposed wires and frayed insulation.
Damaged Plugs and Cords: Examine for any signs of damage.
Overloaded Outlets: Identify any outlets that seem overloaded or stressed.
Lighting Fixtures and Switches: Look for signs of overheating or arcing.
Panels and Enclosures: Inspect for damage, rust, and loose connections.
Grounding and Bonding: Verify that all equipment is properly grounded and bonded.
Functional Testing
Circuit Breakers: Test to ensure they trip at the correct amperage.
Operation of GFCIs and AFCIs: Verify their proper functioning.
Voltage and Current Measurements: Identify potential imbalances.
Ground Fault Testing: Ensure an adequate grounding path is present.
Documentation
Documentation is a critical step in any electrical safety inspection. It's not just about noting what you see; it's about creating a comprehensive record of your findings.
This includes detailed observations, any identified deficiencies, and potential hazards. Offer clear recommendations for corrective actions and repairs.
And remember, any unsafe equipment should be immediately labeled and tagged for attention.
Electrical Inspection Frequency
Now, how often should these inspections occur? Several factors influence this decision: the age and condition of your electrical system, the type and purpose of the building, any history of electrical problems, and local regulations.
For instance, new homes should have an inspection before occupancy and then every 10 years. Existing homes require an inspection upon purchase, every 10 years, and before major renovations.
Commercial buildings and industrial facilities have their specific guidelines based on local regulations and industry standards.
Additional Considerations
In some cases, it’s wise to hire a qualified electrician for complex inspections or to address significant hazards.
Maintaining a record of electrical safety checks and documentation is not just for compliance; it’s a proactive measure for future safety.
Don’t overlook the importance of educating occupants on electrical safety. Awareness is a powerful tool in preventing hazards.
Conclusion
Regular electrical safety inspections are not just a regulatory formality; they are a fundamental aspect of maintaining a safe living and working environment.
By being proactive, you can prevent electrical hazards and ensure peace of mind. For more information and assistance,
#ElectricalSafety#SafetyInspections#HomeSafety#ElectricalInspection#SafetyFirst#ElectricalTips#ElectricalMaintenance#PropertySafety#DIYSafety#CommercialSafety#IndustrialSafety#ElectricalCode#SafeElectrical#PreventativeMaintenance#ElectricalHazards
0 notes
Video
youtube
How to Fix Balcony Net in Hyderabad
Learn how to properly fix balcony nets in Hyderabad with this step-by-step tutorial. Discover the importance of balcony safety and how Eyan Safety Nets Hyderabad can help secure your space.
If you're looking to fix your balcony netting, here's a step-by-step process to guide you through the process: Identify the problem:
Before you begin fixing your balcony net, you need to identify the problem. Is there a tear in the netting? Are the fasteners loose? Is the net sagging? Knowing the problem will help you determine the best course of action.
Gather the necessary tools: Depending on the problem, you may need tools such as scissors, pliers, zip ties, or replacement fasteners. Make sure you have everything you need before you start.
Measure and cut netting: Measure the area where the new netting will go, and cut the netting to size. Make sure to leave a little extra on each side to ensure a snug fit.
Install the netting: Depending on the type of fasteners you're using, you may need to thread the netting through them or use a zip tie to secure it in place. Make sure the netting is taut and straight.
Test the netting: Once the new netting is installed, give it a good tug to make sure it's securely fastened. If everything looks good, your balcony netting should be fixed and ready to use!
Remember, if you're not comfortable fixing your balcony netting yourself, it's always best to hire a professional like us. Safety should always be your top priority when working at heights.
Contact Eyan Safety Nets Hyderabad: 📞 Contact Number: 9550282911 📧 Email: [email protected] 🌐 Website: https://eyansafetynets.com/ #BalconySafety #HyderabadNets #EyanSafetyNets #BalconyNetInstallation #SafetyFirst #HomeSafety #NetFixing #HyderabadSafety #EyanSafetyHyderabad #BalconyProtection #DIYSafety
0 notes
Photo

Friends, I need your advice! I'm converting some vintage tube television sets into mini-bars, and I've heard that the old tubes can carry a residual electrical charge...anyone have experience with this? I'm not eager to electrocute myself, so I want to make sure that I do this safely! * * * * * #safetyfirst #vintagetv #tubetv #restorationchic #reclaimed #restoredantiques #vintagetvbar #makersgonnamake #makeradvice #vintagegoodies #vintagerestoration #DIY #DIYsafety #classic #vintagedecor #upcycle #minibar #helpagalout #advice #restorationadvice #DIYadvice #womenwithtools #Wheatlandmaker #yycmaker #HistorymeetHandmade https://ift.tt/2M7C1Mp
0 notes
Last Seen Blogs

someone-with-a-boring-username
I don't know. . .

siril-borode-love-blog
Untitled

thvcherie
thvchérie ˚ ༘♡ ⋆。˚

viperinoire
lukanette/adrigami/lovesquare

alemoine81
Live Fast and Die Young