#RHS
Text
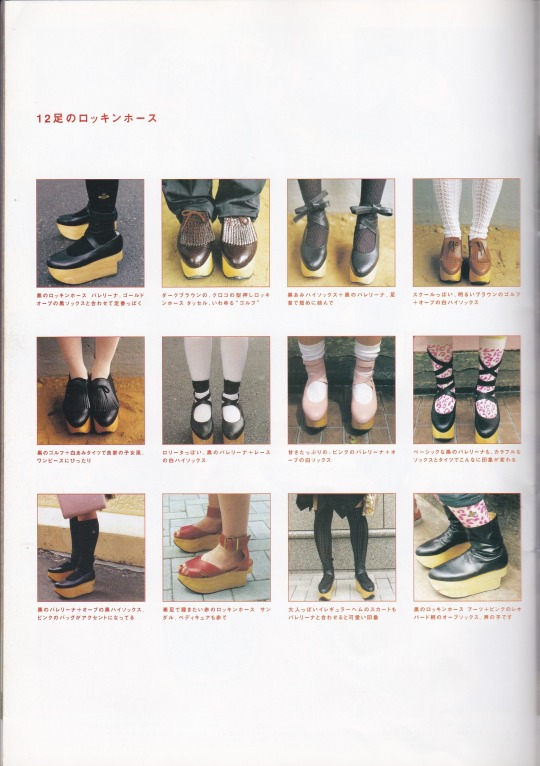
SAMPLING
Volume 1 September 1998
A selection of 12 pairs of Vivienne Westwood Rocking Horse Shoes
#Vivienne Westwood#Rocking Horse Shoes#RHS#1998#90s fashion#90s jfashion#90s jpunk#90s punk#Japanese Street Fashion#jfashion#VW#Old School Lolita#SAMPLING
4K notes
·
View notes
Text
CONGRATULATIONS TO DR. FRANK-N-FURTER !!!
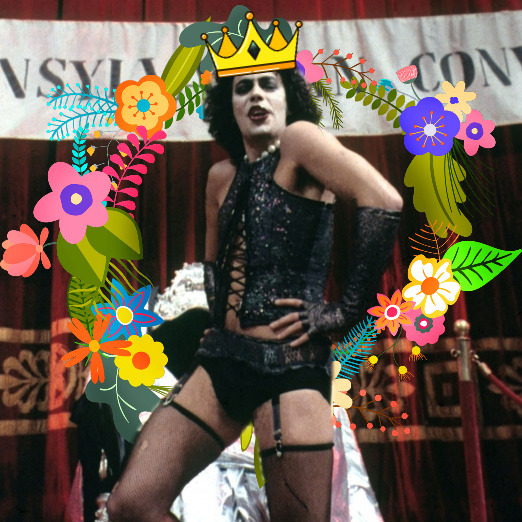
THE ULTIMATE JOKER OF MUSICALS, THE DEMOCRATICALLY ELECTED MUSICAL TUMBLRMAN !!!
pleasure doing business (polls) with you, everybody
#mod post#tjom bracket#frank-n-furter#the rocky horror show#the rocky horror picture show#rocky horror show#rhs#rhps
427 notes
·
View notes
Text
I'm kinda obsessed with Riff Raff's design rn (kinda wrote a lot of HCS about him), so enjoy some Riff and Frankie in his more euro style design that I'm playing around
(they both hate eachother)
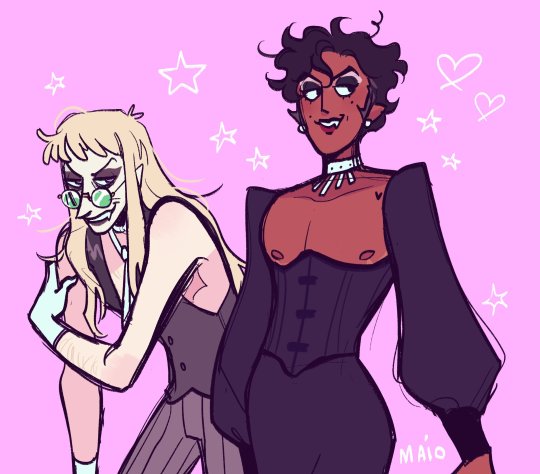
This second one is kinda "old" but I'll post here anyways--
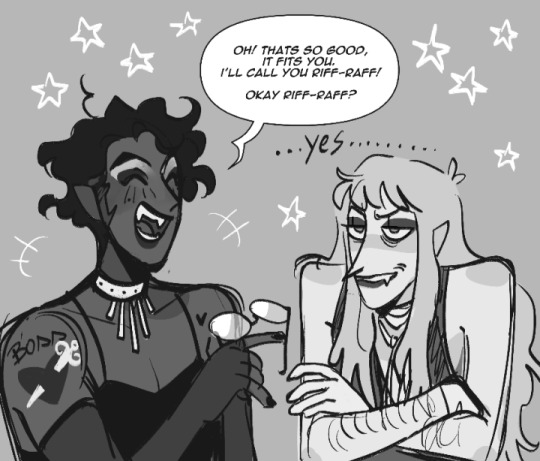

I LOVE the euro production vibe and character designs, I might keep it
#rocky horror au#rocky horror fanart#the rocky horror show#rhs#riff raff rhps#riff raff#frank n furter fanart#frank rhps#art#artists on tumblr#artwork#drawing#doodle#magma doodles
74 notes
·
View notes
Text


#bodyline lolita#bodyline#vivienne westwood#melissa#rocking horse shoes#rhs#sweetlolitafashion#egl coord#eglcommunity#eglfashion#kawaii#lolita fashion#sweetlolita#lolita lifestyle#egl
54 notes
·
View notes
Text
spotify just called me gay in four languages
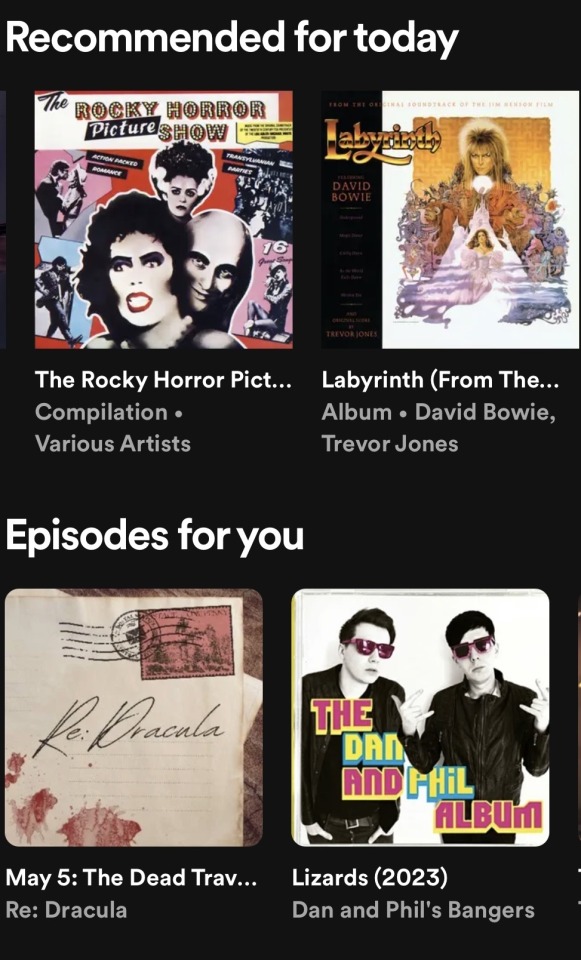
#actually think ‘you seem to like rhps and labyrinth’ is the same language#tee is tumblring#rocky horror picture show#rhps#rocky horror show#rhs#labyrinth#labyrinth movie#david bowie#(that one gay maze post)#dracula#dracula daily#re dracula#re: dracula#dan and phil#dnp#dan howell#daniel howell#spotify#phil lester#philip lester#gay#lgbt#lgbt+#queer
87 notes
·
View notes
Text


#rocky horror picture show#rocky horror show#the rocky horror picture show#the rocky horror show#rhps#rhs#rocky horror#columbia rocky horror#columbia rhps#brad majors#janet weiss#rose-tint my world#tumblr polls#i love polls#fandom polls#my polls#polls
41 notes
·
View notes
Text
psa to my fellas! here's a simple and quick list of things NOT to say if you don't wanna awaken my inner theatre kid....
- "It's because of you"
- "Feed me"
- "It's your fault"
- "First place"
- "Janet"
- "Brad"
- "Money"
- "Honey"
- "Mamma mia"
- "Taco Bell"
- "Transylvania"
- "Tomorrow"
- "Good morning"
- "Uranium"
- "Saskatchewan"
- "Head"
- "Flasher"
- "It takes two"
- "It takes two" (the other one)
- "Rollercoaster"
- "Crash"
- "Unidentified body"
- "Hubcap"
- "What the world needs"
- "Hello"
- "Bean"
- "Cow"
- "Cape"
- "Corn"
- "Hair"
- "Slipper"
- "Pure as gold"
- "I believe"
- "Jesus Christ"
- "The Bible"
- "Turn it off"
- "Gay thoughts"
- "Bi-yatch"
- "I like"
- "Rum and coke"
(part 1/∞)
#into the woods#itw#ride the cyclone#rtc#little shop of horrors#little shop#rhps#rhs#rocky horror show#rocky horror picture show#bom#book of mormon#heathers#annie#hairpsray#theatre kid#musicals
20 notes
·
View notes
Text
Shoe repair: Regluing soles.
So, when I was out and about, dressed all cute, my Bodyline shoes did to me what my Bodyline shoes have done to me many times before.

By the end of my trip to the quality retail establishment known as Five Below, the platform and sole of my Mary Jane pump had detached itself.
As I've mentioned before, it's generally not a bad idea to have some tape in your purse when you're working with Bodyline shoes. Almost every pair of Bodyline shoes that I've owned has broken on me in some way, and sometimes you need to tape it back together to get home. I was driving myself this time, and I keep backup shoes in my car because of a longstanding ankle problem, so my day wasn't completely ruined.
if you have to tape your pump to your foot so you can get through the day, I find that putting a few loops of tape around the middle works pretty well, Tape all the way over your foot and all the way under the shoe. This allows the tape to actually support the shoe, instead of trying to peel off, and it's relatively subtle if you have to do it, like I had to at the convention earlier this year.
Anyway, Bodyline's shoes are just not meant for northern California in the summer, and I think the glue just melts, so I actually had two pairs I needed to glue back together. There's part of me that actually looks forward to needing to do this, because I know that my glue job won't fall apart, and my shoes will be better in the end. I did a tutorial on regluing shoes back in 2015, so it's time to redo that tutorial.

Let's take a look at what we need to do this:
One, we need a place to work that will be safe if little bits of glue get on it. If we do this right, we will not drip glue everywhere. However, if we do this right, we also will not be somewhere that a little drop of glue will destroy.
Two, you need clamps and clamping material. I'm going to be honest, getting some good quick-release clamps and keeping them with your sewing/crafting/diy supplies will be a game changer in many aspects of what you do.
Pretty much any clamp that you get will be good for something, but here's my favorites:
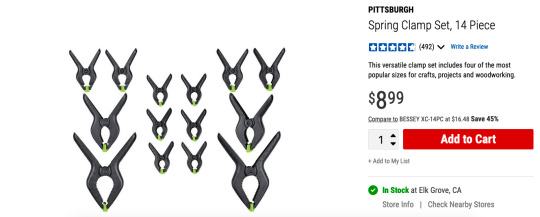
Rabbit-ear spring clamps. The smaller sizes are really good to have around because you sometimes just need A Thing to hold A Thing nice and tight. I used one of the really big ones to hold the sole of the black shoe's rubber sole onto the back. The clamping surface swivels so they're good for clamping angled things.

These things are like a traditional c-clamp, but with a quick-slide action that makes them way easier and faster to use than a c-clamp. I have like 20 of these with my weaving supplies because it's way better than a warping peg or a table clamp. These have a swivel clamping surface, so they can do angles okay. The end of the clamp that swivels also adjusts in and out, so you can use that to put clamping force over a edge of a shoe and avoid bending the edges too much. You can also use that screw mechanism to really tightly clamp something.

You can take the end off one of these and put it on the other end, and then it's a reverse clamp used to hold things apart. I like these little 4" ones for a lot of applications. You can also get a really tight clamp/strong spread with these because of the ratcheting handle. In this tutorial, I use one of these, but I'm using the 14" version instead of the 4" version. This is because I don't know how to read when I buy things online.
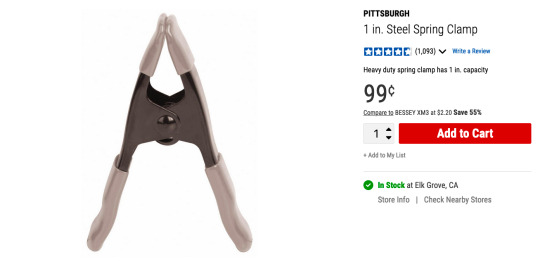
And I'm throwing this 99 cent spring clamp in here because I use these in sewing all the time. Any time you need to get some fabric together and out of the way, this is your tool. Also, if you have rented costumes that are larger than your actor, you can clamp the extra fabric in the back to make it look like it fits them (and then clamp it in the front for any shots of them from behind). I keep these on my dress form as well, because I'm a slightly different size than my dress form, and clamping the back edge of the garment sometimes makes it photograph better on the form.
So get yourself some clamps. In addition to those clamps, I used bungee cords and a lot of stained towels/discarded shipping envelopes to stuff the insides of the shoe. Don't need to make new trash if you reuse the trash you have.
Let's talk about glue, really fast. In that picture, we have four kinds of glue.
Shoe Goo: This is the one I used in this tutorial. Shoe Goo is a glue made specifically for shoes. It's a little bit flexible when dry, is water proof, and can withstand higher temps intermittently. This means that it won't melt when you leave your shoes in your car on a summer day.
E-6000: E-6000 will glue most things to most other things. It comes in a few colors and dries flexible. I keep it on hand, and I have fixed shoes with it before. I like the Goo a little better for this specific application, but I use E6000 on small things like broken buckles. I think I fixed the left shoe of this black pair with E6000, because the store I was at didn't carry Shoe Goo.
Fix All Adhesive: I've used this one in a pinch before. You can find it in more places. It also does something that the other two glues can't do, which I'll go into in a minute.
Glossy Accents: Glossy Accents should not be out there. Glossy Accents is not ready for shoe repair. Glossy Accents does not know what it's doing out there with all those strong glues. Glossy Accents should go back home. Do not use Glossy Accents on your shoe repairs.
Please note that, with the exception of the accidental inclusion of Glossy Accents, all of these are called solvent glues. A water-based glue has water in it, and the glue will dry as fast as water evaporates. If you want it to dry faster, you can replace the water with a solvent like acetone, which will dry as fast as acetone evaporates, which is much faster. If you expose a dried water-based glue to water, it could dissolve back into the glue, making the join weak. A solvent-based glue won't dissolve in water, but you also can't use water to clean it up. Read the instructions on your glue. It will tell you, "when wet, clean up with x." Find out what X is and then have that on hand. Hopefully, you won't need it. Also, most solvent glues are flammable, so don't smoke or burn candles while you do that. The lighter in that picture up there, much like Glossy Accents, has no place in that image and should just go home.

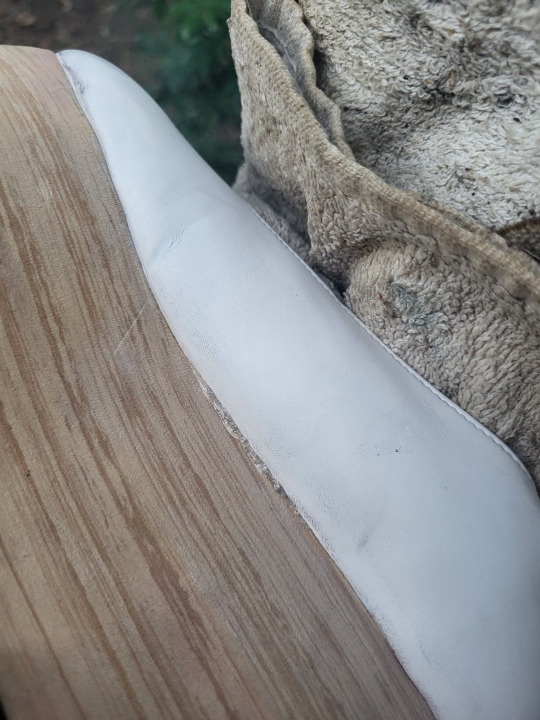
My white rocking horse shoe is a really good example of an easy shoe to re-glue. The front is still attached, but the back is free. Because the front it attached, it will keep the back in alignment. You don't need to worry about lining it up as much, because the shoe will line it up for you.
This is also nice because there's not really any dirt or grass in there. If your shoe broke and you had to walk home with your sole missing, you might have dirt to clean out before you do this glue.
What we do here is pretty simple: put a lot of glue in there, spread it around, put the two sides, together, clamp, and come back later.
How much glue? You want enough so that there's not a lot of empty air pockets between the two sides of the shoe. You want it to be shoe to glue to shoe, without air between. However, you don't want so much that a ton runs out of the sides of the shoes and you need to do cleanup.
I did a nice fat bead of glue down the sole, squished it together, and then pulled it apart. From that point, I could spread the glue around and get good coverage. You want glue on both parts to be glued.
Then, apply some force onto the shoe, to really get the two glue surfaces touching each other as much as possible. I like to just put the shoe on my foot and stand on it for a few seconds.
Once I've put some pressure onto it, I check for two things. The first is for any glue squeeze-out. Acetone cleans that up, but it can also dissolve some of the finishes on some shoes, so be careful with throwing it on there.
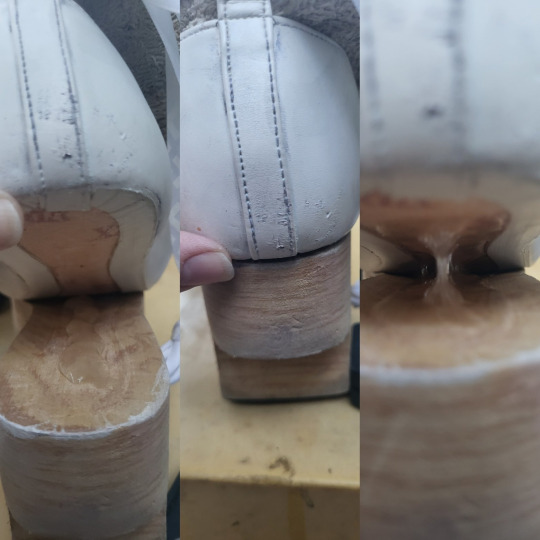
The second thing I look for is any areas where the sole and the shoe are not properly joining. You can see in that three-part pic up there that the back of the shoe wasn't totally meeting the sole, so I had to make sure that I had glue all the way back there.
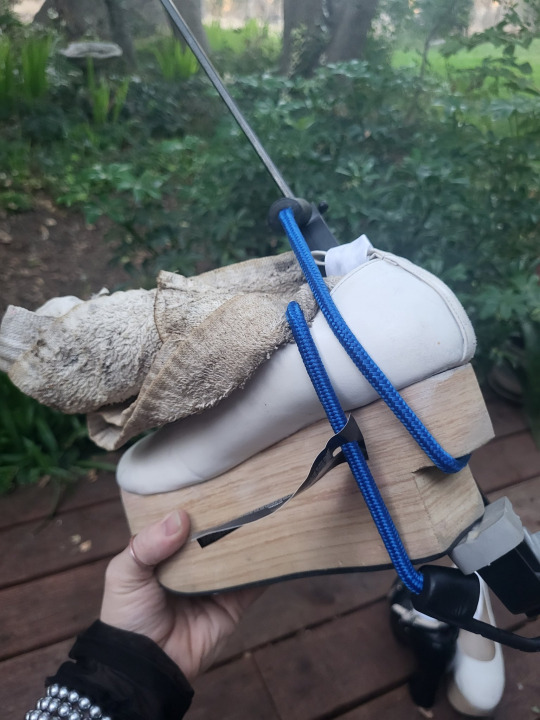
Then it was time to stuff the shoe with something (I used a stained towel) and apply clamps to it. We stuff the shoe so that the clamp can't bend the edges of the shoe down and break them. Here I have one large clamp to provide most of the clamping force, and then a bungee cord to make sure that very back part stays stuck to the sole properly.
Once I was confident that everything was making contact, and that any excess glue was cleaned up, I could set the shoe aside and allow the glue to cure.
So what's going on with the Fix All glue? The main different thing about the fix-all glue is that they instruct you to apply it to both sides, let it dry, and then bring the sides together. This makes two changes to doing it with Shoe Goo.
First of all, when you use glue that dries first, you only get a single chance to align the two parts. This means it's a good choice for things that are very easy to align (like this shoe where the front half is still attached) and not very good for things that might take a couple of tries (like my black pump with the whole platform detached).
The second thing is that it grabs hold immediately, making it a good option for things that are difficult to effectively clamp. You will still want to clamp it in place until it dries, but it will do a lot of that initial holding for you.
Know that one kind of glue will give you multiple tries, but must be heavily clamped while it dries, and another kind will only give you one shot, but it'll do some of the holding for you. (If you really need that sudden grab and long hold, and you're applying it to a large heavy-wear area like the entire sole of a shoe, you probably want Barge All-Purpose TF Cement. It's a dangerous product to work with, but exposing yourself multiple times to different slightly-less dangerous products to glue and then reglue and reglue a shoe as it keeps falling apart seems like a not better option IMO).
So a glue that has you let both sides dry first can be really great if you have just the tip of the rubber sole starting to peel back. The other advantage is that, if the glue dries before it sticks, it dries faster than if you have glue trapped between two non-porous surfaces. Because of this, I use Fix-All when I'm just gluing the soft rubber coating on the sole back into place.
On the black shoes, I needed a few tries to be able to get the platform aligned with the upper. The platform had completely detached, so I had to make sure it was in proper alignment. The right shoe is also where my bad ankle is, so I had to make sure the shoe wasn't twisted, so that my ankle wouldn't be under additional stress.

Here's how much glue I used, before it was spread around. I moved it around to make sure there weren't big patches with no glue. Good contact is good bond.
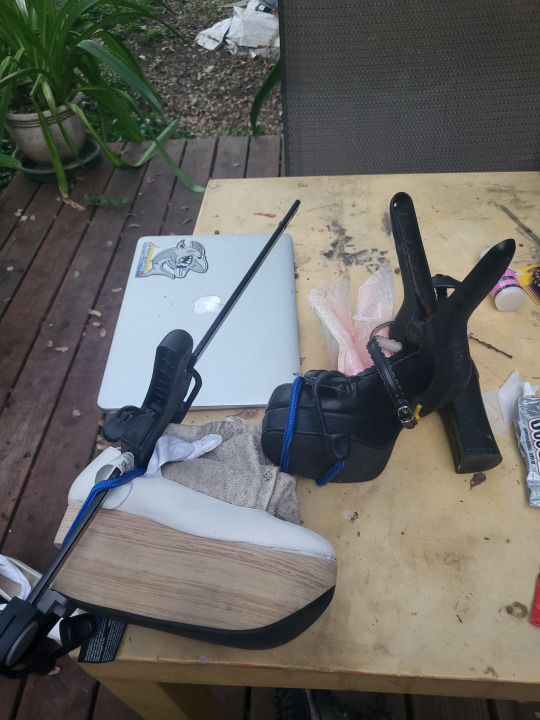
And here's how I clamped it. I shoved a bubble mailer (waste not; reuse your trash!) into the toe of the shoe, and the wrapped a bungee cord around that to hold on the platform. Then, I used a rabbit-ear clamp to hold the instep together.
And then it's just about giving it 24 hours to mostly cure. After 24 hours, it's a good idea to remove the clamps, so you don't put stress on the walls of the shoe. However, give it a full 48 before you try to wear the shoes, because there's still some final curing that has to happen before the whole thing is ready to be put under stress.
And now you can go out and about, knowing that your shoes are stronger than before, and that you won't need to fix that shoe again.
#tutorial#shoe repair#20dollarlolita#lolita fashion#diy lolita#long post#bodyline#rockinghorse shoes#rhs#i told myself i'd be doing a better job with pictures of this one and then used the ugliest table ever
123 notes
·
View notes
Text
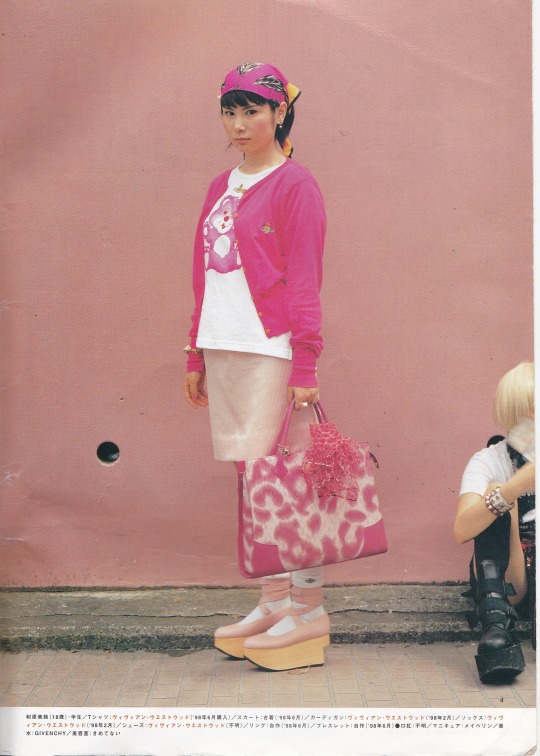

SAMPLING Volume 1
September 1998
2K notes
·
View notes
Text
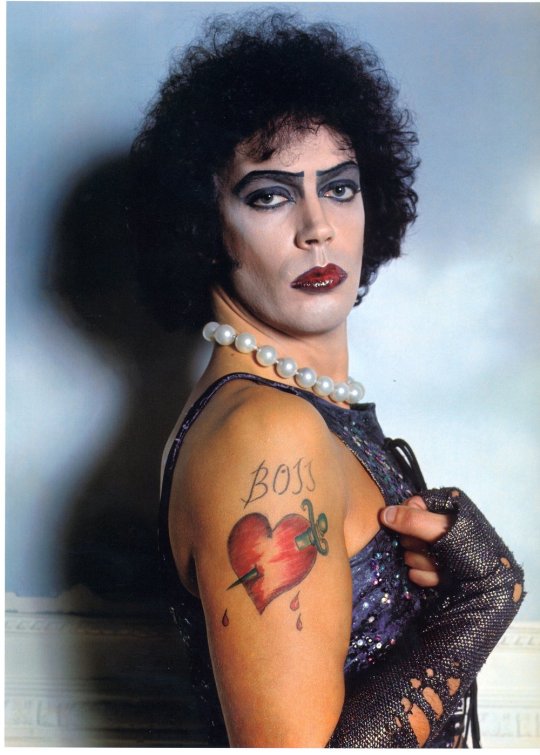

frank-n-furter propaganda
lives in a mansion with three of his gay best friends. The dream life tbh
enjolras propaganda (by @nickclose)
everything that Happened 2012-2015 to him on this site. he was the musical theater darling to all…….. and he deserves a win for everything he gets put through etc also the THEMES and MOTIFS that are not only in the musical but also the book………..
#frank-n-furter#rocky horror show#the rocky horror show#the rocky horror picture show#rhps#rhs#enjolras#les miserables#les mis#mod post#tjom bracket#round three
123 notes
·
View notes
Text
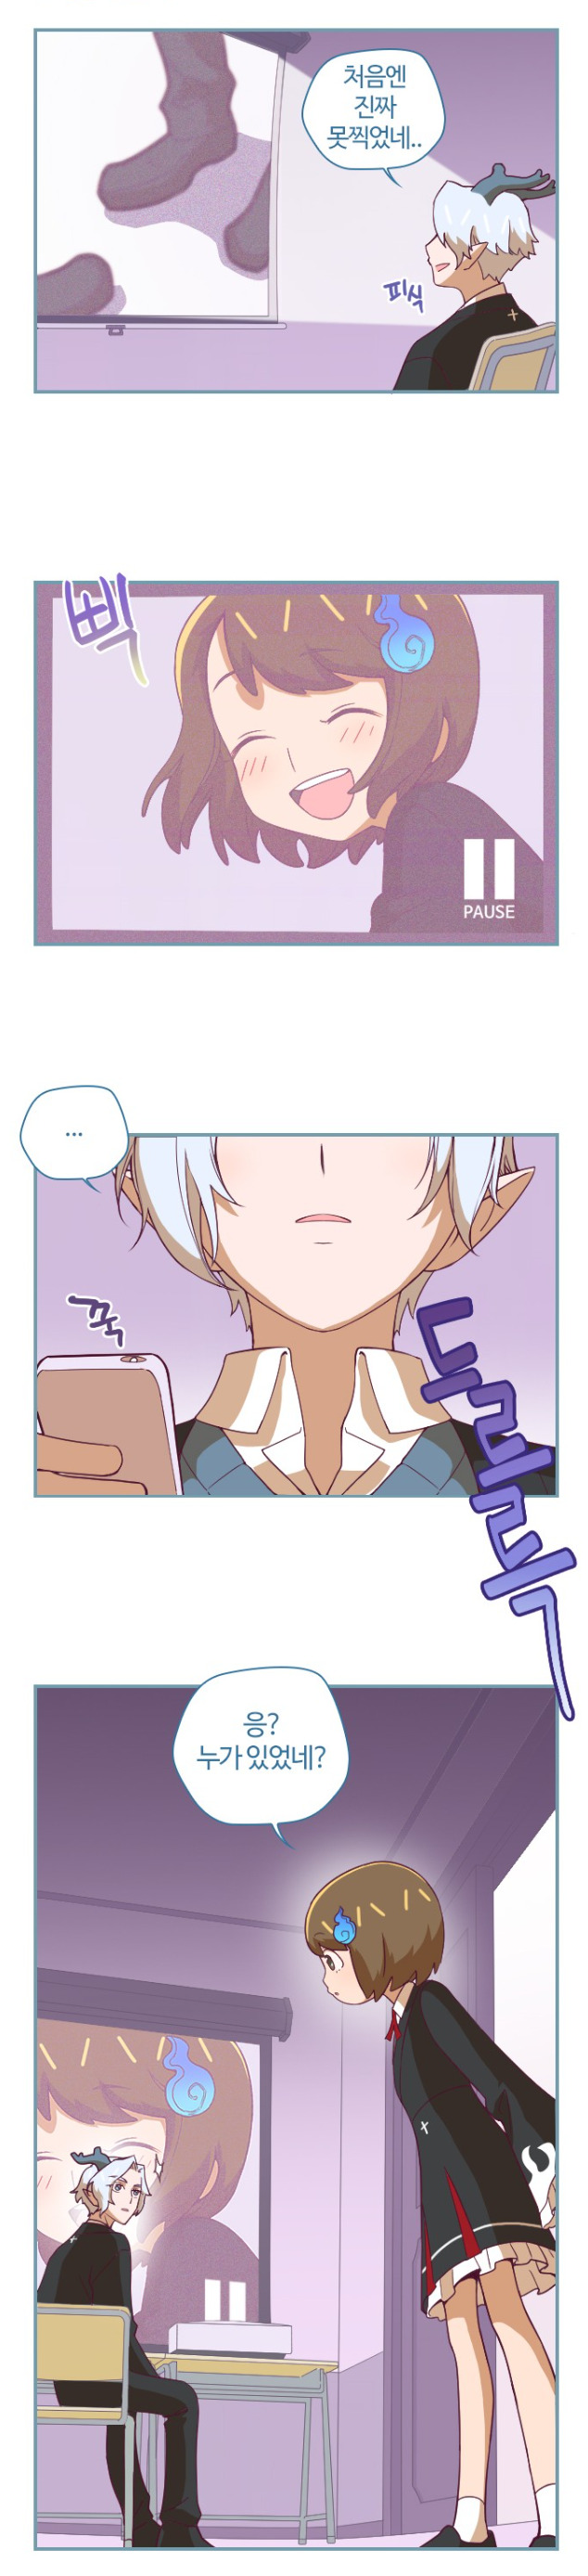
The fact that this screenshot I've seen a few times is literally a canon RHS scene:
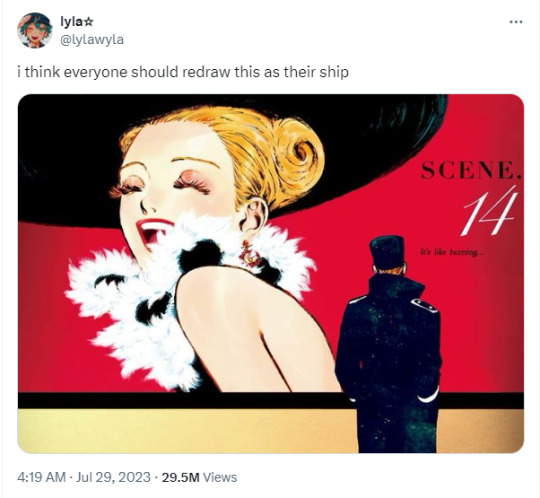
Specifically this scene from episode 21
3 notes
·
View notes
Text


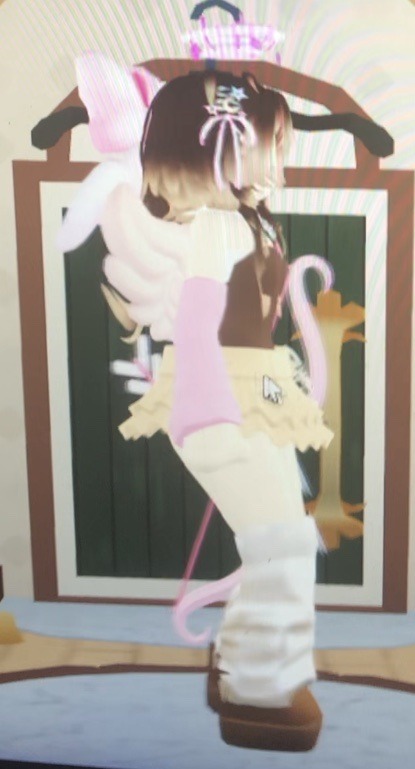

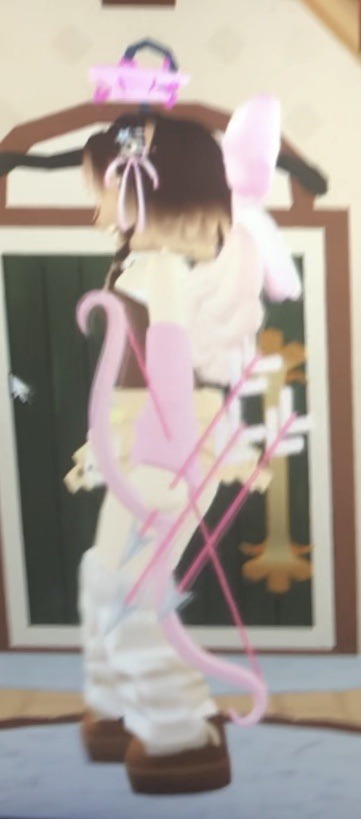

Made an oc and then made her in Roblox rhs‼️💪
4 notes
·
View notes
Text
me and the girls; halloween 2023

#rocky horror picture show#rhps#rocky horror show#rhs#frank n furter#rocky horror#riff raff#magenta#colombia
16 notes
·
View notes
Text
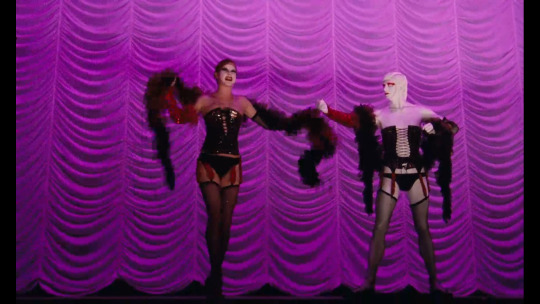
If there’s one thing I like to do whenever I get in a really Rocky Horror mood, is to put in the YouTube search bar ‘Rocky Horror’ and set the video length on maximum.
Because that way you can get a whole bunch of recordings of all sorts of fun RHS productions. Interesting international versions and/or oddball local shows, all sort of fun stuff! Like Spanish Rollerblading Action Frank here!
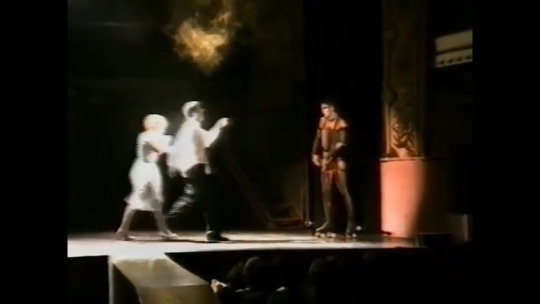
And I have a special soft spot for the cheapo productions, really. I mean, the current West End Version is pretty damn cool - but there’s something especially ‘punk-rock’ about making Rocky Horror works with a budget of twenty dollars and a corset which fits just so well with the whole Vibe of RHS. I just love seeing folks finding clever cost-efficient workarounds to some of the trickier setpieces, and improvise the characters’ outfits via the power of Closet Cosplay + Maid Halloween Costume for Magenta.
And one example that really stuck with me is from this little video.

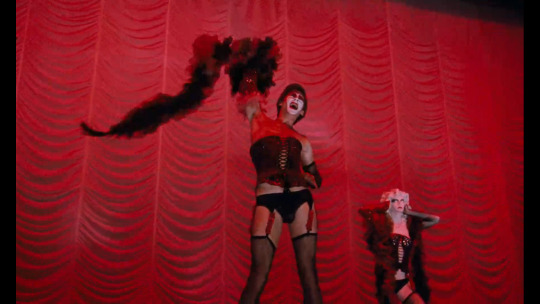
So one thing you notice watching a lot of smaller RHS productions, is that one design detail a lot of folks tend to just drop is Frank’s labcoat-frock-thingie.

Because, well, it’s an outfit that only appears for one scene, and it’s not as iconic as his other Looks and it’s a bit harder to cobble together from bits from the closet of your Most Interesting Friend. So if you’re working with a shoestring budget, it makes more sense to give Frank a Generic Labcoat or just go ‘screw it! Frank-N-Furter does Mad Science in his lingerie!’
But this production… this production actually thought up a really fun solution to the LabFrock problem!
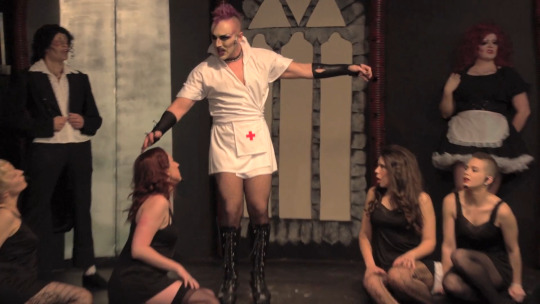
Frank's Lab Outfit is a Sexy Nurse Halloween Costume!
I just... love this so much! It's cost-efficient and it's creative and it's fun and it's just so perfectly Frank-N-Furter! That's exactly the kind of thing that makes me love theatre AND Rocky Horror!!
#rocky horror show#rocky horror#rhs#the rocky horror show#frank n furter#dr frank n furter#dr. frank n furter
78 notes
·
View notes
Text

Bob (RHS2) fanart ✍️
I’m running out of ideas - I’m drawing mf roblox npc’s 😭💀 at least I’m drawing stuff but maybe it’s just me trying to avoid art block tbh
#art#fanart#illustration#artwork#doodle#artist#digital art#character art#artists on tumblr#fanartist#roblox#roblox art#roblox fanart#rhs2#Roblox high school#rhs#bob#character drawing#character sketch#character doodle#character fanart#character design#digital artwork#digital arwork#digital drawing#digital portrait#clip studio paint#roblox drawing#male art#art ref
32 notes
·
View notes
Last Seen Blogs
cloudyarnav
Oblimareus
pcetstcrtured
all that’s left behind is the tortured poetry

chaaneek
Chaneek
houseishungry
I’m Never Gonna Let You Know Me
chaaneek
Chaneek