#Thermalright M.2 2280 Pro
Text

My NVMe Upgrade by ~murumokirby360
My most ambitious computer upgrade I've ever done, this year! 😁🖥️⬆️
Full story:
• Part 1: Samsung SSD 970 EVO Plus NVMe M.2 SSD (1TB) Review [Apr 7th, 2023]
• Part 2: Thermalright M.2 2280 Pro Review [Apr 11th, 2023]
• Part 3: Installation and trial & error [Recorded on Apr 21st, 2023] (published: Apr 22nd, 2023)
• Part 4: Another Trial & Error [Apr 21st, 2023] (published: Apr 22nd, 2023
• Part 5: Timing comparison - HDD vs SSD NVMe M.2 Drive [Apr 25th, 2023]
• Part 6 (Final): Samsung Magician & HWiNFO Softwares [Apr 25th, 2023]
⬇️⬇️⬇️⬇️⬇️⬇️PLUS⬇️⬇️⬇️⬇️⬇️⬇️
A little update about my "Samsung Magician" software. 😊🖥️⚙️
Tagged: @lordromulus90, @bryan360, @carmenramcat, @leapant, @rafacaz4lisam2k4, @alexander1301, @paektu
#DeviantART#GIMP#My Photo#MyPhoto#Photo#My Record Video#MyVideo#My Video#Video#VLC#VLC Media Player#Samsung#Thermalright#Thermalright M.2 2280 Pro#Thermalright M2 2280 Pro#Samsung 970 EVO Plus#Samsung SSD 970 EVO Plus#Samsung 970 EVO Plus NVMe#M.2 Drive#M2 Drive#Heat Sink#M2 NVMe Heat Sink#M.2 NVMe Heat Sink#NVMe M.2 PCIE SSD#NVMe M2 PCIE SSD#Memory Drive#Photography
12 notes
·
View notes
Text
ヒートパイプ内蔵のM.2 SSDヒートシンクがThermalrightから登場
Thermalrightからヒートパイプ内蔵のM.2 SSDヒートシンク「M.2 2280 PRO」が発売された。
Source: ASCII.jp

View On WordPress
0 notes
Text

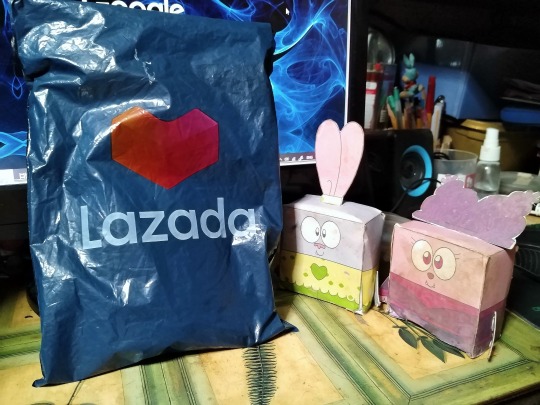
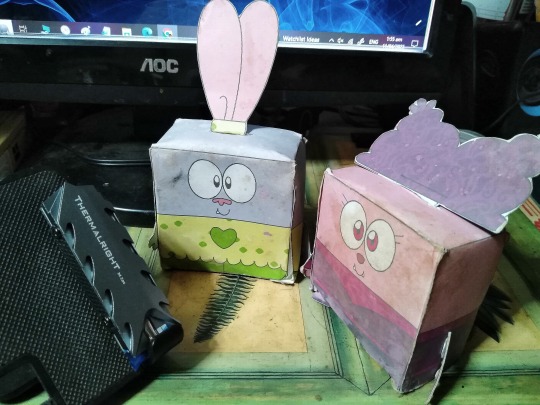
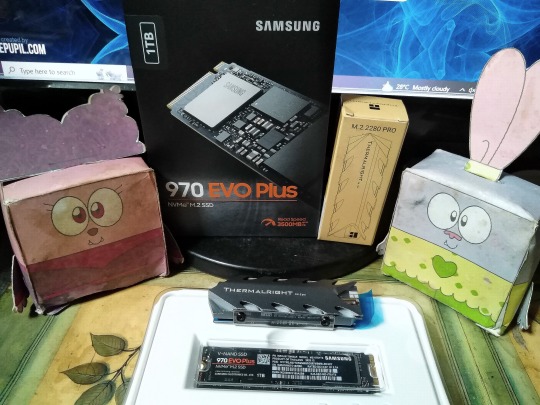
1st & 2nd Image(s): ↑
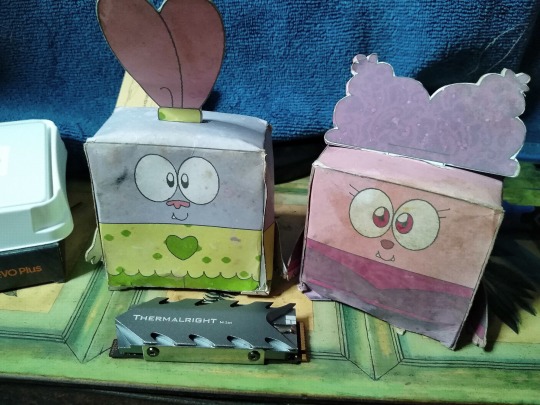
Hello, April! I got another parcel (Lazada) was arrived, last Sunday. 📦🏠🙂
"What's inside?" said my paper dolls. Well, let's not waste our time because I'm about to open & review it in one sitting post! So, let's go! 😁📦✂️
○○○○○○○○○○○○○○○○○○○○○○○○○○○○○○○
My recorded video 🎦📲 (Pls watch!): ↓
My NVMe Needs - Part 2: Thermalright M.2 2280 Pro Review (w/ my paper dolls) [Apr 11th, 2023]
So, here's Part 2 of “My NVMe Needs", with Thermalright M.2 2280 Pro review (featuring my paper dolls). 😁
If you haven't seen my Part 1, then please [CLICK ME!].
BTW: I changed the title of this month's topic (see my "Part 1") I mean, its not just my NVMe memory stick, but also this one, too.
So, without further ado, let's get started!
My NVMe Needs - Part 2: Thermalright M.2 2280 Pro Review (w/ my paper dolls) [Mar 11th, 2023]
So, here's Part 2 of “My NVMe Needs", with Thermalright M.2 2280 Pro review (featuring my paper dolls). 😁
If you haven't seen my Part 1, then please [CLICK ME!].
BTW: I changed the title of this month's topic (see my "Part 1") I mean, its not just my NVMe memory stick, but also this one, too.
So, without further ado, let's get started!
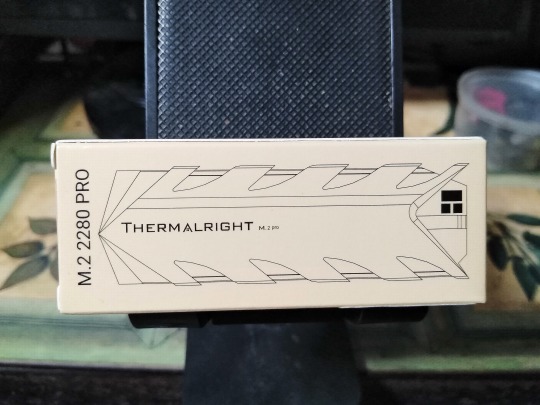
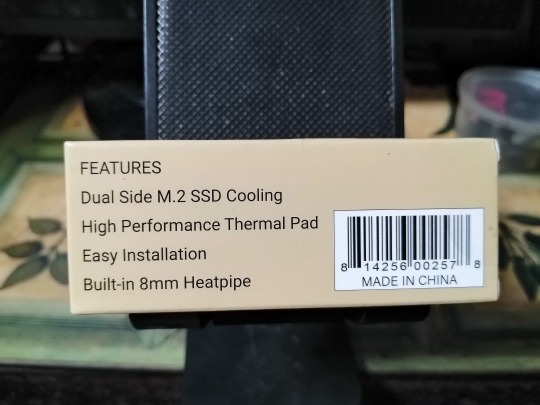
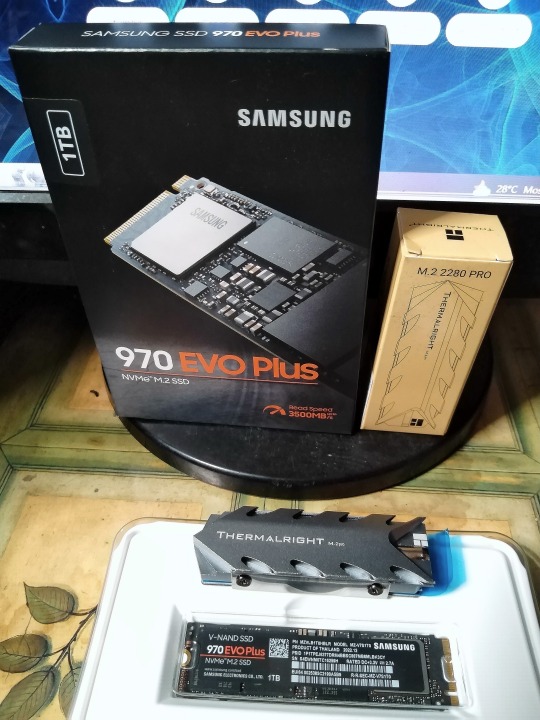
3rd to 7th Image(s): ↑
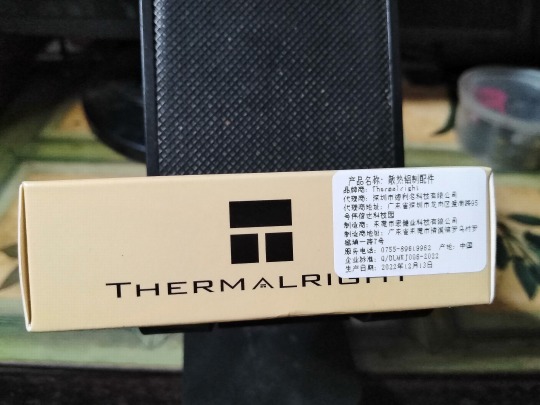
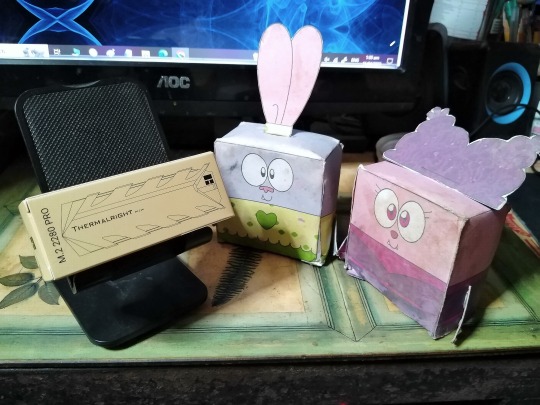
• Let's start with the packaging, very promising w/ the gorgeous outline image of the actual item inside & some information specs about it. 🙂📦 And if paper dolls think that looks like a mini box of chocolate mint bites, well you are wrong. lol 😅 Nonetheless, let's open!
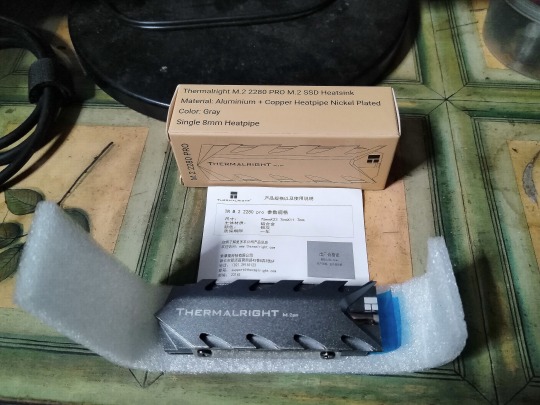
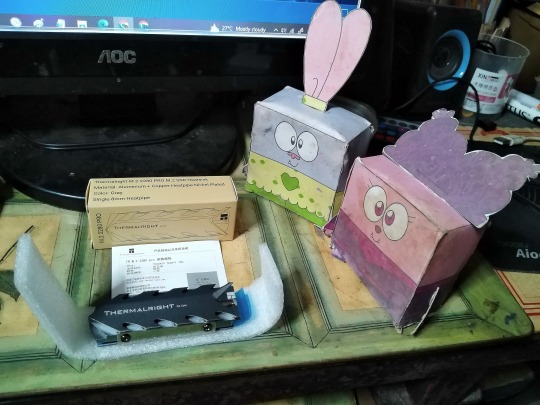
8th & 9th Image(s): ↑
• The packaging contains the main item wrapped around by a flexible Styrofoam & a mini instruction/specs about the item, plus a warranty card on the other side. Uh yeah, did I mention they're written in Chinese (including that mini box because I saw a sticker though)? They were all over it, given that this item was "Made in Taiwan". I have no complaints about that, including "Made in China". After all, my paper dolls love munching on Peking Duck & delicious Chǎofàn rice. Mmmmm... 🍗🍚🤤
Okay, enough with the food related stuff. Let's keep going with our next images.
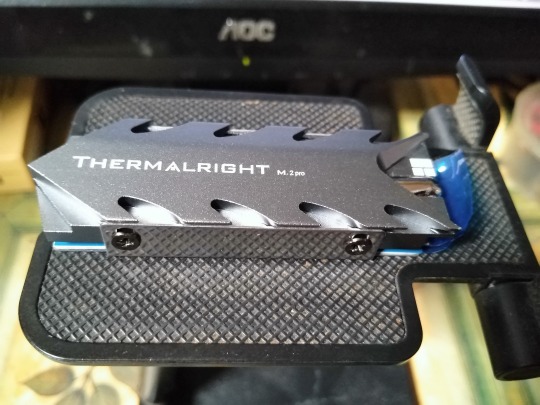
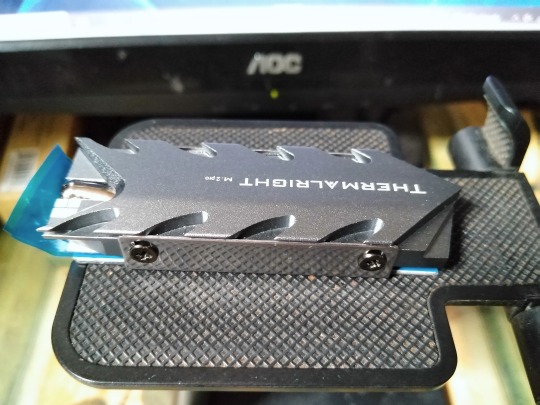

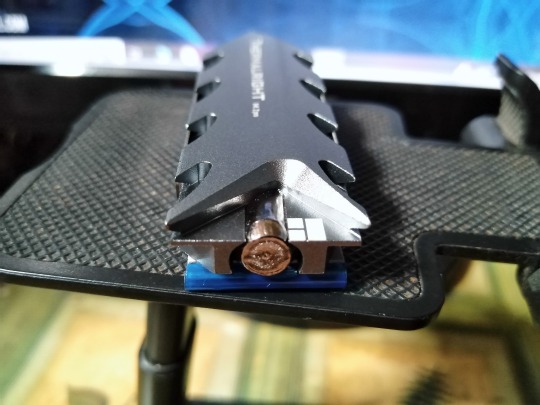
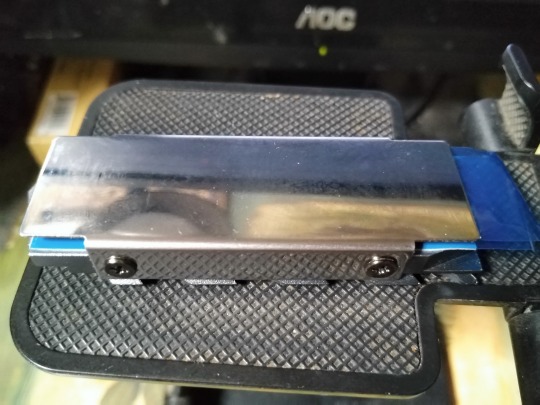

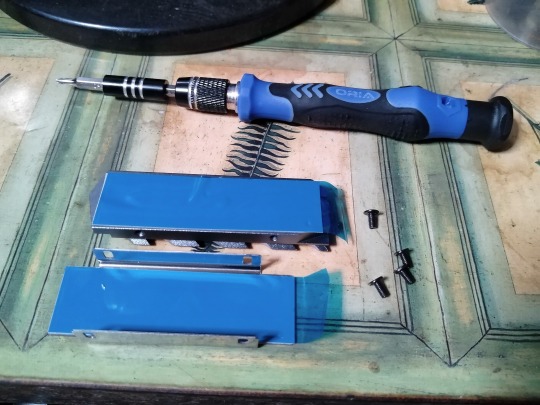
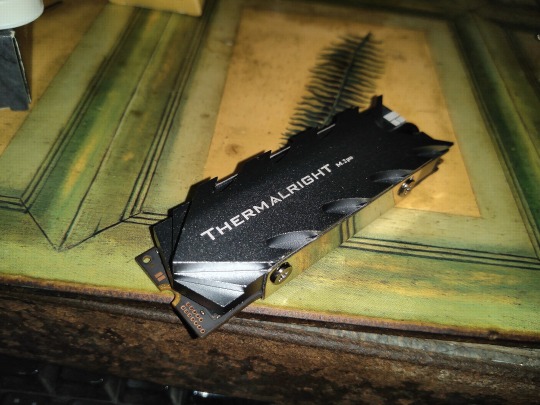
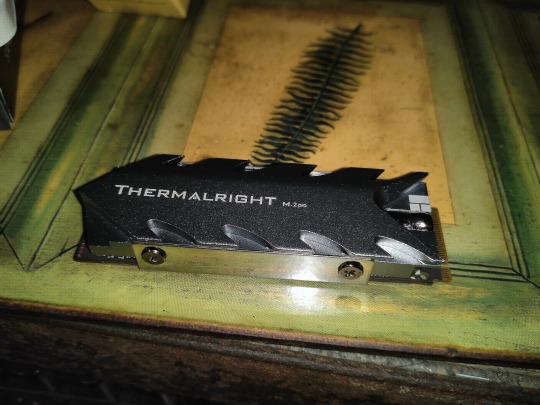
10th to 16th Image(s): ↑
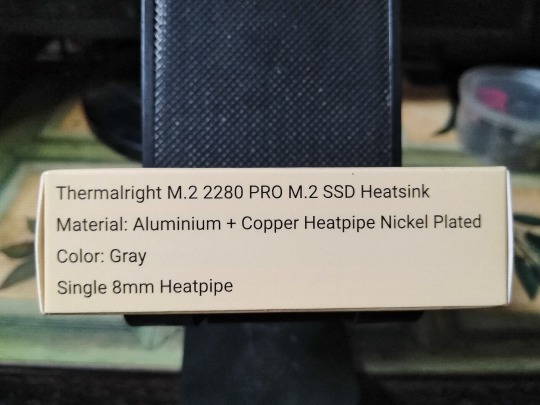
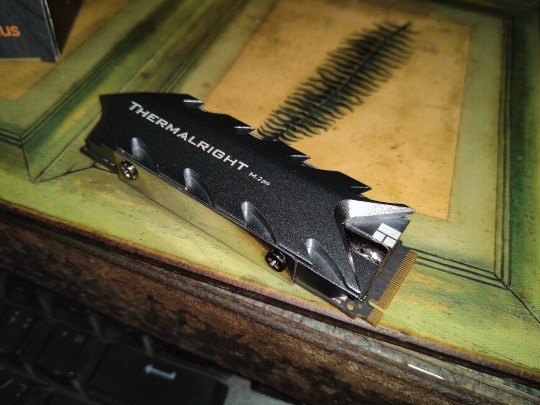
• Let's focus on the main item. The designers for this particular item had an interesting look of a razor-sharp shaped arrow w/ five blade fins w/ one pin end & that tube of the end that looks like snapped from a metal bar. (I think) It's a decent eye-catching, don't you think, you two? "Yeah, I think so", my paper dolls said.
• Uh yeah, and they're all made in aluminum with w/ Nickel Plated Copper heat pipe (which said so in the mini box). And the latter can solve the heat dissipation problem from the chip processor, unlike other metal material components. They already exist in CPU air coolers & installed graphics cards of tomorrow, nowadays, the NVMe heat sinks have joined the bandwagon of PC cooler components. And that's the reason why I need a heat sink for my first owned NVMe memory drive.
• [15th Image to the right] By the way, I made tiny damage from using a screwdriver of my own, and I shouldn't unscrew four screw nuts before taking more pictures. But, doesn't matter, it won't affect the cooldown feature. (Right?)🤷
SIDE NOTE: I made a confusing chronological order for my snapshots. Hehe 📷📲😅
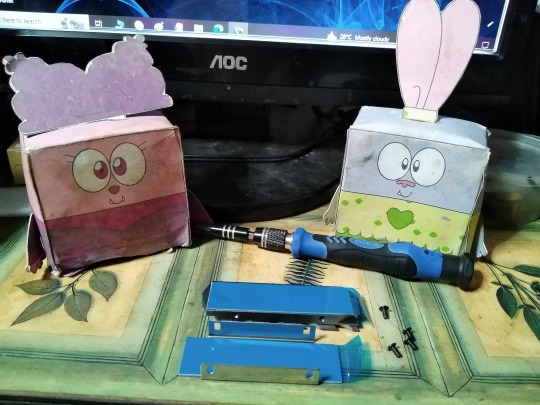
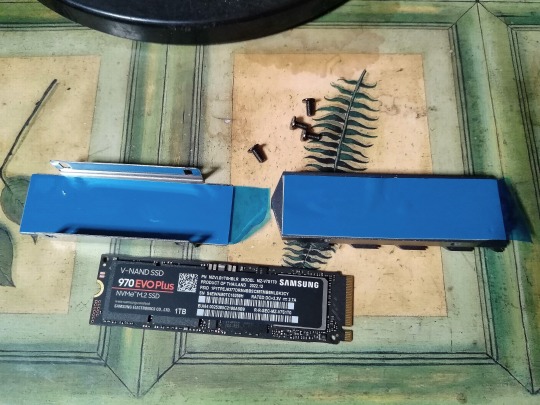
17th & 18th Image(s): ↑
• Now, you may wonder, why are these blue plastic adhesive tapes attached to each piece. Well, the company installed thermal pads on each piece of the heat sink, now that's a double safe to prevent overheat. 🙂❄️🌡️ This is where I install the NVMe stick onto the heat sink by peeling off two blue adhesives before I place & seal it with four screws to make my NVMe stick secure.
• You know, kind a like two pieces of bread with slices of cheese & put a delicious deli-cooked ham or pure juicy ground beef to make a perfect grilled cheese sandwich special (or something). (I made a terminology of sorts.) Yum-yum! 🥪🤤 My paper dolls certainly love my idea! 😋 *Ughh* 😫 Yeah, yeah, I made another food-related stuff. I should stop because I'm reviewing my NVMe heat sink. lol 😅
Nonetheless, I'll show you what I mean in my next part. Onto to the final photos.
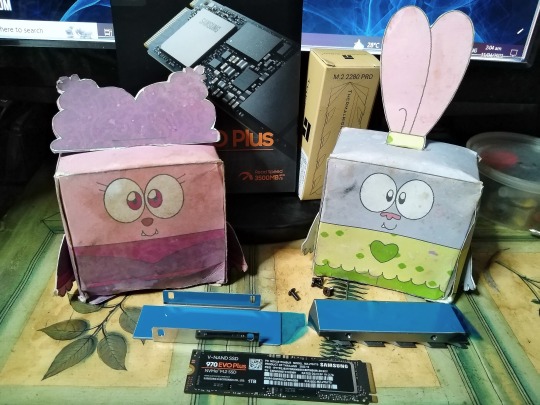

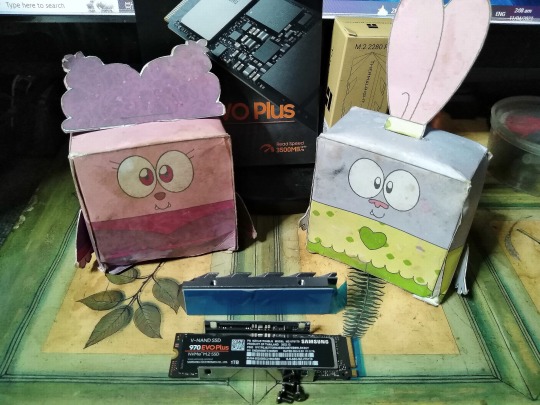
19th to 24th Image(s): ↑
• Speaking of which, here's what is gonna happened for my next upcoming part, where I combine two items into one accelerating NVMe function machine! And of course, I have two software(s) I need to run; one of which will migrate my entire data, including the OS that I'm currently running (Windows 10 Pro - 64bit). And the other software will be checking the stats on my first owned NVMe memory stick (from Samsung). 🖥️➡️🖥️😃
• This should be exciting, right you two? 😁 Hey, don't worry, We'll have a celebratory treat once where my topic, okay? 😉 (Privacy celebration, am I add. 🤫)
Overall & Asking Price:
• This NVMe heat sink from Thermalright is worth my wallet and saving my first owned NVMe memory stick (from Samsung) from an endurance overheat. 🙂👍 Sure, some say that equipping the heat sink could not affect the NVMe's performance 🤔, but to be honest, we would love to install it, as we did to our CPU chip. Without the heat sink equip, it'll soon be heating up from running all applications, and then the computer dies (instantly). Then suddenly, you need a brand new expensive computer. You get the picture, I know.
• Anyways, I bought it from this online Lazada PH store 🛒🌐🇵🇭 [CLICK ME! #1] for ₱ 550 💵 when I picked the "Pro" variant [CLICK ME! #2]. However, with free shipping & cashback points, I get an exact ₱ 500💵! 😁 And thank goodness, I still got my dough after purchasing my most expensive thing from March (of that year). Big savings! 😁 There's also available in RGB light (w/ 4-pin wire attached) & standard variants, and so, I went with the Pro version of the 2280 heat sink. 🙂 I was gonna buy the one with the built-in small fan from a different online store (whether in Lazada or Shopee), but I'm insufficient my earn funds.
Anyways, that's all for now! I'll see in the next part. 😊
(Again,) If you haven’t seen my previous topic, then please [CLICK ME!].
Tagged: @lordromulus90, @bryan360, @carmenramcat, @leapant, @rafacaz4lisam2k4, @alexander1301, @paektu
#My Record Video#MyVideo#My Video#My Photos#My Photo#MyPhotos#MyPhoto#Photos#Photo#Chowder#Panini#Chowder Panini#Paper Dolls#Thermalright#Thermalright M.2 2280 Pro#Thermalright M2 2280 Pro#M2 NVMe Heat Sink#Heat Sink#Samsung#Samsung 970 EVO Plus#Samsung 970 EVO Plus NVMe SSD#Samsung SSD 970 EVO Plus#Samsung SSD 970 EVO Plus NVMe#NVMe SSD#M.2 Drive#M2 Drive#NVMe M.2 PCIE SSD#NVMe M2 PCIE SSD#Memory Drive#Photography
6 notes
·
View notes
Text
My PC Screen Upgrades Review - Part 5 "Final" (w/ my paper dolls) [Recorded on Jan 21st & 26th, 2024]
Hello, February! The wait is over! 😁 Because here’s the final "Part 5" of my “PC Screen Upgrades Review” (featuring my paper dolls). Yup, this is my second attempt after I replaced the CPU cooling and added two PC fans in June of 2023. 🖥️🔧 This year is for the screen monitor by replacing/installing this trio of PC-related items! 😁
But before that, if you haven’t seen my previous topics that related to my “PC Upgrades”, then I’ll provide some links down below: ↓ 😉
- My PC Cooling Upgrades Review -
• Part 1 [First Half] [Recorded on Jun 9th, 2023]
• Part 1 [Second Half] [Recorded on Jun 9th, 2023]
• Part 2 [First Half] [Recorded on Jun 9th, 2023]
• Part 2 [Second Half] (Final) [Recorded on Jun 9th, 2023]
- My NVME Upgrade -
• Part 1: Samsung SSD 970 EVO Plus NVMe M.2 SSD (1TB) Review [Apr 7th, 2023]
• Part 2: Thermalright M.2 2280 Pro Review [Apr 11th, 2023]
• Part 3: Installation and trial & error [Recorded on Apr 21st, 2023] (published: Apr 22nd, 2023)
• Part 4: Another Trial & Error [Apr 21st, 2023] (published: Apr 22nd, 2023
• Part 5: Timing comparison - HDD vs SSD NVMe M.2 Drive [Apr 25th, 2023]
• Part 6 (Final): Samsung Magician & HWiNFO Softwares [Apr 25th, 2023]
And don’t forget this “Part 1, 2, 3, and 4" in case you missed it → [CLICK ME! For Part 1], [CLICK ME! For Part 2], [CLICK ME! For Part 3], [CLICK ME! For Part 4].
So, without further ado, let’s get started:
My Recorded Video [edited by: Filmora 9] 🎦🎞️:
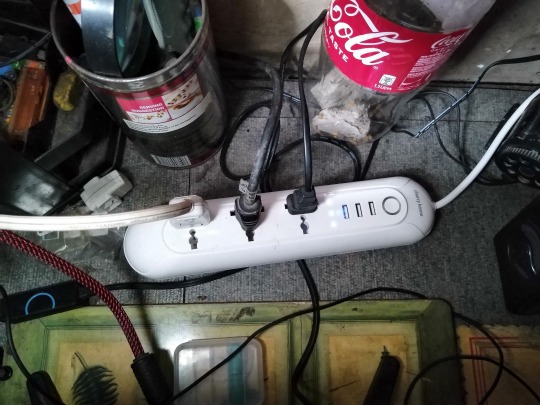
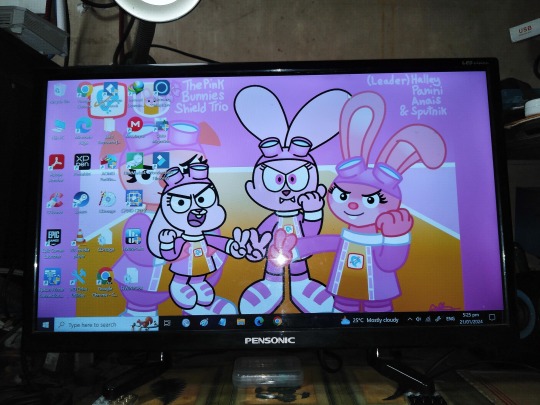
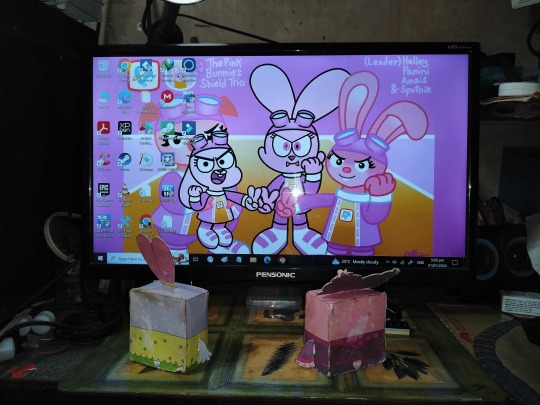
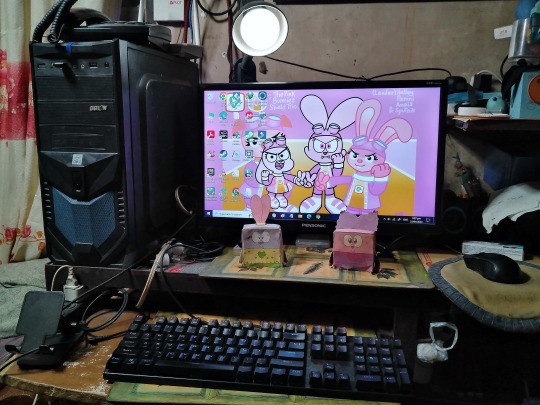
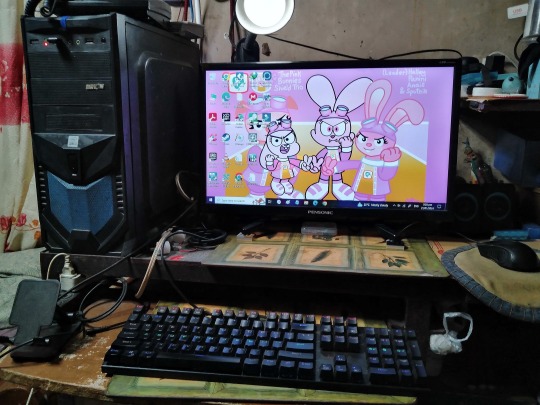
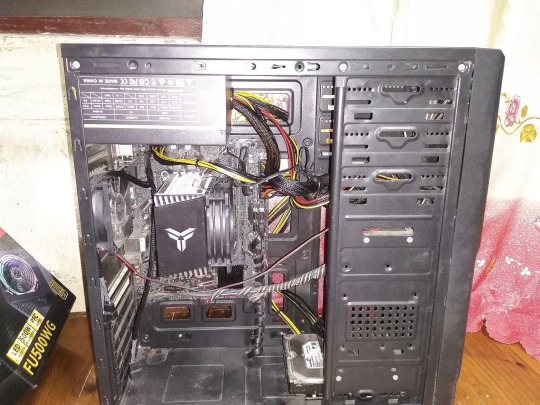
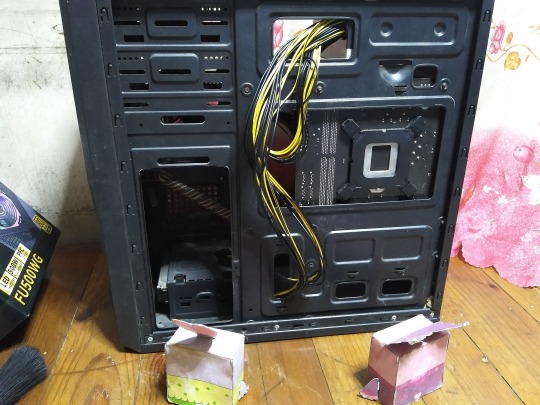
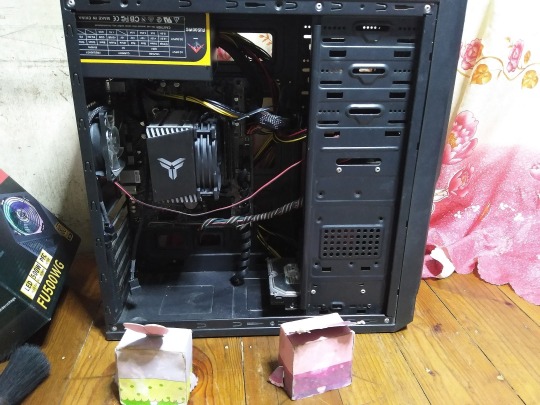
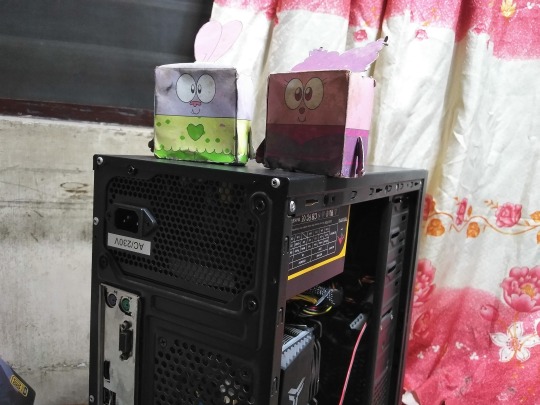
• In the final part, you could see my computer desk overhauled, with the exception my desktop tower. The monitor and the extension sockets were changed to a different brand (Pensonic and Cherry Home). 🖥️🔌⚡And do you remember from my "Part 4" when the old AOC monitor had a spark sound by the time I turned on my custom PC? Well, it's dead. I wish I could fix it, but I don't have the tools to detect the old monitor's problem. 😞 As a result, my HDMI to VGA converter is now useless... 😥 Damn, I wasted my ₱250 fund. But it's okay, I could sell it at the same price, anyway. 🤷♀️ Nevertheless, after a long day of troubleshooting and tips on how our PC works, I turned on my PC by pressing a single power button, and my PC was brought back to life by a blinking red light! 😃 Now I turned on my new monitor to see if it works, and it does! My installation was a success! And man, I missed you so much, custom PC! It's been 7 months of being inactive and now you're alive! 🖥️😄 Then, I had to check the interior of my PC by removing the cover, and you could see they all functioning in all light up from the new PC power supply to the new GPU card! Uh yeah, I've also mentioned that our telephone and router were changed, with the latter changed from a four-antenna router to a two-antenna router which is a downgrade for our family. 😒 However, my new monitor's position was too low causing my head to tilt down and it was uncomfortable to view. So, 5 days later, my parents decided to add some floor tiles as an improvised stand booster of sorts, and I put two LEGO blocks on each leg for a little angle to make it a proper view 🧱➡️🖥️, since my 22-inch TV monitor (from Pensonic) wasn't designed for angle screen adjustment, unlike the actual computer monitors. You noticed I removed two universal adapter switches, but I'll re-attach these, soon. 🔌⚡ Another thing was my RGB LED light bulb was replaced with a white LED light bulb because my RGB light was dead, since September of 2023. But, I've bought a better one, so I'll reveal it, coming soon. Nevertheless, the 22-inch TV monitor includes a TV remote which is more convenient than pressing buttons at the back (any sides) of the monitor/television. Okay so, it's not NEW-NEW or as in literally "Brand New", but rather my big brother gave it to me. Plus, my dad won the prize from a raffle. So, congrats Dad. 👨🖥️🥳 So, what's the culprit of being unable to turn on my custom PC? 🤔 Well, the "DDR4 RAM Memory sticks" that will soon be decommissioned, after a long years of usage. 😮 However, these two RAMS we're functioned as usual with only my elbow grease and a luck. It looks like I'll invest in brand-new RAM memory sticks when these old RAM ones finally giving out, someday. 💵

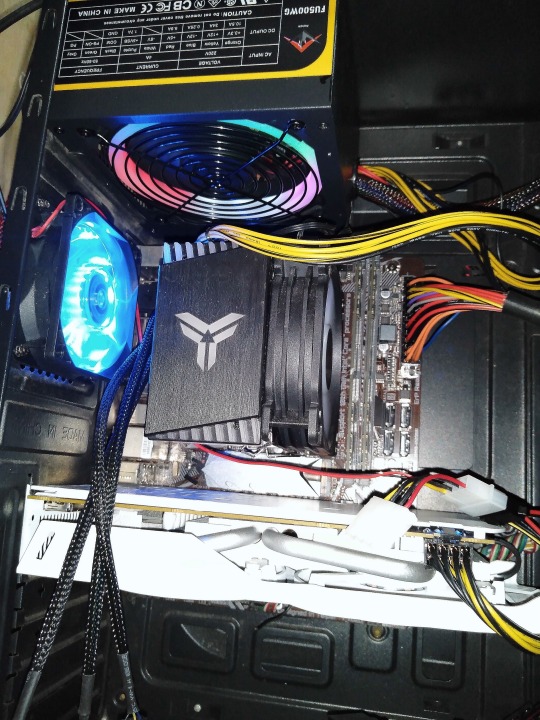

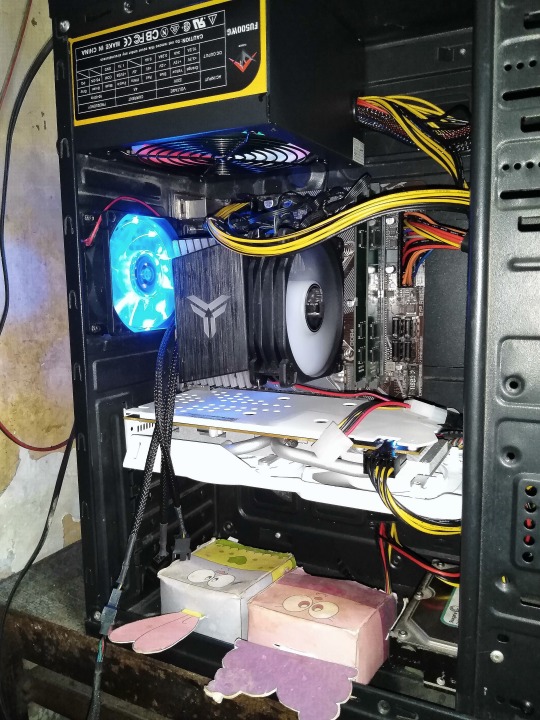
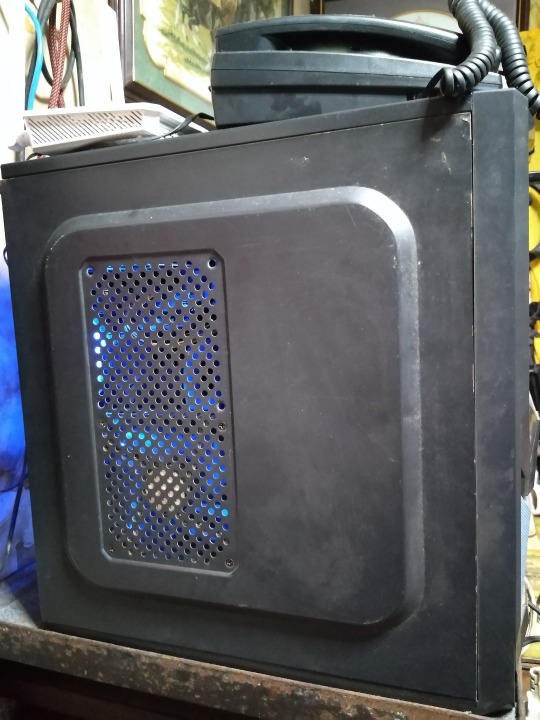


1st to 12th Image(s) 📷📲 & Aftermath: ↑
• Here are some of the photos that I took, and I'm happy to report that my PC is still working after this moment. 🖥️🖱️😁 There are a few things that I want to address, as of February 2024. Like the 22-inch TV monitor had a few dead pixel lines when I view in black/dark mode, and the BIOS intro screen was skipped when I turned on the TV monitor first then the PC. The latter will work it out, soon after I browse and watch the tutorials via the web. 🌐🤔 But hey, on the bright side, my paper dolls we're happy to see my PC finally come back to life and they seem to be enjoying themselves from the gorgeous lights from the interior. 😄💡🖥️ Plus, they liked the new look, and with the 22-inch screen they could enjoy watching videos, or heck maybe re-visiting their "Chowder" episodes in 1080p High-Definition! Right, you two? Hehe 😁 Yes, I forgot to mention, that this TV monitor handles 1080p in a standard 60Hz rather than higher 120 or 160Hz.😅 Yeah, I'm okay with that. 😊👍
IMPORTANT NOTE: Pls, don't mind about that 1.5 litre coke. Its a improvised mouse trap. So, please don't mind that. ☝️😮
Final Overall:
• I'm so very happy to see my custom PC has risen like a Phoenix thanks to my two new PC parts that we've installed and some of my elbow grease 🖥️🔧, except my HDMI to VGA converter. And you know, there was a VGA port built-in at the back of the 22-inch TV monitor, though. Then I thought to myself, Nah... I would rather use an HDMI cable that we're lying around and use it instead of the VGA + converter combined. After all, the HDMI cable/port had already a superior approach when it comes to quality screen over the old-style VGA cable/port. Aside from the BIOS problem, as I said in my video, this isn't my final PC desktop look because there are some things or parts that I want to replace, like my two DDR4 RAM Memory Sticks (currently: PROVISION DDR4 8GB RAM (2x4GB) with 2133Mhz speed) will soon be decommissioned, and the entire PC desktop case which has to be replaced for a newer design look. But for now, "Functional" is important to me over appearance, and soon I'll take care of the latter. 😊🖥️ But right now, I'm enjoying reuniting my custom PC with blazing reading speeds from an NVMe card, and a serious GPU Card limit. More PC parts will be installed soon. 😉
Well, that's the end of my topic! More topics coming up, soon. 😊
Tagged: @lordromulus90, @bryan360, @carmenramcat, @leapant, @rafacaz4lisam2k4, @paektu, @alexander1301
#My Video#MyVideo#Video#MyPhotos#MyPhoto#My Photos#My Photo#Photos#Photo#My Edit#My Edited#MyEdit#MyEdited#Edit#Edited#Chowder#Panini#Chowder Panini#Paper Dolls#My PC Upgrade#PC Upgrade#PC Desktop#Personal Computer#Photography
4 notes
·
View notes
Text
My PC Screen Upgrades Review - Part 3 (w/ my paper dolls) [Recorded on Jan 14th, 2024]
Hello, February! The wait is over! 😁 Because here's "Part 3" of my "PC Screen Upgrades Review" (featuring my paper dolls). Yup, this is my second attempt after I replaced the CPU cooling and added two PC fans in June of 2023. 🖥️🔧 This year is for the screen monitor by replacing/installing this trio of PC-related items! 😁
But before that, if you haven't seen my previous topics that related to my "PC Upgrades", then I'll provide some links down below: ↓ 😉
- My PC Cooling Upgrades Review -
• Part 1 [First Half] [Recorded on Jun 9th, 2023]
• Part 1 [Second Half] [Recorded on Jun 9th, 2023]
• Part 2 [First Half] [Recorded on Jun 9th, 2023]
• Part 2 [Second Half] (Final) [Recorded on Jun 9th, 2023]
- My NVME Upgrade -
• Part 1: Samsung SSD 970 EVO Plus NVMe M.2 SSD (1TB) Review [Apr 7th, 2023]
• Part 2: Thermalright M.2 2280 Pro Review [Apr 11th, 2023]
• Part 3: Installation and trial & error [Recorded on Apr 21st, 2023] (published: Apr 22nd, 2023)
• Part 4: Another Trial & Error [Apr 21st, 2023] (published: Apr 22nd, 2023
• Part 5: Timing comparison - HDD vs SSD NVMe M.2 Drive [Apr 25th, 2023]
• Part 6 (Final): Samsung Magician & HWiNFO Softwares [Apr 25th, 2023]
And don't forget this "Part 1 & 2", in case you missed it → [CLICK ME! For Part 1], [CLICK ME! For Part 2].
So, without further ado, let's get started:


My Recorded Video [edited by: Filmora 9] 🎦🎞️ (with 1st to 4th Images): ↑
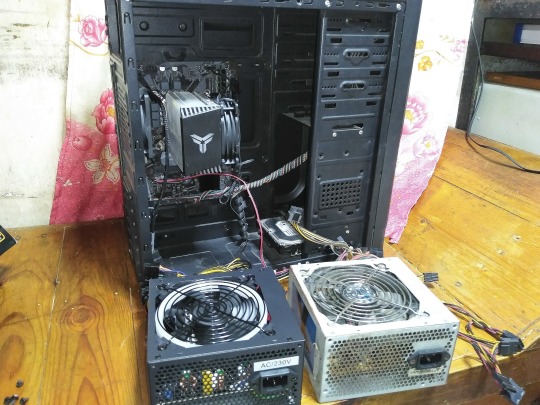
• In Part 3, my three pc item upgrades are now set up for installation onto my custom PC desktop. Plus, I can't fix/install these without my single set of screwdriver tools by ORIA brand (if you haven't check it out → [CLICK ME!]). 🙂🔧🖥️ I recommend that you should watch my video before reading. 😊
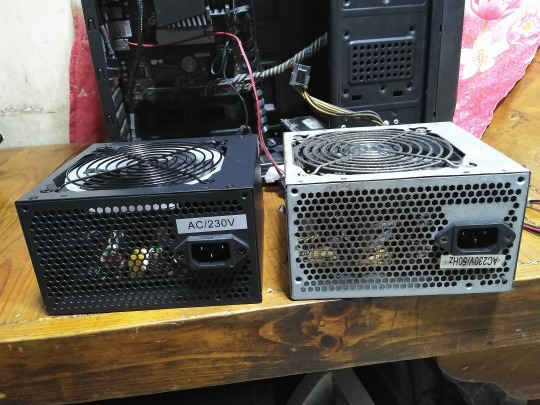
• So, the first thing I removed was the old PC power supply, and after I consumed time progressing the old power supply was finally unshackled from the PC case. Before I installed the new one, I did a little comparison and there we're completely matched the size of the metal box, except for their limited number of connectors and appearances. Once I'm done little comparison moment, I'm now proceeding with the installation with my new PC P.S. (Power Supply), anyway. However, there is only one trick I've learned from watching PC-related YouTube clips, yet, otherwise, a standard one; hiding wires by inserting them at the side of the case. After another consuming time process, and even connecting two power ATX connectors, the installation of my new PC P.S. was complete! And uh... I forgot to connect the 80mm PC cooling fan's Molex connector, but I've already taken care of it, in the next part ("Part 4"). 😊🔧🖥️
• My cringe moment during the removing the old PC power supply was my hand unable to disconnect the 6-pin power ATX connector between two PC parts that I'd already installed, back in June of 2023. So, the only way to disconnect was to unscrew the main body of the old PC P.S. with four screws before I finally disconnect the aforementioned 6-pin one. Other than that, it was done, and I moved on to another PC part, in the next part, once again.

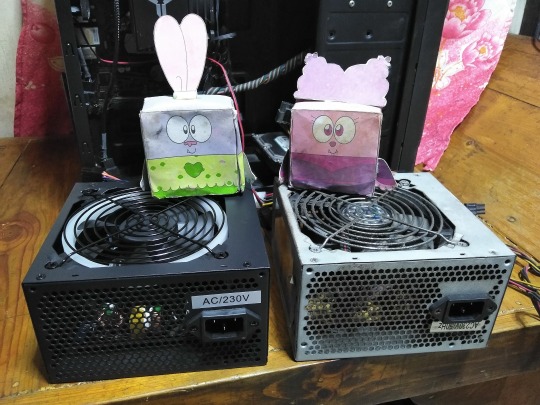


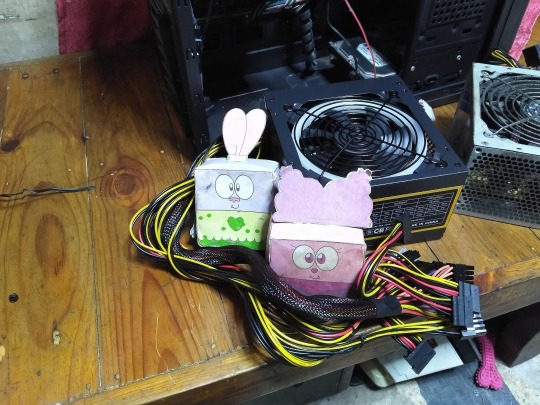


5th to 13th Image(s)📷📲: ↑
• Here are some of my snapshots during my installation process, featuring my two beloved paper dolls! 😄 They rather watching than helping with their cute tiny paper made hands because they're doing nothing at all except peeking, I guess. hehe 😅
Okay, let's move on to "Part 4", shall we? 😉 → [CLICK ME!].
Well, that's all for now.
Tagged: @lordromulus90, @bryan360, @carmenramcat, @leapant, @rafacaz4lisam2k4, @paektu, @alexander1301
#My Video#MyVideo#Video#My Photos#My Photo#MyPhotos#MyPhoto#Photos#Photo#My Edited#My Edit#MyEdited#MyEdit#Edited#Edit#Chowder#Panini#Chowder Panini#Paper Dolls#My PC Upgrade#PC Upgrade#Fuzion#PC Power Supply#Personal Computer#PC Desktop#Photography
4 notes
·
View notes
Text
My PC Screen Upgrades Review - Part 2 (w/ my paper dolls) [Recorded on Jan 14th, 2024]
Hello, February! The wait is over! 😁 Because here's "Part 2" of my "PC Screen Upgrades Review" (featuring my paper dolls). Yup, this is my second attempt after I replaced the CPU cooling and added two PC fans in June of 2023. 🖥️🔧 This year is for the screen monitor by replacing/installing this trio of PC-related items! 😁
But before that, if you haven't seen my previous topics that related to my "PC Upgrades", then I'll provide some links down below: ↓ 😉
- My PC Cooling Upgrades Review -
• Part 1 [First Half] [Recorded on Jun 9th, 2023]
• Part 1 [Second Half] [Recorded on Jun 9th, 2023]
• Part 2 [First Half] [Recorded on Jun 9th, 2023]
• Part 2 [Second Half] (Final) [Recorded on Jun 9th, 2023]
- My NVME Upgrade -
• Part 1: Samsung SSD 970 EVO Plus NVMe M.2 SSD (1TB) Review [Apr 7th, 2023]
• Part 2: Thermalright M.2 2280 Pro Review [Apr 11th, 2023]
• Part 3: Installation and trial & error [Recorded on Apr 21st, 2023] (published: Apr 22nd, 2023)
• Part 4: Another Trial & Error [Apr 21st, 2023] (published: Apr 22nd, 2023
• Part 5: Timing comparison - HDD vs SSD NVMe M.2 Drive [Apr 25th, 2023]
• Part 6 (Final): Samsung Magician & HWiNFO Softwares [Apr 25th, 2023]
And don't forget this "Part 1", in case you missed it → [CLICK ME!].
So, without further ado, let's get started:
My Recorded Video [edited by: Filmora 9] 🎦🎞️: ↑
• Once again, in my recorded video, I'm showing off one-by-one of my trio of PC upgrades before I installed. 🖥️🔧🙂 Please, enjoy my unboxing video. Otherwise, you could at least check it out my snapshots, down below. ↓ 😉
14th to 24th Image(s) 📷📲: ↑
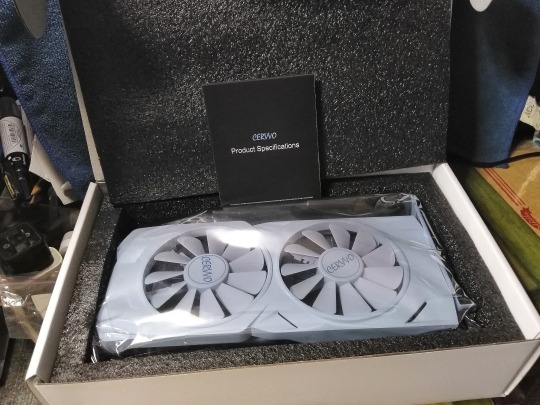
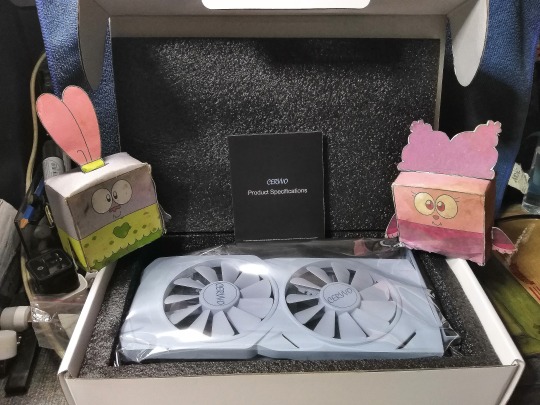
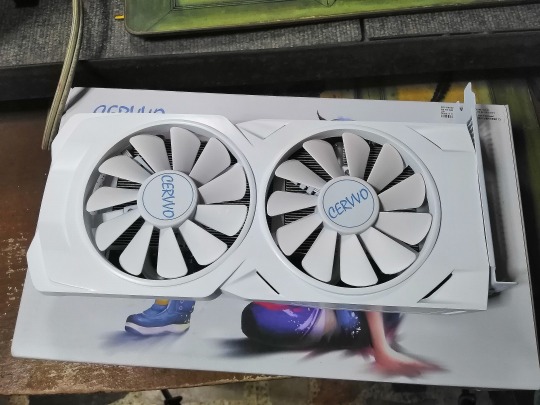
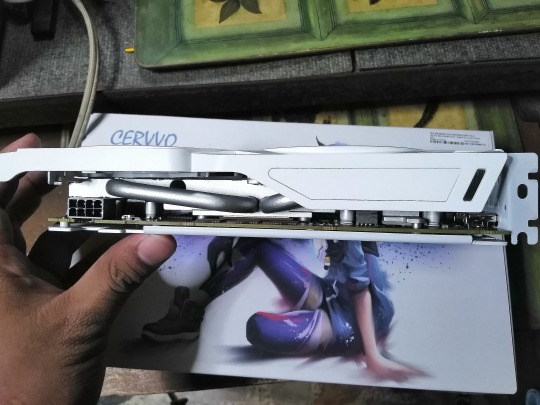
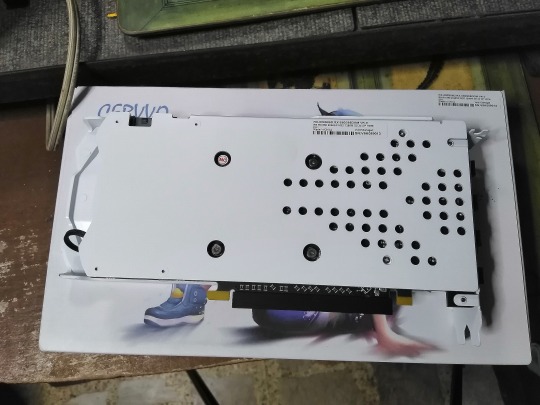
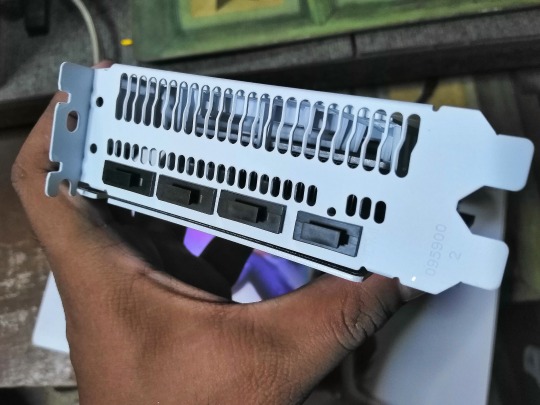
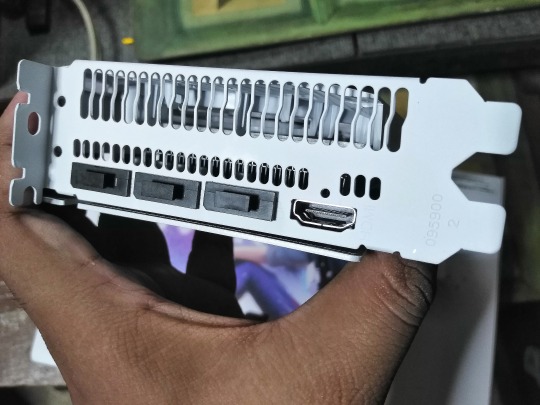
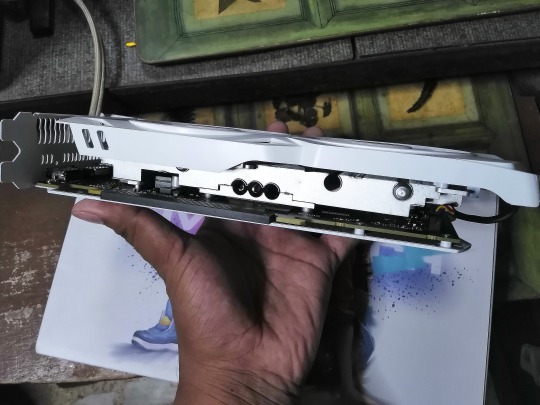
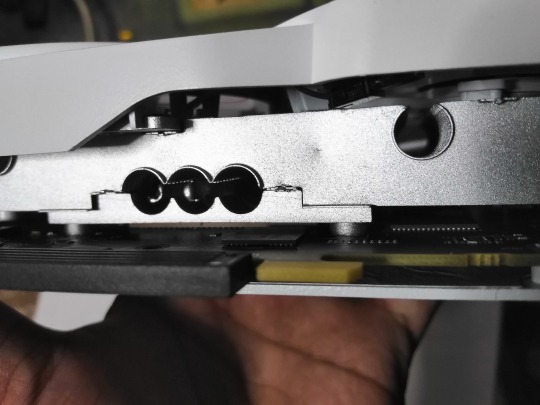
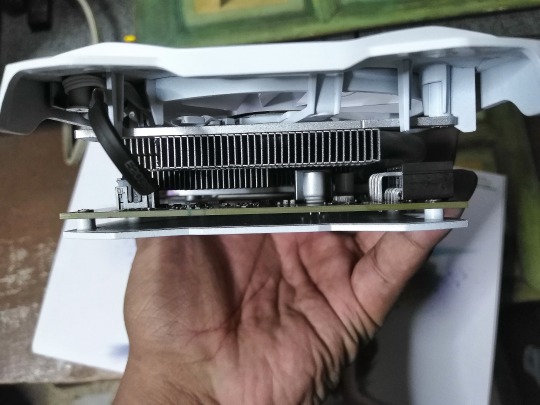
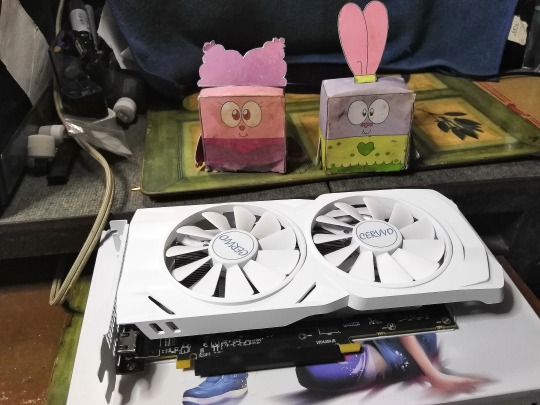
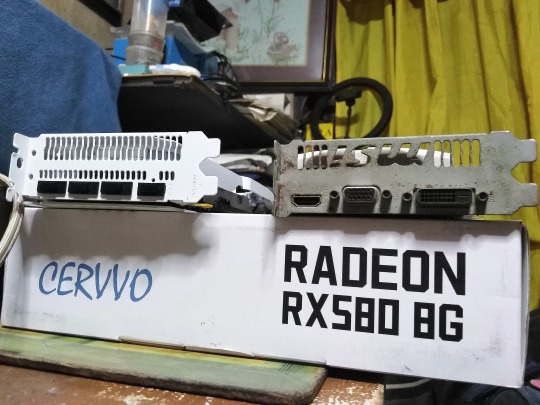
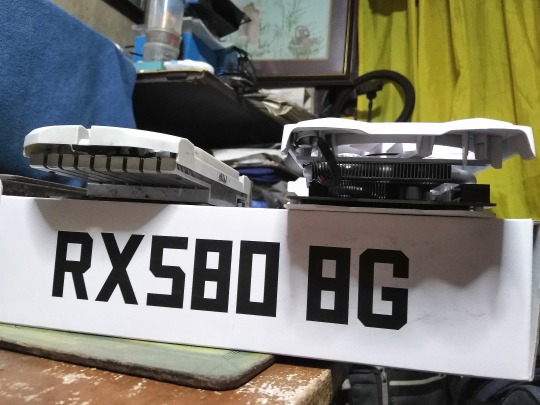
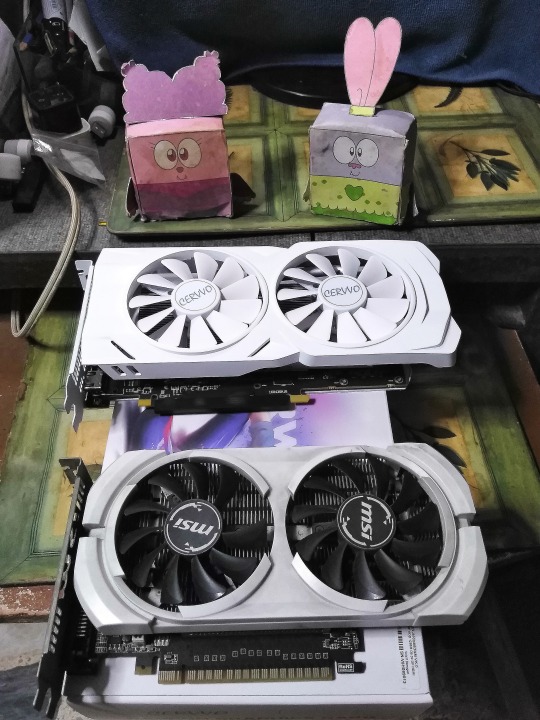
• Okay, unboxing time - snapshot edition! 😊 First off is the CERVVO GPU Card. This box contains a Product Specifications booklet with few instructions, and the main item covered in anti-static plastic to prevent conducting electricity. I also mentioned, that the GPU Card also available in black color, but the seller gave me a white variant. After all, it matches the color from the old MSi GTX 750 Ti GPU.

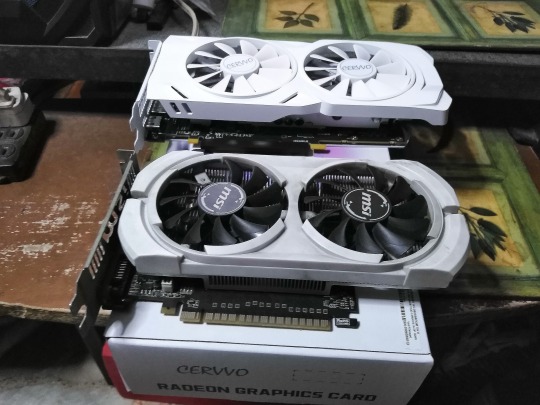
25th to 29th Image(s) 📷📲: ↑
• Speaking of, here's a comparison with my aforementioned one, and in terms of length & size sees through our visions. 👀
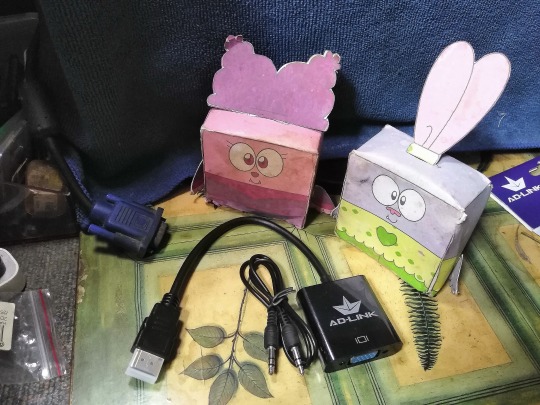

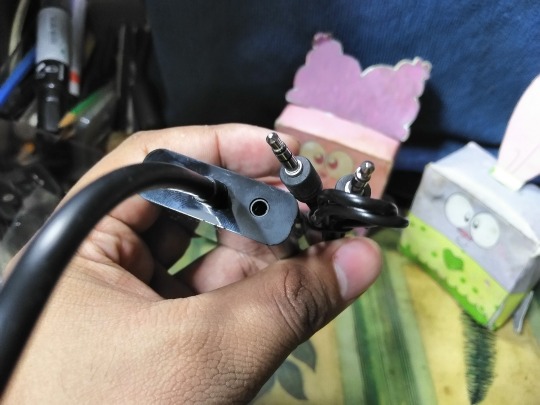
30th to 33rd Image(s) 📷📲: ↑
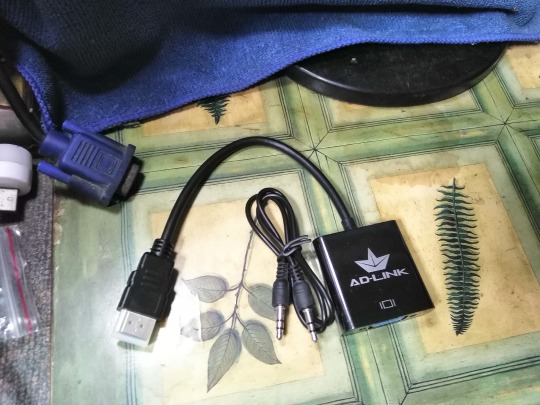
• Okay, let's moved on to my next item, this is the Ad-Link HDMI to VGA converter. And I confirmed, that the AOC's old VGA port would fit in right through the converter. Plus, a 3.5mm audio jack port built right in, with the included auxiliary cable. Although, I don't need it, to be honest. 🤷♀️
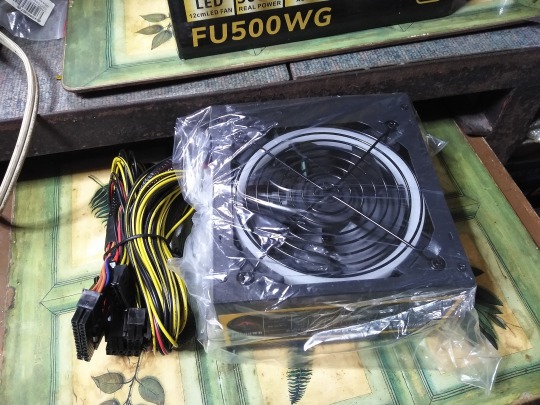
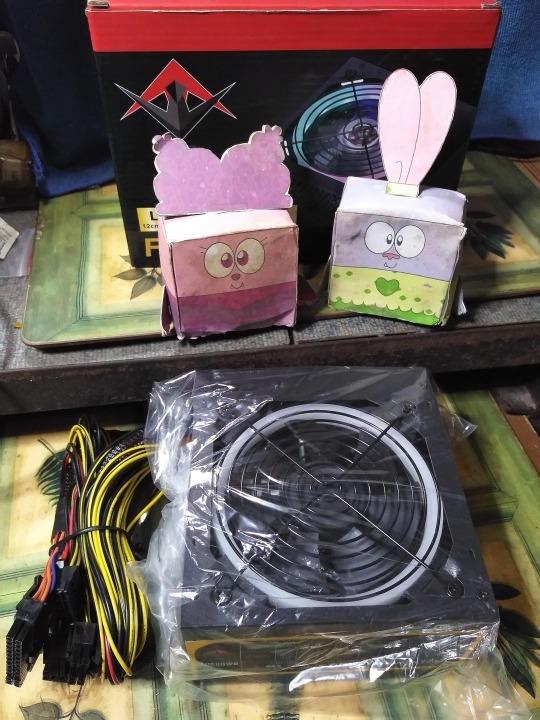
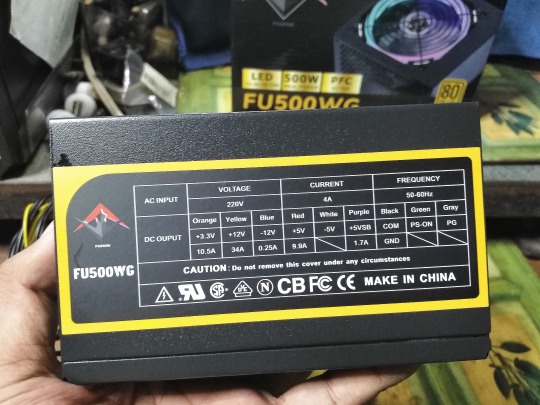
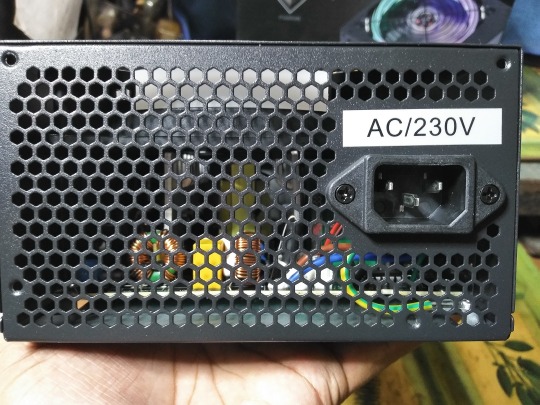
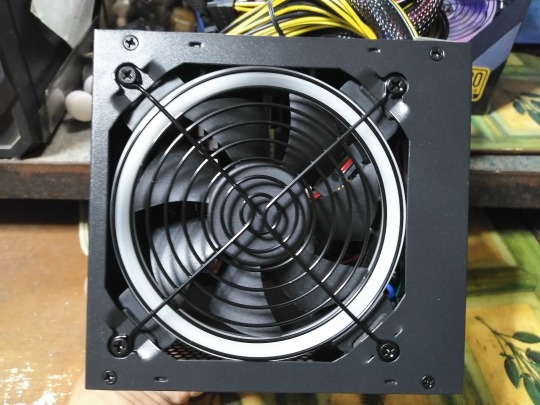
34th to 42nd Image(s) 📷📲: ↑
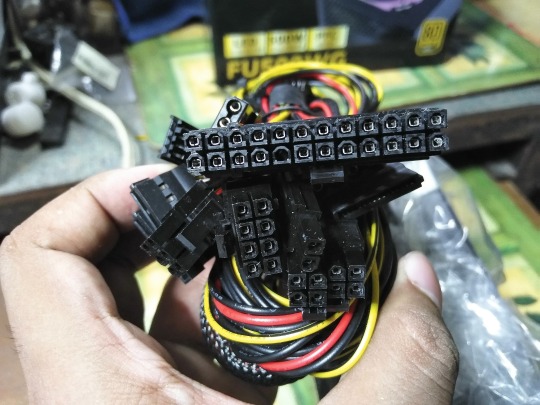
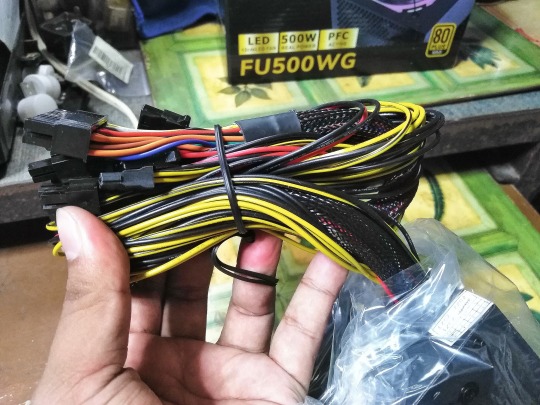
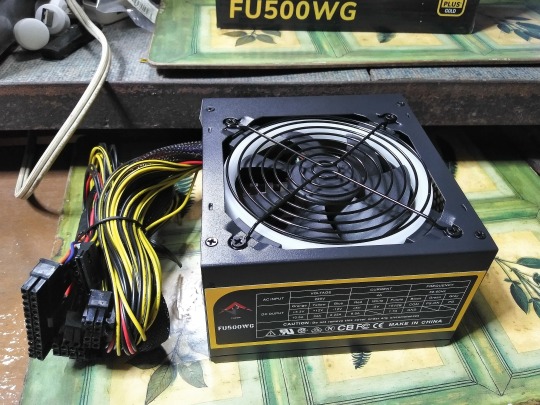
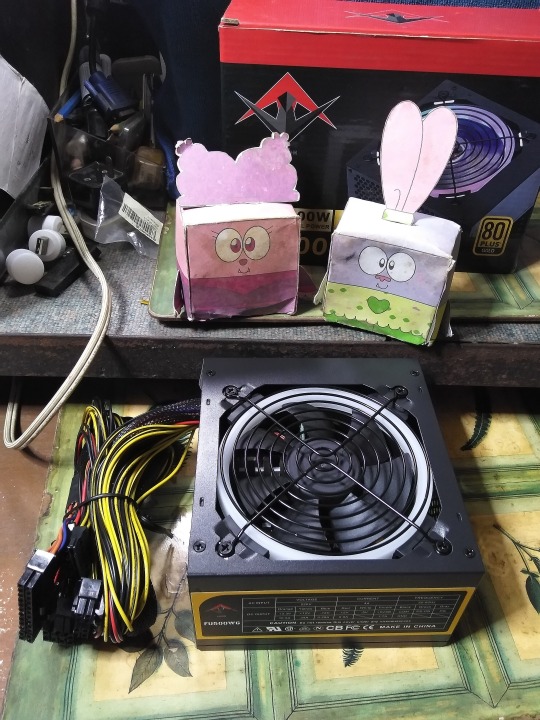
• And finally, the Fuzion PC power supply. With no additional accessories, this thing will slapped on any format desktop tower case. And unlike my old PC power supply, aside from the aforementioned PCI-E ports, the 24-pin ATX power connector cable was covered in nylon braided-ish material. Yes, I said "Nylon-Braided" because it looks like one, although the material doesn't have the same as the soft thread nylon-braided ones from our existing USB cables for mobile devices. 🙂
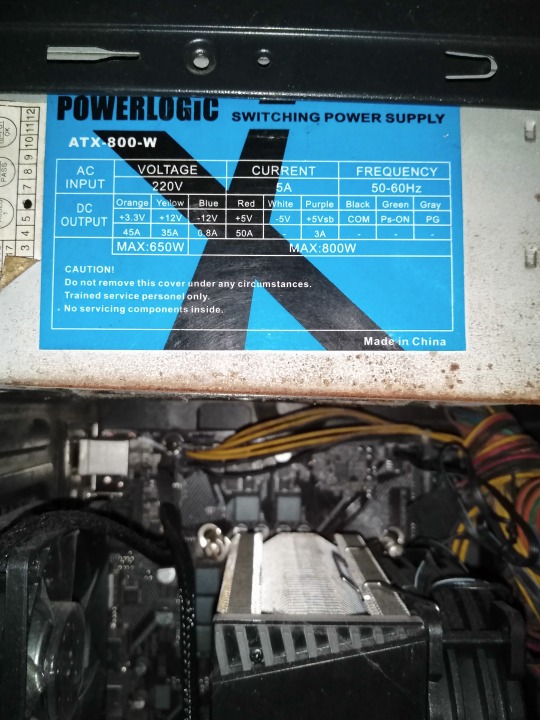
43rd Image 📷📲 [Jan 12th, 2024]: ↑
• Ah yeah, I forgot. Here's the specs information about the old PC Power Supply from Powerlogic as a comparison against my new PC Power Supply from Fuzion. ⚡🖥️ To be honest and in my opinion, I wish my new Fuzion PC PS (Power Supply) would have the same specs as my old Powerlogic PC PS. Just saying. ☺
Well, that's the end of my "Part 2". "Part 3" is now available! Pls proceed → [CLICK ME!]. 🙂
And GOOD NEWS! I'm attending my job as a "Volunteering Worker" for the "Person's With Disabilities and Senior Citizen's Cash For Work Program"! 😁👷♂️ "Four hours" on weekdays for "Four months" until I get paid! So, I'll do my best! 😊
Well, that's all for now.
Tagged: @lordromulus90, @bryan360, @carmenramcat, @leapant, @rafacaz4lisam2k4, @paektu, @alexander1301
#My Video#MyVideo#My Photos#My Photo#MyPhotos#MyPhoto#Photos#Photo#Chowder#Panini#Chowder Panini#Paper Dolls#My PC Upgrade#PC Upgrade#CERVVO#GPU Card#Graphics Card#AD-Link#AD Link#Screen Converter#Fuzion#PC Power Supply#Personal Computer#PC Desktop#Photography
4 notes
·
View notes
Text
My NVMe Needs - Part 6 (Final): Samsung Magician & HWiNFO Softwares [Apr 25th, 2023]
Hello, April! This is it! Here's final part (Part 6) of my of “My NVMe Needs“ (this time, without my paper dolls 😅). 😊
And in this part, I'm installing two monitoring stats & other memory tool purposes, the Samsung Magician & the HWiNFO. 🙂🖥️⚙️🔢
If you haven't seen my two previous post(s) & other ones (that we're related), then I'll provide some links down below. ↓
• Part 1: Samsung SSD 970 EVO Plus NVMe M.2 SSD (1TB) Review [Apr 7th, 2023]
• Part 2: Thermalright M.2 2280 Pro Review [Apr 11th, 2023]
• Part 3: Installation and trial & error [Recorded on Apr 21st, 2023] (published: Apr 22nd, 2023)
• Part 4: Another Trial & Error [Apr 21st, 2023] (published: Apr 22nd, 2023
• *Part 5: Timing comparison - HDD vs SSD NVMe M.2 Drive [Apr 25th, 2023]*
So, without further ado, let’s get started:
My Recorded & Edited Video (using Filmora 9): (pls watch) ↑ 🎦✏️🖥️
• First off is the "Samsung Magician", a monitoring software tool used for legitimate Samsung memory products exclusively (e.g. QVOs, EVOs, PROs, 870, 970, 980, 990). It'll give information about your recent memory drive stats, test some benchmarks, diagnose your drives, and even link "Data Migration" (software) to form one working software, and so much more to do. One con, I would say is my NVMe didn't recognize the authentication after re-install & restart my PC to unlock the real performance stats. Considering, that my purchased NVMe stick is 100% genuine, I just don't understand what's the situation though. Maybe I'll wait for the future update, soon? Who knows?
BTW: If you want more about it, then please → [CLICK ME!].
• However, there's another software that I can take a deeper look at my NVMe's stats, so let's bring out the "HWiNFO". Unlike "Samsung Magician", this software can monitor pretty much any internal component not just memory-based drives but also Graphics Card, CPU Chip, Motherboard, etc. And also, not just Samsung, but also other brands can recognize, too. Although, it can't do much as the "Samsung Magician", the "HWiNFO" will sense the voltage, rating speed, health, and even temperature of the computer's internal component(s). For instance, my 970 EVO Plus has a decent accuracy of 50°C compared to 51°C from the "Samsung Magician", and so far, no faulty & failure signs of SSD warning. Everyday, I open this monitoring software to check my computer stats just in case someone makes hot during either opening window task(s) or playing PC games. If somethings wrong, then I have to something about it, but as of now, everything seems to be fine.
Overall & Final remarks:
• So far, this is the most ambitious & most satisfying thing I've ever done this year. I've been stuck on physical HD for years. Since 2006, we're always provided physical hard drives as our main source of computer OS & storage purposes. In fact, in my elementary days, I had never seen or heard about "Solid State Drives", I mean nobody uses SSD only rich people can afford the premium SSDs. Nowadays, the SSDs & NVMe we're spread across the globe, and they became the standard of all existing computers. Best of all, random brands are now making cheap SSDs & NVMEs compared to the well-known competitive brands such as Samsung, Adata, Corsair, Western Digital, Sandisk, and more. But, should you buy cheap alternatives or well-known trusted brands? You decide. And let's not forget about the capacity size, they're arranged from less than 64GB of SSDs/NVMEs for a fair cheaper price to the overly expensive price of 1TB to a massive 8TB of SSDs/NVMEs. So, choose wisely if you're planning to get yourself a perfect SSD/NVMe brand(s). And if you're planning to get a NVMe M.2 Drive be sure to purcahse a separate heat sink or a built-in counterpart.
• But, as for me, I purchased Samsung SSD 970 EVO Plus & the Thermalright M.2 2280 Pro Heat Sink separately, and combine these two into one custom. Overall, so far, I am certified as "Worth it" because I dream to get my hands on a high-performance SSD than a slower physical hard drive. And with two monitoring & diagnostic software(s) on my computer, I could always check the stats of my NVMe stick, alongside other functional PC internal components (motherboard, graphics card, etc.). I hope my NVMe stick never dies from my progress.
Well, that's the end of my topic!
If you haven’t seen my previous topic, then I’ll provide some links down below. ↓😉
• Goodbye my old Anker Powerport 2 - Full [Mar 16th, 2023]
Tagged: @lordromulus90, @bryan360, @carmenramcat, @leapant, @rafacaz4lisam2k4, @paektu, @alexander1301
#My Record Video#MyVideo#My Video#Video#VLC#VLC Media Player#Samsung#Samsung Magician#hwinfo#Monitor Software#Software#Windows 10#NVMe#NVMe SSD#NVMe M.2 PCIE SSD#NVMe M2 PCIE SSD#M2 Drive#M.2 Drive
5 notes
·
View notes
Text
My NVMe Needs - Part 5: Timing comparison - HDD vs SSD NVMe M.2 Drive [Apr 25th, 2023]
Hello, April! Here's Part 5 of my of “My NVMe Needs“ (this time, without my paper dolls 😅). 😊
And in this part, I have another video to show ya. This is a timing comparison between my old physical drive (the Seagate Barracuda 7200 - 400GB) & my current used NVMe M.2 PCIE SSD (the Samsung 970 EVO Plus - 1TB). 🖥️⌚ Man, that latter was pretty mouthful, don't you think? 👅
Nonetheless, if you haven't seen my two previous post(s) & other ones (that we're related), then I'll provide some links down below. ↓
• Part 1: Samsung SSD 970 EVO Plus NVMe M.2 SSD (1TB) Review [Apr 7th, 2023]
• Part 2: Thermalright M.2 2280 Pro Review [Apr 11th, 2023]
*• Part 3: Installation and trial & error [Recorded on Apr 21st, 2023] (published: Apr 22nd, 2023)*
*• Part 4: Another Trial & Error [Apr 21st, 2023] (published: Apr 22nd, 2023*
So, without further ado, let’s get started:
My Recorded & Edited Video (using Filmora 9): (pls watch) ↑ 🎦✏️🖥️
• Okay, let's make my summary quick because I don't need to explain everything. Before installing my newly fast solid drive & a heat sink, I decided to record the physical hard drive, ranging from noisy clicking sounds to the timing of powering up & after hibernating the PC (for several hours while I'm sleeping). It takes some time while dealing with background noises from neighbors' dogs barking or a chicken/rooster doing the morning cock-a-doodle before I editing a video, along with my recordings of using the NVMe M.2 drive, days later.
• Now, I don't want a do file transfer test back 'n forth because we've already seen it in my previous part (alternatively, am I add), as well as a bunch of tests that might affect my procrastination (well, not really) because we all know, that quick pace NVMe M.2 drives are beat out the old-style bulky hard drives for read & write rate speeds. It's already well documented by countless YouTube videos from Youtubers. (So, go educate yourself if you so desire) Nonetheless, all I want it to see is to do a comparison between two of my memory devices, and what you see is what you watch, right now.
BTW: Remember, what I said that there's no counterfeit for Samsung's legitimate NVMe M.2 drives? Well, I was wrong, and it turns out that the PC website, "Tom's HARDWARE" had already reported & encountered a counterfeit Samsung 980 EVO Plus NVMe M.2 drive. It may look like a real deal but looks can be deceiving. So, I suggest that you should check it out → [CLICK ME!]. It was already published, a month ago.
• Also, some brands are now expand to 8TBs capacity size (or much MUCH higher size) for the SSD NVMe sticks! DAMN! 😲 And if you want proof? Then → [CLICK ME!].
Overall:
• Like I said, switching between the physical slow hard drive to the quick pace solid state drive NVMe M.2 was a night & day! And so far, I'm really enjoying it after 4 days of usage. Here's hoping, my NVMe drive won't fail or damage after significate hours of play & work. But hey, not to worry, I could always hibernate or shut down my PC to prevent endurance heat. Man, if only I have more spare funds to replace my PC desktop case with a modern look & armed with 6 or 8 PC cooling fans. That's my next target, you know.
Anyways, I have another post, right here! And this is my last part. I promise → [CLICK ME!].
Well, that’s all for now!
Tagged: @lordromulus90, @bryan360, @carmenramcat, @leapant, @alexander1301, @rafacaz4lisam2k4, @paektu
#My Record Video#MyVideo#My Video#Edit#Edited#My Edited#MyEdited#MyEdit#My Edit#PC#Personal Computer#Computer#Timing#Compare#Comparison#Seagate#Samsung#Hard Disk Drive#HDD#Hard Drive#NVMe#NVMe SSD#NVMe M.2 PCIE SSD#NVMe M2 PCIE SSD#M.2 Drive#M2 Drive#Windows 10
5 notes
·
View notes
Text
My NVMe Needs - Part 4: Another Trial & Error (w/ my paper dolls) [Recorded on Apr 21st, 2023]
So, here’s Part 4 of “My NVMe Needs“ (featuring my paper dolls). 😁 Actually, this is Part 2 of 2 videos that I've recorded, yesterday (April 21st, 2023).
For this continuation, I'm attempting another try & hopefully will succeed in the migration. Plus, I'll reveal the benchmarks using helpful software (which, I won't mention the name until the end). No, not the "Samsung Magician"; not yet though, I'll save it, but rather something else. You'll see. 😉
If you haven't seen my previous part & other ones (that related), then I'll provide some links down below: ↓
• Part 1: Samsung SSD 970 EVO Plus NVMe M.2 SSD (1TB) Review [Apr 7th, 2023]
• Part 2: Thermalright M.2 2280 Pro Review [Apr 11th, 2023]
*• Part 3: Installation and trial & error [Recorded on Apr 21st, 2023] (published: Apr 22nd, 2023)*
So, without further ado, let's continue we left of:
✋ HOLD IT! (AGAIN!)✋
• Okay so before I discuss my experience, let's discuss my recording process. I have 17 recorded videos 🎦📲on my smartphone (the Honor 8C), one of which is from the VLC media player 🎦🖥️. However, squeezing 17 videos in one package wouldn't fit in my (Tumblr) post 😕, so I decided to slice it in half to make a minimum of 500 MB per video post 🪓, not to mention, the adjustments, speeding up the process, and adding subtitles. 🎦✏️🖥️ And thus, I made two videos. It took 7 hours to finish these videos between 7 PM to 2 AM (Apr 21st to 22nd). And man, I'm all relieved after editing. So much so, I want a take a break after this, but I can't because I want to end my ambitious topic sooner before celebrating my birthday, next month (May 6th). Regardless, at least I'm all done with editing, and all was left is to type in with my thoughts. And uhh, if you see me shirtless, then my apologies for that, I completely forgot to wear a shirt before recording. lol 😅 Plus, it's damn heat season in my country (The Philippines), so it's hard enough to sweat my glands while progressing (, both daylight & night), you know. 🥵☀️ Anyways, let's get over with...
My Recorded & Edited Video (using Filmora 9): (pls watch) ↑ 🎦✏️🖥️
• So, in second attempt, you noticed the total memory size was decreased by 789 bytes than before. Here, I have some photos, right here. ↓ [pls see my 12th & 13th image(s)]
• Sadly, the third attempt was another failure despite the 250+ GB won't handle the migration. And uh, did I mention the writing rate is slow from the physical drive? Yeah, I could see that. However, there's a solution to that. So, let's proceed to these images. ↓ [pls see 14th & 15th image(s)]
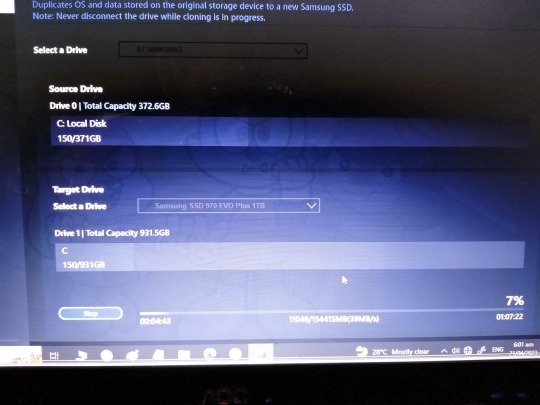
• Alright, third attempt time! And you noticed I reduced the memory size to 150+ GB because I uninstalled larger files/apps. But wait, what are the larger files/apps that I've uninstalled? Well, 2 PC games. One is what I actively played [CLICK ME! #1], while the other is not [CLICK ME! #2] because I suck at playing it. But, is still a great game though (you should check it out at #2). Nonetheless, after it reach 99%, it was a success! And I immediately click the button to shut down the PC! *sigh* Yes! Rejoice!
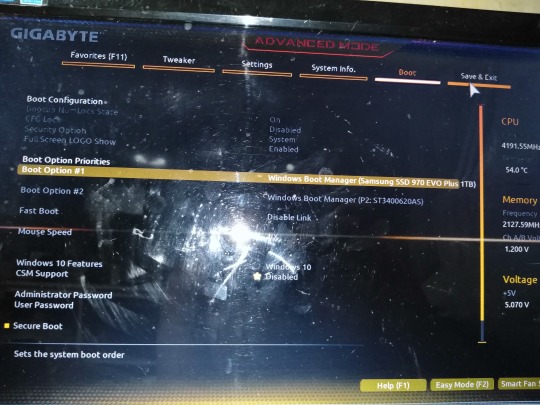

16th & 17th Image(s): ↑
• Next, I turn on the PC once more & press F12 to access the boot menu. There, I swap my old physical drive to my NVMe M.2 drive as my new main boot before I save & click the new main boot from the "Boot Override" list. Then it restarts my PC, but there's a problem... It did not work well! I'm not sure what happened, so I have another round of manual troubleshooting (Round 2). After a couple of minutes, I fire up my PC & it finally worked! It boost very quickly than before until another problem came out to smash my monitor's face, it blacked out! (no pun intended) Round 3 for manual troubleshooting! I'm starting to get frustrated, but I won't give up on my PC. With blood, sweat & tears in my body, my PC has finally worked! And it was worth the hard for me!
18th & 19th Image(s): ↑
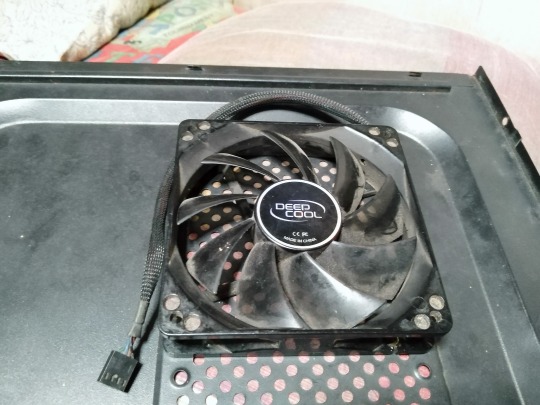
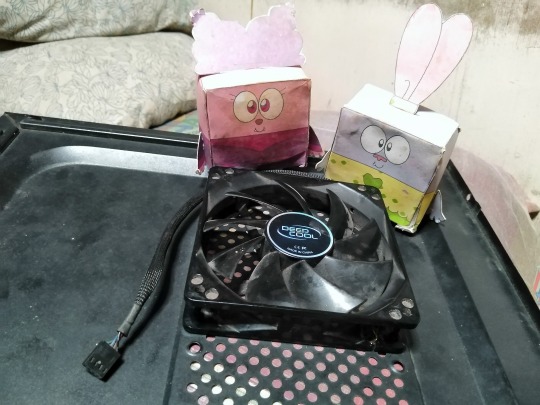
• Now, I was gonna install a leftover cooling fan from a brand called "DeepCool", but I'm having trouble my PC, a couple of times. Installing a cooling fan (whether 4 fans or more) is an essential requirement to keep our internal board (CPU, Graphics Card, NVMe) from overheating for a long period. And it sucks without it. *sigh* But don't worry, I'll be targeting & browsing a new spanking PC tower case, very soon. As well as a brand new power supply, too. My paper dolls approves my idea.

My Benchmarks: ↑
• Let's proceed with another test (that I've promised). This is the so-called "helpful software" that I was talking about. I would like to introduce the "CrystalDiskMark", a read/write memory testing software. Some of you may familiar with it, but others not so much. Nonetheless, these are the four benchmarks that I've tested, including my recent Samsung 970 EVO Plus NVMe, which has the most readable & writable rated speeds of the four memory-based drives, with the bottom right being the least, and that's the Seagate Barracuda 7200 HD. That's the reason why I struggle with playing games or waiting to boot using an old & slow physical drive. Not only that but the multiple windows & tasks that sometimes can't handle. I could relate to that situation though. But thanks to the supreme performance of the NVMe M.2 drives, it can handle pretty much anything, including PC games that are larger files (particularly AAA game titles). However, running large-size PC games means overheating the NVMe's processing unit & other chips, making it stressful on your gaming PC, and that brings it with the introduction of the heat sink for NVMe, which can dissipate the heat & prevent overheating the NVMe's processor & chips. Sure, it may not need it for your NVMe sticks, but we need to keep our memory-based drives & our PC itself top-shaped without any signs of error, not to mention longer period. And that make sense, you know.
Side Note: It said, that the Samsung 970 EVO Plus delivers a sequential read & writes of 3,500 MB/s & 3,300 MB/s respectively. And according to my benchmark test, I would say a solid promise. Even though, the write rate was almost 3,300 MB/s-ish but still a solid promise to me.
Overall:
• I have to say, it was satisfying & a bit frustrating, at the same time. I've shared a lot of mistakes & plenty of undo processes, with a ton of sweaty & face-rubbing from my body because of the dry season, but that doesn't stop me until I'm done. But in the end, I accomplished the installation of the SSD NVMe M.2 drive with my first owned NVMe stick from Samsung (970 EVO Plus) & the heat sink by Thermalright. Hopefully, these two we're safe & sound, forever without second thoughts about removing them. But, should I buy another NVMe with additional items to operate? Maybe. If I buy another NVMe M.2 drive, then I could use it for my file storage instead of the mechanical counterpart. But Nah, I guess one NVMe stick is good enough for me (I suppose). One thing I'm concerned about is not touching any internal components when I try to install a cooling fan or a heat sink with another NVMe stick on it because if I do with a slight touch my PC won't run at all, and that scares me... *sigh* But in the end, it was a worth it & satisfied my computer upgrade. My ambitious computer upgrade was a success!
I have more tests to come until the end, so I'll be planning to make another part for the finale (before my birthday countdown starts), so stay tuned.
Well, that's all for now.
Tagged: @lordromulus90, @bryan360, @carmenramcat, @leapant, @paektu, @rafacaz4lisam2k4, @alexander1301
#My Record Video#MyVideo#My Video#Edit#Edited#My Photos#My Photo#MyPhotos#MyPhoto#Chowder#Panini#Chowder Panini#Paper Dolls#NVMe#NVMe SSD#Samsung#Samsung 970 EVO Plus#Samsung 970 EVO Plus NVMe SSD#M.2 Drive#M2 Drive#NVMe M.2 PCIE SSD#NVMe M2 PCIE SSD#Memory Drive#Windows 10#Personal Computer#Photography
5 notes
·
View notes
Text
My NVMe Needs - Part 3: Installation and trial & error (w/ my paper dolls) [Recorded on Apr 21st, 2023]
So, here’s Part 3 of “My NVMe Needs“ (featuring my paper dolls). 😁 Actually, this is Part 1 of 2 videos that I've recorded, yesterday (April 21st, 2023).
And this part is the moment I've been waiting for, the installation & test using the two important upgrade items I need for my current PC. ⬆️🖥️😁 Plus, I'll share my overall thoughts, in Part 2 recorded video.
If you haven't seen my previous parts of the same topic, then I'll provide some links down below. ↓
• Part 1: Samsung SSD 970 EVO Plus NVMe M.2 SSD (1TB) Review [Apr 7th, 2023]
• Part 2: Thermalright M.2 2280 Pro Review [Apr 11th, 2023]
So, without further ado, let's get started:
✋ HOLD IT! ✋
• Okay so before I discuss my experience, let's discuss my recording process. I have 17 recorded videos 🎦📲on my smartphone (the Honor 8C), one of which is from the VLC media player 🎦🖥️. However, squeezing 17 videos in one package wouldn't fit in my (Tumblr) post 😕, so I decided to slice it in half to make a minimum of 500 MB per video post 🪓, not to mention, the adjustments, speeding up the process, and adding subtitles. 🎦✏️🖥️ And thus, I made two videos. It took 7 hours to finish these videos between 7 PM to 2 AM (Apr 21st to 22nd). And man, I'm all relieved after editing. So much so, I want a take a break after this, but I can't because I want to end my ambitious topic sooner before celebrating my birthday, next month (May 6th). Regardless, at least I'm all done with editing, and all was left is to type in with my thoughts. And uhh, if you see me shirtless, then my apologies for that, I completely forgot to wear a shirt before recording. lol 😅 Plus, it's damn heat season in my country (The Philippines), so it's hard enough to sweat my glands while progressing (, both daylight & night), you know. 🥵☀️ Anyways, let's get over with...
My Recorded & Edited Video (using Filmora 9): (pls watch) ↑ 🎦✏️🖥️
• Alright so, what you see here is I combine two techs in one digital memory sandwich before I connect it to my current PC. Yeah, I speed it up my thoughts because I've already add subtitles. So please, go watch my entire 8½ minute recording before you read my thoughts. Anyways, here are the photos I took before I proceed. ↓ [please see my 1st to 5th image(s)]

• See? What I told ya! It's like PB&J Sandwich, right you two?! They get it... But, please don't eat it. lol
• However, once I install my custom NVMe my PC won't read, and thus I need to do manual & painstaking troubleshooting (1st Round). It took me minutes to fix without disassembling it before it functions. What a relief! Here are more pictures before I firing up my PC. ↓ [please see my 6th & 7th image(s)]

• What a thing of beauty, isn't it? What I don't like is the plastic peg. It should it go with metal screws over this. (just saying)
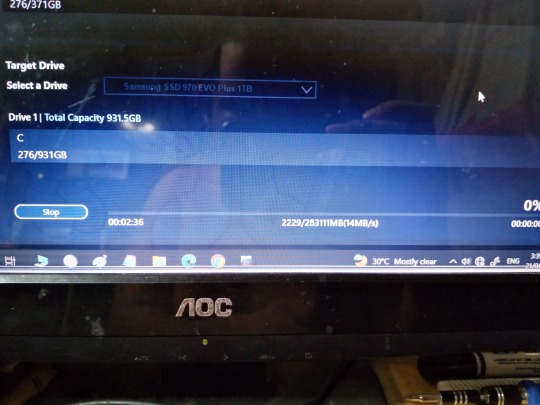
• Next, I need to open "Computer Management" for setting up my NVMe stick from switching "GPT" (which stands for "GUID Partition Table") to format with "NTFS" (which stands for "NT file system and the New Technology File System"), and then I proceed to install Samsung's provided "Data Migration". I also downloaded the "Samsung Magician" software in a form of the RAR file. Which, I'll discuss in my final part.
• Once my NVMe is formatted & installing the data migration, the latter automatically opens (at a slow pace). Sorry, my physical drive is having a rough day, but don't, my HD will be retired once I've done migrating. Before I start migration take a look at their capacity differences. Their quite an opposite when it comes to storage spaces of 400GB (Seagate Barracuda 7200) & 1TB (Samsung SSD 970 EVO Plus NVMe). So anyway, I start the migration process & wait for couple of hours. ↓ [please see my 8th image]


• [9th image ↑] And while we're wait, my paper dolls seem to be hungry. Luckily, I have a single fun size M&Ms for my beloved paper dolls! Take it, you two & eat share. Yum-yum!
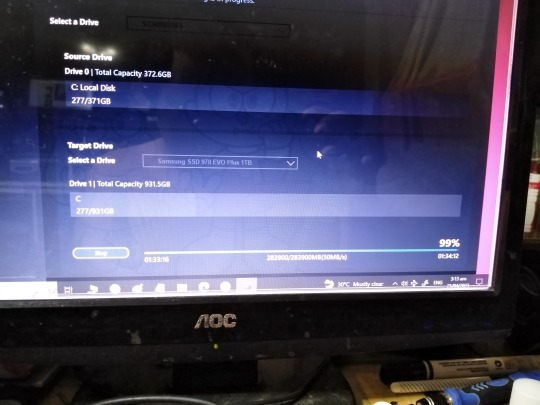
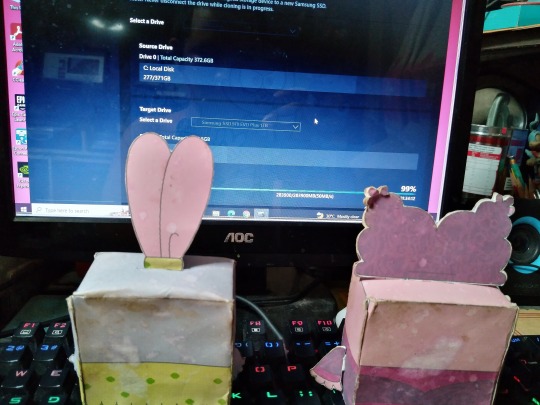
10th & 11th Image(s): ↑
• Hours later, the migration is almost complete! Until the physical drive went to halt the process despite the red light indicator immediately stopping blinking. *Sigh* We're SO CLOSE to reaching 100% migrating files & OS to my first owned NVMe stick! So, I guess we're gonna try again on the second attempt.
But, will it succeed? I don't know, so please click here to proceed Part 2 of the video → [CLICK ME!].
○ No overall thoughts this time around! ○
Well, that’s all for now!
Tagged: @lordromulus90, @bryan360, @carmenramcat, @leapant, @paektu, @rafacaz4lisam2k4, @alexander1301
#My Record Video#My Video#MyVideo#Edit#Edited#MyPhotos#MyPhoto#My Photos#My Photo#Chowder#Panini#Chowder Panini#Paper Dolls#NVMe#NVMe SSD#Samsung#Samsung 970 Evo Plus#Samsung 970 Evo Plus NVMe SSD#Thermalright#Thermalright M2 2280 Pro#Thermalright M.2 2280 Pro#M.2 Drive#M2 Drive#NVMe M.2 PCIE SSD#NVMe M2 PCIE SSD#Memory Drive#Windows 10#Personal Computer#Photography
5 notes
·
View notes
Last Seen Blogs

vanhoa247
vanhoa247

egyptiansos
bianca

devotedtoericadurance-blog
DEVOTED TO ERICA DURANCE

iceflowerglow
art blog

detectiveseaslug
A Galactic Mystery....