#Video Resource
Text
The Power of Game Illustration: How to Create Captivating Visuals for Video Games
Game illustration is a form of digital art that has been embraced by game developers, artists and players alike in order to create captivating visuals and experiences for video games. This type of art encompasses concept art, character designs, background illustrations, user interface design and more.

Game illustration is an essential component of the gaming industry as it gives life to the world of a game while enhancing the overall player experience. With stunning visuals created through game illustration, players can be immersed into their favorite virtual worlds like never before.
Game illustration is not limited to just one type of visual. It can be used in various ways to create immersive experiences for players through:
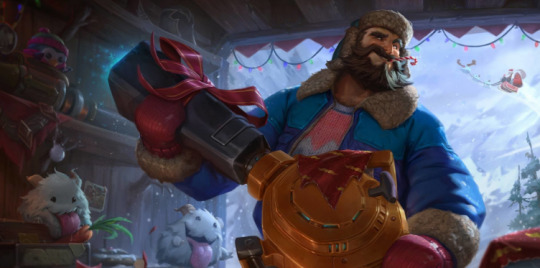
Concept Art – This form of game illustration involves creating visuals that help bring the game concept to life. Concept art is a crucial step in the development process and is used to help the team decide how a game should look and feel.
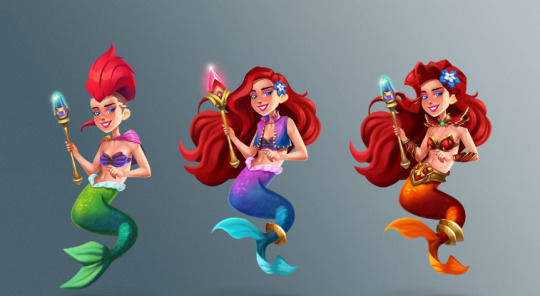
Character designs are important to make the characters look realistic. Artists put a lot of time and detail into making the characters look right and adding personality. This makes the game more interesting for people who play it.
Background Illustrations – Background illustrations create the setting that a player will be immersed in. By creating stunning visuals through backgrounds, players can experience the world within the game in a more realistic way.
The user interface, or UI, is the part of the game that players use to understand the game and how to interact with it. Artists use visuals in the UI design to help players move around in the game and have a smooth experience.
How game illustration can help create an immersive experience for players
Game illustrations are about making the game look really good. This way, players can get more into the game and have more fun.

The artwork should be related to the game's theme and story. Then players will feel like they are in the game world.
Showcase examples of stunning visuals created with game illustration
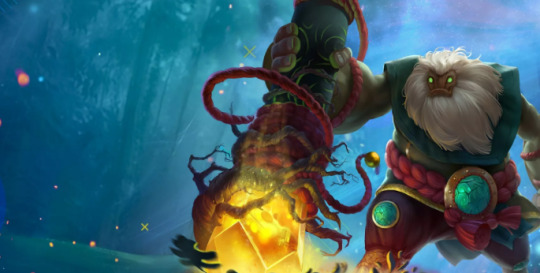
Game illustration has been used to create some of the most stunning visuals for video games.
From fantasy landscapes and alien worlds, to post-apocalyptic cities and magical creatures, artists have created visuals that transport players into these digital worlds with each step they take.
Tips on how to use game illustration to create captivating visuals for video games
When making pictures for video games, it is important to think about the game's story. This will help the artists make art that goes with the game and looks good to people playing the game. It is important to keep up with the latest trends in game illustration. This can help maintain a fresh and modern look for the visuals. Finally, it is important to practice and experiment with different styles in order to become more confident with game illustration.
Conclusion
Artists create illustrations for video games. This is important because it makes the game more exciting for people who play it. With better visuals, people feel like they are in the game and can have more fun. Artists should follow the tips above and stay up-to-date with trends to make the best visuals for video games.

This concludes our article on game illustration and how it can be used to create beautiful and engaging visuals for video games. Through the use of stunning visuals, games become more immersive and engaging for players. We hope this article has been informative and we thank you for reading!
Happy gaming!
#tag games#the hunger games#pc games#board games#indie games#video games#gaming#steam#ps5#xbox#video post#video review#video looper#video resource#sound on#video on youtube#tiktoks#funny video#i love this video#illustrations#illustration#digital illustration#drawing#artwork#illustrators on tumblr#art on tumblr#artists on tumblr#art#nail art#digital art
2 notes
·
View notes
Text
youtube
https://jojos-crusade.tumblr.com/post/740479865282756608 posted also these resources
Impressive:
Video from https://dopelilfizz.tumblr.com/post/740466263814537216
from https://b-dweave.tumblr.com/post/740477355959746560
0 notes
Text
youtube
Long time no post (whoops) but I found this! It's for Mandarin, but I think I can modify the beginning stuff especially to help me learn Taishanese. (The later stuff suggests adding tv shows and podcasts with more and more advanced language to your daily life, which is difficult when Taishanese has no movies and tv shows and few youtube videos or podcasts (yes I know I could add Cantonese which has lots of movies and shows but I'm not learning Cantonese yet))
I've taken my notes, now I just need to start making myself a plan of action. In the video, she suggests using Week 1 to get familiar with the tones, which I'm pretty familiar with in my general floundering already, but I could use a refresher
More to the point though, she recommends learning the 55 most common radicals in Week 2, so I'm going to google a list of those, write them all down, translate the pinyin to penyim, and then continue writing them all down until they're familiar. Here is a list with the 35 most common, which I will be using
I've got a notebook I'm not using and a bunch of pens, so let's get going
0 notes
Text
Here’s a list of miscellaneous children’s shows with links to full episodes for whenever you wish to watch them!
𐐪𐑂 Strawberry Shortcake (2003)
𐐪𐑂 Bluey
𐐪𐑂 My Little Pony: Friendship is Magic
𐐪𐑂 Batman: The Animated Series
𐐪𐑂 My Friend Rabbit
𐐪𐑂 Care Bears (1985)
𐐪𐑂 Care Bears: Unlock the Magic
𐐪𐑂 Rupert
𐐪𐑂 Spot the Dog
𐐪𐑂 The Paz Show
𐐪𐑂 Maggie and the Ferocious Beast
𐐪𐑂 Miss Spider’s Sunny Patch Friends
𐐪𐑂 Little Bear
𐐪𐑂 Rolie Polie Olie
𐐪𐑂 Babar
𐐪𐑂 64 Zoo Lane
𐐪𐑂 The Upside Down Show
𐐪𐑂 Rubberdubbers
𐐪𐑂 Monster High (G1)
𐐪𐑂 Monster High (G3)
𐐪𐑂 Ruby Gloom
𐐪𐑂 Super Mario Brothers Super Show
𐐪𐑂 Growing Up Creepie
𐐪𐑂 Tutenstein
𐐪𐑂 The Magic School Bus
𐐪𐑂 Angelina Ballerina
𐐪𐑂 Moomin (1990)
𐐪𐑂 Whisker Haven: Tales with the Palace Pets
𐐪𐑂 Enchantimals: Tales from Everwilde
𐐪𐑂 Catch! Teenieping
𐐪𐑂 Onegai! My Melody
𐐪𐑂 Little Twin Stars
𐐪𐑂 Sugarbunnies
𐐪𐑂 Calico Critters
14K notes
·
View notes
Text
#online games#online gaming industry#online gaming platforms#onlineearnmoney#online#freefire#gaming pc#video resource#youtube viral videos#the best youtube videos
0 notes
Text
Novice sewing pattern: Cut out shapes. Line up the little triangles on the edges. Stitch edges together. We've also included step-by-step assembly instructions with illustrations.
Novice knitting pattern: yOU MUSt uNDerstANd thE SECret cOdE CO67 (73, 87, 93) BO44 (63, 76, 90) 28 (32, 34) slip first pw repeat 7x K to end *kl (pl) 42 * until 13" (13, 13, 15) join new at 30 pl for 17 rows ssk 27 k2tog mattress lengthwise BO and sacrifice a goat to the knitting gods. WHAT DO YOU MEAN YOU WANT "INSTRUCTIONS," I JUST GAVE THEM TO YOU
#knitting#no it's not a real pattern but I can't write one that makes sense because I have no freaking clue what any of that means#How do you make things that aren't basic rectangles#Why has every knitter I've asked for help just said 'patterns are easy; you just have to know how to read them' & then refused to teach me#Where do I even find a goat to sacrifice#How do I join the pattern cult#I am so confused#I've been knitting for almost a decade but I can only make scarves and potholders#I learned one (1) stitch by watching a YouTube video and none of my friends or family knit so I have no IRL resources#And nobody I meet seems to want to take the time to explain the rest to me#I taught myself to sew through trial and error but that doesn't really work with knitting because error is pretty much just... Unraveling?#Anyway sorry for the tag rant I'm just frustrated that I see pretty things I want to make but the instructions are in an alien language#And the gap between 'absolute novice' and 'intermediate' seems to be about 20 years of experience and formal instruction
2K notes
·
View notes
Text
i was extremely sleep deprived yesterday when i discovered the dragon survival mod which was LIFE CHANGING when you're on three hours of sleep so of course i made a whole custom forest dragon texture in one day about it.
and. just for fun, some concept art i made for it:
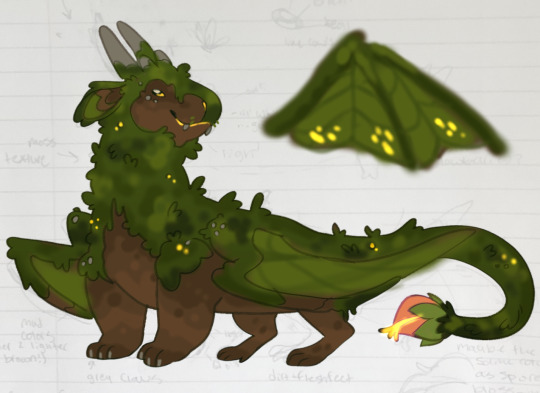
#aka i was too tired to trust myself to speak coherently with clients or make commission work up to my standards. but i need to be productive#or ill die#my art#minecraft#mineblr#dragon#dragonsona#of sorts#forest dragon#earth dragon#lush cave#mods in the video tht are noticable btw: complimentary reimagined shaders. alex's mobs. ambient sounds 5. mizuno 16 craft resource pack.#and a really cool seed i found online :]#video#NOT my model but im going to tag it as#my model#since it's 3D work!! actual model made by blackaures who made the mod and also some SICK ass dragon art#also. patreon gets to see the other 3 pages of concept art i made for this later today! :] wink wink nudge. coughs#sorry i need to shill#um. anyways#no name for this dragon yet. i do know it steals livestock from too-small village/illager pens#to give them enriched lives in its expansive cave farm#i'd like to come back to this eventually and touch up the wing design since the glowing spots didnt really shake out
3K notes
·
View notes
Text
youtube
🔴 YOUTUBE Essential Library | RECURSOS para Youtubers
0 notes
Text
🌲 From the Nakba 76 years ago all the way up until today, the Jewish National Fund has been using "environmentalism" and tree-planting to greenwash Israel's ethnic cleansing of Palestinians.
[Source: Mondoweiss]
#greenwashing#palestine#free palestine#gaza#free gaza#jerusalem#israel#tel aviv#gaza strip#from the river to the sea palestine will be free#joe biden#benjamin netanyahu#video#news#resources: palestine#palestine resources#nakba 1948#nakba#ethnic cleansing
2K notes
·
View notes
Text


random game graphic stamps blinkies buttons
#gaming#video games#minecraft#undertale#deltarune#ddr#dance dance revolution#legend of zelda#zelda#portal#fnaf#five nights at freddy's#sonic the hedgehog#sonic#chao sonic#kirby#web graphics#webcore#website#carrd resources#carrd stuff#carrd#rentry resources#rentry#graphics#blinkies#stamps#neocities#neocities resources
2K notes
·
View notes
Text
youtube
0 notes
Text
youtube
https://jojos-crusade.tumblr.com/post/740479864505827328 posted also these resources
Impressive:
Video from https://dopelilfizz.tumblr.com/post/740466263114088448
from https://b-dweave.tumblr.com/post/740477355402870784
0 notes
Text
"The Global North’s political economy relies on the oppression of the Global South in general and of Palestine in particular.
As academic and writer Patrick Higgins noted in late October: 'We’re seeing a blow against the US-led world system. Since, really post-World War II, but especially post-1970 or so, Israel has been the linchpin, the basket into which most of the American chips are put, in order to sustain broader control of West Asia.'
This historical reality places a profound obligation on those in the Global North who would seek to be in solidarity to seriously consider what strategies and tactics Palestinians are calling for in the struggle for liberation, sovereignty and safety.
Such calls to action do not include that we opine on Palestinians’ methods of resistance.
They do include that we understand the history and actuality of that resistance, do all we can to stop the ongoing provision of arms to the occupation, engage in boycott, divestment and sanctions, and fight back against the criminalization of those who support Palestine’s liberation from Zionist settler colonialism.
As Virginia Tech’s Bikrum Gill exhorted: 'Show no fear, no surrender, as you oppose those who support the US-Israeli genocide of Palestinians. Bring your institutions to crisis if their functioning requires silence or complicity.'"
#palestine#action#library#some great audio and video resources in the inline links in this excerpt + throughout the article
887 notes
·
View notes
Text

Just saving this for my own writing purposes cos I can never remember what time their store is open and apparently I've let Steve get off work early way too many times lol
610 notes
·
View notes
Text
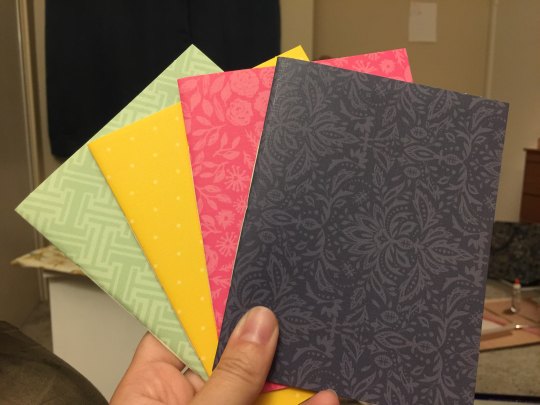
I've always wanted to learn bookbinding, ever since I was a wee little nerd, but there are a lot of things I've always wanted to learn, and this one has both a daunting upfront materials cost and a daunting upfront research cost. however, my sister is a jewel among siblings and gave me for christmas last year a handy dandy bookbinding manual, a block of good paper, and a little bag of tools.
but I still didn't have a suitable workspace, nor any of the many important tools and materials that she didn't include in her gift. so I just read the manual and pined. until maybe a month ago I got fed up with pining, flattened a cardboard box for a cutting mat, and went to town.
and I'm real proud of myself, so here's me rambling, plus photos!
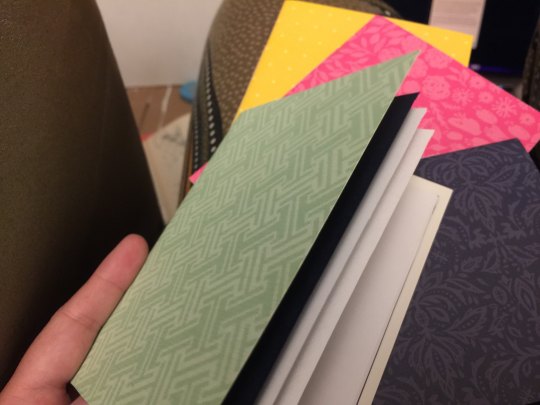
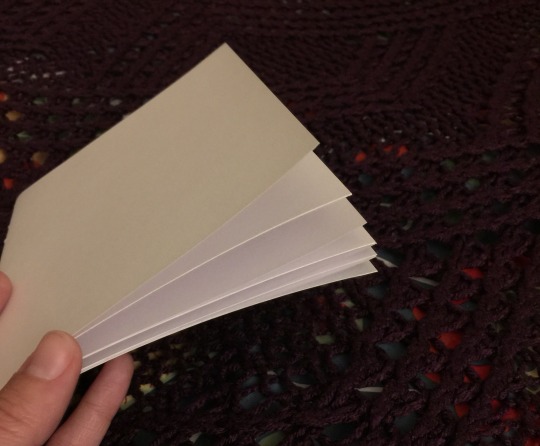
I went to the thrift store and got glue + some fabric to bind the cover, went to Michaels for a paintbrush (and later went back for a metal ruler lmao it's amazing how useful it is to have a straightedge for cutting the paper), and...could not find material for the cover boards. so I went home and pined some more. but the urges were too strong, so after a couple hours of moping I got a stack of printer paper at the grocery store (I could not bring myself to use the good paper for my first, inevitably weak attempts, I just couldn't do it) and started making a little booklet. which was a great idea, it turned out, since it makes for good practice with cutting the paper, measuring things, punching holes in the signatures, etc.
I have a big box of greeting cards from Michaels, which I used for the covers. it didn't feel like I was making a Real Book, so I got some colored paper from the stationery store and used that for end papers.
so fancy~
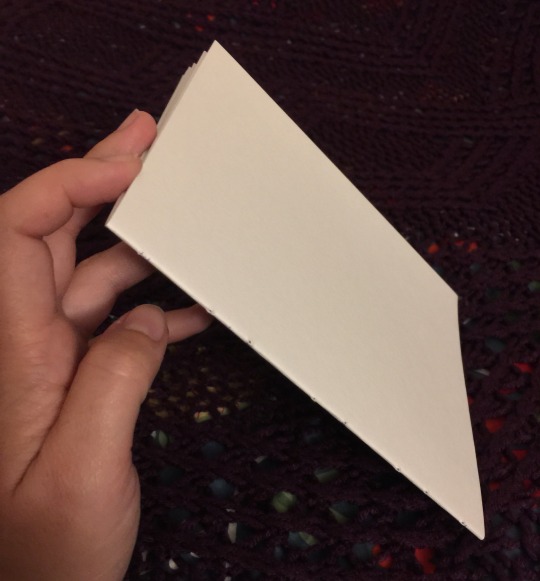
galvanized by this success, I ordered a stack of chipboard online to use for cover boards; and once I was confident that I could cut paper without making it look too stupid (getting that straightedge ruler sure helped lol), I made signatures out of the good paper, left them under some heavy books overnight since I don't have a book press, and then punched holes in them! (huzzah for this nice video on getting the holes right)
my sister's gift included good linen thread. it's unwaxed, but after some poking around on r/bookbinding it looks like that just means I'll have to be more careful to avoid tangles and keep good tension. I am fine with this. I can be extra attentive. (I considered just running it over a beeswax candle, but one commenter said if your wax has paraffin in it, it could melt in a hot car, ruining the spine. I can't guarantee my candle is 100% beeswax, I didn't make it, so maybe we just move on.)
I don't have good linen fabric to use for the tapes, but the important part there is that the fabric be thin, sturdy, and not stretchy. the probably-cotton I got from the thrift store fits the bill, so it'll do!

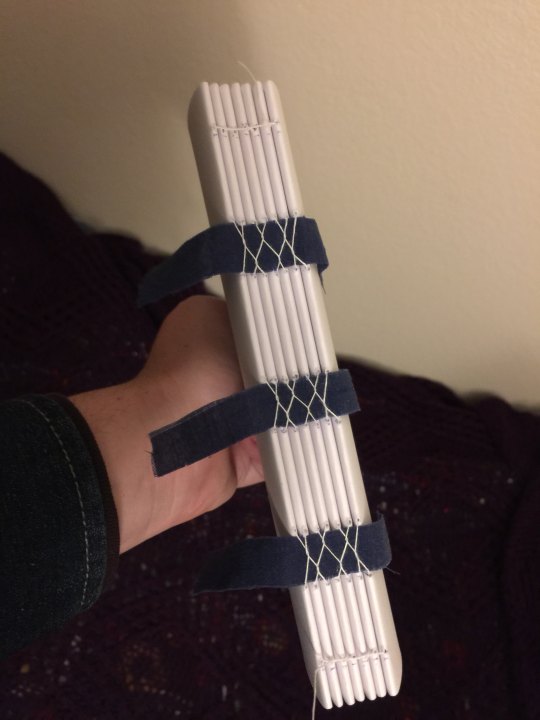
this is a french link stitch, which I got from this exceedingly good tutorial. apparently it's strong enough on its own that for a book of this size, I don't actually need tapes, but I'd already cut the things so eh here we are. and tapes plus french link will make it a stronger binding still (according to a friendly redditor on r/bookbinding), so we carry on.
specifically we carry on to the gluing step. now as I mentioned, I do not have a book press, and you....kinda need one for this step. you need to hold the book block in place with the signatures facing upwards, pressed together hard enough that the glue won't run down between them and stick the pages together (though you do want the glue to get between them just a little, just for like a 16th of an inch). you at least need some clamps and a couple boards to sandwich the book block with.
but you know what? I'm not a professional, this is my first ever book, if it's a little bit off it'll be fine. so we grab all the heaviest books off the bookshelf and improvise.
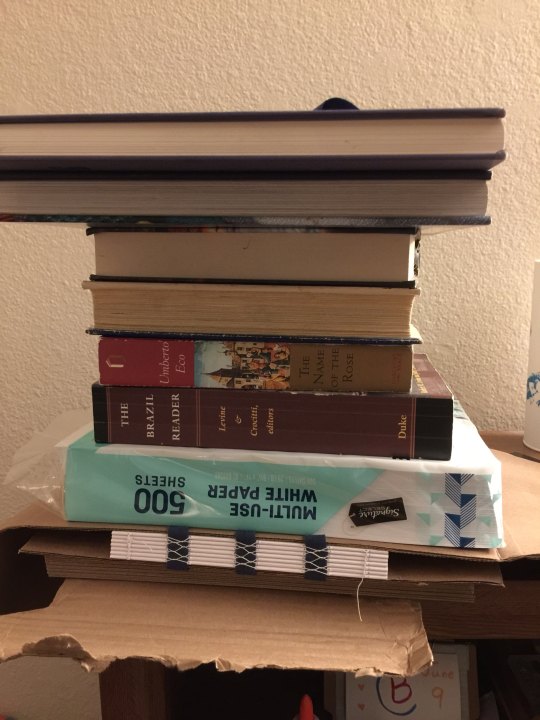
it's fine! I'm sure it's fine! and just in case it's not, I've tucked a bit of cardboard underneath to catch any glue that drips down so it won't land on the floor. see? I'm prepared! I'm acing this.
and actually, it really was fine. I used clear elmer's glue, applied with a flat paintbrush from the art supplies aisle at Michael's, and frankly I liked the way the flat paintbrush let me slip glue in between the signatures. I did poke around on a couple bookbinding sites to see what kind of glue I should use, and the gist is that although there are better options than this, elmer's glue is perfectly serviceable, and the main downside is it's not archival grade. but I don't need my first bookbinding attempts to last 200 years, that's fine.
the next step is to add the mull. mull is a specific type of fabric – extremely loose-weave linen – and the idea is to paste it down over the spine to essentially hold the tapes and signatures all in place in relation to each other.
but I don't have mull! so I'm using more of the thrift store probably-cotton, because it's thin enough and not really stretchy at all. I'm sure this will be fine too. I painted a layer of glue onto the spine, then left it to dry a bit while I measured and cut the fabric, then painted a generous stripe of glue down the center, where it'll affix onto the spine. then I added a bit more glue to the spine, just to be sure, and pressed the mull into place, rubbing it thoroughly to make sure it's firmly affixed to every signature, with no creases in the fabric or air bubbles beneath it.
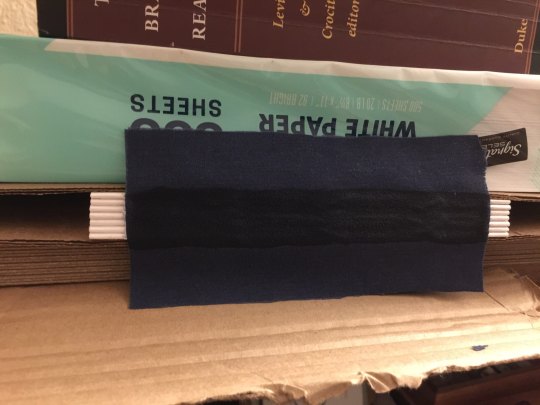
honestly I might have overdone it on the glue. I've never done this before, I don't know! I think it's okay, though – I tried not to ever let it become a thick layer, just a slight coating, since the danger of too much glue is that it might crack once dry and weaken the spine.
and now we leave it in the press overnight to dry, and pick up the next step in the morning!
#finx rambles#bookbinding#finx makes stuff#technically this is the second hardcover book I've made#but it's the first I'm making using Approved Techniques™#instead of watching a handful of half-relevant youtube videos and making up the rest#which was fun!#but did mean that once I was done I didn't know where to go from there#and at the time I couldn't find better resources#(I really wanted better youtube videos! just didn't know how to find them idk)#(it was 2020 I was unwell. as I'm sure we all understand)#but now I have an abundance of good sources#and I'm determined
558 notes
·
View notes
Text

DaVinci Resolve FX Presets | Transitions, Effects, Titles, VHS, SFX por DaniMult
0 notes
Last Seen Blogs

jirachihime
YOOOOOOO!

superhappychick
Digital Media Marketing

theladyfromthevalley82
inner peace

alainasaveyourscissors
Untitled
