#WordPress migrate from localhost to server
Explore tagged Tumblr posts
Visit Tumblr Blog
Explore Tumblr blogs with no restrictions, modern design and the best experience.
Last Seen Tumblr Blogs


Fun Fact
When “GIF” was named word of the year in 2012, Oxford Dictionaries U.S.A. credited Tumblr for pushing the word.
Text
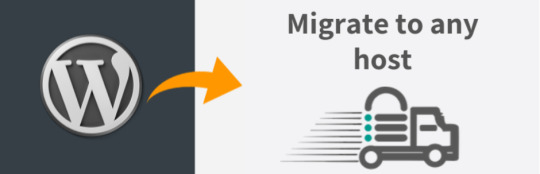
How to Move Your WordPress Site from Localhost to a Live Server
Developing a WordPress site on localhost is a great way to build and test your website in a controlled environment. However, the real challenge arises when it's time to move the site from your local server to a live hosting environment. If not done correctly, you could encounter broken links, missing images, or even database errors.
In this blog, we'll guide you through a step-by-step process to successfully move your WordPress site from localhost to a live server.

Step 1: Choose the Right Hosting Provider
Your first step is to select a reliable web hosting provider that meets your website’s needs. Look for:
Server Speed: Fast servers for better performance.
Uptime Guarantee: At least 99.9% uptime to ensure availability.
Ease of Use: User-friendly dashboards and tools.
WordPress Support: Hosting optimized for WordPress websites.
Popular options include Bluehost, SiteGround, and WP Engine.
Step 2: Export Your Local WordPress Database
The database is the backbone of your WordPress site. To export it:
Open phpMyAdmin on your local server (e.g., XAMPP or WAMP).
Select your WordPress database.
Click on the Export tab and choose the Quick Export method.
Save the .sql file to your computer.
Step 3: Upload Your WordPress Files to the Live Server
To move your files:
Compress Your WordPress Folder: Zip your local WordPress installation folder.
Access Your Hosting Account: Use a file manager or an FTP client like FileZilla.
Upload the Files: Transfer the zipped folder to your hosting server's root directory (usually public_html).
Unzip the Folder: Extract the files once uploaded.
Step 4: Create a Database on the Live Server
Now, set up a new database on your live hosting server:
Log in to your hosting control panel (e.g., cPanel).
Navigate to the MySQL Databases section.
Create a new database, database user, and password.
Assign the user to the database with full privileges.
Step 5: Import the Database to the Live Server
Open phpMyAdmin in your hosting control panel.
Select the new database you created.
Click the Import tab.
Choose the .sql file you exported from your localhost.
Click Go to import the database.
Step 6: Update the wp-config.php File
To connect your site to the live database:
Locate the wp-config.php file in your WordPress installation.
Open the file in a text editor.
Update the following lines: define('DB_NAME', 'your_live_database_name'); define('DB_USER', 'your_live_database_user'); define('DB_PASSWORD', 'your_live_database_password'); define('DB_HOST', 'localhost'); // Keep this unless your host specifies otherwise.
Save the file and upload it to your server via FTP.
Step 7: Update URLs in the Database
Your localhost URLs need to be replaced with your live site URLs.
Use a tool like Search Replace DB or run SQL queries in phpMyAdmin.
In phpMyAdmin, run the following query: UPDATE wp_options SET option_value = 'http://your-live-site.com' WHERE option_name = 'siteurl'; UPDATE wp_options SET option_value = 'http://your-live-site.com' WHERE option_name = 'home';
Step 8: Test Your Live Website
Once everything is uploaded and configured, check your website by entering its URL in a browser. Test for:
Broken Links: Fix them using plugins like Broken Link Checker.
Missing Images: Ensure media files were uploaded correctly.
Functionality: Verify forms, buttons, and features work as expected.
Step 9: Set Up Permalinks
To ensure proper URL structure:
Log in to your WordPress admin dashboard on the live site.
Go to Settings > Permalinks.
Choose your preferred permalink structure and click Save Changes.
Step 10: Secure Your Live Website
After migrating, secure your site to prevent vulnerabilities:
Install an SSL Certificate: Most hosting providers offer free SSL certificates.
Update Plugins and Themes: Ensure everything is up to date.
Set Up Backups: Use plugins like UpdraftPlus for regular backups.
Conclusion
Moving your WordPress site from localhost to a live server may seem daunting, but by following these steps, you can ensure a smooth and error-free migration. A successful move allows you to showcase your site to the world, engage your audience, and achieve your goals.
Start today and take your WordPress project live with confidence!
0 notes
Text
How do you edit WordPress on a localhost?
Editing a WordPress site on localhost involves setting up a local development environment on your computer. Here's a general guide on how to do this:
1. Install a Local Server Environment:
You can use software like XAMPP, MAMP, or Local by Flywheel. These tools provide a local server environment with Apache, MySQL, and PHP.
Download and install the software of your choice.
2. Download WordPress:
Visit the official WordPress website (https://wordpress.org/) and download the latest version of WordPress.
3. Set Up Database:
Open your local server software and start the server.
Create a new database for your WordPress installation. Note down the database name, username, and password.
4. Install WordPress:
Extract the WordPress zip file you downloaded.
Move the WordPress files to the root directory of your local server (e.g., htdocs in XAMPP).
Rename the wp-config-sample.php file to wp-config.php.
Open wp-config.php and enter your database details (database name, username, password).
5. Access Local WordPress Site:
Open your web browser and go to http://localhost/yourwordpressfolder (replace "yourwordpressfolder" with the actual folder name where you installed WordPress).
6. Edit Your WordPress Site:
Log in to your local WordPress site using the credentials you set during the installation.
You can now edit your WordPress site just like you would on a live server. Install themes, plugins, and make changes to content and settings.
7. Theme and Plugin Development:
If you are a developer and want to make theme or plugin changes, you can create a themes or plugins folder inside the wp-content directory and develop your code there.
8. Save Changes:
Any changes you make on your localhost won't affect your live site until you migrate the changes. For this, you might use a migration plugin or manually transfer files and the database.
Important Note: Always remember that changes made on your localhost won't reflect on the live site until you manually migrate the changes. Be cautious when making significant changes, and consider using a backup solution.
If you plan to move your site from localhost to a live server, you'll need to export your database and migrate your files. There are plugins and manual methods available for this purpose.
1 note
·
View note
Link
Upload the WordPress localhost website to the live server using the plugin. You can easily migrate your WordPress website to a live server within 5 minutes. Follow the step by step video instructions and make your website live on the server.
#WordPress migrate from localhost to server#WordPress how to migrate site#how to migrate WordPress site#how to transfer WordPress site to new host#how to migrate wordpress site to new host#how to move wordpress site to new host#how to migrate wordpress site to another hosting#how to transfer website to another domain#transfer a wordpress site to another host#move website from one host to another#migrate wordpress site from localhost to server#transfer wordpress website from one hosting to another
2 notes
·
View notes
Text
WordPress Vs Custom Website Development: illuminating Pros & Cons
Having a featured-packed website is vital to the success of your brand. A website is a platform for your customers to learn more about you and decide if they want to engage with you.

That’s why it’s so important to consider every aspect of your website’s launch, from design to development, when planning your website launch. One of the first choices you’ll face is deciding whether to build your website from scratch using custom HTML or choosing a pre-built template on WordPress. Here are some of the advantages and disadvantages of WordPress vs custom website development.
Read More About Pros & Cons of Both WordPress and Custom Website Development
Read Here: https://www.wordpressmigrationhelp.com/blog/wordpress-vs-custom-website-development/
You Can Also Hire The WordPress Migration Help for Website Development Services:
Our Contact Details: https://www.wordpressmigrationhelp.com/ E-mail Id: [email protected] Call us at: +1 888-606-1808, +1800-243-0593 (Toll Free)
all in one wp migration Move Website to WordPress move godaddy website to wordpress move html website to wordpress
#migrate wordpress website#migrate wordpress site to new host#migrate wordpress site#wordpress migration services#all in one wp migration#Move Website to WordPress#move godaddy website to wordpress#move html website to wordpress#move static website to wordpress#export website to wordpress#migrate wordpress site to new domain#migrate wordpress site from localhost to server#moving from squarespace to wordpress#migrate psd to wordpress#drupal to wordpress#shopify to wordpress migration#move my site to wordpress
0 notes
Link
This article help you to understand how to move wordpress.com to wordpress.org, after going through this you are unable to do, call toll free: +1-888-581-0004.
#how to transfer from wordpress com to wordpress org#how to transfer a wordpress site to another domain#transfer wordpress site to new domain#wordpress transfer site#moving wordpress site to new domain#moving wordpress from localhost to server#wordpress migration service
0 notes
Photo

https://www.wpplatformhelp.com/wordpress-tutorials-by-wp-learning-lab/how-to-move-a-wordpress-website-from-localhost-to-server-using-all-in-one-migration-wordpress-plugin/
How To Move A WordPress Website From localhost To Server Using All-In-One Migration WordPress Plugin
youtube
Grab Your Free 17-Point WordPress Pre-Launch PDF Checklist: https://wplearninglab.com/17-point-wp-pre-launch-checklist-optin-yt/?utm_source=YouTube_Video&utm_medium=Description_Link&utm_term=Description_Link&utm_campaign=YouTube
Check out the free WP & Online Marketing Summit For Beginners. The online event is June 18, 2019: https://events.wplearninglab.com/
How To Move A WordPress Website From localhost To Server Using All-In-One Migration WordPress Plugin https://youtu.be/n45K2PYSAmo
Join our private Facebook group today! https://www.facebook.com/groups/wplearninglab
Link to Duplicator plugin tutorial: https://www.youtube.com/watch?v=SkjAxA48SA8&list=PLlgSvQqMfii4l2cVV1TZ7j_kHs_2qmf4b
Developing a site locally is a great way to get started with WordPress, but eventually, you have to move it to a hosting account and make it live.
This video will show you how to move a WordPress website from localhost to a hosting account server.
I use the All-in-One WP Migration plugin to make the move and it’s pretty pain-free.
Post videos of your WordPress success using the hashtag #WPLLCommunity!
Download your exclusive 10-Point WP Security Checklist: http://bit.ly/10point-wordpress-hardening-checklist
I hope this information helps you! If you have any questions leave a comment below or ping me @WPLearningLab on Twitter.
————–
If you want more excellent WordPress information check out our website where we post WordPress tutorials daily.
https://wplearninglab.com/
Connect with us:
WP Learning Lab Channel: http://www.youtube.com/subscription_center?add_user=wplearninglab
Facebook: https://www.facebook.com/wplearninglab
Twitter: https://twitter.com/WPLearningLab source
0 notes
Text
Using MySQL Database Service for WordPress
Today we will see how to use MySQL Database Service aka MDS with WordPress. To achieve this easy task, we will use the architecture we already deployed in this article. We have then two Compute Instances on OCI, 1 running WordPress (Apache and PHP) and one running MySQL 8.0. The Plan This is how we will proceed to migrate to MDS with minimal maintenance time, we will: create a MDS instance verify if the database is ready to act as replication source dump the MySQL instance running on OCI for being migrated to MDS. load the dump in MDS create a user dedicated to the replication create a replication channel on MDS (from OCI to MDS) modify WordPress config to point to MDS Create a MDS instance The first step is of course to connect to OCI’s dashboard. We should see our two running compute instances: Let’s now create the MySQL Database Service instance, you will find the service in the left column; Now we just follow the creation wizard that is very simple: It’s very important to create an admin user (the name can be whatever you want) and don’t forget the password. We will put our service in the private subnet we created earlier (see also this post): The last screen of the wizard is related to the automatic backups: The MDS instance will be provisioned after a short time and you can see that in its detailed view: All good for step 1, we can now proceed with the second one. Verify our database to act as replication source We now connect to our current MySQL running on OCI and verify that all settings required to replication with GTID are in place. mysql> select @@gtid_mode; +-------------+ | @@gtid_mode | +-------------+ | OFF | +-------------+ 1 row in set (0.00 sec) By default GTID mode is disabled and we need to enable it. To be able to perform this operation without restarting the MySQL instance, this is how to proceed: mysql> SET PERSIST server_id=1; mysql> SET PERSIST enforce_gtid_consistency=true; mysql> SET PERSIST gtid_mode=off_permissive; mysql> SET PERSIST gtid_mode=on_permissive; mysql> SET PERSIST gtid_mode=on; mysql> select @@gtid_mode; +-------------+ | @@gtid_mode | +-------------+ | ON | +-------------+ All good now ! MySQL Shell Dump & Load Instead of using mysqldump or mysqlpump that are not efficient in case of large dataset and are certainly not optimized for Cloud, we will use the new amazing feature of MySQL Shell (since 8.0.21): Dump & Load. Please check those links for more details: https://docs.cloud.oracle.com/en-us/iaas/mysql-database/doc/importing-and-exporting-databases.html https://mysqlserverteam.com/mysql-shell-dump-load-part-1-demo/ https://mysqlserverteam.com/mysql-shell-dump-load-part-2-benchmarks/ https://mysqlserverteam.com/mysql-shell-dump-load-part-3-load-dump/ https://mysqlserverteam.com/mysql-shell-8-0-21-speeding-up-the-dump-process/ We connect in ssh to our MySQL instance in OCI and we can start the dump. There are multiple ways to perform such operation. As my WordPress dataset is not so large and already in the cloud, I use the filesystem. If it was on premise with a large dataset I would have used Object Store. I start MySQL Shell and connect to my MySQL instance on OCI (the one WordPress is using for the moment). As I’m connected via ssh on the server, I use localhost to connect using Shell: $ mysqlsh root@localhost And now I just dump my instance. As I know this dump will be used to be loaded in MDS, I will add some options: MySQL localhost:33060+ ssl JS > util.dumpInstance('file://dump', {ocimds: true, compatibility: ["strip_restricted_grants"]}) This is the full output of the command: Checking for compatibility with MySQL Database Service 8.0.21 NOTE: User root@localhost had restricted privileges (RELOAD, FILE, SUPER, BINLOG_ADMIN, SET_USER_ID) removed NOTE: Database wordpress had unsupported ENCRYPTION option commented out Compatibility issues with MySQL Database Service 8.0.21 were found and repaired. Please review the changes made before loading them. Acquiring global read lock All transactions have been started Locking instance for backup Global read lock has been released Writing global DDL files Writing users DDL Preparing data dump for table wordpress.wp_commentmeta Writing DDL for schema wordpress Writing DDL for table wordpress.wp_commentmeta Data dump for table wordpress.wp_commentmeta will be chunked using column meta_id Preparing data dump for table wordpress.wp_comments Data dump for table wordpress.wp_comments will be chunked using column comment_ID Preparing data dump for table wordpress.wp_links Data dump for table wordpress.wp_links will be chunked using column link_id Preparing data dump for table wordpress.wp_options Data dump for table wordpress.wp_options will be chunked using column option_id Preparing data dump for table wordpress.wp_postmeta Data dump for table wordpress.wp_postmeta will be chunked using column meta_id Preparing data dump for table wordpress.wp_posts Data dump for table wordpress.wp_posts will be chunked using column ID Preparing data dump for table wordpress.wp_term_relationships Data dump for table wordpress.wp_term_relationships will be chunked using column object_id Preparing data dump for table wordpress.wp_term_taxonomy Data dump for table wordpress.wp_term_taxonomy will be chunked using column term_taxonomy_id Preparing data dump for table wordpress.wp_termmeta Data dump for table wordpress.wp_termmeta will be chunked using column meta_id Preparing data dump for table wordpress.wp_terms Data dump for table wordpress.wp_terms will be chunked using column term_id Preparing data dump for table wordpress.wp_usermeta Writing DDL for table wordpress.wp_comments Writing DDL for table wordpress.wp_links Writing DDL for table wordpress.wp_options Data dump for table wordpress.wp_usermeta will be chunked using column umeta_id Preparing data dump for table wordpress.wp_users Data dump for table wordpress.wp_users will be chunked using column ID Running data dump using 4 threads. NOTE: Progress information uses estimated values and may not be accurate. Writing DDL for table wordpress.wp_postmeta Writing DDL for table wordpress.wp_posts Writing DDL for table wordpress.wp_term_relationships Writing DDL for table wordpress.wp_term_taxonomy Writing DDL for table wordpress.wp_termmeta Writing DDL for table wordpress.wp_terms Writing DDL for table wordpress.wp_usermeta Writing DDL for table wordpress.wp_users Data dump for table wordpress.wp_commentmeta will be written to 1 file Data dump for table wordpress.wp_comments will be written to 1 file Data dump for table wordpress.wp_links will be written to 1 file Data dump for table wordpress.wp_postmeta will be written to 1 file Data dump for table wordpress.wp_options will be written to 1 file Data dump for table wordpress.wp_term_taxonomy will be written to 1 file Data dump for table wordpress.wp_term_relationships will be written to 1 file Data dump for table wordpress.wp_terms will be written to 1 file Data dump for table wordpress.wp_posts will be written to 1 file Data dump for table wordpress.wp_termmeta will be written to 1 file Data dump for table wordpress.wp_users will be written to 1 file Data dump for table wordpress.wp_usermeta will be written to 1 file 1 thds dumping - 110% (2.22K rows / ~2.00K rows), 0.00 rows/s, 0.00 B/s uncompressed, 0.00 B/s compressed Duration: 00:00:00s Schemas dumped: 1 Tables dumped: 12 Uncompressed data size: 1.49 MB Compressed data size: 341.04 KB Compression ratio: 4.4 Rows written: 2216 Bytes written: 341.04 KB Average uncompressed throughput: 1.49 MB/s Average compressed throughput: 341.04 KB/s We can now load that dump to our MDS Instance easily. From MySQL Shell we connect to our instance using the IP we have in the detailed view or using the name we gave it during setup: MySQL localhost:33060+ ssl JS > c [email protected] Creating a session to '[email protected]' Please provide the password for '[email protected]': *** Save password for '[email protected]'? [Y]es/[N]o/Ne[v]er (default No): y Fetching schema names for autocompletion… Press ^C to stop. Closing old connection… Your MySQL connection id is 9 (X protocol) Server version: 8.0.21-u1-cloud MySQL Enterprise - Cloud No default schema selected; type use to set one. Perfect ! We can start the load: MySQL 10.0.1.9:33060+ ssl JS > util.loadDump('file://dump') Loading DDL and Data from 'file://dump' using 4 threads. Target is MySQL 8.0.21-u1-cloud. Dump was produced from MySQL 8.0.21 Checking for pre-existing objects… Executing common preamble SQL Executing DDL script for schema wordpress Executing DDL script for wordpress.wp_users Executing DDL script for wordpress.wp_usermeta Executing DDL script for wordpress.wp_links Executing DDL script for wordpress.wp_options Executing DDL script for wordpress.wp_termmeta Executing DDL script for wordpress.wp_comments Executing DDL script for wordpress.wp_commentmeta Executing DDL script for wordpress.wp_postmeta Executing DDL script for wordpress.wp_term_taxonomy Executing DDL script for wordpress.wp_term_relationships Executing DDL script for wordpress.wp_posts Executing DDL script for wordpress.wp_terms [Worker003] wordpress@wp_options@@0.tsv.zst: Records: 128 Deleted: 0 Skipped: 0 Warnings: 0 [Worker003] wordpress@wp_usermeta@@0.tsv.zst: Records: 18 Deleted: 0 Skipped: 0 Warnings: 0 [Worker003] wordpress@wp_term_relationships@@0.tsv.zst: Records: 177 Deleted: 0 Skipped: 0 Warnings: 0 [Worker003] wordpress@wp_users@@0.tsv.zst: Records: 1 Deleted: 0 Skipped: 0 Warnings: 0 [Worker003] wordpress@wp_terms@@0.tsv.zst: Records: 1 Deleted: 0 Skipped: 0 Warnings: 0 [Worker003] wordpress@wp_term_taxonomy@@0.tsv.zst: Records: 1 Deleted: 0 Skipped: 0 Warnings: 0 [Worker002] wordpress@wp_comments@@0.tsv.zst: Records: 201 Deleted: 0 Skipped: 0 Warnings: 0 [Worker001] wordpress@wp_postmeta@@0.tsv.zst: Records: 1266 Deleted: 0 Skipped: 0 Warnings: 0 [Worker000] wordpress@wp_posts@@0.tsv.zst: Records: 423 Deleted: 0 Skipped: 0 Warnings: 0 Executing common postamble SQL 9 chunks (2.22K rows, 1.49 MB) for 9 tables in 1 schemas were loaded in 1 sec (avg throughput 1.49 MB/s) 0 warnings were reported during the load. Et voilà ! All is imported. In MDS with MySQL Shell 8.0.21, loading users can be problematic. You can try with {loadUsers: true} but it will fails for the user root. In 8.0.22, you will have to possibility to exclude or include some users. Therefor, in our case the wp user needs to be created manually in MDS (you will find the statements in the dump @.users.sql file. If you are a specialist of MySQL Replication, you already noticed that we are missing on important thing to after have loaded the dump. We still need to set the GTID purged information from when the dump was taken. In MDS, this operation can be achieved calling a dedicated procedure called sys.set_gtid_purged() Now let’s find the value we need to add there. The value of GTID executed from the dump is written in the file @.json in the dump directory: $ cat dump/@.json | grep gtidEx "gtidExecuted": "7c9286c7-dd49-11ea-8564-020017013873:1-369", Now that we know the value, we can specify it in our MDS instance: MySQL 10.0.1.9:33060+ ssl JS > sql call sys.set_gtid_purged("7c9286c7-dd49-11ea-8564-020017013873:1-369") Replication user creation On the production MySQL (the one still running on the OCI compute instance), we need to create a user dedicated to replication: mysql> CREATE USER 'repl'@'10.0.1.%' IDENTIFIED BY 'C0mpl1c4t3d!Paddw0rd' REQUIRE SSL; mysql> GRANT REPLICATION SLAVE ON *.* TO 'repl'@'10.0.1.%'; Create the replication channel We go back on OCI’s dashboard and in our MDS instance’s details page, we click on Channels: We now create a channel and follow the wizard: We use the credentials we just created and as hostname we put or the IP or the fqdn of the compute instance. After a little while, the channel will be created and in MySQL Shell when connected to your MDS instance, you can see that replication is running: I invite you to use this query to have all the information you need (cut and paste it ): SELECT concat(conn_status.channel_name, ' (', worker_id,')') AS channel, conn_status.service_state AS io_state, applier_status.service_state AS sql_state, format_pico_time(if(GTID_SUBTRACT(LAST_QUEUED_TRANSACTION, LAST_APPLIED_TRANSACTION) = "","0", abs(time_to_sec(if(time_to_sec(APPLYING_TRANSACTION_ORIGINAL_COMMIT_TIMESTAMP)=0,0, timediff(APPLYING_TRANSACTION_ORIGINAL_COMMIT_TIMESTAMP,now()))))) * 1000000000000) latency, format_pico_time((LAST_QUEUED_TRANSACTION_START_QUEUE_TIMESTAMP - LAST_QUEUED_TRANSACTION_ORIGINAL_COMMIT_TIMESTAMP) * 100000000000) transport_time, format_pico_time((LAST_QUEUED_TRANSACTION_END_QUEUE_TIMESTAMP - LAST_QUEUED_TRANSACTION_START_QUEUE_TIMESTAMP) * 1000000000000) time_to_relay_log, format_pico_time((LAST_APPLIED_TRANSACTION_END_APPLY_TIMESTAMP - LAST_APPLIED_TRANSACTION_START_APPLY_TIMESTAMP) * 1000000000000) apply_time, conn_status.LAST_QUEUED_TRANSACTION AS last_queued_transaction, applier_status.LAST_APPLIED_TRANSACTION AS last_applied_transaction FROM performance_schema.replication_connection_status AS conn_status JOIN performance_schema.replication_applier_status_by_worker AS applier_status ON applier_status.channel_name = conn_status.channel_name ; This is an example of the output: Point WordPress to MDS Now you need to change the location of your MySQL Server in WordPress. If you prefer you can put WordPress in Maintenance Mode (there are few plugins to do that) or just change the wp-config.php file immediately. You can of course wait a but to see how MDS behave and to get familiar with it. Replication is setup and running. When you are ready, just make the change. In my case I need to replace /** MySQL hostname */ define( 'DB_HOST', '10.0.1.5' ); by /** MySQL hostname */ define( 'DB_HOST', '10.0.1.9' ); And that’s it ! Wooohoooo, it works o/ We are now running WordPress with MDS ! After, you can stop the replication channel and terminal the MySQL Compute Instance. https://lefred.be/content/using-mysql-database-service-for-wordpress/
0 notes
Text
Top 8 Must-have Wordpress Migrate Site Plugin In 2020

Migrate Site Plugin plays an essential role in helping you move your website to a new one. Let read the article to research about the plugin.
As you know, when you have an intention to move your website, you have to find a useful plugin to help you clone all database, files and theme. And possessing a suitable migration plugin will make your site moving become easier and more convenient. Because of the reason, we decided to suggest for you Top 8 Must-have Wordpress Migrate Site Plugin In 2020. 1. Duplicator
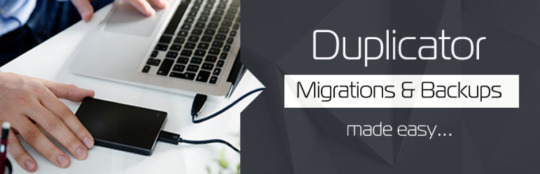
Duplicator is the first plugin we want to recommend for you because of its flexibility. With this plugin, besides handling standard migrations, it also helps you clone your site to a new domain name, set up staging versions of your site, and back up your site to prevent data loss situation. Provides features: Move, migrate or clone a WordPress site between domains or hosts with zero downtime Transfer a WordPress site from one host to another Duplicate a live site to a staging area or vice versa Perform a full WordPress migration without struggling with messy import/export sql scripts Pull down a live site to localhost for development Highlights: Free Easy to use Flexible 2. SiteGround Migrator

Another nice plugin we would like introduce for you is SiteGround Migrator. The plugin allows you to move your website to SiteGround hosting server. Besides that, if you don’t want to use the plugin, then you can simply ask SiteGround support. They offer 1 free website migration with their GrowBig and GoGeek plans. Provides features: It works well because it is made for a specific scenario transferring from any hosting company to SiteGround If you are not changing the domain name, then it automatically creates a temporary domain for the transferred site. Later you can change the DNS to point your domain name Super-easy to use you just need to enter a token from your hosting control panel and the plugin takes care of the rest Highlights: Easy to use Free 3. UpdraftPlus

UpdraftPlus is also a powerful plugin that you should have. It is known as the world’s highest ranking and most popular scheduled backup plugin. All your files and database will be backuped into the cloud, and with a single click, you can restore all of them. Provides features: Restore, as well as backing up Allow you to set up automatic backup schedules, for the ultimate in convenience Has been tested on over 1 million sites Use up fewer server resources Highlights: Fast and convenient Free 4. WP Migrate DB Pro
WP Migrate DB Pro is the next plugin that we think you should try. With the plugin, you will feel that website migration is very easy, fast, and straightforward. By following three steps, everything has done well. Provides features: Priority email support Push and pull databases and media libraries from one environment to the other Advanced multisite features like pushing a subsite to single site install. Command-line support (Use WP-CLI with WP Migrate DB) Highlights: Simple and easy to use Good supports 5. VaultPress
The next suggested plugin that we think you shouldn’t miss is VaultPress. When you are using this wordpress migrate site plugin, you will feel surprised because it backs up and secures every part of your WordPress site. After that, it’s quite easy for you to copy your site to a new location with VaultPress’ Restore to a different site tool. Provides features: Make WordPress backups and restore them on a new location easily Incremental backups save server resources Includes site security features which makes your backups secure Highlights: Time-saving High security Useful 6. All-in-One WP Migration

If you are seeking a migation plugin that needn’t technical knowledge required, All-in-One WP Migration will be a suitable option for you. This plugin can move both your database and your files, which means it handles all aspects of migration. In addition, it also has extensions, so you can migrate your site to cloud storage providers like Dropbox or Google Drive. Provides features: Tested and supports a large number of wordpress hosting providers, operating systems, PHP versions, and more Supports older versions upto WordPress 3.3 bypasses your host’s file size limits by importing chunks of data Highlights: Mobile device compatible Good supports Free 7. Migrate Guru
If you want to possess a popular WordPress backup solution, don’t hestitate to download and install Migrate Guru. The plugin specializes in migrating websites to a new host or server. Moreover, you will feel quite simple because it can copy WordPress sites without any manual work, add-ons, or additional tools. Provides features: True one-click migration Build for large sites No overload on site Fully automatic, build-in search and replace Highlights: Compatible with every web host Simple and quick Free 8. Clone

The last plugin we want to bring for you is Clone. With the plugin, you can use it to backup, migrate or clone your site to/from local server hosting, to create backup of your site for development or testing purposes, and to install pre-configured backups of WordPress. Provides features: Backup, migrate or clone a WordPress site to another domain or hosting server Not require FTP access to backup files you migrate or clone Fetche the site backup via your host’s direct http connection Highlights: Easy and fast to use Useful Free Conclusion We hope that the list Top 8 Must-have Wordpress Migrate Site Plugin In 2020 will be an effective tool for you to move your site safely and quickly. If you have any question, don't hesitate to leave us your comment. Besides that, you can get more free WordPress themes for your new site! Read the full article
0 notes
Text
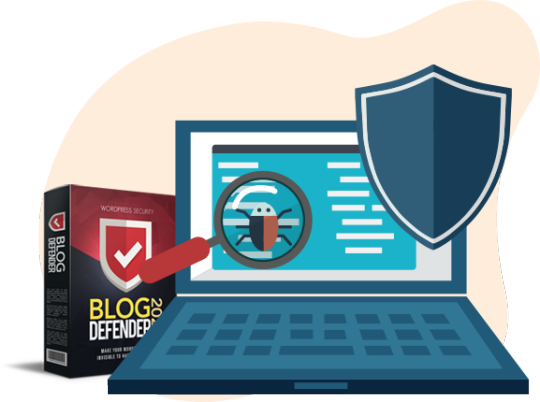
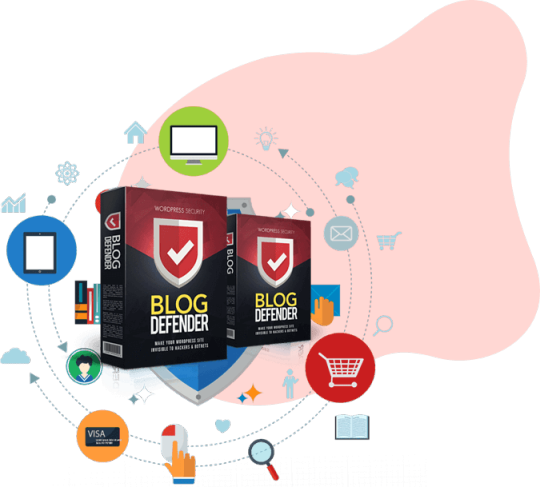
Keep Your Wordpress Blog Secure
New Post has been published on https://autotraffixpro.app/allenmendezsr/keep-your-wordpress-blog-secure/
Keep Your Wordpress Blog Secure

Buy Now


Securing Your Most Valuable Online Assets Can Be Done In 3 Simple Steps:

Follow Our Hosting Security

Use The Tools To Identify

Implement Site & Recommended Host List
Full Developer Rights License Included: Protect Yourself And Get Paid At The Same Time

John Thornhillwww.johnthornhill.com

Great way to secure your blog
I’ve had to go through the inconvenience of a hacked blog before and let me tell you it’s not nice. With online security becoming an increasing problem, especially with WordPress, this is a great way to secure your blog. I’ll be following Matt’s training and securing all my blogs … great job.

Simon Hodgkinsonwww.hodgkinsonpublishing.com
This is a seriously good product
I’ve been in the online business for 10+ years and had my fair share of hacked sites which have cost me time and money (lots of it) … I’ve also seen a good number of people have their reputations and entire businesses left in tatters when their sites have been hacked…

It’s Matt Garrett here with an important message about YOUR web properties. I don’t release digital products often, so when I do the goal is to save YOU time and money. Everything I share is based on personal experience and results.
Whatever you’ve heard about increasing conversions and sales ….
Whatever popups, viral softwares and other methods you’ve got in place … None of it matters if your money site gets hacked or compromised. It all comes down to keeping the doors to YOUR business OPEN …
99% Of Success Is Showing Up – Make Sure YOUR Sites Keep Showing Up!
Regardless of whether or not you feel you need this offer, I’m going to share information on this page that’s CRITICAL for you to know.
No “fake” pain points or “how I’m like you” hogwash … Just industry facts that most website owners are simply unaware of.

And it’s costing them thousands. Did you know …
It’s a pretty grim picture, but it’s the reality.
See, I’ve been a niche marketer and WordPress user for OVER 12 years. I run hundreds of profitable websites, and have seen first hand the pain and suffering of having a money site hacked.
On average, it takes a webmaster 152 days to even realize his or her site has been hacked.
In ALL that time, the site owner can be losing traffic, compromising their subscriber base, and unknowingly presenting FRAUDULENT offers to visitors.
And potentially be facing CRIMINAL charges, fines and court time – in addition to a MASSIVE loss of business and being PERMANENTLY blacklisted by the search engines.
OUR “ZERO-HACK” TRACK RECORD
Since releasing the original version of this software, none of our OVER 2500 users have had a SINGLE site hacked. And now we’ve updated it to make it easier to use, faster to setup, and to better protect YOUR assets against the most current attacks happening right now. Even tighter server security, kick-out policy, file monitoring, spam blocking, reputation checking, security audits and more – just SOME of the updates in this version.

“It Can’t Happen To Me – I Just Have A Simple Blog Without Much Traffic Or Income”
Sadly, wrong. To hackers, EVERY site is a potential cash resource. Skilled hackers can:
Imagine, you’ve spent months developing an amazing website. Researched your niche, created unique content. Invested time or hard-earned dollars on SEO, link building and traffic.
Finally your site is getting regular visitors AND income, then one day you wake up and it’s … all … gone.
Your site’s been hacked, and all that hard work has gone up in smoke.
It could take you DAYS to restore your site.
Your hosting account has been suspended or banned.
You’ve been BLACKLISTED by the search engines.
And every day your business is bleeding profits

This PROFIT KILLING NIGHTMARE Happens To 30 THOUSAND Webmasters EVERY SINGLE Day
According to research from the BBC, Forbes, Securi and Sophos – in articles released between February and April of 2015 – the following AUTHORITY sites were HACKED:


Think it can’t happen to you? Look at that list, then think again!
If you haven’t been hacked yet, it’s really just a matter of time.
Secure Your Sites From 99.9% of All Hacker, Bot And Brute Force Attacks
Relax, knowing that your money sites, digital products and subscriber lists are completely secure. Continue to build your business knowing that your traffic ISN’T being compromised. All WITHOUT costly plugins or EXPENSIVE monthly fees paid to security specialists.
INTRODUCING
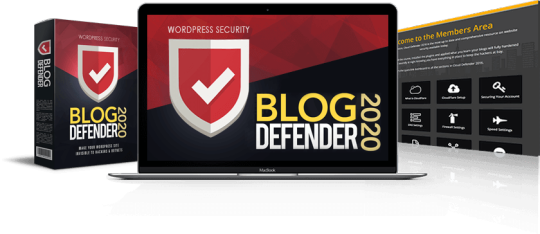
EASY WORDPRESS SECURITY WITHOUT COMPROMISE
My main goal with Blog Defender was to create a SIMPLE website security solution. That DOESN’T need constant attention. And is AFFORDABLE, while providing as good or BETTER protection than any other premium product or paid service offered anywhere.

Blog Defender will lock down your money sites so you’ll never have to worry again. And with this update, we’ve included complete developer rights.
Meaning? You can now install and implement the SAME security features on unlimited client sites. Charge WHATEVER you wish – from a simple one-time setup fee to an ongoing maintenance charge, the choice is yours.
With the stats you’ve seen, you ALREADY know website owners are concerned about site security. This is an ESSENTIAL service that business owners desperately need. Now YOU can be the one to provide that service to them.
All included. No need to upgrade or pay for a special license. Your access today literally gives you the keys to charge clients and make an ongoing, passive income.
Security Specialists Regularly Charge $500 Per Month Or More, Per Client, For Much Less

Consider how VALUABLE this service will be to your clients. 100% peace of mind for them, and hundreds of dollars (or more), recurring, straight to your PayPal each and every month.
Remember – this is NOT an upgrade – it’s INCLUDED with your access today.
How Does Blog Defender Lock Down My Websites?
We’ve left absolutely nothing to chance. The software STARTS with the 4 most vulnerable points of attack for any WP site:

That’s Just For Starters – Blog Defender Goes Many Steps Further:

Blog Defender Is Like Having A TRIPLE Kryptonite Lock On Your Best Bike
The bottom line is this. Most hackers – like bike thieves – are lazy. They’ll try for “easy” wins. When they come across your site and see the security in place, most will move on instantly.
Those that go a step further will be blocked at every turn. And soon realize it’s not in their best interest to continue. Then they’ll move to another, more vulnerable website.

Hackers Have MANY WAYS To Attack Your Site – Blog Defender Slams The Door In Their Face
Blog Defender will protect your sites, AND your client sites, in the following ways:

Hosting Security Advicory

Plugin Security Audits

Theme Security Audits

Anti Brute Force Security

Anti Cross Site Scripting

MYSQL Database Security

Nefarious Traffic Blocking

Hiding WordPress ‘Tell Tales’

Anti Comment Spam

File & Link Monitoring

Active Known Offender Blocking

Automating Core Updates

WP Security Audit

+Use on Unlimited Sites
Passive Income PLUS Total Security Has NEVER Been Easier
SECURE ALL YOUR WP SITES BEFORE IT’S TOO LATE:
RRP $37 – COST SLASHED TO $15 Until April 19th

You Don’t Even Need To Know HOW It Works, It Just DOES!
When I got started, I had no idea of all the ways hackers could attack. Learned by painful experience. That’s why I developed this package. To protect site owners from experiencing the same hassles I did back in the day. And this completely updated version represents the most cutting edge, MODERN tactics to protect YOUR digital assets from attack.

An Estimated TRILLION Dollars Of Intellectual Property STOLEN
Once hacked, it’s too easy for attackers to share your paid products on blackhat and torrent sites. Some product creators have had this happen EVEN BEFORE they launched their product. All that work – and potential profit – gone.

Blacklisted By The Search Engines
Hacked sites are almost instantly de-indexed by the major search engines. Organic traffic to these sites disappears overnight.
And when legitimate customers or prospects do try to navigate
to a hacked site? Often they’ll get a scary warning like this:
Even if you’re able to recover your site if it’s hacked – 1 out of 4 hacked sites are NEVER recovered
Even if you’re able to reopen your hosting account – most hosts suspend or cancel the accounts of users that get their sites hacked.

The LONG TERM Damage To Your Online Reputation Can Be Devastating

Short term loss of profits from having a site hacked is really just the start of the story. Having your entire subscriber base compromised – often sold and presented with fraudulent offers – is where things get really scary.
Add in the fact that any or all of your PAID products can start popping up on free sharing sites, and it’s easy to realize that being hacked is a serious risk to any online business.
And if you think your hosting company, basic security plugins and even paid services will protect your site, think again. In my years of experience, none of these have done anything to secure my websites.
Set & Forget WordPress Security In Minutes
Blog Defender is the most advanced, all-in-one WP site security system available today. It protects against ALL kinds of hackers, bots and data miners.
And is now faster & easier to have up and running than ever before. Secure your sites AND client sites in a matter of minutes.

Here’s How Blog Defender Is Going To Secure
YOUR Most Valuable Assets:
At the core of the system are 3 plugins that once activated will work 24/7 in the background, protecting your sites:

Back up to DropBox, Amazon
Web Services, Rackspace
Cloudfiles, FTP & Email
Database only or full site backup
Scheduled backups
Exclude files or tables
Restore or deploy ta a different
host, including from a localhost setup
URL replacement for site migration
Backup notifications
Individual file restore option
Mass text replace in databases
Auto database scan and repair
Malware scan & blacklist check
Brute force protection
File change detection
404 detection
Strong password enforcement
Lock out bad users
Away mode
Hide login & admin
Email notifications (user lockouts etc.)
Online file comparisons
Two factor login authentication
Scheduled malware scans
+Standard security tweaks
Scan & Repair – detect what has been changed and fix it
Source code scanning to verify open source plugins, themes & WP core files
Scan content for malicious URLS
Backdoor scanning
Automated bad bot banning
Block brute force attacks
Detect content leeching
Step By Step Video Training To Lock Down ANY WP Sites
6 no-fluff, to the point videos walk you thru the process of securing your sites and those of your clients.

VIDEO MODULE 1
Preparation
Hosting, Local Security & Installing Plugins

VIDEO MODULE 2
Backup WordPress
Choose backup locations, run 1st backup, schedule future backups

VIDEO MODULE 3
Security Plugin Setup
Initial setup, whitelist IP, global settings, system tweaks

VIDEO MODULE 4
Scan WP for Malware
Scan with Wordfence, get your Virus Total API Key, cleaning infected files
Schedule scanning, file change detection

VIDEO MODULE 5
Hide WordPress
Hide login area, change admin user, change content directory
Change database prefix, WordPress tweaks

VIDEO MODULE 6
Defend WP With A Firewall
404 detection, banned users, user logging
Brute force protection, automatically ban admin users
This ENTIRE SECURITY package is included and completed with a WP Security PDF as a handy extra resource.
Your Business DESERVES To Be Protected
Funny how we’ll lock up something that costs money, but not take the same care with assets that actually PAY us.
Not many would leave their car unlocked in a busy downtown parking lot. But leaving a money site completely unprotected?
That’s like leaving bags of money in the open trunk of an unlocked car in the busiest parking lot on the planet!
What Do You Have To Lose? If You Do Nothing, Plenty:
Or, RELAX Knowing Your Sites Are Secured With Blog Defender

Focus on building your business and profits. Knowing your sites are protected and the plugins are working 24/7 to keep you safe from attack.
Add a NEW income stream by selling site security as a service with the INCLUDED developer rights license

26 Million Out Of 36 Million Self-Hosted WP Sites Run Little Or NO Security

These sites are easy targets. Don’t be one of them. Protect yourself AND your financial future by securing your Blog Defender license today.
Sounds Great Matt, But Will Blog Defender Work For Me? It most certainly will – in fact, I guarantee it.
The Blog Defender 100% Unconditional, Iron-Clad 30 Day Money Back Guarantee
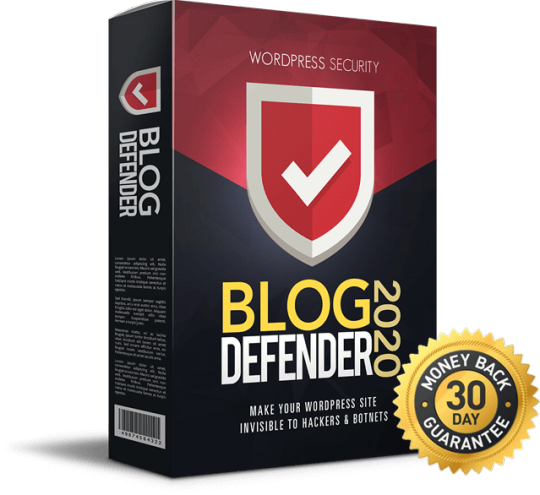
If for any reason you’re not happy with the product within 30 days of your investment, you’re entitled to our 100% money back guarantee. No quibbles, no buts, no bad feeling.
But I’m not stopping there. Configure the plugins and follow the simple instructions, and you’ll start getting real time feedback on the number of attacks Blog Defender has prevented.
If this doesn’t happen, if you don’t feel your sites are secure, or if you don’t see the potential in offering site security as a paid service, just contact our support desk and we’ll gladly refund your small investment.
Blog Defender 2020: Special Local Business Edition Bonuses!

WordPress Security is a massive and ongoing problem for local businesses – they’ve generally struggled to get a site up and running, and now they need to work out how to secure it and their client data as well!!!
Most are MORE THAN HAPPY to get someone else to take care of it for them – that’s where you come in…
Blog Defender shows you exactly how to secure your clients sites AND gives you the premium plugins to do it with!
But that’s not all…
#1: You get our Local Business Security Blog Post/Article for you to use on your local agency site.
#2: AND you get our UNBRANDED “Local Business Site Security CheckList” that you can use as a lead generation giveaway – give them the steps they need to go through to secure their site, then offer to do it all for them by simply adding your page link!
Get Your Blog Defender 2020 “Local Edition” Bonuses Today, Scroll Down And Hit The Buy Button Now…
SECURE ALL YOUR WP SITES FOR A LOW ONE TIME FEE BEFORE THE OFFER EXPIRES:

RRP $37 – COST SLASHED TO $15 Until April 19th
Launch Offer Ending Soon…:
That’s Exactly What Blog Defender Delivers, And Here Are The Results:

Richard Leggwww.richard-legg.com
“ Just one tip could have prevented my blogs getting hacked”
In the past month alone, I’ve had 3 niche blogs hacked, costing me hundreds of dollars in lost sales … there’s nothing worse than spending months building up a blog, adding posts every few days, and then finding it all gone in an instant. Just one of the tips in the first video alone could probably have prevented …

Micheal NicholasImpact Info Marketing
“A top level force against hacker attacks”
Blog Defender is viable WordPress blog security prevention system that offers video instruction along with 3 software plugins … The instruction shows the optimum setting on how to use the plugins that will allow you top level force against blog hacker attacks.
It’s Time To Decide. You’ve seen the MASSIVE security risks the majority of WP site owners face.
Do you want to CONTINUE facing these risks, or secure your sites and continue to build your business?
Without worrying about losing your sites, subscribers and valuable content?
All while potentially adding another income stream by offering one of the most IN-DEMAND services every website owner needs to have?
Hit the button below before time runs out.
This is a limited launch. With all the development that’s gone into Blog Defender, I can’t promise it will ever be made available again for such a low one time fee.
You’re getting our most updated hosting report so YOU can make an informed decision about the best web hosts in the game.
You’re getting the 3 security plugins.
The 6 step by step training videos, and the WP Security PDF.
PLUS the ability to add a passive income stream – the included developer rights license lets you sell this security package as a service.
Absolutely NOTHING is left to chance in securing your most valuable assets. This is truly the most powerful, set-and-forget COMPLETE WordPress security solution available.
Thanks for reading. To your ongoing success, security and prosperity.
Matt Garrett
P.S.
Every SECOND you delay leaves your money sites vulnerable to literally millions of hackers – many of which are trying RIGHT NOW to attack your web properties. You’ve worked too hard to build your online business, and now is the time to protect it.
P.P.S.
Imagine how you’d feel in a few days, if you passed on this offer, and became yet another victim of hackers? Instead of happily growing your business, you’d be spending time AND cash simply trying to restore something you’ve already built. I don’t want you to be a victim, which is why I’ve created this complete security system for you.
You know what to do.
Frequently Asked Question

Will This Work On My Mac?
Yes, the plugins are cloud-based so work seamlessly on any operating system. As long as you OR your clients have a WordPress site, Blog Defender is the solution.
Will Blog Defender Protect Against ANY Attack?
As of today, we can say Blog Defender will secure your site from 99.9% of any potential vulnerabilities. It’s impossible to stay ahead of every threat, but this is the most cutting edge security protocol available. The good news is Blog Defender turns your WP sites into MAJOR headaches for potential hackers, meaning most will take one look and move on, knowing that trying to leverage your site is just not worth their time.
Do I Need Any Technical Skills?
If you’ve got a WP site, you know everything you need to use Blog Defender. Installation is as simple as activating a plugin, and the video training walks you through everything step by step.
Are There Limits On How Many Sites I Can Protect?
None at all! This license lets you install Blog Defender on unlimited personal AND client sites.
What About Updates?
Your license INCLUDES 12 months of completely free updates. If new threats are uncovered in that time, your plugins will be updated and you’ll be automatically notified.
What If I’ve Purchased A Previous Version?
As an existing customer you can claim an upgrade coupon, simply get in touch with out support desk with your original purchase details (including receipt ID and paypal email address) and we’ll send you a special coupon to use.

0 notes
Text
Backing Up Your Localhost WordPress Site: Methods and Tools
Creating backups of your localhost WordPress site is an essential practice for safeguarding your work and ensuring you can recover from unexpected errors or data loss. Whether you are testing themes, developing plugins, or building a new website, a reliable backup process can save you time and stress. This blog outlines effective methods and tools to back up your localhost WordPress site.

Why Backup Your Localhost WordPress Site?
Prevent Data Loss
Unintentional file deletions, database errors, or hardware failures can result in losing hours of work.
Streamline Testing
Backups enable you to revert to a previous state if something breaks during theme or plugin testing.
Ease Migration
Backing up your localhost site simplifies the process of moving it to a live server or another environment.
Experiment Freely
Knowing you have a backup allows you to experiment with code or settings without fear of permanent damage.
Components to Back Up
A WordPress site consists of two primary components:
WordPress Files
These include core files, theme files, plugin files, and uploaded media stored in the wp-content folder.
Database
The database stores your website’s content, settings, and user data. It is usually managed through tools like phpMyAdmin or MySQL Workbench.
Methods for Backing Up Localhost WordPress Sites
1. Manual Backup
Steps:
Copy WordPress Files
Navigate to the directory where your WordPress installation resides (e.g., htdocs in XAMPP).
Copy all files and folders to a secure location, such as an external hard drive or cloud storage.
Export the Database
Access phpMyAdmin or your database management tool.
Select your WordPress database and click on the "Export" option.
Choose the "Quick" export method and save the .sql file.
Advantages:
Complete control over the backup process.
No additional tools required.
Disadvantages:
Time-consuming and prone to human error.
2. Using Plugins
Many WordPress backup plugins work seamlessly on localhost installations. Here are some popular choices:
UpdraftPlus
Schedule and automate backups for both files and databases.
Store backups locally or on cloud platforms like Google Drive, Dropbox, or OneDrive.
Duplicator
Create complete site backups, including files and databases.
Ideal for migrating your localhost site to a live server.
All-in-One WP Migration
Export your site’s files and database into a single file.
Easily import backups to restore your site.
Steps to Use a Plugin:
Install the chosen plugin on your localhost WordPress site.
Follow the plugin’s setup instructions to create and save backups.
Store the backups in a secure location.
Advantages:
Automated and user-friendly.
Additional features like scheduling and cloud integration.
Disadvantages:
Some advanced features may require a premium version.
3. Using Command Line Tools
If you are comfortable with the command line, tools like WP-CLI can streamline the backup process.
Steps:
Backup Files
Use commands to compress your WordPress directory into a zip file:zip -r backup.zip /path/to/wordpress
Backup Database
Export your database using WP-CLI:wp db export backup.sql
Advantages:
Fast and efficient for advanced users.
Scriptable for regular backups.
Disadvantages:
Requires familiarity with the command line.
4. Using Localhost Management Tools
Tools like Local by Flywheel and DevKinsta come with built-in backup options, making the process simpler.
Steps:
Locate the backup feature in your chosen tool.
Follow the instructions to create and store a backup.
Restore the backup if needed.
Advantages:
Integrated with the localhost environment.
Minimal setup required.
Disadvantages:
Limited to specific tools.
Best Practices for Backing Up Localhost WordPress Sites
Schedule Regular Backups
Set a schedule to ensure backups are created consistently.
Use Multiple Storage Locations
Keep backups in at least two locations, such as an external drive and cloud storage.
Test Your Backups
Regularly restore backups to verify their integrity and functionality.
Document Your Process
Maintain a clear record of your backup and restoration steps for future reference.
Secure Your Backups
Encrypt sensitive backups and limit access to authorized users.
Conclusion
Backing up your localhost WordPress site is a vital step in ensuring the safety and continuity of your work. Whether you choose manual methods, plugins, or advanced tools, the key is consistency and reliability. By implementing these best practices, you can safeguard your projects and work with confidence, knowing that you’re prepared for any challenges that come your way.
0 notes
Text
Getting Started with Phyton and Django - Hello World Web App

Have you ever heard anything about Phyton? If you're reading this, I bet you do! Python is an interpreted, high-level, general-purpose programming language with an object-oriented approach: it was created by Guido van Rossum in 1991 and constantly updated ever since. It's dynamically typed and supports multiple programming paradigms, including procedural, object-oriented, and functional programming. Phyton went through two major upgrades: the first in 2000, with the release of the 2.0 version, which introduced a garbage collection system capable of collecting reference cycles; the second in 2008 with the release of Python 3.0, which was a major revision - mostly backward-incompatible - of the language. Following the Phyton 3.0 release, most developers chose to stick to the 2.x version, which eventually led to extended support for Python 2.7 (the last release in the 2.x series) up to 2020. As of today, all the main resources for Phyton and CPython (an open-source implementation of Phyton) are maintained and managed by the Phyton Software Foundation, a non-profit organization.
Phyton 2 vs Phyton 3
Python 2 and Phyton 3 are the two major versions of Phyton that are still used nowadays. These two versions are quite different: although Phyton 3 arguably has a better syntax, is more semantically correct and supports newer features, most developers chose to stick with Phyton 2 until recent years thanks to a much wider database of libraries and resources available on the web. Although there still is a bit of a debate in the coding community about which Python version was the best one to learn nowadays (Python 2.7 vs 3.5), there is now a general consensus on considering Phyton 3 the most appropriate choice for newcomers and also for those who want to update their coding skills. For this very reason, in this quick tutorial, we're going to use the Phyton 3 syntax.
Console, Desktop, or Web?
Just like most programming languages, such as Java, C# and so on, Phyton can be used for a number of different purposes. The most common scenarios are: Console Applications: console applications are programs designed to be used via a text-only computer interface, such as a text terminal, the command line interface of some operating systems (Unix, DOS, etc.). Common examples include openssl, ping, telnet, defrag, chkdsk, and the likes. Desktop Applications: desktop applications are programs designed to be used via a Graphical User Interface (GUI): such GUI can either be designed by making use of the operating system native libraries or made from scratch using the language native elements (or specifically designed GUI frameworks). Typical examples of desktop applications include Photoshop, Thunderbird, Chrome, and so on. Desktop application development dominated the software world for many years and are still widely used, even if the broadband + Internet combo is making web-based applications more appealing year after year. Web Applications: web applications or web apps are client-server computer programs where the client - including the user interface (UI) and the client-side logic - runs in a web browser: common examples include webmail (such as GMail), e-banking websites, and so on. On a more general basis, we could say that most interactive websites can be defined as web applications, from the CMS who can help you to write an essay on time management to more complex, fully packaged products such as Wordpress and Joomla. In this tutorial, for the sake of simplicity, we'll talk about the latter: therefore, our Hello World sample will be a (minimal) Web Application.
Phyton Web Frameworks
The first thing you have to do before starting is to pick a decent Phyton Web Frameworks: although you can write Phyton using any text editor (including Notepad), you should definitely stick with a GUI framework to benefit from very useful features such as syntax highlighting, built-in compiler/debugger, folder tree lists, windows tiling, and so on. These are the most popular high-level web frameworks for Phyton available nowadays. Django The Web framework for perfectionists (with deadlines). Django makes it easier to build better Web apps more quickly and with less code. Django is a high-level Python Web framework that encourages rapid development and clean, pragmatic design. It lets you build high-performing, elegant Web applications quickly. Django focuses on automating as much as possible and adhering to the DRY (Don't Repeat Yourself) principle. TurboGears The rapid Web development web framework you've been looking for. Combines SQLAlchemy (Model) or Ming (MongoDB Model), Genshi (View), Repoze and Tosca Widgets. Create a database-driven, ready-to-extend application in minutes. All with designer-friendly templates, easy AJAX on the browser side and on the server side, with an incredibly powerful and flexible Object Relational Mapper (ORM), and with code that is as natural as writing a function. After reviewing the Documentation, check out the Tutorials web2py All in one package with no further dependencies. Development, deployment, debugging, testing, database administration and maintenance of applications can be done via the provided web interface, but not required. web2py has no configuration files, requires no installation, can be run off a USB drive: it uses Python for the Model, View and the Controller. It main features include: a built-in ticketing system to manage errors; internationalization engine and pluralization, caching system; flexible authentication system (LDAP, MySQL, janrain & more); Available for Linux, BSD, Windows, and Mac OSX; works with MySQL, PostgreSQL, SQLite , Firebird, Oracle, MSSQL and the Google App Engine via an ORM abstraction layer.
Hello World in Phyton
Before installing Django, let’s see how we can generate a sample "Hello World" web page using Python. From a Linux shell, open your favorite text editor (mine is nano, but you can also use vi or anything else) and type the following: #!/usr/bin/env python import textwrap from six.moves.BaseHTTPServer import BaseHTTPRequestHandler, HTTPServer class HelloRequestHandler(BaseHTTPRequestHandler): def do_GET(self): if self.path != '/': self.send_error(404, "Object not found") return self.send_response(200) self.send_header('Content-type', 'text/html; charset=utf-8') self.end_headers() response_text = textwrap.dedent('''\ Hello World
Hello, World!
... Here we are! ''') self.wfile.write(response_text.encode('utf-8')) server_address = ('', 8000) httpd = HTTPServer(server_address, HelloRequestHandler) httpd.serve_forever() ... And that's pretty much it! This simple program can be executed and then tested by visiting http://localhost:8000/ with any browser.
Hello World with Django
Writing a Hello World sample web page with Django is definitely more difficult than doing it using blue Phyton... But there's a tremendous advantage in doing that: the scaling factor. If you're dealing with a more complex web application, you won't be able to write it using pure Phyton without losing control over the code pretty soon. The good thing about Django is that, once you learn the basics, you'll be able to deal with your projects in a comfortable fashion and with a great learning curve. Installing Django The first thing to do is to make sure that you have Django installed. Assuming you are using virtualenv, the following command should suffice: > pip install django Right after that, we need to create a Django project and a Django app: > django-admin startproject hello_world_project > cd hello_world_project > python manage.py startapp hello We now have a project called hello_world_project and an app named hello. When we executed python manage.py startapp hello, Django created a folder called hello with several files inside it. In this sample tutorial we won't use most of these files, hence we can delete them: the file that can be deleted are the following: hello/admin.py hello/models.py the whole hello/migrations folder. Writing the code Once done, edit the hello/views.py file in the following way: import textwrap from django.http import HttpResponse from django.views.generic.base import View class HomePageView(View): def dispatch(request, *args, **kwargs): response_text = textwrap.dedent('''\ Hello World
Hello, World!
... Here we are! ''') return HttpResponse(response_text) As we can see, we have basically created a Phyton class, which in Django is called a view. More specifically, this will be the class that will output the same HTML snippet we previously wrote using pure Phyton. Right after that, create a new hello/urls.py file with the following contents: from django.conf.urls import patterns, url from hello.views import HomePageView urlpatterns = patterns( '', url(r'^$', HomePageView.as_view(), name='home'), ) Next, edit the hello_world_project/urls.py file to make it looks like this: from django.conf.urls import patterns, include, url urlpatterns = patterns( '', url(r'', include('hello.urls')), ) As we can see by looking at the code, these urls.py files are the routing system that will be used by Django to understand what view to load whenever a specific URL is requested by a user. In a nutshell, we just told to our main project routing file (hello_world_project/urls.py) to route all the requests pointing to the site root to the app routing file (hello/urls.py), which in turn will point to the HomePageView view, that will then be executed - eventually returning the HTML content. The last thing we need to do is to edit the hello_world_project/settings.py file and remove some unused stuff that could prevent our sample web application from running. Around line 30, find a variable called INSTALLED_APPS: remove the first four items of the sequence and add 'hello' to the end. INSTALLED_APPS = ( 'django.contrib.messages', 'django.contrib.staticfiles', 'hello', ) Immediately after these lines, find the MIDDLEWARE_CLASSES variable and remove the line containing SessionAuthenticationMiddleware. MIDDLEWARE_CLASSES = ( 'django.contrib.sessions.middleware.SessionMiddleware', 'django.middleware.common.CommonMiddleware', 'django.middleware.csrf.CsrfViewMiddleware', 'django.contrib.auth.middleware.AuthenticationMiddleware', 'django.contrib.messages.middleware.MessageMiddleware', 'django.middleware.clickjacking.XFrameOptionsMiddleware', ) That's it: our Django web application is ready. You can start it by typing the following: > python manage.py runserver And then visit http://localhost:8000/ in your browser to see it in action.
Conclusion
That's pretty much about it. If you are interested in Phyton and you would like to go further, we strongly suggest to visit one of the following resources: PhytonTips.com FullStackPhyton The Hitchhiker's Guide to Python ... and so on. See you next time, and... happy coding! Read the full article
0 notes
Video
youtube
How to Move WordPress from Local Server to Live Server | WordPress Migrate from LocalHost to Server
#WordPress migrate from localhost to server#WordPress how to migrate site#how to migrate WordPress site#how to transfer WordPress site to new host#how to migrate wordpress site to new host#how to move wordpress site to new host#how to migrate wordpress site to another hosting#how to transfer website to another domain#transfer a wordpress site to another host#move website from one host to another#migrate wordpress site from localhost to server#transfer wordpress website from one hosting to another
1 note
·
View note
Text
Top Best WP Migration Plugins. List Of The Best Plugins For WordPress Migration
WordPress is Trending
As WordPress is becoming the leading service provider for websites many different companies intend to move website to WordPress. WordPress provide high quality website hosting in a very affordable price and packages it also provides its kinds with many complex website features which are built in. One of the major advantages that WordPress provide you is that just hosting your website on WordPress ranks you above others. Google just seems to love WordPress and it's because it has built-in exceptional search engine optimized capability.

Move to WordPress
WordPress has paid excessive attention to make the process of starting a new WordPress website very easy however if you wish to move a website that is already on internet migrate to WordPress or even any other hosting company it is a hard nut to crack. There are companies that can help you with WordPress migration services that can make your website move to WordPress without errors. It is very important to take top wp migration help otherwise some features of your website may lose functionality.
Migration Plugins
The downsides of WordPress migration if done wrong are that your website may fail to function as certain important features might not work and you might lose your ranking. If you want to make your website migration to WordPress journey easy and smooth then you should definitely use the best plugins that might help you preserve not just your website functionality but also your website ranking after migration. Some of the best plugins for WordPress migration are mentioned below:
1. UpdraftPlus Premium
Updraftplus is no doubt one of the top plugins when it comes to WordPress migration assistance. However it is very important that you subscribe to their premium service. Their distinct feature is that they provide you complete backup of your entire website saving server resources and backup from remote locations allow different developers to make changes to the website.
2. Duplicator Pro
Duplicator Pro provides you with a complete guide so that you move to each step and complete it efficiently. It completely supports WordPress multisite migration and allows you to schedule your backups. You can also store your backup data in other cloud services that your company has subscribed to. In this way your subscribed cloud service is used to store the changes and your server resources remain saved. Duplicate off Pro makes your migration easier however if you are new to it you might have to connect to FTP server and you also need a reliable and fast internet connectivity. (migrate wordpress website)
3. JetPack
JetPack is a widely used WordPress plugin because it is not just powerful and has massive features but it also comes in a very affordable price range. It gives you complete control to put your website in the backup so that you can easily transfer it to another host. Just like other plugins JetPack provide backup services and save your server resources. One thing that makes JetPack distinct is that it has its own security features that make sure that your website is in safe hands. The only drawback that is observable so far in the JetPack is that you will have to install the WordPress software to initiate the transfer of your website. (export website to wordpress)
Read More about how moving Website to WordPress CMS can be very useful for your Business: WordPress Development Services
#migrate wordpress website#migrate wordpress site to new host#migrate wordpress site#wordpress migration services#all in one wp migration#Move Website to WordPress#move godaddy website to wordpress#move html website to wordpress#move static website to wordpress#export website to wordpress#migrate wordpress site to new domain#best way to migrate wordpress site#migrate wordpress site from localhost to server#moving from squarespace to wordpress#move wordpress site from subdomain to root#migrate psd to wordpress#drupal to wordpress#shopify to wordpress migration#move my site to wordpress
0 notes
Text
How To Migrate A WordPress Website From Localhost To Live Server
https://ift.tt/eA8V8J
Today on our tutorial series, we'll be showing you how to migrate a WordPress site from a localhost to a live server. Having a WordPress server on your computer provides a great option to test out a theme or plugin in a safe environment before adding it to a live server. Many developers actually use […]
The post How To Migrate A WordPress Website From Localhost To Live Server appeared first on Themify.
https://goo.gl/SzVtfq
0 notes
Link
Planning to Move a Website to WordPress (renowned CMS platform). Get WordPress Migration Services, migrate your HTML, Joomla, Drupal, Django and any other website to WordPress.
#Move Website to WordPress#move godaddy website to wordpress#move html website to wordpress#move static website to wordpress#export website to wordpress#migrate wordpress site to new domain#best way to migrate wordpress site#migrate wordpress site from localhost to server#moving from squarespace to wordpress#move wordpress site from subdomain to root
0 notes
Text
How to Move Your WordPress Website from Localhost to Cloudways Using WordPress Duplicator Plugin
If you are a WordPress developer, you work with a customized dev environment that you have customized to your preferences. Every developer has their own configuration settings that are based on their workflows and the tools they use for WordPress development.
Once the project is working as expected on the localhost, the next step is to move the project to an online host. Fortunately, WordPress offers WordPress duplicator solutions in the form of several plugins that simplify the entire process of migrating WordPress sites from localhost to an online host.
For the purpose of this article, I will demonstrate how you can move a WordPress website from a localhost to a Cloudways managed server running a WordPress application. While there are several plugins that work very well (I encourage you to experiment to find the right fit for your requirements), for the purpose of this tutorial, I will use the WordPress Duplicator plugin.
Let’s begin,Table of Contents
WordPress Migrator Plugin
Best Cloning Plugins Around
WordPress Duplicator: Local Server to Cloudways
Why Use WordPress Duplicator
Benefits of WordPress Duplicator
What You Need for WordPress Localhost to Live
WordPress Duplicator Plugin Installation
Step 1: Download and Install Plugin on a Local Site
Step 2: How to Export WordPress Site
Create a New Package
Step 3: How to Make WordPress Site Live
Move WordPress Website from a Localhost to Cloudways
How to Upload a Localhost WordPress Site to Live Server
Upload Installer and Archive File to Live Site
Install WordPress Website on Cloud Server
Step 1: Extract Archive
Step 2: Database Setup
Step 3: Run Installer
Step 4: Data Replacement
Step 5: Test Site
Testing the Live Site
Final Thoughts!
WordPress Migrator Plugins
Moving your WordPress website manually is quite stressful, very time-consuming, and prone to errors. You need to make sure that all steps are executed in the correct order with no issues. An if something goes wrong, you have to start all over again.
Fortunately, there are several excellent WordPress migration plugins that take care of all the steps of the process and ensure that your website gets migrated from the localhost to its new Cloudways WordPress web hosting server without any issues.
Best Cloning Plugins
Here is the list of the best WordPress migrator plugins that you can try out:
WordPress Duplicator (Freemium)
All-in-One WP Migration (Free)
BackupBuddy (Premium)
UpdraftPlus WordPress Backup Plugin (UpdraftPlus Migrator) (Freemium)
WP Migrate DB (Premium)
Migrate Guru (Premium)
VaultPress (Premium)
WP Clone (Free)
As mentioned earlier, I will use the Duplicator plugin for demonstrating the process of WordPress website migration.
WordPress Duplicator: Local Server to Cloudways
In this tutorial, I am going to describe how you can move your WordPress website from localhost to Cloudways using WordPress Duplicator plugin. Duplicator has a great 5 out of 5 stars rating on the WordPress repository and has been downloaded and installed over one million.
Why Use WordPress Duplicator Plugin
The Duplicator plugin provides WordPress administrators the ability to migrate, copy or clone, a WordPress site from one location to another.
Using this plugin, you can forget your worries about backing up the database, plugins, themes, and moving all these components (whether in full or in parts), because the WordPress Duplicator can do everything for you!
Even if you are a newbie with little to no knowledge, this plugin can help you migrate WordPress site from localhost to Cloudways server easily. However, you do need to know a bit about finding your database credentials and related information.
Benefits of WordPress Duplicator
Easily migrate WordPress websites from one host to another
Take manual backups of WordPress websites
Pull down a live site to localhost
Easy website duplication
Schedule backups at your convenience
Expert support available
Email notifications
Additional developer support
Connect to cPanel directly from installer
Database creation built into the installer
Integrated transfer to cloud storage services such as Dropbox, Google Drive, and Amazon S3
What You Need for Moving WordPress Sites to Live Servers
To move your WordPress website from localhost to another server, you need to have two elements. Firstly, you must have a local server setup on your computer (I assume that your website is up and running on a localhost server). Secondly, you should have a good web hosting plan that supports WordPress.
WordPress Duplicator Plugin Installation
Downloading and installing the WordPress Duplicator plugin is a simple matter of following the standard WordPress process.
Step 1: Download and Install Plugin on the Local Site
From your WordPress Dashboard, navigate to Plugins → Add New. Search for WordPress Duplicator plugin in the top-right search bar. Next, click the Install Now button. After successful installation, click the activate button.
The second method is to go to the WordPress Plugins Directory and directly download the Duplicator WordPress Migration Plugin from there. Next, add the plugin manually to the WordPress website. For this, simply go to Plugins → Add New, and then upload the plugin.
After activating the plugin, you will see the Duplicator menu on the left side of your WordPress Dashboard.
Step 2: Export the WordPress Site
Now in this step, I am going to describe how you can package the WordPress files on your local computer using the WordPress Duplicator plugin so that these files can be easily moved to the live server.
Create a New Package
After activating the plugin, you will see the Duplicator menu on the left side WordPress dashboard. Go to Duplicator → Packages and click the Create New button to build a new package.
This process has the following major steps:
1- Setup
Simply click the Next button to start the process.
2- Scan
Click the Build button.
3- Build
When you are done with the setup process, you will receive two files; Installer and Archive. Download both files on your desktop.
Next, let’s move the website files to the live site.
Step 3: How to Take the WordPress Site Live
Now it’s time to transfer the WordPress site from localhost to live server by using the WordPress duplicator plugin.
Move WordPress Website from a Localhost to Cloudways
First things first, log in to your Cloudways account. If you are new to Cloudways, you would need to sign up and then log into your account.
Once you are in, click the Servers tab where you can see all the servers that are active under your account. Go to the server you wish to migrate the WordPress website, go to Server → Server Management and get the FTP Master Credentials.
Upload the Localhost WordPress Site to the Live Server
In previous steps, you downloaded the Installer and Archive files to your computer. Now it’s time to upload those two files to the live server.
Upload Installer and Archive File to Live Site
For uploading these files, you can use any FTP client of your choice. I prefer FileZilla, and thus suggest that if haven’t tried it out yet, go to the Filezilla official website and download the latest build.
Next, provide the Host, Username, Password, and Port, and connect to your server via FTP.
Note: On Cloudways, you need to use port 22 to avoid issues.
Note: Before you go ahead with uploading archive files, make sure that you delete the wp-config file (located in the public_html folder).
Next, go to the applications folder and to your application’s folder. Navigate to the public_html folder and upload the Installer and Archive files from your desktop to this folder.
It will take a couple of minutes because the archive files are generally large in size.
Install WordPress Website on Cloud Server
Now, it’s time to run the installer setup on the live server. To do this, you need to go to your website address and add installer.php at the end. For instance, http://test.cloudways.com/installer.php.
Now that everything is good, the next step is the extraction of the Archive file.
Step 1: Extract the Archive
After going to the installer page, you can see some like:
Click the Next button to move on.
Step 2: Database Setup
Now, you need to add the database details. To get them, go back to your Cloudways dashboard, choose your Server > Application and click it.
Under the Application Management, you will see database details such as db name, username, and password.
If all goes well, you will set the green lights beside two of the most important fields: Server Connected and Database Found.
image
Now, click Next to move on to the next step.
Step 3: Run the Installer
The Duplicator plugin works best with empty databases. Hence, before moving forward, you need to remove all previous data. For this, go to the Application Management screen and click the Launch Database Manager.
Next, the database window will open. You need to check the checkbox named tables to select all the tables in the database. Next, click the Drop button to remove the selected tables.
Click the Yes button.
Step 4: Data Replacement
Once you click the YES button, you will be given a URL, Path, and Title automatically.
Now, click the Next button.
Step 5: Test the Live Site
Once done, the final essential step is to test your live website. For that, the WordPress Duplicator plugin will ask you to follow several important steps.
Save Permalinks: Click on Save Permalinks button and you will be automatically redirected to your live site. Here, you can change the permalink settings as per your requirements.
Test Site: Click on the Test Site button and it will open the frontend of your live site. Here, you can test if everything is working as expected.
Security Cleanup: Lastly, Security Cleanup allows you to clean all the installation files and other files created by the Duplicator plugin during the transfer process. Before cleaning up, make sure that your website is properly copied and is working correctly.
Now it’s time to move on to the live site.
Testing the Live Site
In most cases, all plugins are deactivated when you move WordPress site from a localhost to the Cloudways server. To reactivate all the deactivated plugins, navigate to Plugins → Installed Plugin, select all and then click the Activate button.
If you have opted to use Breeze, the Cloudways WordPress cache plugin, now is the time to set up the recommended settings of the plugin. This is an important step in finalizing the process of a successful migration of your site from the localhost to the Cloudways managed server. These recommended settings better optimize the website and enhance the speed of WordPress websites.
Congratulations! You have successfully tested and moved your WordPress website from localhost to Cloudways – A Managed Cloud Hosting Platform.
Final Thoughts!
That’s it!
As you can see it is very easy to move WordPress websites from localhost to a Cloudways managed server, thanks to the amazing WordPress Duplicator Plugin. If it weren’t for a WordPress migrator plugin, the process would be a huge hassle. However, in just a few clicks, all website content is successfully transferred from the localhost to a cloud server.
The aim of this tutorial is to educate users on how they can move their WordPress website from localhost to Cloudways. Keep in mind, the above method is not recommended for transferring content from other hosting providers to Cloudways. If you want to do so, I recommend users to use WordPress Migration Plugin.
If you encounter any cloud migration problems while transferring your website content, don’t hold back! Feel free to ask us and leave your questions in the comment section provided below. I would love to help you out with your queries.
The post How to Move Your WordPress Website from Localhost to Cloudways Using WordPress Duplicator Plugin appeared first on The Coding Bus.
from WordPress https://ift.tt/31TaKr4 via IFTTT
0 notes