#all handmade clothes
Text
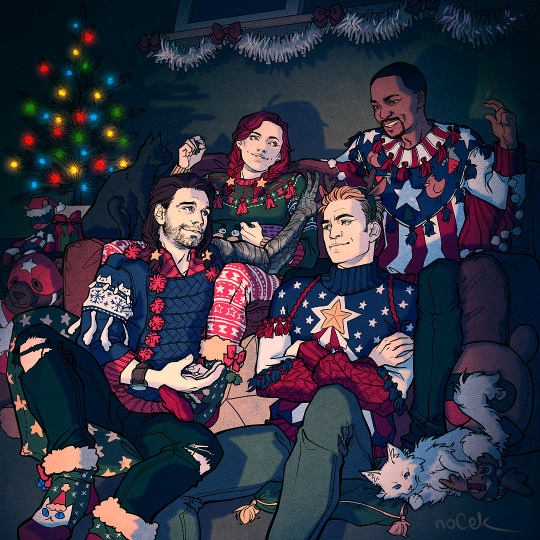
Aaaand I've managed to finish it on time by the end of christmas season / on time for orthodox one? Happy ugly sweater season anyway regardless what you celebrate.
Main idea here is that they are having great holiday marathon of old spy films curated by Nat. Also she and Bucky are providing reality check for the dumb shit happening while giving lived through examples of reality being even stupider sometimes ;P
Also I headcanon (does it count as a headcanon if it's my drawing?idk) that either after last year sweater fiasco few aunts in Sam's quite big family decided to fix that while taking inspiration from their superhero costumes. Or that actually Bucky took up knitting because it requires a lot of repetitive and very precise hand movements and it helps him notice when his hand may need a tune up.
Clear lineart version is here and there is a close up below the cut ;)
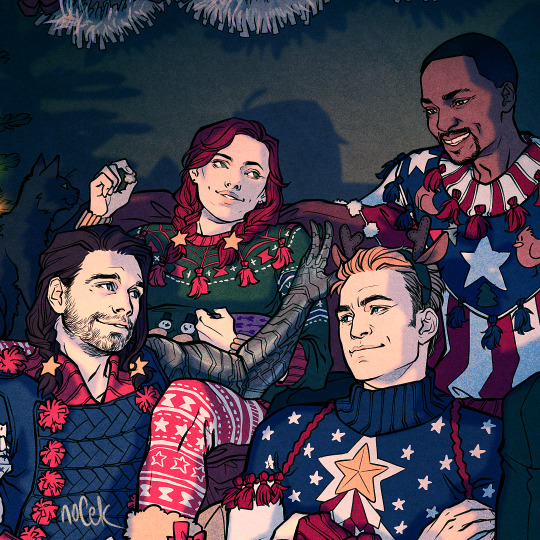
#barbershop quartet#natasha romanoff#sam wilson#steve rogers#bucky barnes#liho the cat#alpine the cat#black widow#captain america#winter soldier#falcon#with guest appearances of captain ameribirb and captain ameribear#and bigger quest appearance of djungelskogg the crimson dynamo bear#i mean red guardian bear :P#all handmade clothes#Nat couldn't turn down this very thoughtful gift from dad ;P
908 notes
·
View notes
Text


teenager/preteen warden?!?!?!?!
#superjail#the warden superjail#art#he handmade his braces so thats ehy they didnt wotk#and his clothes are all hand me downs so thats why theyre too big!!!!#rip warden you wouldve loved oingo boingo#he also probably ate dirt#vision of teen warden bouncing a tennis ball on the wall with thr widest grin ever#(he prolly had a journal and all thats in there is him getting WAY too excited over mundane things)
45 notes
·
View notes
Text
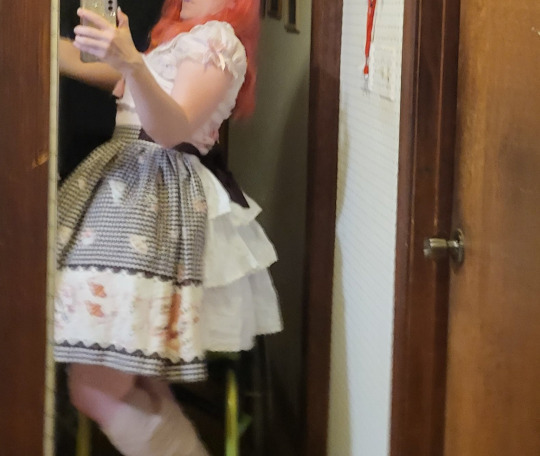
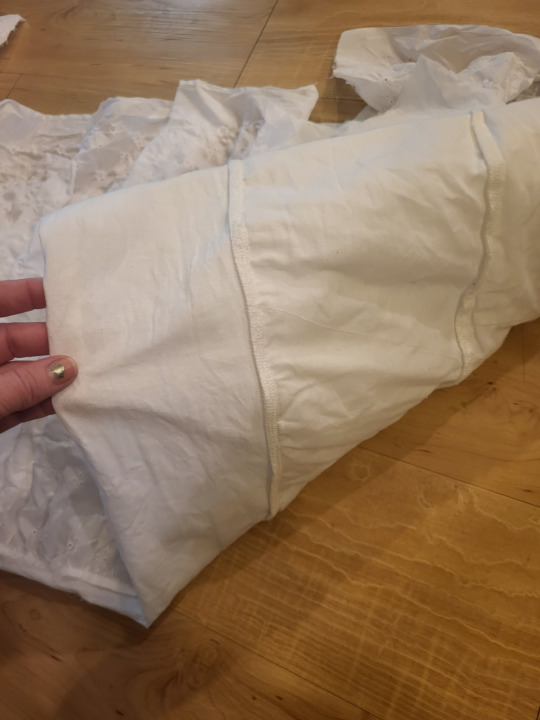
(It's been entirely too long since we've started a tutorial with a very blurry picture, which is a 20dollarlolita tradition. Am I about to fall over and only staying upright because of a death grip on this trim? Stay tuned to find out)
Let's make a skirt.
There's a lot of lolita fashion that doesn't fit most people. It's me. I'm most people. I'm going to wear it anyway, so I'm going to resize that to fit me.
The hardest part of resizing a lolita skirt (or skirt part of a dress) is that you almost never can get the fabric that the skirt was made out of. Lolita prints are usually pretty limited run. While some dresses will let you redistribute the fabric to have a slightly less full skirt, that's usually a major reconstruction that ends up drifting a bit away from the lolita shape.

x
A ruffled bustle bustle, however, is pretty common. Bustles like this are pretty common in lolita fashion and add an additional detail. In addition, you can make the waist of the skirt several inches bigger without a problem, and without compromising skirt fullness. If you ever want to undo the alteration, seaming the skirt back up is not very difficult. It's not a fully seamlessly reversible alteration, but there's far worse things you could do to the garment (ask me about my AP dress with mesh pits).
The problem is that bustles like this take quite a bit of energy and fabric, especially if you want to have details like lace trim. It's one of the more time-consuming alterations to do.
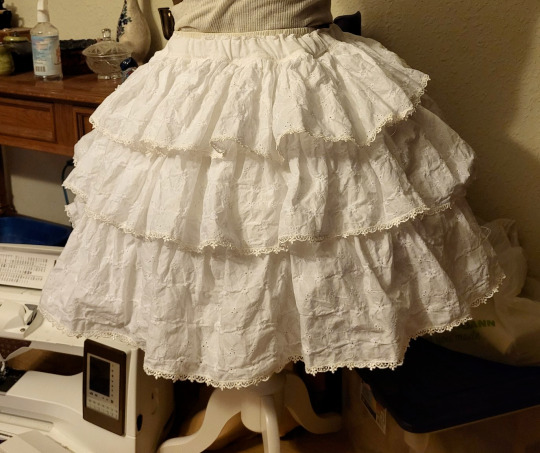
Or you can make one bustle/ruffle underskirt, one time, and wear it with all your skirt and dress modifications. You can splurge and get some nice trim and get some nice fabric, because you only need to buy it once. You can also wear it as a standalone skirt. (Just remember to never, ever steam it before taking pictures. You wouldn't want to look competent)
I put off making one of these for a very long time, because I'd made the process much more complicated in my head than it turned out needing to be. Once I was building this and realized I needed to simplify the fuck down, this became a really easy project.
Materials:
I decided to make the ruffles on my skirt out of eyelet lawn, which is a cotton fabric that has an all-over embroidery. I got this for about $10 a yard on ebay. I don't have a very accurate judgement of how much I used on the skirt. I bought 4 yards and used probably 3.5, but I also wasted a bunch of fabric on an extra tier that I had to chop off. I wanted a fabric with more detail than broadcloth, but that wasn't exclusively going to work with OTT styling.
I got 30 yards of 1/2" Venise lace off cheeptrims.com for $9. I really recommend putting lace on your ruffles if you can. It really adds to the detail level, and you only need to buy it once. You already have to hem all of this so you might as well hem it with lace.
You will also want some fabric for the slip layer (for want of a better term) to attach the ruffles to. My ruffles were a little bit sheer, so I wanted an opaque base fabric for modesty. Depending on the look you're going for, you can also use this layer to add some subtle detailing or changes to the finished look. If you're only wearing it with over-the-top looks, using a base fabric with shine or glitter can stop your ultrabustle from looking too plain. If you're wanting your ruffles to lay flatter, getting a soft fabric with a lot of drape will make the ruffles droopier. I just used some weird cotton plainweave that I got at Green Store for 75% off due to a bolt-long defect.
I used 1" elastic in the waistband here, because this skirt can get a little bit heavy, and then you often have another skirt on top of it adding to the weight.
The other thing that I used that made this much easier was a ruffling attachment for my serger. You don't need to use a serger, but a ruffling or gathering attachment that allows you to ruffle a flat strip of fabric and sew it onto another piece of (not to-be-ruffled) fabric will speed things up considerably. I know a lot of people buy a ruffler or a gathering foot when they start sewing lolita, and then are disappointed when they don't use it very much. There's a very limited number of lolita applications for these attachments, and I'm happy to tell you that this is one of them. If you don't have one, you don't need to go buy one. You can just do the two-step process of gathering the fabric and then sewing it on. But if you wanted an excuse to go buy one, well, you have one.
The Plan:
So I'd previously made a lot of math and calculations for how each tier was going to gather into the previous one, and then realized during the build phase that actually was way too complicated.
What we need is a rectangle with ruffles on it gathered into a waistband. Yes, a rectangle. I know, I was stunned too, but the final result worked the best.
I wanted the tops of the ruffles to be hidden in seams. If you just sew ruffled strips onto a single piece of fabric, it's very difficult to hide all the raw edges and to make sure you're not spreading loose threads all over the place. We're going to make ruffled strips, and sew them to each other. This covers up the raw edges very nicely.
This also will allow you to slightly gather the second and top tiers to each other, if you want to make this skirt in an a-line instead of a bell/cupcake shape.
The Math:

If you know what skirts you're planning on wearing your ultrabustle with, it can help to measure them and get a good guideline.
Generally, you want your ultrabustle to be a number somewhere within these guidelines.
~~Close to the same length of the skirt you're wearing it with
or
~~4"ish longer than the skirt you're wearing it with.
(This depends on if you want the bottom ruffle to stick out. If you're Tallita and all the skirts and dresses you're resizing are also too short, you might want this to double as a ruffled underskirt)
and
~~An acceptable length to wear as a skirt all on its own.
My first run at this ultrabustle was WAY too long, and after chopping off the entire top tier, it ended up being either 1" shorter or 1" longer than the skirts I'm planning on wearing it with, which is a great number for me.
As for the total fullness of the skirt, you have to remember that the ruffles will add visual volume to the skirt. This means that you don't actually need the hemline of your skirt to be super full. All that matters is that your petticoat can comfortably squeeze in there. For this, I measured the hemline of the smallest dress that I had that still fit my petticoat, and used that. It turned out to be about 80" around.
So, what sizes do we cut this at? It's math time.

Here's a worksheet if you want.
You're going to need to know how long you want the finished skirt, how wide you want the hem of the slip (not the ruffle) of the skirt, how many ruffle layers you want, and your waist measurement.
The slip needs to be shorter than the ruffles, so it doesn't show. So total slip length is your skirt length minus 2.5". Divide that by the number of ruffle layers that you have, and you'll have how long to cut each of those. This is slip tier short side.
Each ruffle layer needs to be longer than each slip layer, so that the slip doesn't show. You want each ruffle to overlap the previous one. So, take your slip tier short side and add 2-3" (or more, if you want). This is your ruffle short side.
Your finished slip diameter is your slip tier long side. That one's easy.
If you're a math and planning person, you can determine your ruffle long side measurement. You'll want to take a piece of your fabric, cut to the ruffle short side measurement and also about 45+ inches wide, and a piece of your slip fabric. Run them both through your gathering attachment so that your ruffle fabric is sewn onto your slip fabric. If you like how that looks, you can then measure the finished length of the ruffled fabric and use that to calculate how much fabric you'll need for the ruffles.
There's four places where people mess this up. First of all, if you're using your gathering attachment to sew and gather at the same time (which is the point of that attachment), you want to do all your test runs gathering it onto a fabric. The amount of fabric that goes into a machine ruffle changes depending on if it's onto fabric or just gathering. Second, you want to use your finished fabric, at your finished ruffle length. Different fabrics will ruffle different amounts, and different ruffle widths will look different even at the same gathering amount. Third mistake people make is to not gather a long enough strip. The longer a strip you gather, the more accurately you can measure how much fabric is actually going into your ruffle. And the fourth is to take that measure as an accurate one, and not plan for needing extra fabric. The upside of the gathering attachment is that it will save you so much time. The downside is that you can't be as accurate with knowing how much fabric you'll use. Remember, you can always turn the leftovers into a matching accessory.
Even if you're going to go yolo like I did and not do the math about how many ruffles you need, you will still want to run a check that you like how your ruffling attachment looks. You don't need to measure super accurately, but try to get a feel for how much fabric is going into each ruffle. For example, if your ruffler takes a strip and makes it 1/3 it's flat size, then you'll need more fabric than if your ruffler makes it 1/2 it's flat size.
If you're really on a budget, you can just cut your ruffles at 2.5x your slip long dimension and precisely gather by hand. My time's worth something to me and so it wasn't worth it to do that just to save a yard of $10 fabric.
The last part is just to check that your ruffle long dimension (or it's rough approximation) is still at least 2.75x your waist measure (3.25 is better). If you don't have that, your skirt likely won't look full enough for a lolita silhouette. If that's the case, just add to your skirt dimension until it is.
Actually making it:

Before you forget, cut out a piece for your waistband. You can decide if this looks better in your ruffle fabric or your slip fabric (I used slip). This piece should be 3ish" longer than the distance around the fullest part of your booty. You need this to be longer than your booty distance so that you can get it on your body. If you're using 1" elastic, you want this piece to be a minimum of 3" wide.
I've found that the easiest way to do this is to start out by making the whole skirt as a single, very long strip. So, I take my slip tiers and cut them all out, and sew them into a long strip.
On my specific fabric, I decided that I wanted the pattern on the eyelet to go lengthwise. So, instead of cutting the fabric across the grain (short side, selvedge to selvedge) like I normally would, I cut down the 4 yard length of the fabric. This meant a lot less seaming. Since I didn't really know how much fabric I was going to use (you know that test I described to check how much fabric you're going to use? Yeah, guess who didn't do that), I just cut them one 4-yard strip at a time. I'd ruffle one all the way, stop, and cut the next one. This did actually save me quite a bit of fabric versus cutting them all at once. I had to go back and sew the sides of the ruffle together once the skirt was done. It was a small price to pay for the convenience I experienced.
I knew what size I wanted the finished ruffle length to be, but I cut my ruffles about 2.5" longer than that. I wanted a little bit of wiggle room once the skirt was done, so that I could do the length adjustment once the whole skirt was assembled.
And then, it's just a matter of letting the ruffler do its work. My serger ruffler works by you putting the item to-be-ruffled on the bottom, and the item to attach the ruffle to on the top, and then just hitting go. Some other rufflers work by putting the to-be-ruffled at the top, so you can see it as you go. Like all sewing machine attachments, if you're not sure, just go on youtube and search "HOW SINGER GATHERING FOOT DO THING NOT LOOK LIKE SHIT?" and someone's probably made a video of it.
So, once you've run all your ruffle through your machine, you should have a nice single strip of slip fabric with a ruffle on top of it. Now, some gathering attachments don't actually sew super strong seams, because you have to adjust tension or stitch length pretty severely to get it to ruffle like you want. The other advantage of putting the ruffles in a seam instead of just topstitching them onto a piece of fabric is that it doesn't matter how strong your ruffle attachment is, as long as it's strong enough to hold until you can put the ruffle in the seam. The seam provides the strength.
Once you have your single long ruffle, cut off a section that's the diameter of your bottom tier.
Now you just need to sew them together (and finish your inside edges). I like to start at the bottom tier and go up.
For each tier, you're sewing the bottom of the slip layer to the top (ruffle and slip) of the tier below. Just pull the ruffle of the higher tier out of the way, put right sides together, and sew.
If you aren't using a serger, you can zigzag over your edges and then trim them down, use an overcasting stitch from your sewing machine, or topstitch some seam binding over the seams. The extra line of stitching on the slip layers in front won't be visible.
One of the other nice things about building this in the way we have is that, when you finish the edges of your inside seams, you're putting three layers together and finishing it as one. This is actually a lot less then 1/3 of the work of finishing them separately, because you'd have to finish the ruffle as a flat piece, which would take way more time. Have I convinced you on the greatness of this technique yet?
Continue cutting pieces off your ruffle layer and stacking them until you have as many layers as you decided you were going to have.
Once you have your layers all stacked up on each other, it's time to sew the skirt back seam. I find that it looks best to hold the ruffles out of the way, sew the slip together, and then go back and sew all the ruffle pieces. Basically now is a good time to just check for any ugly spots and to touch them up.
There's like 50 ways to attach a waistband to a skirt. For this one I used this method (what a blast from the 20dollarlolita past we have there. Also please note that the cost of ruffler feet seems to have gone up from $15 to $60-$100 in the past 10 years and despite working in a sewing machine store, I'm not totally sure why).
Once you've got the whole skirt assembled, it's time for the finishing.
The first thing that I did was put it on and try to judge how short I wanted my top ruffle. I'd cut all my ruffles extra long in the short dimension, so that I could shorten them when they were on the skirt. I picked a length that worked, marked it out, and chopped at that point. I then did this for the other two layers. I found that I wanted my bottom ruffle to be a little bit longer than my top ones, and cutting it long allowed me to make that choice.

I then started just zigagging on my lace. If you don't have a serger, you can use the lace as a hem finish, which also saves you an additional step. The lace really added a lot to this, and since I only need to make this once to wear with a lot of different garments, it was an economical use of nice lace.
I started putting the lace on the top layer first. This is because, if I ran out of lace, having a different (wider) lace on the bottom layer wouldn't look strange. As previously mentioned, I did zero measuring of how long my ruffles are, and had no idea if 27 yards would be enough lace. Don't be like me. Do some tests. Or be like me and choose the life of treachery. Anyway, stick lace on this thing, please. You worked hard and your skirts deserve it.
The only other thing that I did was to cut the slip layer down by about 3" on the very bottom. I did this because I made a mistake, but I like how it looks.

You can take this system of ataching ruffles in rectangles or even a trapezoid and stick it in the back of a skirt (or skirt on a dress). I did that here because I knew that I wanted a pink bustle, not a white one.

I'll do a tutorial for the actual skirt resizing sometime after I actually resize a skirt with this. Here, all I did was slice the back, hem those edges, and then button on some waist ties from another dress. This let me easily add several inches to the back of this skirt, without needing to re-distribute pleats, and without sacrificing the fullness of the shape.
This will all sit a little bit better once I've pressed the skirt, as well. Steaming the top layer of this while the garment is on me/a dress form/a hanger will decrease the poof in the top layer a little bit, and honestly, we could benefit from that in this case.
Anyway, if you have this, you have a very fast way to enlarge existing garments.
So, while this has thankfully very much decreased in the past years, there's still some people with weird opinions on MoDiFyInG bUrAnDo, so let's have a talk.
Lolita clothing is not community owned. If someone who was never going to sell a dress to you modifies it, that doesn't take it away from you. This is a mentality that we tend to have in lolita more than other fashion just because of our high resell scene, but it wasn't ever going to be your dress and so you don't need to have an opinion about what happens to a thing you were never going to personally own.
Things have value more than money, and value is often changed rather than destroyed. AP's Halloween Treats OP has no value to me when sold for $500 on Lacemarket. I don't spend that much money on lolita, ever. But a questionably-altered AP's Halloween Treats OP that I can un-alter has value to me if the price is good. But a questionably-altered AP's Halloween Treats OP has very little value to someone who likes the price, but can't undo the alterations. When someone resizes a dress or skirt, true, sometimes the people who are the size it was originally made can't wear it anymore. You've decreased the value to them, but you've made it more valuable to people who are the size that you've made the garment become. This skirt had no value to me when it's waist measure is 7.5" too small, but now I can wear it, so it has functional value to me.
A lot of people who say that modifying the dress ruins it are either ignoring that also the stress of putting a dress not sized large enough for your body can damage it and not look as great while doing so, or else they have a much worse take. People who say that modifying clothes ruins the garment, but also say that wearing a garment that's too small ruins the garment, what they're actually saying is that wearing that garment is a privilege that should not be extended to larger sized people, and if they say that then they can just, you know, go fuck themselves. We don't need that in the community. Everyone deserves to wear lolita, and some people have to work harder to achieve it, and that's not fair, but everyone deserves it.
So yeah, kiddos! Build a skirt! Go cut up some clothes! Wear the skirts you've always wanted to wear! You can do anything!
And to answer the question we opened this with, yes, I was absolutely falling over.
#handmade lolita#20dollarlolita#lolita fashion#resizing clothes#making clothes bigger#tutorial#skirt tutorial#lolita skirt tutorial#sewing tutorial#bustle underskirt#utilibustle#ultrabustle#the one bustle to rule them all#one bustle to find them
229 notes
·
View notes
Text


sometimes you need to make a jacket that looks like a fish
#about me#my face#sewing#fashion design#fish jacket#thats not a real tag#fish#clothing design#handmade#tailor#my stuff#please of all my bullshit this one deserves the recognition#i hand beaded those eyes in like 1.5 hours in a blind fit of inspiration
49 notes
·
View notes
Text
From October 31st to December 31st, I'll have TREATS23 active in my shop. Just put in the discount code and watch the price drop 25%. It applies only to items listed in my shop, not to commissions.
Help me clear out my shop (and put money in my wallet).
I have no intention of adding anything new to the shop, but if I do, the code will apply.
Here are a few listings, just to grab your interest.
Thank you! I look forward to having more space to put new things.
#quilt#sewing#handmade#discount code#home decor#I won't be having another sale until June!#the reason this is running so long is because I really wanna see my inventory shipped out#seriously I'm running outta room. sure it may not seem like much but we have no closets. I have things in plastic bins under the#bed and others hanging in my standing wardrobe closet. said closet also has all my clothes and bedding#kofi challenge#kofichallenge
125 notes
·
View notes
Text
i am super pleased with how this dress turned out

if Christmas is gonna keep trying to creep past thanksgiving into november, i think we should simply keep Halloween going for as long as it takes to push it back
#also it’s going be almost 80F today so like. fuck it#it me#ootd#today i wore#handmade#handmade dress#all clothing is costume#be the ms frizzle you want to see in the world
477 notes
·
View notes
Text


Helena, on her way to find new signs of spring, stops by Whinnyfred's pasture and shares an apple with her horse friend. She's warmly dressed for a walk outside.
Helena Marchmont is my A Girl for All Time doll from the Regency period in Great Britain. She doesn't have a book, and so I know very little about her. That, of course, means I get to create her story myself! My Helena lives in England in 1816, during the Year Without a Summer. This was a real event caused by the eruption of a volcano in Indonesia in 1815, which put so much dust and ash into the atmosphere that it blocked sunlight. This caused extreme cold temperatures through spring and summer in the northern hemisphere. Crops were killed by frost or never grew at all. Famine was widespread as food prices spiked.
Despite all the trouble in the world, Helena cheerfully continues to look for reasons to be hopeful. She is warmly dressed in the long-sleeved gown I made for her. Looking at the pictures now, I think I should shorten the skirt--Helena is a lively 12 year old girl and deserves to be able to run and climb more freely! I also made her cameo necklace, but I think from now on she'll save that for fancy occasions.
48 notes
·
View notes
Text

It's here! The Beamie's Buddies Official Website!
I'm so excited to finally share this with you! I've been planning this for years and it's finally a thing I have made that you can view with your eyeballs! It is very bare bones at the moment but down the road I will be fleshing it out to be a full online shop, blog & gallery!
I'd love it if you checked it out! Feel free to give any feedback/report any bugs. And if you are so inclined, you can buy me a Ko-fi to help support my small business and the web hosting costs!
Enjoy!
~Beamie
#beamies buddies#website#beamies buddies update#cloth dolls#custom dolls#handmade dolls#i worked on this for 5 months there were so many images 💀#also to note i have to add in all the alt text for photos so that will happen eventually!
28 notes
·
View notes
Text
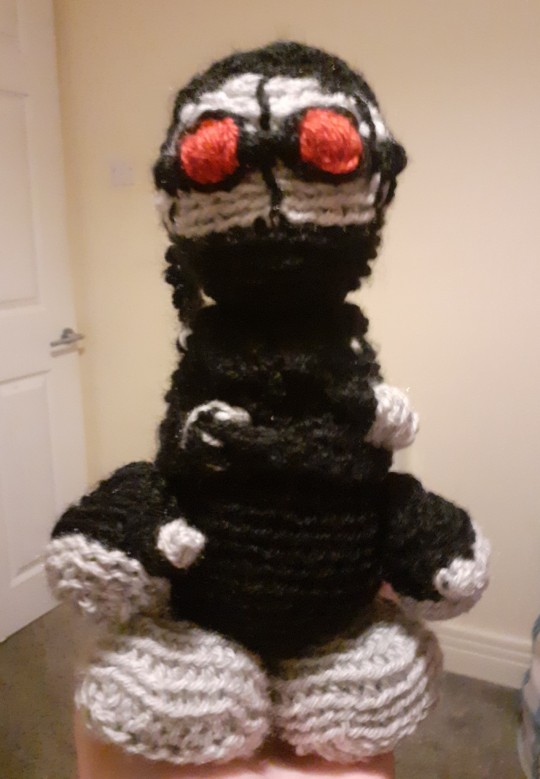

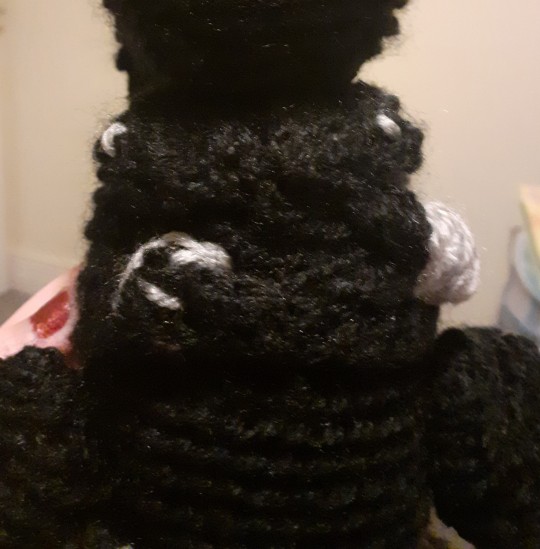

Well, he's done ! The Hank Jackass Wimbleton is on my bedroom floor after. 3 days of working on him in the late evening?
Bonus
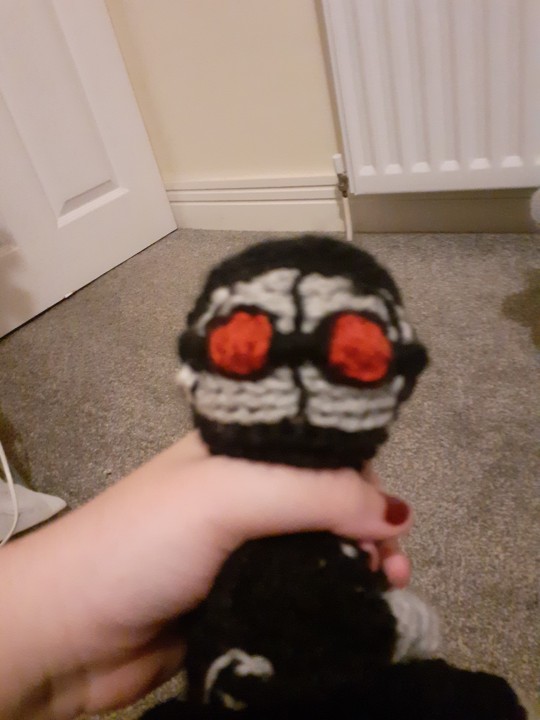
#gamer txt.#al art#crochet#plushie#madness combat#hank j. wimbleton#can. can you see the details on his jacket#the belts are there i promise#his lapels are also seperate and i can lift them up:]c#i like how in the picture with torture all of his clothes look completely pitch black. thank you#his hands are moveable aswell btw#this is now my 3rd handmade madcom plushie. i think. im being normal
86 notes
·
View notes
Text


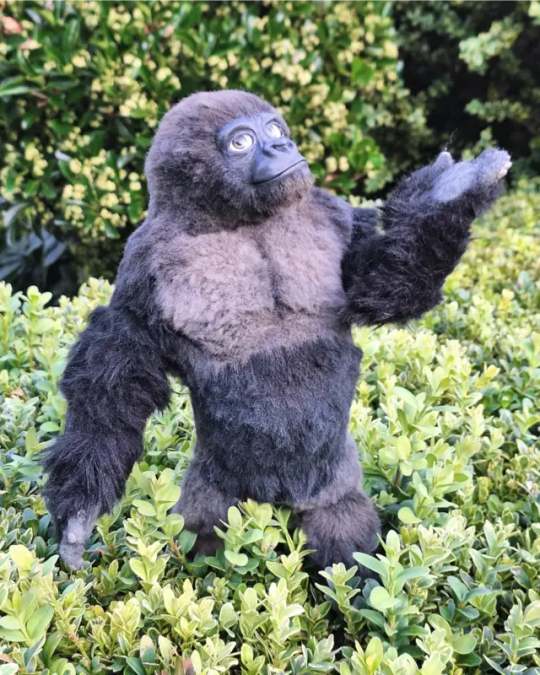
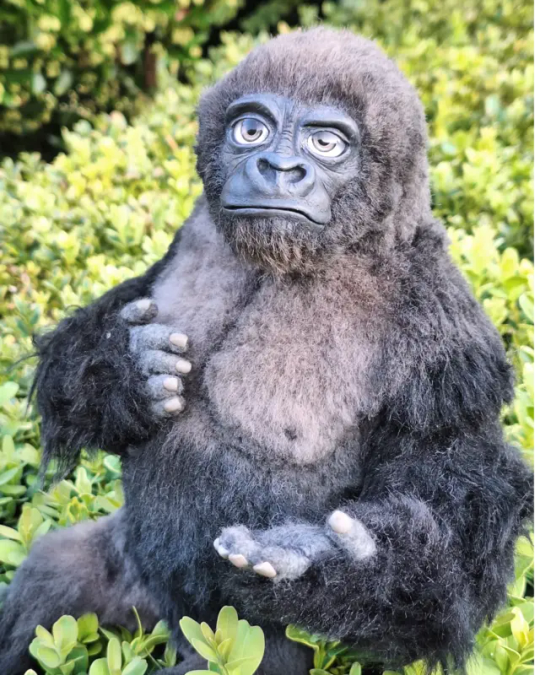
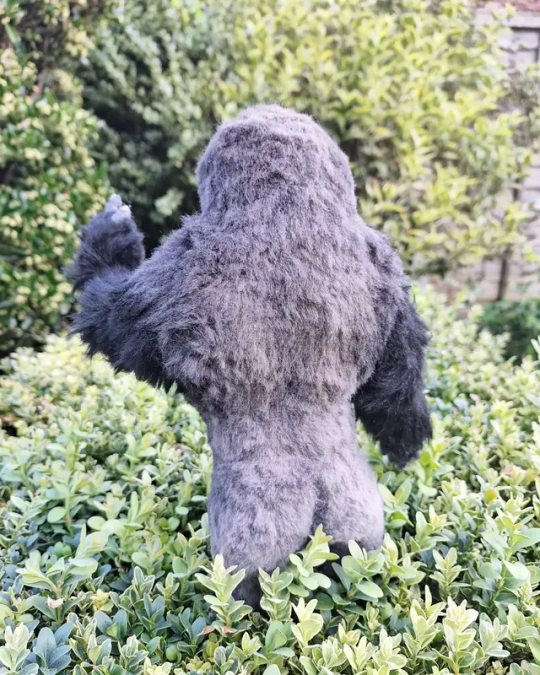
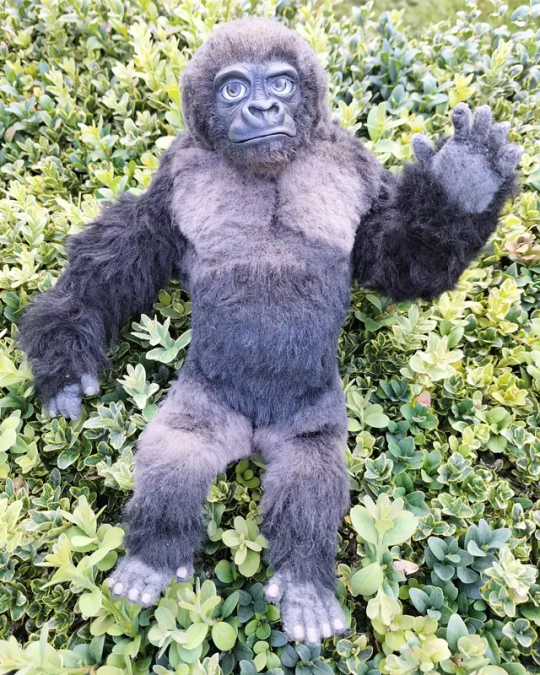

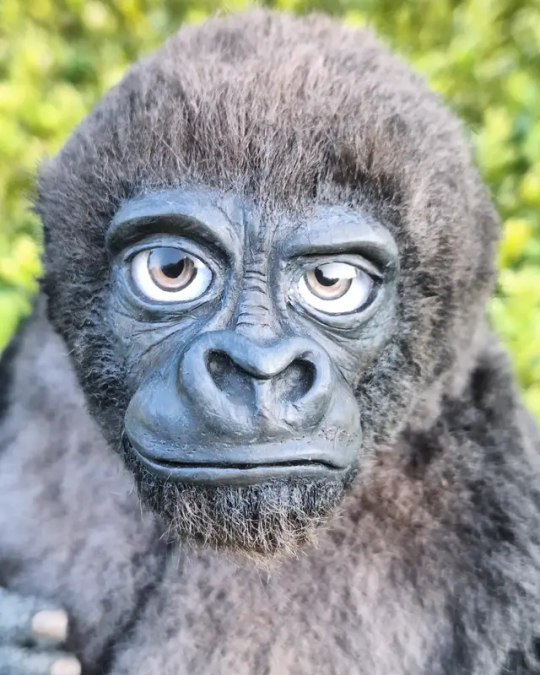
Here's a look at an art doll iv been working on for the longest time.
He's halfway till being complete, just have to bust out the old sewing machine and make him some 1920s themed explorer clothes to finish him off!
He is fully posable, with his spine being made from ball and socet joints and his limbs and fingers being made from wire.
Every part of him is hand made :)
#art doll#ooak doll#art#handmade#art dolls#ooak#gorilla#this guy has been in the works for way to long#all i need to do to finish him is to get of my lazy ass and make his clothes#like i have all the materials i just can't be bothered to make the patterns#he was supposed to be my mums birthday presents two years ago!
23 notes
·
View notes
Text
i dressed real scene today and some little four year old boys were looking at me like i was so cool and it felt good
#for those who don't know#i'm like a part time scene kid#i listen to a bit of scene tunes now and then and occasionally dress in rainbows and goth shit and kandi beads#its very thrown together handmade cheap shit but thats like the whole spirit of scene so it works#and always the same outfit too rip#because i have like. one outfit per occasion per theme often with intersecting pieces of clothing#because i cant afford more than one outfit per theme because i am multifaceted and desire variety in themes#i do not belong to one subculture which is why i prioritise versatility in clothes and why half my clothes are black XD#i have my scene outfit#my vampire outfit#my witch outfit#my rainbow outfit#my pastel outfit#my sanrio-themed outfit#my butch enby visiting mitre ten fish-themed outfit#and all of them are signified by a signature hawaiian shirt or hoodie
24 notes
·
View notes
Text
Hm this outfit would look cooler with one of those fishnets-long sleeve-shirt thingies, plus black boots...
#ive been wanting to do the drawing the milgram characters with clothes we wear and this one.... probably for fuuta#but im gonna add the net thingy#AND IDC IM GONNA GIVE HIM MY HAIR CLIPS TOO BECAUSE I CAN#seari talks#also my black boots im gonna stop using them because they 1. hurt my feet and 2. the material used on the inner edge gives my skin#an alergic reaction.... I've been using them anyways but last time i used them I could barely walk from the pain#i know where i can get new ones from... and they have cool variety and they arent a big corporation so all great#they are handmade by an artisan... shoe... um... zapatero!! and the story on how they got him online is cute
10 notes
·
View notes
Text
someone needs to tell the depop girlies that buying shein clothes and throwing an acrylic paint block print or a shittily made patch in the front is not "sustainable" or "upcycling" its still exploitative overconsumption
#like i used to actually buy most of my clothes on depop#now its ALL shein shit#with the tag hidden in the photos marked as “handmade” because becky wrote bikini kill on the front with a posca marker
3 notes
·
View notes
Text
mfw every time i see a modern au tmn art and caducues is wearing like , jeans or a hipster lookin beanie or, god forbid,... one time i saw a art of him with like, a fashion scarf ... .. 😐

#/j tone and /lh but also . .......he would not fucking wear that#bratz EWWW clip.mp4#aside from being ooc .. its a bad fit#like i think he would totally make weird outfits but not like that . cad only buys a new clothing item once every 6 years . its all handmade#and secondhand and hand-me-downs. hand dyed and adjusted n stuff .. . ..#thats my thoughts. :-3#kiddo say
85 notes
·
View notes
Text

I've cut all my pieces for my maxi dress. Hopefully I'm not too tired to sew it by this week.
#sewing#sewist#sew#handmade#selfmade#memadewardrobe#fashion#cloth#hand sewing#sewblr#sewing blog#tired all the time
6 notes
·
View notes
Text
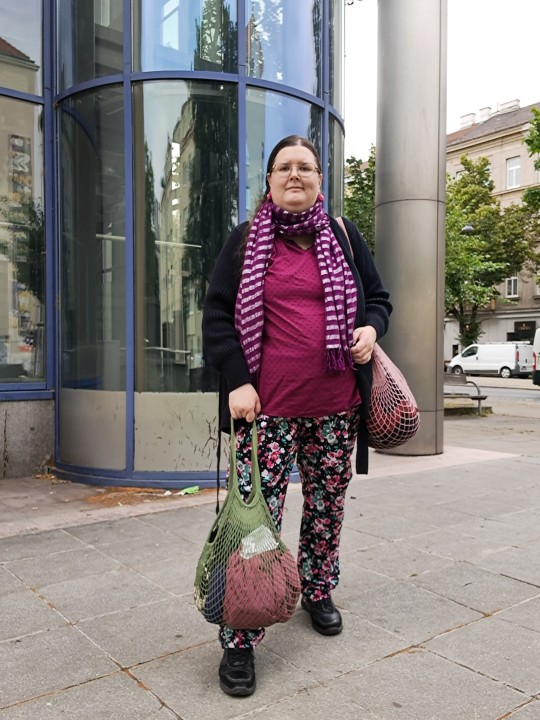
Let's go thrifting together!!
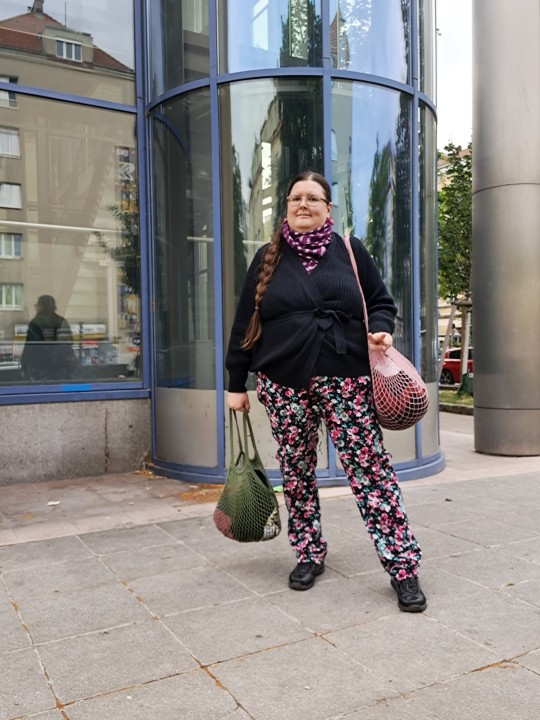
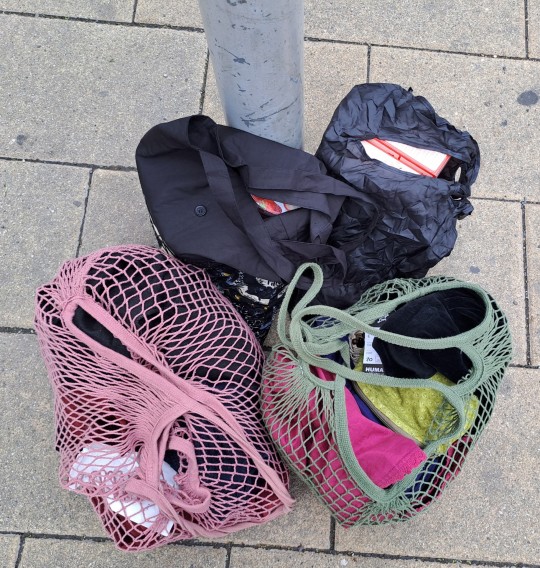


My local thrift store(s) had a special countdown action going on during the last two weeks. Marked items started at 8€ and counted down to 2€ on the last day.
I already went there on the first day of this special action and got an amazing patchwork jacket, a dark green velvet jacket (which I gave to my mum because it fit her without alterations and she loved it aswell) and a dark blue shirt that's very cute and which I already wore to work!
Today was the last day and I scored big!! Found five items reduced down to 2€ (and 3 others for still very inexpensive, which weren't part of the deal but still too gorgeous to leave behind!!)
Upsizing candidates are the two jackets/blazers and the trachten wool skirt. The skirt was just too cute to leave behind and made from wool! Sounds perfect for the colder season!
By the way, I also got groceries while I was out (because food is life) and that's why I had to lug so many bags home! Good thing I filled my little backpack up with totes before I left on my treasure hunt.
Oh!! And the berry coloured/silver striped scarf is thrifted aswell! From the same store too :)
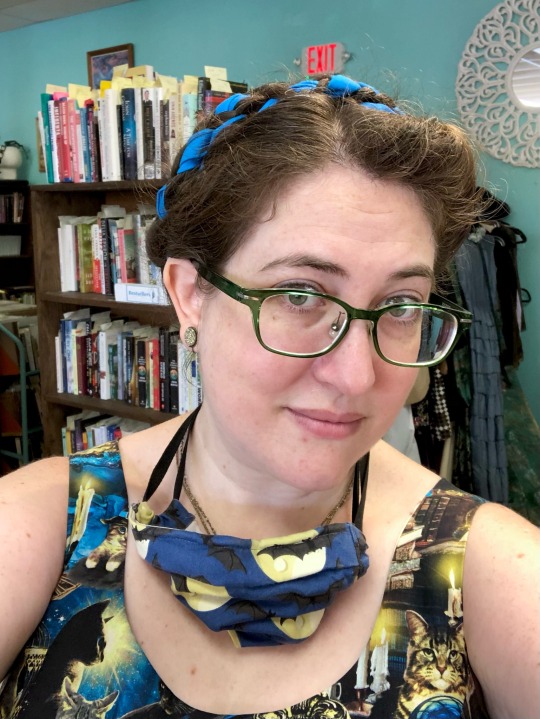
[id]Pic 1 & 10: A full body shot of a fat, white woman with long brown hair which she's wearing in one big braid. She's got glasses on and looking toward the camera/viewer. From her clothes you can see it was kinda cold on that day: she's wearing black pants with pink-and-white flowers on them (and green leaves), black shoes, a berry-coloured long-sleeved top with flocked dots on it, a black knit jacket/cardigan and a darker berry-coloured cloth scarf with silver stripes. She's also wearing pink felt flower earrings with yellow flower insides! It's a cheerful look, contrasted with the black. The woman is holding a dusty-pink and a second green net bag filled with freshly thrifted clothes! The two poses are different, otherwise the two pictures are pretty similar.
Pic 2 & 9 are detail shots of the clothes she'd manage to thrift
2: net bags with thrifted clothes on the ground, next to bags filled with groceries
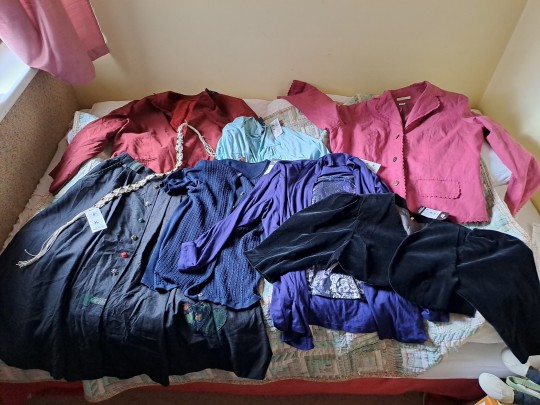
3: all the thrifted clothes spread out on top of a bed
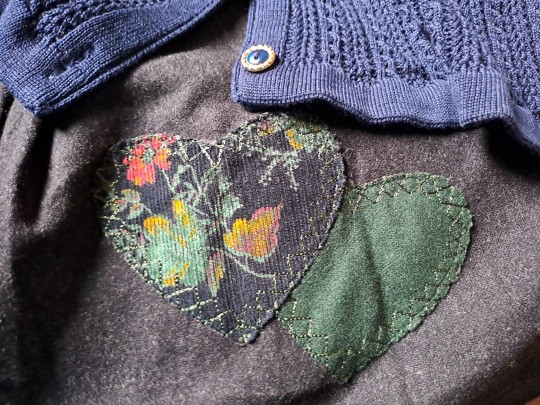
4: the lower half of a dark blue knit cardigan and patchwork hearts sewn on a black wool skirt
5: a longsleeved top with a layered look: it looks like a patterned top with a purple cardigan over it
6: showing the pretty sleeves of a black velvet bolero jacket, the purple top of pic 5 can be seen in the background
7: a pink blazer/jacket with the dusty colour of raspberries, it has beautiful cotton lace details along it's edges (the collar, pocket, etc)
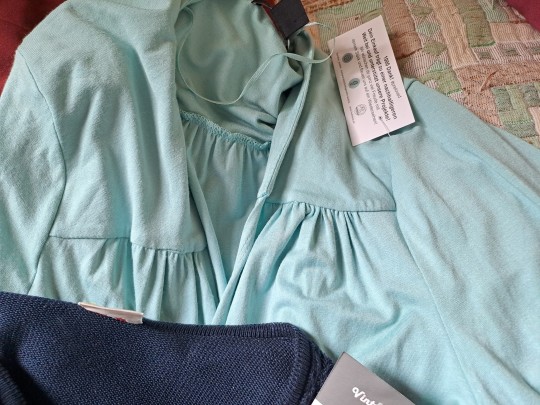
8: a light blue long-sleeved cardigan with a pretty gathered detail at the bust
9: The pocket of the raspberry coloured blazer is shown again! Because it's such a pretty piece!
[/id]
#plussize thrifting#thrifting#thrifted fashion#thrift flips to be#upsize your clothes#future upsizing#i leave clothes that are too big for me behind#have no qualms about making smaller clothes bigger though#there's so few plussize as is#stay tuned for me making all of these fit me#though jury's out whether or not I'll upsize the red blazer on the left#mum might love it too#in that case she can have it#an outfit without anything handmade???#shock and horror#spread out the thrift haul on mum's bed because mine is too high up to take pictures on#thrift haul#natural fibers thrift haul
14 notes
·
View notes
Last Seen Blogs


princess-fiestypants
wait, what?

barely-sanhas-noona
*ASTRO 💜 AROHA*

kamoeji
Peko

monasteriodomoletom
à la portilho