#and i also really wanted waterproof trekking/hiking shoes
Text
it's strange beyond belief going from thinking "oh I need a new bag" -> finding one on the street that's in pretty good condition and going "yes fuck yes thank GOD I really needed a bag"
TO
thinking "oh I need a new bag"" -> "well I guess I'll add it to my dad's wishlist and we can talk about whether or not he wants to buy it" -> "oh shit he bought the bag for me without me having to convince him of the pros of having this bag. I have a bag that I like and that suits all my needs now and I didn't have to mentally agonize over it"
#personal#me#2023 voyage#its just a really weird experience going from having 400$ a month to live on and stealing and getting things from friends#to suddenly having things purchased for me en masse. i have like half of a new wardrobe. i have shirts that excite me.#this isn't a bragging post. its a things are really weird and im gonna have to go back to not having shit post.#like i got new really expensive running shoes that fit me like a dream but aren't waterproof#and i also really wanted waterproof trekking/hiking shoes#so i got the hiking shoes online and they fit me fine but like could bear to have a bit more space#but i don't have the time to order another pair before i leave#so either i take these ones with me and hope that they work fine. which. they should.#or i let my dad return them because they're not perfect#and then I don't have hiking shoes. and i know i won't get hiking shoes bcs spoons bcs money etc#idk in which store i could even attempt to get these shoes and ordering online is near impossible. especially a wide fit shoe.
2 notes
·
View notes
Photo

Are Hiking Boots Good for Work?
Are you one of those who like to wear the same pair of boots everywhere? While some people want to have a different pair of shoes for every occasion, a lot many people can’t afford to do the same. And even if those people are financially stable, they prefer wearing the same boots everywhere because they are generally too tired to get used to different boots again and again. These people have generally one question in their mind: can hiking boots be used as work boots?
Yes, you can use hiking boots as work boots. I think hiking boots are extremely versatile and in fact, can turn out to be a great option if you are really looking for a comfortable pair to wear at work. Hiking boots are perfect amalgamation of comfort and toughness and can sustain almost all weather conditions. These are durable, waterproof and offer great support.
However, there are some basic differences that need to be kept in mind while comparing hiking boots and work boots. In this article, I will break down these differences and will discuss the factors on which the functioning of the hiking boot depends and how they can turn out to be a blessing in a hard day’s labour.
Difference between Hiking boots and Work boots
Here are few key differences between the two styles which you surely don’t want to miss
Hiking Boots
Hiking boots, as we all know are designed to conquer everything from moderate to harsh that nature throws at them. Waterproofing is a key feature since the sole purpose of these boots is to save your feet since you will be trekking in nature. Therefore hiking boots are mostly waterproof and can face all types of water conditions.
Next comes the inner sole of hiking boots which should be of top quality in order to make the boots more comfortable for you so that you can cover distances in a blink. I think EVA is the most common and fine option in these boots. The EVA inner sole not only molds to the shape of your feet but also ensures a different level of solace especially if you are suffering from pronation and supination.
Another important aspect that you need to focus on is the outer sole. Hiking boots that have durable lug outer sole and decent grip patterns promise to be with you a little longer than your normal work boots and saves you from slipping on slippery surfaces. In short, you don’t have to worry about the things that nature throws at you.
Lastly, in order to keep your feet dry and crispy, you will need some ventilation and inner lining plays a major role in this. Gore-Tex is one of the best options which ensures that your feet remain toasty even when you drench them in water.
Work Boots
While work boots vary significantly from work to work, there are two things that are common in all which is comfort and safety in the workplace.
Since work boots are constructed for hazardous areas, you can find features like the presence of a safety toe designed from composite materials, alloys or steel depending on your needs. And this particular feature is absent in hiking boots.
The outer sole of the work boots is mostly resistant to electrical surges and hazards and are quite versatile. That is why they can be used as multiple places and for more job types giving you more value for your money.
Unlike hiking boots which are mostly waterproof, work boots are designed to be water resistant and not really waterproof which comes as an advantage in case of hiking boots. Although boots which are designed for people working in the logger industry are somewhat waterproof but unfortunately, they don’t have proper ventilation.
For your ease of understanding I have mentioned these differences according to their features.
FeaturesWork BootsHiking Boots
Weight Due to increased hazards of a construction site, presence of steel toe often adds significant weight.To avoid trips and abrasions, toe caps or bumper made of material like rubber are present which make the boots lightweight.
Flexibility Rigid in comparison to hiking boots.More flexible to avoid hindrance.
Traction Rubber outsoles with deep indentations to avoid slippage.Lug soles which includes grooves to increase stability.
Pros and Cons of wearing Hiking boots to work
Pros
We all know that hiking boots are exclusively designed to make your hiking experience much better but they are even great when you wear them at work. Getting confused? Well, let me help you by telling you some of the benefits of wearing hiking boots:
1.) Support and Stiffness: Hiking boots gives you just the right amount of support and stiffness you require to function well. The stiffer midsole and better ankle coverage in comparison to normal work boots allow you to carry out tough and hefty activities without hurting your feet. These are generally lightweight which makes them relatively comfortable and help avoiding sprains.
2.) Outer Soles: Almost every work demands a specific amount of tread to be present in the boots. The tread of the hiking boots permits them to form a steady grip on uneven surfaces. This way, these boots prevent slippage on slippery surfaces and accidents.
3.) Meant for watery surfaces: Since hiking boots are designed for hiking purposes where you are generally exposed to many things including water, these are generally waterproof. While your regular boots might remain wet, these boots are designed to dry quickly even when you walk through streams and mud. That is why hiking boots are suitable almost for all kinds of work that include even slightest of outdoor activity.
4.) Durability: You can’t ignore the fact that hiking boots are designed keeping hiking terrains in mind. When compared to normal work boots, these last longer. While with other boots, you have to replace them after every few months, hiking boots can last for years with some proper care.
5.) Better Foot Support: Hiking boots have stiff soles and great torsional rigidity which means you have a solid platform to step on. No matter how tough the environment is, your foot is safe from getting twisted.
Cons
1.) Poor Breathability: Hiking boots are made of thicker materials like leather that don’t breathe well. Another reason that could be responsible for less breathability is the presence of high tops through which heat and moisture can’t easily vent through. This not only makes your feet uncomfortable but also increases the chances of blisters.
2.) Hiking boots take time to break in: Hiking boots are designed using stiffer material that takes time to soften up. Because of this it sometimes becomes really intolerable to wear these boots at work.
3.) Your feet can get hot: Since hiking boots are less breathable, they tend to trap heat. This is bearable in cold weather but it is not so great in hot weather because it makes your feet sweat more which can increase the chances of developing blisters and other foot problems. If you are working in a hot environment then you’ll have to stop periodically and let your feet dry out and cool off which is really annoying.
Do hiking boots meet OSHA footwear guidelines for work?
If you are unaware about what exactly OSHA standards then let me tell you that these standards are generally available in footwears that are protective in nature and save workers from the risk of injury from impacts, punctures or electrical hazards at the job site. These generally impact and compression resistant as certified by the American Society for Testing and Material Standards.
However, when we particularly talk about hiking boots, these boots are not OSHA approved as they do not comply with ASTM standards for protective shoe performance and testing methods. But that does not stop them from being any less protective in nature. Although, if you are wearing hiking boots at work you should be a little more focused towards safety in comparison to your regular work boots.
Best Hiking Boots for Work
My top three choices for hiking boots are as follows
1.) Columbia Men’s Newton Ridge Plus Waterproof hiking boots
If you are looking for boots that are built to deliver the best in terms of style, performance and versatility then these Ridge plus are meant for you. Made exclusively from fine leather, the boots feature Omni-tech waterproof technology that allows them to fight unfavorable weather and prevent it from affecting your feet.
Technically, the outsole is made of rubber which is responsive, supportive and super grippy so that you can stand firmly at the worksite. The shaft measures approximately 5” from the arch and the heel measures approx 1.5” with the platform measuring approximately 0.50”.
Not just this, the boots are infused with advanced technologies which make them lightweight. Moreover, the durable midsole promises to offer long lasting comfort, superior cushioning and high energy return. The advanced traction rubber sole allows you to have a slip free movement on rough grounds.
The boots have durable mesh tongue for breathability with waterproof full grain leather and features a lace up closure for an adjustable, secure fit.
To get more information, Contact us at -https://workgearz.com/are-hiking-boots-good-for-work/
0 notes
Link

How should I pack for a hike? What should I pack for a multi-day trek? what’s too much? And what’s too little? How am I getting to carry it all? Which hiking gear and essentials should I stock advance and which may I buy on the ground? That’s where this Ultimate Hiking Packing List comes in to answer all of these questions — and far more — to organize you for your next adventure.
What is the difference between trekking and hiking?
Good question. While this text does an honest job breaking it down, for our purposes here we’re using the 2 words somewhat interchangeably to represent going out and walking in nature for a period of your time . this is often different from mountaineers trekking and Hiking Packing Myths
During the primary six years of our journey, we carried all that we would have liked in our backpacks so on be prepared for almost any quite climate or activity, from the beach to glacier. on reflection , we made some silly decisions in those youth .
As a result, we schlepped a couple of bits we never used. But through experience and experimentation and after a few dozen multi-day treks across all continents, we got smart not only on what gear to hold with us but also what to shop for locally or rent.ng, which usually involves specialized climbing gear and technical skills.
1. you want to purchase the newest and greatest trekking gear.
It’s true that some trekking clothing technology is particularly useful for lightness, wind-resistance, waterproofing and wicking (GoreTex, fleece, Polartec, etc., come to mind). However, we propose that specialize in the trekking basics: clothing that’s comfortable, breathable, light, easily layered.
2. you would like to bring EVERYTHING with you.
For every trek we’ve undertaken, there’s been ample opportunity to rent or buy gear to supplement our trekking kit. for instance , it’s just not practical for us to hold around bulky waterproof pants in our backpacks once we only need them a small fraction of the time.
3. Real treks require camping.
This is all subjective. It’s true that camping and carrying all of your own gear may offer you a greater sense of independence and accomplishment and permit you to dive deeper into nature. However, we disagree with the assertion that camping equals a far better trekking experience. In fact, a number of our most memorable treks (e.g., Annapurna Circuit, Markha Valley Trek, Svaneti, Peaks of the Balkans, Kalaw to Inle Lake in Burma, etc.) are memorable precisely due to the local culture and human interaction dimensions surrounding our accommodation and food arrangements.
Hiking Backpacks and Camera Bags Small hiking backpack or day pack
You’ll be carrying all of your stuff on your copy and down mountain passes therefore the size, fit and luxury of your pack are important. Aim to carry a pack that’s large enough to hold the essentials (e.g., water, jacket, rain gear, sunscreen, etc.), yet not too big that it’ll weigh you down.
The size will depend upon what percentage days your trek is and whether or not you’ll camp. do not forget to bring a rain cover to guard your backpack in storms.
We’ve often repurposed our laptop backpacks or rented backpacks from trekking agencies. This usually did the trick, but they weren’t always entirely appropriate and thus kind to our back and shoulders. We’ve since invested in proper trekking backpacks and haven’t looked back.
My approach is to hold and maintain separate hiking and sleeping (or relaxing in the dark ) clothes in order that you usually have something clean(ish) to vary into at night. To get on the safe side to guard against things getting wet, put your sleeping clothes and whatever else you are not wearing at the time in Ziploc or another quite bag .
1 pair of trekking pants: We’re both been using Clothing Arts Travel Pants (men’s trekking pants and women’s trekking pants) for over eight years on all of our day hikes and multi-day treks. They not only are sturdy (we’ve put them through tons and that they still look great), but they’re also quick-dry and avoid stains and odors. we discover the extra secure zipper and buttoned pockets useful on treks for keeping phones, money, tissues and other things handy. (Note: this is often especially relevant for ladies as many women’s trekking pants hardly have any pockets.)
Thermal underwear (top/bottom): i really like my silk underwear as they’re warm, comfy and take up almost no room in the least . Also good is Uniqlo’s Heat Tech collection of thin, but warm, layers of leggings and tops. Dan remains keen on his Patagonia zipper top and bottoms that he’s been using for over a decade.
2-3 short-sleeved t-shirts: Preferably quick-dry or regular cotton. we frequently use our running shirts as they’re light and wick away sweat well.
1 long-sleeved pullover or zipped shirt: once you need another light layer to travel over your t-shirt for cold or sun protection. i have been enjoying this light zipped top for ladies and Dan’s been employing a half-zip pullover.
Pyjama/sleeping pants: I find that cotton yoga pants work quite well.
Underwear: However many pairs that you’re comfortable with carrying. Here are recommended men’s boxer shorts and women’s underwear.
3 pairs of socks: i really like SmartWool hiking socks as my first pairs lasted me almost seven years of heavy usage.Hiking Shoes and Other Footwear Hiking Shoes
Shoes could also be the foremost important thing you bring with you so if you invest in one thing beforehand , invest during a solid comfortable pair of hiking shoes. And break them in. Your shoes can literally make or break a visit .
If you’ve got a specific trek or hike in mind, invite advance whether you would like mid- or high-cut hiking shoes for ankle support as this might influence your purchasing decision. we do not find ourselves often needing high-cut boots. However, if your ankles are weak or vulnerable to turns and sprains, more support is best than less.
We both recently shifted to wearing Oboz Sawtooth hiking boots. The insoles and support for your feet are specialized , and therefore the shoes are sturdy and may get up to some tough terrain. additionally , Oboz plants a tree for each pair of shoes sold so you’ll feel good that your purchase goes towards reforestation and environmental projects.
0 notes
Text
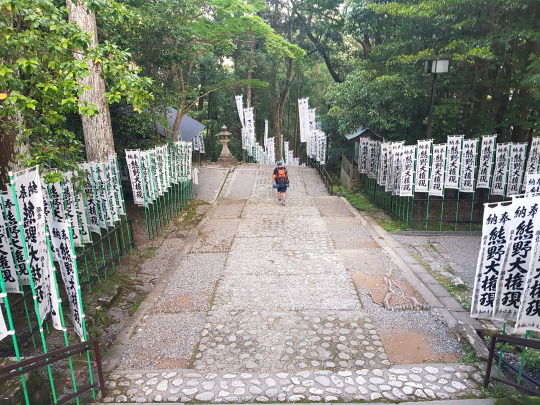
A beginner's guide to Hiking the Kumano Kodo Nakahechi Route
If you are planning to hike the Kumano Kodo Pilgrimage, you’re in for some fantastic historical sights, stunning views, and close-up encounters with various wildlife.
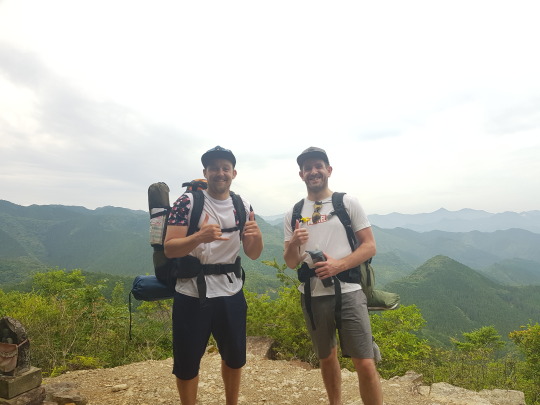
I had the fortune to join a friend for the full 72km Nakahechi Route from Takajiri-oji right through to Kumano Nachi Taisha just as the Pandemic lockdowns were lifting across Japan in June 2020.
At this time there were very few people to encounter on the trail or at the shrines and towns. The recent lockdown also meant a lot of usual stops for shopping and accommodation had limited options due to the tourism industry being so severely affected.
The 1000-year-old path is not without its challenges, so a little bit of preparation goes a long way;
When to travel
Most years, spring and Autumn are the preferred times to travel the route to avoid the heat. We chose to begin the pilgrimage on the first day of June 2020 - the day that the government officially lifted the lockdown in Japan. June is early Summer in Japan and temperatures start creeping into the 30-degree region. June is also the beginning of the rainy season (known locally as Tsuyu meaning “Plum Rain”), and the combination of hot weather and heavy rain makes it a less popular period for attempting the Kumano Kodo. Fortunately, we enjoyed a week of perfect weather with just a single overcast day.
Fitness
For reference, my hiking partner and I are both in our mid 30’s and of average fitness. Our winter seasons are spent working desk jobs and enjoying too much beer in ski towns, so summer is a period where we try to shed some of the bad habits and get more active. Neither of us had ever experienced anything longer than an overnight hike before this. Nevertheless, I would describe the Kumano Kodo as being a very beginner-friendly multi-day hike experience. There are so many populated areas along the way that it’s quite unlikely you will succumb to the elements and have your bones picked clean by the local fauna.

Packing Guide for four nights/five days
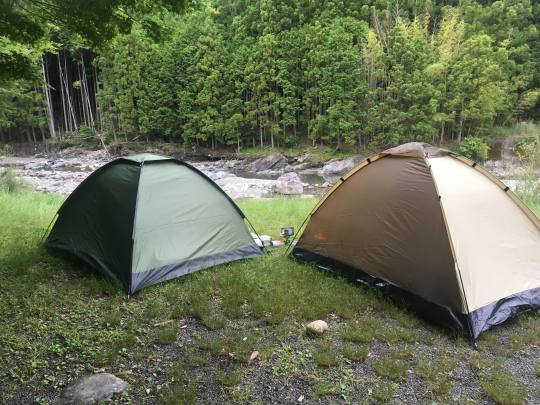
We both carried 60L hiking packs as we were also carrying camping equipment such as tents, sleeping bags, sleeping roll, cooking equipment etc. These added up to 15kg of weight with water included which made some of the steep passes quite a challenge in our poorly conditioned state.
For other beginners who would like to do the Nakahechi Route for themselves, below is an outline of what we packed and where we purchased our items locally. Note that the below is not necessarily the best advice; it is merely what two inexperienced and budget-savvy guys chose.
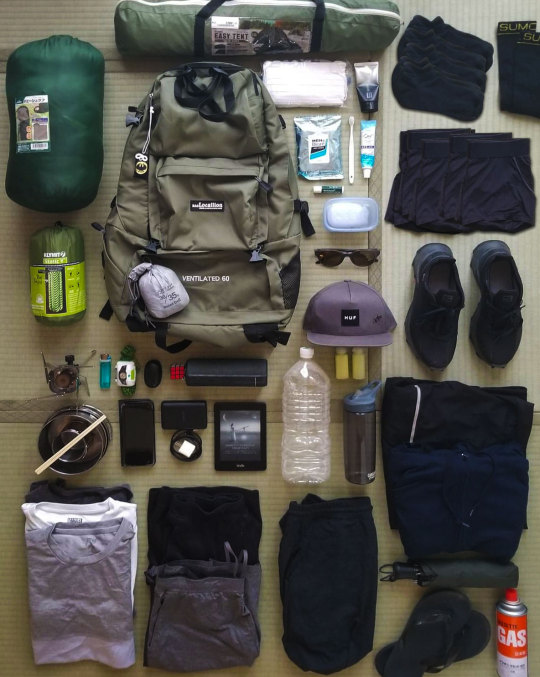
10-15kg camping setup (per person)
We purchased most of our camping gear from either Hard Off or Second Street. They both stock second hand and budget retail gear and are chain stores available in most large towns throughout Japan.
60L Backpack - 5,500 yen from Hard Off
I went for a large backpack because we were packing camping gear. Most people stay at guest houses each evening and only need a day pack for water, snacks, etc.
One person tent - 1,370 yen from 2nd Street
This tent was reeeeeeaallly cheap. I’m glad it didn’t rain.
Sleeping Bag - 1,500 yen from 2nd Street
Cheapest of the cheap sleeping bags. Not good for cold weather. Great for keeping the boogeyman away from your toes.
Sleeping Roll - 9,000 yen from Alpen Outdoor
I splashed out because I wanted a sleeping roll which packs down really small. Also hoped extra cost meant extra comfort, but it was still quite terrible to wake upon in the middle of the night.
Rain Cover for Backpack - 1,000 yen from Hard Off
Just in case it rained. A cheaper option is to put a bin liner in your Backpack.
Gas Stove & Gas & Lighter - 5,000 yen from Alpen Outdoor
Simple but effective. A little bulky compared to models in the 10,000 yen range and it uses larger gas canisters but got plenty of cooks and cups of coffee out of it.
Pots & Cup - 900 yen from 2nd Street
These were incredibly cheap, and we instantly burned the hell out of everything we tried to cook. Great for boiling water. Will carbonise anything else. A decent Teflon camping pot set will be on my Xmas list.
Umbrella - 1,000 yen from Uniqlo
A simple alternative for keeping dry if you don’t want to purchase waterproof pants and jacket, which tend to get pricey when they are both waterproof and breathable.
Clothing
We stopped at Uniqlo for super cheap, light clothing. Nothing special, no fancy brands or special weaves. It was all comfortable for our needs.
3 x Tee shirts - 1,000 yen each from Uniqlo
2 x shorts - 1,000 yen each from Uniqlo
1 x Gym pants - 1,500 yen from Uniqlo
Great for changing into after washing up each day and keeping bugs away from the ankles.
1 x light hoodie - 2,000 yen from Uniqlo
1 x light windbreaker - a Nike running Jacket I already owned
I never used this, but it packed down tiny so no problem.
5 x socks - 2,000 yen total from Uniqlo
These were cheap, cotton, ankle socks. I know cotton is basically the devil; however, I applied antiperspirant cream to my feet each morning to prevent my shoes from turning into the Bog of Eternal Stench and had no problems.
5 x undies
Personal preference. We ended up swimming on a couple of afternoons, so I found it easier to just rock life “commando” for a day or two rather than suffer wearing or carrying damp undies for hours.
1 x Shoes - Salomon AlphaCross 8,000 yen from Amazon
Hiking boots may be a better option due to the unstable terrain - my hiking companion almost rolled his ankle into the next century a couple of times. That said, these trail runners were comfortable and dry, and the traction was excellent everywhere except for the sections with wet, mossy rocks. Might as well have been wearing banana peels on my feet during those parts of the path.
1 x Jandals - already owned
For letting the piggy wiggies breath after a long day in the shoes.
1 x set of thermals - already owned
Totally unnecessary in June. Don’t be like me.
Sun hat and Sunnies - already owned
For looking cool at the club. A wide brim hat would be a better choice for the trail.
Food and water
You should encounter drink vending machines and food shops at least once each day, so it’s not necessary to go overboard with supplies - especially if you’ve booked accommodations which provide dinner, breakfast, or a packed lunch.
As we specifically planned to camp on a couple of evenings, and we had a brand new gas stove to try out, we brought extra food to cook up so we could feel like self-sufficient mountain men.
We packed:
Rice which we mixed with grains and seasoning and refrigerated for rice balls on the trail. Warning: google how to prepare rice for eating later, so you don’t DIE.
Instant ramen and canned tuna, which we cooked up for dinner both nights that we camped.
Eggs and spam which we cooked and promptly burned for breakfast the morning after our first camp
Bananas, trail mix, CalorieMates, and Protein Jelly drinks as snacks
Instant Coffee and Teabags
Around 2-3 litres of water
Special mentions
Wipes in case of emergency poopage
Bluetooth speaker for fighting off the Daru Spirits during the steep sections (special mention to Prodigy’s Fat of the Land album for getting us to the top of Echizen Toge Pass on day four).
We forgot Insect Repellant and received some gnarly bites on the legs
Itinerary
(5 days, approx 80km / 4160m total elevation gain)
Our Itinerary was modified mid-travel because the Info Desk in Hongu advised that all accommodations and shops were likely closed at Koguchi. This village is where people typically rest overnight before tackling the demanding Echizen Toge Pass on the Ogumotori-goe section which is the most gruelling climb of the Nakahechi Route. As such, we incorporated the climb into the end of our 4th day rather than the beginning of our 5th.
Day One
Takajiri-oji Trailhead > Chikatsuyu-oji - approx 13.5km
After being dropped off at the Trailhead by bus, we nosed about and took a few photos at the entrance before starting the ascent. It didn’t take a great deal of time to start building a sweat as the steps slowly took us up to the 400m mark, and I could feel a bit of self doubt (henceforth known as Daru Spirits) setting in as my lack of fitness made itself clear. Fortunately, there were a couple of interesting shrines on the way up which offered a chance to take off the packs and have a few sips of water.
Only a short while into this first climb we encountered our first slithery friend as we startled a nearby snake beside the track who in turn startled a few of my hairs into turning grey.
Once on the ridge line the pace was quite easy right through until Takahara 4km further. Here we enjoyed idyllic scenes of stepped rice paddies dropping down into the valley while a nearby water wheel lazily turned under a weak stream.
Another relatively tough climb directly out of Takahara - mostly due to the heat - and we were back under the forest canopy.

In between enjoying the shrines and the forest views along the trail there were also plenty of interesting creatures spotted including more slitheries, and some red crabs which were definitely completely lost.

We camped at the Iris Park Campground which added a couple of extra km of walking as it is located over the hill from the main village. It was a great spot next to a river with plenty of amenities including cabins, sento bath facilities, power outlets, covered bbq areas, and - inexplicably - some sort of menagerie.
Day Two
Chikatsuyu-oji > Hongu - approx 25km

After a surprisingly shit sleep in our $15 tents, we cooked up some spam and eggs for breakfast to fuel the finely tuned machines that are our bodies then hit the trail again.
Today was to be a big 25km trek to Hongu where the first major shrine “Kumano Hongu Taisha” is located, and it was another hot one pushing 30 degrees with 85% humidity.
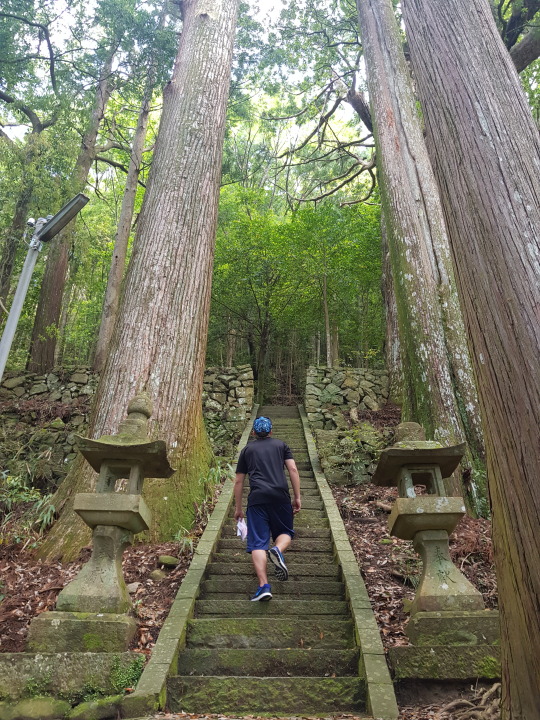
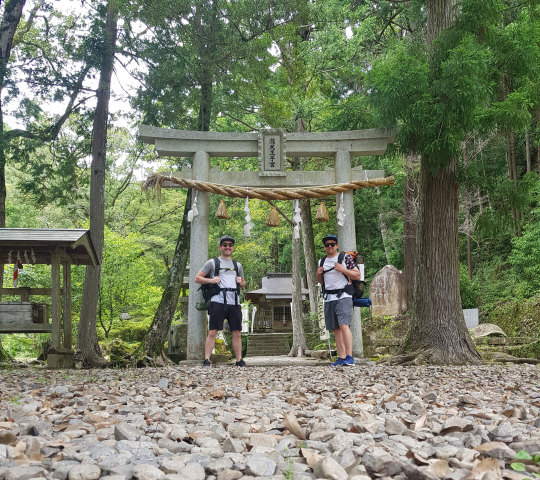
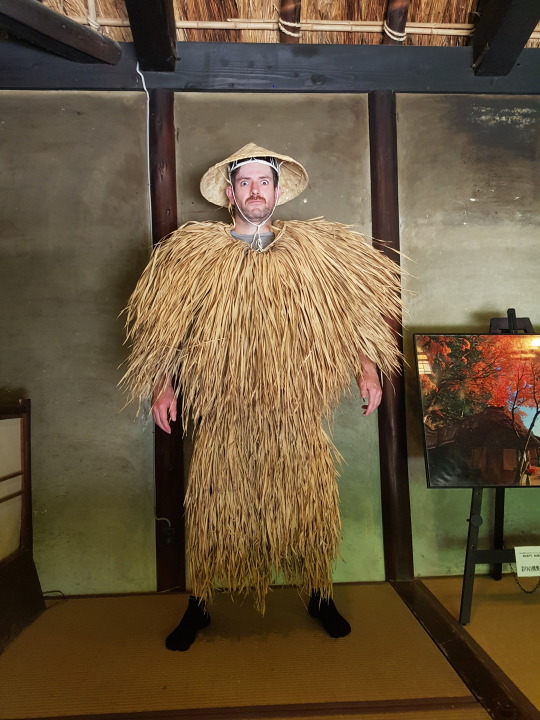
An hour or two out of Chikatsuyu there was an impressive shrine with stunning Cedar trees lining the stairway and a rest stop displaying a traditional grass “raincoat”.
TIP: Don’t try this thing on with short sleeves or you’ll rash up like a baby’s ass in summer.
The trail followed the road for some time making it an easy journey - except for the moment we didn’t notice a recently-squished snake on the road until we almost trod on it and squealed in sheer terror.
The easy times were short lived though, as we entered the Detour Pass and started climbing, Daru Spirits started flying at us from every angle; between the steep staircases and sections exposed to the blazing sun, the Daru almost got the better of us. Fortunately, after a hard fought battle we reached the peak and promptly collapsed in the shade knowing that the worst was behind us for now.
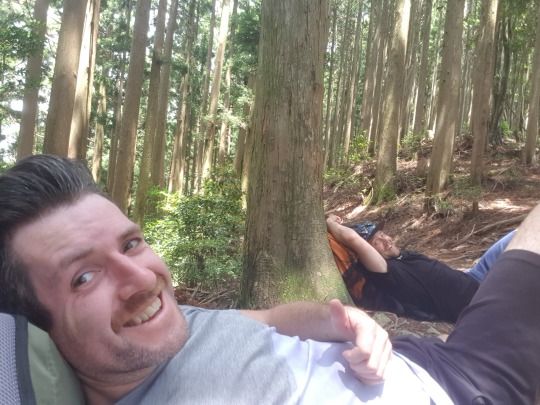
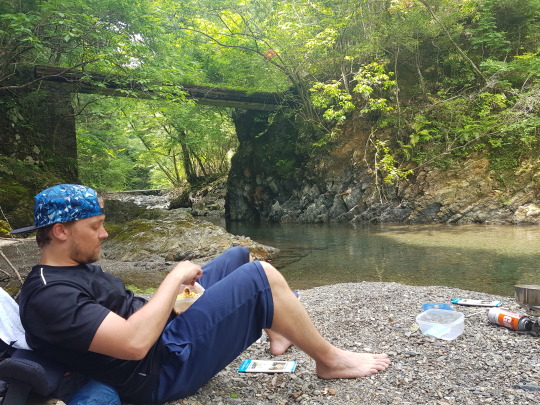
Our feet were definitely feeling tender after this lengthy hike which involved clearing three passes in total, each with steep elevation. After the Detour Pass near Jagata-jizo, there was an excellent spot to relax on the stoney shore of a small stream, have a bite and cool the feet off in the chilly water.
As we were descending the final pass of the day, we had set a brisk pace through the trees and I accidentally stepped on a snake which was having a nap on the path. Needless to say it was none too happy about having its slumber rudely interrupted and it made a bee-line for my companion close behind who gave a yell and looked about ready to throw himself off the path to avoid the slithery vengeance. We proceeded a little more cautiously afterwards, but between all the sticks that look a lot like snakes, and all the snakes that look a lot like sticks it was a jumpy last few kilometers.
Once we arrived in Hongu we picked up a celebratory beer - had a kanpai to celebrate surviving our snake encounter - and booked a dorm at the Kumano Backpackers. The owner offered excellent local advice about where to find river swimming spots, camping, and refilling drink bottles on the road ahead.
Day Three
Rest Day - approx 7km

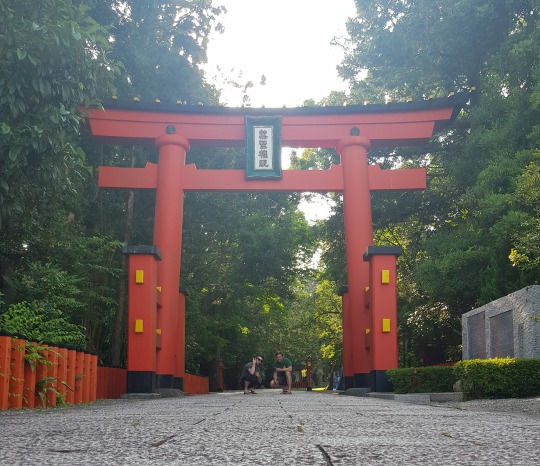
We stayed a second night at Kumano Backpackers and used our free time to properly explore the Kumano Hongu Taisha Shrine, the impressive Otorii, and we also caught the bus to check out the nearby Yunomine Onsen town.


We learned on this day that our intended destination of Koguchi for the following evening was likely closed - which meant we may not be able to top up on clean water, fresh food, or book accommodation. This meant we were looking at a much bigger day of walking and would need to clear the Echizen-toge pass the same day to reach the next stop - Jizo-jaya Teahouse - which hopefully had operational vending machines for fresh drinks and a good camping spot.
We spent the evening preparing our rice for additional trail snacks, purchased an extra 2L water and looked forward to carrying the heaviest load of the whole trip up the largest mountain.
Day Four
Ukegawa Trailhead > Jizo-Jaya Teahouse Remains - approx 19km
Well rested, we caught an early bus to the Ukegawa trailhead, which saved us an hour or so of walking along the highway. From here it was an easy 12.5km to Koguchi where we stopped for a lunch break.
Upon arriving, it turned out the local shop was, in fact, open and the incredibly kind lady working there gave us a hearty Ganbatte! after topping up our water bottles with fresh, icey water and offering a snack for the road ahead.
Under the Koguchi bridge was a spectacular swimming hole with a plethora of fingerlings ready to nibble on any weary feet dipped into the water. We stopped here for two hours to enjoy a refreshing swim and a brief nap before downing a CalorieMate, Banana, Rice Ball, and an Energy Jelly (for good measure).
Soon enough, it was time to saddle up again and tackle the 800m Echizen Toge Pass.
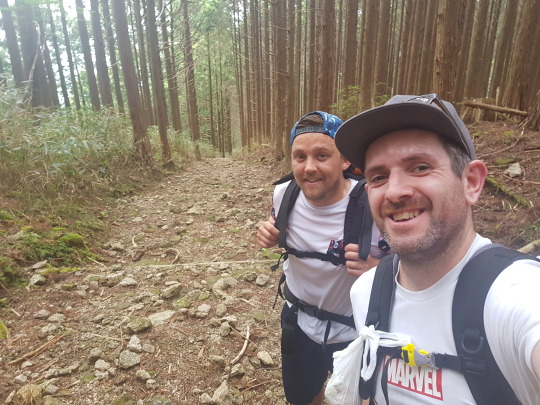
This was a long hike up, and many times we saw the sky appear in the trees ahead and felt we must be near the top, only for the track to turn once again and present us with another indeterminable number of stairs. We found ourselves making steady progress by focussing on counting down the official markers every 500m, and picking an easy line up the stairs which avoided making large strides. Since the steps were often haphazardly sized stones it was a good mental distraction to pick a path a few meters ahead as you climbed to avoid strenuous steps.
As we neared the top, we took a water break, connected the bluetooth speaker and queued up The Prodigy to get us pumped for the final few hundred meters.
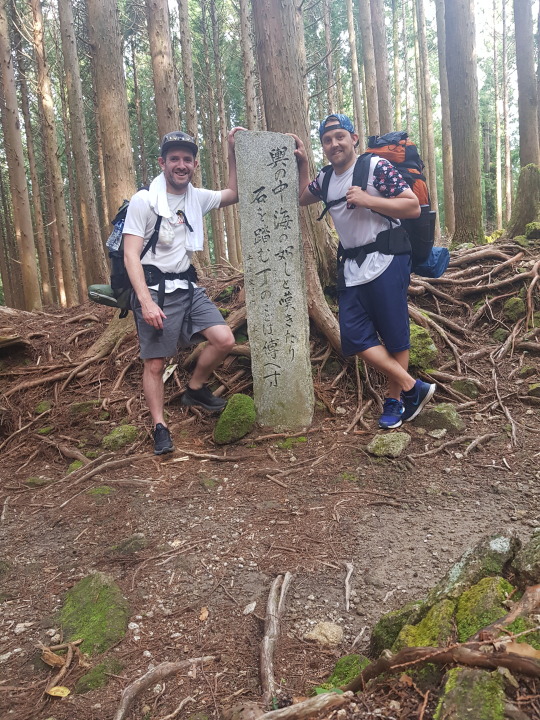
And then we were there - and we felt great! A quick water break, a photo-op, and then down the other side of the pass.
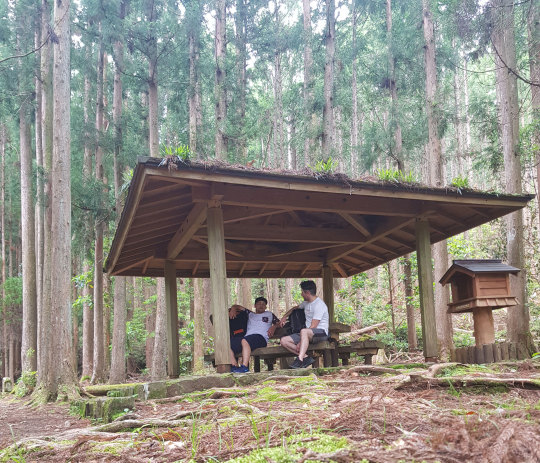
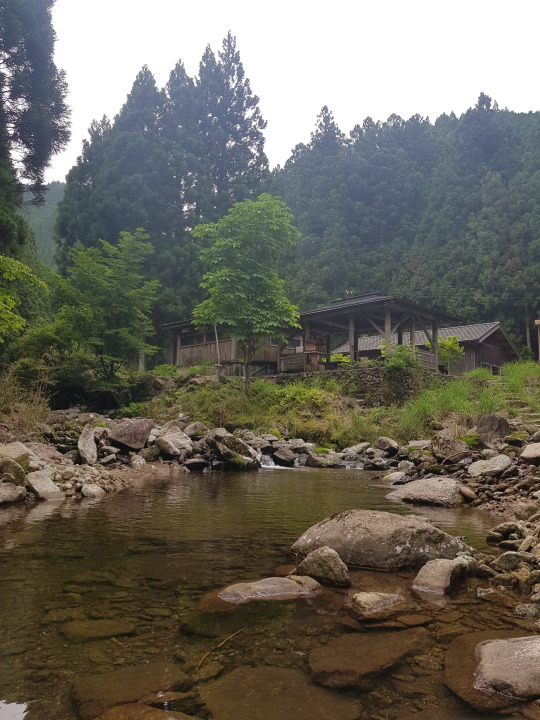
That evening we camped at Jizo-Jaya Teahouse - a fantastic rest stop with power and an indoor seating area for travellers. The shelter was located a short 1600m walk after completing the Pass.
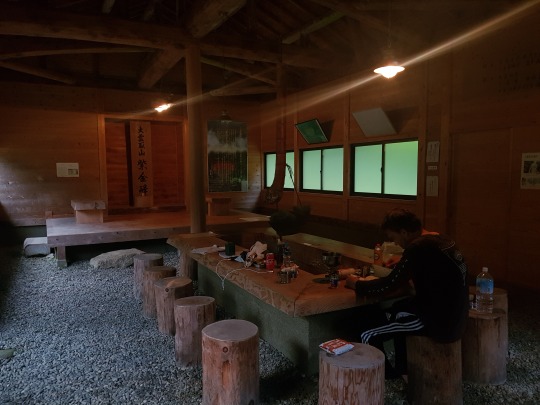
As well as offering more drink vending machines, the rest house area had a tranquil stream perfect for washing off the day’s sweat and grime.
Day Five
Jizo-Jaya Teahouse Remains > Kumano Nachi Taisha Shrine - approx 8km
We made an early start to complete the final unchallenging 8km of the Nakahechi Route. The descent into the valley where the second Major Shrine is located offers a rewarding view.
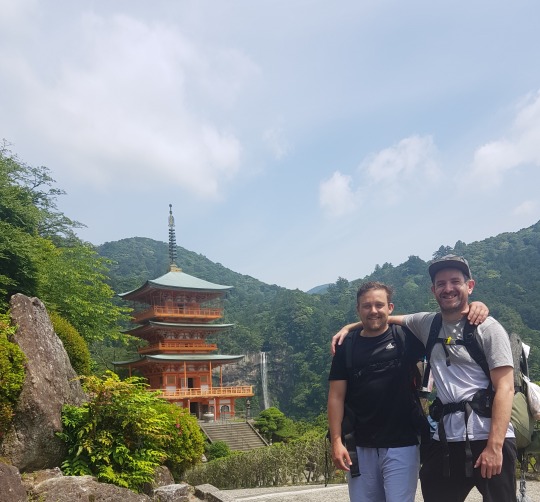
After exploring the temple grounds for an hour or two and collecting some souvenir junk, we descended the Daimon Zaka and caught the bus to Nachi Station, then a short train ride to Shingu to visit the third shrine - Kumano Hayatama Taisha.
At Shingu we booked a traditional style hotel room, took off the packs for good and called it a week.

Final Thoughts
Bring a copy of the official Kumano Travel guide with you, The information inside is amazing.
Be sure to stop and read the information signs at the various points of interest during the pilgrimage. No photos of the Jizo and Oji shrines are included in this post because I felt they were best enjoyed in person as a rewarding place to rest during the journey.
Sleeping in a tent on a thin matt is pretty uncomfortable - book a guesthouse well in advance if you want the traditional experience.
Bring a notebook so you can stamp the pages at each shrine along the way.
Every toilet I encountered along the way was in great condition and extremely clean. If you can hold it in until you reach proper facilities you’ll thank yourself.
Stay hydrated and don’t push yourself too hard on the steep sections.
Don’t rush on the downhill side - it’s easy to injure yourself on the uneven paths.
Phone service can be limited especially in the last couple of valleys.
Beware of the Daru!
0 notes
Text
LONSUNEER Paw Protector Dog Boots Review
Just like we need our feet protected by shoes, dogs also need something to protect their paws. As we walk and go on adventures, there are always hazards that may cause harm to your dog’s paws. Dog boots like The LONSUNEER Paw Protector Dog Boots can help you take walks and hikes worry-free. This article is a total review of the LONSUNEER dog paw protector booties. You can also check out article that highlights the 5 best Dog booties with reviews.
Do I need dog boots?
There are a lot of reasons for you to purchase dog boots for your furry friend. If you have an active do who likes to walk a lot, you can use it to protect them from hot pavements, and broken glass or stones while on a walk. There are dogs that need them to get additional traction when walking indoors, like dogs who have certain injuries or conditions that have trouble walking. Most people though, use dog bots to take their dog on hikes and protect them from the rough roads on the hiking trail.
For any reason that you would need one of these, there are some things that you want to consider before you buy a pair of these dog boots. Here are some of them:
Material and Quality – How breathable are these boots? Will my dog’s paws get hot while wearing these boots?
Design – What makes these boots special? What can it protect my dog from?
Security – How do I keep these on my dog? What safety features do these boots have?
These are just some of the things that you should look for when deciding to buy dog boots. Ultimately, It is up to you on which boots you want to get based on what you need. Let us show you one of these boots you might want to consider. The LONSUNEER Paw Protector Dog Boots.
Presenting LONSUNEER Paw Protector Dog Boots
Check Amazon’s Price
The LONSUNEER Paw Protectors are made with soft fabric mixed with mesh to provide breathable boots to make it as comfortable as it can be for your dog. It has flexible cuffs to protect debris that may enter the boots. Non-slip soles to avoid any injury while taking a walk. It comes in 2 colors: Blue and Red and various sizes from X-small to X-Large.
.wp-pros-cons { background: #F9F9F9; border: dashed 2px #001a71; } .wp-pros-cons .wppc-btn-wrapper .jd-wppc-btn { color: #fff; background: #212121; } .wp-pros-cons .wppc-btn-wrapper .jd-wppc-btn { border-radius: 5px; }
Quick Glance
What’s Good
Breathable fabric
Flexible cuffs for easy on/off
Non-slip soles
What’s Bad
Hard plastic for the velcro straps irritate the dog’s skin
Not waterproof
No Reflective Straps
Best Qualities of the LONSUNEER Dog Booties
Each and every brand that makes dog boots have something unique that sets them apart from the rest. Some of them better than others but it doesn’t mean that they are not good products. Let’s see what these paw protectors have to offer.
Material and Quality
The LONSUNEER boots are made of mesh and soft oxford fabric. This combination makes it really comfortable for your dog to walk with them on. They are breathable and can be worn all day long as if you were putting them on for a cut to heal. It has a stretchable and flexible cuff for the ease of putting them on and taking them off. One thing that users have noticed is that these boots are not waterproof, so be careful when you are out at the beach or near rivers.
Check Amazon’s Price
Design
These boots are designed to protect your dog’s feet from any injuries from taking a walk or hiking or simply using them so they would not slip on hardwood floors. They are equipped with non-slip soles that help give your dog some traction when walking or running. They come in 2 colors: Red and Blue. They are available in a range of 5 sizes from X-small to X-large. Not as wide as the other brands but still wide enough to accommodate small and big dogs alike.
Security
The paw protectors have velcro straps to keep them on your dog’s paws. The flexible cuffs also provide protection for debris that could otherwise go inside your dog’s boots. Unfortunately, these boots do not come with reflective straps so these might not be safe for walking at night or in the early morning. Another flaw that users noticed is that the velcro straps have hard plastic connectors that sit right on the dewclaws of some dogs so it makes it uncomfortable for them to walk in.
Check Amazon’s Price
What do others say about the LONSUNEER Paw Protectors?
Of course, you can’t just trust our judgment when it comes to your dog. We have gathered some user comments about the products that use them regularly for you to see what they’re really like.
Jason and Dana bought these boots to keep their dog’s paws protected from hot sand and pavements. It did the job though, sadly, they found out these were not waterproof when they used it at the beach.
Mynxcat has a problem with these boots because of the velcro strap connector, it sits on her dog’s dew claws that her dog started limping after w while of wearing them because of it.
Coleen thinks these boots are heaven-sent. These boots fit her dog properly and protector the paws from the AZ heat.
Alternatives to LONSUNEER’s Breathable Paw Protection
If you think that the paw protectors are the boots for you, great! However, if you are still unsure, here are some possible alternatives that you can purchase instead that might fit your needs.
Canine Equipment Ultimate Trail Dog Boots
These dog boots are made from recycled rubber soles to provide traction for your dog on any kind of surface. These can also provide protection from small and sharp objects in grass and gravel. Different sizing for the front and hind paws to get a better fit. Canine Equipment’s paw protectors come only in Black and 5 different sizes ranging from X-Small to X-Large.
Ruffwear – Grip Trex

Dog Boots
Ruffwear’s Greip Trex
are said to be the standard dog boots worn by active dogs who like to run, hike, and trek. High-performance dog boots that have a resilient and rugged design with Vibram outsole for exceptional grip on hard-to-walk on the terrain. Designed to securely fit on your dog’s paws so they can forge ahead and explore the great outdoors with you.
QUMY Dog Boots
QUMY’s dog paw protection boots are made to protect them from the dangers of the rough roads. With an extra extended design, these boots will surely fit comfortably on your dog’s paws. Equipped with adjustable reflective velcro straps your dog will be safe from harm when walking in the early morning or even at night. It has non-slip water-resistant soles that help your dog move better in indoor and outdoor environments. Weatherproof and waterproof these are the boots that you can take anywhere.
Our Final Thoughts
The LONSUNEER dog boots are one of the most inexpensive of all the ones in its category. Though it is, they are also a great product to have if you’re not into buying super high-quality material that burns your wallet. The non-slip soles are great and so is the breathable fabric. These are the type of boots that you need to keep your dog safe from taking a normal walk. Click here to view these booties on Amazon.
The post LONSUNEER Paw Protector Dog Boots Review appeared first on Furry Friends Gear.
LONSUNEER Paw Protector Dog Boots Review published first on https://furryfriendsgear.tumblr.com
0 notes
Photo

Hello Michael,
I read your article about ultra-backpacking and how you did the John Muir Trail in seven days. I am planning on doing it, but would like to know, for an ultralight backpacker, what do you suggest for a backpack, tent, sleeping bag, etc.? Any feedback or thoughts that you have would be much appreciated.
Thank you.
Joei
Covina, CA
Hi Joei,
Very cool that you’re making a John Muir Trail thru-hike. (The lead photo above shows a view of the Yosemite National Park.) I did it in late August, and I think late August through mid-September is the best time of year to hike the JMT, because you’ll find a largely snow-free trail, the voracious mosquitoes of mid-summer are just about gone, and the afternoons aren’t as blazing hot as mid-summer.
My specific gear suggestions below would, of course, apply to almost any backpacker who wants to go lighter and hike more comfortably in most mid-latitude mountain ranges in summer—although the choice of shelter would depend on typical weather and bugs.
You should also read my tips on ultralight backpacking, which includes my generic ultralight gear checklist and a chart describing each piece of gear and apparel with its weight; and see my standard checklist for backpacking.
Hi, I’m Michael Lanza, creator of The Big Outside, which has made several top outdoors blog lists. Click here to sign up for my FREE email newsletter. Click here to learn how I can help you plan your next trip. Click here to get full access to all of my blog’s stories. Follow my adventures on Facebook, Twitter, Instagram, and Youtube.
Mark Fenton at Trail Crest on the John Muir Trail, Mount Whitney.
Here are my picks for the major gear items.
For a backpack, I like a few models: the Osprey Exos 58 or Exos 48, which have been udpated for 2018, when Osprey also introduced the women’s version, the Eja 58 and Eja 48 (read my review); the Gregory men’s Optic 58 and women’s Octal 55 (read my review), and the smaller Optic 48 and Octal 45; and the Hyperlite Mountain Gear 3400 Windrider (read my review).
See all of my picks for the best ultralight, thru-hiking backpack.
Want to hike the John Muir Trail? Click here for expert, detailed advice you won’t get elsewhere.
In late summer, outside the buggy season in the High Sierra, I prefer using a tarp, like the Sea to Summit Escapist Tarp (read my review), which I used on an ultralight, 86-mile, four-day, September hike in northern Yosemite. I often sleep under the stars on a clear night, but a tarp, besides protecting you from rain and some wind, can trap a surprising amount of warmth underneath it on a calm night.
If you want a full tent, look for a solo that’s around two pounds or two-person tent that’s well under three pounds, like the two-person Big Agnes Tiger Wall UL2 (read my review), Big Agnes Fly Creek HV UL2 (read my review), Slingfin 2Lite Trek, which pitches with trekking poles (read my review), or the MSR FlyLite (read my review). Or if you’re willing to carry a little more weight for more space, check out the Big Agnes Copper Spur HV UL2 (read my review) or Marmot Tungsten UL 2p (read my review).
See my picks for the five best backpacking tents, all of my backpacking tent/shelter reviews, my “5 Tips For Buying a Backpacking Tent” and my story “How to Choose the Best Ultralight Backpacking Tent For You.”
Plan your next great backpacking adventure in Yosemite and other flagship parks using my expert e-guides.
On the JMT below Forester Pass, Sequoia National Park.
For most three-season backpacking, I carry a sleeping bag rated around 30 degrees F. It’s warm enough for me on nights above freezing, as most nights are in summer; on an unusually cold night, I can supplement by wearing my clothing. People who get cold more easily may want a bag rated 20 to 25 degrees—and there are some high-quality, relatively light and compact models out there.
Down bags were traditionally warmer, lighter, and more compact and durable than synthetic (if also more expensive), but the best synthetic insulations now compete with down for warmth and packability, while down feathers treated to make them water resistant compete with synthetic insulations for continuing to trap heat when damp or wet.
My favorites include a bag I’ve used for years, the Marmot Hydrogen; the Western Mountaineering Summerlite (read my review); the Sierra Designs Nitro 800 20-degree (read my review), which comes in a 35-degree version; the REI men’s Magma 10 and women’s Magma 17 (read my review); and the Big Agnes Picket SL 30 (read my review).
See my “10 Pro Tips For Staying Warm in a Sleeping Bag” and all of my sleeping bag reviews.
For nighttime lows generally above freezing, take a lightweight or ultralight insulation piece like the Patagonia Micro Puff Hoody (read my review), the Mountain Hardwear Ghost Whisperer (read my review), or the somewhat warmer Arc’teryx Cerium LT Hoody (read my review) or Patagonia Nano Puff Hoody (read my review).
See my “Review: The 10 Best Down Jackets,” my story “Ask Me: How Can You Tell How Warm a Down Jacket Is?” and all of my puffy jacket reviews.
Get the right pack for you. See my “Gear Review: The 10 Best Packs For Backpacking”
and my “Top 5 Tips For Buying the Right Backpack.”
Lastly, if all of your gear is light, you should get lightweight hiking shoes or boots. You may want something waterproof-breathable that’s still relatively light, like the Scarpa Proton GTX (read my review), Arc’teryx Acrux2 FL GTX (read my review), or Oboz Crest Low BDry (read my review).
For hiking the JMT at a time when it will be largely snow-free, I’d go with non-waterproof, mid-cut or low-cut hiking shoes for maximum breathability, as my friends and I did in late summer because we didn’t have to worry much about getting wet, and highly breathable shoes dry much faster, too. Shoes I like include the La Sportiva TX3 (read my review), Scarpa Epic Lite (read my review), Oboz Scapegoat Mid (read my review), and Arc’teryx Acrux FL (read my review).
See all of my reviews of hiking shoes.
I can help you plan this or any trip you read about at my blog. Find out more here.
You should read my story “5 Things to Know Before Buying Backpacking Gear,” which has my general tips on buying any gear and links to my stories offering specific tips on buying a pack, tent, boots, and sleeping bag.
See also my advice to another reader about thru-hiking the JMT in early summer and all of my stories about the John Muir Trail.
The JMT is a wonderful experience. Good luck.
Best,
Michael
Tell me what you think.
I spent a lot of time writing this story, so if you enjoyed it, please consider giving it a share using one of the buttons below, and leave a comment or question at the bottom of this story. I’d really appreciate it.
The Big Outside helps you find the best adventures. Subscribe now to read ALL stories and get a free e-guide!
0 notes
Photo

The West Highland Way is one of the world’s most popular long-distance walks and is approximately 154 kilometres (95 miles) long. It starts its journey in the town of Milngavie (Mul-guy) and winds its way north through the countryside, past lochs and over moorlands. Along with old rail-lines and through Scottish villages and past farmlands with the famous Highland cattle.
You will finish your way in the town of Fort William that sits in the shadows of UK’s highest mountain, the famous Ben Nevis. The end of the way isn’t necessarily the end of the walk as from here you can continue your journey north walking the Great Glen Way.
A view of the Buachaille Etive Mòr mountain on our trip.
History of the area
Many of these distance walks throughout the UK and Europe have evolved from pathways used before the time of the motor vehicle when the only way to get from one land to the next was by walking. Much of the West Highland Way (WHW) is made up of such pathways and it is steeped in history that goes right back to the 13th century of the McDougall Clan, as well as the Jacobite rebellion in the 17th and 18th centuries.
This was a time of major uprising and many of the old military roads were built for the British troops to quell the Jacobite rebellion. You will also be travelling along old drover’s roads the local farmers used to herd their livestock to town and there are also the old railway lines and coach roads.
The West Highland Way as a walking route is not so old, although its origins show it first being identified back in the 1930s and 40s. The official pathway did not open until October 1980.
You’ll likely pass herds of Highland cattle grazing along the walk.
Distance to hike the WHW
Walking the WHW takes around 7 days, but this depends on what you want to experience along the way as there are plenty of side trips to be explored. It is common to walk this trail from the south to north staying in the quaint country towns.
Although overall, the route isn’t one that is of any great difficulty, there are some sections of ups and downs and there is the element of weather that can add more of a challenge.
If you walk this route, it should take you around a week.
Our trip
We chose to walk the WHW at the end of our hiking trip in Europe where we had walked 645km (400 miles) of the St. Olav Way in Norway. It was a great way to end our journey especially as we had some dear friends meet and walk with us in Scotland. We chose to take 7 days for this trip as we had very little time left on our holiday, but now in writing this I really wish we had more time to see what Scotland has to offer.
For this journey, we had pre-booked our accommodation before leaving Australia, so we knew that each night we had a place to stay. Though upon arriving, we realised that this wasn’t necessary but still a good idea if you go during peak season.
Us at the start of our Scottish Highland journey.
Maps and guidebooks
These can be easily obtained online or even from any of the tourist centres or outdoor stores once you arrive.
Terrain
The terrain is not technically difficult, but you will be ascending and descending a fair bit in sections. Expect mud, rocky paths, as well as country laneways and valley walks.
You can expect some rocky paths on this walk – so trekking poles are worth taking.
Accommodation
There is a variety of accommodation types you can expect on this route from hotels/Inns, B&B’s to hostels. You can also book a package service with one of the many tour companies who arrange everything for you from the accommodation, luggage transfers and even packed lunches.
Camping
If you want to get the wild camping experience, it is possible, though it’s best to check the ‘bylaws’ throughout the National Park areas. There are also dotted campgrounds along the way. Remember to respect the land you are camping on and leave no trace.
Don’t camp within paddocks and crop fields and stay clear of buildings and historic sites. For more information, check the Scottish outdoor access code site here.
Rowardennan hostel is just one of the places we stayed in.
Choosing one of the many tour companies
There are many companies to choose from to help you with your journey. From organising the whole trip, including accommodation to luggage transfer and meals, to others that are happy just to carry your luggage. Do some research and read reviews about other people’s experiences, and pick one based on what is going to work best for you.
The best time to visit
This is a trail that can be walked at any time of the year, but the best time is during spring or autumn. Do be aware that May is the peak season of the WHW and accommodation can be difficult to get. Another tip to remember is to avoid starting on a Saturday, as this is the favourite day to start and the accommodation could be tight.
If you want to enjoy your time, then walk the WHW in the spring or autumn.
What conditions you can expect
On any hiking journey, you must be prepared for whatever nature throws out and Scotland is no exception. Even though you will not be climbing any great heights, you are at the mercy of the Scottish weather and believe me she can give it all to you. So, whether you are carrying a day bag (and having your luggage transported) or carrying all your gear, be prepared for all weather conditions.
When that wind and rain rips through the moorlands you will feel it, so be sure to have good waterproof and warm clothes like thermals. Always check your guidebook for towns along the way to refuel with food and water, as there will be times you might need to carry a packed lunch and snacks.
You should also carry at least 2 litres of water per day. Be sure to also have your map and guidebook in your day bag rather than left in your luggage – it is no use to you there!
Don’t underestimate how cold it can get in Scotland, even in the warmer season.
Packing for the West Highland Way
To pack for the WHW, just remember it is Scotland and can be wetter and windier, with the average temperature lower than the rest of the UK. May, June and July are their sunniest months with the days being the longest of the year with the lowest rainfall.
In the Highlands, they have an average of 250 days of rain per year. The average maximum temperature during these 3 months is 15-17C (59-63F), remembering wind chill factor is a lot colder. Keep this in mind when packing for this walk and ensure that your clothes are going to be warm enough for the trip.
Also, If you have chosen a company to transport your luggage, then be sure to check with them the maximum weight allowance as well.
Factor in the weather when packing for this trip.
Packing list for the WHW
A backpack to the size you need.
Sturdy boots or shoes you plan to trek in. Don’t forget spare ones for the evenings.
Gaiters as they help keep the mud out of your shoes.
Hiking poles (if preferred)
Water bottles or a hydration pack.
socks
2 quick drying shirts. Remember, Scotland is a wet country so anything that isn’t quick drying will make your life difficult.
2 zip-off hiking pants. Hiking pants are always quick drying and with the bonus of zip-offs, you will also have 2 pairs of shorts, though I don’t think you will need shorts in Scotland.
Rain jacket and rain pants, (highly recommend these items).
A lightweight windproof jacket, great for when it isn’t raining but the wind is blowing.
1 thermal top (this is optional, not necessary).
2
Sarong or Shemagh. This is my must-have item and it has many uses including – a scarf, a towel and a wrap for after a shower or can be used as a picnic blanket. You can also create many outfits to wear in the evenings like a top, a jacket, a skirt or even a bag, just to name a few.
Something to sleep in.
A windproof jacket, hiking poles and a day pack are just some of the essentials you’ll need.
Extras if camping
A Cooker and fuel for the cooker (just be aware that fuel and matches are not allowed on planes but quite easily purchased when you arrive).
Food utensils
Sleeping bag
Sleeping mat
Headlamp
Where to store your excess luggage
Over the years of travel, I have found that the hotels where you start and end your journey are always more than happy to store your excess luggage. We left gear we did not need for the WHW at our hotel in Glasgow and retrieved it on our return.
Your hostel or hotel will likely be happy to store your excess baggage for you.
The route and towns on the West Highland Way
Milngavie to Dryman – 19km (12 miles)
This day is a relatively easy one and starts in the centre of town at the large granite obelisk, which marks the official start of the Way. As you leave the urban landscape you head into the Lowlands, through farmlands, pass Lochs and enter the Loch Lomond and the Trossachs National Park.
Dryman to Rowardennan – 22.5km (14 miles)
Today you will be walking along the famous Loch Lomond, but not before climbing up over ‘Conic Hill’. Hope for a clear day, as the views looking down over the Loch and its many islands are simply stunning when it is.
If there are clear skies, the views from Conic Hill are incredible.
Rowardennan to Inverarnan – 22.5km (14 miles)
Today you will work for your walk a wee bit harder, you’ll also have a choice of taking the high route or the low route. Hint: The low way is not the easy way but well worth the scrabbling along the stones beside the Loch. To end the day, you might want to stay in the allegedly haunted 310-year-old Drover’s Inn. We experienced no ghosts, but we ate a great meal and stayed in the room named ‘Rob Roy’.
Inverarnan to Tyndrum – 19.5km (12 miles)
Today you will pass by ruins of St. Fillan’s Chapel. This is the battleground of Daligh where Robert the Bruce, King of Scots, was defeated by Clan MacDougalls back in 1306. Tip: the whole way along there is some amazing history worth researching about the West Highland Way.
Look out for the ruins of Fillan’s chapel, the site where Robert the Bruce was defeated in the 1300s.
Tyndrum to Kingshouse – 30.5km (19 miles)
This was our longest walk but my favourite day. Along the way, you will walk through some beautiful moorlands as well as on some old military roads. You are now at the gateway to the Highlands! Tip: Kingshouse is one of the most remote places along the way, so if you’re not staying there, you can bus or cab back to your accommodation.
Kingshouse to Kinlochleven – 14.5km (9 miles)
This one is a short day but there are a few hills, including ‘The Devils Staircase’. The name says it all, taking you up to the highest point on the Way which is 550m above sea level. If the weather treats you well the views you receive on the Glencoe mountains is just outstanding. Tip: Beware of midges in the area.
The view of the walk to Kinlochleven.
Kinlochleven to Fort William – 24km (16 miles)
More steep hills today and very open areas, as well as some protection from the elements in the woodlands of the Nevis Forest before descending into Fort William. This is a historical town that has the mountains surrounding it, including the famous Ben Nevis.
Getting to and from the WHW
To start your way, it is easy enough to get to Milngavie as it is only 13km (8 miles) northwest of the Glasgow city centre. You can quite easily catch a taxi that will take around 15 mins and cost approximately $45 AUD or by train which on weekdays runs every 15 mins and every 20 mins on weekends. This option takes approximately 20 mins and will set you back around $5.50 AUD. There are also buses that travel there and take up to 40 mins travel time.
To return from Fort William there are a few train routes available. The rides will take between 3.5 – 6 hrs, so do check with ScotRail to get the one you want. Prices vary as well. There are buses available which take around 3.5 hrs.
If you are needing to get to Edinburgh from Fort William this is possible by train with the average time taking 5 hrs. There are also bus services too taking around 4.5hrs.
Getting to and from this walk is fairly easy from Glasgow.
Extra activities to do in Scotland
Within the Loch Lomond and the Trossachs National Park, there are many things to explore including the ‘Scenic Route Artworks’. This gives you unique artwork structures throughout the park for you to discover and in turn, they give you the most stunning viewpoints to see of the nature around you.
When you arrive in Fort William do try to have a few days exploring as there is so much to see. If you are wanting to keep walking, there is Ben Nevis to climb or just continue walking from here heading northward on the ‘Great Glen Way’ adding another 127km (79 miles) to take you all the way to Inverness.
Perhaps instead of walking, why not catch the ‘Jacobite Steam Train’. This is a great way to experience more of Scotland by very different means. This impressive steam train starts in Fort William and heads out to Loch Nevis before returning. On this 135km (84 miles) round trip, you will see more of the incredible countryside from a different perspective.
While you’re in Scotland, make the most of it by exploring what the nearby cities have to offer.
If you’re flying in and out
In Edinburgh, you must explore the ‘Edinburgh Castle’ and ‘Arthurs Seat’ among other great attractions.
If you have some extra time in Glasgow, then you should perhaps book one of the many walking tours of the city. This is such a great way to discover some of the hidden beauties of a city, just like the ‘Glasgow’s Secret Ghost Station’. This is a hidden station of the Old Victorian Platform under the city.
There are also many day tours you can experience like the Whiskey and Distilleries tours if you’re a fan of Scottish spirits.
Final thoughts on Scotland and the WHW
I feel there might be another journey to experience in those Scottish Highlands for me as there is so much more I can discover than what I did in just the one week.
Is the West Highland Way calling your name? What do you think of hiking in the UK?
The post Exploring Scotland’s West Highland Way Route appeared first on Snowys Blog.
#>First#/specFilters=5m!-!2163&pageSize=40&orderBy=-1&pageNumber=1#>Buff</a>.#/specFilters=21m!-!89&pageSize=40&orderBy=-1&pageNumber=1#/specFilters=5m!-!2090&pageSize=40&orderBy=-1&pageNumber=1>hats</a>.#/specFilters=5!-!2163&manFilters=250&pageSize=40&orderBy=-1&pageNumber=1>tent</a>
0 notes
Text
Glaciar Perito Moreno, Patagonia: photos and travel tips

Patagonia is probably in my top five of most awe-inspiring places I’ve ever been. I still feel so lucky I got to experience this place that is really unlike anywhere I’ve been. These photos do not even do it justice.

Patagonia spans across Argentina and Chile and is huge - almost twice the size of Texas when I just looked it up - so there was no way we could explore all of it in one weekend. We chose to visit two of the most well-known areas to visitors, El Calafate and El Chalten, both of which are on the Argentina side.


In El Calafate, we booked a tour of the Perito Moreno glacier with Hielo y Aventura. They offer two tours, the Minitrek and Big Ice. I would highly recommend the Big Ice tour, which is more strenuous but it’s the option that lets you actually get out and hike on the glacier.


We had a driver take us to the glacier which I would also recommend. We thought about renting a car but when someone warned us that the roads go on for miles without gas stations and that we should “bring a tank of gas in the car just in case,” we realized we probably were not familiar enough with the area to go on our own. Even the drive to the glacier was so incredible. The colors of the surrounding mountains are truly unlike other mountain regions I’ve been to, with a unique mix of plant and tree species that make the entire area shades of blue, yellow, brown, and grey.


Getting to the actual glacier was a trek requiring a boat and then a lot of hiking, and we also had to make a change of shoes to crampons once we were on it so we wouldn’t slip. The glacier itself is so big (97 square miles) and we spent hours exploring, while taking breaks to drink the fresh ice water. My other tip is to bring wine! You have to bring your own lunch, and another group we were with had this great idea and very kindly shared some with us.

My last tip is to bring layers, but not too many. The temperatures vary throughout the day based on whether you’re in the mountains or on the glacier, and on how windy and sunny it is that day. Our guide told us that we were lucky because every day that week except for the day we were there had been really cold. So bring layers, but don’t bring so much that it will be hard to fit stuff in your backpack or too heavy that it will make you tired. Also, everything you’re wearing for your outer layer should ideally be waterproof.

My last tip is that if you want to visit the glacier, time your trip to Argentina accordingly. The southern hemisphere has opposite seasons from the U.S., so spring/summer is from October to April. We went in April, just about to approach winter, and this is the last month that Hielo y Aventura offers the glacier tour because after that it gets too cold.


#patagonia#el calafate#hielo y aventura#glaciar perito moreno#perito moreno#glaciarperitomoreno#argentina
0 notes
Text
Spending a weekend hiking a canyon and sleeping in a hut with a group of strangers is not something I would have ever thought I would be interested in. But something important I learned about myself throughout the horrific year of 2016 is that I’m not the same person I was three years ago. And so despite last year being an incredibly tough year, it needed to happen, because I have changed, but I’d obviously changed without even realising just how much, and so it felt like my time in South America was my time to discover who I am now and what I enjoy doing … and it turns out spending a weekend hiking a canyon and sleeping in a hut with a group of strangers is actually up there on my list of things I enjoy, right alongside Skydiving and Red Wine – who knew?
My last stop in Peru was the city of Arequipa where I booked myself onto this Canyon excursion, the Colca Canyon to be precise, one of the deepest Canyons in the world, it’s twice as deep as the Grand Canyon! Before booking I was given a brief overview of the trip; Day one we would drive up to the Canyon and starting from the very top we would descend to the summit where we would then spend the night in electricity free accommodation. Day two, was to involve an early hike back up to the top of the Canyon followed by a day of visiting local towns and the nearby Hot Springs. It sounded great, we were warned it was a lot of walking, but that was fine with me so I signed myself up and was given a list things to pack, including food as only three meals where to be provided over our two day tour.
This is where I learnt something else about myself – I love packing, especially for excursions. After receiving my list I immediately I headed to the supermarket to pick up snacks and water. There I bumped into three people from my hostel also doing the trek; as they rustled through the cereal bars complaining about having to buy snacks, I was genuinely buzzing at the excitement of picking out my own snack pack for the weekend and debating how many bottles of water to take. Things got even more exciting when I saw an aisle selling camping equipment including water bottles that you can attach to your backpack … I know, so wild!
After purchasing eight bottles of water, two boxes of cranberry cereal bars, four apples, two bags of peanut M&Ms, two snickers, two bananas, AND a pink water bottle to attach to my backpack (!!) I went back to the hostel try and pack all this food into my daytime rucksack, along with a fresh change of clothes, my bikini, my microfiber towel, my first aid kit essentials, my waterproof jacket, some thermals and my GoPro. It was a lot to squeeze into my small rucksack, especially all the water, but I more than managed, I had become a packing pro. Plus, I knew that technically I would be drinking and eating away most of the weight.
After a carby meal of pasta and a glass of red, I hit the sack at 8pm to get some sleep. But it felt like my eyes had only been closed for a mere five minutes when my alarm went off at 2.55am. The six of us from our hostel were being picked up at 3.15am, so it was a super quick shower before I dragged me and my heavy backpack to the hangout room why we waited for our ride.
A white minivan eventually turned up at 3.25am and the six of us piled in. Annoyingly we were the last pick-up which meant all the best seats were taken (back row & window seats, obvs). As it was almost a four hour journey upto the Canyon AND pitch black outside, I had planned to sleep on the bus, I think we all had. But being squashed onto an aisle seat, next to a stranger, unable to lean either side of me, it was incredibly uncomfortable. There were legs and backpacks everywhere and I couldn’t spread out, and urgh, it was just awkward. The most annoying thing is that after about two hours, the two girls either side of me began talking to each other. From their conversation it became clear they were travelling together, yet had decided to sit separately. It really bothers me when people who travel as a two-some do this. Why not just sit together and let me sit by myself?
Anywho, after stopping at a restaurant for coffee and breakfast (bread and jam, which seems to be the only thing the Peruvians ever seem to offer tourists for breakfast) followed by a pit stop at a lookout point to watch the Condors where we spotted *drum roll* zero condors, we FINALLY arrived at the top of the Colca Canyon at 9am.
From here, we were going to spend the rest of the day journeying down the Canyon. We would be following a route that would basically takes us on a big wide zig zag route down to a bridge, there we would cross over and have some lunch, and from there we would continue on the trek down to the summit, where we would be having dinner before hitting the sack. So off we went.
Another thing I learnt about myself? I love being outdoors. When I was younger I was so lazy, I never wanted to walk anywhere or do anything strenuous and the great outdoors didn’t interest me at all. I never understood why my Parents always wanted to go on these big walks when they could stay inside, watch TV and eat. That changed after moving to London where I began walking everywhere. But still, I don’t know when this change from indoors to outdoors person happened. But it’s true. Throughout this weekend trekking the Colca Canyon, I realised that I really do want more of my future to be spent outdoors.
On the decent down, our group were all at different paces, but even so we all managed to have a conversation with one another at some point, learning about where everyone was from and what they did. We had three Americans, two Irish, one Scottish-American, two Dutch, one Spanish, one Australian and me, the English girl.
During this trip, I also learnt that I do not need to make life-long friends with every person I meet when backpacking. On my first ever backpacking trip to Asia in 2013, I had this idea built up in my head that I was going to make friends for life when backpacking, a family, people I’d never forget. And yes whilst at one point I had a little Travel family, and I’ve stayed in touch with some real genuine friends I made, I really didn’t need to add every Tom, Dick and Harry on Facebook. Back then a very brief encounter would result in the swapping of FB details. This trip was different. This trip, and especially that weekend, I took the time to get to know the people there and then, rather than just taking names and adding them to a website that offers a very blurry window into mine and their lives.
Hiking down the Canyon I had one-to-one conversations with people, we had group conversations, we took photos of each other, we shared jokes, but at no point was I building anything up in my head about seeing these people again or making sure we became friends. I enjoyed the people for what they were, my hiking buddies, companions on that particular excursions.
However before the end of the hike the group had split in half due to a few people being injured and tired. A few of us decided to trek on to the summit and find the resort by ourselves. That was another thing I discovered about myself – I’m much fitter than I give myself credit for. I may have my foodie rolls and double chin, but I was incredibly impressed to find myself at the front of the trek most of the time. During the second part of the descent, I began to see others struggling, girls younger than me where continuously stopping for breaks and were almost in tears. I had to give myself a pat on the back, it was tiring of course and my feet were hurting and I honestly couldn’t wait to get to the resort and relax, but I was still doing it, I was still enjoying it and I was powering through.
Eventually, a group of us found the resorts. As our guide was behind helping an injured girl down very slowly, we had to find our resort by ourselves. As we looked around all the resorts were teasing us. We wandered through them all, smelling meat on barbecues, hearing Bob Marley play through speakers and watching people chilling out with cold beers. There were bright blue pools with water fountains coming out of them. I couldn’t wait to kick off my walking boots and get my bikini on. But every time we asked a resort owner if they had a reservation for us, they shook their head. Eventually one man told us he knew where we staying and pointed towards the bushes. We passed all the resorts, including all the pools, all the barbecues and a load of goats and sheep, went through the bushes, then the trees and down a path and finally arrived at our hidden away resort.
We couldn’t even hide the disappointment on our faces.
There was no barbecue, no music blaring out, no party people chilling with ice cold beverages and sun loungers. There was a pool but it was filthy, full of leaves and dirt. There was one broken sun lounger and two chairs crawling with ants. We decided to look at the positive – we had made it! We took off our shoes and all sat around the pool with our feet dangling in, only one of us was brave enough to go for an actual swim and he only lasted about 30 seconds.
That night we had a few beers, a group dinner (soup, followed by rice and meat) and all got an early night in our huts. I’ll be honest I wasn’t impressed with the accommodation, but we had been pre-warned so I wasn’t too fussed. There was a few puddles surrounding my bed, and I’d found two big dead moths and a dead bug on my pillow, but I rather bravely brushed them, wrapped my scarf around my head, got under the covers and squeezed my eyes shut trying not to think about the insects.
Another thing learnt – I still hate bugs and spiders but I’m a lot better than I used to be as 2013 me would not have been able to just shut her eyes and sleep in that bed.
I must have been exhausted as the next thing I remember is my alarm going off at 4am. I went to get a shower, but as I felt the ice cold water shock my skin like the blade of a knife, I remembered about the lack of electricity and decided against it. Instead did a wet-wipe wash, festival style, and brushed my teeth in the dark.
At 5am, with the sun barely up, we began our hike. Unlike our descent on the previous day, we would not be doing a wide walk that was to zig zag. Instead we would be doing a hike straight up and we were told it was going to take three hours. Being the competitive person I am, once I heard “three hours to the top” the Runner in me woke up and I knew I would be doing everything I could to beat that time.
But if I had thought it was going to be anything like the day before, I was wrong. Day one we had dropped about 1200m in altitude throughout the course of the day. Now we were going to trek up to the top, reaching 3,300m in a much quicker time. I was lucky enough not to get altitude sickness during my time in Peru, but the shortness of breath really got to me. And it was no different on this hike. Three of us broke off from the group, racing ahead and at first it was fine. But after an hour of upward hiking, clambering over big rocks all the while feeling like I constantly had to catch my breath, I was beginning to really struggle. As I took a much needed break I watched on as the other two raced ahead of me, but I was unable to keep up at their pace. But power on I did (whilst knocking back lots of water and some peanut M&M’s) as I was still determined to beat a time of three hours.
Towards the top my legs were beginning to feel incredibly weak and I was using my hands a lot when going over rocks. A big cross made out of sticks stood tall at the top and everytime I felt like I was getting closer, I scramble over another big rock only to realise that I still hadn’t reached it. But finally, after just two hours and six minutes (and a lot of sweat) I reached the top of Colca Canyon *does a mini fist pump*
I was honestly so proud of myself, especially after I learnt a lot of people couldn’t complete it and had to be brought up by Mules. I celebrated at the top with a banana and a snickers and lots of photos. I felt a similar feeling to my runners high taking over me and you couldn’t wipe the smile off my face; I felt so happy that I had not only completed the hike and done the Colca Canyon trek, but that I had ben brave enough to come on this trip alone and take on this whole experience.
Once all the group arrived at the top, we went for breakfast (where we actually got some eggs this time) and then we spent the afternoon soaking our tired feet and bodies in the natural hot springs of Arequipa before visiting Chachani Volcano. Incredible!
[do_widget id=manna_social_widget-3]
[do_widget “Blog Subscriptions (jetpack)”]
Follow(function(d, s, id) {var js, fjs = d.getElementsByTagName(s)[0];if (d.getElementById(id)) return;js = d.createElement(s);js.id = id;js.src = “https://www.bloglovin.com/widget/js/loader.js?v=1”;fjs.parentNode.insertBefore(js, fjs);}(document, “script”, “bloglovin-sdk”))
Finding myself on Colca Canyon Spending a weekend hiking a canyon and sleeping in a hut with a group of strangers is not something I would have ever thought I would be interested in.
1 note
·
View note
Photo

The Inca Trail
The Inca trail is often the first thing people associate with South America. When I signed up for the 42km walk, I remember being incredibly worried about whether and how I would survive it considering my very lacking level of fitness. Now that I’m on the other side, I wanted to write a bit about the concerns I had and how they eventuated as well as all the things I did and didn’t expect from the trail. As a disclaimer, this is all very subjective information and I have no doubt that every person has a very different and unique experience of the trail.
Most importantly, if you have the choice between the trail and other ways to get to Machu Pichu and you don’t have any medical conditions preventing you, DO THE INCA TRAIL. The four days of the trail were four of the best on my trip and very much a bucket list-ticking, perspective changing experience. Besides suddenly now having muscles in my legs and a much greater stamina, I have a greater appreciation for many things in my life and in the world. Finishing the trail was definitely one of my proudest moments of life.
Walking the trail
Hire walking sticks. Prior to the trail I had spent a long time mentally preparing myself for the uphill battles ahead, however one of the biggest surprises was just how painful it was to go down. On the afternoon of day two, after conquering dead woman’s pass, a steep decent of a couple of hours awaits you. This is when the only significant injury in our group occurred and it wasn’t hard to see why. As a 23 year old who has never had knee issues in her life, my knees were in a lot of pain at the end of each downhill segment. The only respite were my two walking sticks, without which I’m sure I would definitely have fallen on the slippery, steep Inca stairs. The sticks are also helpful on the uphill slopes, acting like a second pair of legs and after my sticks were taken away at Machu Picchu I found myself grasping at phantom sticks (I also may have been slightly delirious from exhaustion at this point);
My group agreed that half (or possibly more than half) the battle was mental and psychological rather than physical. Before leaving Sydney I had all the best intentions of improving my fitness before the trip, but uni, exams and life inevitably got in the way. Nevertheless, while travelling prior to the trail I did a few hikes and walks in Brazil, Chile and at altitude in Bolivia and Peru. These were enough to prepare me physically for the particular challenges of the Inca trail, namely inclines, altitude and stamina. By the time I arrived at Km 82, my body was fairly well prepared and I had learnt how to pace myself and keep hydrated. Nevertheless, unlike the other walks I had done, the Inca trail is 4 days long and offers little in the way of physical and emotional respite at the end of each day. Despite sleeping mats and warm sleeping bags, there were sore limbs waking up each day and the exhaustion wasn’t helped by the altitude. Waking up on day 2 to the coming hours of uphill climbs proved that the challenge was largely emotional. I remember at one point on day 2, I was channelling all the anger and emotion I had built over the previous year into my walking sticks to keep going. Day 2 is when walking groups disperse and perseverance and determination become particularly important when you’re own your own. Prior to starting the trail I had hyped it up mentally to the point that I felt sick on the bus ride to Km 82, but had I not done this I’m not sure I would have made it to the top of dead woman’s pass. I knew this would be one of the biggest challenges I had faced and because of this I was able to fight with it and feel the incredible sense of achievement at the top;
I’m not sure if it was because of altitude or rainy season but my nose wouldn’t stop running through the trail, and I ended up with tissues in every pocket of my hiking pants. It sounds trivial but having a runny nose while struggling to breathe on a steep incline at altitude isn’t much fun. Keep lots of tissues with you;
Seriously, lots of tissues. Tissues and toilet paper may be your saviours on the trek, particularly since they will be your only glimpse of luxury while using inca trail toilets. Toilet options include the ‘au naturale’ (which our boys used most of the time) or campsite pit toilets (the state of which was the reason the boys preferred nature). If you have had experience with camp toilets it’s not that really that bad, however I highly suggest wearing your hiking boots to the bathrooms rather than thongs as some suggest to change into at camp. It rained as we arrived to camp on our first night and as a result I kept my hiking shoes on until I slept. On the second two nights I changed into thongs after going to the bathroom. Toilets on the morning of day 4 in the dark are a particularly interesting experience, my only advice is to hold your breath;
This was highly unexpected but the first day and a half is highly populated by horses, donkeys and llamas which leave droppings to be avoided as you walk. This disappears as rescue from the trail by these animals gets more difficult on day two;
I carried a camel pack for water however I didn’t end up drinking nearly as much as expected. This may have been because we were hiking in the clouds during rainy season so didn’t really feel the dehydration. Nevertheless, my camel pack was one of my best purchases for the trip and helped through the two months along all the hikes and walks I did;
It doesn’t matter what the weather is like at the Sun Gate or at Machu Picchu. That stereotypical photo at the top? It doesn’t matter. I learned that the inca trail to Machu Picchu isn’t about getting to a picture perfect location and taking the perfect cloudless photo, it’s about the journey and everything you learn about the Incas, about the world and about yourself on the way. It rained when we got to Machu Picchu, but as it turned out this was one of the most enjoyable days of the trip. Three of us decided to ditch our ponchos and run around the wonder of the world in the rain, stopping to take frantic photos with the sites and the llamas and it was one of the most liberating experiences of my life. The sense of achievement at getting to the top is unmatchable and because of this it is important not to worry too much about the weather and perfect images particularly when hiking in rainy season.
Teamwork is everything on the trail, and when one member of the group is struggling it’s important that everyone chips in to encourage them. From the moment we were tattooed with some sort of dead insect blood on day one, it was a team effort to get each other to the top: the Inca trail is not and should not be a race. You will come across other groups along the way, and I enjoyed getting to know different people on the trail and occasionally having mass Disney sing-a-longs. Keeping our collective spirits up was on of the most important things, and I’m glad I had a good group to walk with.
Packing and clothing
The weight porters are able to carry is limited and after subtracting the weight of the sleeping bag and air mattress (both which I recommend because the former is warmer than anything in the world, and the latter will be a life saver when camping on rock), this leaves only 2.5kgs for personal items.
Clothing: I wore my Kathmandu hiking pants for 3 days of the hike, adding cotton leggings underneath for day 2. This was a perfect balance for me as the excessive number of pockets on the hiking pants will be more helpful than you anticipate when having to carry tissues, quick sugar fixes, torches, and a variety of other things on your body. Day two can be very cold and I was also grateful for my leggings. I was advised to wear long pants through the trek because of flies and the terrain and as I think my whole group followed this advice I cannot comment on the alternative but I don’t see any reason to wear otherwise. I wore three quick dry active wear singlets on the three first days, and I appreciated the quick dry material as well as being able to change every morning (my clothing was light so this wasn’t a big issue). In addition I carried a thin long sleeved top, a thin sweater and my down jacket. Dressing like an onion is ideal on the trail, and I constantly altered between different combinations of these items. Day two is particularly confusing because as soon as you stop walking, you freeze enough to throw on your down jacket only to feel incredibly hot again 10 minutes later. Apart from this, I always had my beanie, gloves and scarf in my backpack and this was a periodic lifesaver as the weather kept changing. I also wore a bandana everyday or the hike which was one of my favourite items: it dealt with sweat, rain, kept my hair out of my face and did a multitude of other things. I also wore my cap (which provided protection from both the sun and rain) and sunglasses. As we were hiking in rainy season, my poncho was always easily accessible and used excessively enough that it was the first thing to be thrown out when we returned back to Cusco. There are plenty of rumours regarding what to wear at night to keep warm: I wore just a thermal top and bottom every night and never felt cold, while some in our group were wearing all their jackets to sleep and getting cold. One hypothesis is that the sleeping bag works best when it’s closer to body heat but this isn’t verified. I carried four pairs of hiking socks for each day on the advice of the Internet - this comprised a lot of my weight and I’m not sure if it was entirely necessary to change socks everyday (particularly since my boots were waterproof) but I don’t know the alternative well enough to comment. I changed into a new set of clothes for the last day (a t shirt and leggings): this was a good idea because you are more likely than not to only finish the Inca trail once in life and you might as well look decent (and smell relatively decent) for the photos that await.
Shoes: We grappled with the hiking boots vs hiking shoes vs sneakers and the buy vs rent decision before leaving. Ultimately we both bought Colombia leather waterproof hiking boots which we used as our closed shoes for the entirety of the trip. I found myself in huge relief for this decision throughout the trip, as the boots served us well on all our walks and hikes and the ankle support and waterproof material was a life saver on many occasions. All the girls in our group wore hiking boots, most were bought but two hired boots in Cusco and were happy with their hire. Some boys wore sneakers and they appeared to be okay with that decision. Ultimately the decision is a subjective one and is dependent on how much walking you intend to do on your travel and whether you have another pair of sneakers that could fulfil this role.
Other items: I enjoyed my wet wipe shower at the end of each day. Take all the medications you need in your backpack - altitude tablets, panadol and asthma medication were my most used. I took two spare camera batteries in my backpack which is important if you want the freedom to take photos throughout the trail without being concerned about a lack of photos at Machu Picchu. I kept these in my sleeping bag at night to prevent them draining. I didn’t take my phone on the trail because I wasn’t using it as a camera, and didn’t find I needed it as we were awoken each day either by the sun, each other or the porters. One of my biggest regrets is not carrying a proper head-torch (still haunting me in the Amazon with a lack of electricity)- invest in one. Besides this I carried glasses, contact lenses and spares and contact solution, many plastic bags and deodorant. I was considering taking a blow up neck pillow (one girl in the group did this and appreciated it), however I was tired enough at night to sleep soundly on my clothes stuffed in the top of the sleeping bag. I think any luxuries beyond this are unnecessary and I enjoyed having little to worry about.
The Porters
The porters on the Inca trail are some of the most incredible men I’ve come across in life. Besides lugging tents, our belongings, food and literally everything we needed every night, they treated us as some sort of Inca royalty, even waking us up with cocoa tea in the mornings (drink this even if you don’t like the taste - it helps with the altitude). They cooked our food (including three courses for lunch - a healthy soup, main course and dessert), set up our tents and always had smiles on their faces. On our third day they even baked a cake to celebrate, ‘New years eve’, a feat I’m still coming to terms with. It’s almost impossible to fully appreciate these men until you actually experience their work. From learning their names and backgrounds on the first night to cheering them on along the trail with claps and ‘vamos amigos’ to saying goodbye on the last night, the porters were one of the most overwhelming aspects of the trail for me.
The Camino Inca is an experience that I’m sure has a profound and varied meaning to everyone who complete it. I am extremely glad I recklessly signed up to walk the track, and I hope my little guide helps someone else make that decision in the future.
2 notes
·
View notes
Text
5 Essential Hiking Tips For Beginners
It’s so exciting!
The feeling of expecting an upcoming adventure out in the wilderness is sometimes so powerful that it can keep you ecstatic for days. Especially if it is something that you don’t have enough experience with. I know it. If you are reading this, chances are you know it too. But how can you make sure that everything goes smooth and enjoyable as it should be?
In this article, I am going to share with you some practical advice on hiking for newbies that really work. In short, if you have little to no experience with going out in the mountains or in backcountry, you’re going to love this guide.
Without further ado, let’s get started!
Bring The Right Gear
Probably you’ve heard a thousand times that having the appropriate gear when going on a hike is essential. I can’t emphasize more on the importance of that. That’s the first thing you need to think about and the last thing you’d want to overlook.
Being well-equipped when trekking in nature is crucial for your comfort, safety, and endurance. A good rule of thumb is to make a list of all the things you plan on taking based on the type of trip you want to do. In that way you’ll be able to decide what exactly to pack. Bring only necessities and avoid taking items you don’t need. Here’s a basic example list of must-haves:
An appropriate backpack – make yourself familiar with the different types of backpacks Often, they come in various sizes so pick up the one that fits you best. Learn how to measure backpack dimensions. Don’t take a pack that is too heavy or big if you are going only for the day. Also, make sure the pack is waterproof. Ideally, it would have an integrated rain cover, easily adjustable suspension system, and ventilated back panel.
Good shoes – the first thing I mean by good is comfortable. Make sure to try your shoes before wearing them on the trail. You need lightweight, yet sturdy and stable boots that support your ankles. They need to flex easily and not to have a break-in period. Avoid wearing sneakers with flat grip, as you need maximum traction. Don’t underestimate the power of the appropriate socks too.
GPS system – you need to know where are you heading at and what are your current whereabouts. If you are using your smartphone for that, make sure to bring an external battery. It’s a good idea to use some proven hiking apps as well – Gaia GPS, Mountain Collector or MapMyHike.
Weather-appropriate clothes – this includes a warm jacket. Preferably, it’s good for it to be waterproof and windproof. You’ll be surprised to see how abruptly the weather changes especially high in the mountains. In addition, avoid wearing cotton T-shirts because they make you sweat. Instead, use clothes made of polyester. This fabric is wrinkle-resistant, lightweight, non-absorbent, and breathable.
Compact torch – better safe than sorry, right?
First-Aid Kit – basically, what you need are tweezers, bister pads, antiseptic wipes, bandages, medical tape, and small packages of pills. Don’t forget to learn how to use all that.
Enough food and water – don’t forget to maintain your stamina always up by bringing good (but not excessive) amounts of snacks and hydrating beverages. I always take with me protein bars rich in magnesium and B12 vitamins. They are compact, delicious, and provide enough energy.
Get To Know The Place Where You Are Going
Invest enough time to learn everything about your itinerary. Do an online research about the trail and read reviews and opinions of others who’ve already been there. Hang in social media groups if you’d like. It’s always best to familiarize yourself with some technical aspects of the terrain such as elevation and the steepness. In that way, you’ll know what to expect and how to prepare for it. Which brings us to the next point.
Make Your Trip Easy And Short
For the sake of your own comfort and safety, I advise you to pick up an easy trail suitable for a day hike. You are not a hiking guru yet. You’ll get to that eventually with time and practice. Your body and muscles are not accustomed to such specific and demanding physical activity that the hiking is.
That’s why you’d want to take it easy and choose a mountain trail that’s flat and not more than 5-7 miles long. Avoid, steep, rocky terrains because they are difficult to walk on.
Hydrate Like A Pro
When it comes to performing such an invigorating but demanding cardio exercise as hiking, you need enough water. Adequately hydrating yourself has a direct impact on your endurance. It sounds as something easy and intuitive but I have to tell you that many people don’t have an idea how to hydrate properly during hiking. Here are four pro tips:
Drink a cup or two of water or a sport drink right before hiking.
Forget about coffee and cola – caffeine increases fluid loss.
When hiking in hot weather and you sweat a lot, don’t be afraid to drink 800-1000 mls of water every hour.
If possible, eat potassium-rich fruits because they contain important electrolytes. Such fruits are bananas and citrus fruits.
Go With An Experienced Buddy
If you want to ease your mind and feel more secure on your first hiking trip, then a good idea is to go with a friend who is more experienced that you are. Having someone to rely on is something you’ll most certainly appreciate when walking on the mountain trail.
It’s even better if your friend has already been there before you and knows what’s all about. In that way you minimize potential risks and difficulties that you might encounter along the way.
Another option would be to enlist in an organized hiking group that welcomes beginners.
Conclusion
There you have it. I hope that now you have a much clearer picture of what to do in order to guarantee yourself an enjoyable and less-stressful hiking trip. Don’t forget to immerse yourself in nature and take pictures. And remember – as John Muir said “In every walk with nature, one receives far more than he seeks”. Happy trails!
About the Author
My name is Asen and I am a passionate hiker and a blogger raised in Bulgaria – a place with gorgeous mountains and breathtaking sceneries. I like to travel and hike to majestic places all over the world. On my blog https://gearuphiking.com I provide tips and advice on the topic I love most – hiking & trekking. I also write hiking backpack reviews.
The post 5 Essential Hiking Tips For Beginners appeared first on Montem Outdoor Gear.
from Montem Outdoor Gear https://montemlife.com/5-essential-hiking-tips-for-beginners/
0 notes
Text
What to pack for a trip to Antarctica
Packing for an adventure overseas can be stressful at the best of times. But packing for Antarctica? Where do you even start? Last January I headed down to the Falkland Islands, South Georgia and the Antarctic Peninsula with Quark Expeditions.
It took 10 years of travel for me to become the packing queen that I am today; it didn’t just happen overnight, guys. And packing for a month in Antarctica was the ultimate test for me. BRING. IT. ON.
25 photos that will inspire you to visit Antarctica
In fact there was only one thing I needed to buy for the whole trip, can you guess what it was? Everything else I already owned from my adventures around New Zealand. Honestly my house looks like an ad for Backcountry.com. I should start doing gear rentals.
To be fair, I did overpack, which is one of my common mistakes but I’d rather be safe than sorry, and a month at sea with no internet meant I needed a few extras, like games, books, journaling things, and maybe a cheeky bottle of gin.
While there are plenty of helpful packing lists out there, and every trip will usually send out its own list too, I wanted to share my own personal experience of what you might need for an expedition cruise down to Antarctica as well as the subantarctic islands of South Georgia and the Falklands.
Gin aside, here are my best tips of what to pack. Enjoy!
10 things that surprised me in Antarctica
Not recommended to go naked in Antarctica, though it’s a lot of fun I hear
If pictures could show the wind….
Outer layers
Step 1. Everything you wear on the outside in Antarctica needs to be waterproof, windproof, and penguin-poo proof.
And by waterproof, I mean REALLY waterproof, not sort of waterproof. I’m talking Goretex here or something similar, don’t be cheap because the weather down on the last continent can only be described as wild and unforgiving.
You will get wet a lot. And also not necessarily because of the snow or rain, which trust me, can happen at a moment’s notice, but for the zodiac boat rides to and from shore or cruises. The swells can come out of nowhere and you’re gonna get wet with the spray of the sea if not soaked. And it’s rough salty water too that can destroy your stuff after a while, go heavy duty. If I didn’t rinse my gear regularly in the shower, it would get caked with salt.
One of the coldest days
One of the warmest days on the Falkland Islands
This means waterproof pants and windproof shell/rain jacket with a hood. Waterproof gloves or mittens. I have started using these really cool photography gloves by Vallerret that are super handy where you can pull back the end of the finger and thumb to use the controls on the camera.
All the trips I’ve been on provide you with rubber muckboots or gumboots for the landings, but I bring hiking boots too.
If you travel with a company like Quark Expeditions, they give you one of their signature special yellow parkas, which has a shell and a removable fleece puffer inside.
North Face bib Trekking Pants Hiking Boots Photography Gloves
That is all poop. Not mud. At all.
Jarrad Seng’s take on activewear, what lurks beneath the rain pants
I have a few different pairs of pants I would wear, and even wear my snow pants sometimes, though they were getting a bit tight after 3 weeks of bottomless buffets on board (yikes) though this year I upgraded to Goretex bib snowboard pants, which have a bit more, ah, room shall we say in the waist department.
Also pack a tight beanie or two, it’ll be cold and no one likes cold ears, am I right? Also it’s windy as all hell, remember where you are: the roaring 40s, furious 50s, and screaming 60s. If your hat isn’t tight, it’ll be a goner, and you’ll be in trouble for littering in a pristine environment, even if you didn’t mean to.
Batten down the hatches as they say.
Beanie 1 Beanie 2 Jacket 1 Jacket 2
Inner layers
Underneath my rain jacket, I usually wore several layers I could pull off on land if needed. Since moving to New Zealand five years ago, I quickly became obsessed with merino wool aka the magic fabric.
It dries fast, wicks away moisture from your skin, keeps you warm when you need it, and it doesn’t itch, and it doesn’t smell! This means you can rewear it over and over again on the trip. Even my underwear is merino. I do change that though.
Thermal top 1 Merino hoodie Thermal top 2 Puffer jacket Flannel Shirt
I start with either a short sleeve or long sleeve thin merino shirt, followed up with a merino hoodie. I’m not kidding, I’m obsessed. I usually bring 3-4 merino shirts and one hoodie and one or two fleece shirts I can layer.
And if it’s really cold I’ll wear a thin puffer jacket on top before putting my wet weather gear over it. As they say in New Zealand, we are not here to fuck spiders i.e. not mess around.
The best base layers have thumbholes – all Mons Royale does!
I wear a pair of merino leggings underneath my wet weather pants, the same thermals I wear when I go snowboarding in the winter. I usually bring two pairs.
My feet are decked out in the thickest wool socks you can find. I bring several pairs, and by several I mean like five pairs, no one wants cold feet though they stay pretty warm inside the good boots the ships provide.
I also bring a pair of thin glove liners or thin gloves I can wear easily than my preferred big old mittens or wear inside my mittens.
Don’t forget my wooly merino undies and sports bras! They are game-changers, guys. And I also have a merino wool neck gaiter or buff that I always wear.
Merino leggings Merino sports bra Wooly socks Merino neck warmer
Extra boring bits and bobs
If you guessed the one thing I had to buy for this trip was seasickness meds, you were right!
I don’t actually get seasick really, but who’s gonna take that chance on the notorious Drake Passage? Not me, that’s for sure. My doctor prescribed Cyclizine, again we’re not here to fuck spiders with some lame ginger tablets or hippy patch. Gimme the real stuff. These are the roughest seas on earth.
I had two camera backpacks, one large and one small for the trip depending on the landings and the weather, and I also had a few small dry bags I could chuck stuff into if needed.
Also be sure to double check what kind of outlets are on board the ship, they move all over the world and sometimes it can surprise.
The ugly sweater diaries continue… Jarrad can’t be tamed
I brought a water bottle of course, along with the other necessities like sunglasses (used once), earplugs (just do it, even if it’s not for snoring roommates the booming of the ship in storms is loud as), an eye mask (there’s no nighttime and also I day nap a lot), and sunscreen, you know, since we destroyed the ozone layer.
For down time on the ship, of which there is heaps, I wore normal casual comfy clothes. The temperature on board can actually be pretty warm so I would have t-shirts on hand and some easy shoes I could wear around, though you want non-slip ones for when you go out on deck a lot.
I also brought my favorite Onepiece onesie, which I shamelessly wore all the time! And I might add received more than one compliment on. Which might have been sarcastic but who cares. It was so comfortable, and it wasn’t like I was trying to meet anyone or anything.
Everything gets shoved willy nilly into my favorite large North Face Duffel. An icon. Can you go to Antarctica with anything less? I don’t think so.
Camp Duffel Day Pack Camera bag Dry Bags
Fun stuff
Now for the stuff you really want to know, all of the fun and random crap that made it inside my Mary Poppins bottomless North Face duffel bag.
Where to begin?
Yahtzee! You will be spending days at sea with total strangers and no Facebook. What to do? Board games! They usually have some on board but I also brought my own, from Yahtzee to Uno to Scrabble among many others, it’s a great way to meet people in the beginning.
I also brought my own pillow because I’m a princess. And an insomniac, and anything that helps me sleep better is worth its weight in gold.
Heaps of books! I love reading so I downloaded a few fun novels on my Kindle which were great to read in bed when we had 10 meter swells and Yahtzee was out of the question. I also brought half a dozen paperbacks too, all books about Antarctica and the early explorers. If you only bring one book, make sure it’s Shackleton’s Endurance. It’s incredible to read from the comforts of a modern-day ship.
I also brought a blank Moleskine sketchbook that I used to journal and draw during the trip. I used to always do this when traveling but have stopped in recent years and it was a great way to go back to my roots.
And finally, don’t forget a swimsuit! Bathers, togs, whatever you call them. You’ll likely have the chance to do the polar plunge and jump into the icy waters which I highly recommend.
While it’s important to pack all of the essentials because the weather in Antarctica is unforgiving, it’s also a trip with plenty of downtime to make sure you pack a few little treats and goodies for yourself too!
What did I miss? Have any tips for packing for the Antarctic? Share!
PS some of these links are affiliate links
The post What to pack for a trip to Antarctica appeared first on Young Adventuress.
from Young Adventuress http://bit.ly/2LvJ0PC
0 notes
Text
What To Pack For A Long Distance Bicycle Tour - A Cycling Checklist

When preparing a cycling checklist, one of the first questions asked for any overnight tour is "What to pack for a long distance bicycle tour?". But before you answer that, the most important question to ask is "Where will I sleep at night ?".
For a lot of touring cyclists, the thought of camping each night and carrying everything with you sounds like a nightmare. Staying in hotels and B&B's after a long day on the bike sounds like just what the doctor ordered. The time and budget you have to complete a tour is also a reason when thinking of how you will cycle.
I personally, love the challenge of bringing my camping gear with me and finding a camping site, or sometimes "Wild-Camping" out in the forest, spending nights in my sleeping bag.
So there are 2 ways to look at what to pack. Firstly, there are the things that you need regardless of your accommodation. Then there is the world of camping and what you need when out under the stars. I will discuss bicycle camping in a future post.
The 3 main essential categories are:
Clothing
Bicycle Parts and Accessories, and
Personal Items
CLOTHING
Waterproofs
Regardless on the time of year and the country you're in, the first thing you want to be packing is your waterproofs. Make sure your jacket and rain pants are made of BREATHABLE material such as Gortex. Because you're cycling, you generate body heat and sweat which can make you just as wet on the inside of the jacket as you are from the rain, especially in the summer months.
When you choose a rain jacket, zippable vents around the underarm are a bonus, and make sure that the main zipper is 2-way, allowing you to zip up from the bottom to allow venting.
I use Hiking/Walking waterproof pants as they have a zipper and stud-buttons that goes all the way along the leg. Then, when it is too hot, you can zip down the leg and pop it back together with the stud buttons, allowing your whole leg to ventilate. You do get small amounts of water in this way when it is really raining hard, but in the end, your legs get wet and sweaty anyway from all the hard cycling they do.
They are also great just to have on whilst cycling anyway if it's raining or not. They are the perfect windproof pant with the zipper down and buttoned up, keep your legs from sweating too much.
T-shirts
Lightweight, quick-dry shirts are the way to go. Sure you can buy fancy cycling shirts with sponsorship logos on them, but let's face it, you look like a clown and you are already drawing enough attention to yourself with your touring bags on your bike.
The reality is, tight cycling shirts might be great when you're trying to shred off 100th of a second around a velodrome, but when you're bike touring over long periods of time against all different weather conditions, these overpriced shirts are nothing more than a fashion over practicality.
Again, I use shirts that I can also use when I'm not on the bike. Plain colored Trekking / Adventure quick-dry shirts are perfect. They are very lightweight and you can pack a ton of them without weighing you down and they dry extremely fast.
Shorts
Preparing for my very first tour in 2004 I bought myself some padded cycling shorts. Let's put it this way, they found themselves in the rubbish bin after the first day of cycling.
Normally when I'm cycling around town or out on a day trip I just wear what ever my clothes are for the day. OK, jeans are not ideal for touring, but I wear my Australian swimming shorts (board shorts) most of the time when cycling. They are made of a lightweight material, and like my hiking shirts, they are quick-dry. Perfect ! I feel comfortable wearing them off the bike too. Another bonus.
The problem I found with cycling shorts are they don't allow "breathing room" for the lads downstairs and they are just too tight and uncomfortable. The other issue is when you're walking around off the bike when shopping or going for lunch. I just don't want to walk around with tight cycle shorts on.. Period.
I understand the benefits of cycle shorts such as chaffing, but the funny thing is, whenever I hear about cyclists with saddle sores or chaffing, guess what 9/10 are wearing? That's right. Cycling pants. One issue is that because they don't breathe, you get hot and sweaty down there. Cycling all day with moisture down there only leads to trouble.
You also have to remember that we are bicycle touring here, not racing against the clock, so you are not pumping your legs up and down at the speed most road cyclists are who are more prone to chaffing and seat rubbing issues.
Get rid of them and wear loose fitting running/swimming shorts.
Shoes
This goes down to personal preference and the weather. First of all, it comes down to the pedals on your bike. Hopefully you have good strong MTB style pedals as opposed to racing pedals that only allow cleat shoes. There are good reasons why you shouldn't be using racing pedals for touring, but I will discuss that in a future post.
For touring, I highly recommend NOT wearing bike shoes with cleats. Yes, you will probably spend 95% of your cycling on the road, where the cleats are working great, but the thing with touring and having a loaded bicycle, is that you find yourself in situations where you might need to get off and push.
There is no way I could have made it through a bike tour if I was wearing bicycle shoes.
Also, they are just downright dangerous. Your bike is heavy, and you are spending a lot of time in difficult situations. Don't get caught losing your balance and falling down in front of a car.
Because you are touring, you spend a lot of time off the bike walking about, stopping and taking pictures, going into the supermarket, restaurant stops, toilet stops, etc. For that reason, and so I don't need to bring an extra pair of casual shoes, I wear my Gortex hiking shoes, or my hiking sandals on hot summer days. No tight, plastic, uncomfortable, blister-prone, impracticable clip-clop cycling shoes for me thank you very much.
However, for cycling efficiency, and to keep my shoes in place, I use the old-school plastic bike pedal clips on my wide-mountain-bike-style pedals and remove the strap. Your feet never slip and you can easily get them onto the ground fast in emergencies.
You'll be glad you're wearing your hiking shoes when you have to start pushing your loaded bike up that unexpected hill or muddy trail.
Extras
Gloves (preferably windproof) for the cold, early mornings. I have a pair of North Face Etip Gloves that have the ability to use the touchscreen on my phone. VERY handy. You can find them here: US or UK
Hat - depending if it fits with your helmet on ;-)
Socks - quick-dry trekking socks preferably, cotton can take too long to dry when wet.
Sweater - mainly for off-bike use, lightweight Polartec material with front zipper in case you want to wear when cycling. You get hot, fast !
Jeans and/or Track pants - for off-bike use around the hotel or campground. I have a pair of lightweight Transformer Cargo hiking pants that can be used as shorts as well. Quick dry and weighs next to nothing.
Underwear - your choice ;-)
Stuff Sacks - Stuff and compress your clothing in these space-saving sacks.
Bicycle Accessories and Parts
There are only a couple of things you really NEED when bicycle touring and the rest is determined on the length of your cycle trip, where you are cycling, and availability of cycle shops.
The essential bicycle accessories you want to have with you are:
Bicycle Tool & Adjustable Wrench - I use this daily for maintenance and adjustments
Chain Oil - your chain gets a hammering from the amount of miles you clock up. Make sure you keep it well oiled to prevent lock-ups and damage.
Spare Tube & Tire Levers - I use Kevlar-rimmed tyres and haven't had a single puncture over 10's of thousands of miles. But you never know when you need a spare as you can repair a punctured tube later that night rather than on the side of the road.
Bicycle Lock - Invest in a good Heavy-Duty bike chain and attach through front wheel and frame to a fixed object. Buy a second Lighter-duty thinner wire chain to lock the back wheel through the frame, then up through the underside of your seat. The last thing you want is to come out of a shop with your seat stolen via the quick-release bolt. It's happened to me once, and it will never again.
Water Bottles - Take at least 2 large bottles with you. Minimum !
Panniers - I use, and will only use, Ortlieb Pannier bags. They are tough, 100% Waterproof, and can take a real beating from your adventure. For my back panniers, I use the Ortlieb Bike-Packer Plus bags and for my front panniers, I use Ortlieb Sport-Packer Plus panniers. I've owned them for over 15 years and they are still going strong, like the day I bought them.
Extra items you want to take with you:
First Aid Kit - look for small sized, waterproof cased kits with essentials such as various sized plasters and disinfectant.
Waterproof Stuff Sacks and Compression straps - Handy for storing odds and ends, including electrical devices, toiletries, as well as food.
Toiletries - Toothbrush, toothpaste, and roll of toilet paper (keep this in an easy access of your bags as you don't want to be digging through your bags looking for it along the road)
Sunscreen & Lip Balm - Even when not hot or sunny, bring sunscreen as your face and lips can still get windburn.
Swiss Army / Pocket Knife with Can Opener - Comes in handy if you feel like a supermarket lunch.
Personal items
Cash and Debit/Credit Cards - keep your all your cash and bank cards in a waterproof bag or snap-lock sandwich bag in your handlebar bag or whatever bag you take into shops with you. If you are cycling alone, I recommend a handlebar bag like this one as you can easily take it off and put on your shoulder when going into shops or food stops.
Phone and Charger
USB Charger and Phone Holder (within your budget) - I bought a USB charger for my phone that ran off the dynamo hub on my front wheel. It was probably one of the best investments I have made in the last 10 years for my bike. It kept my phone charged at 100% every day whilst riding using the Phone as a GPS. I bought it when in Germany (found here - USB 5V Bike Dynamo Charger) as I have not seen the product elsewhere. Without a charged phone and precise GPS locations, it would have made touring a lot more difficult. I will discuss more on GPS navigating in a future post.
Summary - Complete Cycling Checklist with Purchase Recommendations
Clothes
Waterproof Jacket
Waterproof Pants
2-3 t-shirts
1-2 shorts
Shoes and/or Sandals/Flip Flops
Gloves - North Face Etip Gloves
Hat
Socks
Sweater
Jeans/Trackpants
Underwear
Stuff sacks to pack clothes
Bicycle Accessories, Parts, and Extras
Panniers - Back - Ortlieb Bike-Packer Plus & Front - Ortlieb Sport-Packer Plus
Bicycle Tool & Adjustable Wrench - Crankbrothers Multi-Tool
Chain Oil - Finish Line Wet Bicycle Chain Lube
Spare Tube & Levers - Various (depending on tire size)
Bicycle Lock - Kryptonite Keeper 785 Integrated Chain Lock and U Lock
Water Bottle
Emergency / Medical Kit - First Aid Kit with Case
Waterproof Stuff Sacks and Compression straps - Dry Sack and Compression Straps
Toiletries
Sunscreen & Lip Balm
Army / Pocket Knife with Can Opener - Victorinox Swiss Army Fieldmaster
Personal Gear
Cash and Debit/Credit Cards
Phone and Charger
USB Charger and Phone Holder
keywords: what to pack for a long distance bicycle tour, cycling checklist
Read the full article
0 notes
Text
A hiking equipment checklist daily excursions
If planning a trekking excursion, proceed through the listing below To know exactly very well what will comprise as a hiking gear:
Hiking shorts or trousers
Suitably perfect hiking trousers are absolutely crucial. I enjoy The ones which have venting which may be opened allowing for superior venting and also maintain your legs dry whilst the perspiration leaves skin.
Hiking fleece
It really is must for the decreased temperatures. A Fantastic hiking fleece Keeps you dry and warm under the right watertight hiking jacket.
Trekking hat
When trekking in colder weather states, a Fantastic wool coat really is really a fantastic Addition. Worn beneath the hood of one's watertight hiking jacket, it keeps your head toasty and agreeable.

Hiking gloves
All these ought to be plain water resistant and wind-repellent and ideally possess A few freedom on the hands to catch things, to start out material, etc..
Hiking boots
When it comes into an Essential increase, you Want the appropriate Boots or shoes to the current weather and also the full time that you're hiking. It's a great idea to start them in your neighborhood or home before with them throughout a walk. Consistently wear hiking socks breaking a walking boot!
Trekking socks
Very similar to boots that are good, superior socks can also be crucial. It Really Is Worth purchasing some amazing hiking socks which complete the boots walking shoes to guarantee maximum relaxation and avoid the dreadful bladder!
Waterproof hiking jacket
It depends a Whole Lot over the time you undergo, but it will always rain, and so you Will Need to Bring the ideal watertight hiking jacket alongside you. There are numerous alternatives to select from, a lot that contain removable levels and will, hence, utilize during the entire season.
Extra trekking clothing
Extra clothes Is Essential in case you proceed in various Temperatures and climate conditions which may quickly occur while increasing a mountain.
This listing Isn't exhaustive but lists a few of these fundamental things You ought to take along with you in your own daily life trekking. Becoming ready ensures you Can walk into the relaxed and enjoyable way.
0 notes
Text
Ruffwear – Grip Trex™ Dog Boots Review
Trekking and Hiking are always fun, especially if you have your furry companion with you. Just like your feet needs to be protected, so does his. A way to protect them is with some dog boots that are built for rough terrain. Ruffwear’s Grip Trex

may be the one for the job. This article is a complete review of Ruffwear’s bog paw protection booties. If you want to see other options, check out the best dog protection booties on our list.
What To Consider When Buying Dog Paw Protection Boots
There are a lot of different types of dog boots. Choosing the right dog boots will help you out in the long run, pun intended. Our dog’s paws, much like our own feet, are not immune to cuts, blisters, and punctures. The dog boots can protect them from possible injuries that they can sustain on your hike. Although the weather isn’t the only criterion when looking for dog boots. Numerous factors can affect your decision.
Material and Quality – What are the shoes made of? Are these comfortable for my dog? Can I use it to do long hikes?
Design – What makes this product worth it? Is it good for all weather types?
Security – How easy is it to put on and take off?
These are only some of the things that I would consider before buying dog boots for your furry friend. Although it is still up to you what type of dog boots you should get depending on your needs. In this article, we’ll be taking a look at dog boots that prides itself as the standard pet wear for hiking and other outdoor activities. Let’s dive right into it.
Ruffwear – Grip Trex
Dog Boots Review
Check Amazon’s Price
Ruffwear’s Boots are said to be the standard dog boots worn by active dogs who like to run, hike, and trek. High-performance dog boots that have a resilient and rugged design with Vibram outsole for exceptional grip on hard-to-walk on the terrain. Designed to securely fit on your dog’s paws so they can forge ahead and explore the great outdoors with you.
.wp-pros-cons { background: #F9F9F9; border: dashed 2px #001a71; } .wp-pros-cons .wppc-btn-wrapper .jd-wppc-btn { color: #fff; background: #212121; } .wp-pros-cons .wppc-btn-wrapper .jd-wppc-btn { border-radius: 5px; }
Quick Glance
What’s Good
Gusset Design for easy on and off
Hook and loop that securely fastens the boots on your dog
Reflective trim for visibility on early morning or night runs
Vibram sole to grip on difficult terrain
What’s Bad
Getting the right size to fit your dog
They’re a little too short for some dogs
Not suitable for giant dog breeds
Dog’s with dewclaws may feel slight discomfort
Why Choose Ruffwear – Grip Trex
?
All dog boots have one goal – to protect your dog’s paws. However, what makes them unique is the features that they offer. Let’s take a look at what makes Ruffwear so different.
Quality and Material
Check Amazon’s Price
One unique quality about these boots is that they are made with Vibram non-marking outsoles that help your dog traverse the trail with extra grip so he doesn’t slip, hence, Grip Trex
. This gives your dog traction and flexibility to roam around without you having to worry about any injuries. Breathable mesh covers your dog’s paw that allows him to wear it on long hikes and trips. It keeps dirt from going into the boots while making your dog’s paws comfortable as he strides.
Design
Check Amazon’s Price
Ruffwear designed these boots to be trail-ready. It is equipped to handle anything that you may encounter on a hike, trek, or any outdoor activity that you and dog can enjoy. It is also designed to fit your dog’s paws very well to keep him comfortable on your adventure. It has a gusset design that expands to give you the ease of on and off. With these, Ruffwear promises that every dog is an explorer.
A design flaw that I saw with this is that these boots are a little short so sometimes gravel and other small rocks can enter the boots. An important aspect of ordering is measuring your dog’s paws correctly. Usually, there are measuring guidelines that help you fit the boots correctly. If done correctly I don’t see a problem with rocks and gravel.
Check Amazon’s Price
Security
Security is the most important feature in dog boots. You have to make sure that these boots don’t come off while you’re on the trail. Luckily, these Grip Trex
boots are equipped with a loop and hook feature that makes sure that the boots are securely fastened on your dog’s paws. Reiterating that these only work if the size of your boots is a snug fit on your dog. Another safety feature that is worth mentioning is the reflective trim that makes it convenient to take early morning hikes and midnight walks. These will reflect light off from the boots so you can see your dog when lights are flashed on them.
Check Amazon’s Price
One part of the design that you have to really watch out for is the sizing. Some people have commented that you’d want to get a size smaller than your dog’s measured paws so that it doesn’t fall off as you are walking. One solution to fix this problem is to put some socks on your dog. Overall, Ruffwear’s Grip Trex
is a dog boot worth mentioning. They are prepared for any type of terrain, they are waterproof and safety locks that keep the paws of your dog free from harm.
What do people say about Grip Trex
?
Showing you the features of this product is not enough to convince you to get one of these. I have gathered some user feedback on this Ruffwear Boots and this is what I found.
Corrina used these boots to rehabilitate her boxer after losing muscles in her legs due to arthritis. The grips really helped her get back on her feet!
DL Finds these dog boots good but a bit too short. He says that they are very durable but a little stiff that his dog looked a little uncomfortable.
For GMSqueaky, these boots helped with her dog’s problem with breaking nails while running and playing fetch. Her concerns are the dewclaws but the socks do help a little.
Alternatives to the Ruffwear Boots
Choosing the right dog boots can be difficult. If you think that these boots are not for you, check these alternates out:
QUMY Dog Boots
QUMY’s dog boots are made to protect them from the dangers of the rough roads. With an extra extended design, these boots will surely fit comfortably on your dog’s paws. Equipped with adjustable reflective velcro straps your dog will be safe from harm when walking in the early morning or even at night. It has non-slip water-resistant soles that help your dog move better in indoor and outdoor environments. Weatherproof and waterproof these are the boots that you can take anywhere.
Petilleur Breathable Dog Hiking Shoes
These weatherproof, all-around dog boots are made with lycra fabric that protects your dogs from anything along their way. Petilleur’s boots are comfortable, flexible, and breathable. Your dog’s paws will not feel stuffy when used on long walks and hikes. They have non-slip soles to protect them from slippery terrain and indoor flooring. With magic sticker straps, these boots are easy to wear and do not slip off that easily so you can enjoy your walk without worrying about your dog’s paws.
LONSUNEER Paw Protector Dog Boots
LONSUNEER Paw Protectors are capable of protecting your dogs from indoor and outdoor activities. These are made with breathable mesh hemmed with soft cloth fabric to cover your dog’s paws comfortably. Non-slip soles are fitted to protect your dogs from hot pavements, rocks, and other trail hazards. They also provide your dog with extra traction to traverse any trail he may face.
Our Final Thoughts
Ruffwear – Grip Trex
Dog Boots are made with great quality material that you can take to any outdoor activity you want. They are made to be durable and withstand any weather. It is not the cheapest in its category but I think it is worth the money. Dog boots are an investment for those who lead very active lifestyles. These are also great for dogs who are living with arthritis and other injuries that need traction on their paws to rehabilitate themselves. Don’t forget to measure your dog’s paws properly before making the purchase. Over-all Ruffwear produced very impressive dog boots. Click here to view this product on Amazon.
The post Ruffwear – Grip Trex™ Dog Boots Review appeared first on Furry Friends Gear.
Ruffwear – Grip Trex™ Dog Boots Review published first on https://furryfriendsgear.tumblr.com
0 notes
Photo

Hello Michael,
I read your article about ultra-backpacking and how you did the John Muir Trail in seven days. I am planning on doing it, but would like to know, for an ultralight backpacker, what do you suggest for a backpack, tent, sleeping bag, etc.? Any feedback or thoughts that you have would be much appreciated.
Thank you.
Joei
Covina, CA
Hi Joei,
Very cool that you’re making a John Muir Trail thru-hike. (The lead photo above shows a view of the Yosemite National Park.) I did it in late August, and I think late August through mid-September is the best time of year to hike the JMT, because you’ll find a largely snow-free trail, the voracious mosquitoes of mid-summer are just about gone, and the afternoons aren’t as blazing hot as mid-summer.
My specific gear suggestions below would, of course, apply to almost any backpacker who wants to go lighter and hike more comfortably in most mid-latitude mountain ranges in summer—although the choice of shelter would depend on typical weather and bugs.
You should also read my tips on ultralight backpacking, which includes my generic ultralight gear checklist and a chart describing each piece of gear and apparel with its weight; and see my standard checklist for backpacking.
Hi, I’m Michael Lanza, creator of The Big Outside, which has made several top outdoors blog lists. Click here to sign up for my FREE email newsletter. Click here to learn how I can help you plan your next trip. Click here to get full access to all of my blog’s stories. Follow my adventures on Facebook, Twitter, Instagram, and Youtube.
Mark Fenton at Trail Crest on the John Muir Trail, Mount Whitney.
Here are my picks for the major gear items.
For a backpack, I like a few models: the Osprey Exos 58 or Exos 48, which have been udpated for 2018, when Osprey also introduced the women’s version, the Eja 58 and Eja 48 (read my review); the Gregory men’s Optic 58 and women’s Octal 55 (read my review), and the smaller Optic 48 and Octal 45; and the Hyperlite Mountain Gear 3400 Windrider (read my review).
See all of my picks for the best ultralight, thru-hiking backpack.
Want to hike the John Muir Trail? Click here for expert, detailed advice you won’t get elsewhere.
In late summer, outside the buggy season in the High Sierra, I prefer using a tarp, like the Sea to Summit Escapist Tarp (read my review), which I used on an ultralight, 86-mile, four-day, September hike in northern Yosemite. I often sleep under the stars on a clear night, but a tarp, besides protecting you from rain and some wind, can trap a surprising amount of warmth underneath it on a calm night.
If you want a full tent, look for a solo that’s around two pounds or two-person tent that’s well under three pounds, like the two-person Big Agnes Tiger Wall UL2 (read my review), Big Agnes Fly Creek HV UL2 (read my review), Slingfin 2Lite Trek, which pitches with trekking poles (read my review), or the MSR FlyLite (read my review). Or if you’re willing to carry a little more weight for more space, check out the Big Agnes Copper Spur HV UL2 (read my review) or Marmot Tungsten UL 2p (read my review).
See my picks for the five best backpacking tents, all of my backpacking tent/shelter reviews, my “5 Tips For Buying a Backpacking Tent” and my story “How to Choose the Best Ultralight Backpacking Tent For You.”
Plan your next great backpacking adventure in Yosemite and other flagship parks using my expert e-guides.
On the JMT below Forester Pass, Sequoia National Park.
For most three-season backpacking, I carry a sleeping bag rated around 30 degrees F. It’s warm enough for me on nights above freezing, as most nights are in summer; on an unusually cold night, I can supplement by wearing my clothing. People who get cold more easily may want a bag rated 20 to 25 degrees—and there are some high-quality, relatively light and compact models out there.
Down bags were traditionally warmer, lighter, and more compact and durable than synthetic (if also more expensive), but the best synthetic insulations now compete with down for warmth and packability, while down feathers treated to make them water resistant compete with synthetic insulations for continuing to trap heat when damp or wet.
My favorites include a bag I’ve used for years, the Marmot Hydrogen; the Western Mountaineering Summerlite (read my review); the Sierra Designs Nitro 800 20-degree (read my review), which comes in a 35-degree version; the REI men’s Magma 10 and women’s Magma 17 (read my review); and the Big Agnes Picket SL 30 (read my review).
See my “10 Pro Tips For Staying Warm in a Sleeping Bag” and all of my sleeping bag reviews.
For nighttime lows generally above freezing, take a lightweight or ultralight insulation piece like the Patagonia Micro Puff Hoody (read my review), the Mountain Hardwear Ghost Whisperer (read my review), or the somewhat warmer Arc’teryx Cerium LT Hoody (read my review) or Patagonia Nano Puff Hoody (read my review).
See my “Review: The 10 Best Down Jackets,” my story “Ask Me: How Can You Tell How Warm a Down Jacket Is?” and all of my puffy jacket reviews.
Get the right pack for you. See my “Gear Review: The 10 Best Packs For Backpacking”
and my “Top 5 Tips For Buying the Right Backpack.”
Lastly, if all of your gear is light, you should get lightweight hiking shoes or boots. You may want something waterproof-breathable that’s still relatively light, like the Scarpa Proton GTX (read my review), Arc’teryx Acrux2 FL GTX (read my review), or Oboz Crest Low BDry (read my review).
For hiking the JMT at a time when it will be largely snow-free, I’d go with non-waterproof, mid-cut or low-cut hiking shoes for maximum breathability, as my friends and I did in late summer because we didn’t have to worry much about getting wet, and highly breathable shoes dry much faster, too. Shoes I like include the La Sportiva TX3 (read my review), Scarpa Epic Lite (read my review), Oboz Scapegoat Mid (read my review), and Arc’teryx Acrux FL (read my review).
See all of my reviews of hiking shoes.
I can help you plan this or any trip you read about at my blog. Find out more here.
You should read my story “5 Things to Know Before Buying Backpacking Gear,” which has my general tips on buying any gear and links to my stories offering specific tips on buying a pack, tent, boots, and sleeping bag.
See also my advice to another reader about thru-hiking the JMT in early summer and all of my stories about the John Muir Trail.
The JMT is a wonderful experience. Good luck.
Best,
Michael
Tell me what you think.
I spent a lot of time writing this story, so if you enjoyed it, please consider giving it a share using one of the buttons below, and leave a comment or question at the bottom of this story. I’d really appreciate it.
The Big Outside helps you find the best adventures. Subscribe now to read ALL stories and get a free e-guide!
0 notes
Last Seen Blogs

notadurigej
Untitled

oddotato
im olaf and i like warm potatoes

catcowboy
art blog!

angelsknifeprty
angel 𝄞⨾𓍢ִ໋

nanaofrp
Tough Kookie