#flavours. and i suggested we could get that one gluten free so we can try different ones. and my one friend refused and was like 'i think
Text
Something i realised is a hard boundary for me for any future partner is that they must never make me feel left out about food. I have a lot of food intolerances, however they are accommodateable, and i expect my partner to do that. Always, no exceptions. And I don't mean they can't try a new restaurant that only serves food i can't eat, as long as this isn't the only type of 'let's try a new food' they suggest. But if the theme is 'let's invite friends and have cake' and they don't get one i can eat too, or something as a replacement that has the same value (and not sad prepackaged cookies), then i will not play nice to that. I might even just fucking leave, because i will not put a brave face on and be all "No, its fine, how is the cake? I hope you enjoy it".
And i also won't bring my own food to an event someone else organises, especially not my partner's. I used to go to an event where they had, until then, always accommodated me (and others), and then suddenly they stopped and said that it was too much money and effort, and i could write an email before what food they will have and bring a replacement myself. Like no fuck that, i will not pretend they accommodated me through my own effort, if anything i will bring a wildly different food and tell anyone who asks what i have that they were unable to provide accomodation. And yes I do bring my own food to something like going on vacation because I'd rather not starve, but a hotel is neither my friend nor my partner nor an event that prides themselves on inclusivity.
For the longest time i accepted this stuff, but since then i made friends that saw it as a given to accomodate me, and i have raised my standards.
#own post#i once went to a restaurant with two friends for my birthday and they have gluten free pizza and a extra long pizza to share wuth different#flavours. and i suggested we could get that one gluten free so we can try different ones. and my one friend refused and was like 'i think#it will taste weird (she meant taste like shit). you understand' and instead shared the pizza with the other friend and i got a single#person gluten free one. and you know what pizza base she chose? fucking BUCHWEIZEN-DINKEL#as if that wont tase ''weird''#and i don't expect everyone to eat by my dietary restrictions but it was MY BIRTHDAY. my birthday where i invited them to the gluten free#pizza place that i was so excited for. fucking birthday#*MY fucking birthday. was that supposed to say at the end#that is one of the reasons she is now an ex friend#someone not including me for food makes me feel crushed and hollow and unvalued#and i know that is trauma but that doesn't mean i don't deserve to be included
0 notes
Text
Edible cookie dough recipe

#Edible cookie dough recipe free
Vanilla extract – vanilla adds such a rich, sophisticated flavor to the dough.Salt – just a dash to balance all that sweetness.Sugar – depending on the recipe you choose, you’ll use white granulated sugar, light brown sugar, or both.
#Edible cookie dough recipe free
Butter – your butter (or dairy free alternative) will act as the glue to hold your gf cookie dough together.Gum free gluten free flour blend – I tried other gf flour variations, and none came close to being as delicious as this one.In your pantry, right this very second, you likely have all the ingredients you need to make irresistible gluten free cookie dough: Gluten free edible cookie dough ingredients Skip the pretenses and just dig in with a spoon and a smile!.Coat them in chocolate to make decadent gf cookie dough truffles.Drop them on top of warm brownies and watch as they melt slightly into the perfect topping.Eat it by the spoonful without any guilt or worry! Add 1 to 2 tablespoons milk to the edible cookie dough, and make it smooth and creamy.As bites, drop them into some ice cream (bonus points for homemade vanilla ice cream!).Make them into little cookie dough bites, and keep them chilled in a jar in the refrigerator for snacking.Here are my favorite things to do with the raw dough: Shape and stash the bites in the refrigerator or in the freezer for longer storage. You can make this dough in a small batch, or even double or triple it. You can make this dough in a small batch and even double or triple it. This one-bowl (!) gluten free edible cookie dough recipe requires as few as 6 ingredients (!!) and is ready to eat in under 15 minutes (!!!) I ask a lot of myself sometimes, but you have to push to get what you want - and I did. I also wanted the recipe to be quick and easy, both in preparation and cleanup. I wanted a gf edible cookie dough recipe that was indistinguishable from the “real stuff”. I had to experiment a bit with different gluten free flours to find the best for this particular recipe. Every time my family sees me making cookie dough, they ask if it’s edible raw gf cookie dough. Making cookie dough made to be eaten raw is just never a bad idea. You could put it into the base of a chocolate trifle or use it in an ice cream terrine.Why this is the best gluten free cookie dough that you can eat raw The cookie dough is also delicious in other desserts. Adding slightly less milk to the cookie dough mixture will also make it easier to shape into balls that will hold their shape while in the ice cream. Make sure your ice cream base mixture is cold, as it will melt the butter in the cookie dough otherwise – you’ll lose the shape of the dough and the chocolate will melt. Then, mix the dough pieces through your crème anglaise before churning it. We'd suggest freezing the cookie dough first and chopping it into small pieces or shaping into tiny balls and freezing those. Can I add this cookie dough to ice cream? If you were to bake off this cookie dough, we would suggest either crumbling it over ice cream or poached fruit as it may spread too much for cookies. If you are looking for a baked cookie recipe, we recommend trying these basic cookies. As it doesn’t have any eggs or leavening agent, the dough will spread. We couldn’t recommend baking this dough, although it is safe to do so. Once they’ve frozen, tip into a freezer bag and return to the freezer for up to three months. Simply roll the cookie dough into balls the size you’d like and arrange on a baking tray lined with baking parchment, well spaced apart. How long does cookie dough last in the fridge?ĭue to the high sugar content in the dough, it will last for up to four days. We'd also suggest making chocolate cookie dough by added 1 tbsp cocoa powder to the mix. Apple and cinnamon is also a delicious flavour combination for cookie dough. For a s’mores cookie dough, add 1 tbsp hazelnut spread, some crumbled biscuits and mini marshmallows. For a salted caramel cookie dough, simply add 1 tbsp dulce de leche and ½ tsp salt along with a handful of chopped dark chocolate to the dough. The best thing about this cookie dough is that it’s easy to alter the flavour to suit your tastes. Simply spread it over a baking sheet and cook it at 175C for 5 mins until the flour reaches 60-70C. Due to the fact flour is not usually treated to kill pathogens, you could heat-sterilise it yourself at home. In the recipe, we've compensated for the lack of eggs by using milk and more butter. This recipe for cookie dough is safe to eat as it doesn’t contain egg, so the risk of salmonella food poisoning is reduced.
0 notes
Text
Get healthier pizzas at home and a spelt crust recipe

Everyone likes pizza so why not make a homemade variation of your favorite pizza using fresh, wholesome as well as standard ingredients. Making a pizza at residence with your household is fun and very easy, in addition to cheaper as well as healthier!
Here are some of the standard active ingredients you'll require for a healthy and balanced pizza evening party.
1. Rethink your crust
In order to earn a fantastic pizza, you require a great crust. Lengthy gone are the days of white crust loaded with unhealthy ingredients. Spelt is the flour of option for all-natural, pure dough that's authentically Italian. Spelt is additionally higher in protein as well as fiber and has a wonderful nutty flavour as well as appearance. You will also digest it a lot easier compared to white flour. Note that spelt is not gluten-free, if you're searching for a gluten-free choice I suggest using wild rice flour or an all-round gluten-free flour mix.
2. Don't complicate the sauce
When it concerns sauce there are many choices past the traditional tomato, however there is actually absolutely nothing incorrect with making use of a pure roma tomato sauce no matter of whether it's homemade or store-bought. Just try to find a label without any included salt, sugar or oils besides typical components like olive oil, seasonings, garlic, tomatoes and also sea salt, that's all you need.
More sauce alternatives consist of pesto, baked garlic and also olive oil or attempt no sauce whatsoever if you're going for something rustic.
3. Try a new cheese
This is where points can obtain sticky. It's very simple to use too much or the wrong kind of cheese which can pack in undesirable calories as well as fat. Here are a few nourishing options for cheeses:
Dairy cheese: If you're mosting likely to pick this kind, choose goat and also sheep's milk cheeses. You can select a traditional chevre or feta. Make certain to make use of celebrity moderately on the pizza due to the fact that you really do not need a great deal to get the flavour, appearance as well as fulfillment of a cheesy pie. You can additionally grate some goat mozzarella as a choice to cow. You'll have a much less complicated time absorbing sheep and also goat cheese as they include much less lactose.
Non-dairy cheeses: If you're entirely dairy-free, lactose intolerant or vegan, you could want to go with store-bought cheeses sucha daiya - which is made from tapioca and also coconut. It thaws actually well on pizza and also provides that gooey structure we all love (while being soy and also casein-free). After that you can go natural and use wholesome garnishes such as soaked and also combined cashews, avocado slices or you could also spray dietary yeast on the pizza to get a velvety appearance and also flavour.
4. Load up on toppings
When it involves toppings, the skies is the restriction. You can pick any kind of veggies you desire. Some also go with fruit! Have enjoyable with it and also pick components such as mushrooms, onions, kale, arugula, peppers, olives, spinach, broccoli, zucchini, eggplant, basil, wonderful potato or you could obtain a little unique and attempt pineapple, pear, walnuts, or figs. Make a couple of different pizzas, so that you have a few different choices for your visitors! The even more garnishes the a lot more nutrients so load up in this department.
Pizza dough: Spelt crust recipe
Ingredients:
1-1/4 cup spelt flour
¼ cup ground flax seeds
½ cup water
2 tbsp olive oil
1 tsp honey
Pinch sea salt
Directions:
1. Line a round frying pan with parchment paper.
2. Mix flour, flax, as well as salt in large dish as well as reserved. In a gauging cup, step 1/2 mug water. Include oil, honey, as well as salt and mix well.
3. Pour the wet combination over the dry combination and also throw with fork. Once it begins to integrate, knead with your hands for about 2 minutes. It should be a soft dough, but one that holds together.
4. Making use of strong pressure, press the dough with your knuckles or fingers and spread uniformly over the pizza frying pan. Allow the dough extend a little onto the rim of the frying pan. Puncture the surface with a fork then bake for 10 minutes in oven.
And right here are a couple of favourite homemade Chatelaine pizza recipes:
Potato pizza with caramelized onions (imagined over)
Gluten-free pizza dough
Blue cheese pizza with pears and also arugula
Grilled margherita pizza
Three-cheese pizza with sundried tomatoes
Enjoy!
0 notes
Text
If you love a good curry, but keep making the same ones time and time again, it might be time to try something different. This healthy mushroom curry with cashew nuts is full of flavour, colour and nutritious ingredients. It’s one of Chetna Makan’s recipes from her new book, Chetna’s Healthy Indian Vegetarian. Plus there’s a chance to win a copy for yourself.
If you’re a fan of The Great British Bake Off, you will know Chetna Makan. She wowed the judges with her creative and vibrant flavour combinations back in 2014. But although she’s a keen baker, she also enjoys simple Indian home cooking. Chetna’s Healthy Indian: Vegetarian is her fourth book.
Chetna’s Healthy Indian: Vegetarian
Chetna was inspired to write this book after a research trip to India. Vegetables and home cooking are integral to the cuisine of most parts of this vast country. As well as making veg the star of the show, however, she also showcases recipes that are healthier than many. The tag lines, “everyday veg and vegan feasts; effortlessly good for you”, pretty much says it all.
Most of the recipes are really easy to make. And a lot of them are quite quick too.
The book is divided into eight chapters. Each chapter contains around ten recipes, although some have a couple more and some a couple less. I’ve looked at every single one and strangely enough, I want to try them all. Here’s a flavour of each of the chapters and what you might find therein.
Soups & Starters
Soup isn’t something I generally associate with Indian cuisine. But of course there are soup recipes. Every culture has them after all. Creamy tomato and coconut milk soup looks totally delicious. Sweet and sour garlic and tamarind rasam, on the other hand, sounds quite intriguing.
The salads are refreshing and light and include lentil and mango salad and grilled corn and red onion salad. You can treat these as a starter, a light lunch or a side.
Snacks & Canapés
The recipes in this chapter are perfect for entertaining. But they’re also great for picnics and packed lunches. Cheese and potato chapatti sandwiches sound counterintuitive , but I suspect I’d find them irresistible. They’re definitely on my list of must tries. I’ve made chocolate rocot0 stuffed chillies before and they nearly blew our heads off. Chetna has a recipe for gram flour stuffed chillies. She suggests finding the right chilli for your tastes before stuffing them. Much more sensible than our approach.
Sabji
Sabji are dry vegetable dishes. Chetna describes them as akin to Indian vegetable stir-fries. Serve them on their own with flatbreads or to accompany curries and other dishes such as dal and rice. Chetna particularly likes to use them as stuffings for sandwiches, wraps and toasties.
Onion and green pea sabji is a great all rounder. It sounds delicious and given that most of us have a pack of frozen peas in the freezer, it can be made at a moment’s notice. I’m also keen to try sour and spicy okra with potatoes and asparagus paneer.
Lentils, Peas & Beans
Dal is one of my absolute favourite dishes. So I can’t wait to get properly stuck into the recipes in this chapter. You’ll find a basic quick and easy dal recipe for sure, but there’s so much more. In this chapter you’ll also find a recipe for a super green spinach masala chickpeas.
I know I have a pack of urad dal lurking around somewhere in the back of a cupboard. So I absolutely must make Chetna’s masala urad dal. It’s a nice thick one and it just sounds so good.
Curries
As you’d expect from Chetna, there are a few tricks and twists to elevate your curry cookery to the next level. The mushroom curry for example, isn’t just any old mushroom curry. It contains cashew nuts for extra texture, nutrition and flavour, but also gram flour for thickening.
There are also some unexpected finds. I understand jackfruit curry is quite common in India, but I’ve never seen a recipe for one in an Indian cookbook here in the UK before. Chetna has that one covered.
As much as I dislike the term fusion food, Chetna has snuck in a few adaptations. Look out for some standard British produce which gets a makeover. Here are a couple: broad bean curry; courgette kofta curry.
Rice & Roti
If you’re after a standard roti, paratha or naan bread recipe, this isn’t the book for you. Instead Chetna gives us a whole range of lesser known and unusual bread recipes. I’ve been exploring all sorts of flatbreads over the last few months and I’ve enjoyed the process enormously. But I have to say I’d never heard of kulcha until I saw the recipe for buckwheat kulcha in this book. But now, of course, I want to try it.
This chapter includes recipes for dosas, a beetroot chapatti and a chilli naan. When it comes to the rice side of things, expect to see such delights as bengali khichdi and aubergine and potato rice.
Raita & Chutney
The penultimate chapter of the book is for the spicy or cooling condiments that put the finishing touches to a good Indian meal. Roast carrot raita sits alongside a host of other yoghurt based sides. The tamarind and date chutney, with its sweet and sour notes, has my name written all over it.
Sweets
Well you can’t have an Indian cookbook without a few sweets to finish off. Indians have a notoriously sweet tooth. Chetna’s desserts err on the healthier end of the spectrum though and aren’t nearly as sweet as you’d expect. Rose sandesh, a strained milk based pudding, sounds particularly appealing.
Publisher Details
Chetna’s Healthy Indian: Vegetarian */ Chetna Makan. Published by Octopus Books in hardback with an RRP of £20. ISBN – 9781784726621.
If you like the sound of this cookbook, head down to the bottom of the post where you’ll find the chance to win a copy.
What I Really Like
Although there are some familiar recipes in the book, such as chana dal there are many more unusual ones. This gets me excited.
Every recipe has a photograph to show the finished dish. This is quite a rarity in cookbooks these days. As you’d expect, they all look good and eminently toothsome. But there’s also a number of shots taken in India. These are mostly of market produce, but there’s a few buildings and street scenes thrown in to conjure up an exotic, sultry and colourful aura – the essence of India.
Some cookbooks these days are obsessed by celebrity culture and feature more shots of the author than they do of the recipes they’ve created. I’m very pleased to say that Chetna is not such a person. There are only two photos of her in the whole book and they’re both in the introduction.
I’m a big fan of pulses, which is just as well as they’re a mainstay of my diet. Not only are they nutritious and tasty but they’re also incredibly versatile. It seems I’m not alone. Chetna is also a fan. To help those that aren’t as familiar with peas, beans and lentils as she is, there is a Pulse Primer section in the book.
Her guide to the individual qualities of different pulses is to encourage readers to explore and use a wider variety than they may be familiar with.
What Could Be Better
To be honest, I’m struggling to think of anything.
Mushroom Curry with Cashew Nuts
We really enjoyed Chetna’s mushroom and cashew curry. I’ve called it mushroom curry because there aren’t really that many cashews included. They do add to the overall texture and flavour though, so they’re an important addition.
To turn this mushroom curry into a vegan offering rather than a vegetarian one, just swap the dairy yoghurt for a plant based one.
It’s a standalone dish, quite capable of top billing. Just serve it with rice or flatbreads. That said, it would also make a fabulous contribution to a curry night. Pair it with a dal and some sort of green vegetable curry maybe. I’ve provided a selection of curries further down the post which would all make excellent accompaniments.
#gallery-0-10 { margin: auto; } #gallery-0-10 .gallery-item { float: left; margin-top: 10px; text-align: center; width: 50%; } #gallery-0-10 img { border: 2px solid #cfcfcf; } #gallery-0-10 .gallery-caption { margin-left: 0; } /* see gallery_shortcode() in wp-includes/media.php */
Fry the cumin seeds, onions and cashew nuts.
Add the garlic or garlic scapes.
I mostly followed the recipe, but did make a couple of adjustments. We had a load of garlic scapes from the allotment that I needed to use up. So I added quite a lot of those rather than the garlic listed in the recipe. As there was quite enough allium activity going on, I only used one onion rather than two.
Gram Flour for Thickening
Watery curries aren’t generally that appealing. Chetna, however, has a great tip for thickening the sauce for this cashew mushroom curry. She uses chickpea flour, also known as gram flour or besan. Well what a brilliant idea this is.
The flour not only helps to thicken the sauce, but it also add flavour and a little extra protein. And it’s gluten-free, so there’s no need to worry about any allergies on that score.
Add the gram flour to the fried onions along with the spices and stir. I also added salt and pepper at this stage as I thought it would be harder to stir everything together later in the proceedings.
Top Yoghurt Tip
I’m always wary of adding yoghurt to curries as the yoghurt tends to split. Consequently, the resulting dish doesn’t look very appetising. Chetna’s top tip is to add water to the yoghurt before adding it to the other cooking ingredients. It worked perfectly in this mushroom curry. Just give it a good stir before you pour it in and don’t add it all at once. Slow and steady wins the race.
#gallery-0-11 { margin: auto; } #gallery-0-11 .gallery-item { float: left; margin-top: 10px; text-align: center; width: 50%; } #gallery-0-11 img { border: 2px solid #cfcfcf; } #gallery-0-11 .gallery-caption { margin-left: 0; } /* see gallery_shortcode() in wp-includes/media.php */
Stir in the yoghurt & water after adding spices and gram flour.
Add chopped tomatoes.
I deviated from Chetna’s instructions at this point. Who am I to mess with her recipe? Well it seems I just can’t help myself. I mixed all of the water with the yoghurt and added it in after frying the onions etc. It somehow made more sense to me to do it that way. I poured it in slowly whilst giving it a good stir to mix in the gram flour and spices. It worked fine.
At this point, you add the tomatoes, clap the lid on the pan and allow the contents to gently simmer for ten minutes.
Cooking the Mushrooms
Finally it’s the turn of the main ingredient. Add the sliced mushrooms and coriander leaves. Turns out I had plenty of parsley, but no coriander leaves. So I substituted the first for the second. Cover the pan again and cook for a further ten minutes. Job done.
#gallery-0-12 { margin: auto; } #gallery-0-12 .gallery-item { float: left; margin-top: 10px; text-align: center; width: 50%; } #gallery-0-12 img { border: 2px solid #cfcfcf; } #gallery-0-12 .gallery-caption { margin-left: 0; } /* see gallery_shortcode() in wp-includes/media.php */
Add the mushrooms and coriander (or parsley) leaves.
Cover and cook for ten minutes, then give a good stir and serve.
My top tip is that mushrooms really benefit from a little drop of soy sauce. So I added a teaspoonful of tamari along with the mushrooms for an extra umami boost.
We accompanied the mushroom curry with rice initially. But as there were only two of us, there was plenty left over. So the following evening I warmed the curry up and we enjoyed it with flatbreads.
Other Curry Recipes You Might Like
Baby corn masala via Flavours Treat
Cauliflower kurma via Greedy Gourmet
Green split pea curry via Tin and Thyme
Indian potatoes via Crunch & Cream
Lentil curry with kale & red peppers via Tin and Thyme
Matar paneer via Lost in Food
Roasted aubergine curry (baingan ka bartha) via Simply Food
Sri Lankan okra curry via Veggielicioius
Spinach chickpea curry via Tin and Thyme
Keep in Touch
Thanks for visiting Tin and Thyme. If you make this mushroom curry or have a copy of the book, I’d love to hear about it in the comments below. Have you made any of Chetna’s vegetarian curries? Do share photos on social media too and use the hashtag #tinandthyme, so I can spot them.
For further book reviews and giveaways follow me on Twitter, Facebook, Instagram or Pinterest.
Choclette x
Mushroom Curry. PIN IT.
Subscribe and Receive
[mailerlite_form form_id=1]
Mushroom Curry – The Recipe
Mushroom Curry

A healthy vegetarian main dish curry which is full of flavour, colour and nutritious ingredients.
2 tbsp sunflower oil
1 tsp cumin seeds
12 raw cashew nuts – roughly chopped
2 onions – finely chopped
2 garlic cloves ((I used garlic scapes))
1 tsp ground coriander
½ tsp chilli powder
½ tsp garam masala
½ tsp turmeric
2 tbsp gram flour
100 g natural yoghurt
250 ml water
3 to matoes – finely chopped
400 g chestnut mushrooms – thinly sliced
20 g coriander leaves ((I used parsley))
¾ tsp salt ((I used ½ tsp salt and 1 tsp tamari))
¼ tsp freshly ground black pepper
Heat the oil in a large pan over a medium to low heat and add the cumin seeds. Once they start to sizzle, stir in the cashew nuts followed by the onions.
Cook for about twelve minutes or until the onions are golden brown. Add the garlic and fry for a further minute.
Add the gram flour and remaining spices and stir fry for another minute.
Stir the yoghurt and water together and pour into the pan, a little at a time, stirring all the while. I added the salt and pepper at this point.
Bring it up to a simmer then add the tomatoes. Cover the pan and simmer gently for ten minutes.
Add the mushrooms, coriander leaves and the salt and pepper, if you haven’t already done so. Cover and simmer for a further ten to fifteen minutes or until the mushrooms are cooked.
Give it a good stir and serve warm with rice or flatbreads.
To make this curry vegan, just swap the yoghurt for a plant based one.
Please note: calories and other nutritional information are per serving. They’re approximate and will depend on serving size and exact ingredients used.
Mushroom Curry Sharing
I’m sharing this recipe for a gluten free sponge cake with Apply to Face Blog for #CookBlogShare.
Chetna’s Vegetarian Healthy Indian Giveaway
Octopus Books is offering one Tin and Thyme reader a copy of Chetna’s Healthy Indian: Vegetarian. To be in with a chance of winning, please fill in the Gleam widget below. You will need to leave a comment on this post, answering the question, which then gives you additional chances to enter if you so wish. Gleam will pick a winner at random from the entries received. If you are commenting anonymously, please give me some way of identifying you as I will be verifying the validity of entries. Any automated entries will be disqualified.
This giveaway is only open to those with a UK postal address. Winners will need to respond within 5 days of being contacted. Failure to do this may result in another winner being picked. Leaving your details gives permission for them to be passed on to Octopus Books should you be a winner in this giveaway.
Prizes are offered and provided by Octopus Books and Tin and Thyme accepts no responsibility for the acts or defaults of said third party. Tin and Thyme reserves the right to cancel or amend the giveaway and these terms and conditions without notice.
Closing date is Thursday 16 July 2020
Healthy Indian
Thanks to Octopus Books for the copy of Chetna’s Healthy Indian. They did not expect me to write a positive review and all opinions are, as always, my own. This post contains affiliate links to Amazon*. Links are marked with an *. If you buy through a link it won’t cost you any more, but I’ll get a small commission. Thanks to my readers for supporting the brands and organisations that help to keep Tin and Thyme blithe and blogging.
Mushroom Curry + Chetna’s Healthy Indian Giveaway If you love a good curry, but keep making the same ones time and time again, it might be time to try something different.
0 notes
Text
Sugar-Free & Grain-Free Cinnamon Crunch

This web page could comprise affiliate hyperlinks. Any commissions earned will assist my web site to stay free ceaselessly. (Full disclosure).
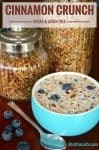


Are you on the hunt for sugar-free breakfast recipes? Your complete household will love this straightforward grain-free cinnamon crunch.
This selfmade pantry recipe is only one of many sugar-free and grain-free granolas I've on Ditch The Carbs. Take a glance beneath in any respect the opposite flavours that we’ve whipped as much as make issues simpler.

Grain-Free Cinnamon Crunch
In this submit you'll study:
What easy pantry elements do you want?What’s mistaken with boxed cereal?Why is breakfast the brand new dessert?Why do they feed grains to fatten animals?More Healthy Pantry Breakfast Recipes – No Sugar, No Gluten, Low-Carb And Keto Sugar-free grain-free cinnamon crunch recipe
Sugar-Free & Grain-Free Cinnamon Crunch

I’ve been promising to submit this recipe for some time, so right here it's. Sugar-free and grain-free cinnamon crunch with a touch of vanilla, is totally divine.
I've to cease my youngsters from consuming it straight from the jar. They eat it for breakfast with berries and unsweetened yoghurt or sprinkled on whipped cream for a fast and wholesome dessert.
We all need one thing fast within the morning and are so used to pouring one thing from a packet, it is a nice wholesome various. I make a giant batch each few weeks with no matter combination of seeds, nuts and coconut I've in my pantry on the time.
More Low-Carb Breakfast Recipes …
What Pantry Ingredients Do You Need For Grain-Free Cinnamon Crunch?

I've given a choice of nuts and seeds within the home-made grain-free granola recipe beneath, however in reality, it's fairly adaptable pantry recipe. If you possibly can’t discover a number of the elements, merely use whichever seeds and nuts that you could find, and you'll tolerate.
When attainable, try to discover thread coconut or coconut chips because it provides a extremely stunning texture and crunch.
TOP TIP: I usually add walnut halves or chopped uncooked almonds AFTER it has been baked, so as to add selection and texture.
If you haven’t seen my earlier grain-free granola/muesli recipes check out the unique Grain-Free Granola and an all-time favorite Chocolate Grain-Free Granola. I particularly encourage you to learn the submit right here on why it's good to ditch the cereals and the 5 myths that cereal is sweet for you.
What’s Wrong With Boxed Cereal?
If you perceive what's mistaken with cereals and the way they're marketed, you'll perceive what's mistaken with fashionable meals manufacturing. See how firms flip an inexpensive grain right into a socially acceptable breakfast meals.
Cereals at this time are extra akin to a dessert than a breakfast meal.
And do not forget that grains are used to fatten cattle, so cease grazing except you need to be the scale of 1. And attempt to pledge by no means to feed your youngsters cornflakes and cereals once more.
Read extra: Why is breakfast the brand new dessert?

More Healthy Pantry Breakfast Recipes – No Sugar, No Gluten, Low-Carb And Keto
So if you're model new right here, granola might not be your factor, possibly pancakes and waffles are extra interesting proper now.
I’ve bought you coated too. Here is a choice of the most well-liked wholesome breakfast recipes.
More recipes you might like:
LOW-CARB BREAKFASTS: Who else needs to begin their day the simple manner? There’s even an egg-free chapter for you too – CLICK HERE

Home-made Grain-Free Cinnamon Crunch – no sugars!
Grain-free cinnamon crunch is a game-changer. Adults and children alike fall in love with this wholesome pantry recipe and is the right antidote to sugary cereals/granolas within the morning. P
Prep Time10 minutes Cook Time30 minutes Total Time40 minutes
Course: Breakfast, Lunch packing containers, Snacks Diet: Dairy Free, Gluten Free, Grain free, LCHF, Low Carb, No Sugars, Paleo, Wheat Free Diet: Diabetic, Gluten Free Keyword: Grain-free granola, Homemade granola recipe
Total Carbs: 6.9g
Fibre: 5g
InstructionsNutty Base Place all of the nuts, seeds and coconut in an enormous baking dish then pour over the cinnamon crunch. Mix gently with a serving spoon. Bake at 180C/350F for 30 minutes however you MUST flip the combination over each 3-Four minutes to keep away from the coconut from burning. You don't want an costly mistake in your palms. Adjust your oven in line with how briskly it's cooking. Store in an hermetic container within the fridge. Will maintain for 3-Four weeks. Sotre within the freezer for as much as Three months.
Want to begin low-carb FAST?Grab your FREE 5-day meal plan, pantry information, procuring checklist & tracker CLICK HERE
NotesNutrition values will fluctuate extensively for this recipe relying on which seed/nuts you add and the way a lot.
Use the vitamin panel as a information solely.
I've calculated the values utilizing a 1/2 cup (43g) however will rely on how a lot you utilize for breakfast (possibly extra) or as a dessert on berries (possibly much less).
Nutrition Facts
Home-made Grain-Free Cinnamon Crunch – no sugars!
Amount Per Serving (43 g)
Calories 258
Calories from Fat 220
% Daily Value*
Fat 24.4g38% Carbohydrates 6.9g2% Fiber 5g21% Sugar 0.4g0% Protein 6g12% * Percent Daily Values are primarily based on a 2000 calorie food plan.
NEED MORE HELP?Ditch The Carbs PRO – your low-carb course PLUS the FAMOUS mini-challenges that cease you falling again into previous habits – JOIN US
Cookbooks & Meal PlansTake the stress out of cooking, all of the assets you’ll ever want – SHOW ME
Need assist, suggestions & tips?Join our pleasant SUPPORT GROUP to assist assist and information you and your loved ones to stay low-carb for all times!


If this text has triggered you to make well being a precedence, however you don’t know the place to begin, be part of us at Ditch The Carbs PRO. Get IMMEDIATE entry so you can begin TODAY!


Want to begin low-carb FAST?

Subscribe to my FREE publication service and get immediate entry to the FREE Low-Carb FAQ & Diet Sheet as a subscriber bonus. You additionally obtain secret low cost codes for subscribers solely. You are also agreeing to our Privacy Policy
Success! Now test your e mail to obtain your FREE eBook instantly.
!function(f,b,e,v,n,t,s)
{if(f.fbq)return;n=f.fbq=function(){n.callMethod?
n.callMethod.apply(n,arguments):n.queue.push(arguments)};
if(!f._fbq)f._fbq=n;n.push=n;n.loaded=!0;n.version='2.0';
n.queue=;t=b.createElement(e);t.async=!0;
t.src=v;s=b.getElementsByTagName(e);
s.parentNode.insertBefore(t,s)}(window, document,'script',
'https://connect.facebook.net/en_US/fbevents.js');
fbq('init', '389949918466211');
fbq('track', 'PageView');
Source link
Read the full article
0 notes
Text
6 Ways to Handle Picky Eaters

When I was a kid, I was a choosy eater. I do not understand if my parents realized it at the time, however whether I liked a meal or otherwise had very little to do with the taste. It was everything about the structure. I instantly recognized if I liked food based upon how it felt on my tongue - grainy, mushy as well as slimed foods did not agree with me and also would instantaneously trigger my gag response. I would commonly choose about whether I liked a food or not just by checking out it.
Now that I'm a parent myself, I have actually been honored with a particular eater of my own. I say honored, half joking (any type of moms and dad of a choosy eater understands most of the time handling a fussy eater is a curse). In my case though, parenting a choosy eater is a bit of a blessing. Having been a fussy eater myself has given me an one-of-a-kind insight right into the mind of a kid that is mindful concerning food as well as has given me the tools for exactly how to overcome this parenting hurdle.
Most children have a "point" that is making them choosy. For some it might be that they hesitate to eat foods that are a particular colour (for several youngsters this is environment-friendly), others are sensitive to appearance (like I was) and some do not like various sorts of food mixing or touching (my little girl fits into this classification).
As I grew up, my texture level of sensitivity slowly began to disappear and also I outgrew my choosy eating. I'm now a fairly adventurous eater and also make a great section of my living from establishing dishes for my internet site as well as mentor family-friendly food preparation courses in my community.
Two years ago I made "dominating the pickies" a priority in my house. While we have not formally claimed "bye bye" to the pickies, my little girl has ended up being a lot more adventurous with what she eats. I credit the adjustment to my 6 Policies To Urge a Picky-Free Home. I'm sharing these regulations with you today and also I wish that they will aid other family members produce a better connection with food in their homes.
6 Ways to Handle Picky Eaters
Rule 1: Determine what your youngster's "particular point" is.
If they are scared of a specific colour of vegetables (or vegetables generally) begin by concealing a little quantity of veggies in their food and afterwards slowly raising the quantity. Smoothies and juicing are excellent methods to creep some covert veggies into your youngster's diet plan and after that slowly boost the amounts.
If it's an appearance concern, check out various manner ins which you can utilize components to make the structure a lot more enticing. The appearance of a perfectly ripe avocado cut right into dices is really different from avocados mashed right into guacamole.
If they do not like various components blended together or touching, consider preparing their meals deconstructed. If you were preparing homemade poultry soup, take into consideration providing them a cup of brew with shredded or cubed poultry, carrots and celery separate on the side. Relying on exactly how delicate your kid is to his or her food touching, you can additionally purchase plates that have dividers to maintain each ingredient separated.
Rule 2: Everybody in the family members ought to only use favorable language and constructive criticism when it involves food.
Examples would be:
“This is yummy!”
" I enjoy the means these pop when I eat them!"
" Look how rather the colours on the plate are!"
Instigate the policy that no one ever before uses negative words when it comes to food. Words like 'despise', 'gross' or 'revolting' are not allowed. This is where the favorable constructive objection is especially effective. Youngsters must be encouraged to believe of why they don't like something as well as to determine it. Instead of saying "I hate this chicken, it's revolting," they could state "I found the chicken really hot on my tongue. Following time I wish to try it with less flavor."
I inform children in my courses that if they truly can not locate anything favorable to claim about the food that they need to say, "This isn't my preferred today, yet maybe I'll like it next time." You 'd marvel exactly how typically informing on your own that you might such as something next time really causes a positive food experience the following time you try it.
Rule 3: Talk about your food.
Encourage your youngsters to review what they such as about each meal. Moms and dads can most definitely lead by example on this set. Beginning a conversation at each meal about the flavours, appearances and colours of each food. Discover the suggestion of where the various components come from, such as, " These carrots were grown by the farmer who runs the farm stand where we do our produce buying" or "These peaches come from the Okanagan where we went with getaway in 2014!"
Talk concerning what active ingredients in the dish are everyone's much-loved, and what you might alter or include to try out the dish the following time you make it.
Rule 4: Turn off digital gadgets and also have everybody in the family eat as several dishes together as possible.
I know that this set can be challenging with the hectic lives all of us lead. It can be tempting to do what's easiest, to allow the kids consume supper in front of the TV when Dad is working late or to reach for your cellular phone when you listen to a text message come with. Eliminate digital lures as well as collect your whole family around the table. Everyone in your residence will certainly take advantage of this practice in numerous ways aside from simply "battling the pickies.'
Eating far from the TELEVISION and also various other electronic tools additionally urges conscious eating, which helps us obtain in song with our body as well as pay attention to our cravings cues.
Eating with each other, thanking for the food you are eating as well as developing family members memories together is simply one even more method to make food fun. And also when food is fun, your child is more probable to attempt brand-new things.
Rule 5: Plates do not need to be vacant at the end of a meal, but everybody requires to try a minimum of a bite of everything served.
Sometimes the first time your child attempts something they won't like it (the same thing goes for adults as well!) Do you understand that we get new tastebuds concerning every two weeks until we get to midlife? That indicates that our palates (what informs us if we such as the taste of something or otherwise) are constantly changing.
So even if your child doesn't such as something the first time they attempt it, doesn't indicate they won't like it the 5th, sixth or 12th time they attempt a bite. I can't tell you the amount of times this method has actually assisted me with my little girl. She has amazed me on countless occasions by instantly requesting second helpings of broccoli, bell peppers, cucumbers and also cantaloupe after attempting "simply one bite" for a number of months.
Rule 6: Obtain kids involved with meal preparation, grocery store buying, meal prep work and also cooking.
Sit down as a family as soon as a week and also strategy out the meals for the week. Ask each of your kids to pick one or 2 recipes that they wish to consume that week, then have them aid you make it.
Take your youngsters grocery shopping with you and encourage them to choose a fruit or veggie that they have not tried before to bring home to trying out. Make a video game of "eating the rainbow" and store by colour in the produce department.
Identify age proper tasks in the kitchen area that your youngster can assist with and get them involved developing homemade, heart-made dishes. You can review much more about exactly how to involve your picky eater in the kitchen area here.
I wish to leave you with one final factor though: please bear in mind that food is enjoyable! We never intend to turn the table into a field of battle, which I've seen taking place so frequently in the houses of particular eaters. Urge your kids to be endure, daring, food explorers! Lead by example as well as attempt not to let it worry you out.
Some various other resources to help you:
How to Engage Your Picky Eater
Feed Your Child These 5 Foods To Boost Focus + Attention
25 Kid-Friendly Food Blogs
20 Best Kid-Friendly Gluten-Free Snacks
I assure your kid will not deprive as well as slowly yet surely, you'll start to see changes happen. Persevere, compensate favorable practices and also be excited that you're fuelling your household with scrumptious as well as healthy and balanced food.
0 notes
Text
Parmesan & Tomato Keto Bread Buns

Following the popularity of our Ultimate Keto Buns recipe, we thought you might like to try some new flavours so I’ve created these Sun Dried Tomato and Parmesan Keto Buns… and guys, they are ridiculously tasty!
Fill with your favourite source of Keto protein, like some nice grilled chicken with rocket, or a good old Keto burger. If you like olives, you could even try mixing some in the batter with the sun dried tomatoes. Would totally work.
I hope these become a staple in your like Martina’s classic Keto Bun recipe. If you’ve not tried the original, you need to give it a go!
youtube
Join my giveaway! Visit my YouTube Channel and check the description of my video for details.
Preparation time
Hands-on: 10-15 minutes Overall: 55-60 minutes
Nutritional values (per serving, 1 large bun)
Total Carbs 13.2 grams Fiber 8.3 grams Net Carbs 4.9 grams Protein 14.5 grams Fat 18.9 grams of which Saturated 4.4 grams Energy 261 kcal Magnesium 101 mg (25.3% RDA) Potassium 412 mg (20.6% EMR)
Macronutrient ratio: Calories from carbs (8%), protein (23%), fat (69%)
Ingredients (makes 5 buns) Dry ingredients:
3/4 cup almond flour (75 g/ 2.7 oz)
2 1/2 tbsp psyllium husk powder (20 g/ 0.7 oz)
1/4 cup coconut flour (30 g/ 1.1 oz)
1/4 cup packed cup flax meal (38 g/ 1.3 oz)
1 tsp cream of tartar or apple cider vinegar
1/2 tsp baking soda
2/3 cup grated Parmesan cheese (60 g/ 2.1 oz)
1/3 cup chopped sun-dried tomatoes (37 g/ 1.3 oz)
1/4 - 1/2 tsp pink sea salt
2 tbsp sesame seeds (18 g/ 0.6 oz) - or use 2 tbsp sunflower, flax, poppy seeds, or 1 tbsp caraway seeds
Wet ingredients:
3 large egg whites
1 large egg
1 cups boiling water (240 ml/ 8 fl oz)
Note: You Can make 5 regular/large buns as per recipe, or up to 10 small buns.
Instructions
Preheat the oven to 175 °C/ 350 °F (fan assisted). Use a kitchen scale to measure all the ingredients and add them to a mixing bowl (apart from the sesame seeds which are used for topping): almond flour, coconut flour, flax meal, psyllium husk powder, cream of tartar, baking soda, salt, parmesan cheese and sun dried tomatoes. Mix all the dry ingredients together.

Add the egg whites and eggs and process well using a mixer until the dough is thick.
The reason you shouldn't use only whole eggs is that the buns wouldn't rise with so many egg yolks in. Don't waste them - use them for making Home-made Mayo, Easy Hollandaise Sauce or Lemon Curd.

Add boiling water and process until well combined.

Using a spoon, divide the keto buns mix into 5 and roll into buns using your hands. Place them on a non-stick baking tray or on parchment paper. They will grow in size, so make sure to leave some space between them. You can even use small tart trays.
Top each of the buns with sesame seeds (or any other seeds) and gently press them into the dough, so they don't fall out. Place in the oven and cook for about 45 - 50 minutes until golden on top.

Remove from the oven, let the tray cool down and place the buns on a rack to cool to room temperature.

Enjoy just like you would regular bread — with butter, ham or cheese!

Store in a tupperware for 2-3 days or freeze for up to 3 months.

Allergy-free Tips & Suggestions
If for any reason you can't get this recipe to work, here are some tips that might help.
If making a loaf instead of buns, bake for 75 minutes. Do not use a silicon loaf pan - use a metallic one instead.
Allergy-friendly options: flax-free, multi-purpose bread (includes a nut-free option), nut-free keto buns (includes flaxmeal), psyllium-free buns (include flaxmeal and nuts).
If you don't want to use coconut flour: Although I haven't tried it, I'd use twice the amount of almond flour or flaxmeal instead of coconut flour (1 cup of almond flour / flaxmeal instead of 1/2 cup coconut flour). Or you can use the same amount but reduce the water by ~ 1/2 cup
For best results, use a kitchen scale when measuring all the dry ingredients. Using just cups may not be enough to achieve best results, especially in baked goods. Weights per cups and tablespoons may vary depending on the product/ brand or if you make you own ingredients (like flaxmeal from flaxseeds). Psyllium absorbs lots of water.
Cream of tartar and baking soda act as leavening agents. This is how it works: To get 2 teaspoons of gluten-free baking powder, you need 1/2 a teaspoon of baking soda and 1 teaspoon of cream of tartar. If you don't have cream of tartar, instead you can use apple cider vinegar.
When baking with psyllium, you must remember to drink enough water throughout the day to prevent constipation!
I've had best results with psyllium husks that I powder myself. Store-bought ready-made psyllium powder may result in dense buns.
If the final result is too moist, do not reduce the water used in this recipe or the psyllium will clump. Instead, dry the buns in the oven on low, up to 100 °C/ 210 °F for 30-60 minutes. If needed, cut them in half and place in a toaster.
Do not leave the batter outside the oven for too long. Place in the oven as soon as you form the buns.
For more tips on how to bake the perfect keto bread, check out the troubleshooting in this recipe.
http://bit.ly/2RDgFIJ
0 notes
Text
1 carrot, 1 radish and a few beans: Cooking in the time of COVID-19
New Post has been published on https://apzweb.com/1-carrot-1-radish-and-a-few-beans-cooking-in-the-time-of-covid-19/
1 carrot, 1 radish and a few beans: Cooking in the time of COVID-19
I know this is not the place: it is, after all, a food column. But when I was asked to write it, focusing on the situation, something in me turned. The Hindu has readers who have access to food, but need ideas on how to cope with shortages. Shortages not of quantity, but of variety; in the worst-case scenario, maybe of traditional ingredients. And oftentimes of help.
A couple of weeks ago, an American magazine had a tongue-in-cheek article where the author, an accomplished baker, went to the local grocery, noted that yeast was clean off the shelves, and had a face-off with another customer over the last bag of flour on the top rack. He muttered — in his mind — about how the other chap had probably never baked bread before in his life, what a waste that bag would be, and how he knew the other would fail and get his comeuppance.
I am a grasshopper
It was slightly funny, in a superior, nudge-nudge, wink-wink sort of way. But deep down, it was a reminder of how privileged we are; we look for variety. When asked to give to those who have nothing, we hem and haw. I’m trying not to sermonise, but let’s count our blessings and do what we can to help others.
I can’t help but think of the ant and grasshopper fable because when the lockdown was expected, all the ants I know drove around loading their cars, stockpiling victuals. Grasshoppers like me didn’t, for vaguely moral reasons. And now we’re stuck with what we have in our cupboards. Which are, like Old Mother Hubbard’s, bare. Unfortunately, I’m a relentless cleaner-of-shelves, so no serendipitous delights await me, however far back I reach into fridges or cupboards. I know exactly what I can expect to find — how many stumps of drying cheese and how many inches of peanut butter in the jar.
I see what people post on social media about what they cook, of how they’re coping with the lockdown. And I’m amazed at the dishes home cooks are conjuring up. The Westerners all seem to have forgotten jars of sundried tomatoes in extra virgin olive oil so they can make flavourful pasta, and bags of buckwheat flour so they can make soba noodles, and bags of almond meal and boxes of cocoa powder so they can make gluten-free cake. This seems to be an opportunity to experiment. Some Indian cooks are making gatta curry, chana bhatura, gol gappa and ras malai.
Watching these posts gives me a complex, so I prefer to believe that they must be proficient cooks anyway. Maybe it’s to do with their now having more time to indulge a hobby, but I don’t know how to make complicated dishes and I’m dealing with a different challenge. Vegetables aren’t consistently available. Sometimes, if we have only handfuls of different vegetables in the house, I make combinations that may seem odd bedfellows, but I’ve always been charmed by the Bengali panch mishali. So we collect a single radish, a carrot, a handful of beans, a layer or two of cabbage, a few leaves of spinach, a chunk of pumpkin, a potato, half a cauliflower.
Making do
The principle we’ve adopted is to make do and to juxtapose textures: firm and soft-and-squishable. The varieties may be more or less than panch or five, the spicing may be different, but the method is broadly to temper mustard oil with a single spice like kalonji, nigella, or a standard combination like panch phoran, a couple of green chillies, and then cook the vegetables, having cut them into cubes or fingers and timing their addition at the appropriate moment to make sure they cook.
A bit of ginger juice freshens the flavour and probably helps digestion. Finally, I add a smidgen of ghee and a pinch of sugar and it lets me pretend it’s authentic.
We are a meat-eating family and there is no meat, fish or chicken. Egg supply is erratic. This week, the local Safal is well stocked with lentils and pulses. Fortunately, I have a full chest of spices. The upshot of all this is that I can only perk up flavour with unexpected combinations and spices. Because I’m one of the miraculously lucky élite whose only pressing concern is combating ennui.
A principle we learnt back in the days before liberalisation was to substitute, replace and adapt. I had a recipe for aubergine parmigiana that looked uncomplicated enough, but since it asked for Parmesan cheese and I had only stubs of Cheddar and Red Leicester, and because it asked for fresh basil and I had none, I did what I could. Because I had the main ingredients: aubergines and tomatoes. And the dish is elastic and accommodating.
Gone yeast
Meanwhile our local ‘artisanal’ bakery has temporarily shut shop, so last week, the baker-in-residence said he’d make bread. Unfortunately, the dough didn’t rise. When I told a friend this, she suggested that the yeast could have expired, and sent me, in the hope of better times, the link to a video describing how to make near-perfect toddy at home, with a mere three ingredients: coconut water, sugar and yeast. I’m saving it for when yeast is available.
Instead I made muffins. I wrote about them about 12 years ago, in one of my earliest columns here. Because they are so satisfying and so easy to make in these hard times, it seemed worth sharing again. As my mother, who taught me the recipe, said, “they’re very forgiving” — you can use any flour, any shortening, they take a few minutes, and if you want you can bung in whatever flavouring you have at hand, sweet or savoury.
SUNDAY RECIPE
Basic muffins
(makes 12)
Photo: Getty Images/ iStock
Ingredients
2 cups sifted flour
½ cup sugar
3 tsp baking soda
½ tsp salt
1 cup milk
½ cup vegetable oil
1 egg
Method
1. Preheat oven to 200° C (400° F). Grease bottoms only of 12 muffin-pan cups. Sift flour with baking soda and salt. Stir in sugar. In separate bowl, beat together egg, milk and oil.
2. Spread flour mixture in wide round bowl and make a well in the centre. Pour in egg-milk-oil mixture all at once. Stir with a fork just until combined. Spoon mixture into prepared muffin-pan cups.
3. Bake until golden, for about 25 minutes. Immediately remove from cups by inserting knife tip under each to loosen. Serve hot with butter.
When mixing batter, stir just until flour is moistened. Do not beat. Batter will be lumpy but makes for tender muffins.
Muffins can be frozen or kept for a few days. Wrap in foil and reheat in oven before serving.
From the once-forbidden joy of eggs to the ingratitude of guests, the writer reflects on every association with food. [email protected]
Source link
0 notes
Text
Here are some easy, healthy dinner ideas for busy families
New Post has been published on https://bestrawfoodrecipes.com/here-are-some-easy-healthy-dinner-ideas-for-busy-families/
Here are some easy, healthy dinner ideas for busy families
Dear Nutritionist,
I enjoyed your recipe suggestions last week. I’ve never heard of bento boxes before and my kids liked the idea and so we picked out boxes together and got started. So far so good! My problem is managing dinners when the kids play sports and have band practice. I just can’t think what to cook that’s fast so I’ve ended up doing take out a lot. Other nights, I do our traditional rice and veg with dahl or some meat in sauce because I know how to cook that but I know the rice makes me put on the weight. I’ve lost weight this summer and don’t want to gain it all back again! Do you also have recipes for healthy quick weeknight dinners?
Thank you!
Amani
Dear Amani,
I hear you! This was the hardest time for me to manage my son’s diet when he was at home. After battling rush hour traffic and being on my feet all day, the last thing I wanted to do was cook a meal from scratch. But with a kid who was gluten, dairy, sugar, and preservative intolerant, the options were limited. As a result, I got really good at it. I’ll share some of my solutions — one of which is South Asian (my favourite food by the way)!
With mothers working outside the home now, really, who has time to stay home and cook healthy food from scratch? But convenience / take-out foods are loaded with unhealthy fats, excess sodium, highly processed starches, and sugars. And despite selling the “there’s veggies on it so it’s OK,” the standard take out pizza fare isn’t any better. But I have a hack for that, too!
Let’s jump right in.
The first thing you can do to make your life easier is make a seven-day meal plan. You can then do this again once you master the first one, to add variety. So at that point you have two meal plans of seven days each, and are only eating the same meal every two weeks. That’s enough variety for anyone.
Let’s start with seven days. It may seem cumbersome at first, but when we ritualize changes they stick. And this is the secret every fitness guru knows about weight management that we commoners seem to miss: you need to have a plan to succeed. This is especially so in an environment that is laden with overly processed convenience food everywhere you turn.
I will suggest a few recipes that make week nights easy, to get people started. You can supplement them with other ones if they suit you better. But you will need a plan and a grocery list. This grocery list will be a royal pain to generate at first, but you will put it on your phone and thereafter, you can get the same groceries every single week (or two, once you’re on a biweekly schedule).
That alone makes life so much more manageable — you know exactly what you are getting and where to get it. And, if you take advantage of the order online services grocery stores now offer and have a butcher for the meat, you can order and just pick up. There’s an hour or more of time saved and you do not have to walk through aisles and be tempted by foods you’re trying to avoid, or worse, wrestle with kids putting things in the cart that you really don’t want in the house.
Next — and this is key to your busy routine success — when you buy your groceries you will spend about one to two hours doing meal prep for the week. If this is totally overwhelming, I offer inexpensive classes online where I go through this weekly to demonstrate. Clients who sign up get a menu plan and grocery list in advance so they can be prepped for the class to cook together. It ends up being a lot of fun.
Doing the meal plan prep may seem like a huge chunk of your weekend, but you’ve just saved at least an hour shopping. And during the week you will save another hour running around after take-out or trying to get groceries and figure out what to eat. So a meal plan is really very efficient.
I find it’s a nice early Sunday afternoon ritual and I do it with music or audiobook/ podcast and a bit of kombucha or dry wine or sangria. I often talk to friends on the phone while I prep and sometimes we do it together on the phone or in person. This short time spent organizing ensures you have all your ingredients (and a few dishes) prepped for your meals in advance, making weeknights a breeze.
So on to some suggestions.
Homemade Tortilla Pizzas:
These are a much healthier version of pizza that take about 10 minutes to make – if you cut up your ingredients and shred the cheese on the weekend when you get your groceries. (Home shredded cheese is much healthier and fresher.) These are made with a very thin crust, low carb flat bread I get called Protein Up. There are a variety of flavours. The kids may be able to handle more carbs than you and you could make theirs with a standard soft flour tortilla or whole wheat tortilla. If someone in the family is gluten-free, you can also use gluten-free tortillas.
The toppings you choose are completely up to you! My favourite is spinach, pesto, sundried tomato, artichoke, and feta or goat cheese. The great thing about these is the kids don’t have to agree on toppings and you don’t end up having anyone picking things off. It also puts the prep into each person’s hands, which makes things faster and gives the kids cooking skills that will stay with them for life. The key to this coming out right is to pre-bake the tortillas first. The entire recipe is done in less than 15 minutes. And if you pair it with a bag of Dole’s premixed salad kits (Greek or Italian have less sugar than others), you have an easy, fresh meal.
Fish Tacos:
This is a great, delicious, gluten-free recipe if you use corn tortillas. If you want to go low-carb, it’s way easy to hack by just putting the ingredients in a bowl and eating it like a salad. And there’s no loss of flavour or texture in doing that with this recipe.
The only things to make ahead for this are the salsa, guacamole, and mango salsa, if you want them. Click on each for links to recipes. The salsas are better if they sit in the fridge a few days, so making ahead is perfect, and this gives you dips for your bentos. The entire dish takes only 15 minutes to whip up once that part is done.
If you’re not into making salsa by hand, try adding chopped red onion, pressed garlic, and finely diced cilantro (optional jalapeno finely diced) to a jar of store bought salsa (always get the unsweetened kind). Let this sit in the fridge a few days and you will be amazed how delish it is!
For anyone who has a family member who’s dairy intolerant, I substitute goat or sheep cheese and coconut or homemade cashew milk for cream.
Pasta Bolognese:
This is a meal pretty much every person I’ve ever met likes. It can be made much healthier by using whole wheat or high fibre pasta for the kids and shirataki spaghetti noodles for you. These are found in Asian or specialty stores and they are a very good texture with no taste and zero carbs! The shirataki only need to brought to a boil to freshen them up, so it’s a 5 minute meal if you make your bolognaise sauce ahead.
You can put whatever you like in your Bolognese sauce, but the foundation should be a sugar-free, good quality tomato sauce. I like the Classico brand, but you can also just used canned pureed tomatoes and add your own oil and spices. I cook all my other ingredients (onion, carrot, garlic, sweet pepper, spinach, ground beef, spices) before adding the tomato sauce to simmer and reduce. Many people use ground veal or pork and celery in this, but it’s really up to you.
Instead of serving parmesan cheese as a topper, try nutritional yeast. It’s very high in B vitamins and it’s a very close substitute for that cheesy flavour. Serve with another pre-made salad mix with a higher quality italian or homemade oil/ vinegar dressing. I add baby tomatoes, olives, and red onion with a feta dressing to make this a nice greek salad.
Again, your pasta prep on the day of is super quick. Any leftover pasta sauce can get frozen for a quick heat up the next time you make this dish, so making double or triple will save you time and work going forward!
Chicken Korma with Parboiled Brown Rice:
Before you moan and eyeroll about the disgusting stickiness that is most brown rice, let me tell you about a very well kept secret. Uncle Ben’s Instant Brown Rice. I am not kidding. This stuff is perfectly formed, long grain rice that retains its texture while taking only 10 minutes to cook! And, unlike basmati, any idiot can do it right.
Brown rice is known to be more nutritious, higher in fibre, and lower glycemic than white rice, owing to the bran, while parboiled rice is low glycemic and retains the nutrients, at the same time as being more palatable and easier to prepare. New research shows that cooking the rice with coconut (or possibly ghee or olive) oil and then refrigerating it overnight changes the starch and lowers the glycemic index even more. That means a modest portion of this staple food can be part of a low-carb diet when prepared this way.
You can also do cauliflower rice for yourself, if you want to stay ultra low-carb or keto. I’ve included links on how to make it.
Again, if you make extra korma and freeze it, you’re ahead of the game for the following weeks.
Some other suggestions I have for weeknights are make ahead chaplee kabobs with green beans, and turkey breast protein-up wraps with lettuce, and cranberry mayo, with a broccoli salad. These are just a few of the recipes I share in my meal prep meetup.
If all this sounds overwhelming, I urge you to remember you have to make something. At least having a plan will make sure they are good meals and you’re not eating out. You will know exactly what you are eating on each day, and so will the kids. This predictability really helps. While it may be a lot to get done the first few weeks, within a month you will get very good at your meal plan and you can add another week of recipes to it to make sure there is no boredom. And making it a habit will do more to get you into your skinny jeans than any amount of time spent at the gym!
OMG all this food writing is making me hungry! Until next week!
Namaste!
Nonie Nutritionista
Nonie De Long is a registered orthomolecular nutritionist with a clinic in Bradford West Gwillimbury, where she offers holistic, integrative health care for physical and mental health issues. Check out her website here.
Do you have a question about health and wellness? Email [email protected]
Source link Keto Diet Dinner Ideas
0 notes
Text
Review: Vegan Beyond Burger from A&W Canada
Have you heard of Beyond Meat? It’s a hugely successful company that makes vegan meats, such as the Beyond Burger!
The Beyond Burger is 100% plant-based and pretty unique. It’s soy-free, gluten-free, and GMO-free. The main ingredients are: water, pea protein, canola oil, and coconut oil. Where will you find it? In the meat aisle, and now, at all A&W locations in Canada.
This is a big deal! This the first time the Beyond Burger is available in Canada. And this is a huge fast food company offering not one, but two plant-based burger patties. Before introducing the Beyond Burger to Canada, A&W had their Deluxe Veggie Burger. The Deluxe Veggie Burger is a typical “veggie patty” made with vegetables and portobello mushrooms. Make it vegan by ordering it without cheese and ranch sauce. Overall, this is a big win for vegans!
So what’s the Beyond Burger like? Today we’re reviewing the Beyond Burger from A&W!
A&W’s Beyond Burger is served on a sesame seed bun with lettuce, tomato, red onion, pickles, ketchup, mustard, mayo, and “Uncle sauce”.
A ¼ lb Beyond Burger patty contains 20g of plant protein, 25% of your daily iron intake, 5g of saturated fat, 0mg of cholesterol, and 22g of total fat.
Compared to an 80/20 ¼ lb. beef patty, it’s higher in protein and iron and lower in saturated fat and cholesterol.
Unfortunately, ordering the Beyond Burger as-is isn’t vegan. You’ll need to order it without mayo or “Uncle sauce”. Thankfully, customization is a breeze at A&W and ordering it vegan is super easy.
I also want to note that the Beyond Burger is cooked on the same grill the meat patties are cooked. I’d prefer if A&W could make this switch to cooking the Beyond Burger on it’s own grill or section. Unfortunately this I don’t think this is realistic right now but in the future, with enough sales and conversation around the topic, I’d love to see this change!
This burger is really good. It’s meaty and satisfying. It doesn’t taste like a veggie patty or vegetables, it tastes meaty but with a different texture than meat. The texture is lighter and a little flaky. The patty is seasoned with A&W’s signature seasoning giving it a distinct A&W-ish flavour. It’s a burger that’s craveable, something I’d look forward to eating. When you’re busy or travelling it can be difficult to find vegan food that’s convenient and delicious. These are usually the times that make veganism feel difficult. This burger definitely changes that. I can see myself making A&W a go-to stop when travelling.
After trying the Beyond Burger twice, we tried adding our own vegan mayo. It’s SO good. Adding a little vegan mayo makes the Beyond Burger taste richer and for lack of a better term, “less vegan”. Come on A&W, bring on the vegan mayo!
The Beyond Burger is $6.99 or $10.98 for a combo (with fries and a drink.) I find this a little expensive for fast food. In comparison, the Mama Burger (beef patty and similar toppings) is $4.79. The Veggie Deluxe Burger is $6.59.
We didn’t find the Beyond Burger to be very filling. If you’re hungry, you’d want to order a combo. For two people that brings the total up to $21.96 plus tax.
A&W will charge you $1.49 per patty to sub the Beyond Burger patty into any other burger on the menu.
The Beyond Burger is delicious! We really enjoyed it and would order it again
I’m so happy A&W added the Beyond Burger to it’s lineup. It’s a great vegan fast food option that’s satisfying and delicious. It’s a big step up from fries or plain salads.
A&W has set a great example. Hopefully this encourages other fast food restaurants to add vegan options to their menus. It gets frustrating having only a few side dishes to choose from when you do go out for fast food.
The cost of each burger is a little prohibitive. At $6.99 per burger, the price will keep me from ordering the Beyond Burger often. It’s something I’ll view as a treat or an option for really busy days or travel.
We highly suggest giving the Beyond Burger a try.
Other vegan options from A&W (Canada) include:
We’d love to hear your thoughts on this addition to A&W’s lineup! Have you tried it? What did you think? Are you vegan? Would you give this burger a try?
Related Posts and Recipes:
Source: http://www.ilovevegan.com/review-of-the-vegan-beyond-burger-from-aw-canada/
0 notes
Text
Could Your Gut Health Be Linked to Parkinson’s Disease - New Research Suggests So!
(adsbygoogle = window.adsbygoogle || []).push({});
n recent years, gut health is something we have become increasingly aware of, with Doctors and health experts alike denoting that the gut is the body’s second brain! A new report discusses ways that gut health could link to Parkinson’s disease
more and more studies are suggesting the condition starts in the gastrointestinal system, years before any motor symptoms develop. This could mean that changes in the gut might be utilised to diagnose the disease earlier; new therapies targeting these changes might slow disease progression, reduce constipation, as well as improve gut function in patients who have already been diagnosed.
New research such as this helps to demonstrate the importance of gut health, so our experts are on hand with their tips to help keep your gut in tip top shape.
Try a Probiotic…
Nutritionist Cassandra Barns explains how you can give your gut some TLC “The bacteria in our gut outnumber our cells by about 10 to 1 and take residence in our bodies from the day we are born, remaining with us throughout our lives. Stress, diet, illness, exercise, medications, even getting older can affect the gut by upsetting the natural balance of bacteria. So, sometimes it needs a helping hand. One way to give your gut some love is by providing it with ‘friendly bacteria’, also known as probiotics. A good-quality probiotic supplement could help move things along and improve digestive comfort,” Taking a probiotic supplement can help re-balance the good bacteria in your gut, support digestion and reduce symptoms of intolerance.
“People with gut issues suffer from a wide array of symptoms, from cramping and pain to bloating and gas or strong food intolerances. Looking at gut inflammation and at improving gut environment to promote healthy flora is key for long-lasting results,” adds Nutritionist at Natures Plus, Martina Della Vedova (www.naturesplus.com),
Try GI Natural Powder by Natures Plus (£33.75, www.naturesplus.com), which contains 4000 mg of L-Glutamine to help strengthen and repair the mucosal lining of the entire digestive tract. Highly active probiotics, whole food enzymes, prebiotic fibre and other essential co-factors, deliver powerful synergistic activity to ensure total digestive wellness.
Top Tip: “This formula works very efficiently if taken before bed with half glass of warm water: when your digestion is at rest and you are having a temporary fasting, then the ingredients in GI Natural powder work their magic,” explains Martina.
Take your time…
One of the most common symptoms that indicate the health of your gut, is bloating. The UK’s leading Nutritionist Dr Marilyn Glenville (www.glenvilleclinics.com) offers her tips to combat bloating, “The best tip for me is to take my time when I eat. It is often easy to eat too quickly or on the run, especially breakfast and/or lunch if time is short but it can cause bloating. If you eat on the run your body is feeling stressed because you are rushing. The stress response was designed to enable you to either run or fight for your life, during which time digestion of food was unlikely, the natural flow of energy is diverted away from your digestive system to your extremities to give you the energy to run or fight”.
Marilyn adds that “Your body literally shuts down your digestive function and food stagnates and ferments, making you feel bloated and often giving you gas. The solution is to take your time and chew well, so your body calms down. There are certain nutrients that can help your body not respond so easily to stress and therefore not affect your digestive system so much. These include the B vitamins (known as the ‘stress’ vitamins), magnesium (‘nature’s tranquiliser’), Siberian ginseng (the herb of choice for stress) and an amino acid called L-theanine- which has a relaxing effect on both the mind and body”.
Try NHP’s Tranquil Woman Support, which contains all these nutrients and more. (RRP £24.77 www.naturalhealthpractice.com)
Keep moving…
“It’s all too common for the average person to be seated 8 hours a day at their desk jobs - this can be detrimental to digestion and gut health. Exercise aids with peristalsis within the gut, which stimulates movement of food and gas through the digestive system, which can help to prevent stomach cramps and pain,” explains Lily Soutter, leading London nutritionist (www.lilysoutternutrition.com).
Finding it hard to lose weight?
Have you been trying to lose weight without success? Well, it could be your gut health – more specifically, the population of microbes in your gut – that’s the problem. There’s more and more evidence that the bacteria and other organisms that live in our gut can affect our hunger signals and cravings as well as our tendency towards weight gain. Cassandra recommends Miso, “Miso is a traditional fermented food from Japan. It’s fantastic used to make sauces and dips, and added to stews, stir-fries or soups, as it gives them that delicious umami flavour. Choose miso for the active bacteria and gut health benefits; and if you’re using it in hot dishes, add only towards the end of cooking.
Try itsu’s miso’easy (RRP £2.00, available nationwide at Tesco) in traditional and chilli flavour, this miso is a great choice for improving gut health and its also vegan, gluten free and dairy free. Simply add water for a delicious miso soup or transform simple dishes with miso marinades, dressings and glazes.
(adsbygoogle = window.adsbygoogle || []).push({});
(adsbygoogle = window.adsbygoogle || []).push({});
READ NEXT
0 notes
Text
Zucchini Bread Oatmeal
Would you believe me if I told you that, before today’s post, I had two other recipes written, photographed, and ready to share…only to scrap them at the last minute?! I think I was cursed these past couple weeks because I just couldn’t develop a recipe that I could 100% get behind. I have to say it nearly killed me to finish all the work on those new posts only for them to be put on the shelf, never to see the light of day. I hope you know that I only share recipes I’m crazy about (and that my testers are also crazy for) because I want to be absolutely sure you can trust and love them too!
So, with my tail tucked between my legs, I moved on from those two recipes…and I’m glad I did! I’m in love with this Zucchini Bread Oatmeal. Some of you may recognize the original recipe from way back in 2011 (how was that 7 years ago!?). Although this oatmeal fell off my radar for a while, it’s made a serious comeback in our morning rotation. This breakfast is a delicious, creative way to fulfill your weekly zucchini quota all summer long! I know it’s a bit early for summer squash season, but I’ve personally been on a huge zucchini kick this month. The recipe will be a good one to tuck away for later in the summer when you have zucchini overload—but I don’t think you’ll be able to wait that long.
I decided to revamp my old recipe and give the post a facelift complete with some snazzy new photos for you. This bowl is one of my favourite ways to sneak veggies into my oatmeal…if you’re crazy like me, you may even find yourself doubling the amount of zucchini for extra morning veggie goodness (just be sure to reduce the liquid accordingly). Sometimes I’ll even use instant oats (gasp! lol) and those work great as well. Leftovers can be enjoyed straight from the fridge, which will be a nice option on those steamy summer mornings too.
Before I get to the recipe, I want to thank you so much for taking the time to complete the Oh She Glows Reader Survey! We went through every single response with a fine-tooth comb. One of our big takeaways is that you want even MORE RECIPES!!! *Wipes bead of sweat from forehead*, lol. So in the future you’ll be seeing a bit of a shift in blog content—Ask Angela and Things I’m Loving Lately posts will be less frequent so that I can focus more time on recipe creation. I’m going to try my best to zero in on the content that really matters to you.
We also sent out a brand new issue of In The Glow a couple weeks ago (complete with a fun new look too). I had a lot of positive feedback about the “Hello from Angela” message in this issue, so I just wanted to thank those of you who sent me DMs about it. I was also asked by a few readers who didn’t get a chance to sign up in time whether issue 21 would be available online. I’m happy to say that it’s available here! We send out a new In The Glow every 4 to 6 weeks, and if you’d like to receive future issues, you can sign up here.
Last but not least, I have to share this with you here because it kind of blew my mind and made my entire week! Does anyone recognize a certain app icon below?
The Oh She Glows Recipe App icon was featured in Apple CEO Tim Cook’s recent presentation at Apple’s Worldwide Developers Conference. You guys, I almost died when Eric plopped this paper in front of me at my desk. His uncle texted him saying we might want to pick up a copy of that day’s Globe and Mail newspaper. (Thanks Uncle Steve for your newspaper sleuthing!) It’s so wild and wouldn’t be possible without your incredible support!
Zucchini Bread Oatmeal
Vegan, gluten-free, nut-free, oil-free, refined sugar-free, soy-free
Zucchini bread in oatmeal form...who knew?! This tasty dish comes together in less than 15 minutes—perfect for when you’re craving the warm spiciness of zucchini bread but don’t have time to make a whole loaf. Luxurious canned coconut milk lends this oatmeal a satisfying, decadent creaminess, while the grated zucchini adds a dose of Vitamin C, B Vitamins, and Potassium. Chia seeds help thicken the oatmeal and provide a nice boost of healthy fats! I don’t recommend skipping the suggested toppings below—they give this bowl a nutty, sweet chewiness and that signature zucchini bread flavour. And you may be happy to know that this oatmeal is super versatile (often I don’t even measure when I make it at home!)—you can use rolled or instant oats, grated or finely grated zucchini, and play around with the zucchini-to-oat ratio however you’d like. I encourage you to find your perfect bowl! This recipe is inspired by my 2011 version.
Yield
2 generous bowls
Prep time
5 Minutes
Cook time
8 Minutes
Total time
13 Minutes
Ingredients:
For the oatmeal:
1 (14-ounce/400 mL) can light coconut milk
2/3 cup (66 g) gluten-free rolled oats*
1 cup (125 g) packed finely grated zucchini (1 medium)**
2 tablespoons (20 g) chia seeds
1/2 to 1 teaspoon cinnamon, to taste
1/4 teaspoon freshly grated nutmeg or a dash of ground nutmeg
1 1/2 tablespoons (22.5 mL) pure maple syrup or 1 large ripe banana, mashed
Small pinch fine sea salt
1 teaspoon pure vanilla extract
Topping suggestions:
Chopped pecans
Raisins or chopped pitted dates
Pat of coconut oil or vegan butter
Pure maple syrup or coconut sugar
Cinnamon
Shaved dark chocolate
Directions:
Add all of the oatmeal ingredients except for the vanilla to a medium pot and stir to combine. Bring mixture to a simmer over medium-high heat. Reduce heat to medium. Cook uncovered for 7 to 9 minutes, stirring frequently, until thickened.
Remove from heat and stir in the vanilla. Adjust spices and sweetener to taste, if desired.
Divide the oatmeal into bowls and top with your desired toppings. Leftovers will keep in an airtight container in the fridge for 3 to 5 days. To reheat, add the leftovers to a small pot along with a splash of coconut milk. Stir and heat over medium until heated through. Alternatively, you can enjoy leftovers cold too!
Tips:
* You can use instant oats instead of rolled oats, if you prefer. Instant oats have a much less chewy texture and tend to disappear into the mixture, but they work well for babies and toddlers who aren’t able to chew the larger oats.
** If you use the finest grate hole on the box grater, the zucchini will virtually disappear into the oatmeal, whereas a standard-size grate hole will yield visible strands of zucchini throughout (and amp up the bowl’s chewy texture). You can play around with these two options to see which way you prefer the oatmeal. Once you get used to it, feel free to add even more zucchini to future pots!
Make it nut-free: Omit the pecan topping.
Comments (10) | function fbs_click() {u=location.href;t=document.title;window.open('//www.facebook.com/sharer.php?u='+encodeURIComponent(u)+'&t='+encodeURIComponent(t),'sharer','toolbar=0,status=0,width=626,height=436'); return false;}Share on Facebook | Tweet | Pin It | Snapchat | Google+
© copyright 2018 Oh She Glows. All Rights Reserved.
Zucchini Bread Oatmeal published first on https://wittooth.tumblr.com/
0 notes
Text
Zucchini Bread Oatmeal
http://ohsheglows.com/wp-content/uploads/2018/06/zucchinibreadoatmeal-3-1-682x1024.jpg
Would you believe me if I told you that, before today’s post, I had two other recipes written, photographed, and ready to share…only to scrap them at the last minute?! I think I was cursed these past couple weeks because I just couldn’t develop a recipe that I could 100% get behind. I have to say it nearly killed me to finish all the work on those new posts only for them to be put on the shelf, never to see the light of day. I hope you know that I only share recipes I’m crazy about (and that my testers are also crazy for) because I want to be absolutely sure you can trust and love them too!
So, with my tail tucked between my legs, I moved on from those two recipes…and I’m glad I did! I’m in love with this Zucchini Bread Oatmeal. Some of you may recognize the original recipe from way back in 2011 (how was that 7 years ago!?). Although this oatmeal fell off my radar for a while, it’s made a serious comeback in our morning rotation. This breakfast is a delicious, creative way to fulfill your weekly zucchini quota all summer long! I know it’s a bit early for summer squash season, but I’ve personally been on a huge zucchini kick this month. The recipe will be a good one to tuck away for later in the summer when you have zucchini overload—but I don’t think you’ll be able to wait that long.
I decided to revamp my old recipe and give the post a facelift complete with some snazzy new photos for you. This bowl is one of my favourite ways to sneak veggies into my oatmeal…if you’re crazy like me, you may even find yourself doubling the amount of zucchini for extra morning veggie goodness (just be sure to reduce the liquid accordingly). Sometimes I’ll even use instant oats (gasp! lol) and those work great as well. Leftovers can be enjoyed straight from the fridge, which will be a nice option on those steamy summer mornings too.
Before I get to the recipe, I want to thank you so much for taking the time to complete the Oh She Glows Reader Survey! We went through every single response with a fine-tooth comb. One of our big takeaways is that you want even MORE RECIPES!!! *Wipes bead of sweat from forehead*, lol. So in the future you’ll be seeing a bit of a shift in blog content—Ask Angela and Things I’m Loving Lately posts will be less frequent so that I can focus more time on recipe creation. I’m going to try my best to zero in on the content that really matters to you. Oh, and not to worry if you haven’t had a chance to fill out the survey yet…it’ll be live for the next little while for you to chime in!
We also sent out a brand new issue of In The Glow a couple weeks ago (complete with a fun new look too). I had a lot of positive feedback about the “Hello from Angela” message in this issue, so I just wanted to thank those of you who sent me DMs about it. I was also asked by a few readers who didn’t get a chance to sign up in time whether issue 21 would be available online. I’m happy to say that it’s available here! We send out a new In The Glow every 4 to 6 weeks, and if you’d like to receive future issues, you can sign up here.
Last but not least, I have to share this with you here because it kind of blew my mind and made my entire week! Does anyone recognize a certain app icon below?
The Oh She Glows Recipe App icon was featured in Apple CEO Tim Cook’s recent presentation at Apple’s Worldwide Developers Conference. You guys, I almost died when Eric plopped this paper in front of me at my desk. His uncle texted him saying we might want to pick up a copy of that day’s Globe and Mail newspaper. (Thanks Uncle Steve for your newspaper sleuthing!) It’s so wild and wouldn’t be possible without your incredible support!
Zucchini Bread Oatmeal
Vegan, gluten-free, nut-free, oil-free, refined sugar-free, soy-free
Zucchini bread in oatmeal form...who knew?! This tasty dish comes together in less than 15 minutes—perfect for when you’re craving the warm spiciness of zucchini bread but don’t have time to make a whole loaf. Luxurious canned coconut milk lends this oatmeal a satisfying, decadent creaminess, while the grated zucchini adds a dose of Vitamin C, B Vitamins, and Potassium. Chia seeds help thicken the oatmeal and provide a nice boost of healthy fats! I don’t recommend skipping the suggested toppings below—they give this bowl a nutty, sweet chewiness and that signature zucchini bread flavour. And you may be happy to know that this oatmeal is super versatile (often I don’t even measure when I make it at home!)—you can use rolled or instant oats, grated or finely grated zucchini, and play around with the zucchini-to-oat ratio however you’d like. I encourage you to find your perfect bowl! This recipe is inspired by my 2011 version.
Yield
2 generous bowls
Prep time
5 Minutes
Cook time
8 Minutes
Total time
13 Minutes
Ingredients:
For the oatmeal:
1 (14-ounce/400 mL) can light coconut milk
2/3 cup (66 g) gluten-free rolled oats*
1 cup (125 g) packed finely grated zucchini (1 medium)**
2 tablespoons (20 g) chia seeds
1/2 to 1 teaspoon cinnamon, to taste
1/4 teaspoon freshly grated nutmeg or a dash of ground nutmeg
1 1/2 tablespoons (22.5 mL) pure maple syrup or 1 large ripe banana, mashed
Small pinch fine sea salt
1 teaspoon pure vanilla extract
Topping suggestions:
Chopped pecans
Raisins or chopped pitted dates
Pat of coconut oil or vegan butter
Pure maple syrup or coconut sugar
Cinnamon
Shaved dark chocolate
Directions:
Add all of the oatmeal ingredients except for the vanilla to a medium pot and stir to combine. Bring mixture to a simmer over medium-high heat. Reduce heat to medium. Cook uncovered for 7 to 9 minutes, stirring frequently, until thickened.
Remove from heat and stir in the vanilla. Adjust spices and sweetener to taste, if desired.
Divide the oatmeal into bowls and top with your desired toppings. Leftovers will keep in an airtight container in the fridge for 3 to 5 days. To reheat, add the leftovers to a small pot along with a splash of coconut milk. Stir and heat over medium until heated through. Alternatively, you can enjoy leftovers cold too!
Tips:
* You can use instant oats instead of rolled oats, if you prefer. Instant oats have a much less chewy texture and tend to disappear into the mixture, but they work well for babies and toddlers who aren’t able to chew the larger oats.
** If you use the finest grate hole on the box grater, the zucchini will virtually disappear into the oatmeal, whereas a standard-size grate hole will yield visible strands of zucchini throughout (and amp up the bowl’s chewy texture). You can play around with these two options to see which way you prefer the oatmeal. Once you get used to it, feel free to add even more zucchini to future pots!
Make it nut-free: Omit the pecan topping.
Comments (0) | Share on Facebook | Tweet | Pin It | Snapchat | Google+
© copyright 2018 Oh She Glows. All Rights Reserved.
[Read More ...]
http://ohsheglows.com/2018/06/13/zucchini-bread-oatmeal-2/
0 notes
Text
Nutty Crusted Butternut Squash Bowl with 10-Spice Roasted Chickpeas
I was recently asked by Terra (OSG’s editor extraordinaire) how I came up with this recipe and after explaining my process to her, we both agreed I should share my fun little kitchen story with you on the blog! I often think this stuff is going to be boring so I don’t tend to get into the behind-the-scenes details too often, but I’d love to hear what you think!
This recipe actually began as something totally different. I’d been working on a simplified butternut risotto and, despite a few attempts, it just wasn’t impressing me (okay, I totally have Shania Twain in my head right now). I had planned on trying that recipe one more time before moving on, but just couldn’t shake the feeling of DOOM I had about it. Whenever I’m clouded by this “feeling of doom” and try to force a recipe (ignoring the voices in my head screaming “noooo don’t do it!”), I find it usually winds up being a waste of time anyway. I have to say that the results are almost always still edible and often quite tasty…just not quite good enough to share!
So, putting the risotto aside, I brainstormed something in a totally new direction! I couldn’t get crusted butternut squash out of my head (#weirdo), and thought it would be absolutely amazing to create a nut-and-seed coating for one of my favourite sweet, hearty winter veggies. I thought about my popular eggplant parmesan recipe from Oh She Glows Every Day (page 173) and used that as a jumping off point to get the wheels turning.
But I didn’t want to share the crusted squash recipe on its own as I had a hunch many of you would ask me how to turn these crunchy beauties into a complete meal. I checked my fridge and saw that I had some kale on hand, so I decided to marinate the greens in a creamy dressing for a hearty base. Now what about adding more protein in addition to what the nuts and seeds provide? I’ve been wanting to make spicy roasted chickpeas using my 10-Spice Mix for a while, and thought the pop of heat they bring would be a nice contrast to the the sweet, nutty squash. Bingo!!
Let’s recap: crunchy crusted squash, marinated kale, and 10-Spice roasted chickpeas. Yes, this could be AMAZING!!! Soon enough, a meal was born! This is when I start to get really excited, if you can’t already tell. But then I realize that I have to write up that dang recipe…
After I come up with the complete recipe idea, I type the recipe out in its entirety, visualizing each step as I go along. (This is something I’ve gotten better at as the years have gone by, but I still think it’s probably the most difficult part of the process!) Then I use this detailed recipe draft as as a guide for my first test and any trials thereafter. Each time my recipe tester Nicole and I test the recipe, I make live edits into the working draft on my laptop. (Live editing sounds way more exciting than it is…hah.) Once we both approve of the recipe (Nicole owns her own daycare, so other testers often include children and parents too…score!), I make final recipe edits before Terra and I begin the back and forth of our editing process. I’ve been creating recipes for almost 10 years now, and I find this system helps me deliver consistent and high-quality recipes.
Okay, if you skip right over this and go straight to the recipe, I won’t blame you. It’s all about the food, after all! This recipe is a big one, so reading it over before you begin is especially important. Also, you’ll see it contains a few “mini” recipes within—nutty topping, 10-Spice Roasted Chickpeas, marinated kale, etc.—feel free to make individual components (like the roasted chickpeas or marinated kale) on their own when you’re not up for preparing the full dish. A little mix-and-match, if you will! I don’t want to gush too much, but I really hope you make the whole thing…everyone who tried this recipe RAVED about it (one tester even said it’s possibly her favourite OSG recipe ever!). I could eat it every day, personally. :)
Nutty Crusted Butternut Squash Bowl
Vegan, gluten-free, grain-free, refined sugar-free, soy-free
This hearty dish is filled with so many amazing crunchy, chewy textures—the crispy roasted chickpeas and nutty butternut coating are a delightful contrast to the soft squash and chewy kale. The flavours are out of this world: there’s sweetness from the squash and pure maple syrup, pops of tangy lemon and savoury garlic, and smokiness from the spiced chickpeas. Because there are a few components, this recipe is perfect for the weekend when you have a bit of extra time on your hands. If you’re like me, you’ll find yourself dreaming about these nutty crusted butternut squash wedges and wanting to put them on just about everything!
Yield
4 generous servings
Prep time
25 Minutes
Cook time
50 Minutes
Total time
1 Hour, 15 Minutes
Ingredients:
For the nutty crust topping:
1 large garlic clove
6 tablespoons (53 g) hemp hearts
6 tablespoons (50 g) raw hazelnuts
3/4 cup (57 g) raw cashews
3/4 cup (38 g) raw walnuts
3 tablespoons (15 g) nutritional yeast
1 1/4 teaspoons fine sea salt
For the butternut squash:
1 small/medium (2 to 2 1/2 pound) butternut squash*
1 1/2 tablespoons arrowroot powder**
6 tablespoons (90 mL) extra-virgin olive oil
For the 10-Spice Roasted Chickpeas:
1 (14-ounce/398 mL) can chickpeas, drained and rinsed
1/2 tablespoon extra-virgin olive oil
1 tablespoon 10-Spice Mix***
For the marinated kale:
1 medium (300 to 350 g) bunch curly kale
1 small garlic clove, finely grated on a microplane
1 tablespoon (15 mL) extra-virgin olive oil
1 teaspoon (5 mL) pure maple syrup, or to taste
1/4 teaspoon fine sea salt
3 tablespoons (45 mL) fresh lemon juice, plus lemon wedges for serving
1 tablespoon (15 mL) tahini, plus more for serving
Directions:
Position two oven racks near the middle of the oven and preheat oven to 375°F (190°C). Line two large baking sheets with parchment paper and set aside.
Prepare the nutty crust topping: Add the garlic clove to a food processor and process until minced. Now add the hemp hearts, hazelnuts (no need to remove skins!), cashews, walnuts, nutritional yeast, and salt to the processor and pulse the mixture until coarsely ground with some larger chunks of nuts (the mixture should be the texture of large-flake sea salt). Be careful not to overprocess the nuts as you want the topping to be crunchy. Spoon all of the mixture into a large shallow bowl.
Peel the squash and halve it lengthwise. Use a spoon to remove and discard the seeds inside. Slice each half into thin 3/4-inch wedges.
Now we’re going to coat the wedges in the nutty crust topping, and I’ll warn you in advance that this is a messy, imperfect process...but the result is delicious, so don’t sweat it! To start, in a shallow bowl, whisk the arrowroot powder and oil together until smooth. Use a pastry brush to generously brush the oil mixture onto a single squash wedge until it’s completely coated in oil (or simply dip the wedge into the oil and toss to coat). Immediately transfer the oil-coated wedge to the bowl of nutty crust topping. Using your fingers, heap the mixture onto the top and sides of the wedge until it’s covered completely. Be generous! Press the topping into the wedge so that there’s a thick coating. (And it’s totally normal for some topping to fall off in spots.) If you find your fingers covered in the topping, rinse and dry them as needed.
Repeat this process for all of the wedges, placing each one gently on the baking sheet as you go and leaving about 2 inches of space between. If you run out of topping, you can reserve leftover wedges for another use or coat them in oil and roast them alongside the topping-coated wedges as directed.
Prepare the 10-Spice Roasted Chickpeas: Place the drained and rinsed chickpeas onto a tea towel and roll the chickpeas around until they’re dry. Spread the chickpeas onto the second baking sheet and toss with the oil. Sprinkle on the 10-Spice Mix and toss the chickpeas again until coated evenly.
Place both baking sheets into the oven. Roast the chickpeas for about 30 to 35 minutes until lightly golden and then remove them from the oven. Roast the squash for a total of 40 to 55 minutes (I bake for about 50 minutes), until fork tender and lightly golden. I suggest testing the squash around the 40-minute mark and keeping a close eye on it thereafter.
While the chickpeas and squash are roasting, prepare the marinated kale. Rinse the kale leaves and use absorbent tea towels to pat dry. Separate the stems from the kale and discard. Tear the kale into bite-sized pieces and transfer to a very large mixing bowl. In a small bowl, whisk the garlic, olive oil, maple syrup, salt, lemon, and tahini until smooth. Pour the dressing over the kale and “massage” until fully coated. Feel free to enjoy the marinated kale raw or use a skillet to heat it up. (I like to sauté mine if I have time!) Set aside.
For serving: Divide the marinated kale into 4 large shallow bowls and top each with a few squash wedges along with a large spoonful of roasted chickpeas. Drizzle a tablespoon of tahini onto each bowl and top with a few generous squeezes of lemon juice too. You can serve the bowls with lemon wedges on the side if preferred. Oh, and if there is nutty topping remaining on the baking sheet, feel free to sprinkle it over the bowls so nothing goes to waste.
Tips:
* I recommend using a butternut squash on the smaller side here because a large squash (2 1/2 pounds or more) won’t leave enough nutty crust topping to go around.
** Cornstarch should work as an alternative to arrowroot powder.
*** For the 10-Spice Mix, use this recipe from the blog or on page 284 of The Oh She Glows Cookbook. Feel free to omit the white pepper for a slightly less spicy version.
If you’re not including the roasted chickpeas, please note that the squash will bake more quickly in the oven alone.
Have leftover roasted squash? It’s great thrown into a wrap the next day!
As always, you can find this recipe in The Oh She Glows Recipe App as well! The app is available on iOS and Android.
Comments (0) | function fbs_click() {u=location.href;t=document.title;window.open('//www.facebook.com/sharer.php?u='+encodeURIComponent(u)+'&t='+encodeURIComponent(t),'sharer','toolbar=0,status=0,width=626,height=436'); return false;}Share on Facebook | Tweet | Pin It | Snapchat | Google+
© copyright 2018 Oh She Glows. All Rights Reserved.
from Oh She Glows http://ift.tt/2FUkBzA
0 notes
Text
While saying my rosary this morning, I had a sudden inspiration to volunteer to help clean up the church! Was it divine intervention or just pure coincidence? Read on to find out more!
Every Wednesday and Saturday at 9am, a group of volunteers called “Willing Hands” will spend about an hour cleaning the main church.
Since this morning I was ‘off’, I thought, “Why not?”
After my morning prayers and exercise/sunshine at the park below my place, I was running pretty late and so packed some sourdough in a hurry, thinking I would eat it after the church cleaning.
The church was eerily quiet as I cycled in. At first, I did not know where or who to report to. Father Peter suggested I check the Chapel or main Hall. The Chapel was empty so I went up.
I was greeted by a few Aunties and Uncles holding brooms, dustpans and trash bags. They were all wearing such big, warm smiles that I could not help but grin sheepishly back.
From the first aunty I met, I felt as if I was returning home to my family!
“Welcome, JOHN the Baptist!” one aunty joked.
“GOD sent you here to help us! He knew we were short-handed!” another one replied.
They were so warm and welcoming and cute and funny! I really felt right at home from the beginning!
We started by sweeping and picking up litter below the pews and arranging them neatly. We then proceeded to mop the floors. The entire operation took roughly about an hour, way faster than I’d expected! (My mother wasn’t exactly pleased at the idea of me going to help clean the church this morning. “Clean the church for what? Don’t go and clean the whole church arh!”)
Following this, I took a moment to breathe in the atmosphere of the empty church hall. Without the usual mass crowd, priests and formalities, it was a nice feeling. I took time to savour our beautiful stained-glass paintings and the statue of Jesus going up into heaven (some affectionately nickname this statue “The Spaceman” because of the blue background 😂).

***Side note: While looking back at this picture, I realized the shadows kind of show a person’s face! Face of God?

Face of God?
I could also walk up close to our beautiful crib and even picked baby Jesus up to cradle him and ‘tickle’ his feet! (okay, that may be a little weird but it brought me such joy haha!)

We then gathered for a closing prayer of which I felt some verses were very poetic! Our head then gave us all a box of Ricola Herbal Mint as a small Christmas gift. ☺️
We then proceeded to the crib to take the annual christmas group photo. How coincidental that they’d do this today, although it’s only my first day haha … Naturally I felt a little odd since some of them have been doing this for almost a decade!

At the end I tried a ‘selfie’ so I could get everyone in the picture.
It turned out pretty nice!
The good Lord might have even blessed us with some heavenly sunshine on the top right!

Selfie with heavenly sunshine on top right!
After that we took a slow walk to a nearby hawker centre cum wet market, aptly named the ‘Round Market’ because of its shape. The group did not like the limited breakfast options at the coffee shop opposite our church and would rather walk 15 minutes away!
All along the way, I was engaged in hearty conversation with one of the Aunties who was delighted to speak with me in chinese because the rest usually spoke in english and I wanted to practice my chinese.
I learned that she was almost 80! And that long ago her husband left the family after being seduced by a young pretty girl. He has since passed on. She already has many grandchildren, the youngest of which is just one year younger than me!
I also learnt that a number of them in the group are peranakan (hence they usually spoke english or Malay to each other) and that they loved gardening and plants!
My ears immediately pricked up when I heard this! Gardening is something that has been at the back of my mind that I’ve been meaning to pick up in my free time.
I was interested in how to grow plants, especially herbs, as well as the names of different plants, their medicinal properties, edible parts, how to tend to them and other uses like which plants are best for indoor air purification!
Along the way I was also given a ‘educational tour’ about different plants that owners of shophouses planted at the space in front of their shops below the HDB flats.
One plant in particular really caught my eye! They lovingly called this the “Birdie Plant” because its flowers looked just like little colourful canaries! Here is a picture of a red variety of this plant!

During breakfast, one of the aunties bought us drinks and even made a chocolate cake for us all! It was unexpected as it was actually her birthday! 😂 Fancy the birthday girl making the cake and buying drinks … we catholics are a weird bunch!
I shared my packed sourdough bread around and they loved it! I brought the two varieties we purchased this week – a white chocolate cranberry flavour and a Rugbread (dark rye with an assortment of seeds like pumpkin, flax, sesame and sunflower!).
I told them that this was from my favourite baker, Mr Kneady’s, located at the end of Bedok Marketplace level 2 next to a Japanese cuisine stall.
The owner, Lionel is a one of the most cheerful and amiable young baker I’ve ever known! He always greets customers with a huge smile and will take time to interact with all his customers.
I also explained to them all about his sourdough bread and pizzas. How he uses traditional overnight fermentation methods with a “starter” vs commercial baker’s yeast which can reduce bread rising time from 7+ hours to just 1 hour! He got his starter from the bakery he was working at in Iceland!
The use of overnight fermentation in a humidity- and temperature-controlled environment ensures the gluten in the bread is more easily digested and the nutrients in the flour become more bioavailable!
This is especially important for someone with an autoimmune disease like me who may be intolerant to gluten but can tolerate this form of fermented bread! Even people with celiac disease, an allergy to gluten in wheat, may in time be able to tolerate sourdough if they are careful with introducing it very slowly! (Please be warned that I am not a physician and do check with your holistic healthcare practitioner before trying anything on this blog!)
Besides eating sourdough bread, a dear aunty, Aunty D (for privacy reasons), also shared a bowl of “Heih Mee” (or Prawn Noodle in Hokkien dialect) with me. This was the famous one which they were all raving about. The soup was really tasty! Despite breaking my vegetarian diet (I’m not so strict when eating out) I enjoyed it very much! 😄

Back to our conversations.
Throughout breakfast, we were passionately discussing about herbs and the plants they grew in the backyard of another church, Divine Mercy at Pasir Ris. Apparently, the Parish priest knew Aunty D very well and when the parish gardener suffered a serious accident, asked her if she knew anyone who loved gardening. That was how they started volunteering at the Church of the Divine Mercy every Tuesdays too!
They will go down after breakfast and help with some cleaning of the chapel before tending to the plants. What a special group! 😆
I learnt that they grew all kinds of plants and herbs there in abundance. From banana trees to papaya, olives and even grapes!
Aunty T also told me of two special plants they were especially proud of due to its healing properties.
The first was the Moringa plant! This plant is also known as the “Miracle Plant” due to its healing abilities for everything from the common cuts and headaches to stomach and skin infections, cardiovascular and cancer problems. Every part of the plant has a medicinal property! Read more about it here.
Its other name is the “Drumstick Tree” due to the seed pods of some varieties growing like drumsticks! 😂 The edible seeds inside the pods are commonly found in Indian Cuisines!
Moringa Seed Pod from an indian grocery store we passed on the way back!
The second plant is the Sabah Snake Grass which anecdotally, has been very effective in treating all kinds of cancer in asian countries where this plant grows wildy and abundantly! Read more here.

Sabah Snake Grass in a pot at the plant store. Aunty T said this plant grows best on the ground with plenty of soil, like grass!
We then took a tour of the nearby plant shop owned by a man they affectionately call the ‘Snake Man’. Aptly named because he likes to ‘snake’ around the shop and Round Market so they tend to have a hard time finding him! (‘Snaking around’ is also another way of saying you aren’t doing your job or remaining at your post, kind of like being lazy!)

Here I was amazed at the varieties of plants for sale. I was given another ‘plants crash course’ and found out the best plants for indoor air purification are the Aloe Vera and the Mother in Law’s tongue!
Another plant was the Peace lily. Named so because of its beautiful white flower! I purchased one of this for $9!

After this, I was promptly dragged aside by Aunty D and ‘scolded’ because I did not listen to her telling me not to buy from Snakeman haha. At the shop she was telling me that she has sooooo many plants at home and that she has extra pots and soil and can just give them to me. My reasoning was that I needed a plant soon for my father’s office table and did not think I was going to her house anytime soon as I did not know where it was.
However, she told me that her house was just walking distance from the church and that we could go there now and split this one Peace Lily that I’d bought into a few more pots! She added that it was clearly overcrowded.
So off we went to her place! Another unexpected turn of events haha. Initially I was thinking I’d be on my way home after cleaning the church and be back for lunch by 11am. 😂
It was about 12pm by the time we arrived. She stayed at a corner flat and since her neighbour did not keep plants, she had the entire corridor for herself! As you can see in the picture below, she has turned the place into a little garden of neatly arranged plants!

It was truly a sight to behold at first! You can just feel the air changing as you walk towards her house, lined with all the plants! I definitely felt the energy of the place changing too!
She had all sorts of flowering plants from Orchids to Cacti, Japanese Roses to Air Plants and even a green ‘Birdie Plant’! (picture below)
She then taught me how to split the one Peace Lily I bought into a few other pots. Initially I was just thinking of splitting it into 2 but after that, she still felt it was too crowded and we eventually split it into FIVE pots!!! All for the price of one! 😂
I also received 2 more pots of plants from her! One called a Lucky flower plant because its flowers only bloom from midnight to sunrise so you have to be ‘lucky’ to see it in full bloom. The other is another plant of which neither of us knows the name of. Its flowers were so unique and I thought my mother would love it so I asked if I could have a pot of it.

Before I left, she also educated me about fertilizers, how to take care of the plants and where her favourite place to shop for plants and gardening supplies was – at a nursery in Eunos!

Upon reaching home, I immediately set about arranging the plants. The first name that came to my mind when looking at the unusual flowered plant is ‘Morry’ so I named it so. My mother then named the other Lucky Flower plant ‘Angel’ haha.
Conclusion
What an unexpectedly blessed morning this was!
I never expected that a simple church cleaning session would bless me with a new ‘family’ of loving uncles and aunties, new knowledge about plants and herbs, an opportunity to learn gardening (I’m definitely going gardening next tuesday with them!) and 6 new pots of plants to bring home!
God truly works in unexpected ways and although I never really outright prayed for this to happen, it feels like he knew what I was missing/desired in the back of my head and heart and granted it today in the form of divine motivation to go and do some charity work in church!
My soul continues to rejoice in his majesty!
God bless you all!
While saying my rosary this morning, I had a sudden inspiration to volunteer to help clean up the church! Was it divine intervention or just pure coincidence? Read on to find out more! While saying my rosary this morning, I had a sudden inspiration to volunteer to help clean up the church!
#Asian Herbs#Church Cleaning#Face of God?#Holy Sunshine Selfie#Miracle Morning#Mr. Kneady&039;s Sourdough Bread and Pizza#Plant Medicine#Unexpected Blessings#Willing Hands
0 notes
Last Seen Blogs

transpartnering
Trans Partnering

larryr09
Untitled

hlomov
Alexandr Hlomov

nanaki0920
52+2 room

drisea
Untitled