#how boot linux iso on USB drive
Explore tagged Tumblr posts
Visit Tumblr Blog
Explore Tumblr blogs with no restrictions, modern design and the best experience.
Last Seen Tumblr Blogs


Fun Fact
Tumblr posted its first advertisements in May 2012 and subsequently earned $13M in revenue.
Text
Installing Linux (Mint) as a Non-Techy Person
I've wanted Linux for various reasons since college. I tried it once when I no longer had to worry about having specific programs for school, but it did not go well. It was a dedicated PC that was, I believe, poorly made. Anyway.
In the process of deGoogling and deWindows365'ing, I started to think about Linux again. Here is my experience.
Pre-Work: Take Stock
List out the programs you use regularly and those you need. Look up whether or not they work on Linux. For those that don't, look up alternatives.
If the alternative works on Windows/Mac, try it out first.
Make sure you have your files backed up somewhere.
Also, pick up a 5GB minimum USB drive.
Oh and make a system restore point (look it up in your Start menu) and back-up your files.
Step One: Choose a Distro
Dear god do Linux people like to talk about distros. Basically, from what all I've read, if you don't want to fuss a lot with your OS, you've got two options: Ubuntu and Linux Mint. Ubuntu is better known and run by a company called Canonical. Linux Mint is run by a small team and paid for via donations.
I chose Linux Mint. Some of the stuff I read about Ubuntu reminded me too much of my reasons for wanting to leave Windows, basically. Did I second-guess this a half-dozen times? Yes, yes I did.
The rest of this is true for Linux Mint Cinnamon only.
Step Two: Make your Flash Drive
Linux Mint has great instructions. For the most part they work.
Start here:
The trickiest part of creating the flash drive is verifying and authenticating it.
On the same page that you download the Linux .iso file there are two links. Right click+save as both of those files to your computer. I saved them and the .iso file all to my Downloads folder.
Then, once you get to the 'Verify your ISO image' page in their guide and you're on Windows like me, skip down to this link about verifying on Windows.
Once it is verified, you can go back to the Linux Mint guide. They'll direct you to download Etchr and use that to create your flash drive.
If this step is too tricky, then please reconsider Linux. Subsequent steps are both easier and trickier.
Step Three: Restart from your Flash Drive
This is the step where I nearly gave up. The guide is still great, except it doesn't mention certain security features that make installing Linux Mint impossible without extra steps.
(1) Look up your Bitlocker recovery key and have it handy.
I don't know if you'll need it like I did (I did not turn off Bitlocker at first), but better to be safe.
(2) Turn off Bitlocker.
(3) Restart. When on the title screen, press your Bios key. There might be more than one. On a Lenovo, pressing F1 several times gets you to the relevant menu. This is not the menu you'll need to install, though. Turn off "Secure Boot."
(4) Restart. This time press F12 (on a Lenovo). The HDD option, iirc, is your USB. Look it up on your phone to be sure.
Now you can return to the Linux Mint instructions.
Figuring this out via trial-and-error was not fun.
Step Four: Install Mint
Just follow the prompts. I chose to do the dual boot.
You will have to click through some scary messages about irrevocable changes. This is your last chance to change your mind.
I chose the dual boot because I may not have anticipated everything I'll need from Windows. My goal is to work primarily in Linux. Then, in a few months, if it is working, I'll look up the steps for making my machine Linux only.
Some Notes on Linux Mint
Some of the minor things I looked up ahead of time and other miscellany:
(1) HP Printers supposedly play nice with Linux. I have not tested this yet.
(2) Linux Mint can easily access your Windows files. I've read that this does not go both ways. I've not tested it yet.
(3) You can move the taskbar (panel in LM) to the left side of your screen.
(4) You are going to have to download your key programs again.
(5) The LM software manager has most programs, but not all. Some you'll have to download from websites. Follow instructions. If a file leads to a scary wall of strange text, close it and just do the Terminal instructions instead.
(6) The software manager also has fonts. I was able to get Fanwood (my favorite serif) and JetBrains (my favorite mono) easily.
In the end, be prepared for something to go wrong. Just trust that you are not the first person to ever experience the issue and look it up. If that doesn't help, you can always ask. The forums and reddit community both look active.
172 notes
·
View notes
Text
Have YOU got an old Windows PC Microsoft has told you can't run Windows 11? It's time to give it a new life!
How to install Windows 11 on unsupported PC Hardware using Rufus. You can also disable some other Windows 11 bullshit like data harvesting and needing a Microsoft account.
It has been in the news a lot lately that Windows 11 isn't allowed to be installed on PCs without certain requirements, including the TPM 2.0, a chip that was only included in PCs made in 2018 or later. This means that once Windows 10 stops receiving security updates, those PCs will not be able to (officially) run a safe, updated version of Windows anymore. This has led to an estimated 240 million PCs bound for the landfill. Thanks Microsoft! I get you don't want to be seen as the insecure one, but creating this much waste can't be the solution.
(I know nerds, Linux is a thing. I love you but we are not having that conversation. If you want to use Linux on an old PC you are already doing it and you don't need to tell me about it. People need Windows for all sorts of reasons that Linux won't cut.)
So lately I have been helping some under privileged teens get set up with PCs. Their school was giving away their old lab computers, and these kids would usually have no chance to afford even a basic computer. They had their hard drives pulled so I have been setting them up with SSDs, but the question was, what to do about the operating system? So I looked into it and I found out there IS actually a way to bypass Microsoft's system requirement and put Windows 11 on PCs as old as 2010.
You will need: Rufus: An open source ISO burning tool.
A Windows 11 ISO: Available from Microsoft.
A USB Flash Drive, at least 16GB.
A working PC to make the ISO, and a PC from 2018 or older you want to install Windows 11 on.
Here is the guide I used, but I will put it in my own words as well.
Download your Windows 11 ISO, and plug in your USB drive. It will be erased, so don't have anything valuable on it. Run Rufus, select your USB drive in the Device window, and select your Windows 11 ISO with the Select button. (There is supposed to be a feature in Rufus to download your ISO but I couldn't get it to work.?
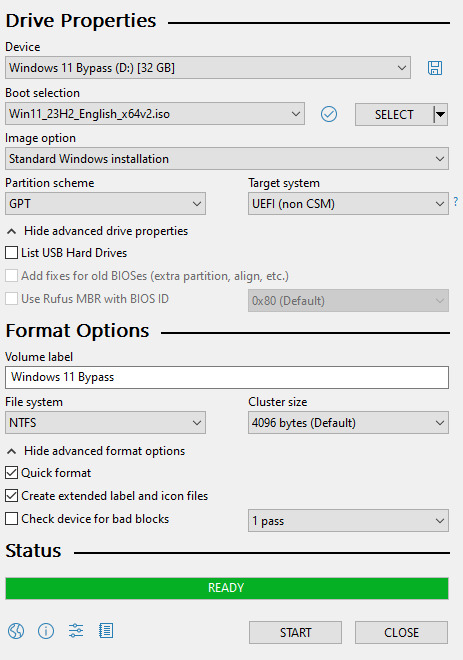
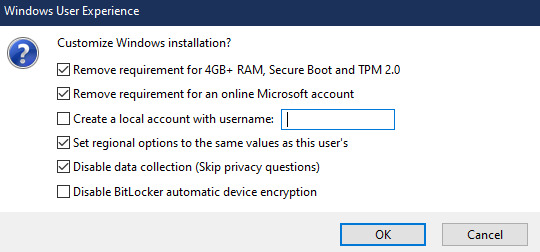
Choose standard windows installation, and follow the screenshot for your settings. Once you are done that, press Start, and then the magic happens. Another window pops up allowing you to remove the system requirements, the need for a microsoft account, and turn off data collecting. Just click the options you want, and press ok to write your iso to a drive.
From there you just need to use the USB drive to install windows. I won't go into details here, but here are some resources if you don't know how to do it.
Boot your PC from a USB Drive
Install Windows 11 from USB Drive
If you had a licensed copy of Windows 10, Windows 11 will already be licensed. If you don't, then perhaps you can use some kind of... Activation Scripts for Microsoft software, that will allow you to activate them. Of course I cannot link such tools here. So there you go, now you can save a PC made from before 2018 from the landfill, and maybe give it to a deserving teen in the process. The more we can extend the lives of technology and keep it out of the trash, the better.
Additional note: This removes the requirement for having 4GB Minimum of RAM, but I think that requirement should honestly be higher. Windows 11 will be unusable slow on any system with below 8GB of RAM. 8GB is the minimum I think you should have before trying this but it still really not enough for modern use outside of light web and office work. I wouldn't recommend trying this on anything with 4GB or less. I am honestly shocked they are still selling brand new Windows 11 PCs with 4GB of ram. If you're not sure how much RAM you have, you can find out in the performance tab of Task Manager in Windows, if you click the More Details icon on the bottom right. If you don't have enough, RAM for old systems is super cheap and widely available so it would definitely be worth upgrading if you have a ram starved machine you'd like to give a new life.

#Windows#Windows 11#tech#tech advice#pc#TPM 2.0#rufus#open source#open source software#technology#tech tips
722 notes
·
View notes
Note
Please, please explain how to install and use linux like I'm 5 years old. I'm so sick of windows adding AI and other bullshit to my already struggling elderly laptop but I'm really not good with computers at all so I have no idea where to start with Linux.
Okay, so, I'm going to break this down into steps I would give the average tumblr user first, and then if any of them are confusing or use words you don't understand, ask me and I'll explain that step in greater detail.
Step 0) BACK. UP. YOUR. SHIT.
NEVER EVER EVER CHANGE YOUR OPERATING SYSTEM WITHOUT A COMPLETE BACKUP OF ALL YOUR FILES.
Step 1) Learn your machine. You need to know:
How much RAM you have
If your processor is 32 or 64 bit
How big your hard drive is
On windows, you can find out all of this by going to the start menu, typing "about" and opening the first result on your system instead of the internet.
For additional instructions, visit this page.
Step 2) Pick your Linux.
There's like 10,000 kinds of Linux, each tailored to particular functions that the end-user (that is you!) might want to have. The sheer amount is very daunting, so first I'm going to give my suggestions, then I'll explain how to pick for yourself.
For Mac users, I suggest Kubuntu. For windows users, I suggest Mint Cinnamon. If your laptop is really REALLY old, I recommend Sparky Stable, which is the lightest weight Linux I would ever suggest for a new user. In every case, download the version suited to your processor (32 bit can be labelled "x86" or "32 bit"; 64 bit is always labelled "64 bit").
If you want to try a different type of linux, you'll need to make sure your laptop meets the "minimum specs" or "system requirements." These numbers tell you how much RAM, processor and hard drive space the linux will use. (That's why you needed those numbers at the beginning.)
Step 3) Collect your supplies. You're going to need:
An ISO burning program compatible with your current system, like Balena Etcher.
A copy of the ISO file for the Linux you want to use.
Your laptop.
An 8gb or larger USB flash drive.
Step 3) Make a bootable USB drive
Install Balena Etcher, hitting "okay" and "next" when prompted. Last I checked, Etcher doesn't have adware attached, so you can just hit next every time.
Plug your USB drive into the laptop.
Open Etcher.
Click "flash from file" and open the ISO file with your Linux on it.
Click "Select target" and open the USB drive location. Hit the "flash" button. This will start writing all the linux installer data to your flash drive. Depending on the speed of your machine, this could take as long as 10 minutes, but shouldn't be much longer.
Step 4) Boot to the USB drive
This is, in my opinion, the trickiest step for a lot of people who don't do "computer stuff." Fortunately, in a rare act of good will, Windows 10 made this process a lot easier.
All you'll need to do is go to settings, then recovery, then advanced startup and pick the button labelled "use a device."
This tutorial has images showing where each of those is located. It's considered an "advanced setting" so you may get a spooky popup warning you that you could "harm your system by making changes" but we're not doing anything potentially harmful so you can ignore that if you get it.
Step 5) Try out linux on the flash drive first.
Linux installs using a cool little test version of itself that you can play around in. You won't be able to make changes or save settings, but you can explore a bit and see if the interface is to your liking. If it's hideous or hard to navigate, simply pick a new linux version to download, and repeat the "make a bootable USB" step for it.
Step 6) Actually install that sucker
This step varies from version to version, but the first part should be the same across the board: on the desktop, there should be a shortcut that says something like "install now." Double click it.
Follow the instructions your specific linux version gives you. When in doubt, pick the default, with one exception:
If it asks you to encrypt your drive say no. That's a more advanced feature that can really fuck your shit up down the road if you don't know how to handle it.
At some point you're going to get a scary looking warning that says 1 of 2 things. Either:
Install Linux alongside Windows, or
Format harddrive to delete all data
That first option will let you do what is called "dual booting." From then on, your computer will ask every time you turn it on whether you want Windows or Linux.
The second option will nuke Windows from orbit, leaving only linux behind.
The install process is slower the larger your chosen version is, but I've never seen it take more than half an hour. During that time, most linux versions will have a little slideshow of the features and layout of common settings that you can read or ignore as you prefer.
Step 7) Boot to your sexy new Linux device.
If you're dual booting, use the arrow keys and enter key to select your linux version from the new boot menu, called GRUB.
If you've only got linux, turn the computer on as normal and linux will boot up immediately.
Bonus Step: Copy Pasting some code
In your new start menu, look for an application called "terminal" or "terminal emulator." Open that up, and you will be presented with an intense looking (but actually very harmless) text command area.
Now, open up your web browser (firefox comes pre-installed on most!), and search the phrase "what to do after installing [linux version you picked]"
You're looking for a website called "It's FOSS." Here's a link to their page on Mint. This site has lots and lots of snippets of little text commands you can experiment with to learn how that functionality works!
Or, if you don't want to fuck with the terminal at all (fair enough!) then instead of "terminal" look for something called "software manager."
This is sort of like an app store for linux; you can install all kinds of programs directly from there without needing to go to the website of the program itself!
296 notes
·
View notes
Text
My 3 days of Linux adventures
I figured out how to copy an iso onto a flashdrive to install linux and after realizing I was hitting the wrong BIOS menu button after a few hours of trial and error and a call to my more tech savvy sister
Started linux setup, got steam on there, realized how many of my games were windows only downloads, and proceeded to research for another couple hours how to get wine running and what front end to use because my computer has 3 gb of ram and I didn't trust that it could handle duel running OSs
Figure out there's literally a button for it in steam download options after which I say fuck it pass out and just reinstall linux the next morning hours faster than the first time I did.
Yay! Games installed!!
Download discord. Discord calls sound like I'm talking through a tin can on a landing strip no matter what settings I mess with. Assume it's something to do with the wifi cutting out. Investigate for hours to experiment with wifi power saving and settings and finally throw in the towel to talk to my sister again
My wifi despite showing two bars is actually faster than it's ever been and is downloading at ~100mbs. Give up for the night
Wake up the next morning to figure out what was fucking up, play around with mic settings and levels before finally reading a forum post from two years ago talking about window's auto installed noise cancellation drivers.
Resign myself to either needing to buy an external mic that's not right next to my computer's half broken fan, or needing to download specific noise canceling drives from github
Struggle with figuring out how to run shit from github for an hour
Resign myself to the external mic pt 2, try to boot up my favorite little rpgmaker puzzle game and it runs like a slideshow. This is my limit. I need my little mimic chest puzzle.
Begin researching again. Learn about more drivers I could potentially try installing or the much simpler method of just dual booting (computer has no ram. She's so old you guys)
Finally throw in the towel completely and decide to unfortunately switch back to Windows10. Download the iso accidentally and struggle around with getting it on the usb before getting the rar I need and the program to reformat the usb to take it (thank you ventoy) and struggle to download it while making sense of tutorials
Try to boot it. Fail.
What the fuck is a partition
Finally realized at this point that the prefix 'Sudo' in ubuntu is the command to run from root. That wouldve been nice to know
Finally delete partitions, run windows and get it reinstalled.
Honestly a 10/10 experience had a blast would do again
13 notes
·
View notes
Text
Installing Kali Linux on a USB Stick: A Step-by-Step Guide
If you want a portable, powerful cybersecurity toolkit you can carry in your pocket, installing Kali Linux on a USB stick is the perfect solution. With Kali on a USB, you can boot into your personalized hacking environment on almost any computer without leaving a trace — making it a favorite setup for ethical hackers, penetration testers, and cybersecurity enthusiasts.

In this guide, we'll walk you through how to install Kali Linux onto a USB drive — step-by-step — so you can have a portable Kali environment ready wherever you go.
Why Install Kali Linux on a USB?
Before we dive into the steps, here’s why you might want a Kali USB:
Portability: Carry your entire hacking setup with you.
Privacy: No need to install anything on the host machine.
Persistence: Save your settings, files, and tools even after rebooting.
Flexibility: Boot into Kali on any system that allows USB boot.
There are two main ways to use Kali on a USB:
Live USB: Runs Kali temporarily without saving changes after reboot.
Persistent USB: Saves your files and system changes across reboots.
In this article, we’ll focus on setting up a Live USB, and I'll also mention how to add persistence if you want. and if you seek knowledge about kali linux you can visit our website any time
Website Name : Linux Tools Guide
What You’ll Need
✅ A USB drive (at least 8GB; 16GB or more recommended if you want persistence). ✅ Kali Linux ISO file (download it from the official Kali website). ✅ Rufus (for Windows) or Etcher/balenaEtcher (for Mac/Linux/Windows). ✅ A computer that can boot from USB.
Step 1: Download the Kali Linux ISO
Go to the Kali Linux Downloads page and grab the latest version of the ISO. You can choose between the full version or a lightweight version depending on your USB size and system requirements.
Tip: Always verify the checksum of the ISO to ensure it hasn't been tampered with!
Step 2: Insert Your USB Drive
Plug your USB stick into your computer. ⚠️ Warning: Installing Kali onto the USB will erase all existing data on it. Backup anything important first!
Step 3: Create a Bootable Kali Linux USB
Depending on your operating system, the tool you use may vary:
For Windows Users (using Rufus):
Download and open Rufus (Get Rufus here).
Select your USB drive under Device.
Under Boot selection, choose the Kali Linux ISO you downloaded.
Keep the Partition scheme as MBR (for BIOS) or GPT (for UEFI) based on your system.
Click Start and wait for the process to complete.
For Mac/Linux Users (using balenaEtcher):
Download and open balenaEtcher (Get Etcher here).
Select the Kali ISO.
Select the USB drive.
Click Flash and wait until it's done.
That's it! You now have a Live Kali USB ready.
Step 4: Boot Kali Linux from the USB
Restart your computer with the USB plugged in.
Enter the BIOS/UEFI settings (usually by pressing a key like F12, Esc, Del, or F2 right after starting the computer).
Change the boot order to boot from the USB first.
Save changes and reboot.
You should now see the Kali Linux boot menu! Select "Live (amd64)" to start Kali without installation.
(Optional) Step 5: Adding Persistence
Persistence allows you to save files, system changes, or even installed tools across reboots — super useful for real-world usage.
Setting up persistence requires creating an extra partition on the USB and tweaking a few settings. Here's a quick overview:
Create a second partition labeled persistence.
Format it as ext4.
Mount it and create a file /persistence.conf inside it with the content: cppCopyEdit/ union
When booting Kali, choose the "Live USB Persistence" option.
Persistence is a little more technical but absolutely worth it if you want a real working Kali USB system!
Troubleshooting Common Issues
USB not showing up in boot menu?
Make sure Secure Boot is disabled in BIOS.
Ensure the USB was properly written (try writing it again if necessary).
Kali not booting properly?
Verify the ISO file integrity.
Try a different USB port (preferably USB 2.0 instead of 3.0 sometimes).
Persistence not working?
Double-check the /persistence.conf file and make sure it's correctly placed.
Conclusion
Installing Kali Linux onto a USB stick is one of the smartest ways to carry a secure, full-featured hacking lab with you anywhere. Whether you’re practicing ethical hacking, doing security audits, or just exploring the world of cybersecurity, a Kali USB drive gives you power, portability, and flexibility all at once.
Once you’re set up, the possibilities are endless — happy hacking! 🔥
2 notes
·
View notes
Text
Okay: speaking of the Drama of the World's Stupidest Netbook: often the problem is me, actually!
Remember how I complained that my ISO flash drives didn't work? There was a reason for that.
I only figured this out today, when I grew so angry about not being able to job hunt that I started scouring Public Surplus, Craigslist, eBay, and Facebook Marketplace for used laptops. My RAM threshold was 8 GB and I wanted an AMD CPU.
This town is a great place to look for electronics. There's money here. So within an hour I find a perfectly suitable ASUS laptop (Intel, though. Boooo) under $100. I jumped on it, I didn't give a single fuck.
I bring back my prize. Start it up. Windows immediately loads. I stare in deep revulsion at the opening screen. Every load screen is worse than the last. Think of all the privacy failures, the AI, the unintuitive GUI, the fascism, the monopoly. Decide I'm going to fucking do it, I'm going to fucking make this a devoted Linux machine. I will run Scrivener on Wine.
Machine refuses to boot from USB.
Re-read to-do list.
You have to flash the fucking flash drive. I feel that this is offensive and an unnecessary extra step.
Downloaded Balena, which refused to flash anything. Looked up the error message. The solution was to not use Balena. The querent asking about my error message was snootily reprimanded about using "gimmicky packages" in one of the most Linuxy sentences ever recorded. Ventoy was suggested. Am sure that the developers of Balena would be confused to hear their program described as "gimmicky."
Linuxy user proved instantly right. Ventoy is fucking elegant. You can load multiple ISOs on a single flash drive. Cool as fuck!!! Guess who has a devoted ISO flashdrive now.

The process of looking all of this up was a fucking nightmare. I used Edge because I wasn't intending on using Windows at all. Jesus fucking Christ! Some of the websites were borderline unusable. Pop-ups and embedded ads covered the text and the only reason I could follow the article at all was because I could suss out the width of the margins. There were ads everywhere, some in text mirroring the formatting of the article, and they broke up the margins and covered paragraphs. Half of the pop-ups were from Microsoft itself using my own fucking operating system and I must stress that they were advertisements.
On a list of advice about installing an operating system.
Oh my god. That just made me angrier.
Anyway. I have Linux Mint, Cinnamon edition, on a computer I have named "zip." Time to set up Scrivener!
btw the dogs are going to wake me up tomorrow at 5 am so this is going to be great
2 notes
·
View notes
Note
tell us the linux story. 🎤
OKAY this is going to get a lot of technobabble probably but I'll try to simplify and explain everything. Also some of the explainations may not be technically correct, im a Casual hobbyist. Long post warning.
So, this started when I was checking my windows error logs, because my computer had started to randomly blue screen (again) (it stopped for a while but I suspect it was just happening in sleep mode). So I check the logs, and it's. It's bad. There's SO many errors. Windows has apparently been throwing up under the hood. I showed a computer adept friend and his response was "Oh God" followed up by "i think you need to reinstall your OS" so that was great.
First I'm directed to do what I'll call a soft reinstall, which is basically windows redownloads the OS and applies it as an update. You get to keep your stuff. I back up Everything to my external hard drive anyways because I know better. Do the install, check the logs the next day, windows is still throwing up. I'm told I will likely have to do a fresh install of windows.
I decide, fuck it, let's take a look at linux. I was planning on swotching to linux next time i get a computer anyways. How installing linux works, is you basically download an ISO file of the linux version you want, and use a program to put it on a USB or DVD, and stick it in your computer for it to boot off of. So, you're running linux completely separate from the rest of your computer, just using the hardware. Whatever you do in this environment isn't saved, so it's supposed to be a safe way to test out an OS. I imagine for people who aren't me, it is.
I try Ubunto, decide i want to try linux mint instead for petty reasons (Ubunto doesn't have shortcuts built in, mint does, i didn't feel like going to the command prompt every time I wanted to make a shortcut).
To do this, I have to restart my computer back into windows, so i can download and make the mint USB. I have not installed linux yet.
I promptly learn windows has decided to murder me for booting Anything off a USB. It's aggressively encrypted both of my hard drives. (The external drive is fine, it wasn't plugged in.) This is a security measure it must have activated in case I was a Hacker trying to bypass my login password. I cannot use my password to fix it.
Luckily, if I install Ubuntu to a drive, it'll format that drive and basically rescue it from the grips of windows. This is why I backed everything up, because windows is a piece of shit. I do that. I pick the one with windows to fucking eradicate windows.
My original plan was dual-booting windows and linux, simply because I wanted to make sure I could still run games that might not work on linux. Oh well, I decide. I'll just do mint.
I use Ubuntu to make the mint USB, wipe the other drive with mint, and then reformat the Ubunto drive. This is fine! It's great. Linux is responsive and my steam games are happy, because somehow valve made a thing that just Makes Games Work On Linux.
Now, I have a Legally Obtained Copy of ac3. There's specific ways to install windows games onto Linux like this, using a thing called WINE, and a program called lutris. Wine just sort of... translates windows stuff into Linux??? You can install windows drivers with it. Lutris is a game hub that manages all that using WINE for video games.
(I successfully installed the .Net framework with wine. Which if you're like me and have ever had a fucking nightmare trying and failing to install it on windows for Gaming, you will know this feels like stepping into the twilight zone to see.)
Anyways, for reasons unknown to me still, it has some kind of problem getting the installer to run. Okay, I say, I'll go back to my dual boot plan. I make a windows 11 install ISO on mint, boot off it, encounter thirty problems I don't understand and have to remake the ISO like three times, and then get windows installed. I also learned how to set the default drive to boot from using the BIOS, aka the super scary thing you shouldn't touch unless you're doing insane computer sjit like this. Turns out the windows USB installer needs to be the default boot while installing.
Note here: don't be me. Always install windows first, and THEN linux. They both have dual booting managers, and the second install overrides the first, and you NEED the linux boot manager.
NEW exciting windows problems! It cannot percieve my wifi card. Or, as I later learn, act like a fucking gaming laptop. It also fucks Linux again so I have to reinstall mint. I take the time to politely partition the drives (split it up into chunks, basically, so the windows-storage doesn't interact with the linux-storage), and disable the security thing windows freaked out and triggered earlier to encrypt my drives. Yay! My OS's are now installed and linux is in charge of booting, which is good because the windows booter can't tell the computer to boot into linux.
I use rose's computer to download and install a bunch of drivers that my windows install lacks in an attempt to fix the wifi, no dice. Currently I am waiting for a wifi USB adapter to see if that will get around it.
At this point, I decide to install AC3. Install goes okay! It's giving me a weird error with the launcher, but it worked on the second install, so okay. Except there's a problem: once it gets past the safety warnings and stuff, it decides to drop to 1fps. Messing with the game settings doesn't change this. Reinstalling doesn't fix this. I complain to rose. I install every driver related to my laptop I can think of. 1fps. No wifi. Audio works fine though!
I then remember a random thing a redditor mentioned while I was working with lutris: installing the game on windows, and using external storage to copy that install to limux.
So... I do that. I add it to lutris. I open the game.
It Just Works. No lag. Fully working. What the fuck. I installed the make on WINDOWS and fucking LINUX was running it better.
At this point, I had been working on this for three days, and it was 4am. I felt insane! I still feel insane! It just works!
Now, it's basically just messing with windows again tomorrow when the wifi adapter arrives, and finishing transferring everything to linux. And other small things that are basically just quality of life for me.
Windows is just going to be my non-steam windows games installer, basically. I don't think I'll need all 400gb i partitioned off for windows, I'll probably reduce it to 250gb or 300gb, so linux can have Even More. I literally just need it for edge cases and running game installers.
So, that's what I spent my weekend doing!!!!! Do more research than me if you change to linux, kids.
#ramblings#long post#it really was an experience#to be clear wifi and everything DOES work on linux. i didnt have to do anything special for linux. idk whats up with windows#if you want any more details on any onr part of this Let Me Know#curtis does hobbies
2 notes
·
View notes
Text

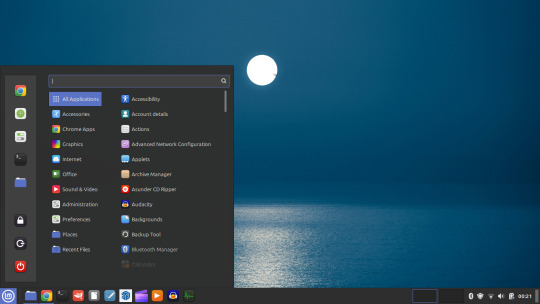
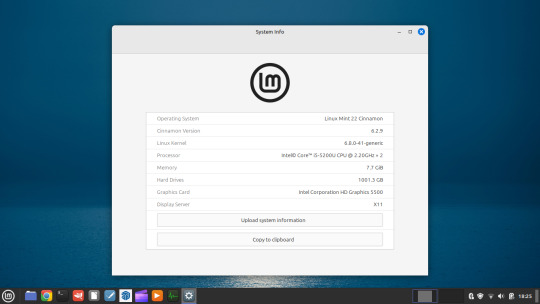
05.09.24
Linux laptop project 2024.
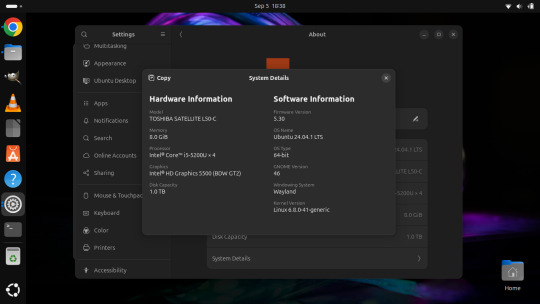
I decided to upgrade my old laptop by making it a Linux dual boot system. I had never done this before. I downloaded the ISO files for Linux Mint 22 'Wilma' and Ubuntu 24.04.1 'Noble Numbat' LTS.
The selected files include the standard desktop environments for each, Cinnamon, for Linux Mint and GNOME for Ubuntu.
Then using the built in USB disk creator on Linux Mint, I created bootable USBs, one for Linux Mint and one for Ubuntu. I decided to install Linux Mint first. The installation includes creating partitions and I used the installation partition creator to create a 25 Giga-byte partition in which I installed Linux Mint. The installation went ahead smoothly, and when it completed, I booted up Linux Mint. It looked perfect.
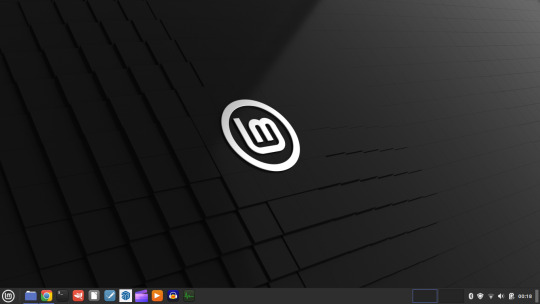
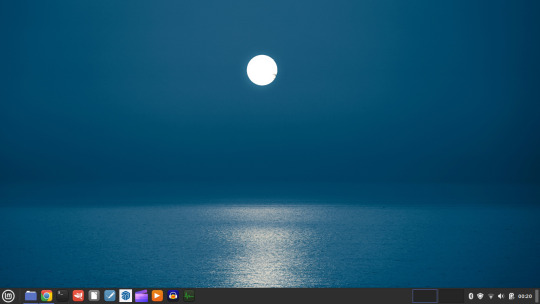
See screenshots below.


I then installed GParted, which is a more powerful partition manager to create the additional partitions I needed. I created a 25 Giga-byte partition for Ubuntu, two other 25 Giga-byte partitions and I hundred Giga-byte data partition formatting them all using ext4.
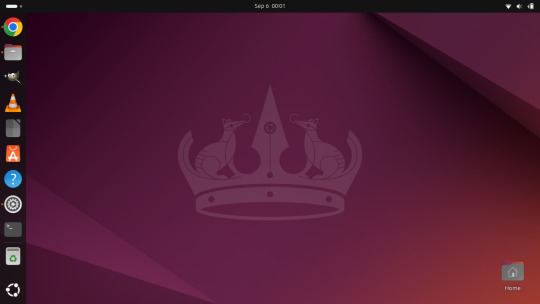
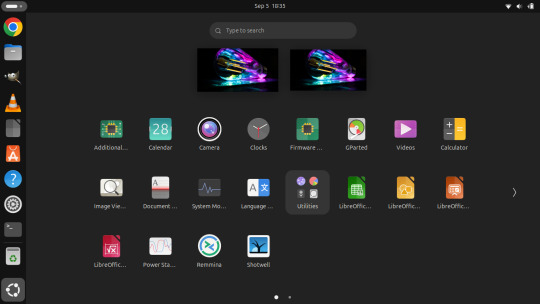
I then installed Ubuntu. During the installation, I selected the extended install, rather than the minimal install, so I had a full Ubuntu desktop installation on the second partition on my laptop hard drive. This all went well and at the end of it all I had a system which could boot either Linux Mint or Ubuntu.


After installation, I booted each system up individually and updated them with the latest updates available, and then I installed necessary software that I wanted such as the Google Chrome Browser, Audacity, VLC Media Player, GIMP, Asunder CD ripper.
I also reinstalled the Chrome web apps for Microsoft Clipchamp and Trimble SketchUp web.
The majority of software bundled on these Linux distros is already preinstalled. I then had fun tweaking each install and making them look how I wanted.
Here is a list of some of the tasks I did in both installs:
- configuring the desktop environment to my liking, e.g. background, theme colour, dark theme (Ubuntu) mixed colour scheme (Mint). - added Bluetooth devices (headphones, Mini-Rig speaker) - added the printer device - dual booted into each one to check them out!
-
After this, Dad wanted to finish the set-up in such a way that I could link my local laptop Documents, Downloads, Pictures, Music and Video folders directly to the data partition, which would mean that I could access those folders automatically from any installed Linux distributions, however this didn't quite go to plan and messed some things up, so we decided to re-install both operating systems again and I repeated all the previous steps and left out the folder sharing part for now.
-
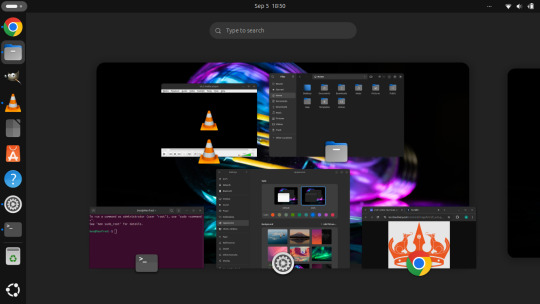
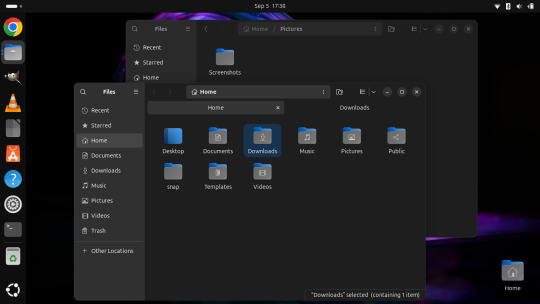
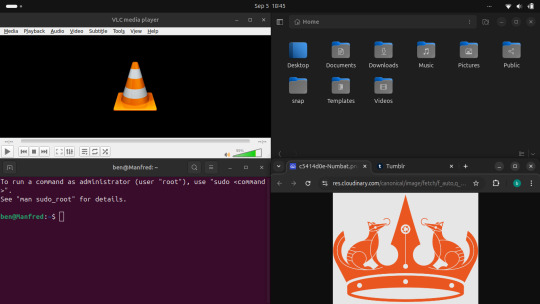
The images underneath show the final desktop installs with my various theme and desktop personalisation's applied and all the installed apps.
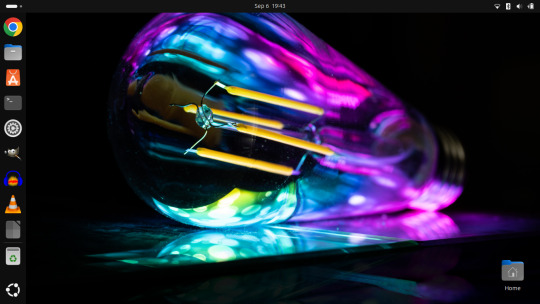
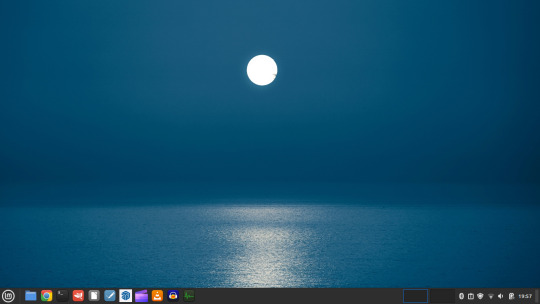
Here is a screenshot of the 'GNOME image viewer' in Mint and Ubuntu.

Ubuntu Linux is celebrating its 20th anniversary with a web post.
See link below:
https://ubuntu.com/20years
For more information about the Linux laptop project, search 'Linux' on my Tumblr blog!
6 notes
·
View notes
Text
I have two hard drives in my computer: one 500GB SSD (disk 0), and one 1TB SSD (disk 1). Based on my personal experience, I've found this computer to be horribly incompatible with just about everything. For whatever reason, I tried installing Linux Mint, and it went pretty good. That was until it installed the bootloader on disk0 without detecting my Windows installation on disk1, pretty much making my Windows installation inaccessible. This would've been easy to fix if I could make Windows 10 boot media, but I couldn't get an ISO or any software to make boot media because the Wi-FI just decided to stop working when I restarted the computer (I don't even have an Ethernet port in my house). I have a physical copy of Windows 10 lying around, but it's from 2016, so it has a USB driver that causes all of the connected USB devices on my computer (including keyboard/mouse) to stop working. I'm so fucking sick of how incompatible this garbage custom-build tower PC is, I'm so close to just getting a ThinkPad or something.
Hopefully, I'll be able to use one of my spare computers to make Windows 10 boot media and save the Windows 10 installation on my PC, but I honestly just don't want to at this point.
4 notes
·
View notes
Note
Just got a new laptop which unfortunately comes with windows 11, so I’m kinda tempted to throw Linux on it out of spite
Would that be a good idea, seeing as I have never to my knowledge used linux?
Ok so this is in my honest opinion, if you want something good for beginners, then Linux Mint is your best option
If you already know how to flash an ISO to a USB drive and boot to it and all that, then you don't have to click the read more button, but if you don't there's some more instructions below the cut
There's a really easy way to get started
First, get a torrent client like qBittorrent, Deluge, Transmission, whatever, they're all pretty good open source torrent clients (although I'm biased towards qBittorrent because that's my personal client of choice)
Then you're gonna wanna go to https://linuxmint.com and you're gonna wanna click that download button
You're gonna come across three different editions of Linux Mint, I recommend going with the first option, Cinnamon edition as Cinnamon is pretty good at helping you feel at home when coming from Windows
Hit the download button and then click the button that says Torrent Download: 64-bit, and you'll get a torrent file that you can open up in your torrent client
Or you could just do a direct download if you're gonna wipe the damn laptop, no point in trying to seed the ISO when Windows 11 is gonna get wiped
Anyway, let that iso download and then you're gonna wanna grab a piece of software called rufus
Go to https://rufus.ie/en/ and download the correct version for your platform
Now get a USB drive you don't mind wiping the data off of, because you need to flash the ISO to it
Then you're gonna wanna plug the USB drive into your computer and open up rufus and select the USB drive you just plugged in, if it didn't already do that
Then you're gonna wanna select the ISO you downloaded in Rufus
Leave all the settings as is, it'll be fine, but given you have a new laptop, I'm gonna assume it's one of the newer models and not something like a Thinkpad, so you should set the partition scheme to GPT
Then you just hit start, click through a couple of prompts, and then you just wait
At this point, just reboot your computer and figure out which key gets you into the boot menu, could be escape, f11, f12, delete, beats me, it's always something different
You may need to disable secureboot because it may prevent you from booting the USB, so there's that
Anyway, boot into the USB, hit enter to start Linux Mint and you'll be dropped into the live desktop
You can poke around and see if you like what you see, or if you don't, then that's alright, you can shutdown and pull the USB and flash a different edition or use a completely different distro
Just poke around in it, see what looks good to you, see what doesn't, you won't affect any of your disks until you decide to install
But yeah, there should be a CD looking icon on the desktop, and you can click it to start the install process
Once you go through it all and wiped Windows 11, there you go, Linux Mint on your computer
And if a video guide works better for you, then maybe this tutorial might help, it's a little old, but the same broad strokes still apply
youtube
Have fun on linux and enjoy the wild west of computing
9 notes
·
View notes
Text
Apologies for necro-posting, but I looked through the notes and while people have given you some pros and cons, no one actually walked you through getting it up and running, and I might as well give my best shot at helping someone evacuate from windows 11, so here is the Jack Joy's Explanation and Guide to Linux. Chapter 0: The Pitch for the Penguin.
Linux is all about freedom. While Windows and MacOS are Walled Gardens that are slowly stripping away control from their users and extracting more and more from you, the person who is using a non-linux OS, Linux does not do that shit. Free and Open Source Software is the name of the game in Linux, as that is what is mostly being developed in that space by an army of volunteers passionate about keeping the PC personal. That comes with some caveats though. A lot of the software you use is proprietary, and while some of that is still available on Linux, most of it is not. Some you'll expect. Some you wouldn't think is even proprietary and will surprise you when you lose access to it. The Linux community has done it's best to provide solutions for a lot of these, and you will find that a lot of what you want to use has some alternative in linux, but some things will just be fucked. You trade convenience for control.
Chapter 0.5: When you are a King very few choices are simple
If the Pitch convinced you, then congrats, you now have one of the hardest decisions to make as a Linux User. What Distribution of Linux are we using? Distributions (or Distro's for short) are all different OS' who run on the Linux Kernel, the thing that gives your machine thought and makes it possible to run the hit video game Team Fortress 2 (2007). There are a lot of distributions of linux, all of which do weird things with it, but my personal Picks are as follows.
Linux Mint
Linux Mint is the gold standard for stupid simple linux distro. It just works*, it comes with a DE(desktop Enviroment) that is reminiscent of windows 7 so adjustment should be minimal and overall, is very uncomplicated. Is a bit bland tho. *(things still break sometimes).
Ubuntu
Ubuntu meanwhile you probably already heard of. Think of it as the MacOS of Linux. It has the most company support, it's DE called GNOME is very MacOS like in it's design language, incredibly stable, but also very poor in customization. If something says tested on linux, a lot of the time, it means tested on Ubuntu.
EndeavourOS
EndeavourOS is my linux distribution of choice. It's based off of Arch Linux, which is what powers the Steamdeck with SteamOS, and as such has a lot of nifty Arch linux niceties, like the Arch User Repository, and KDE Plasma as it's DE. It tries to combine being user friendly while letting you tinker with everything, it is on the cutting edge of linux, but that also means that stuff CAN break more often.
These are just my picks. Some other notable beginner friendly Linux Distros that might pique your interest could be Pop_Os, Manjaro, Elementary OS and probably a bunch of others that I forgot or don't even know exist until someone will complain at me for forgetting after writing this guide. Choice my friend. You have a lot of it, and so think about what you want from your PC and go with the distro that seems to be best suited for your usecase, whether it be as a game machine or to just use firefox and libreoffice.
Chapter 1: Performing OS Replacement Therapy on your PC
So, you know what Linux Distro you are gonna use, you know you are ready to do this, so how are we doing this? Pretty simple in all honesty. We only need:
A Flash drive (USB preferred, SD or micro SD card readers can get FUNKY)
Balena Etcher
The ISO of the flavor of Linux you want to use
Some knowledge of how to navigate your computers BIOS
And preferably a secondary boot device (IE, a second SSD in your PC)
Plug your USB into your PC, and with Balena Etcher flash your ISO onto it. If you got another USB to spare, it is a good idea to flash an image of Windows 7 onto it. Think of that second USB stick as a "In Case of Emergency, Break Glass" type of safety precaution. We don't wanna have to use it, but it's good to have just in case. Reboot your PC with your Linux flashed USB stick in, and get into your BIOS. There you are going to pull that USB stick up the boot loader until it goes before windows. If that is somehow not an option, you might have to fuck around with your PC as there might be some secure boot shennanigans going on. Consult DuckDuckGo about your specific Computer, someone already figured it out if there is a hiccup. If you were able to pull up your USB up the boot order, exit the BIOS and hopefully things should be happening. To confirm look at the screen and if it does something new (and potentially scary looking) instead of the normal windows boot sequence, it is probably doing good. After a while you should be spat back out into a "Live Enviroment" version of your OS. This version of the OS exists only for this boot, and is pulled from your USB stick. There should be an installer inside of that live enviroment version of your OS, after which it is mostly smooth sailing. Follow the Installer, but pay REAL GOOD ATTENTION to what it is sayin when it asks you where it wants to be installed, as it will create a partition somewhere on your PC. If you have a PC with an SSD that isn't being used by windows, I recommend giving it that as you'll just be able to give that entire drive to Linux without problem. If you don't have an extra SSD, you will have to cleave a chunk from the one drive you have from windows. You can just give it 50% of the drive if you want to be conservative and still retain the ability to go back to windows. But should you feel particularly pissed/want to make sure you have no escape back to windows without having to reinstall it via that second USB stick, then torch the damn thing. Once the Installer is done it will either ask you to reboot your PC or just do it itself. After which point if everything went right, you will complete your first boot of Linux and end up in the actual version of the OS you installed. If you made it there, congratulations, and welcome to Linux. You might want to update the first time you boot, but after that, feel free to poke around to see what you have installed. Get Acquainted with your new Desktop, use some of the artisanal software that is FOS, if you are feeling spicey, run some commands in the terminal (as long as you know what they do. please do not run sudo rm -rf / because you saw it on a funny linux meme, that will uninstall your entire OS.) I hope this Guide has been helpful ^w^.
Hey. Gonna gamble here. Can someone explain to me the pros and cons of Linux as a whole and tell me maybe -possibly- how one might go about getting something set up
471 notes
·
View notes
Video
youtube
Discover the EASY Way to Install LINUX Without the Hassle!
*Linux For DevOps:* https://www.youtube.com/playlist?list=PLGj4aMqxhpL6qwlxRuVljjIxvNoMy-W91 *Linux For DevOps: Beginner Level:* https://www.youtube.com/playlist?list=PLGj4aMqxhpL5bLDvXBIpOmS_Vh6U8tjM0 *Linux For DevOps: Intermediate Level:* https://www.youtube.com/playlist?list=PLGj4aMqxhpL79czyihLsCRXHePzY0zQuv ***************************** * Discover the EASY Way to Install LINUX Without the Hassle! * 🎥: https://youtu.be/V7ZOuK6o5KQ *****************************
Linux is a powerful, versatile operating system widely used for servers, development environments, and personal computing. If you're new to Linux, this guide will walk you through the installation process and initial setup to get you started.
Why Choose Linux? - Free and Open Source: Most Linux distributions are completely free to use. - Customizable: Tailor your operating system to your needs. - Secure and Reliable: Preferred for servers and development due to robust security. - Community Support: A vast, active community to help with troubleshooting and learning.
Step 1: Choose a Linux Distribution Popular Linux distributions include: - Ubuntu: Beginner-friendly and widely supported. - Fedora: Cutting-edge features for developers. - Debian: Stable and ideal for servers. - Linux Mint: Great for transitioning from Windows. - CentOS Stream: Suitable for enterprise environments.
Step 2: Download the ISO File 1. Visit the official website of your chosen Linux distribution. 2. Download the appropriate ISO file for your system (32-bit or 64-bit).
Step 3: Create a Bootable USB Drive To install Linux, you'll need a bootable USB drive: 1. Use tools like Rufus (Windows), Etcher, or UNetbootin to create a bootable USB. 2. Select the downloaded ISO file and the USB drive, then start the process.
Step 4: Install Linux 1. Insert the bootable USB into your computer and restart. 2. Access the BIOS/UEFI menu (usually by pressing `F2`, `F12`, `Esc`, or `Del` during startup). 3. Set the USB drive as the first boot device. 4. Follow the installation wizard to: - Select your language. - Partition your disk (use “Automatic” if unsure). - Create a user account and set a password.
Step 5: Perform Initial Setup After installation: 1. Update the System: ```bash sudo apt update && sudo apt upgrade -y # For Debian-based systems sudo dnf update # For Fedora-based systems ``` 2. Install Essential Software: - Text editors: `nano`, `vim`. - Browsers: `Firefox`, `Chromium`. - Development tools: `git`, `gcc`.
3. Enable Firewall: ```bash sudo ufw enable # Uncomplicated Firewall ```
4. Learn Basic Commands: - File navigation: `ls`, `cd`. - File management: `cp`, `mv`, `rm`. - Viewing files: `cat`, `less`.
Tips for Beginners - Experiment with a Live Environment before installing. - Use VirtualBox or VMware to practice Linux in a virtual machine. - Join forums like Ubuntu Forums, Reddit’s r/linux, or Linux Questions for support.
Linux installation, Linux beginner guide, Linux setup, how to install Linux, Linux for beginners, Linux distributions, Ubuntu installation, Linux Mint setup, Fedora installation guide, Linux tips
#Linux #LinuxForBeginners #Ubuntu #LinuxMint #Fedora #LinuxTips #OpenSource #LinuxInstallation #TechGuide #LinuxSetup #ClouDolus #ClouDolusPro
ubuntu,Getting Started with Linux Installation and Basic Setup,linux tutorial for beginners,open source,linux terminal,distrotube,ubuntu is bad,linux tutorial,linux for beginners,linux commands,Linux installation,Linux beginner guide,Linux setup,how to install Linux,Linux for beginners,Linux distributions,Ubuntu installation,Fedora installation guide,Linux tips,cloudolus,cloudoluspro,free,Linux,Linux for DevOps,Linux basics,DevOps basics,cloud computing,DevOps skills,Linux tutorial,Linux scripting,Linux automation,Linux shell scripting,Linux in DevOps,Ubuntu,CentOS,Red Hat Linux,DevOps tools,ClouDolus,DevOps career,Linux commands for beginners,Introduction to Linux for DevOps: Why It’s Essential,devops tutorial for beginners,learn devops,devops tutorial,Who Should Learn Linux for DevOps?,Why You Should Learn Linux for DevOps,Why Linux is Critical in DevOps,Why Linux Essential?,What Is Linux Overview?,What Linux Key Features?,What Linux Key Benefits?,What Is Linux Overview? Linux for DevOps,Linux for cloud,Linux training,devops tutorial Linux,Linux commands for beginners ubuntu,cloud computing Linux for DevOps
***************************** *Follow Me* https://www.facebook.com/cloudolus/ | https://www.facebook.com/groups/cloudolus | https://www.linkedin.com/groups/14347089/ | https://www.instagram.com/cloudolus/ | https://twitter.com/cloudolus | https://www.pinterest.com/cloudolus/ | https://www.youtube.com/@cloudolus | https://www.youtube.com/@ClouDolusPro | https://discord.gg/GBMt4PDK | https://www.tumblr.com/cloudolus | https://cloudolus.blogspot.com/ | https://t.me/cloudolus | https://www.whatsapp.com/channel/0029VadSJdv9hXFAu3acAu0r | https://chat.whatsapp.com/D6I4JafCUVhGihV7wpryP2 *****************************
*🔔Subscribe & Stay Updated:* Don't forget to subscribe and hit the bell icon to receive notifications and stay updated on our latest videos, tutorials & playlists! *ClouDolus:* https://www.youtube.com/@cloudolus *ClouDolus AWS DevOps:* https://www.youtube.com/@ClouDolusPro *THANKS FOR BEING A PART OF ClouDolus! 🙌✨*
#youtube#ubuntuGetting Started with Linux Installation and Basic Setuplinux tutorial for beginnersopen sourcelinux terminaldistrotubeubuntu is badlin
0 notes
Text
HOW TO CREAT BOOTABLE PENDRIVE
Rufus is a popular utility software used for creating bootable USB drives. It is widely used for various purposes, including installing operating systems, running live Linux distributions, updating firmware, and more. Here are some key features and functionalities of Rufus:
Bootable USB Creation: Rufus allows you to create bootable USB drives from ISO image files for operating systems such as Windows, Linux, and others.
UEFI and BIOS Support: Rufus supports both UEFI and BIOS boot modes, making it compatible with a wide range of systems and devices.
Partition Schemes and File Systems: You can choose from various partition schemes (MBR, GPT) and file systems (FAT32, NTFS, exFAT) when creating bootable USB drives, depending on your requirements.
Bad Block Detection: Rufus includes a feature to check for bad blocks on the target USB drive before creating the bootable drive, helping to ensure data integrity.
Fast and Lightweight: Rufus is known for its speed and efficiency. It is a lightweight application that launches quickly and performs USB drive operations rapidly.
User-Friendly Interface: The interface of Rufus is simple and easy to use, making it accessible to users of all skill levels.
Open Source: Rufus is open-source software, which means its source code is freely available for inspection, modification, and distribution by anyone.
Overall, Rufus is a versatile and reliable tool for creating bootable USB drives, and it's a popular choice among users who need to install or run operating systems from USB media. However, as with any software, it's essential to download Rufus from a trusted source to avoid potential security risks from downloading malware-infected versions.
0 notes
Text
Fucking hell. I don't get why it is that seemingly basic and simple installations seem to give me the most trouble. The simple act of trying to dual boot linux has sent me through a goddamn cascade of errors that have kept me up until literlaly 5 in the morning.
Oh, I'll just use WSL. Wait, why is WSL not working? Why is WSL on the 1.0 version without the --install option? Wait, why is my Windows version out of date? How about I check for updates and let them apply? What do you mean there was an error? Will everything work if I literally reset my entire PC and start with a fresh installation? No? Okay, how about I create a USB boot drive and use a dual boot installation? What do you mean the torrent missed a fragment of the ISO? Why did the USB drive disappear? Why do I have to disable boot options in the BIOS to get this to work? Why is it 5 am, and this fucking boot drive still won't show up in the boot menu?
It genuinely makes me feel like I'm not a CS student at times
0 notes
Text
In this guide, you will learn how to use Ventoy, a programme that makes it incredibly easy to create a multi bootable USB flash drive of Windows 11 (and 10) without the need to reformat the removable storage. Typically, you use the Media Creation Tool to create a bootable USB media when you need to perform a clean install of Windows 11 (or 10). As an alternative, you can complete the same task with more customization options by using the Rufus tool. The issue is that you have to repeatedly reformat the drive to update the installation files or switch the operating system, even though these tools perform as promised. A flash drive can be made bootable by installing Ventoy as software. Once the flash drive is able to boot, all you have to do is upload the desired ISO (or WIM, IMG, VHDX, or EFI) files without extracting them first. The system will boot into the Ventoy software when you insert the USB flash drive. You can select the image with which you want the computer to start while you are experiencing this. You can keep both versions of the image on the same bootable flash drive if a new version of the ISO becomes available. The instructions in this manual will show you how to use Ventoy to make a bootable USB that you can use to install Windows 10, Windows 11, Linux, or another operating system from the same flash drive. Create multiboot USB flash drive with Ventoy To create a Windows 11 bootable USB with Ventoy, connect a flash drive with enough space, and use these steps: Open Ventoy GitHub page. Under the “Assets” section, click the ventoy-x.x.xx-windows.zip file and download it to your computer. Quick note: You may need to force and keep the file as the browser may detect it as malicious. Open the Zip folder location. Double-click the open the ventoy-x.x.xx-windows.zip file. Click the Extract all button from the command bar. Click the Browse button. Select a location to extract the files. Click the Select Folder button. Click the Extract button. Open the ventoy-x.x.xx folder. Double-click the Ventoy2Disk.exe file to launch the installer. Choose the USB flash drive from the “Device” setting. Click the Install button. Click the OK button. Click on This PC from the left pane of File Explorer. Open the Ventoy drive. Copy and paste the ISO files to make them bootable. You can include the latest image of Windows 11, 10, Linux, etc. Once you complete the steps, you can use the USB flash drive to boot a device with the Ventoy software, where you can then choose to start the device with one of the ISOs you uploaded to the drive.
0 notes
Text
With Ubuntu: Drivers not found during Windows 11 Installation. Here is how!
PROBLEM:
So I was trying to install a fresh or clean copy of Windows 11 Professional on my computer, and everything was pretty straight forward with the obvious. Basically you just download the ISO and flash it to a USB stick. The problem is, when you boot up the Windows 11 setup, and click "Install" it literally cant find any storage drivers. Meaning it cant see any hard drive capable of installing Windows on. But what the heck!?! Its windows 11! Till this moment, I dont know why, and was disappointed. But I do have a high-end latest built computer, so maybe that played a factor!
ANYWAY! I FOUND A SOLUTION!
SOLUTION:
WoeUSB! Using WoeUSB actually is designed to prepare a Windows Installation on a bootable USB from Linux, in my case, Ubuntu 22(23 has issues)
With Terminal: (INSTALL THE Pyhthon-pip for Installation)
sudo apt install git p7zip-full python3-pip python3-wxgtk4.0 grub2-common grub-pc-bin
(INSTALL WoeUSB with pip3 command* NOTE THAT PIP3 ONLY WORKS ON UBUNTU 22, NOT 23.)
sudo pip3 install WoeUSB-ng
Once that's install, its pretty self explanatory. Find the app in the applications section and launch.
Have a copy of windows in ISO, or you can Download a copy and its native website. Follow the on screen and boom! I hope that helped someone!
#linux#ubuntu#fix#solution#solutions#terminal#python#pip#USB#bootable#windows#microsoft#microsoft Windows#Windows 11#Clean Install#Fresh Install#WoeUSB#Flash Drive#Install Media#Media Creation#Drivers not Found#No Drivers#Mass Storage#Storage#NVME#SSD#Thumb Drive
0 notes