#masking fluid tutorial
Explore tagged Tumblr posts
Visit Tumblr Blog
Explore Tumblr blogs with no restrictions, modern design and the best experience.
Last Seen Tumblr Blogs


Fun Fact
The most popular pages on Tumblr are about Minecraft, GIFs, and David J. Peterson.
Note
hi, your gifs are extremely good, I'm sincerely intimidated by your talent so excuse me for the anon ask. I was wondering how did you make this blending? /post/739252081037328384 What was the process to make it look so good? cause I'm trying to do a similar blending with another anime but it's getting hard (and honestly, turning ugly ajskd) thank you
hi! thank you so much 🥺 i'm so sorry for the late reply btw. tbh blending is always hard for me to explain. so i put together a few progress gifs and videos to hopefully demonstrate how i went from start to end, and i'll do my best to add commentary at the end. i'll show the megumi gif from that set, since it had the most layers:
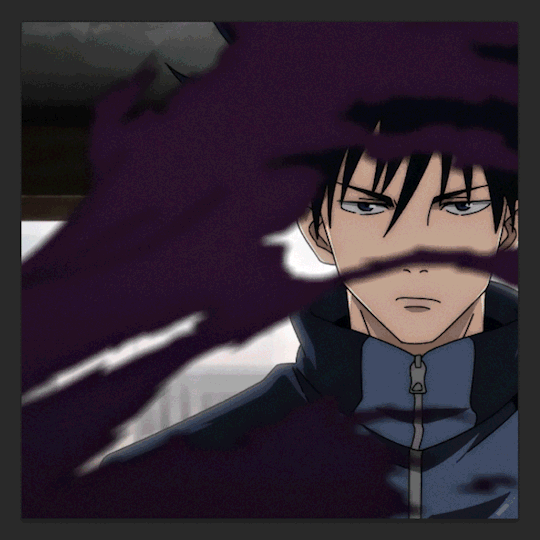
(click for full size) 1. each individual gif before and after coloring + masking (erasing) // 2. each gif being added to the composition
(there's no sound on this video. here you can see me toggling on/off my adjustment layers to demonstrate some aspects i'll explain below the cut)
key parts of blended gifs for me:
choose scenes where the focal point (megumi's face) can be made to stand out. for that, i'll look for scenes against very dark backgrounds or solid backgrounds that can be darkened. when you set a gif to screen (the blend mode used for blended gifs), the light areas of that gif will stand out the most against the dark areas of the gifs underneath
choose scenes with minimal pulsing/harsh/fast movements but with fluid, soft movement (for anime since this style of animation has a lower fps). scenes with enough movement that aren't too jarring can be hard to find in shonen since there's so much action, but some of the best scenes are those "hero pose" moments where their hair blows in the wind lol (one of my fav scenes to gif is gojo in at shibuya station after choso first tries to hit him with his ct bc his blowing hair is animated so gracefully sldkfjs). in this case, i have todo's torn shirt breezing in front of megumi's face. i knew it would be a great shot to blend with bc i could darken the purple of the shirt and any gif layered above those spots would stand out against it
use layer masks and adjustment layers to "erase" distracting parts of the gif. as you can see in the video, i've erased huge chunks of some of my gifs. i often also use levels with a layer mask to darken select parts of my gif (even reducing the white point as shown in the base gif) + hue/sat to darken specific colors in a gif.
so one of my best tips for coloring is to focus on scene selection, masking, and darkening!
i know it's not a full blending tutorial, but i hope there's something here that can help you. i've also talked about parts of my blending process in these asks:
[one]
[two]
[three] (i've been told tip 2 has been super helpful for ppl)
[four]
if you're interested in reading other inquiries, i have a specific tag #nik.help and all my tutorials are tagged #resource* :)
and good luck with your anime gifset! keep at it! blending can be frustrating but trust the process and i'm sure it'll come out stunning!
11 notes
·
View notes
Note
Been following you for while and after seeing a couple of your WIP it made me wonder... What exactly ia your process? And the step by step strategy you follow every time you draw.
And if you use any kind of reference, if you don't mind me asking of course
Ooh fun.
So to start, I still consider myself in a big learning phase. I stopped drawing for a decade and have spent the last 4 years relearning a lot. I only started water color coming up on 2 years ago. So take anything I say with a big grain of salt.
One big thing I've been working on is the process, having drafts, etc.
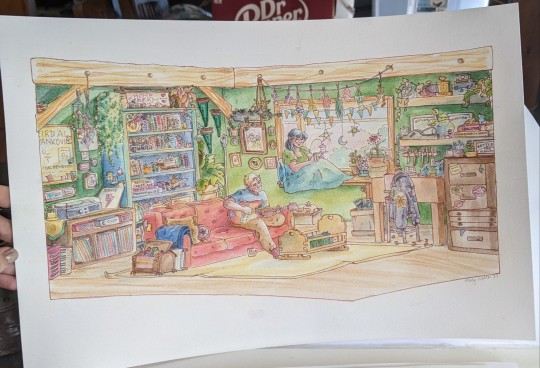
Using a recent painting I can illustrate my ideal method for illustrations (my landscapes skip numbers 4 and 5).
1) research, I use Pinterest a lot, as well as stock photos and posing apps. References are super important to me and I rarely start drawing without them.

2) thumbnails, this is relatively new but things turn out so much better when I do I rough sketch or two (or more)


3) sketch layer in blue pencil
4) round two in purple pencil (below is half way done with step 4) so you can see the two colors
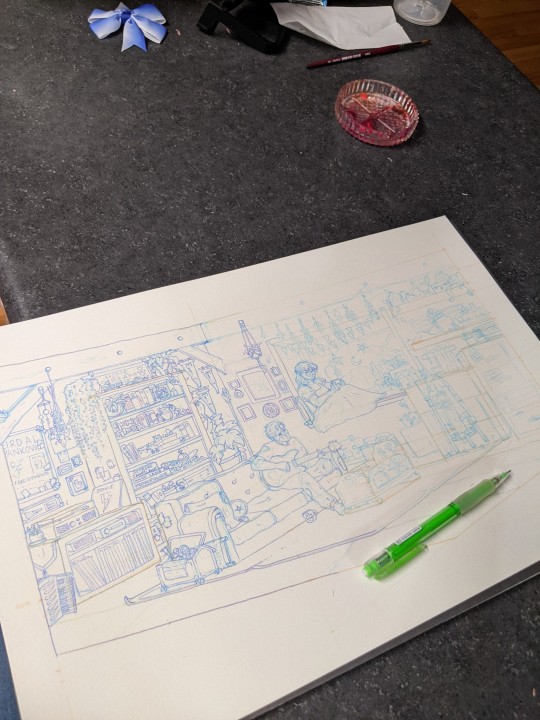
5) round three in light brown ink
6) watercolor painting

(the yellow is masking fluid) that was removed later)
7) second ink layer, and highlights
For supplies I like (I'm not rich, and feel I can say most of this can be acquired on a modest budget, especially over timing and taking advantage of sales)
🌼Pilot Color Eno mechanical pencils in light blue and purple
🌼Factis Black erasers
🌼Stilman and Birn Beta sketchbooks, Baohong paper and in a pinch masters touch paper from Hobby Lobby when I need something super affordable
🌼Windsor Newton professional or Daniel Smith watercolors, pricey but last a long time. (Buy them on sale a few at a time, I have 5 ml tubes and haven't replaced one yet in almost two years). You don't need a lot, I started with about a dozen and that was plenty to start with.
🌼Washi Tape
🌼Princeton Velvet Touch Brushes (rounds in size 2, 4, 6, 8 and a large brush for washes is a great start, you need tons of specialty brushes)
🌼Dr. Martin's Bleedproof White
🌼Sakura Micron Pens (I main use brown, light brown and black in 005 and 01 size)
I don't believe in hoarding art knowledge so please ask any questions. If you're just starting I advise getting at least quality student grade materials, reddit and other sites are great for finding affordable supply recommendations.
If you're interested in watercolor there are a lot of great tutorials out there, I started with a free landscape class from thewritingdesk on Instagram!
27 notes
·
View notes
Text
PART 13: Final Notes
Some Spoilers for DA:TV below.
Main Post Link
Gameplay
Combat is immaculate. Finishing moves are *chefs kiss*
I had so much fun with EVERY class.
Mage is ACTIVE. Spellblade is so much fun, you move, and weave, and dodge, and magic is flying everywhere. Switching to your staff at longer distances is natural. Everything flows without it starting to feel like a slog. Did I mention you get a fuck off huge laser beam as a rage bar?
Rogue feels very much like a return to da2 with SPEED. The moves are again fluid, and feels like your character is recklessly throwing themselves into danger. Cannot wait to test out the different skillsets. BOMBS bwaahahaha.
Warrior is thunky. Idk how else to describe it. Every hit has weight behind it and moves between attacks are smooth. Frankly, it may end up being Lilllithdraagon’s default way to play Veilguard. There is nothing quite like shoving a darkspawn’s face in the pavement with a shield so hard that they die.
The skilltree is expansive but not super overwhelming and you can change your load-out whenever outside of combat. Even mid way through a story mission.
The fights with Ghilan’nain and Elgar’nan felt IMPACTFUL. More like the tutorial at the very start but with the controls firmly under our belt and were very fun. I kept being surprised by what was thrown at me. The escalation of every encounter was PERFECT.
There is a rune that pushes everyone back that is absolutely hilarious to use with enemies on bridges. They just go flying into the aether like it’s nothing. 10/10 would recommend.
Definitely the most engaging combat in a Dragon Age game. Replay-ability in that aspect alone.
Frog time, quizquisition and worms
Yes. Yes. YES and all the ridiculous yes.
THE CHEESE SHIELD IS BACK, and it’s been aging for a sweet sweet 10 years.
Speaking of cheese there’s some in the Veil Jumper vaults and no explanation except maybe Bellara switched that out for her bow? Also why do we keep stacking more and more cheese in the Lighthouse.. music room. And barrels. Who needs that many barrels in the kitchen?
There is a crow mask, a scarecrow set of armour and a giant mallet. That is peak goofy build and we adore it. Become the scareCROW of your dreams.
Characters are dorks with each other and Solas’ sigh at Taash’s questions in late-game is very ‘not another Sera�� coded and it’s just the best.
For all the horror and death in Dragon Age, there has also been giant spoons and ‘Hawke stepped in the poopy.’ And I’m so glad to see Veilguard is much the same.
Getting high with Davrin. Listening to Emmerich talking to Spite. Playing scissors, paper, rock with Manfred except he only ever plays paper. Every single little silly interaction managed to put a smile on our faces.
And you cannot tell us that Elgar’nan wasn’t getting off with those Blight tentacles on that throne lol.
Ultimately
This isn’t just a good game, it’s a DRAGON AGE game. It’s coming home to Thedas, for all the dumpster fire of a world that it is. And I only wish the game were longer because there was so much left we could have explored, and truthfully, for all our ranting and complaints; They got a lot right, and we just didn’t want to leave.
#dragon age#dragon age the veilguard#dragon age the veilgaurd spoilers#dragon age veilguard#dav#dragon age discussion#bioware critical
2 notes
·
View notes
Note
Do you think you could ever drop a color and shading tutorial? Your coloring and shading is mythical!!
this is very kind and i always feel bad when i respond to these questions with "well thank you but i dont actually know what im doing," but honest to god i am just hacking away in there with a blunt machete. i took one fake art class in college and i have no formal training or true intelligence to pass on to you
i think what youre noticing is that im actively trying to be better at shading with the "paint the light, not the shadows" method. (i can clearly picture what this tweet looks like but i cant find it.) this combined with me making more use of masks instead of destructive editing has been helping me a lot with making shading look more believable. im also fully addicted to gradient maps, overlay, and hue layers that help colors look cohesive
if you dont believe me heres a screenshot of how the layers look in a piece i have queued for tomorrow. i really am just rooting around under the hood pouring antifreeze and wiper fluid wherever

2 notes
·
View notes
Text


Holiday Crafting Picks
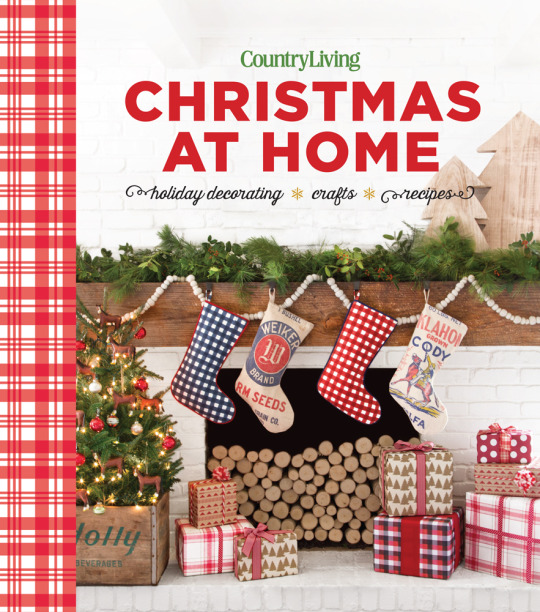
Christmas at Home by Country Living
Country Living knows how to make Christmas memorable, and that's why this spectacular book will become your new go-to resource every year. It's filled with more than 200 beautiful decorating ideas, recipes, and crafts, plus tips galore. Stunning photos show festive table settings; splendidly decorated trees; fun and easy Christmas projects, from wreaths to no-sew stockings; gifts from the kitchen; and gourmet-worthy recipes like Turkey Roulade with Sausage-Cornbread Filling, Brown Butter Mashed Potatoes, Slow-Cooker Apple Cider, and sweet treats like Red Velvet Snowballs and Chocolate & Cranberry Fudge.
Christmas Ornaments by CICO Books
Making your own Christmas decorations is a truly thoughtful way to celebrate the holiday. By creating your own unique decorations, you will have a store of happy memories to bring out each year. It's also good for you - crafting has been shown to reduce stress - and good for the planet, reusing and recycling materials you have around the home and not buying environmentally harmful products such as glitter and plastic.
The 27 projects in Christmas Ornaments are divided into Tree Decorations, Wreaths and Garlands, and Table Decorations, covering every aspect of decorating your home for this special time of year. With an emphasis on simple Scandinavian style and easy techniques, these are quick makes with no special skills required, just basic sewing, cutting, sticking, and arranging.
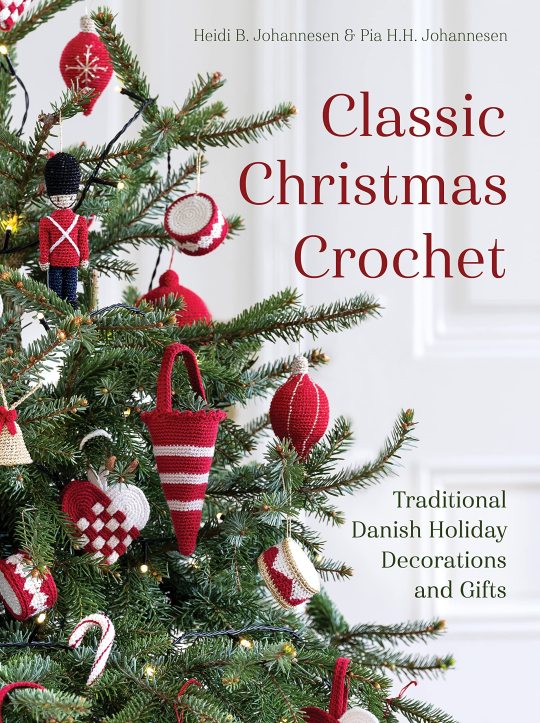
Classic Christmas Crochet by Heidi B. Johannesen
New from Scandinavian knit designers Heidi and Pia Johannesen, this classic selection of holiday designs evokes the spirit of the season with compelling simplicity: red and green, black and white, plus a touch of gold and glitter to bring the magic of Christmas to life. From bells and hearts to elves and stockings, everything you need to crochet yourself a quintessential Christmas is right here at the end of your hook.
This volume includes patterns at every level of difficulty, so beginners can keep it small and straightforward, and seasoned crocheters can craft toy soldiers, friendly elves, and more; full-color photographs, including ideas for arranging and placing decorations, inside and outside the house; and a coordinated color palette for a time-honored Christmas look that works for every home.
DIY Watercolor Christmas by Ingrid Sanchez
Learn the materials and equipment you need for watercolor painting and how to create both traditional and contemporary color palettes for Christmas, and then learn a range of watercolor techniques including washes, blending and gradation, plus experimental ideas to try such as using salt, bleach and masking fluid in your work.
Twelve creative projects follow, with step-by-step tutorials so that even beginners to watercolor can jump right in. Learn how to paint your own Christmas cards, gift tags and gift boxes, create seasonal table settings, hand painted Christmas crackers and garlands.
#holiday crafts#diy projects#nonfiction#reading recommendations#reading recs#book recommendations#book recs#library books#tbr#tbr pile#to read#booklr#book tumblr#book blog#library blog#readers advisory
2 notes
·
View notes
Text
About Me:
Goth bimbo chronicling her experiences w/being in possessive relationships. I like handsome creatures with dark tendencies 😍
🖤Stockholm Syndrome enthusiast
🖤Slut enabler
🖤 Millennial
🖤Curious Capricorn
~~~~~~~~~~~~~~~~~~~~~~~~~~~~~~~~~~~~~~~~~~~~~~~~~~~~~~~~~~~~~~~~~~~~~~~~~~~~~~~~~~~~~~~
Appearance: 5’7”, average build but currently going to the gym 5x a week to lose 50lbs, big tits, dark skinned AA, prefers to wear blonde hair lots of makeup and long black sparkly nails.
Kinks: cnc, fearplay, stalking, forced intox, bimbofication, free use, breeding, monster men, monster women, lesbian tgirls, cockwarming, vampirism, sexual slavery, maledom, tattoos, masks, suits, uniforms, veiny arms
Limits: any bodily fluid beside cum or squirt, blood, gore, pedophillia, necro, anal
Likes: being hyperfeminine, attracting the attention of strong powerful men & tgirls who want to use me, witch house music, slutty outfits, watching makeup tutorials and y2k thrift hauls on YouTube, the color black and pink together, hentai, etc…
Anything else you want to know just ask! I’m friendly and like talking to new ppl (I don’t do sexting tho)
MDNI you will be blocked😡
6 notes
·
View notes
Note
Do you have some kind of art tips or tutorials about how to draw animatronics and humans??
I wanted to draw Puppet and Chica but i dont know where to start....
I am terrible at Animatronics so I can't help you there 😂 But Puppets sketches are the best references to study. I try to make his mask look stiff and his body look fluid. SFM models are good things to study for the Fnaf Animatronics, I've seen some artists recommend those.
4 notes
·
View notes
Text
Book review - Quick and Simple Painting in ProCreate
Quick and Simple Painting in Procreate is a great source of learning for both beginner and experienced artists. A quarter of the book is dedicated to a wealth of beginner-friendly introductions to the functions and tools available in Procreate. It explains how to perform basic tasks such as creating canvases, organizing files in the gallery, using tap gestures to undo and rotate, as well as making perfect lines and circles. Additionally, it covers how to use perspective guides—something I only discovered myself after a year or two of using Procreate—making this a particularly helpful piece of information for beginners. The book also explains the use of filters and image adjustments, including curves, saturation, channels, and liquify. The introduction further provides guidance on creating and editing custom brushes, as well as pinning and sorting them for future use.


Another section focuses on blending modes. Even though I am not as much of a beginner as some who may purchase this book, I still would have found such a resource extremely useful because, even now, I do not fully understand how each blending mode works in detail. The book includes an example showcasing each blending mode, which is consistent with the rest of the sections: they all feature detailed images for those who are more visually inclined, allowing them to progress in a step-by-step manner with labels and annotations.
All this knowledge is then put to use in the following section: the tutorials. This part features eight separate tutorials from different artists, guiding the reader through creating artworks similar to theirs with detailed instructions, step-by-step guidance, annotations, and images. Each artist has their own unique style, using different brushes and providing links to download them, ensuring that readers can best emulate their techniques. Every one of these tutorials showcases how to work with textures to enhance the speed and effect of the artwork.

The first tutorial explains how to create custom brushes and customize the default brush shape, paint a stylized cityscape, simplify complex details, and create depth and atmosphere with values. The second tutorial covers painting with default brushes and the selection tool, dividing a scene into organized and minimal layers, applying stylization to an image, and creating landscapes with reflections on surfaces like water. The third tutorial explores painting in a sketchy, textured style, building up a painting with minimal layers, using selections to create gradients and details, and utilizing adjustment options to refine colors and textures. The fourth tutorial teaches how to adapt an image from a photo reference, create stylized flowers and foliage, use blur effects to create depth of field, and add focus and appeal with a character. The fifth tutorial discusses painting an atmospheric sunset environment, using real-life inspiration to create a magical scene, using the smudge tool, and adding depth through mist, scale, and lighting. The sixth tutorial explains how to create strong line and color thumbnails, set a mood and time of day through color choices, use textured custom brushes for a stylized effect, and paint stylized water inspired by real life. The seventh tutorial provides insights on illustrating a stylized fantasy scene, creating depth in a landscape, using selections to create objects, and painting with a sketchy, fluid approach. Finally, the eighth tutorial teaches how to paint a cozy urban nighttime scene, use block colors to organize objects in a scene, create manual masks for painting and shading, and build up light effects using layer blend modes.

My favorite tutorials from this section are the third one, Furry Friends by Jackie Droujko, the sixth one, On the Beach by Alone Lee, and the final one, Les Bonbons d’Owen by Owen Labbe.
The Furry Friends tutorial was one of the main reasons I purchased this book. I was already familiar with the artist and had been watching Jackie’s videos on YouTube. Her sketchy style appeals to me, and it is something I want to emulate in my own work. Even though sketchiness can sometimes create muddiness, she manages to produce a clear and compelling illustration. The use of texture is a central aspect of her tutorial. Many of the steps in her process involve either using textured brushes or creating texture through various means, such as keeping the initial sketch visible and transparent or adding noise and chromatic aberration later in the process. Jackie also strongly emphasizes the importance of avoiding tunnel vision or hyper-focusing on one section. She urges the reader to spread their attention across different parts of the artwork to maintain motivation and prevent getting stuck. One particularly helpful technique I learned from her tutorial was the use of Gradient Maps to create more interesting color variations. Overall, this tutorial was highly informative, and the artist’s work is both appealing and engaging.


Alone Lee’s tutorial, On The Beach, was the most useful one for me personally due to her stylization and workflow. She encourages the reader to sketch out all their ideas first and then refine them into a composition. She also advises taking one’s own reference photos, as this makes the final illustration more personal and helps the artist better understand what they are drawing. Her explanation of composition is insightful, and the accompanying visual aids make it even more effective. Her working method is something I aim to improve upon, as I already work in a similar way but hope to refine it further. Her use of simple shapes and design is distinctive and plays a key role in her artistic language, which I find to be an interesting approach to illustration. She also utilizes custom brushes to achieve her unique stylization. Additionally, she uses blur in an intriguing way to create reflections and guide focus within the piece. Her entire process is appealing because she demonstrates how to create an interesting, stylized piece in a relatively short amount of time without investing excessive hours into rendering. Her simple use of colors and shapes contributes to this time-efficient aspect of her work. I find that Alone Lee’s illustrations share a visual aesthetic with photography, as they depict people in various everyday scenarios while applying similar compositional principles.


Owen Labbe’s tutorial, Les Bonbons d’Owen, is on a more advanced level compared to the previous tutorials, which makes sense as it is placed at the end of the book. His work has a distinct animator-like quality, with rounded, lively characters and a whimsical feel. A significant portion of this tutorial focuses on color theory, helping the reader understand how to use colors effectively in a scene with numerous different elements. He provides insightful tips on creating texture and implying detail in objects, such as adding wood grain to wooden sections or defining the stone tiles on a rooftop. In addition to color, the tutorial also emphasizes lighting techniques, as the scene is set at nighttime with illuminated shop lights. Owen explains how to create value studies, allowing the reader to grasp how to apply such techniques in their own work. To enhance vibrancy and bring life to a scene, he includes numerous details and encourages the reader to apply their own artistic flair using similar methods. Another key aspect of the tutorial is teaching how to separate a composition into masks to make shading and shadow placement more efficient. His method follows the background-midground-foreground rule, which is something I hope to incorporate into my own workflow. I have been trying to transition into painting without linework, and Owen’s approach aligns with my artistic goals. His insights have inspired me to work towards achieving this technique, and I plan to apply what I have learned in the coming months.

Overall, this book is highly informative. The tutorials are well-paced and offer valuable insight into the workflows of various professionals. For beginners, this book is highly recommended. Some of the terminology may feel daunting at times, though the glossary and index help mitigate this; however, the knowledge gained from this book is incredibly valuable, especially when learned early in one’s artistic journey. I wish this book had been available a few years ago so I could have discovered these techniques earlier in my career, but even now, I find much of the information relevant and beneficial to my workflow. Following each tutorial step-by-step will gradually improve one’s skills. Even just selecting the tutorials that feel most relevant to your own style will still be useful. Completing all the tutorials at a steady pace will likely take a few months if practiced consistently, but doing them intermittently in your free time could take up to a year.
In conclusion, I am very happy with my purchase of this book and would highly recommend it to both beginners and experienced illustrators alike.
0 notes
Text
Famous Hip-Hop Dancers Who Changed the Game!

Hip-hop dance has shaped modern culture, breaking barriers and redefining movement. From its roots in the Bronx to international stages, legendary dancers have left a lasting impact. These pioneers and innovators have transformed hip-hop dance into an art form recognized worldwide. Let's dive into some of the most influential hip-hop dancers who have changed the game forever.
List of Famous Hip-Hop Dancers
1. Michael Jackson – The King of Pop with Hip-Hop Roots
While Michael Jackson wasn’t strictly a hip-hop dancer, his influence on the genre is undeniable. His famous moonwalk and intricate footwork inspired generations of hip-hop dancers. Moves like the robot and popping were key elements of his performances, bridging the gap between hip-hop and mainstream entertainment.
2. Les Twins – The Dynamic Duo of Urban Dance
Laurent and Larry Bourgeois, better known as Les Twins, are French dancers renowned for their seamless freestyle, musicality, and storytelling through dance. Their rise to fame came after winning World of Dance, and they’ve since performed with global superstars like Beyoncé. Their style blends hip-hop, popping, and contemporary dance, making them a force in the industry.
3. Parris Goebel – Choreography Genius
Parris Goebel is a New Zealand-born dancer and choreographer who has revolutionized hip-hop dance with her "Polyswagg" style—a mix of powerful hip-hop movements with feminine energy. She has worked with Rihanna, Janet Jackson, and Justin Bieber, choreographing the viral "Sorry" music video, which showcased a fresh take on hip-hop choreography.
4. MC Hammer – The Man Behind the "Hammer Dance"
MC Hammer not only dominated the music scene in the late ‘80s and early ‘90s but also introduced the world to high-energy hip-hop dance moves. His signature "Hammer Dance", performed in baggy pants, became a cultural phenomenon, proving that hip-hop dance could thrive in the mainstream entertainment industry.
5. Jabbawockeez – Masters of Synchronization
The Jabbawockeez made history as the winners of America’s Best Dance Crew (ABDC) Season 1. Known for their white masks and unmatched synchronization, they brought hip-hop dance to a broader audience. Their performances highlight isolation techniques, musicality, and storytelling, making them one of the most recognizable dance crews in the world.
6. Fik-Shun – Freestyle Master
Dushaunt "Fik-Shun" Stegall took the dance world by storm when he won So You Think You Can Dance (SYTYCD) Season 10. His ability to mix popping, waving, and freestyle hip-hop into mesmerizing routines has earned him international recognition. His performances highlight the beauty of spontaneous movement and pure self-expression.
7. Stephen "tWitch" Boss – Hip-Hop’s Versatile Star
Stephen "tWitch" Boss gained popularity on SYTYCD before becoming a beloved resident DJ on The Ellen DeGeneres Show. His background in hip-hop and popping allowed him to fuse dance styles effortlessly, making him an inspiration for dancers worldwide. His contributions to dance extended beyond performances, mentoring upcoming talents in the hip-hop community.
8. Brian Puspos – The Smooth Choreographer
Brian Puspos made a name for himself as a choreographer and member of SoReal Cru, who competed on America’s Best Dance Crew. His signature smooth movements and storytelling approach to dance have led him to choreograph for top artists while also building a massive fanbase through YouTube tutorials and workshops.
9. Ian Eastwood – Hip-Hop’s New-Gen Choreographer
Ian Eastwood’s fluid style and ability to connect dance with emotions make him one of the most sought-after hip-hop choreographers today. He gained recognition through Mos Wanted Crew and has choreographed for top stars, blending hip-hop with contemporary dance for a fresh, modern look.
10. Jennifer Lopez – From Hip-Hop Roots to Superstar Status
Jennifer Lopez (J.Lo) started her career as a dancer, performing as a Fly Girl on In Living Color. Her background in hip-hop and street dance shaped her stage performances and music videos, proving that dance could be a powerful tool in building a global brand.
The Evolution of Hip-Hop Dance
Hip-hop dance originated in the 1970s Bronx with styles like breaking, locking, and popping. Over the years, it has absorbed influences from other dance genres, evolving into the diverse and expressive art form we see today. With platforms like YouTube, TikTok, and dance competitions, hip-hop dance has become more accessible, inspiring dancers worldwide.
Impact on Global Culture
Hip-hop dance has shaped everything from music videos and fashion to movies and social media trends. Dancers now use Instagram, TikTok, and YouTube to showcase their moves, turning their passion into full-time careers. The rise of online dance classes and global competitions proves that hip-hop dance is here to stay.
FAQs
1. Who is considered the most influential hip-hop dancer?
Michael Jackson, though not strictly a hip-hop dancer, heavily influenced the genre. Other major influencers include Les Twins, Parris Goebel, and the Jabbawockeez.
2. What are the key styles of hip-hop dance?
The main styles include breaking, locking, popping, krumping, and freestyle hip-hop. Each has its own unique movements and origins.
3. How has social media impacted hip-hop dance?
Social media platforms like TikTok and YouTube have given dancers a global stage, helping them gain recognition, book gigs, and teach workshops worldwide.
4. Are there competitions for hip-hop dance?
Yes! Popular competitions include World of Dance, Red Bull BC One, Hip Hop International, and NBC’s World of Dance.
5. Can anyone learn hip-hop dance?
Absolutely! Hip-hop is for everyone. With dedication, practice, and the right mindset, anyone can master hip-hop dance moves.
1 note
·
View note
Text
Opening Scene - Dust
Recently I have been working on creating the dust effect for my opening scene, when the VHS tape is blown on to reveal the title. Although in my schedule it specified creating further animation tests that implicitly were designed to be of the characters, I thought that creating some of the extra asset tests before christmas would allow me more time and focus to hone in on the characters before the deadline, so I opted to do the dust instead. Here was my roadmap.
Dust
I began by researching various different ways in which to animate a dust cloud. A lot of what I came across was pertaining to dust within action scenes, such as when a character hits the ground. However, this video by Youtuber Stylus Rumble was very helpful in displaying the various quick and slow ways in which dust can be animated, and I chose to follow one of her tutorials.


I began by retrieving a screenshot from my animatic with the tape and hands in place, so I could create a rough cycle as to how I would like the dust to move. This is of course very fast, but I was going to change this.
After this, I decided to use the 'popcorn dust' style of animating, something attributed commonly to old Warner Brothers and Disney cartoons, since I believed it could still look fluid and not too cartoony.
From here, I don't have much of a process to be honest, it was mainly just drawing and animating in a way in which I saw fit. I ended up with a dust cloud, animated in a mixture of 2s and 1s, revealing the title at the end. I also added an additional type of dust animation to the scene, the ones where the dust radiates outwards, just for some extra effect.

Upon a closer inspection, I decided I really wasn't a fan of how the dust swirled at the end, and opted to change it for a dissipating outwards effect. I also made the title wiggle a bit for an extra oomph.

To complete this test, I decided to shade the dust, keeping it simple with cell shading. In the future I intend to add a shading mask to this so the bottom is darker, but that will come in due time.

As it stands I am actually quite impressed with myself having completed this test, and I feel as if the assets are coming together nicely.
0 notes
Video
youtube
🌺 **Art Class with Zoe: Pomegranates in Granada – Pen & Watercolour Tutorial! 🎨**
Hey art lovers! Join me in my latest tutorial where we'll capture the beauty of Granada's pomegranates using pen and watercolour. This session is perfect for both beginners and experienced artists looking to explore a new technique or find inspiration in Granada's charm.
📋 **Materials Needed:** - Watercolour paper - Waterproof ink pen (0.3 to 0.8, preferably 0.3 to 0.5) - Watercolour paint: Cerulean Blue, Cadmium Red or Alizarin, Green Mix (light, middle, and dark green) - Optional: Masking tape or washi tape, Masking fluid
I've already sketched and inked the scene, so we're ready to dive into the fun part – painting! Whether you're painting along or just watching for inspiration, I hope you enjoy this creative journey.
📣 **Don't forget to like, follow, and reblog!** If you enjoy this tutorial, please give it a thumbs up, follow my blog for more art lessons, and share it with your friends. Your support means the world and helps me create more content for you. Happy painting! 🌟✨
#ArtClassWithZoe #WatercolourTutorial #PenAndInk #GranadaArt #PomegranatesInWatercolour #ArtTutorial #CreativeJourney #ArtInspiration #LearnToPaint
0 notes
Text
Travel Like a Pro: 5 Unusual Hacks You've Never Heard Of!
youtube
5 Travel Hacks You Didn’t Know
Ever felt like every travel blog and social media post offers the same old advice? Here you will discover five game-changing hacks to revolutionize your adventures, making them smoother, more enjoyable, and budget-friendly than ever before.
Uncover Hidden Treasures at Your Local Library
Your humble local library is a goldmine of untapped travel resources, such as guides, language phrasebooks, and even discounted museum passes. Dive into their website or chat with a knowledgeable librarian to unearth exciting travel gems awaiting discovery.
Meet Your New Travel BFF – The Multifunctional Buff
Introducing the versatile buff – a versatile piece of fabric that magically transforms into a scarf, headband, face mask, or even a makeshift towel. Lightweight, compact, and bursting with color and personality, it's the perfect way to save precious luggage space while adding flair to your travel wardrobe.
Dive into Local Culture with Expert-Led Walking Tours
Swap guidebooks for free, immersive walking tours led by passionate local experts. Unearth hidden gems, historical sites, and captivating stories you'd never stumble upon otherwise. Show your appreciation by tipping your guide at the end, and feel good about supporting local businesses.
Skyrocket Your Airline Miles Experience with Unforgettable Upgrades
Instead of saving your hard-earned miles for free flights, use them to upgrade your seat. Experience the unrivaled luxury of business class without the eye-watering price tag.
Embrace Basic Car Maintenance for Stress-Free Road Trip Adventures
Before your epic road trip, equip yourself with essential car knowledge. Learn to check your tire pressure, refill fluids, and tackle a flat tire like a pro. Countless online tutorials and resources are at your fingertips, transforming you into a confident and savvy road warrior.
You may not be able to use all of these travel tips, but at the very least they will come in handy on your next trip. I have a travel video playlist where I publish tiny travel hacks like these. Please visit the link for more.
0 notes
Text
I'm really really scared of coming across as ungrateful to anyone who has answered this for me already because I know there is lots of juicy information there, but just to better articulate my problem better, you have to understand I have never, ever used makeup, and neither did anyone in my family growing up.
I didn't read make-up magazines, I didn't watch make-up tutorials, I totally bypassed this cultural expectation that I should find out anything at all about makeup.
My knowledge is at like... 0.
Today I found out that eyeliner and eyeshadow aren't the same thing. That's the level we're at here.
I think it's like, I'm into watercolour painting. Sometimes people who are intro watercolour painting debate the difference between hot and cold pressed paper and different types of pans and the benefits of masking tape vs masking fluid and the place of gouache or whatever.
But if I were to come across someone who has never ever encountered watercolour paint, I wouldn't bring any that into it. Half those words would be nonsense to them.
So I'd say, ok get one of these:

Each of those blocks is dried, solid paint. To paint with it, get a wet paintbrush and swirl it around in circles on the paint block until the paint on the paintbrush is opaque. Then you can get some paper and paint with it. Thicker paper is probably better, but you don't need to worry. And then I might touch on the idea that you can mix those colours together to make new colours.
I need the equivalent of that, but for makeup.
Absolutely every make-up tutorial I can find just reads to me like this xkcd comic:

Ok tumblr you've gotta help me.
Let's say I know absolutely nothing about make-up at all. Zip, zilch. I am a 30-something year old woman who somehow managed to make it this far without owning or using any makeup.
And that I want to wear some for cosplay purposes which will at least vaguely help to make me, a round baby-faced woman, look more masculine.
What should I buy? Preferably the minimum and cheapest as possible?
And like... just how? Like... how?
115 notes
·
View notes
Text
Project Development
After receiving feedback from Lesley last week, I decided to start fresh, and I checked out some tutorials on YouTube to add the elements of lines to the animation. I've explored how to use the camera tool in After Effects to smoothly transit from one scene to another.
I've added a grainy film texture using fractal noise in the effects panel and adjusted the brightness and contrast so the film texture is not too much. But because I'm aiming for a minimalist look, I don't know if this texture is necessary, so I will keep this until I finish the animation and see if it disturbs the other elements.
youtube


I've brought back my illustrations and added lines to connect them with my type. This works a lot better now that the style and illustration are connected. I had experience working with trim paths on After Effects before, so I tried to make the lines fluid by setting the trim path's end time. Having it at 0 at the start keyframe and 100 at the end.
I've also made Dame Whina Cooper blink using the liquify and masking tool.
youtube

This is my favourite scene where I animated the text stroke and the lines to help the text disappear. This technique worked well in adding movement and making the text dynamic. I did this by playing with the trim path feature.
I'm happy with how this is turning out. The thin lines leading to the text are fluid and elegant. It also guides the viewers on what and where to read. They also work well with the illustrations. I'm going to keep exploring the line elements in my animation.
0 notes
Text
Masking Fluid 101

Masking fluid, also called masking liquid or liquid masking film, is a thick liquid that is applied to prevent paint from covering certain areas on a painting - you can keep small spots, fine lines, delicate patterns uncovered, even larger parts if you wish. Masking fluid works well with light, water-soluble paints like watercolors or ink. I have collected my top tips on how to use it - read on, or scroll to the bottom for a video version!
#1 PROTECT YOUR BRUSH

If you skip this step, you can quickly end up doing irreversible damage. Choose a brush that you will be using exclusively for applying masking fluid and nothing else.

Before dipping your brush in the fluid, put a little bit of soap onto the brush. Then you can dip it in the masking fluid, apply the fluid on your painting surface, and when you are done, go and clean your brush immediately. Thanks to the soap, you will be able to wash the fluid off of your brush easily. Don't put this step off - the fluid on your painting needs some time to dry anyway.
#2 HOW MUCH MASKING FLUID DO YOU NEED?

Be careful not to apply too little or too much fluid, especially if it's over a bigger patch. If you do a layer that is too light and thin, at the very least it will be difficult to remove. If you apply the fluid too thickly: it might tear some of the paper off when you remove it. When applying masking fluid, try to create an even but not too heavy layer.
#3 DRYING TIME If you have finished applying the masking fluid, now it's time to wait. Don't be impatient, let the fluid dry completely before you go over it with paint. It may seem like a good idea to try speeding up the drying with a blow dryer. I've tested it so I could deliver some first-hand information. The first thing that happened: as soon as the air from the blow dryer hit the liquid, it overflowed and the shape that I had created was ruined. I also have a suspicion that hot air might bake the masking fluid into the paper, making it stick too strongly, and cause problems when you try to remove it.

It's true that blow drying will help the masking fluid dry somewhat quicker, but I do not think it's worth the risk of damaging your painting. The safest way is just to wait patiently until the liquid solidifies. Be careful and avoid touching it before time, because, depending on how far along it is in the drying process, it will either smear or stick to your finger and peel off the paper completely. For the sake of the test, I checked the patch that I left to dry on its own every five minutes.

After 22 minutes, it was solid enough to be removed without a problem. Of course it will depend on the size of the area that you cover with masking fluid, but I think it's safe to say that you should calculate with a drying time of roughly 20 to 30 minutes.

When the masking fluid has dried, it's finally time for the paint! Then comes some more waiting until your paint dries. At this stage, you can use a blow dryer if you want to save some time, but I do recommend setting it at a low temperature. Make sure that the paint has completely dried, before you proceed to
#4 REMOVING THE MASKING FLUID

This is the fun part. Removing the dry mask is easy. You can simply use your fingers or fingernails, just make sure that they are clean!
Keep in mind that you might rub some of the pigments from the paint onto the parts that you wanted to keep unpainted, so be careful.
#5 FINISHING TOUCHES It's possible that you will not achieve the perfect outlines with using masking fluid alone. If that's the case, just grab a brush and perfect the edges where it's necessary.

BONUS
Here is the tutorial in video format if you prefer that:
youtube
#masking fluid#how to use masking fluid#masking fluid tutorial#masking liquid#what is masking fluid#mask#maskingliquid#painting hacks#painting#how to get better at painting#get better at painting#painting tips and tricks#masking fluid tips#dorimuranyi
6 notes
·
View notes
Video
youtube
A quick demo on how to apply masking fluid. This is the technique I’ve found ruins the fewest brushes and lifts cleanly, without tearing paper.
2 notes
·
View notes