#seeker droid mission spoilers
Text
Rain Plays SWTOR: Seeker Droid!
Canon Viri tackled the Dread Seeds/Seeker Droid quests. Macrobinoculars is still not doable solo, but after seeing some YouTube videos of the Seeker Droid quest endings online, I thought I’d go for it. It’s about the Dread Masters and I’m trying to do as much of their content alone as I can.
Seeker Droid story spoilers
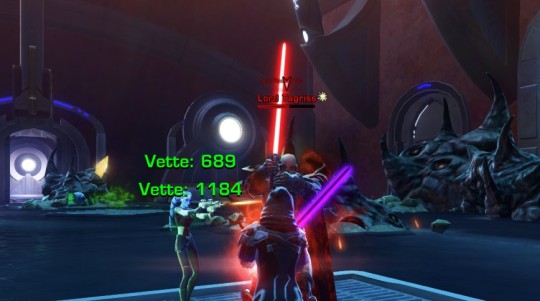
In terms of story, I thought it was a good one. At the end, of course Viri took the power for herself. She's the Wrath. Or she was, at this point in the game. And she sure as hell wasn't going to leave it for Acina to loot or take credit for - which is exactly what she would have done.
I feel like the ending was totally in character for Viri. She was one step ahead of Acina, even though she didn't let on. In canon, once she became the Wrath she knew damned well that Vitiate was gone - it's canon because the Hands sent her an email about it after the class story. So she also knew that anyone telling her "the Emperor told me to do this" was full of shit. Acina wanted her to do all the gruntwork and then take all the credit for reclaiming the Dread Seeds. After seeing the Arcanum that Acina hadn't told her or anyone else about, that contained Patient Zero and all sorts of scary stuff - even more so. She would play along with Acina because the Dread Seeds were a Very Bad Thing, but she was certainly not going to fork over the Dread Masters' tech to her.

Gameplay: It's bugged at the end. The final heroic on Ilum was decidedly miserable, which is a shame because the rest of the quest line was fun.
Since the Dread Seeds happened during Viri's years as the Wrath, she brought along Jaesa to at least try to keep some continuity. Before KOTFE, Jaesa and Vette were her seconds all the time, and she would have chosen the former for anything Scary Force Related. Vette jumped in on the Ilum heroic because unfortunately Jaesa was useless there, despite being Level 50. Of course, she was standing there wearing Lana's belt with gold eyes, so she still didn't look 100% like she was from the correct part of her timeline, but I did what I could.
Overall, once I got the hang of it, using the seeker droid was pretty simple. When I was on Corellia I nearly got ninjaed - some asshole Jedi Knight was literally standing behind me and watching what I did with my seeker droid, then putting his down in the direction it was saying. As soon as I noticed it I just went over to Hoth to search for a different Seed. Sorry. Not helping you, Jedi.
On Alderaan and Balmorra Viri found the Seeds with only two or three tries with the seeker droid, which is...well, I'm not complaining. When I got to Voss, the last one Viri had to collect, I finally checked her mail and there was a buff from GSI in an email to make the search easier. Oops. Could have used that on Corellia.
Somewhere along the way she somehow lost the seeker droid. I logged out and logged back in, and it was back in her mission tools. I also got an email with it. Okay. Glad to see everything's not bugged.
Going through the Arcanum wasn't the easiest, but I'm really proud I was able to do it. I'm horrible at jumps. That's an understatement. Viri did die a few times as I figured out the first jump, and I got stuck behind some shelves once, but I'm really pleased with myself, and proud of Viri, that she was able to make it through. Rocket boost definitely helped.
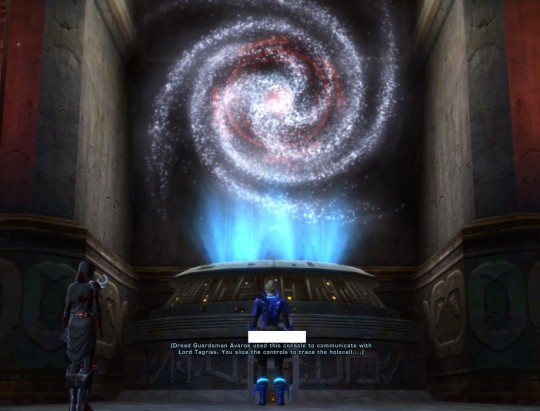
The search took her to one of her favorite places, the ancient side of Belsavis. Better yet, she got to explore another Rakatan crypt. And there was a Rakatan transporter. Pure joy. The boss at the end was hilarious. You don't fight him; you just kill all his adds and he eventually gets zapped by his own artifacts and dies. Score.
And then we went to Ilum.
I don't know if I even want to write a guide for this because the quest is bugged. Very, very bugged. Hellish. It makes me feel better that the difficulties did seem to come largely from the fact that it was bugged and not my own inability to make it through. Once the bugs were sorted out, Viri didn't have much more difficulty with it than she'd had soloing, say, veteran Athiss or Red Reaper.
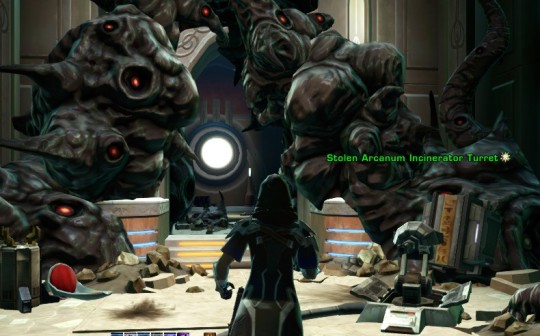
Viri spent three hours trying to get through a single room: a hallway where you need to place the power cells in the turret before the hordes of corrupted soldiers swarm in. The turrets refused to fuel past 87% over and over again. I called in different companions, all influence level 50. Vette, Jaesa, Lana and Shae all had turns. I tried them on tank; I tried them on heal. Worse: when Viri died I had the choice of a) reviving her in the room where ALL the cages were open so she was instantly mobbed; b) respawning her just outside the temple and resetting all the mobs in the entire mission. I was in tears of frustration.
After taking a shower, getting lunch and taking a break, I looked for more information online. Turns out it's a bug that can be alleviated by resetting the quest. I did that, and the next time I went in, I was able to solve the room in two or three tries.
On to the Sithspawn, which was an entirely different level of hell. Viri didn't die here, but neither did the Sithspawn. Again, it was bugged. You're supposed to be able to lure the beast into standing on barrels that explode, but no matter what I did, it it didn't work. I looked online and sure enough, there were reports of this bug, too.
I put Vette on passive and went out into the hallway to take a break when the tentacles reappeared. I have no idea how or why, but after that the barrels worked, and Viri and Vette made short work of the monster.
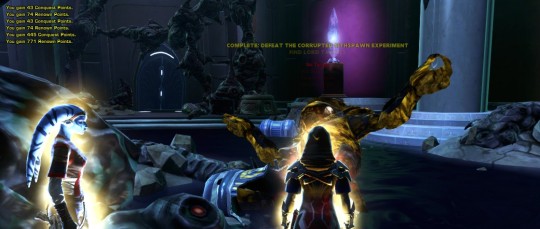
After that, the final boss was honestly a piece of cake. I had trouble finding the crystals to click for a moment, but once I did, easy peasy.
Acina was not happy was Viri. Eh. Don’t underestimate the Wrath. She still got some cute armor.
I don't think I'd be in a hurry to go back to this unless they fixed the bugs. But it's done, and I can say I did it.

#swtor#rain plays swtor#swtor spoilers#seeker droid mission#swtor seeker droid mission#seeker droid spoilers#seeker droid mission spoilers#Viridana Dragoi#Sith Warrior#Viri and Vette
17 notes
·
View notes
Text
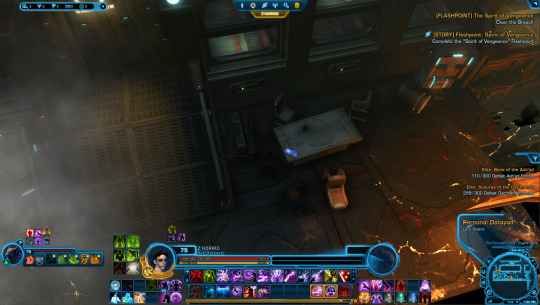
Spirit of Vengeance Walkthrough
Welcome to my (hot-mess) attempt at a walkthrough of the Spirit of Vengeance flashpoint.
This walkthrough will mostly pertain to Story Mode difficulty, as I have yet to run Veteran or Master mode (hoping to get some guildmates to run it with me once they’ve gotten through the story content), but my expectation is that they’re mostly just harder mobs and no kolto stations in Master.
Obviously, there will be spoilers ahead for the 6.2 flashpoint.
If you do Solo-Story mode (the Cinematic Story version where you have the default companion, thankfully now set at influence level 25 instead of 1), you’ll notice that this default companion is ranged. That’s probably a hint as to the type of companion you might want to bring with you on the other difficulty levels. It seems that, as the name implies, you cannot bring group members into solo-story mode, so hopefully in that mode, you won’t encounter too many bugs or issues. Story mode has been stealth patched some to not be too terrible, but lots of players are still having difficulty and running into glitches.
One of the biggest themes of this flashpoint is that there are a lot of mobs. It’s been compared to an uprising, but there are bigger breaks between mobs. Though it is really easy to get the 75, 150, and 300 kills achievements for Varad, Dar’manda, and Ash’ad.
You start out on the Champion’s Glory, and when you run down the hallway, you run right into a Varad mob. You can stick along the right-hand-side wall to not immediately trigger them if you want. In Varad mobs, Bloodsworn are healers, Beskaryc are standard silvers, Hulks are standard golds with a decently nasty knockback, and Hounds are their puppies (you’ve seen them before in Mandalorian Raiders). Nothing much to watch out for with them. There’s one Bloodsworn in the first mob in the room who likes to glitch and be stuck up on a pillar where you can’t target him and can only reach him with AOEs.

Before you leave the first room, there is a Relic for the Relic Hunter achievements here. On one of the tables in the north east corner, you’ll find the Heirloom Varad Warstaff. However, it may be glitchy, and it may not show up. I took my Jedi Knight and my Trooper into the room four times each and it never showed up, but my Bounty Hunter got it on the first try. (The Relics will not be visible in my screenshots since I’ve already collected them, but I’d like to give an idea of location).

Continuing down the hallway, you’ll encounter some more mobs, and you’ll see your first kolto station. You’ll probably use these in at least one of the boss fights.

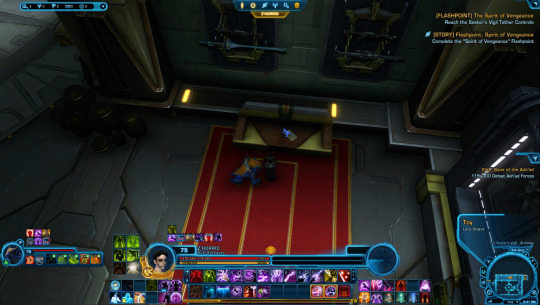
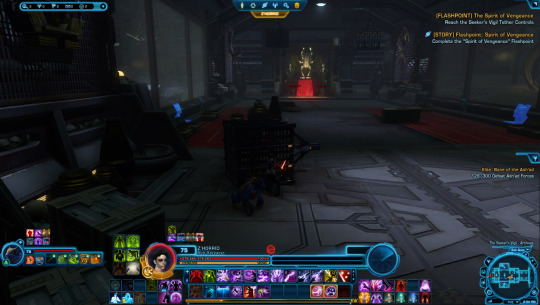
After fighting a biggish mob in the final room, you’ll see a big blue console to disable the first boarding tether. Before clicking it, make note of the three kolto stations around the room, since you may end up needing at least one of them. Disabling the tether summons the first boss, Gorga Brak. He has almost 3 million health, which is maybe a little absurd, but he’s not really thaaaaaaat bad, you’re just in for a long, boring fight. He does Full Auto, Flame Sweep, and Fire Bomb. Remember when I said you might want a ranged companion? Don’t quote me on this, but I think he’s less likely to put the Fire Bomb on a ranged companion. Also I thought for a while that Fire Bomb couldn’t be interrupted, but then I was able to interrupt one of them, so I’m not sure anymore. Maybe you can only interrupt it if it’s targeting you? You can interrupt Flame Sweet and Full Auto, both of which are kind of annoying. Anyway, depending on your dps output, [Spongebob Narrator voice] Several Minutes Later, you will kill Gorga Brak. On to the next ship by clicking a panel by one of the boarding pods in the next room.
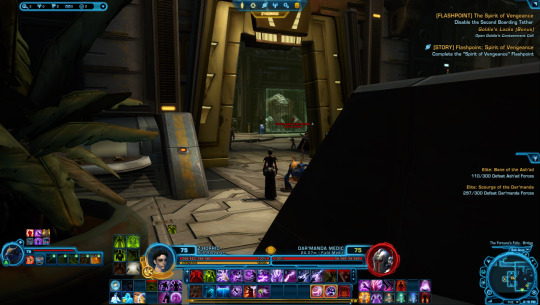
Now you’re on the Dar’manda ship, the Fortune’s Folly, and everything is on fire. Fire bad. As soon as you move, a mob runs in. At least the Dar’manda have the decency for the healers to be labeled “medics.” Commit war crimes and kill the medics first. Next on your kill list should be specialists because they throw some grenades and Fire Bombs and shit that are just annoying.
In the room with the big holes in the floor, just stick to the right-hand-side in order to do the least jumping and potential falling. Turn off sprint if you’re worried. Your companion may just leap to their death because companions Be Like That sometimes, but there’s a platform at the end with a med droid where you can re-summon them. There is a lore item on the south side of the room before you go across, a little datapad.
After crossing the Gaps of Doom, you’ll start seeing yellow NPC nametags for War Profiteers and Dancers. Try not to kill any of them, because if you manage not to, you’ll get an achievement (alternatively, try to kill all of them, maybe there’s an achievement for killing all of the innocent [read, “innocent”] bystanders on the Dar’manda ship). You’ll have to be carefully with AOEs and DOTs, because my pyrotech’s scorch jumped to a LOT of yellows…
The next room has a lot of enemies and a lot of yellows, so depending on how much you want the Mercy achievement, be careful. On your way out of the room, be sure to grab the Flask of Aged Kri’gee from the floor beside one of the benches by the door on the east side for the Dar’manda Relic.
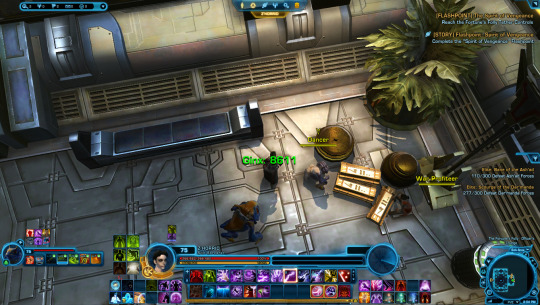
When you get to the Officer’s Quarters, you can pick up the Bonus Mission. If you go into the little side rooms, on the south, there are some biggish mobs there, but there are also two blue crates to click by some of the beds which have keys in them, which gives you the bonus mission Goldie’s Locks. This is for the bonus mission to fight Goldie, a Rancor the Dar’manda are transporting. You might as well pick it up, because even if you don’t pick up the keys, getting too close to Goldie’s cage starts the fight with her, and she’ll be able to kill you but you won’t be able to damage her (features, amiright?).


The room with the second boarding tether has a largish mob and Goldie. Depending on your class, your companion, and your armor rating, you may end up needing one of the kolto stations in the room, but if you do, be very careful that you don’t run close to Goldie’s cage, or you will engage the fight with her, which you’ll have to /stuck out of most likely because her cage door will still be closed and you won’t be able to open it to fight her, but she’ll still be able to kill the shit out of you.
The fight with Goldie is relatively simple. She’s like most of the other Rancor fights--think of the Rancor in the Battle of Rishi or Karagga’s Palace if you’re familiar with either of those. She does an alley attack that you can step out of, but a conal attack that whoever she is targeting has to just eat because it can’t be interrupted, so just point it away from the group (it’s a knockback, but it’s not awful. Her slam isn’t as bad as Bonethrasher’s slam. If you’re on a more mobile dps class, she’ll be a piece of cake. If you have to stand still to do your dps, you may get a little annoyed by her, but it’s not too bad (sorry, snipers and slingers).
There’s also a datapad with lore in the room with Goldie:

On to your next boss fight! Bask Sunn got stealth-nerfed some, but is still a little glitchy (can apparently punch you off the ship entirely according to one report?). Most people’s tactic is to kill his adds first, then take him out. I’ll say though, on my pyrotech, I just put a scorch on each of the four adds, then kicked his ass in about seven seconds, then took out the adds (and on my lightning sorc, I also just focused the boss, doing some AOE damage to the adds, but mostly just burning Bask). So, it’s really up to you. The adds don’t do a whole lot of damage, but they’re annoying, and while they did lower the damage Bask Sunn can do, he can still knock your health down a lot, so I found it easier to just Burn Him (literally, in the case of my PT). My PT was being healed by a level 1 influence Shae Vizla and my sorc was being healed by a level 50 influence Ginx, and both had a great time with just burning the boss, but your mileage may vary on this fight.
For a good time, there are a ton of places you can stand on the bridge and be in the Skybox as I like to call it and just look out into space. When you’re done goofing off, click the panel to go to the Ash’ad ship.
Welcome to the Seeker’s Vigil. In the Ash’ad mobs that greet you, Lorekeepers are healers, and Seekers have an attack called “Surge” with a box that looks like it ought to be a knockback, but either I killed them too quick or it doesn’t actually do shit, so those are your priority targets. Maybe on Veteran and Master step out of it, just in case.
In the “Archives” level of the Seeker’s Vigil, straight west from the door you come out of, there’s a bench with a little toy tauntaun Lore Item on it.
There’s some mobs in the middle of the room that aren’t too bad. Then, if you have a self-yeet to enemy target (Warrior/Knight Force Charge/Force Leap; Powertech/Vanguard Jet Charge/Storm; Assassin/Shadow Phantom Stride/Shadow Stride, but those may be unreliable just because they sometimes like to mess with you when you’re changing elevation; Operative/Scoundrel Holotraverse/Trick Move, similarly may not work since you’ll be changing elevation) you can go upstairs to the Lorekeepers. You can’t get around the debris on the ramp to get up there, you have to yeet up to them (or if you’re in a group and someone else can yeet to them, and then you’ve got a Yeet to Friend, or someone’s got a yoink, etc.), but there’s some cool stuff to look at up there. There isn’t anything to collect that I could find, but just neat stuff to look at.
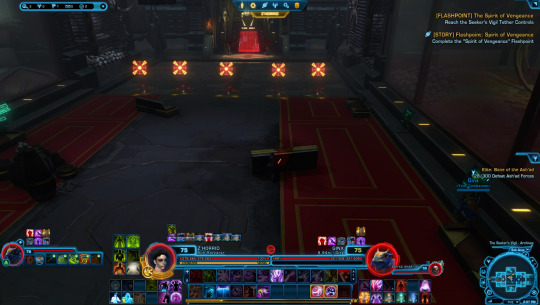
Next up is The Trap. Don’t run willy nilly into this room. There are lore objects on either side of the room, but there are also two Annoying Snipers on the other end of the room who will engage with you as soon as you run in. You can’t hurt them and you can’t yeet to them, so don’t bother. There are plenty of things you can take cover behind, so run over to the lore objects and click them while you’re not being sniped. The snipe interrupts the “cast” on collecting the lore, so time your click carefully, or prepare to be annoyed. Then, run into the trap, because like I said, you can’t fight the snipers. I’ve placed markers of where the floor will fall. Depending on your graphics settings, it’s pretty obvious when the floor is going to fall out from under you, but just in case. It’s also approximately the edge of where the snipers would be in range of most attacks if your attacks would actually work.
If the fall hurts you too much, you can run up the ramp and hide behind some shipping crates for a bit to get out of range of the tentacles for a moment.

The Ash’ad Relic, the Ajak Genealogical Datacron, is in the boss room of this ship. It’s on a crate behind the boss (south east end of the boss, behind the tether controls). It’s pretty easy to miss, so don’t forget to grab it before you leave. You can run over and grab it before engaging the boss if you keep to the edge of the room.

Troya Ajak is a pretty easy fight. Songbird’s Volley knocks you back when it goes off. Pick Off (which I definitely read as “fuck off” while it was casting) blows you up a little when it goes off. I don’t even know if either of these are interruptable, because this was a pretty straightforward “get the boss’s HP to zero before they get your HP to zero” fight.
All righty. Almost done! Now you get some mobs that are mixed groups of all the clans you’ve fought so far. Remember the healers are: Varad Bloodsworn, Dar’manda Medics, and Ash’ad Lorekeepers, so if you see them, they need to go first. The ones that do special ouchie attacks are Dar’manda Specialists and Ash’ad Sharpshooters (honestly the Varad suck and we’ve known this since Mandalorian Raiders; you tried, gold star for effort). The rest of them, just kill them when you can. On to the boss!
Heta Kol will come down and fight you for a little while, then she’ll get buttmad and fly off while some adds come to the door. If you’re ranged, go ahead and stay on the platform to take them out. If you’re melee try to draw them into the room. Some have said that what resets her health when she comes back down is you leaving the room to fight the adds (but the adds like to run back into the hallway, and if you don’t have ranged attacks or a taunt, you might have to chase them; now might be a good time for your saber throws, your grenades, whatever your longest-range attack is).
The second wave of attacks does bring down Sharpshooters (aka snipers) on the platform, so if you’re focusing on the hallway adds and getting confused as to why your HP is still dropping, try turning around, because there may still be someone sniping you. Her move “Lockdown” can be interrupted, and if you don’t interrupt it, you’ll be dropping red circles from it that you want to stay out of. She throws grenades at someone in the last phase, and it seems to be whoever is closest to her (hello, ranged companion!), and it doesn’t seem like you can cleanse them off (or maybe you can, but then you need to, you know, get out of the circle it drops, and companions are too dumb to do that).
Overall, not a terrible flashpoint, just a little on the long side, and a lot to take in. I’m still excited to try it on the harder difficulty modes, and to find all of the hidden achievements, which there seem to be several spots for.
#swtor 6.2#swtor 6.2 spoilers#spirit of vengeance#spirit of vengeance spoilers#spirit of vengeance walkthrough#swtor#november plays swtor
20 notes
·
View notes
Last Seen Blogs