#stim toy tutorial
Text
Squishy dice tutorial [text only,for now]
What you'll need:
The dice mold(you can find the 3d model to print here)
A liquid silicone kit
Something to dye your silicone with. Preferably pigment powder,but liquid silicone dyes or watercolor paints in a tube will work aswell. Just don't add too much liquid colorants,or you'll disrupt the curing process!!! that's very very important!
A mixing stick to stir up the silicone
Two plastic cups(preferably measuring cups. Remember,only use plastic for this one because silicone will stick to silicone!!)
A cup of water
Gloves,if you need to use them for crafts
A flat surface to work on
Some extra silicone made in a constrasting color,to fill in the dice's numbers with
Some electrical wiring tape to cover the mold with(just incase,so you can avoid silicone leaks)
Steps:
Assemble the mold parts together.
Put tape around the edges of the mold. Cover up any spots that don't fit as tightly
Pour equal amounts of silicone into the two separate cups respectively,part a and part b
Combine the two parts into one cup,scraping the sides with the stiring stick to get all of uncured liquid silicone out into just that one cup
Add materials that you're using to color the silicone
Take your mixing stick,and stir up the mixture. You will have to do this for about 6 or more minutes,depending on the type of silicone kit you use. Some cure faster than others,so just watch out!
Carefully pour the mixture into the mold,do this slowly and try to pour it slightly high above the mold so it comes out thinner(it's much less messy that way,you'll avoid over filling the mold hopefully this way)
Don't touch the mold for the estimated curing time,just leave it be after that previous part.
Try to leave it alone for a few extra hours just to be safe,then poke the silicone gently with your finger. If it's hardened to the touch and won't stick to your finger at all,then congrats your squishy should be done!
Very carefully unmold your squishy. Test it some more to make sure it's fully cured. Expose it to the air for a bit,then it's time to make your extra silicone for the numbers!
Mix up equal amounts of a tiny bit of silicon,then add your pigment or liquid dye.
Mix this up extra well,then carefully use a toothpick or paint brush to add on the numbers in silicone.
Let each side cure first before making another batch to color the other numbers,so that you can rest the unpainted sides down on the table to let your extra silicone cure.
Once everything is done curing,carefully give your stress ball a test squeeze.
Congrats! You've just made a very cool dice stim toy.
#text#long post#stim toy tutorial#crafting tutorials#diy stim toys#autismposting#mine#op#original post
3 notes
·
View notes
Text
youtube
#crochet#crochet pattern#free crochet pattern#crocheting#free patterns#Fidget#stim toys#crochet tutorial#Youtube
1 note
·
View note
Text
After running my handmade mandala shop for over 4+ years, here are some popular questions I get asked:
Are these really handmade, or do you import them in from somewhere? - Yes, these are handmade by myself. Every order that comes in is handcrafted as you see in the video above.
If you don't have a style I want, can I request my own personalization? - Absolutely! I love custom requests, and can discuss with you about creating the perfect mandala. If I don't have the beads, I will go out and get it. :)
Where are you located? Do you ship to Italy? - I am in Edmonton, AB Canada, and just recently I now offer worldwide shipping, which includes Italy.
I want to try making it! Can I ask you how it's made? - Of course! No gate-keeping here. I believe the process is as soothing and enjoyable as the end product itself. I sell DIY kits with prepared pieces. All you have to do is assemble it. I also have many tutorials on my TikTok and Instagram accounts. Please feel free to ask me any questions as well.
What are some ways to use this mandala thingamajig? - Some ways I use mine, as well as how customers use theirs include: fashionable bracelet, hair bun basket, Christmas tree ornament, sensory fidget toy, unique desk decor, meditation tool, fruit holder, mantle display, air plant holder, gift idea, and more!
Shop my 3D wire mandala stims, bracelets, and Orbi Loops™ from my Etsy shop! Use this share & save link www.merakisphere.etsy.com | Use Code: TUMBLR for a special discount. :)
Thank you for your support! Please consider sharing this so others know my handmade mandalas are #actuallyhandmade! In a world of industrial goods and manufacturing, it’s sometimes hard to know which products are truly made by hand. 🙌🏼
Music: Wander
Musician: @iksonmusic
41 notes
·
View notes
Text
How to Make DIY Crinkle Plush Toy / DIY Stim Toy
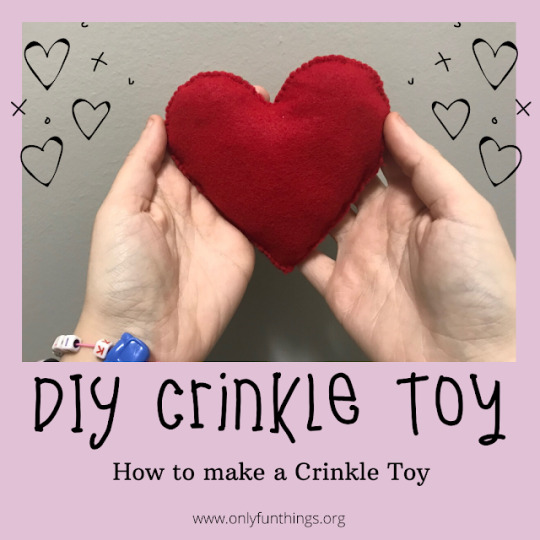
Ciao lovelies! As I promised in my last post, I was working on making NEW Agere DIY’s for you all! So, the other day I was looking through my craft supplies, when I had an idea! I could make a tutorial on how to make DIY crinkle toys! This tutorial is fairly simple and fast- provided that you know how to sew. Though, you could hot-glue the parts where I sew. That much is up to you!
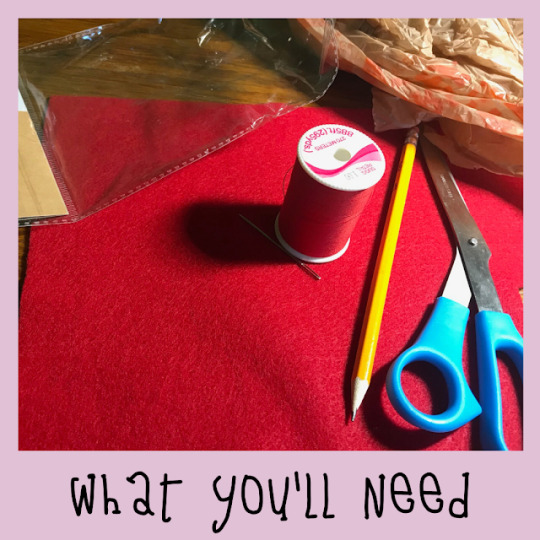
Felt in your choice of color
- Sewing supplies (needle and thread)
- Plastic shopping bags or stuffing
- Crinkly plastic from old packaging
- A pencil or chalk to draw the outline
- Scissors
Here is how you make this DIY Crinkle Toy!
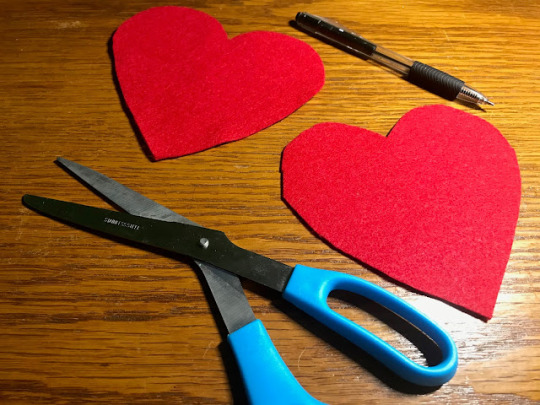
First, draw the shape you want on the felt, and cut out two. I chose a heart because it’s fairly simple, but you could make this more complex if you wanted to.
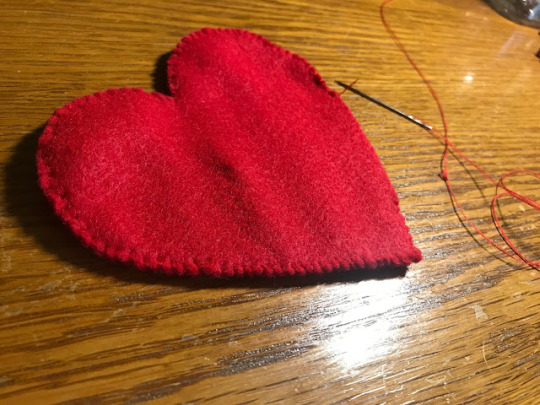
Next, sew together the two pieces, leaving a small gap open where you can put in the “stuffing.”
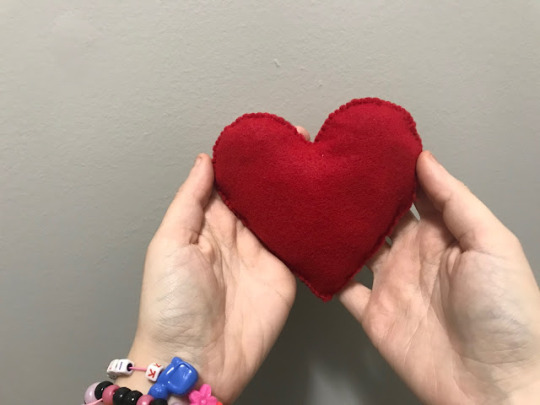
To finish this project, fill the toy with the stuffing of your choice (I used old plastic shopping bags). Then cut a piece of your crinkly plastic and place it inside the toy, against the felt. Then sew up your gap and that’s it!
This DIY is so super simple, but it makes for a great little project! You can even make a bunch of these for you and your friends!
Let me know if you make this DIY by tagging OFT on Instagram ( @onlyfunthingsblog ) or using #OFTreaders for a shoutout!

#agere#age regression#sfw littlespace#sfw agere#age regressor#sfw age regression#agereg#age dreaming#sfw little blog#agere diys#agere diy#agere craft#agere christmas#agere caregiver#agere cg#agere community#agere crafts#agere school#agere daycare#agere classroom
30 notes
·
View notes
Text
SKZ Agere HCs
Request Info - - - - Masterlist
CG!Chan, CG!Minho, CG!Changbin, Little!Hyunjin, Little!Jisung, Little!Felix, CG!Seungmin, Little!Jeongin
Based in an OT8 setting :-)
(NOT PROOFREAD)
Littles
Hyunjin
Age Range: 4-6
Favorite CG: Chan
Favorite Nickname: Little Artist
Loves to color
^He has coloring books everywhere
He is very protective of said coloring books
^But he will occasionally share with Felix
Plays with Felix and Jisung sometimes
^Definitely prefers drawing over playing
Loves to try to mimic drawing tutorials off YouTube
Bedtime stories is his favorite part of the day
Makes a lot of pictures for Chan
Jisung
Age Range: 1.5-3
Favorite CG: Minho
Favorite Nickname: Kiddo
Jumps at loud noises
Very shy
Most of the time won't talk
^Not that he's non-verbal, he just chooses when he wants to talk which isnt often
Likes to play with Felix the most
Always stimming
Has to be carried by Minho all the time
^Will not walk/crawl on his own
Felix
Age Range: 2-6
Favorite CG: Changbin & Chan
Favorite Nickname: Sunbeam, Cuddlebug
Loves piggy back rides from Changbin
Mostly will speak English
^Korean frustrates him
Always wants cuddles
^Especially before bed/naps
Likes to play with Jisung
Likes to color with Hyunjin
He tries to be independent
^Something usually goes wrong
Very, very giggly
Jeongin
Age Range: 0-2
Favorite CG: Seungimn
Favorite Nickname: Baby, Little One
Babbles non-stop
^Even if no one's in the room
Always has a paci
Needs Seungmin to sing to him to go to sleep
Carries his FoxI.Ny plus everywhere
Cartoons fix everything
CGs
Chan
His Little: Hyunjin and Felix
His CG Title: Daddy
Big hugs and cuddles all the time
Keeps every single picture that Hyunjin colors for him
^He has a binder full of them
Reads bedtime stories
^And does the character voices
Tries to get Felix to speak Korean
^Usually gives up when Felix starts getting frustrated
Minho
His Little: Jisung
His CG Title: Eomma
The only one who understands Jisung when he doesn't want to talk
Tries (and usually fails) to get the littles to eat healthy
^It's not his fault that they only want mac & cheese and dino nuggies
^Changbin is the real reason they eat healthy
Plays ASMR videos because he has no clue how to calm down anyone when they cry (idk i just feel like he'd get so confused when they cry)
^But it works, so no one really cares
Changbin
His Little: Felix
His CG Title: Papa
Carries Felix everywhere
Always trying to make the littles laugh
^They all laugh whenever he does aegyo
Gives the littles candy
^But only if they behave and eat something healthy
^Even if it's just a snack
Seungmin
His Little: Jeongin
His CG Title: Dada
The only one who can calm Jisung down when he cries
The master at translating babbles to normal words
Plays with the littles a lot
Always buys a lot of toys/coloring books/little gear for the littles
^Not that the other CGs don't, he just does it the most
Tells jokes a lot
^The master of puns and dad jokes
#agere#sfw agere#age regression#sfw littlespace#kitty agere#kpop agere#littlespace hcs#littlespace headcanon#agere hcs#agere headcanon#cg!chan#cg!minho#cg!lee know#cg!changbin#little!hyunjin#little!han#little!han jisung#little!felix#cg!seungmin#little!jeongin#little!i.n#little!stray kids#little!skz#cg!stray kids#cg!skz
37 notes
·
View notes
Text
new substack essay is up!!
i talk about my history with crafting as well as give 4 barebones tutorials to make stim toys!
this is def the most visually stimulating one!
#rewcana writes#pinned post#oc#my writing#writers on tumblr#writblr#writblur#autism#actually autistic#autistic adult#autistic pride#crafting#stim toys#crafts#maker#stim#stimblr#visual stim#personal essay#personal writing#substack#past pinned
4 notes
·
View notes
Text
I did some communications cards to help communicate my needs and feelings with people around me ! I'll keep you posted on how I'll put them on a keychain with a stim toy, and where I store them in my place and when I go out
I kinda did them goth themed because I suits my aesthetic, also I used Baskerville as writing font
If you need I can do a tutorial, my partner helped me to do them so I give them credits too!

#actually autistic#selective mutism#situational mutism#non verbal#disabled#dissociation#communication cards#goth aesthetic
12 notes
·
View notes
Text
FMP - Research - GAME DESIGN (Development on this idea after Tutorial feedback as well) [edit]. pt 2 (post with other one)
stimming
calming design
what bioms/kind of gameplay to include
colours
my experiments and why they're successful/unsuccessful
game artists


this shows that most stimming occurs due to anxiousness but also its a movement thing. usually relating to repetitive or hand movement.

I would want the game to be something that focusses on these movements and reducing anxiety by having a calming environment if your environment isnt calm, something to take your attention.
Something you need to not worry about when youre playing, so something that i would incorporate would be a timer as soon as you got onto the game, for exmaple, you can use this app infinity time rn, and other set times, you can allocate specifc time so that you dont forget by getting absorbed to go and do it.
I looked if there were any games to help specifically with stimming, and mostly forums/social media come up with peoples personal recommendations including dots, flutter: starlight.
but mostly its focussed on figet toys.

Its a very simple interface, however, i would find this annoying and not immersive enough to keep me entertained, and i have no connection to anyhting within it making it absorb my attention less, and there is no connection, it doesnt feel safe like if there are chaacrters , addiitionally , there is a pressure and you hae to think fully.

i feel like this interface isnt engaging/immersive enough, it also looks childish. That is something i want avoid since many things targeted at autistic individuals/adults are designed with a childish interface with the belief that autistic people are childish which isnt true in a general sence and it feels like a bad stereotype.
chaaracter experimentation and simple expressions and thinking about some in game scenarios that i would have within the game. mindfullness interactin with nature such as looking at fish/finding fish for your aquarium or caring for animals , sounds such as water are calming, and not stakes, not stresful.

0 notes
Text
love how i just use my guitar as a giant stim toy cause i dont actually know how to use this thing . i refuse to look up any tutorials i just wanna make noise that sounds how i feel
0 notes
Photo


📰 || jasenzhangorigami
#the source includes a tutorial if you wanna make one of these!#stim#stims#stimming#stimmy#sensory#pink#light pink#green#light green#yellow#light yellow#blue#light blue#paper#origami#stim toys#irl hands#my gifs
250 notes
·
View notes
Text
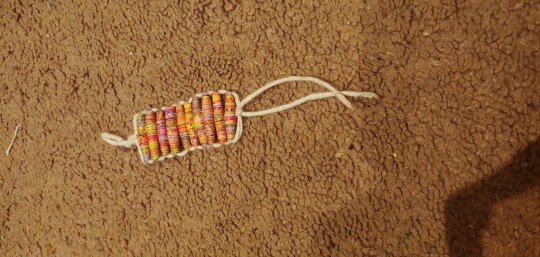
DIY stim toy keychain/bracelet
I really like this project because each step of it can be it's own relaxing project with a fun end result
[[MORE]]
to make one you will need
old magazines/paper
string
scissors
glue
a stick to wrap your beads around
a staight edge
a button (only if you want to make a bracelet)

This part is totally optional but I started by drawing some abstract color blotches all over my paper for more colorful beads, I reccomend markers over colored pencils or crayons for this because the wax from those mediums can make the glue less effective.
After I've decorated my paper I took a ruler and marked out every inch along one of the short sides. On the top of the page I started by measuring half an inch and then marked out in inches from there. Lastly I connected up all the markings so I get a page of long triangles.
Pro tip: do this on the back of your page otherwise those lines will show up on your beads (unless you think those lines look cool in which case do it as I did)
If you dont have a ruler you can use a scrap piece of paper and mark out how long you want your beads to be and just use that as a guide, for the half inch part just fold your guide in half.

Next I cut along those lines and roll/glue them into beads, I found that rolling them up and unrolling before applying the glue can make gluing much easier.
If you want your beads to be more durable you can coat them in a layer of nail polish before using them, I like using a slightly shimmery polish for beads to add a lil extra glam.
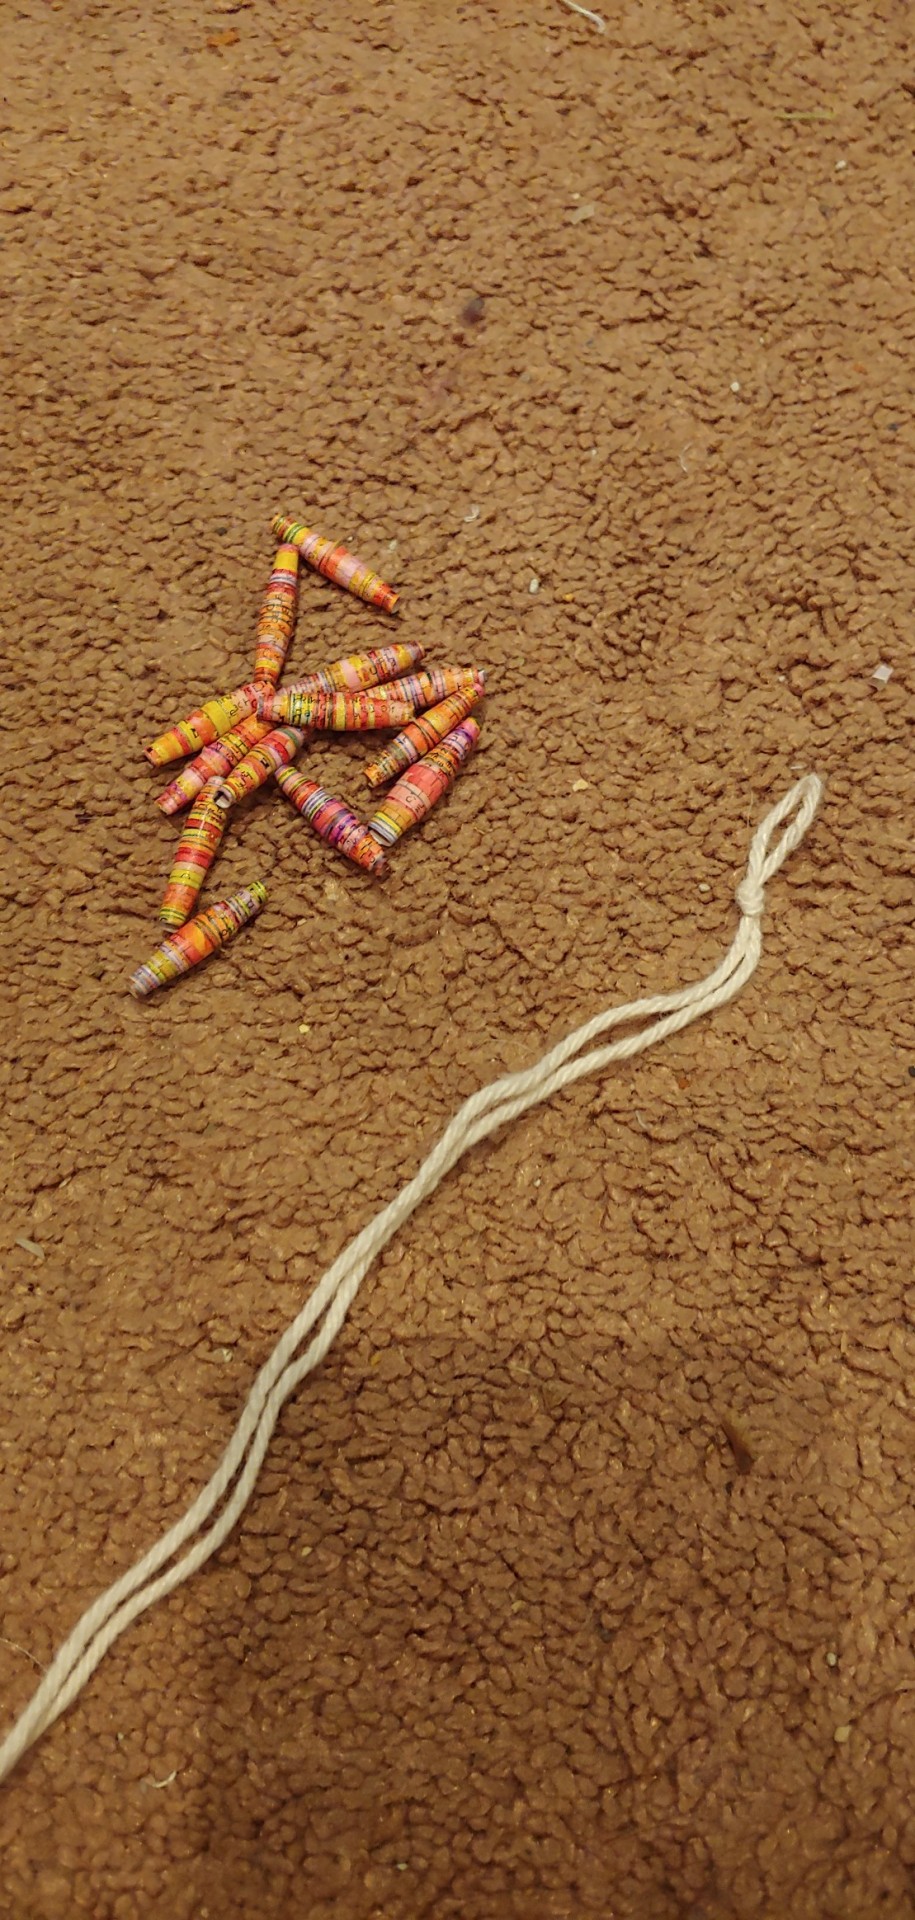
make sure you cut your string much longer than you think you need, the string I cut started off as about two feet long and it shrunk to the size you see on the top most pic.
Once the string is cut fold it in half and tie a knot making a loop in the middle of the string. If you are making a bracelet make sure this loop is big enough for your button to pass through. you can omit this if you just want to make a non keychain/bracelet stim toy

Next start threading the beads onto the string by passing both ends of the string through either end of the bead, crossing in the center of the bead. If you have ever made a bead lizard. this is the same idea. I like the make sure that I'm not pulling the string too tight, so the beads can still roll freely.
Keep adding beads until its a length you like, to finish off a keychain you can just knot the two ends however you want, for a bracelet make sure to add a button so you can put the bracelet on.
I find that rolling the beads between my fingers is nice and so is rolling the beads against each other. I find that playing with it a lil bit helps loosen things up a bit, if after a bit your beads arent rolling well try gently pulling on either end of the stim toy to stretch it out a bit. If that dosent help you might try re threading it. I sometimes find that the ends of my beads can unstick and unroll a bit, but it's not hard to add a bit of glue to get it back in working order.
The nice thing about this is that theyre so easy (and cheap) to make that I dont worry about breaking/losing/giving them away
as always you are welcome to ask any questions or to tag me in your attempt at this project, happy crafting!
178 notes
·
View notes
Photo


I like to call this the Easiest Stim toy Diy Ever.
Do you like spinner rings but can't afford them? or have limited access to buy them?
What you need it a safety pin (the tiny ones probably won't work very well but you can go as big as you like) and some beads. beads that are good to use are ones that have a very smooth even hole that runs through the centre of the beads. beads that are not round will probably work just as well but you want to go for beads that are fairly short as long tube-like beads won't spin in the same fashion.
I chose these beads as they are a hard plastic and so spin very smoothly and are the design is nice when spun.
if you want the easy version of this then simply open the pin, slid several beads onto the open bar ( I chose three as it left just the right amount of room for them to spin freely) and shut the pin if you want to make sure it doesn't open accidentally then pinch the part that hides the sharp end togeather with pliers.
you can now carry it as is or string a cord through the loop on the end of the pin and wear it as a necklace.
If you would like to be able to pin this to your clothing or a bag then you will need to find pins that you can unbend like this :

the difference is that they don't have a cover on the looped end which will allow you to either un bend the pin with a pair of pliers (if using larger beads) or to push the end of a screwdriver between the links

and feed the beads through.
re shape the pin and they will be secure in place and you can now use the open end of the pin normally and wear it as a broach.
the beads are lovely to spin individually or togeather with you fingers, provide a nice vibration and if the beads are larger a good noise if you shake the pin back and forth. its a nice discrete stim toy its not too loud and its easy to carry and can be made so cheaply that it won't matter if it gets lost.
1K notes
·
View notes
Link
Here’s a little side project I finished!!! I did my best to make the instructions as clear and concise as I could, but if you have any questions you can go ahead and send me a DM and I’ll do my best to answer them!
#tj taulks#link#document#tutorial#stuffed animals#plushies#autistic#actually autistic#stim#stim toy#weighted stim
19 notes
·
View notes
Text
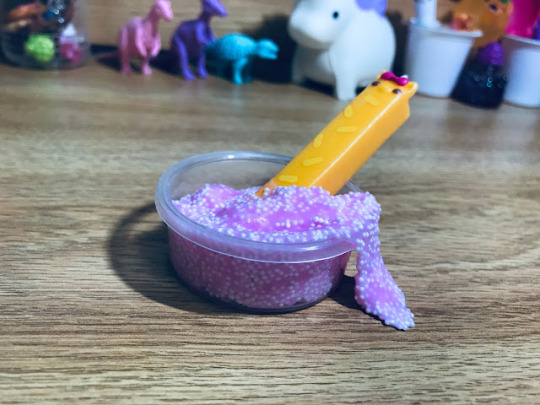
The Slime Trend- What It Is and Why It's Great For Neurodivergent People

originally posted to www.onlyfunthings.org on December 13, 2016
Ciao Lovelies! I bet at least one or two of you have heard of the "Slime Trend" recently. If not, I'll explain everything below! (Images Updated as of January 2019)
(UPDATED AS OF 1/21/19 CLICK ME FOR PART 2!)
So recently, the subject of slime- all types, fishbowl, iridescent, traditional, floam, glitter, crystal, etc- has been trending everywhere. Anywhere you look, you can find YouTube tutorials for how to create slime, find "stim" blogs on tumblr and plenty of gifs of slime, kinetic sand, and more. There are even entire Instagram accounts dedicated to videos of slime!
But what IS stim, or stimming, you might be wondering?
Well, let's let Wikipedia sum it up for us!
"Self-stimulatory behavior, also known as stimming and self-stimulation, is the repetition of physical movements, sounds, or words, or the repetitive movement of objects common in individuals with developmental disabilities and most prevalent in people with autism spectrum disorders. It is also commonly seen in people with anxiety disorders such as obsessive–compulsive disorder, ADHD, and Tourette syndrome, and in people with neurological disorders or brain infections"
The Wikipedia article containing this information can be found HERE.
To summarize, stimming is some form of movement, sound, or texture that is common in neuro-divergent individuals and usually used to self soothe, control anxiety, or filter/block overwhelming sensations.

Autistic individuals are not the only people who stim, however. Some sufferers of anxiety stim to control themselves and calm down, often this manifests in behaviours like nail biting, hair twirling, or repetitive motions like rocking.
What does this mean in terms of the new slime (and other stimming toys) trend?
For one thing, it's good for neurodivergent people because now the things they do to relax are no longer stigmatized but seen as "normal" and acceptable. Colleges even have events around finals making "self-care" kits containing things like play-doh. While these are not advertised as "Stimming," many people use Play-Doh or other molding doughs and such to stim.
Another great thing coming from this trend is that it is opening up the discussions around being neurodivergent and normalizing the idea of talking about mental health. People are adknowledging that stress can be helped by non-conventional methods. Perhaps we are finally reaching the days where instead of someone saying "Oh, you're stressed? Just breathe! (or any other conventional method)", they would say "Well, try playing with some slime or chewing on a chewing necklace!"
Another great outcome of this "trend" is that stimming toys like chewing necklaces, fidget toys, tangles, kinetic sand, floam, and others are becoming much more common and inexpensive!
However, we need to ensure that this "trend" does not become offensive to autistic or neurodivergent individuals. All kinds of stimming are equally good, whether it's rocking, tapping, hand wringing or flapping, etc. If we are normalizing stimming methods like chewing and slime, we should also work to normalize non- "aesthetically pleasing" stimming!
Thank you for reading, remember to love yourself, stay awesome, and I'll see you in our next post!
#agere#age regression#sfw agere#sfw littlespace#age regressor#sfw age regression#agereg#sfw little blog#age dreaming#agere art#agere community#age re safe space#age regression blog#age regression community#age regression sfw#age regressive#agere activities#agere aesthetic#agere blog#agere boy#agere board#age regression caregiver#agere caregiver#agere cg#agere games#agere lifestyle#agere little#agere moodboard#agere outfit#agere outfits
22 notes
·
View notes
Photo

[image description: two silver clip rings sitting on a red watermelon slice pillow along with seven peach silicone beads, shaped like a sphere that has been pressed down on top and bottom. Two sets of three beads are threaded onto the rings, forming a bead ring; a last bead sits between the rings, centre hole facing the camera. A few flecks of dust cling to the peach silicone.]
DIY Silicone Bead Rings
Folks have probably seen the silicone bead rings @stimtastic is now selling, so I thought I’d make my own. These are best for fidgeting rather than chewing because the ring I used isn’t stainless steel (and tarnishes when exposed to water or glue, as I discovered when making chain fidgets) but if you just like the feel of silicone for fidgeting, these were super affordable to make. Unlike regular bead rings (using plastic, metal or glass beads) these are silent when rolled over my desk or hand.
Riot Art and Craft currently has strings of silicone beads on clearance sale for $2 AUD. Because I’m a member, I got them reduced even further--$1.40. Your local store may not have these left (mine only had a couple of strings) and not all the beads available have holes big enough for easy threading onto a ring. I found these 2 cm flattened circle beads to be the best, with holes 3.5 mm across; some smaller round sphere beads I also bought don’t fit on any of my clip rings.
(For other chew-safe bead options, I’d look to Etsy. If you don’t wish to chew on them, eBay has heaps of different beads for very low prices. Buying mixed lots from either means you can get different colours!)
The 50 mm clip rings come from Daiso ($2.80 AUD for five) and I use them because they clip open very easily (meaning I’m not hurting my hands trying to use pliers). I can get proper split rings from Lincraft, which I recommend for folks wanting something more durable, but they’re more expensive and far more difficult to thread. I already had the above from making my own ring fidgets and bead rings!
Since I don’t like chewing on beads this thick, this is a nicely inexpensive fidget. I will say that my fingers catch on the hinge sometimes, so other folks may prefer a split ring instead of a clip ring. Other than that, I’m happy with my versions--and it’s nice to have a bead ring that’s so very quiet to use.
#stim toy#stim toys#Riot Art and Craft#Daiso#Lincraft#Australia#photo#text#link#bead rings#bead ring#silicone beads#DIY#tutorial#review#stimtoybox#long post#very long post#flash#glare
35 notes
·
View notes
Photo


Finally!! Finished my weighted blanket! I started working on this in like June of last year and have been working on it on and off. I tooled back at it today and decided to cut about a foot of fabric off, 1. Because it was already heavy enough and I didn’t want it to become impossible for me to move it around 2. And to save me more time and energy working on it. I did take pictures and notes along the way of making it and I’ll write up a tutorial for it soon. Overall I’m pretty happy with this pattern and type of fabric that I used, and I hope this method can be easier and more affordable for some people.
24 notes
·
View notes
Last Seen Blogs

covalentcovalent-blog
matter

kanostims
stim blog.... of sorts!
greeney26
me wearing a tena slip maxi active plastic backed
kanostims
stim blog.... of sorts!
tusengranajes
La científica de la comunicación