#swtor seeker droid mission
Text


Yeah, Jadus is not going to return to object because Tulia killed him already
#swtor oc tulia#darth marr#i ran this expac with her wearing her hand of jadus outfit but then had thinky thoughts#since you get the seeker droid mission around this time anyway#that this would be an appropriate time for her to have been courted by acina behind the scenes#then further disenfranchised about jadus's continued seclusion/inactivity after ilum#and have just taken a quick break to go murder him and become acina's hand instead#as far as most of the empire knows jadus is still just 'in isolation'#but some know the truth#also her kill count for darths is now 3.5 (malgus doesn't fully count since that bitch wont fucking die)#(but she does get full notches for zhorrid and serevin and jadus)
6 notes
·
View notes
Text
Rain Plays SWTOR: Seeker Droid!
Canon Viri tackled the Dread Seeds/Seeker Droid quests. Macrobinoculars is still not doable solo, but after seeing some YouTube videos of the Seeker Droid quest endings online, I thought I’d go for it. It’s about the Dread Masters and I’m trying to do as much of their content alone as I can.
Seeker Droid story spoilers
In terms of story, I thought it was a good one. At the end, of course Viri took the power for herself. She's the Wrath. Or she was, at this point in the game. And she sure as hell wasn't going to leave it for Acina to loot or take credit for - which is exactly what she would have done.
I feel like the ending was totally in character for Viri. She was one step ahead of Acina, even though she didn't let on. In canon, once she became the Wrath she knew damned well that Vitiate was gone - it's canon because the Hands sent her an email about it after the class story. So she also knew that anyone telling her "the Emperor told me to do this" was full of shit. Acina wanted her to do all the gruntwork and then take all the credit for reclaiming the Dread Seeds. After seeing the Arcanum that Acina hadn't told her or anyone else about, that contained Patient Zero and all sorts of scary stuff - even more so. She would play along with Acina because the Dread Seeds were a Very Bad Thing, but she was certainly not going to fork over the Dread Masters' tech to her.

Gameplay: It's bugged at the end. The final heroic on Ilum was decidedly miserable, which is a shame because the rest of the quest line was fun.
Since the Dread Seeds happened during Viri's years as the Wrath, she brought along Jaesa to at least try to keep some continuity. Before KOTFE, Jaesa and Vette were her seconds all the time, and she would have chosen the former for anything Scary Force Related. Vette jumped in on the Ilum heroic because unfortunately Jaesa was useless there, despite being Level 50. Of course, she was standing there wearing Lana's belt with gold eyes, so she still didn't look 100% like she was from the correct part of her timeline, but I did what I could.
Overall, once I got the hang of it, using the seeker droid was pretty simple. When I was on Corellia I nearly got ninjaed - some asshole Jedi Knight was literally standing behind me and watching what I did with my seeker droid, then putting his down in the direction it was saying. As soon as I noticed it I just went over to Hoth to search for a different Seed. Sorry. Not helping you, Jedi.
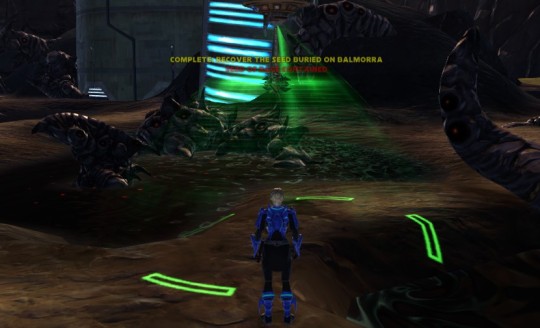
On Alderaan and Balmorra Viri found the Seeds with only two or three tries with the seeker droid, which is...well, I'm not complaining. When I got to Voss, the last one Viri had to collect, I finally checked her mail and there was a buff from GSI in an email to make the search easier. Oops. Could have used that on Corellia.
Somewhere along the way she somehow lost the seeker droid. I logged out and logged back in, and it was back in her mission tools. I also got an email with it. Okay. Glad to see everything's not bugged.
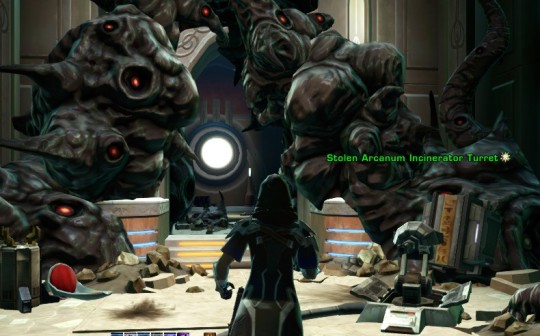
Going through the Arcanum wasn't the easiest, but I'm really proud I was able to do it. I'm horrible at jumps. That's an understatement. Viri did die a few times as I figured out the first jump, and I got stuck behind some shelves once, but I'm really pleased with myself, and proud of Viri, that she was able to make it through. Rocket boost definitely helped.
The search took her to one of her favorite places, the ancient side of Belsavis. Better yet, she got to explore another Rakatan crypt. And there was a Rakatan transporter. Pure joy. The boss at the end was hilarious. You don't fight him; you just kill all his adds and he eventually gets zapped by his own artifacts and dies. Score.

And then we went to Ilum.
I don't know if I even want to write a guide for this because the quest is bugged. Very, very bugged. Hellish. It makes me feel better that the difficulties did seem to come largely from the fact that it was bugged and not my own inability to make it through. Once the bugs were sorted out, Viri didn't have much more difficulty with it than she'd had soloing, say, veteran Athiss or Red Reaper.
Viri spent three hours trying to get through a single room: a hallway where you need to place the power cells in the turret before the hordes of corrupted soldiers swarm in. The turrets refused to fuel past 87% over and over again. I called in different companions, all influence level 50. Vette, Jaesa, Lana and Shae all had turns. I tried them on tank; I tried them on heal. Worse: when Viri died I had the choice of a) reviving her in the room where ALL the cages were open so she was instantly mobbed; b) respawning her just outside the temple and resetting all the mobs in the entire mission. I was in tears of frustration.
After taking a shower, getting lunch and taking a break, I looked for more information online. Turns out it's a bug that can be alleviated by resetting the quest. I did that, and the next time I went in, I was able to solve the room in two or three tries.
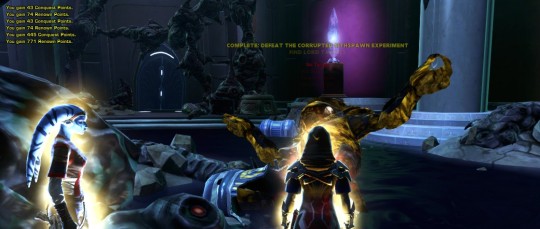
On to the Sithspawn, which was an entirely different level of hell. Viri didn't die here, but neither did the Sithspawn. Again, it was bugged. You're supposed to be able to lure the beast into standing on barrels that explode, but no matter what I did, it it didn't work. I looked online and sure enough, there were reports of this bug, too.
I put Vette on passive and went out into the hallway to take a break when the tentacles reappeared. I have no idea how or why, but after that the barrels worked, and Viri and Vette made short work of the monster.
After that, the final boss was honestly a piece of cake. I had trouble finding the crystals to click for a moment, but once I did, easy peasy.
Acina was not happy was Viri. Eh. Don’t underestimate the Wrath. She still got some cute armor.
I don't think I'd be in a hurry to go back to this unless they fixed the bugs. But it's done, and I can say I did it.

#swtor#rain plays swtor#swtor spoilers#seeker droid mission#swtor seeker droid mission#seeker droid spoilers#seeker droid mission spoilers#Viridana Dragoi#Sith Warrior#Viri and Vette
17 notes
·
View notes
Photo

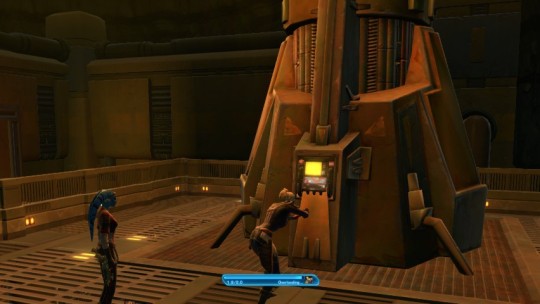
This med droid need his own med droid
(he isn’t getting paid enough for all wounded Imps)
#trying to finish seeker missions and got stuck at that heroic that requires more than one person#this droid represents my mood while trying to finish a damned heroic#swtor#ilum#swtor seeker missions#swtor npc
7 notes
·
View notes
Text
Well playing the seeker droid mission this late in the game is awkward. Isn't it "Darth" Acina?
5 notes
·
View notes
Text
i am faced with the unfortunate truth that if i want to do everything i want to in this game, im gonna have to bite the bullet and do group stuff
#for now im just gonna do val's class story#but man one day id rly like to do the dread masters end operation#and i want to do the hk droid on at LEAST one character and THAT requires hardmode fps#AND i want to finally do the seeker doid/ macrobinocular missions#playing solo means i dont need to worry abt like actually BEING GOOD at the game#playing with strangers means i actually need to know what im doing#and i DONT#sirotras speaks#meredith plays swtor
2 notes
·
View notes
Photo


32 notes
·
View notes
Photo


BB-6G = biggest fan // you + pen = signed autograph?
#i'm sorry#but he's adorable#can i adopt him?#astromech <3#seeker droid missions#swtor#screenshot addiction
32 notes
·
View notes
Text
Rain Plays SWTOR: Full Index
If you enjoy these guides and find them helpful please like and share!
Player Guides and Tips
New Player Tips
Surviving Toxic Players
Avoiding the Fleet
Tatooine Shortcut to Avoid Outlaws Den
Rest Up
Avoiding Shared Tagging
Tech Fragment Suggestions
Decos on a Budget Part 1
Decos on a Budget Part 2
Contending with Bugs
Light It Up: Illuminated Armor
Avoiding GTN Gouging
Preparing for Preferred
Preparing for Preferred Pt. 2
Unlocks Worth Considering
Reputation 101
Curing Womp Rat Fever!
Flashpoints
A Traitor Among the Chiss
Athiss (solo)
Hammer Station (solo)
Call to Arms #1: Boarding Party
Call to Arms #2: The Foundry
Spirit of Vengeance
Directive 7
The Nathema Conspiracy
Crisis on Umbara
False Emperor
Other missions
Dread Seeds/Seeker Droids Solo
Macrobinoculars Solo (most of it) Pt. 1
Macrobinoculars Solo (most of it) Pt. 2
Macrobinoculars - Video of Maki'Voro fight solo
Veteran Star Fortresses
Veteran Star Fortresses Revisited
Veteran Star Fortresses: Exarch Fight Video
Veteran Star Fortresses: Exarch Fight 2 Video
Mek-Sha Explorer
Mek-Sha Tradehouse Missions
Saboteur Quests
Echoes of Oblivion
Galactic Seasons Help
Galactic Seasons Help 2
Where to Find Instanced Mobs
HK-51 Quest Chain
Flirron Friend - Onderon
Loyalist and Saboteur Locations
More Loyalist and Saboteur Locations
Swoop Bike Rally
Extra Area on Ziost
KOTET
Voss Walker, KOTET Chapter 1
How to Save Bergola and her friends, KOTET chapter 6
Uprisings
Part 1: Firefrost, Fractured, Crimson Fang
Part 2: Inferno, Divided We Fall, Trench Runner
Part 3: Landing Party, Destroyer of Worlds
Pt 4: Trial and Error
Uprising Achievements and Finding the Inferno Agent
Bosses
Defeating Revan (solo, Shadow of Revan fight)
HK-47: The Foundry
Vaylin: KOTET
Daily areas/Events
Oricon
Black Hole: End of Torvix Puzzle
Rakghoul Tunnels Sensors
Matrix Shards
Section X: Aurora Cannon
Easy/Fun/Pointless Quests
Harlow Ricks
The DvL Holocrons
Yavin 4 Sensors
Companions
Optional Companions: Reviews
5 notes
·
View notes
Text
okay so my plans in swtor in order of priority because it helps me remember if I make a silly list of things
get sarajah through the consular story
actually get the rerolled vin off ord mantell and through the trooper story
do the section x and seeker droid missions with ana maite and try to get HK-51 with her
replay edelie during double xp. probably also deimos. what is the meaning of anything if I’m not playing the bh story.
speedrun thaston through the rest of the agent story without fucking up the SIS recruitment ending this time. probably end up fixated on some of the expansions with them.
get the new and improved zoyah through the inquisitor story
heroics for the alliance commander title
datacron hunt again? maybe.
#not listed: playing any number of my alts because i’m a mess with too many#dani plays swtor#star wars#game: the old republic
3 notes
·
View notes
Text
Seeker droid mission WHY
So I took canon Viri through the seeker droid arc, because it’s about the Dread Masters and I’m trying to solo as much of that content as I can.
She has had fun with most of the quest line. And then we got to Alchemy of Evil on Ilum, where I have literally been trying to clear the same room for three hours now. I don’t know how many times Viri has died. I’m on the verge of crying with frustration. This CAN be soled, there are YouTube videos of it, but nothing I’m doing is working. The turret shield room is a thing of EVIL.
I HATE that Bioware has made it a bait and switch with the grouping required at the end, and I am determined to thwart it. But I’m super close to giving up on this one.
8 notes
·
View notes
Photo


13 notes
·
View notes
Text
SWTOR: Getting Away from Shared Tagging
This is likely going to be my final Rain Plays SWTOR game guide post at least for a while.
I love SWTOR. I want it to do well. But it's hard to keep writing a guide for a game where the devs have made it very, painfully clear they don't want players like me, ie, solo players who just want to be left alone. They have tried every way they know, and then some, to shove players into grouping, and now they've added shared tagging for 7.0.
That's a deal breaker for me. It's not about not wanting to share credit or loot - it's about the fact that playing with others, especially strangers, is extremely upsetting and distracting to me, and there will now be no way to stop that. That makes the game unplayable for me. I literally cannot see what is going on when several players and their companions are bouncing around on screen with me, and I get very overwhelmed.
So...once 7.0 drops I doubt I'll want to play at all, since open world will now be off limits to me. I just want to be left alone to play solo in the game and it's not what Bioware wants, apparently.
Anyway, if you are like me and find the idea of having to play with strangers all the time extremely upsetting, here are the places in SWTOR that you may want to avoid or can still play after 7.0 drops. If you're trying to get content done, this is also stuff to keep in mind. Right now, once they've reached the Meridian Complex, everyything after that is instanced. But on the other hand there will be major combat changes and set bonuses are getting nuked in 7.0 so you may still want to look into doing them now.
In the meantime, thanks for reading Rain Plays SWTOR.
Lost Cause: Forget about these missions. There's no way to do them without significant open world content, even if they have a lot of instanced areas and cut scenes.
Class story: All
Planetary arcs: All
Planetary bonus series: All
Oricon story arc
Oricon daily area
Ilum (up until flashpoints)
Shadow of Revan: Rishi
Shadow of Revan: Yavin 4
Onslaught: Onderon
Onslaught: Mek-Sha
CZ-198 daily area
Dantooine daily area
Rakghoul tunnels
Gree daily area
Most KOTFE-era Alliance Alerts
Star Fortress recruitment missions
Makeb (both factions)
Jedi Under Siege
Ossus daily area
Onderon daily area
Feast of Prosperity: Gathering and story quest missions
Heroics: Some.
What does that leave you with?
Some open world but still has several instanced areas or is still patially doable without shared tagging:
Iokath (the daily area has a lot of instanced quests and most of the story arc is instanced)
Black Hole daily area (several instanced missions)
Section X daily area (several instanced missions)
GSI macrobinoculars missions
GSI seeker droid missions
Swoop Rally races (open world, but no mobs to be tagged)
Instance, Glorious Instance:
KOTFE (there's a tiny snip of open world content but 98% of this is instanced)
KOTET (all)
Echoes of Oblivion
Relentless Ambition and other small Alliance cut scenes
Flashpoints
Shadow of Revan: Prelude (all flashpoints and cut scenes)
Traitor Arc (all flashpoints and cut scenes)
Eternal Championship
Later Alliance Alerts
Star Fortresses
Feast of Prosperity: kitchen and cantina missions
Heroics: Some.
8 notes
·
View notes
Text
Rain Plays SWTOR: Soloing the Seeker Droid quest
I was reluctant to make a guide for the Seeker Droid series because the final mission on Ilum was so challenging. It's clearly meant to be done by more than one player, although the rest of the quest chain is extremely solo-able.
However, it CAN be done solo, so for those who want to try it out, I recommend Dulfy's guide. I'm not going to duplicate what she's done; I'm going to try to add extra observations from a solo player's perspective.
I went through this quest chain with Viri, a Vengeance Juggernaut Sith Warrior (DPS) with 306 gear. She has three small set bonuses (2% Mastery, 2% Endurance, 2% Alacrity). Her companions were Jaesa and Vette for the missions completed successfully. Both were influence level 50. Her tactical is the Krall’s Accord (the one you get from Onslaught).
The Dread Seeds
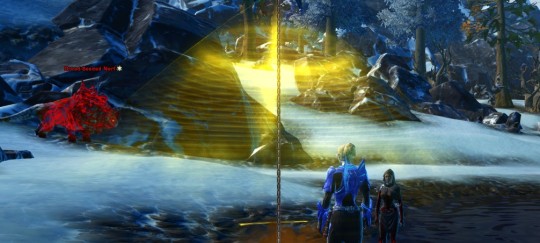
There will be seven Dread Seeds across various planets you will need to collect. Put your Seeker Droid on one of your quickbars so you can access it quickly. You can always tell when you've reached the area with the Dread Seeds. There will be "corrupted" animals with glowing red eyes and bodies, black rocks, and tentacles erupting from the ground.
With the exception of Taris, the Dread Seeds are in the same area for both factions. Here's how to get there.
Imperial Side:
Alderaan: QT to Outpost Talarn.
Balmorra: QT to Sundari.
Corellia: QT to Axial Park South.
Hoth: QT to Thesh Outpost.
Taris: Pick up the Heroic quest Enclave Raid and take the provided transport. You have to go through the heroic area to get to the Dread Seed area anyway; you might as well pick up a few extra credits and XP.
Tatooine: QT to Outpost Zaroche.
Voss: Pick up the Heroic quest Cleanse the Corrupted and follow the map from there.
Republic Side:
Alderaan: QT to House Alde Library in the Juran Mountains.
Balmorra: QT to Lower Sundari Outpost.
Corellia: QT to Axial Park North.
Hoth: QT to Outpost Senth.
Taris: QT to Waypoint Station Draay.
Tatooine: QT to Outpost Thorazan.
Voss: I'm not sure. QT to Shad-Ka Outpost looks closest. (I’ve only done the quest from Imperial side, and while I can travel to the others, I just estimated this on the map)
Arcanum
To get here: use your ship and fly to the marked quest triangle on the map for it.
There's really nothing terribly difficult about this station. The jumps can be challenging, but if you have Phase Walk it will be helpful. Rocket Boost is also really helpful to pick up some extra speed for the jumps. I'm a pretty horrible jumper overall and I was able to handle this.
Hunting through the Shadows - Belsavis
To get here:
Imperial: QT to the Imperial Deep Launchpoint and then take the Rakata Transporter to the Lower Prison Magma Transport. Follow the path to the Tomb and then follow Dulfy's map south.
Republic: QT to the Maximum Security Ops Center and then take the nearby Rakatan transporter to the Upper Transport Center.
There's nothing earthshaking here. Just remember the caveat from Dulfy's site: you can't hit the boss. Hit the adds and he'll be gone in record time.

Alchemy of Evil - Ilum
To get here: go to Ilum by clicking the planet on the galaxy map. If you are Republic, QT to the Republic Waystation and follow Dulfy's map into the Jedi Temple ruins. If you are Imperial. QT t the Imperial Waystation and do the same.
This H4 on Ilum is really, really difficult. It's not so much the difficulty, but the difficulty combined with the various bugs. Make sure you hit this heroic with your best companion with the highest influence. Bring medpacks. Be on your toes.
The mobs in the first hallways can be overwhelming, with a lot of silvers, so be ready.
Let the mobs work against each other. When you get off the elevator, a mob will break through the wall in the hallway. Lead them into the room just on the other side of the hallway and the corrupted sergeants will shoot some of them for you. With the next group, you can do the same. If you hold back for a moment before you get close enough to aggro them, some of the NPCs will take a few of the others out. When you get to the long corridor, this trick works a third time. There are two NPCs at the end of the room. Hold back and a third enemy NPC will appear and kill them both.

The Horrible Turret Room, or Survive the Onslaught
You will be in a long corridor with cells on either side. Behind those force fields are more corrupted mobs. A lot of them. There are clickable power cells - one at each end of the hallway. You need to click on the power cells and carry them to either the turret or the force field controls.
You can only end this battle by getting the turret to kill all the mobs and then blow a hole in the wall. You can only get the turret to work by charging it with the power cells. You need six to charge it fully.
However, while you are doing this, the mobs will be trying to break down the force fields. The force fields will turn yellow, and then red, and then disappear. If this happens, mobs will swarm into the room - and if you're on your own, it's pretty much over.
In order to get this done, move fast. As soon as you kill the first sargeant, the power cells will turn blue and be clickable. Make sure you're in front of one so you can instantly grab it. You can load three or four power cells into the turret before the force fields will start turning.
Try to remember the order of the force fields as they turn. You do not have to immediately address them if they are yellow. If they are red, you want to get to them ASAP. Keep moving back and forth through the room and do not stop.
Another corrupted sergeant will appear when the turret is around 50%. Have your companion keep him away from you - if he touches you as you carry a power cell, your PC will die.
When the turret is powered to 100%, retreat to the entrance of the room and hide behind a pillar. The turrets will take out all the NPCs, and then the wall, without your help.
More tips:
1. If you use any ability while carrying a power cell, it will explode and insta-kill you. This includes the Assassin/Shadow speed runs.
2. If the Corrupted Sergeant touches you while you are carrying a power cell, it will explode and insta-kill you.
3. If you touch the force fields, it's an insta-kill (seeing a theme?)
4. There is apparently a bug that prevents the turret from being charged fully. If this bug is present, you will be able to charge the turret to 87% but not to 100%, no matter how many power cells you feed to it. If you experience this, you will need to reset the mission.
If you die in the corridor, you will not want to respawn there because all of the doors will be open. This means that all the mobs will be in the room, and they will overrun you and your companion very quickly. You will have to go respawn at the medical droid outside the temple.
Sithspawn Experiment
This fight goes in cycles: you fight the Sithspawn. The Sithspawn vanishes and four tentacles appear. When the tentacles are destroyed (or enough time elapses), the Sithspawn returns. The Sithspawn has a stun and a heal ability called DREAD TENTACLES. If you do not interrupt the Dread Tentacles and the heal, you will be in this room for a long, long time. I'm not even kidding. You can keep this fight going for a half hour or longer.
Make sure you keep all your stun breaks and interrupts for Dread Tentacles.
You can drag out the battle with the tentacles slightly in order to allow your stuns and interrupts time to cool down.
Ostensibly, there's a way to stop the endless cycle. There are several barrels around the room. If you attack the dread growths on the barrels (it's one shot), you can use the barrels against the Sithspawn. The barrels will stun it, which will stop its Dread Tentacle heal, stop it from stunning you, and allow you and your companion to wail on it.
When the tentacles are defeated, immediately go to a barrel you have not used yet. Make sure you have already taken the little dread growth off the barrel. Stand ON it. Put your companion on passive and have them stand right next to you. When the Sithspawn jumps, it should explode the barrel and give you a chance to press your attack. Use Heroic Moment here if you have it, and keep hitting it.
However, these barrels can be bugged. When I first attempted this battle, they would not blow up. Thus, the battle continued.
When this happened, I gave up and left the room while the tentacles were out. If you leave while the Sithspawn is out, it will reset the entire battle. Leaving during the tentacle battle and coming back seemed to make the barrels work. I can't promise this will work for you, but I will offer it as the only suggestion I have.

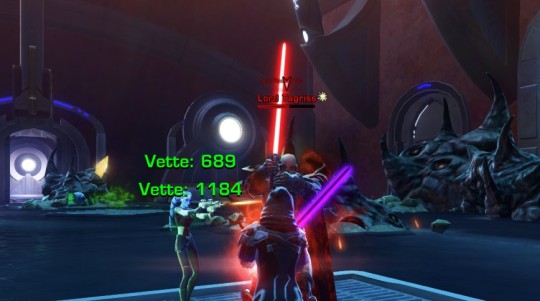
Lord Tagriss
If you made it through the turret room and the Sithspawn you should be absolutely fine here. There's nothing I can really add to what Dulfy has said, except for this: to find the crystal you need to click, turn 180 degrees from the red forge. Now hover your mouse over the piles of crystals one by one. The one you need to click will give you the "hand cursor."

36 notes
·
View notes
Text
The Oricon Problem
I have had a request to talk about Oricon (thank you @thatmmolesbian!)! There's a dailies game guide to follow (I need to get back to Oricon and run a character through to take screenshots), but let's chat about The Oricon Problem first.
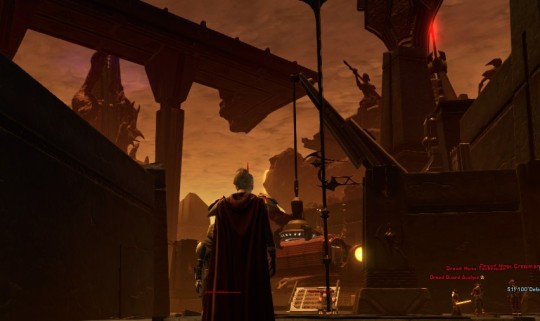
From a story standpoint, I love Oricon. Absolutely love it. I love the way the Dread Masters' responses change depending on which class is going through the mission. I love the way the Sith are actually invited to join the Dread Masters, and the way the player is compelled to barter lives for secrets. I love both the stories established for the Imperial and Republic quest givers alike.
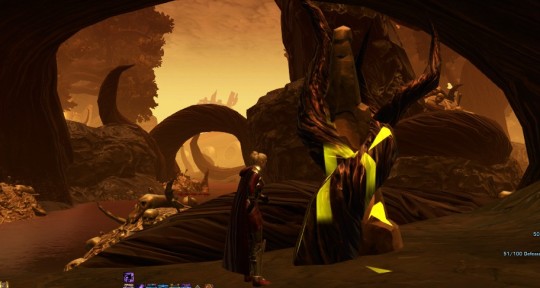
Oricon plants the player in the midst of a literal hellscape: a Mustafar-esque moon spitting lava with black volcanic outcroppings and caves filled with monsters. It plays out like a nightmare come to life, and that's exactly what it is. It's the one place in the game that feels completely corrupted to me; that honestly gives me chills because I know Things Are Bad. The music that exists is discordant; often the player is fighting in silence. The map is small but something about it feels very large.
It's also hands-down one of the most frustrating mission arcs in the game.
The events of Oricon conclude the Dread War and the SWTOR storyline surrounding the Dread Masters. However, the Dread Masters and their handiwork show up numerous times before that, in several types of content.
The Dread Masters storyline starts for Imperial players in the Belsavis planetary arc, which focuses on freeing the Sith from the Republic prison. The player actually meets all six and has a chance to make an impression. For Republic players, first contact with the Dread Masters comes from the operation Terror from Beyond, where you learn that those loveable rascals opened a terrifying hypergate that needs to be closed. Imperial players can also access this Op.
For both factions, you continue to do damage control against the Dread Masters with the Section X daily area and the Dread Seeds seeker droid mission chain. Both mission chains are solable, although the Aurora Cannon - the H4 on Section X - required four players when it was released. It's now a very difficult H4, and it's honestly easier to stealth or suicide run to the end than to try to play it. The Seeker Droid quest line is also soloable, but the final H4 is extremely tough, extremely bugged and may not be feasible for all classes.
After that, it's back to Operations, with Scum and Villainy. And then there's Oricon, which has a solo story section and then additional Ops, the Dread Fortress and the Dread Palace.
If you've lost track:
Belsavis storyline (Imperial only; solo story)
Terror from Beyond (Both; Operation)
Section X (Both; soloable but one difficult part)
Dread Seeds (Both; soloable but one very difficult part)
Scum and Villainy (Both; Operation)
Oricon (Both; soloable but one difficult part)
Dread Palace (Both; Operation)
Dread Fortress (Both; Operation)
Looking at this, it's clear that the devs were banking on players engaging with all sorts of content and grouping up to wind their way through the storyline. And it's clear that's not the case, and I don't know if it's a realistic expectation in any game.
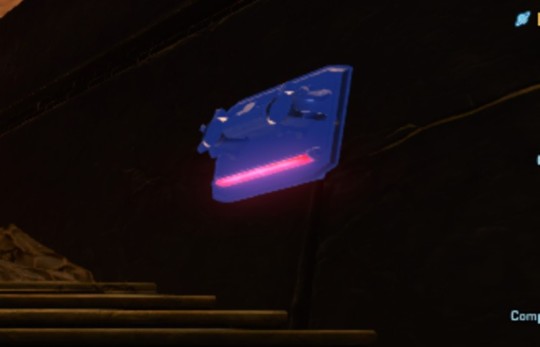
Out of all of these, only the Oricon chain appears on the player's mission finder on their ship. The quest givers for the Dread Seeds linger around on Section X, the Fleet, Coruscant and Dromund Kaas, but the mission can be completely skipped or completed out of order. As for Section X, it's not available to F2P players, unless they buy access to the HK-51 quest, and and the quest giver seems to come and go on the Fleet. Seriously. He was there for a while, then left, then came back, and now I can't find him again. I daresay most players just roll into Section X one day and start playing the dailies without the mission that goes with it. That's what I did.

Caption: Screencap of the player’s mission console on their ship.
Left side:
Mission Console
-Fallen Empire
Chapter 1: The Hunt
- Fractured Alliances
The Forgotten World
- Oricon
PRIORITY: A Path to Madness
- Ossus
Inflection Point
Green button saying “Accept Mission”
Right side:
[PRIORITY]: A Path to Madness
Chapter Four Interlude: The Dread War
**SPOILER WARNING: Due to spoilers in this quest chain, you may prefer to complete your class story, Rise of the Hutt Cartel, and the Operations “Hutt Hospitality,” “Explosive Conflict,” “Terror from Beyond” and “Scum and Villainy” first.
In the aftermath of a disastrous sneak attack on ORICON, am Imperial task force must travel to the moon to destroy the terrifying rogue Sith known as the DREAD MASTERS...
Tasks:
* Speak to D5-F2 on the Imperial Fleet (Introduction to Oricon)
End Caption
I would guess that many players end up doing what I did: play Belsavis's planetary arc, peek in on Section X if they are curious or want to do the HK-51 quest line, and then go to Oricon because that is on the mission console or because they came across the quest giver droid on the Fleet or Section X. I have a memory of Oricon even being a purple mission when I first started, although I'd need other players to confirm or deny that.
You don't strictly need the two Ops - Terror from Beyond and Scum & Villainy - to get up to speed once you're on Oricon; the quest givers illuminate you thoroughly to the current dilemma. You do need the Dread Fortress and Dread Palace Ops to complete the chain, and nobody clues you in that it's coming. Even that vague “Imperial task force” doesn’t really imply you will need 8-16 players to complete this quest line
You play through four or five different missions on Oricon - the dailies, really - and then the H4, which is harder but still can be done solo. You're given the next assignment of the quest, to storm the Dread Fortress. And...surprise! It's an Op! Followed by another Op!
If you do not choose to do the Op - which requires quite a few players and a subscription - there is no way for you to conclude the Dread Masters' story arc. It's left hanging indefinitely. And that's how it's been for the eight or so years since the quest line was released.
It was a rotten trick when Bioware first did it, and it's still a rotten trick, all these years later.
The problem in my opinion is not that Ops exist on Oricon. The issue is that there's no way to complete the story content without the Ops, and that should never be the case in a story-based game. Especially when the rest of the story chain involves solo play. Players on Oricon are led through a quest chain that seems completely solo-friendly, until suddenly it isn't. The same trick is pulled with the Macrobinoculars/Shroud quest line, which was released around the same time.
Was the intent to force players to do Ops because they were invested in the story? Or to force them into Ops because after all, they'd come so far and done so much work and probably would not have wanted to throw it away? Or was Bioware really under the impression that its playerbase wanted all play styles to be required for story completion? Whatever the case, it seems that their move with both Oricon and the Macrobinoculars backfired. There are constant calls, even now, for both quest lines to have an alternative conclusion or have a story mode added. The player base did not bend to the devs' pressure to do Ops; they just noped out.
Looking at SoR, one would hope that Bioware learned something from Oricon's fallout. Notably, the flashpoints that followed Oricon for Shadow of Revan could be completed solo. Shadow of Revan's storyline also gave players a choice between doing an Operation and doing daily quests (which could be completed alone or in groups). The final boss battle of Shadow of Revan was also a solo affair - or rather, a solo player affair, as the player's toon fought Revan with the help of multiple NPCs.
However, years later the devs pulled another Oricon, by tying the end of the Iokath arc to an Operation with six different bosses. Thankfully, one can move on in the story without the Op, but again, just like Oricon, it leaves a major plot point unresolved.
Devs? Stop doing this stuff. Please.
SWTOR has always been billed as a story-based game. It has always been solo-friendly. A lot of its playerbase seems to be there because they like Bioware games (single player, story based); because they liked KOTOR and KOTOR 2 (single player, story based) or because they are curious Star Wars fans trying out the game because it's Star Wars (ie not necessarily hardcore raiders). One has always been able to complete the main storyline without grouping up. And as that is the precedent of the game set from the beginning, I think it should always be so. I'd take this a step further in saying that any content where there are decisions made that affect the player's story should have a solo option.
People play the content they want to play. By all means, offer incentives to encourage people to try something new and branch out into all the types of content the game has to offer. But understand that they might not, and don't force it on them. Nothing in SWTOR has been able to force people into content they don’t want to do. Not gear. Not special rewards and cosmetic items. Not extra XP. Not credits. Not even making it part of the main story. That should send a message.
For many players, such as myself, Ops are totally and completely off the table. From a physical perspective, it's unlikely I'd be able to keep up with an Ops team, since during flashpoints and even some heroics I often stop for breaks. From a visual and neurodivergent standpoint, there's simply too much happening on screen during Operations - too much light, too much sound, too much activity. I can't even watch videos of other people playing Ops.
Oricon fails because it didn't have to fail. Bioware set up an engaging, intriguing story - and then dropped the ball with it. For a lot of players, I think the Oricon missions do not evoke anything other than anger and resentment. I skip the planet on most characters now, and I don't think I'm alone there. There's no point in doing all the work to go through a story chain you can't finish. It's a frustrating reminder to see the Ops quest languishing in my mission log, never to be completed.
Personally, I wish Bioware would find a way for solo players to go through the conclusion of the Oricon chain without the Ops. It's far too late to set it up like Yavin 4, but perhaps they can create a stand-alone easy story flashpoint from the frame of the Ops that does not require grouping. They don't have to give out the same rewards as the Ops - and I would hope that they wouldn't, actually. I don't think most of us are going to want to go in for the Wings of the Architect; we're going to want to see the story reach its finale. It's old content, that's true. All the same, I think it's worth changing this so all players can experience this storyline.
21 notes
·
View notes
Text
Rain Plays SWTOR: Oricon
Let's do the Oricon daily area! Thank you for the request @thatmmolesbian ! . :) You gave me an excuse to head over there to finish the remaining combat achievements.
The Oricon daily area is one of the more difficult in the game, especially if you're approaching it below level 75. I distinctly recall dying several times when I first attempted it on my first character. I hope that doing a daily guide will help some newer players.
Caveats about Oricon:
1. Remember, if you are going in solo: you will not be able to complete the entire storyline. You will be able to do most of it, but not all. Be prepared for the fact that it will be an unresolved storyline for you.
2. The daily area quests do not unlock until you have completed the solo story arc. Thankfully, this does NOT include the Operations.
3. Oricon's map is relatively small, and if the daily area is crowded it can be hard to complete the dailies solo. You may wish to hit this planet when it's less crowded.
4. The quest objectives are mostly open world. Be prepared.
5. There are several PvP specific achievements associated with Oricon, but you don't have to touch them or encounter PvP at all if you don't wish to do so.
6. You may find it easier to use a melee companion here. For some reason, I always do.
7. There are a lot of quests with several steps at the end - clicking things, physically exiting the area. It's easy to forget them and QT out. And then you have to come all the way back, which is a pain. So remember all the steps.
Why do I want to do it?
Oricon has a really interesting story, even the limited amount that solo players can experience. The environment is unlike any other planet in SWTOR. It's spooky, and it's fun to play through at least once.
You can earn reputation points for Oricon, and the reputation vendor sells some cool stuff, including a Sith decoration, the Hallowed Gothic armor and the Gurian Volcano mount.

There are a bunch of achievements you can complete on Oricon - loremaster, exploration, rampage, and more. Oricon is also a great place to do Conquest rampage objectives, as well as work on companion kill count achievements. As you can see, they had fun naming some of the achievements.

Caption: It’s a Dread End Job
1/20/2021 12:24:48 pm
Completed all combat achievements on Oricon
- Brain Dread
- Dawn of the Dread
- Day of the Dread
- Dread Annihiliation
- Dread Eradication
- Dread Head
- Dread Rampage
- Dread Tyrant of Irocon
- Night of the Dread
- Ungrateful Dread
End Caption
How do I start?
- You can pick up the Oricon quest on your ship, but you will still need to talk to the astromech quest giver on either the Fleet or Section X. They are easier to find on Section X, since the base camps there are very small. I think one other planet has an Oricon quest giver - maybe CZ-198?
- After the initial cut scene, go to your ship and travel to Oricon on it. There will be another small cut scene before you land on the planet.
- The quest giver NPCs who will guide you through the story are very close to your landing point on Oricon.
What then?
The story quests on Oricon are essentially the daily quests, albeit with a different number of objectives. I'm giving the daily quest names. But you will know them as you go through the story chain.
The bonus, macrobinoculars and seeker droid quests will not be available during the story chain. They will be available once the daily area is unlocked to you.
1. [AREA] Oricon Decimation: defeat 50 enemy NPCs. You don't pick this up at the terminal. It will be granted to you as soon as you walk into the combat area just outside the base.
Trust me, you do not have to put any special effort into this. None. You can easily defeat double this number just questing. Don't even worry about it - unless you are a stealther who is skipping most mobs, you will meet this kill count without trying.
2. Fallen Forces
In this quest you will free Republic soldiers from the escape pods scattered in the crash zone. Click the escape pod first, even while you are fighting. Let your companion handle things for a few seconds while you click. This is an open world area and if you don't act fast, another player can take the objective as you're fighting.
3. Dread Engines
Just beyond the escape pod zone, you will find these terraforming devices. Remember what I said for Fallen Forces: click them first, then fight.

BONUS: If you are doing the daily area (not the story mission) there's a chance for a bonus quest here. After destroying the terraforming device, grab this crystal from the center. You'll need it in a second.
After you have destroyed the correct number of terraforming devices, go to the southern tip of the map. IF you have the crystal, stop here and click this holocron. It will summon a subteroth that looks scary, but isn't particularly tricky to defeat. Make sure you loot the subteroth to gain the sample you need to finish the quest. Turn it in at the mission dropbox. Yay! Bonus quest complete!
If you do not have the crystal for the bonus quest, or you've already defeated the subteroth, go into the cave at the top of the stairs. Click the last terraforming device, fight the subteroth, click the console at the very back of the room and physically walk out of the cave.
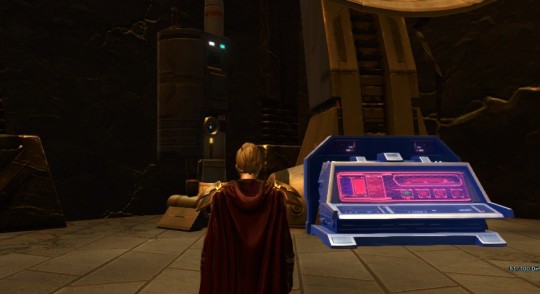
4. The Tower's Core
Close to the terraforming area, there's a small tower fortress. Go up the steps. At the top, go into the cave. Click on the holocron to be transported upstairs.
BONUS: If you are not on the story mission, these panels on the wall will be lit up. Interact with them and collect the cores. There are some both upstairs and downstairs.
Fight your way up the ramp to the tower Be careful- some of the NPCs have knockbacks, and you can get tossed over the edge. Try to stand away from the edge if you can.
If you have picked up enough cores, go to the right at the top of the ramp for the bonus mission. After you clear this area, you can click on this panel to summon another enemy NPC to kill. Yay, second bonus mission complete!

If you're not doing the bonus, go left at the top of the ramp. Fight your way down the corridor until you reach the instanced area on the right.
You will need to click three panels in here, and there's a specific order to it. Facing the panels, when you enter the room: Click the one on the left first, the one on the right second, and the one in the back of the room last. Some droid guards will be summoned to fight; they're not difficult.

If you are on the story quest, there will be a cut scene at this point when you interact with the holocron/panel. If you are on the daily quest, click the panel. It will summon a Sith NPC, Commander Zaoron, to defeat. He's got Sith Warrior mara skills. After defeating the NPC, remember to click the holocron to pick it up, and physically walk out of the instanced area.
When you leave the instanced area, interact with the holocron directly across from you. It can take you back down to the tower steps.
If this is your first time through Oricon, I would recommend swinging over toward the Dread Fortress and the heroic area until you've "discovered" the quick travel spot. This will make it easier for you to return when it's time to do the H4.
5. Dread Paradise
From the tower steps, go north, and fight beasts, beast masters and tentacles. They'll drop yellow Bioenergy Enhancers. When you have enough, click on the purple energy cell you will find in your Mission Items tab in your inventory. This will unlock the location of the cave you need to find, at the very top of the map.

Inside the cave, you will have to fight a Bothrium beast. This fight can be very quick if you know what to do, and interminable if you don't. The beast stays in one place and doesn't have a lot of fancy tricks, but you need to know the ones it does have:
1. When the beast channels healing, interrupt it.
2. The beast will periodically summon tentacles to take their power. Kill the tentacles ASAP. The moment they appear, focus your energy and your companion's energy on killing them.
Once the beast is dead, again, physically leave the cave.
BONUS: If you have the seeker droid, it will sense something in the area around the cave. Look for these twisted red roots that are wrapped around small obelisks. If you position your seeker droid right on them, you can pull up a root. Pull up three roots and turn them in at the mission dropbox to finish a bonus quest and get an achievement.
6. H4: Pre-emptive strike
This H4 can be done solo. If you are a stealther, this will be easy peasy. You can stealth past the mobs, get on the ships to sabotage them, stealth out again and move with ease through the heroic area. For the rest of your toons, it may be very tough. Like, tough enough that if you pull the wrong mobs at the wrong time, they can kill you even at level 75. If you are attempting this at a lower level, even more of a challenge.
Hopefully, you picked up the Dread Fortress QT point earlier. If not, if you are doing the daily areas, I believe you can use the speeder to get to the Dread Fortress medical droids. This is also where you will land if you use the activity panel to return to Oricon later.
The heroic requires you to sabotage a number of Dread ships. Run up the ramps and click on these panels. You will need to get close. Be careful when you jump down from the ship - there is a chasm underneath each launch pad. The mobs you will fight are strong, so try to pull only one at a time.

The other objective in the heroic is to kill a number of commanders. These NPCs are all individually named gold enemies with "Dread commander" name plates. Some are Force users; some are officers. They roam through the heroic area. There are achievements for defeating each of the named commanders.
You want to get the commanders alone. Don't even think about fighting them and a mob at the same time. Doubly: don't think of fighting two commanders at once; they can wear down even strong characters very quickly. If you see one walking near a mob, the best bet is to try to wait to engage them until they're on the steps, in the corridors or away from the other NPCs. The Commanders have varying skills, but what they have in common is a lot of stuns. Your stun breaker abilities will not cool down in time to handle all of them. So they'll pull you and your companion into long, unbreakable stuns and cause a lot of damage.
Specific caution: these two fellows walk the hallway down the stairs near the medical droid area. If one of them happens upon the other while he's fighting a player, he will jump in and help kill you. You do not want to fight these two together. If you see one, be very careful. The other can stroll in even if you don't see him at first. I personally prefer to avoid them both and look for other Commanders to fight.
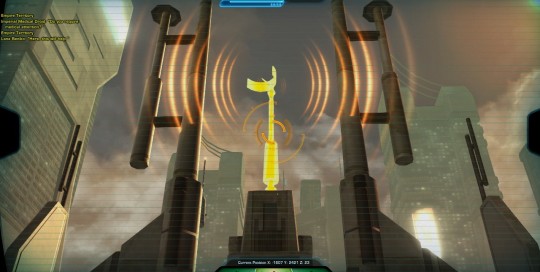
BONUS: If you have the macrobinoculars, you can pick up another mission here. Interact with this console. It will give you four towers to scan.
The towers are on the perimeter of the Dread Fortress, so you need not wade through the heroic area to scan them. You can get two of them from the area close to the console, and get the other two standing outside along the Fortress perimeter. They are marked on thsi map - the fourth is where the player marker is.


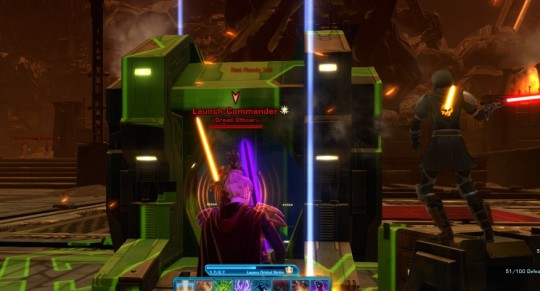
Now go to this box and click on it to summon the Launch Commander. Like the Commanders in the H4, he has a lot of stuns, but he's easier to defeat. All the same you want to get him on his own and not with a mob. Go bacl to the console, click it and go to the mission dropbox in the landing area to complete the mission and get an achievement.
Once you've finished the H4, you'll head back to your base camp. For the story mission players, there will be one more cut scene here. For those of you doing the daily and weekly quests, you will find your mission dropbox here. And...you're done. Unfortunately as a solo player this is where the road ends. Hopefully in the future Bioware will consider adding some solo way to finish Oricon. Until then, enjoy the daily area.
19 notes
·
View notes
Text
Rain Plays SWTOR: Macrobinoculars Solo (most of it) - Imperial Pt. 1
Buoyed by Viri's success soloing the Seeker Droid questline, I decided to tackle the Macrobinoculars.
Please note: THE END OF THIS MISSION IS STILL NOT SOLOABLE. There is apparently one sequence in the final H4 where you need several people to click all the panels. However, the rest is soloable. If you want some challenging gameplay or something new to do in the game, there's still a lot to do here without tackling the final H4.
Also note that even if you do not finish the final H4, as long as you do NOT abandon the quest, you can keep using your macrobinoculars. In fact, you can do that as soon as you pick them up in the beginning of the quest line. There are other quests and achievements you can do with the macrobinoculars, such as scanning all the MCR-99 droids on each planet, scanning the temples you can see from the Yavin 4 stronghold and doing GSI dailies on several worlds.
If you enjoy puzzles, you will love this questline. If not, there are thankfully several guides that can walk you through each puzzle. If you remember one thing, it's that everything can be a trap, you need to check the walls, ceilings and anything around for clues/clickables to proceed, and the solution that appears straightforward probably is not.
Once again, I defer to Dulfy for walkthroughs and videos on how to beat the puzzles, and give you additional suggestions.
This is Part I of the guide, and it is specific for Imperial-side players.
Your first task with the macrobinoculars is to scan the Shroud's monitoring devices around the galaxy. It's far easier than the Dread Seeds search. If you've played the Ziost daily area, the Ossus daily area or some of the Onderon quests, you've already used macrobinoculars.
If this is your first time with the macrobinoculars- right click to activate the binoculars (they are in your mission items tab. You can also drag them to a quickbar, which is a good idea to get to them quickly). Once you activate the binoculars, you can scroll around to survey the area. Targets that are scannable will light up yellow. Left click to zoom in and scan. Click again to zoom out. ESC to put away your binoculars.
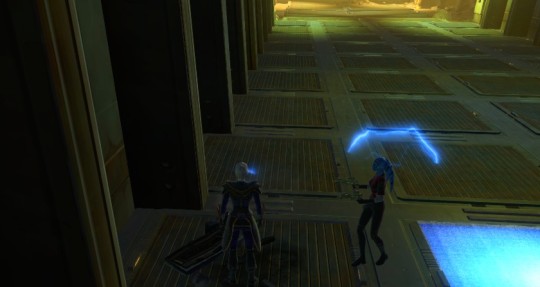
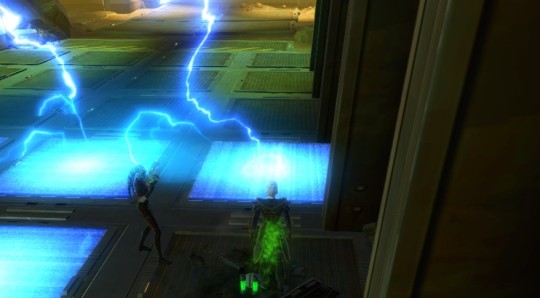
You’ll start by being asked to scan several locations marked on your map. Move your camera around until you see a yellow blinking item (it may or may not look like the example) and then zoom in to scan.
Dromund Kaas - scanning
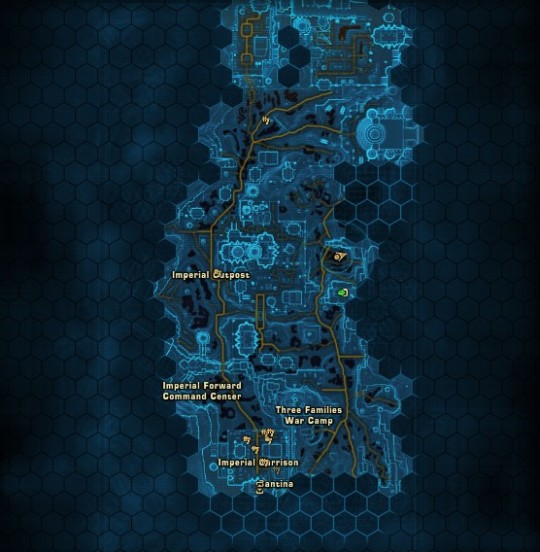
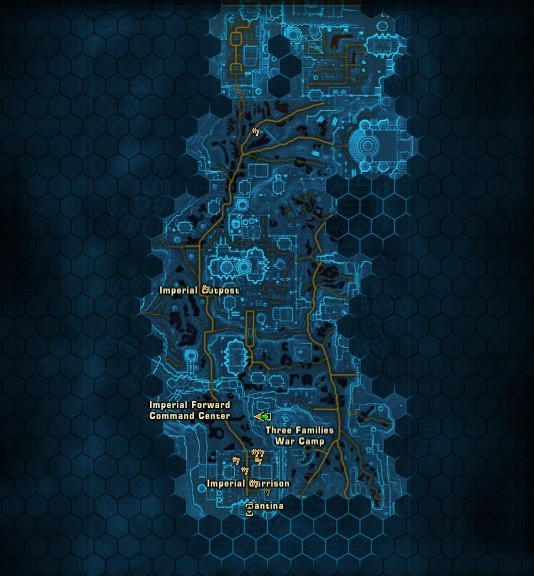
- QT to Tempest. One objective is down at the Unfinished Colossus and the other is on one of the nearby lightning spires.
- QT to the Spaceport.
- QT to the Nexus Room cantina, and then walk over to the launchpad for the nearby taxi. You'll get a good view from there.
Shroud of Ruin temple
How to get there: Pick up the Shadow Spawn heroic and use the provided shuttle/QT. The temple you need is all the way in the back of that heroic area. There are a few jumps to get to the right level of the temple but they aren't too bad overall. There's no threat of death or even damage if you fall and have to try again.
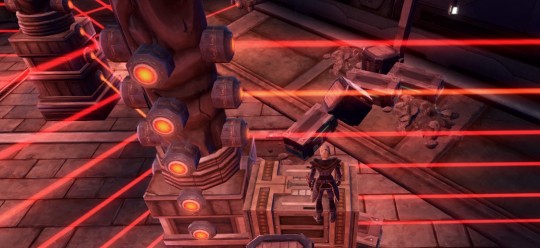
There are only two obstacles in this temple but the first can be frustrating. After you click a rock on the ceiling (mouse around to find it), some of the grids will periodically blink off and on (this is very slow- they don’t blink rapidly, if that is a concern. They go off, stay off for a few beats and then go back on). Make your way through the grid to get to the other side without touching the lasers. Touching the lasers is insta-death. Fortunately the respawn point/ medical droid is just upstairs from the grid so you don't have far to go if you get zapped. Tips:
1. Send your companion away. Put them on a crafting mission for ten minutes or so. They will not be able to follow you through the grid at your pace, so they'll just hit one of the lasers and die.
2. No fancy jumps, no rocket boost, no flair. Do NOT get too close to the lasers, and watch where you are running and jumping.
3. In some places, only one or two lines of the grid will flicker off. Be really careful walking through.
4. Once you finish the maze, you can turn it off completely by smashing the console you will see, but it’s really not necessary because you are almost done. It’s still cathartic to smash it.
The droid you have to face at the end of the hallway should be a snap. It's a garden variety NPC that doesn't seem much more complicated than the average silver, and he's on his own.
You will then be sent off to scan targets on two more planets.
Ambush Warning:
After scanning targets on any of the planets from this point onward, you may be ambushed. It could be a droid and an enemy NPC that is found on that planet (rakghouls on Taris; a Wampa on Hoth). It could also be a gold-level droid, IR-77. I don't think it's a jump scare, but it's very sudden, so I'll mention it here.
Taris scanning:
- QT to 75th Legion Forward Camp.
- QT to Crater Command Base. You can get to both of the targets in Olaris from here.
- QT to Toxic Lake Garrison. This is the base you start at when you land on Taris so you shouldn't need to QT there, but it has a quick travel point in case you've done the others first.
Tatooine scanning: A few of the target points are challenging to get to for Imperial players.
- Mos Ila, relatively close to the taxi. There's a QT point there if you need it.
- QT to Outpost Varath or Outpost Rennar, it's about halfway between the two, near the area with the Tusken Raiders and Mandalorian corpses.
- QT to Mos Anek. Very close to the Lady of Pain area from the Bounty Hunter's class story.
- QT to Outpost Zaroche. Unfortunately, the next target is in the Outlaw's Den. There's no way to see it from outside this area. I've read more than once that if you are on the PvE server, nobody can hurt you in the Outlaw's Den. Your companion will go away, but there's apparently no PvP. Still, I have had no way to confirm this firsthand, so I'd get in and out.
- From there, continue through the Outlaw's Den to the north side and follow the road (filled with hostile NPCs unfortunately) to the mining company for the northernmost target.
- QT to Ridgeside Sentry Post. You have a ways to go from here, but it's the closest Imperial travel point. Take the righthand road north at the fork. The lefthand side is more straightforward but goes through an area with a lot of Twin Suns enemy NPCs. The target is under the rock bridge near the Twin Suns.
Quesh scanning: Quesh is small enough that you don't have to travel long to get just about anywhere, but here are the QT points in case you need them.
- QT to Imperial Garrison OR Imperial Outpost. The target is about halfway between them in an area where a lot of the Imperial Quesh quests happen.
- QT to Imperial Outpost.
- From the second target, you will see a very small dotted line path that goes through a power plant. The first section has Republic hostile NPCs but the second section is friendly. This will take you to the other side of the map to get the third target.

Scratch the Surface - Quesh
How to get there: As Dulfy notes, the map may be bugged. This is the map I got. As you see, the entrance is indicated all the way over on the far right. It's not there. QT back to the Imperial Garrison. The map should change. You need to climb the hill just outside the Garrison and follow the narrow, maze-like path through the stone walls to reach the instanced area.
Wrong map:
Here is the CORRECT map.
Once inside, remember everything is a trap and the solution usually is not straight combat or avoidance. There's always something clickable around that will help you get past each obstacle.
To throw the fruit at the Lurker, click on the gate panel.
The key to getting past this electrified floor is to hit the panels on the ceiling that light up as clickables. After that, the floor will still electrify, but in a very predictable order.
This is the only panel on the first section of grid that will not be electrified. It's easy to spot because of the debris on it. Follow the electricity's pattern so you know when it's clear to run. Once you're there, mouse around the ceiling again for the second clickable panel.
This is the panel on the second section of the grid that is not electrified. Again, it's easy to spot because there's stuff on it. After this, you will need to follow the pattern of the electricity and make a break for the hallway.
You need to shut down the grid to proceed. However, if you step on the platform, you'll get shocked. Walk around the room to the back, where you will see a way to get under the panel. DO NOT WALK ON IT YET. Mouse around and you will find there's a panel that is clickable. Clicking on it will cut the electricity on the floor, allow you to walk in and shut down the second panel. Now you can go on the platform and shut down the grid.
Pictured is STEP THREE. Do not go on this platform until you cut the power from underneath!
Then, it’s off for more scanning.
Corellia
- The first two are close to the spaceport and Incorporation Islands QT point.
- QT to Axial Park South.
- QT to Imperial Central Command (two are here)
Hoth
- Very close to Dorn Outpost, where you start out on Hoth. - QT to Thesh Outpost.
- QT to Imperial Garrison.
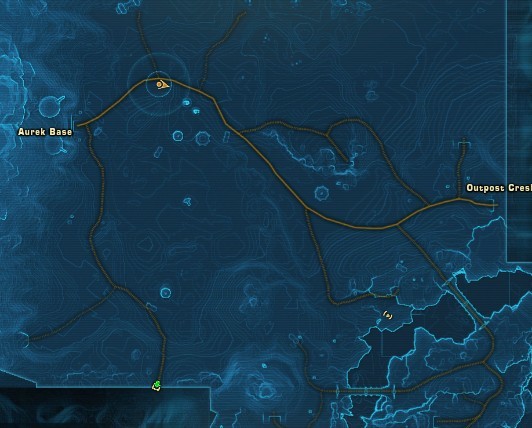
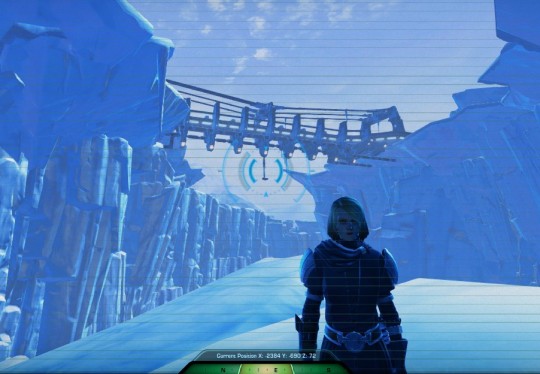
- QT to Jagged Hills Imperial Garrison, which is the northernmost Imperial travel point. From there, go left until you get to the Drift Hills Republic base and then north along the path. It's close to Republic Aurek Base.
- From the point above, go to the right on the marked path. You want to be heading toward Outpost Cresh. When the road has a fork on the righthand side, take that, going south. The point you're looking for is under one of the bridges.
- QT to Frostwake Outpost and then go to the Starship Graveyard.
- QT to Leth Outpost. It's very close to the base.
Belsavis
- QT to Imperial Frontline Camp.
- QT to one of the outposts close to the Rakatan Transport network (Frontline Camp and Imperial Deep Launchpoint both work). Take the Rakatan Transport to the Imperial Power Center Transport.
- From the point above, after you scan, go right back to the Rakatan Transporter. Take it to the Lower Prison Magma Transport stop. Follow the circular path to the Tomb and then find your path to the target from there.
You want to do the Lower Prison Magma Transport target scan last because it will place you in just the right area for the next part of the questline.
10 notes
·
View notes
Last Seen Blogs

t6ryan
T W I N S I X

yttag-blog
YTTAG?

welcome-to-the-zooniverse
Across the Zooniverse

septic-salad
Septic._.Salad

fuckyeahbehindthescenes
Fuck Yeah Behind the Scenes