#the scene is so long and I didn't want a text heavy gifset
Text
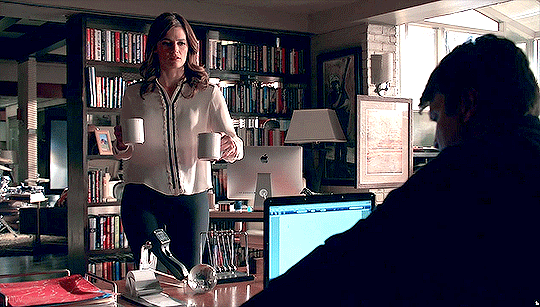
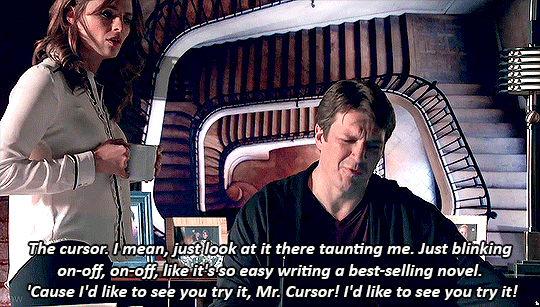

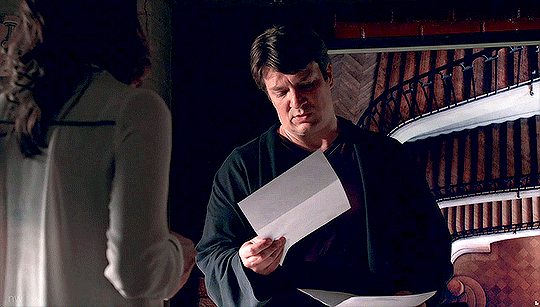
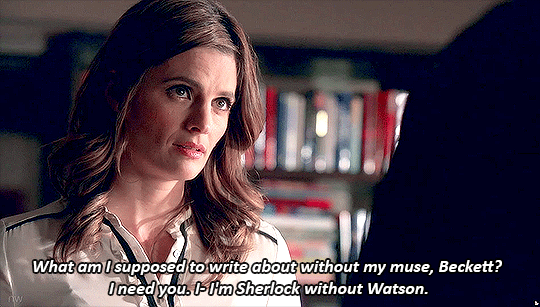
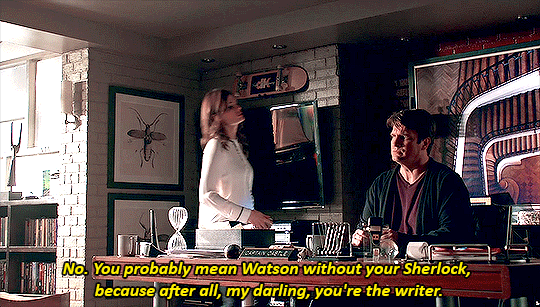
Castle - 8x13 "And Justice For All" (requested)
#castle#8x13#caskett#castleedit#kate beckett#richard castle#my gif#my stuff#the scene is so long and I didn't want a text heavy gifset#so there are just bits of dialogue cause it looked weird with no text
229 notes
·
View notes
Text
Youtuber voice: make a gifset with me :)
alright folks, welcome to another episode of Jo talking to the void. Gonna try and do a "follow my process" thing.
It's very- VERY long and image heavy. Under the cut and feel free to send me an ask if you have any questions/want me to elaborate on anything.
Part 1: Grab at any idea that sparks joy. Anything. Today mine is the word "horror", so we'll try and do a horror set.
Part 2: Scene analysis and reference hunting. I'll open a new folder on my pc named "Horror gifset" and dump there all the FTWS scenes I already have and that I think could be fun. Open pinterest and behance and type "horror", see if anything sparks an idea.
This takes me roughly 20 mins, here's what I have:
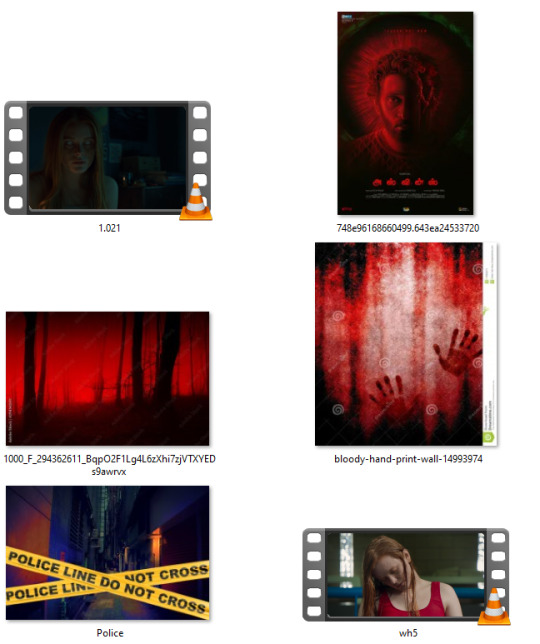
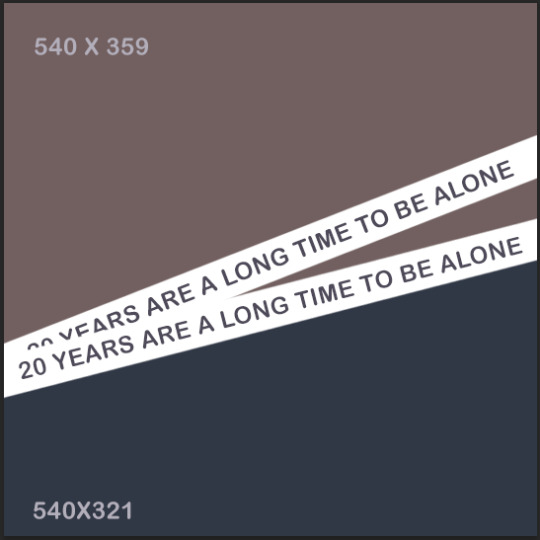
I try to take a step back and see what is it about these designs that attracted me. Clearly the red & black contrast, Bloom and I actually just like the "police line" because of the amount of storytelling it brings by doing basically nothing. (Don't be fooled, I saved many many pics before narrowing it down)
Part 3: To me this is the hardest one. I want to have a small storyline in my gifset, so time to think of it. I open a notes document and just start typing whatever comes to mind, trying to keep the mood of the previous images.
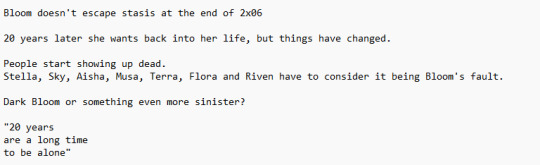
Here's what I landed on. It's not much, but I can now start the fun part of structuring the gifset.
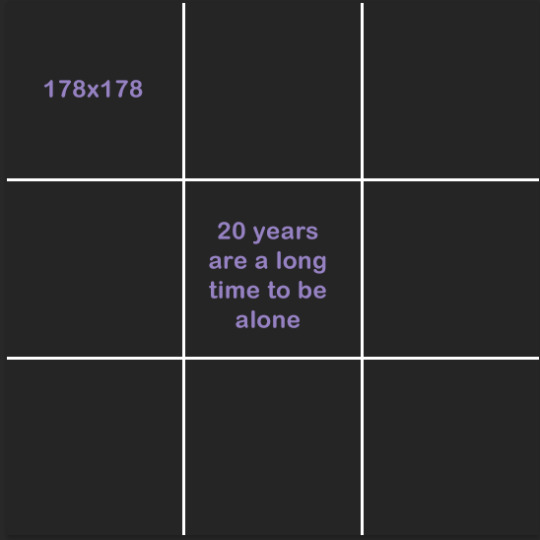
Part 4: I've really been into layout lately, so now's the time to do math.
The first panel I knew I wanted to have the text centered in the middle and surrounded by the mini-gifs. Here are the two layouts I thought of. I decided to go with the second one because it's more interesting, but I already knew I'd tweak a lot, to resemble an actual police line, etc.
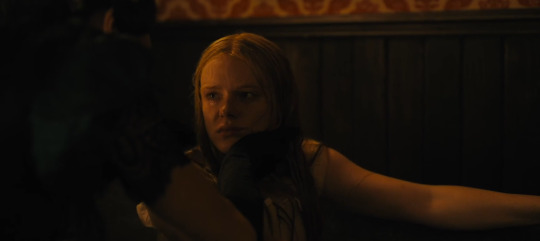
I separated all of the scenes from 2x06. Both when Bloom is arrested and when she's released, considering I could use them in reverse.
When making layouts the only things to keep in mind is that the dashboard optimal width is 540 px and that the space in between every piece of "frame" you put within a gif is 2px. So let's say I was going with the square layout 1. It's 540 px width, BUT I can't just divide 540/3 and make that the size of my layout, because I need to account for the space in between the squares too. So the math is actually 540 - 4 (because I have three columns - two gaps)/3 = 178 px. All the squares in that image are 178 x 178.
On Scene grabbing: I do everything I can to use footage that's high quality. This is the easiest way for your gifs to come out pretty, avoid anything lower than 1080. Especially if you're grabbing a scene that'll need loads of adjustments like a night scene or a period piece with too much yellow, grab even higher quality than 1080.
When I work with Redeeming Love's footage, I work with 4k quality, because I know I'm about to destroy the quality by adjusting it.
I mean look at the amount of yellow.
I t*rrent all my scenes in MKV, then use Avidmux to chop the entire movie/show into smaller sized scenes and convert it into mp4.
Part 5: Back to the set. Once I have the basic layout, I pull in my scenes and check if they make sense. One big tip is to stop thinking of scenes as what you watched, but as what you're seeing.
Scenes meaning are very easily altered by whatever context they're put in. Look for scenes in unexpected places (the romantic scene can absolutely be horror footage) and reverse the order or add in effects to alter their meaning.
Each one of these gifs had it's own peculiarities. So to break it down:
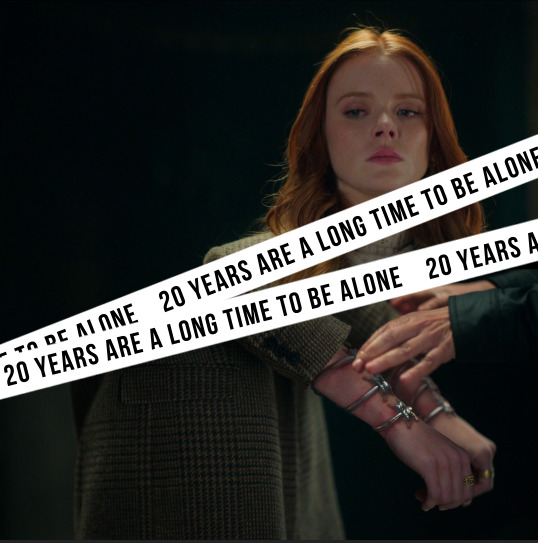
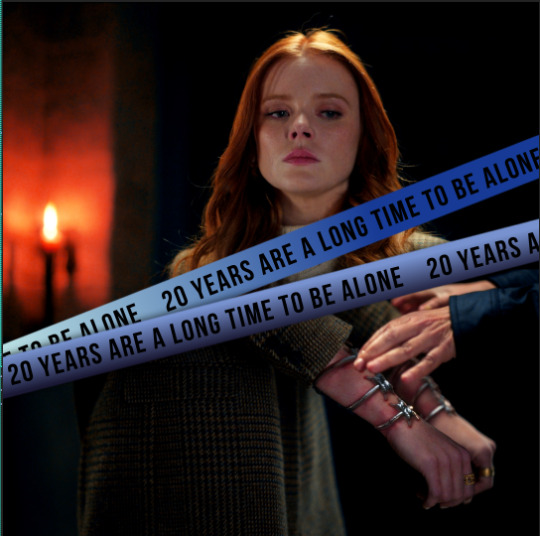
Gif 1: I colored it to bring out the black and added the blue because I knew I wanted to use overwhelming red later and this would pop-out. Shaded the white streaks so they'd appear more like police lines and colored them using a gradient just so it'd be more interesting. I didn't like how Bloom's upper part lined up with the cuffs, so I inverted it and brought out the red


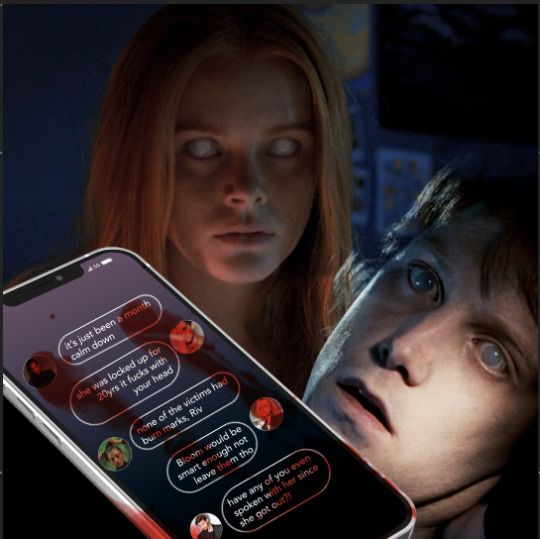
Gif 2: First off, I scavenged my memory to try and find a scene where a character appears with white eyes like Bloom's. This poor fella is from The Covenant (2005). I color matched both Bloom's and his scenes so the green was neutralized and we had more blue and red. Then finally I added the phone where the actual storyline I wrote back up starts to unfold.

Gif 3.1: First off, this gif is 540 width, but not 540 px tall. It's actually 400 px tall, which is a good tip: You don't have to stick to one format when giffing. Sometimes a layout or scene simply won't work in a tall format and that's fine.
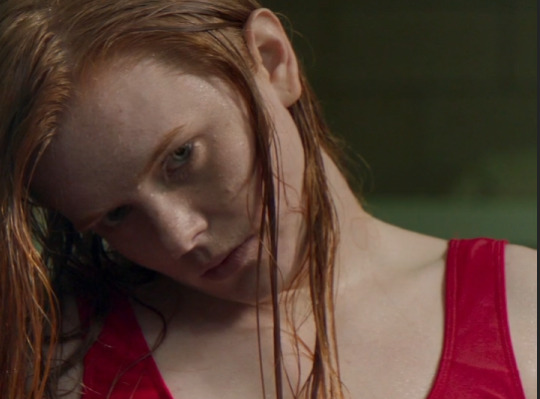
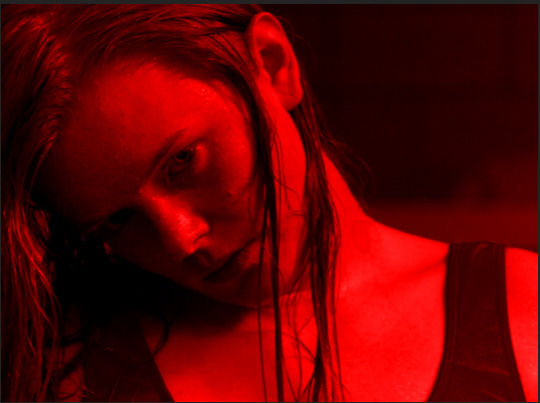
For this first part all I did was color Bloom, slap the all red color map and the text. Then I realized I didn't like her swimsuit under blending, so I went back and specifically desaturated the red in the starting layer and made it dark, so it'd show up black. The "20 years" are subtle, but in my head it'd be what the characters are hearing in their nightmare, so it's just a faint whisper in the corner.
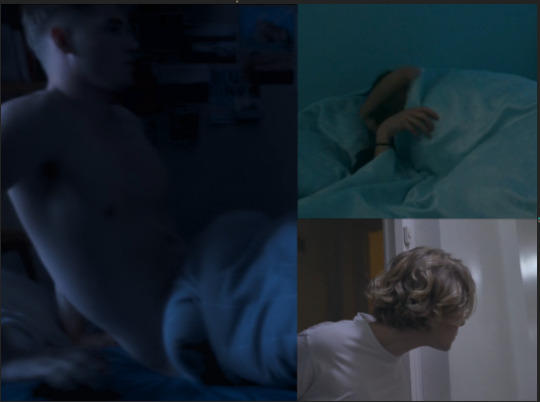

Gif 3.2: I colored all scenes to match each other. Sky's was the darkest one, so I knew I'd try and match to his because then I wouldn't have to destroy the quality of his footage to match the others. Musa's scenes was tricky because in the actual scene she's waking up slowly and happy. I chose to speed it up and start the gif already in her movement, so you don't realize she's actually very relaxed in the scene.
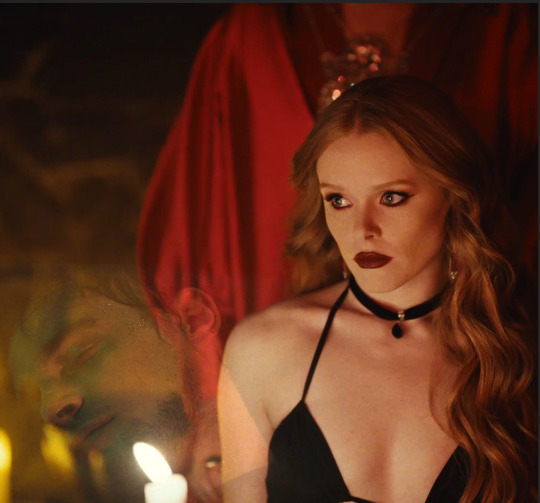
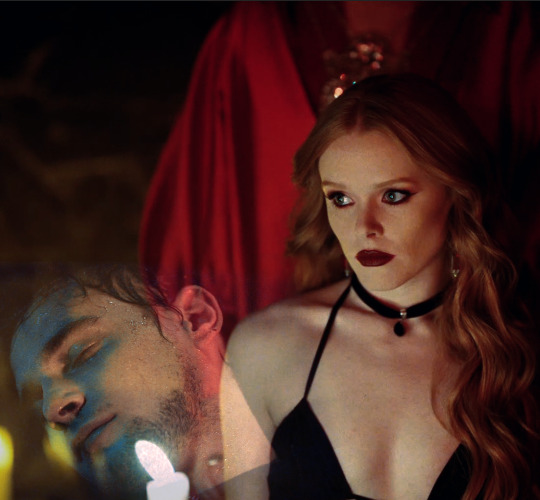

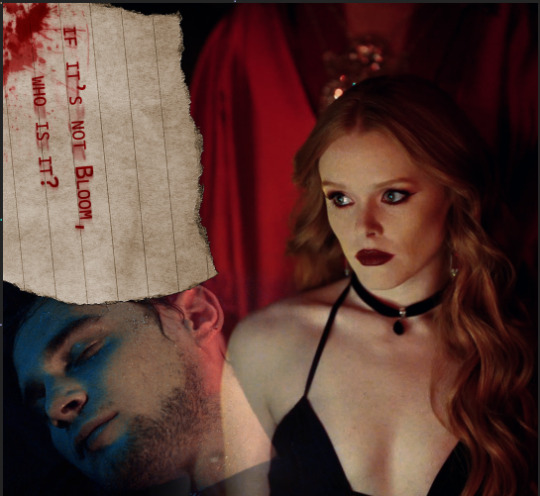
Gif 4: I started by coloring Bloom and Riven's footage, reducing the yellow and bringing out the blue and red in both. As you can see there's still a candle behind Riven, that makes it hard to see his face, so what I did was add a black shape under (or you could paint a layer in PS) with black and just blur the edges, so his footage would actually show. Finally there was that big empty spot in the upper left, so I added a note and used it to wrap up the story of the set.
There are two layers of text, both set to multiply: one is the actual text, the second one is in a brighter red and blurred in one direction, so it looks like the text got smeared in a rush. Added the blood and ta-da! We're done.
Exporting:

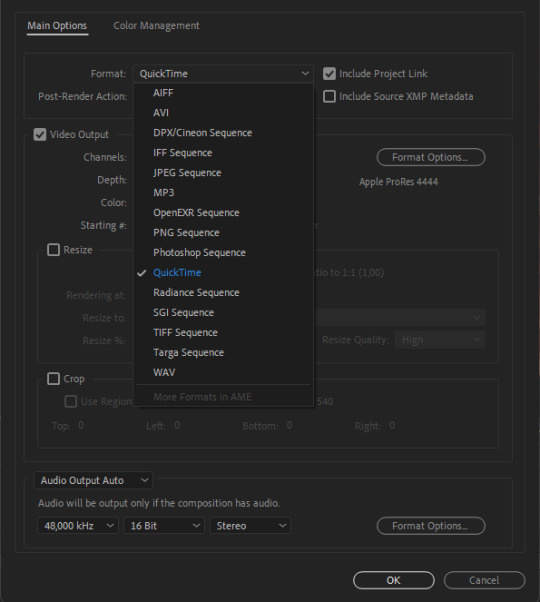
If you're exporting from After Effects, I've found exporting in MOV works better than trying to export in mp4, since it doesn't compress the file. You'll notice I'm using the format "apple ProRes 444", that's simply because this format keeps the alpha channel (transparent). While I didn't need it in this set, it's an habit.
Once I export from after effects, we're importing in Photoshop.
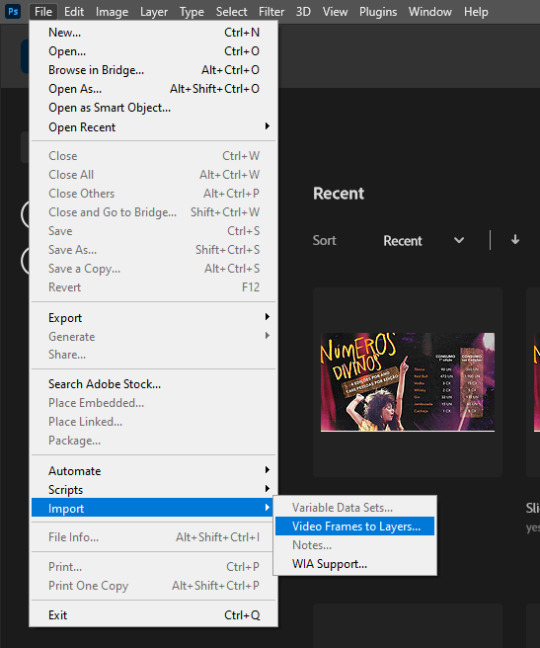
I import by going File > Import > Video Frame to Layers. Then you select your file and you should have this:

Hit OK.
If you don't have the timeline here, simply go in "Window > Timeline"
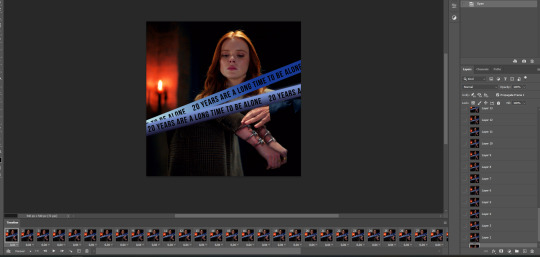
You'll end up with something like this. Now here's the most boring part of giffing, but don't give up now!
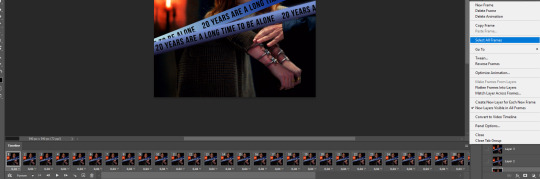
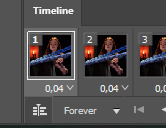
Go on the 3 lines on the bottom right of the timeline (=) and click on "select all frames". Once they're all selected, click the little down arrow under the little thumbnails to change the timing. I change mine from 0.04 to 0.05
Then I select all my LAYERS (not frames), put them inside a group. And click:
On this little piled up icon to transform into the video timeline. This is so we can sharpen our gifs.
Right Click on top of the group on the layers panel and select "convert to smart object". Then in the upper bar, click Filter > Sharpen> Smart Sharpen and use these settings:

This is what makes gifs look clear and crispy.
FINALLY we're saving. You can do it manually, like a peasant, by going on file > export > save for web (legacy). Or you can play keyboard piano and hit alt+shift+ctrl+s.
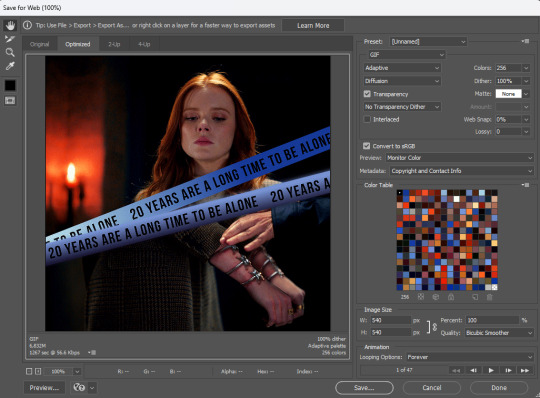
These are my export settings.
Things to keep in mind:
"Diffusion" is just one of the types of exporting you can do. TWEAK THIS for every gif. Sometimes very detailed gifs will look better with Pattern. Very colorful ones with Diffusion. It varies a lot.
"Adaptive" is just another way the pixels are laid out. I don't actually see much difference here, but I always tweak on all settings, just to make sure I'm getting the best quality by the smaller size.
On the bottom left you'll see your size. Mine is currently 6.82M. All you have to know is that Tumblr won't allow any gif bigger than 9.8M.
Looping Options: make sure it's in forever, otherwise your gifs won't play.
And then... finally, hit save.
....
Now rinse repeat and do this for 200 other gifsets, because it's a totally fun hobby to have!
26 notes
·
View notes
Last Seen Blogs
k-ttie
CLOSED

affagato-blog
The Only Moment

deadrangerwalking
Oak and Ash and Thorn

trumpetsandcrumpets
New kid on the block

trendzobe2023
Untitled