#usermod command
Explore tagged Tumblr posts
Visit Tumblr Blog
Explore Tumblr blogs with no restrictions, modern design and the best experience.
Last Seen Tumblr Blogs


Fun Fact
China blocked Tumblr because of pornography and censorship problems in 2013.
Text
How To Add Users in Ubuntu 24.04 LTS
Adding users is a fundamental responsibility of system administrators, crucial for maintaining secure access and efficient resource allocation. Regular users need accounts for their daily operations, and administrators require robust ways to manage these accounts seamlessly. Effective user addition ensures that each user has the appropriate access and permissions for their role.
How To Add Users in Ubuntu 24.04 LTS
Ubuntu 24.04 LTS offers diverse methods for adding users, accommodating various preferences and needs. Whether you prefer the precision of terminal commands, the convenience of a graphical interface, or the efficiency of automation scripts, this guide covers it all. In this comprehensive guide, we will explore multiple methods for adding users in Ubuntu 24.04 LTS, including:
Using the Command Line: Employing powerful commands like adduser and useradd for detailed and controlled user creation.
Using the Graphical User Interface (GUI): Managing user accounts through Ubuntu’s intuitive settings interface.
Adding Users Temporarily: Creating users with expiration dates for specific tasks.
Automating User Creation with Scripts: Streamlining bulk user creation with custom scripts.
Each method is detailed with step-by-step instructions to ensure you can add users effectively and effortlessly, enhancing your Ubuntu experience.
Method 1: Adding a User Using the Command Line
This method is ideal for administrators who prefer using terminal commands.
Using adduser
An easy-to-use, high-level command for adding users is the adduser. It provides a guided process to set up a new user, including setting a password and additional user information.
Step 1: Open the Terminal
To access the terminal, simultaneously depress the Ctrl, Alt, and T keys. Alternatively, search for "Terminal" in your application menu.
Step 2: Add a New User
Execute the following command:
sudo adduser newuser

Substitute newuser with your desired username.
The password must be entered when prompted.
Take Note:
Make sure the password satisfies the following requirements:
Minimum of 8 characters.
Includes both upper and lower case letters.
Contains at least one number.
Includes special characters (e.g., !, @, #, $, etc.).

Enter the password and press Enter.
Type the password one more time and hit Enter to confirm it.
Some details will be asked while adding a new user like full name, room number, work phone, and home phone.

Any field can be skipped by pressing Enter.
After entering the information, you will see a summary of the details.

Confirm the details by typing Y and pressing Enter.
Step 3: Verify User Creation
Execute the below given command to check the new user's addition:
getent passwd newuser
If the command is successful in creating the user, the user's details will be shown like this:

Using useradd
A low-level utility for creating new users is the useradd command. It requires more specific options but offers greater control over the user creation process.
Step 1: Open the Terminal
The terminal can be opened by simultaneously holding down the Ctrl, Alt, and T keys.
Step 2: Add a New User
Run the following command, and substitute new_username with the username you prefer:
sudo useradd -m new_username
Making sure the user's home directory is created is ensured by the -m option.
Step 3: Set Password for the User
The new user can be assigned a password by using:
sudo passwd new_username

Type the password one more time and hit Enter to confirm it.
Step 4: Verify User Creation
Execute the below given command to check the new user's addition:
getent passwd new_username
If the command is successful in creating the user, the user's details will be shown.

Additional Steps (Optional)
Adding the User to a Specific Group
Use the below given command to add a new user to a certain group:
sudo usermod -aG groupname newuser
Replace groupname with the desired group (e.g., sudo, admin, docker).
Execute the below given command to check the new user's addition:
groups new_username
This command will list all the groups that the user belongs to, including the new group.

Method 2: Adding a User Using GUI (Graphical User Interface)
For those who prefer a graphical interface, Ubuntu provides an easy way to manage users through its settings. Here's a step-by-step guide to adding a new user using the GUI.
Step 1: Open Settings
To access the terminal:
Search for "Settings" in your application menu.

Step 2: Access Users Section
In the Settings window, go to the search bar at the top and type "Users."

As an alternative, move to the sidebar's bottom and select "System."

Click on "Users" from the options available in the System settings.
Step 3: Unlock User Management
Select the "Unlock" button by moving to the upper right corner.

Enter your administrative password and click "Authenticate."
Step 4: Add New User
Click the "Add User" button.
Input the required data, including your username and name.
You can choose to keep the toggle button inactive by default to designate the new user as a "Standard" user.
Then insert password.
Step 5: Confirm and Apply
Click "Add" to create the user.
Now the new user will appear in the user list.
Take Note
User Management:
Once the user is created, click on the username in the Users section to manage its settings.
Method 3: Adding a User Temporarily
For certain tasks, you might need to add a user that expires after a specified period. This method outlines how to create a user with an expiration date using the command line.
Step 1: Open the Terminal
The terminal can be opened by simultaneously holding down the Ctrl, Alt, and T keys.
Step 2: Add a User with an Expiry Date
Execute the following command:
sudo useradd -m -e YYYY-MM-DD temporaryuser
Replace YYYY-MM-DD with the desired expiration date and temporaryuser with your desired username.
Step 3: Set Password for the User
The new user can be assigned a password by using:
sudo passwd temporaryuser
Enter the password, when prompted.
Type the password and press Enter.
Type the password one more time and hit Enter to confirm it.
Step 4: Verify User
To verify that a temporary user has been created successfully, use the below given command:
sudo chage -l temporaryUser
Substitute the temporaryuser with the username you want to verify.
Method 4: Automating User Creation with Scripts
The method outlined here demonstrates automating user creation with scripts, particularly useful for bulk user creation tasks.
Step 1: Open the Terminal
The terminal can be opened by simultaneously holding down the Ctrl, Alt, and T keys.
Step 2: Create a Script
Any text editor will work for writing the script. Using nano, for instance:
nano add_users.sh
Step 3: Add Script Content
Add the following content to the script. Modify the usernames and other details as needed.
#!/bin/bash
sudo adduser user1 --gecos "First Last,RoomNumber,WorkPhone,HomePhone" --disabled-password
echo "user1:password1" | sudo chpasswd
sudo adduser user2 --gecos "First Last,RoomNumber,WorkPhone,HomePhone" --disabled-password
echo "user2:password2" | sudo chpasswd
Replace user1, user2, etc., with the desired usernames.
Modify the --gecos option to provide additional information about the user (optional).
Replace the password with the desired password.
Adjust the script content as needed, adding more users or customizing user details.
Save and close the file.
Step 4: Make the Script Executable
To enable the script to run, use the chmod command.
chmod +x add_users.sh

Step 5: Run the Script
Run the script to create the users.
./add_users.sh

Conclusion:
User management in Ubuntu 24.04 LTS is a critical task for system administrators, providing security, efficient resource allocation, and smooth system operation. With various methods available, from command-line interfaces to graphical user interfaces and automation scripts, Ubuntu 24.04 LTS ensures that adding users can be tailored to different needs and preferences. By following the comprehensive steps outlined in this guide, you can effectively manage regular users.
2 notes
·
View notes
Text

SYSTEM ADMIN INTERVIEW QUESTIONS 24-25
Table of Content
Introduction
File Permissions
User and Group Management:
Cron Jobs
System Performance Monitoring
Package Management (Red Hat)
Conclusion
Introduction
The IT field is vast, and Linux is an important player, especially in cloud computing. This blog is written under the guidance of industry experts to help all tech and non-tech background individuals secure interviews for roles in the IT domain related to Red Hat Linux.
File Permissions
Briefly explain how Linux file permissions work, and how you would change the permissions of a file using chmod. In Linux, each file and directory has three types of permissions: read (r), write (w), and execute (x) for three categories of users: owner, group, and others. Example: You will use chmod 744 filename, where the digits represent the permission in octal (7 = rwx, 4 = r–, etc.) to give full permission to the owner and read-only permission to groups and others.
What is the purpose of the umask command? How is it helpful to control default file permissions?umask sets the default permissions for newly created files and directories by subtracting from the full permissions (777 for directories and 666 for files). Example: If you set the umask to 022, new files will have permissions of 644 (rw-r–r–), and directories will have 755 (rwxr-xr-x).
User and Group Management:
Name the command that adds a new user in Linux and the command responsible for adding a user to a group. The Linux useradd command creates a new user, while the usermod command adds a user to a specific group. Example: Create a user called Jenny by sudo useradd jenny and add him to the developer’s group by sudo usermod—aG developers jenny, where the—aG option adds users to more groups without removing them from other groups.
How do you view the groups that a user belongs to in Linux?
The group command in Linux helps to identify the group a user belongs to and is followed by the username. Example: To check user John’s group: groups john
Cron Jobs
What do you mean by cron jobs, and how is it scheduled to run a script every day at 2 AM?
A cron job is defined in a crontab file. Cron is a Linux utility to schedule tasks to run automatically at specified times. Example: To schedule a script ( /home/user/backup.sh ) to run daily at 2 AM: 0 2 * * * /home/user/backup.sh Where 0 means the minimum hour is 2, every day, every month, every day of the week.
How would you prevent cron job emails from being sent every time the job runs?
By default, cron sends an email with the output of the job. You can prevent this by redirecting the output to /dev/null. Example: To run a script daily at 2 AM and discard its output: 0 2 * * * /home/user/backup.sh > /dev/null 2>&1
System Performance Monitoring
How can you monitor system performance in Linux? Name some tools with their uses.
Some of the tools to monitor the performance are: Top: Live view of system processes and usage of resource htop: More user-friendly when compared to the top with an interactive interface. vmstat: Displays information about processes, memory, paging, block IO, and CPU usage. iostat: Showcases Central Processing Unit (CPU) and I/O statistics for devices and partitions. Example: You can use the top command ( top ) to identify processes consuming too much CPU or memory.
In Linux, how would you check the usage of disk space?
The df command checks disk space usage, and Du is responsible for checking the size of the directory/file. Example: To check overall disk space usage: df -h The -h option depicts the size in a human-readable format like GB, MB, etc.
Package Management (Red Hat)
How do you install, update, or remove packages in Red Hat-based Linux distributions by yum command?
In Red Hat and CentOS systems, the yum package manager is used to install, update, or remove software. Install a package: sudo yum install httpd This installs the Apache web server. Update a package: sudo yum update httpd Remove a package:sudo yum remove httpd
By which command will you check the installation of a package on a Red Hat system?
The yum list installed command is required to check whether the package is installed. Example: To check if httpd (Apache) is installed: yum list installed httpd
Conclusion
The questions are designed by our experienced corporate faculty which will help you to prepare well for various positions that require Linux such as System Admin.
Contact for Course Details – 8447712333
2 notes
·
View notes
Text
Postal SMTP install and setup on a virtual server

Postal is a full suite for mail delivery with robust features suited for running a bulk email sending SMTP server. Postal is open source and free. Some of its features are: - UI for maintaining different aspects of your mail server - Runs on containers, hence allows for up and down horizontal scaling - Email security features such as spam and antivirus - IP pools to help you maintain a good sending reputation by sending via multiple IPs - Multitenant support - multiple users, domains and organizations - Monitoring queue for outgoing and incoming mail - Built in DNS setup and monitoring to ensure mail domains are set up correctly List of full postal features
Possible cloud providers to use with Postal
You can use Postal with any VPS or Linux server providers of your choice, however here are some we recommend: Vultr Cloud (Get free $300 credit) - In case your SMTP port is blocked, you can contact Vultr support, and they will open it for you after providing a personal identification method. DigitalOcean (Get free $200 Credit) - You will also need to contact DigitalOcean support for SMTP port to be open for you. Hetzner ( Get free €20) - SMTP port is open for most accounts, if yours isn't, contact the Hetzner support and request for it to be unblocked for you Contabo (Cheapest VPS) - Contabo doesn't block SMTP ports. In case you are unable to send mail, contact support. Interserver
Postal Minimum requirements
- At least 4GB of RAM - At least 2 CPU cores - At least 25GB disk space - You can use docker or any Container runtime app. Ensure Docker Compose plugin is also installed. - Port 25 outbound should be open (A lot of cloud providers block it)
Postal Installation
Should be installed on its own server, meaning, no other items should be running on the server. A fresh server install is recommended. Broad overview of the installation procedure - Install Docker and the other needed apps - Configuration of postal and add DNS entries - Start Postal - Make your first user - Login to the web interface to create virtual mail servers Step by step install Postal Step 1 : Install docker and additional system utilities In this guide, I will use Debian 12 . Feel free to follow along with Ubuntu. The OS to be used does not matter, provided you can install docker or any docker alternative for running container images. Commands for installing Docker on Debian 12 (Read the comments to understand what each command does): #Uninstall any previously installed conflicting software . If you have none of them installed it's ok for pkg in docker.io docker-doc docker-compose podman-docker containerd runc; do sudo apt-get remove $pkg; done #Add Docker's official GPG key: sudo apt-get update sudo apt-get install ca-certificates curl -y sudo install -m 0755 -d /etc/apt/keyrings sudo curl -fsSL https://download.docker.com/linux/debian/gpg -o /etc/apt/keyrings/docker.asc sudo chmod a+r /etc/apt/keyrings/docker.asc #Add the Docker repository to Apt sources: echo "deb https://download.docker.com/linux/debian $(. /etc/os-release && echo "$VERSION_CODENAME") stable" | sudo tee /etc/apt/sources.list.d/docker.list > /dev/null sudo apt-get update #Install the docker packages sudo apt-get install docker-ce docker-ce-cli containerd.io docker-buildx-plugin docker-compose-plugin -y #You can verify that the installation is successful by running the hello-world image sudo docker run hello-world Add the current user to the docker group so that you don't have to use sudo when not logged in as the root user. ##Add your current user to the docker group. sudo usermod -aG docker $USER #Reboot the server sudo reboot Finally test if you can run docker without sudo ##Test that you don't need sudo to run docker docker run hello-world Step 2 : Get the postal installation helper repository The Postal installation helper has all the docker compose files and the important bootstrapping tools needed for generating configuration files. Install various needed tools #Install additional system utlities apt install git vim htop curl jq -y Then clone the helper repository. sudo git clone https://github.com/postalserver/install /opt/postal/install sudo ln -s /opt/postal/install/bin/postal /usr/bin/postal Step 3 : Install MariaDB database Here is a sample MariaDB container from the postal docs. But you can use the docker compose file below it. docker run -d --name postal-mariadb -p 127.0.0.1:3306:3306 --restart always -e MARIADB_DATABASE=postal -e MARIADB_ROOT_PASSWORD=postal mariadb Here is a tested mariadb compose file to run a secure MariaDB 11.4 container. You can change the version to any image you prefer. vi docker-compose.yaml services: mariadb: image: mariadb:11.4 container_name: postal-mariadb restart: unless-stopped environment: MYSQL_ROOT_PASSWORD: ${DB_ROOT_PASSWORD} volumes: - mariadb_data:/var/lib/mysql network_mode: host # Set to use the host's network mode security_opt: - no-new-privileges:true read_only: true tmpfs: - /tmp - /run/mysqld healthcheck: test: interval: 30s timeout: 10s retries: 5 volumes: mariadb_data: You need to create an environment file with the Database password . To simplify things, postal will use the root user to access the Database.env file example is below. Place it in the same location as the compose file. DB_ROOT_PASSWORD=ExtremelyStrongPasswordHere Run docker compose up -d and ensure the database is healthy. Step 4 : Bootstrap the domain for your Postal web interface & Database configs First add DNS records for your postal domain. The most significant records at this stage are the A and/or AAAA records. This is the domain where you'll be accessing the postal UI and for simplicity will also act as the SMTP server. If using Cloudflare, turn off the Cloudflare proxy. sudo postal bootstrap postal.yourdomain.com The above will generate three files in /opt/postal/config. - postal.yml is the main postal configuration file - signing.key is the private key used to sign various things in Postal - Caddyfile is the configuration for the Caddy web server Open /opt/postal/config/postal.yml and add all the values for DB and other settings. Go through the file and see what else you can edit. At the very least, enter the correct DB details for postal message_db and main_db. Step 5 : Initialize the Postal database and create an admin user postal initialize postal make-user If everything goes well with postal initialize, then celebrate. This is the part where you may face some issues due to DB connection failures. Step 6 : Start running postal # run postal postal start #checking postal status postal status # If you make any config changes in future you can restart postal like so # postal restart Step 7 : Proxy for web traffic To handle web traffic and ensure TLS termination you can use any proxy server of your choice, nginx, traefik , caddy etc. Based on Postal documentation, the following will start up caddy. You can use the compose file below it. Caddy is easy to use and does a lot for you out of the box. Ensure your A records are pointing to your server before running Caddy. docker run -d --name postal-caddy --restart always --network host -v /opt/postal/config/Caddyfile:/etc/caddy/Caddyfile -v /opt/postal/caddy-data:/data caddy Here is a compose file you can use instead of the above docker run command. Name it something like caddy-compose.yaml services: postal-caddy: image: caddy container_name: postal-caddy restart: always network_mode: host volumes: - /opt/postal/config/Caddyfile:/etc/caddy/Caddyfile - /opt/postal/caddy-data:/data You can run it by doing docker compose -f caddy-compose.yaml up -d Now it's time to go to the browser and login. Use the domain, bootstrapped earlier. Add an organization, create server and add a domain. This is done via the UI and it is very straight forward. For every domain you add, ensure to add the DNS records you are provided.
Enable IP Pools
One of the reasons why Postal is great for bulk email sending, is because it allows for sending emails using multiple IPs in a round-robin fashion. Pre-requisites - Ensure the IPs you want to add as part of the pool, are already added to your VPS/server. Every cloud provider has a documentation for adding additional IPs, make sure you follow their guide to add all the IPs to the network. When you run ip a , you should see the IP addresses you intend to use in the pool. Enabling IP pools in the Postal config First step is to enable IP pools settings in the postal configuration, then restart postal. Add the following configuration in the postal.yaml (/opt/postal/config/postal.yml) file to enable pools. If the section postal: , exists, then just add use_ip_pools: true under it. postal: use_ip_pools: true Then restart postal. postal stop && postal start The next step is to go to the postal interface on your browser. A new IP pools link is now visible at the top right corner of your postal dashboard. You can use the IP pools link to add a pool, then assign IP addresses in the pools. A pool could be something like marketing, transactions, billing, general etc. Once the pools are created and IPs assigned to them, you can attach a pool to an organization. This organization can now use the provided IP addresses to send emails. Open up an organization and assign a pool to it. Organizations → choose IPs → choose pools . You can then assign the IP pool to servers from the server's Settings page. You can also use the IP pool to configure IP rules for the organization or server. At any point, if you are lost, look at the Postal documentation. Read the full article
0 notes
Video
youtube
How to Create a New User and Grant Sudo Privileges to it in Linux Debian
In this video we will create a user for our Linux system and then grant it the sudo privilege. The commands we will use in this tutorial go following.
# Create a new user sudo adduser USERNAME
Note: Replace USERNAME with the username of your choice and after pressing enter, give it the user password.
# Make user sudoer usermod -aG sudo USERNAME
# Method 2 of making a user sudoer visudo # Add the following line to the end of file: USERNAME ALL=(ALL:ALL) ALL Ctrl+X Y
# Log into the user account su - USERNAME
# Test privileges whoami sudo whoami
# Logout from an account logout
All Open Source!
Arashtad provides high quality tutorials, eBooks, articles and documents, design and development services, over 400 free online tools, frameworks, CMS, WordPress plugins, Joomla extensions, and other products.
More Courses ▶ https://tuts.arashtad.com/
Business Inquiries ▶ https://arashtad.com/business-inquiries/ Affiliate Programs ▶ https://arashtad.com/affiliate-programs/
eBooks ▶ https://press.arashtad.com/ Our Products ▶ https://market.arashtad.com/ Our Services ▶ https://arashtad.com/services/ Our Portfolio ▶ https://demo.arashtad.com/ Free Online Tools ▶ https://tools.arashtad.com/ Our Blog ▶ https://blog.arashtad.com/ Documents ▶ https://doc.arashtad.com/ Licensing ▶ https://arashtad.com/licensing/ About us ▶ https://arashtad.com/about/
Join Arashtad Network ▶ https://i.arashtad.com/
Our Social Profiles ▶ https://arashtad.com/arashtad-social-media-profiles/ Vimeo ▶ https://vimeo.com/arashtad Udemy ▶ https://www.udemy.com/user/arashtad GitHub ▶ https://github.com/arashtad Linkedin ▶ https://www.linkedin.com/company/arashtad Twitter ▶ https://twitter.com/arashtad
0 notes
Text
VirtualBox is an open-source and free virtualization utility made available by Oracle. It is recognised as one of the finest cross-platform applications for simultaneously creating and running virtual machines within an operating system. It is compatible with the majority of major Operating Systems, including macOS, Windows, and Linux. This post will assist you in installing VirtualBox on a CentOS 8 system. To install VirtualBox on CentOS, you can follow these steps: Update the system: Open a terminal and run the following command to update the package lists and upgrade existing packages: sqlCopy code sudo yum update Add the VirtualBox repository: Download and install the VirtualBox repository configuration package by running the following command: rubyCopy code sudo wget https://download.virtualbox.org/virtualbox/rpm/el/virtualbox.repo -P /etc/yum.repos.d/ Install VirtualBox: Use the following command to install VirtualBox and its dependencies: Copy code sudo yum install VirtualBox-6.1 Note: You can change the version number (6.1) in the command above to the latest available version if needed. Install the kernel module package: VirtualBox requires kernel modules to function properly. Install the kernel module package by running the following command: Copy code sudo yum install kernel-devel kernel-headers dkms Start and enable the VirtualBox service: Once the installation is complete, start the VirtualBox service and enable it to start automatically on boot by running the following commands: bashCopy code sudo systemctl start vboxdrv sudo systemctl enable vboxdrv Add your user to the vboxusers group: To allow your user account to access VirtualBox devices, run the following command: phpCopy code sudo usermod -aG vboxusers Replace with your actual username. Reboot your system: It's recommended to reboot your CentOS system after installing VirtualBox to ensure that all necessary services and modules are loaded properly. Launch the VirtualBox To launch the VirtualBox on CentOS 8, Open up your activities menu, search for “VirtualBox”, and from the search results, and select the Virtual box icon as shown in the picture below:
0 notes
Text
There's a good answer on stack overflow. Basically you call usermod twice to rename your username and group, then another command to rename your home directory. Not too complicated but read the answer in full before going ahead
gonna trans my linux username and see how it goes
313 notes
·
View notes
Link
0 notes
Text
HOW DO I INSTALL AND CHANGE MY SHELL TO BASH IN FREEBSD 13?
How to change your shell to Bash in FreeBSD.
For people transitioning from Linux to FreeBSD, a sense of familiarity is a desirable trait, particularly when facing the obstacles of learning the intricacies of a new operating system.
Most Linux distros have the Bash shall set as the default, so it makes sense, at least to begin with, to set up your new FreeBSD with Bash.
Vanilla FreeBSD installations won't already have the bash shell installed, so you''ll need to install it (the default shell for FreeBSD is tsch).
So, to business.
Get the latest package updates first via:
pkg update
Next, we'll run the actual installation by issuing the following command:
pkg install bash
Then run the following to set our shell to bash, where the username in the command equals the username you want to change the shell for:
chsh -s /usr/local/bin/bash username
Alternately you can also run the following:
pw usermod username -s /usr/local/bin/bash
If you want more information on Shells within FreeBSD, see the following from the FreeBSD Foundation:
2 notes
·
View notes
Text
1 note
·
View note
Text
Rhel Docker

Rhel Docker
Rhel Docker Ce
Rhel Docker
Rhel Docker Ce
The Remote - Containers extension lets you use a Docker container as a full-featured development environment. Whether you deploy to containers or not, containers make a great development environment because you can:
Develop with a consistent, easily reproducible toolchain on the same operating system you deploy to.
Quickly swap between different, isolated development environments and safely make updates without worrying about impacting your local machine.
Make it easy for new team members / contributors to get up and running in a consistent development environment.
Try out new technologies or clone a copy of a code base without impacting your local setup.
Rhel Docker
Rhel Docker Ce
The extension starts (or attaches to) a development container running a well defined tool and runtime stack. Workspace files can be mounted into the container from the local file system, or copied or cloned into it once the container is running. Extensions are installed and run inside the container where they have full access to the tools, platform, and file system.
Rhel Docker
Amazon Web Services (AWS) and Red Hat provide a complete, enterprise-class computing environment. Red Hat solutions on AWS give customers the ability to run enterprise traditional on-premises applications, such as SAP, Oracle databases, and custom applications in the cloud.
Windows 10 Home (2004+) requires Docker Desktop 2.2+ and the WSL2 back-end. (Docker Toolbox is not supported.) macOS: Docker Desktop 2.0+. Linux: Docker CE/EE 18.06+ and Docker Compose 1.21+. (The Ubuntu snap package is not supported.) Containers: x8664 / ARMv7l (AArch32) / ARMv8l (AArch64) Debian 9+, Ubuntu 16.04+, CentOS / RHEL 7+ x8664.
Docker volumes allow you to back up, restore, and migrate data easily. This tutorial explains what a Docker volume is and how to use it, as well as how to mount a volume in Docker.
Amazon Web Services (AWS) and Red Hat provide a complete, enterprise-class computing environment. Red Hat solutions on AWS give customers the ability to run enterprise traditional on-premises applications, such as SAP, Oracle databases, and custom applications in the cloud.
You then work with VS Code as if everything were running locally on your machine, except now they are isolated inside a container.
System Requirements
Local:
Windows:Docker Desktop 2.0+ on Windows 10 Pro/Enterprise. Windows 10 Home (2004+) requires Docker Desktop 2.2+ and the WSL2 back-end. (Docker Toolbox is not supported.)
macOS: Docker Desktop 2.0+.
Linux: Docker CE/EE 18.06+ and Docker Compose 1.21+. (The Ubuntu snap package is not supported.)
Containers:
x86_64 / ARMv7l (AArch32) / ARMv8l (AArch64) Debian 9+, Ubuntu 16.04+, CentOS / RHEL 7+
x86_64 Alpine Linux 3.9+
Other glibc based Linux containers may work if they have needed prerequisites.
While ARMv7l (AArch32), ARMv8l (AArch64), and musl based Alpine Linux support is available, some extensions installed on these devices may not work due to the use of glibc or x86 compiled native code in the extension. See the Remote Development with Linux article for details.
Note that while the Docker CLI is required, the Docker daemon/service does not need to be running locally if you are using a remote Docker host.
Installation
To get started, follow these steps:
Install VS Code or VS Code Insiders and this extension.
Install and configure Docker for your operating system.
Windows / macOS:
Install Docker Desktop for Mac/Windows.
If not using WSL2 on Windows, right-click on the Docker task bar item, select Settings / Preferences and update Resources > File Sharing with any locations your source code is kept. See tips and tricks for troubleshooting.
To enable the Windows WSL2 back-end: Right-click on the Docker taskbar item and select Settings. Check Use the WSL2 based engine and verify your distribution is enabled under Resources > WSL Integration.
Linux:
Follow the official install instructions for Docker CE/EE. If you use Docker Compose, follow the Docker Compose install directions.
Add your user to the docker group by using a terminal to run: sudo usermod -aG docker $USER Sign out and back in again so this setting takes effect.
Rhel Docker Ce
Working with Git? Here are two tips to consider:
If you are working with the same repository folder in a container and Windows, be sure to set up consistent line endings. See tips and tricks to learn how.
If you clone using a Git credential manager, your container should already have access to your credentials! If you use SSH keys, you can also opt-in to sharing them. See Sharing Git credentials with your container for details.
Getting started
Follow the step-by-step tutorial or if you are comfortable with Docker, follow these four steps:
Follow the installation steps above.
Clone https://github.com/Microsoft/vscode-remote-try-node locally.
Start VS Code
Run the Remote-Containers: Open Folder in Container... command and select the local folder.
Check out the repository README for things to try. Next, learn how you can:
Use a container as your full-time environment - Open an existing folder in a container for use as your full-time development environment in few easy steps. Works with both container and non-container deployed projects.
Attach to a running container - Attach to a running container for quick edits, debugging, and triaging.
Advanced: Use a remote Docker host - Once you know the basics, learn how to use a remote Docker host if needed.
Available commands
Another way to learn what you can do with the extension is to browse the commands it provides. Press F1 to bring up the Command Palette and type in Remote-Containers for a full list of commands.
You can also click on the Remote 'Quick Access' status bar item to get a list of the most common commands.
For more information, please see the extension documentation.
Release Notes
While an optional install, this extension releases with VS Code. VS Code release notes include a summary of changes to all three Remote Development extensions with a link to detailed release notes.
As with VS Code itself, the extensions update during a development iteration with changes that are only available in VS Code Insiders Edition.
Questions, Feedback, Contributing
Have a question or feedback?
See the documentation or the troubleshooting guide.
Up-vote a feature or request a new one, search existing issues, or report a problem.
Contribute a development container definition for others to use
Contribute to our documentation
...and more. See our CONTRIBUTING guide for details.
Or connect with the community...
Telemetry
Visual Studio Code Remote - Containers and related extensions collect telemetry data to help us build a better experience working remotely from VS Code. We only collect data on which commands are executed. We do not collect any information about image names, paths, etc. The extension respects the telemetry.enableTelemetry setting which you can learn more about in the Visual Studio Code FAQ.
License
By downloading and using the Visual Studio Remote - Containers extension and its related components, you agree to the product license terms and privacy statement.
2 notes
·
View notes
Text
Debian 12 initial server setup on a VPS/Cloud server

After deploying your Debian 12 server on your cloud provider, here are some extra steps you should take to secure your Debian 12 server. Here are some VPS providers we recommend. https://youtu.be/bHAavM_019o The video above follows the steps on this page , to set up a Debian 12 server from Vultr Cloud. Get $300 Credit from Vultr Cloud
Prerequisites
- Deploy a Debian 12 server. - On Windows, download and install Git. You'll use Git Bash to log into your server and carry out these steps. - On Mac or Linux, use your terminal to follow along.
1 SSH into server
Open Git Bash on Windows. Open Terminal on Mac/ Linux. SSH into your new server using the details provided by your cloud provider. Enter the correct user and IP, then enter your password. ssh root@my-server-ip After logging in successfully, update the server and install certain useful apps (they are probably already installed). apt update && apt upgrade -y apt install vim curl wget sudo htop -y
2 Create admin user
Using the root user is not recommended, you should create a new sudo user on Debian. In the commands below, Change the username as needed. adduser yournewuser #After the above user is created, add him to the sudo group usermod -aG sudo yournewuser After creating the user and adding them to the sudoers group, test it. Open a new terminal window, log in and try to update the server. if you are requested for a password, enter your user's password. If the command runs successfully, then your admin user is set and ready. sudo apt update && sudo apt upgrade -y
3 Set up SSH Key authentication for your new user
Logging in with an SSH key is favored over using a password. Step 1: generate SSH key This step is done on your local computer (not on the server). You can change details for the folder name and ssh key name as you see fit. # Create a directory for your key mkdir -p ~/.ssh/mykeys # Generate the keys ssh-keygen -t ed25519 -f ~/.ssh/mykeys/my-ssh-key1 Note that next time if you create another key, you must give it a different name, eg my-ssh-key2. Now that you have your private and public key generated, let's add them to your server. Step 2: copy public key to your server This step is still on your local computer. Run the following. Replace all the details as needed. You will need to enter the user's password. # ssh-copy-id -i ~/path-to-public-key user@host ssh-copy-id -i ~/.ssh/mykeys/my-ssh-key1.pub yournewuser@your-server-ip If you experience any errors in this part, leave a comment below. Step 3: log in with the SSH key Test that your new admin user can log into your Debian 12 server. Replace the details as needed. ssh yournewuser@server_ip -i ~/.ssh/path-to-private-key Step 4: Disable root user login and Password Authentication The Root user should not be able to SSH into the server, and only key based authentication should be used. echo -e "PermitRootLogin nonPasswordAuthentication no" | sudo tee /etc/ssh/sshd_config.d/mycustom.conf > /dev/null && sudo systemctl restart ssh To explain the above command, we are creating our custom ssh config file (mycustom.conf) inside /etc/ssh/sshd_config.d/ . Then in it, we are adding the rules to disable password authentication and root login. And finally restarting the ssh server. Certain cloud providers also create a config file in the /etc/ssh/sshd_config.d/ directory, check if there are other files in there, confirm the content and delete or move the configs to your custom ssh config file. If you are on Vultr cloud or Hetzner or DigitalOcean run this to disable the 50-cloud-init.conf ssh config file: sudo mv /etc/ssh/sshd_config.d/50-cloud-init.conf /etc/ssh/sshd_config.d/50-cloud-init Test it by opening a new terminal, then try logging in as root and also try logging in the new user via a password. If it all fails, you are good to go.
4 Firewall setup - UFW
UFW is an easier interface for managing your Firewall rules on Debian and Ubuntu, Install UFW, activate it, enable default rules and enable various services #Install UFW sudo apt install ufw #Enable it. Type y to accept when prompted sudo ufw enable #Allow SSH HTTP and HTTPS access sudo ufw allow ssh && sudo ufw allow http && sudo ufw allow https If you want to allow a specific port, you can do: sudo ufw allow 7000 sudo ufw allow 7000/tcp #To delete the rule above sudo ufw delete allow 7000 To learn more about UFW, feel free to search online. Here's a quick UFW tutorial that might help get you to understand how to perform certain tasks.
5 Change SSH Port
Before changing the port, ensure you add your intended SSH port to the firewall. Assuming your new SSH port is 7020, allow it on the firewall: sudo ufw allow 7020/tcp To change the SSH port, we'll append the Port number to the custom ssh config file we created above in Step 4 of the SSH key authentication setup. echo "Port 7020" | sudo tee -a /etc/ssh/sshd_config.d/mycustom.conf > /dev/null && sudo systemctl restart ssh In a new terminal/Git Bash window, try to log in with the new port as follows: ssh yournewuser@your-server-ip -i ~/.ssh/mykeys/my-ssh-key1 -p 7020 #ssh user@server_ip -i ~/.ssh/path-to-private-key -p 7020 If you are able to log in, then that’s perfect. Your server's SSH port has been changed successfully.
6 Create a swap file
Feel free to edit this as much as you need to. The provided command will create a swap file of 2G. You can also change all instances of the name, debianswapfile to any other name you prefer. sudo fallocate -l 2G /debianswapfile ; sudo chmod 600 /debianswapfile ; sudo mkswap /debianswapfile && sudo swapon /debianswapfile ; sudo sed -i '$a/debianswapfile swap swap defaults 0 0' /etc/fstab
7 Change Server Hostname (Optional)
If your server will also be running a mail server, then this step is important, if not you can skip it. Change your mail server to a fully qualified domain and add the name to your etc/hosts file #Replace subdomain.example.com with your hostname sudo hostnamectl set-hostname subdomain.example.com #Edit etc/hosts with your hostname and IP. replace 192.168.1.10 with your IP echo "192.168.1.10 subdomain.example.com subdomain" | sudo tee -a /etc/hosts > /dev/null
8 Setup Automatic Updates
You can set up Unattended Upgrades #Install unattended upgrades sudo apt install unattended-upgrades apt-listchanges -y # Enable unattended upgrades sudo dpkg-reconfigure --priority=low unattended-upgrades # Edit the unattended upgrades file sudo vi /etc/apt/apt.conf.d/50unattended-upgrades In the open file, uncomment the types of updates you want to be updated , for example you can make it look like this : Unattended-Upgrade::Origins-Pattern { ......... "origin=Debian,codename=${distro_codename}-updates"; "origin=Debian,codename=${distro_codename}-proposed-updates"; "origin=Debian,codename=${distro_codename},label=Debian"; "origin=Debian,codename=${distro_codename},label=Debian-Security"; "origin=Debian,codename=${distro_codename}-security,label=Debian-Security"; .......... }; Restart and dry run unattended upgrades sudo systemctl restart unattended-upgrades.service sudo unattended-upgrades --dry-run --debug auto-update 3rd party repositories The format for Debian repo updates in the etc/apt/apt.conf.d/50unattended-upgrades file is as follows "origin=Debian,codename=${distro_codename},label=Debian"; So to update third party repos you need to figure out details for the repo as follows # See the list of all repos ls -l /var/lib/apt/lists/ # Then check details for a specific repo( eg apt.hestiacp.com_dists_bookworm_InRelease) sudo cat /var/lib/apt/lists/apt.hestiacp.com_dists_bookworm_InRelease # Just the upper part is what interests us eg : Origin: apt.hestiacp.com Label: apt repository Suite: bookworm Codename: bookworm NotAutomatic: no ButAutomaticUpgrades: no Components: main # Then replace these details in "origin=Debian,codename=${distro_codename},label=Debian"; # And add the new line in etc/apt/apt.conf.d/50unattended-upgrades "origin=apt.hestiacp.com,codename=${distro_codename},label=apt repository"; There you go. This should cover Debian 12 initial server set up on any VPS or cloud server in a production environment. Additional steps you should look into: - Install and set up Fail2ban - Install and set up crowdsec - Enable your app or website on Cloudflare - Enabling your Cloud provider's firewall, if they have one.
Bonus commands
Delete a user sudo deluser yournewuser sudo deluser --remove-home yournewuser Read the full article
0 notes
Video
youtube
How to Install Docker and Create, Use, or Delete Docker Images
In this video we will install docker on a Linux Debian 12 server, then we will create a simple app, build a docker image and run the app on the docker image and after all we remove the image and then uninstall docker from the server completely. The commands we will use for this task go following.
# Update your package list: sudo apt update
# Install necessary packages: sudo apt install apt-transport-https ca-certificates curl software-properties-common
# Add Docker’s official GPG key: curl -fsSL https://download.docker.com/linux/debian/gpg | sudo gpg --dearmor -o /usr/share/keyrings/docker-archive-keyring.gpg
# Set up the stable repository: echo "deb [arch=$(dpkg --print-architecture) signed-by=/usr/share/keyrings/docker-archive-keyring.gpg] https://download.docker.com/linux/debian $(lsb_release -cs) stable" | sudo tee /etc/apt/sources.list.d/docker.list > /dev/null
# Update the package list again to include Docker's repository: sudo apt update
# Install Docker: sudo apt install docker-ce docker-ce-cli containerd.io
# Verify the installation: sudo systemctl status docker
# You should see Docker running. You can also verify by running: sudo docker --version
# (Optional) Allow your user to run Docker commands without sudo: sudo usermod -aG docker $USER Log out and log back in for the group membership to be re-evaluated.
0 notes
Link
In my previous article, I had explained how to create a new user in Linux. Today you will learn how to modify an existing user account in Linux using the usermod command.
usermod stands for “User Modification”.
As a Linux Administrator, many times you get requests for modifications in existing User such as change the primary group of the user, add a user to one/multiple supplementary groups, change login name, Lock or Unlock an account, change the Home directory, change UID or GID and so on.
You have to run the usermod command as a root user because upon running this command, it makes changes to the following important configuration files whose owner is root.
/etc/passwd
/etc/shadow
/etc/gshadow
/etc/group
3 notes
·
View notes
Text
RTX 2080Ti vs RTX 3090 Machine Learning Benchmarks

NVIDIA’s 2nd generation RTX architecture brings more performance for faster Machine Learning training. We tested four Geforce RTX 2080Ti GPUs against three Geforce RTX 3090 GPUs and found that three RTX 3090s performed similar or better than four RTX 2080Ti’s for most tests with the same batch size. The RTX 3090s offer faster training with larger batch sizes as well, thanks to the additional memory available in the RTX 3090. Three RTX 3090s were used, rather than four, due to their increased power requirements.
The tests were conducted on the new Thelio Mega workstation from System76. Thelio Mega was engineered specifically for graphics compute intensive workloads.
The tests include Inception3, Resnet50, Resnet152, VGG16, and Inception4 models. We used Tensorman, available in Pop!_OS, to run the tests. Tensorman is a tool that makes it easy to manage Tensorflow toolchains.

*GeForce RTX 2080Ti were unable to run larger batch sizes due to limited memory. RTX 3090 performance should improve further when new CUDA versions are supported in Tensorflow.
Commands used to run these tests in Pop!_OS 20.04 LTS Install Tensorman
sudo apt install tensorman sudo apt install nvidia-container-runtime sudo usermod -aG docker $USER reboot
Clone the Benchmarks
git clone https://github.com/tensorflow/benchmarks.git cd benchmarks
Run Tests Tensorflow nightly is required for the RTX 3090. Change --num_gpus= to match your setup and --batch_size= for your desired test.
tensorman pull nightly
tensorman +nightly run --gpu python -- ./scripts/tf_cnn_benchmarks/tf_cnn_benchmarks.py --batch_size=128 --model=inception3 --variable_update=parameter_server --use_fp16=True --num_gpus=4
tensorman +nightly run --gpu python -- ./scripts/tf_cnn_benchmarks/tf_cnn_benchmarks.py --batch_size=64 --model=inception4 --variable_update=parameter_server --use_fp16=True --num_gpus=4
tensorman +nightly run --gpu python -- ./scripts/tf_cnn_benchmarks/tf_cnn_benchmarks.py --batch_size=128 --model=resnet50 --variable_update=parameter_server --use_fp16=True --num_gpus=4
tensorman +nightly run --gpu python -- ./scripts/tf_cnn_benchmarks/tf_cnn_benchmarks.py --batch_size=64 --model=resnet152 --variable_update=parameter_server --use_fp16=True --num_gpus=4
tensorman +nightly run --gpu python -- ./scripts/tf_cnn_benchmarks/tf_cnn_benchmarks.py --batch_size=128 --model=vgg16 --variable_update=parameter_server --use_fp16=True --num_gpus=4
The above tests are good for measuring component performance, but not the computer and its thermal system. Training models with a high degree of accuracy takes hours or days. Intense GPU use over an extended period of time demonstrates the system’s performance in real-world scenarios. We use stress-ng and gpuburn tools while engineering our products to ensure maximum component performance over extended compute workloads. More details on that testing and the results for Thelio Mega are coming soon.
Thelio Mega Configuration AMD Ryzen Threadripper 3990X 250 GB Samsung 970 Evo Plus NVMe M.2 Drive 64GB 3200 MHz Kingston HyperX Memory 4 x NVIDIA GeForce RTX 2080ti (Gigabyte GV-N208TTURBO-11GC) 3 x NVIDIA GeForce RTX 3090 (Gigabyte GV-N3090TURBO-24GD)
5 notes
·
View notes
Text
How to launch a symlinked Source 2 addon in the tools & commands to improve the SFM
I like to store a lot of my 3D work in Dropbox, for many reasons. I get an instant backup, synchronization to my laptop if my desktop computer were to suddenly die, and most importantly, a simple 30-day rollback “revision” system. It’s not source control, but it’s the closest convenience to it, with zero effort involved.

This also includes, for example, my Dota SFM addon. I have copied over the /content and /game folder hierarchies inside my Dropbox. On top of the benefits mentioned above, this allows me to launch renders of different shots in the same session easily! With some of my recent work needing to be rendered in resolutions close to 4K, it definitely isn’t a luxury.
So now, of course, I can’t just launch my addon from my Dropbox. I have to create two symbolic links first — basically, “ghost folders” that pretend to be the real ones, but are pointing to where I moved them! Using these commands:
mklink /J "C:\Program Files (x86)\Steam\SteamApps\common\dota 2 beta\content\dota_addons\usermod" "D:\path\to\new\location\content"
and
mklink /J "C:\Program Files (x86)\Steam\SteamApps\common\dota 2 beta\game\dota_addons\usermod" "D:\ path\to\new\location\game"
Now, there’s a problem though; somehow, symlinked addons don’t show up in the tools startup manager (dota2cfg.exe, steamtourscfg.exe, etc)
It’s my understanding that symbolic links are supposed to be transparent to these apps, so maybe they actually aren’t, or Source 2 is doing something weird... I wouldn’t know! But it’s not actually a problem.
Make a .bat file wherever you’d like, and drop this in there:
start "" "C:\Program Files (x86)\Steam\steamapps\common\dota 2 beta\game\bin\win64\dota2.exe" -addon usermod -vconsole -tools -steam -windowed -noborder -width 1920 -height 1080 -novid -d3d11 -high +r_dashboard_render_quality 0 +snd_musicvolume 0.0 +r_texturefilteringquality 5 +engine_no_focus_sleep 0 +dota_use_heightmap 0 -tools_sun_shadow_size 8192 EXIT
Of course, you’ll have replace the paths in these lines (and the previous ones) by the paths that match what you have on your own machine.
Let me go through what each of these commands do. These tend to be very relevant to Dota 2 and may not be useful for SteamVR Home or Half-Life: Alyx.
-addon usermod is what solves our core issue. We’re not going through the launcher (dota2cfg.exe, etc.) anymore. We’re directly telling the engine to look for this addon and load it. In this case, “usermod” is my addon’s name... most people who have used the original Source 1 SFM have probably created their addon under this name 😉
-vconsole enables the nice separate console right away.
-windowed -noborder makes the game window “not a window”.
-width 1920 -height 1080 for its resolution. (I recommend half or 2/3rds.)
-novid disables any startup videos (the Dota 2 trailer, etc.)
-d3d11 is a requirement of the tools (no other APIs are supported AFAIK)
-high ensures that the process gets upgraded to high priority!
+r_dashboard_render_quality 0 disables the fancier Dota dashboard, which could theoretically by a bit of a background drain on resources.
+snd_musicvolume 0.0 disables any music coming from the Dota menu, which would otherwise come back on at random while you click thru tools.
+r_texturefilteringquality 5 forces x16 Anisotropic Filtering.
+engine_no_focus_sleep 0 prevents the engine from “artificially sleeping” for X milliseconds every frame, which would lower framerate, saving power, but also potentially hindering rendering in the SFM. I’m not sure if it still can, but better safe than sorry.
+dota_use_heightmap 0 is a particle bugfix that prevents certain particles from only using the heightmap baked at compile time, instead falling back on full collision. You may wish to experiment with both 0 and 1 when investigating particle behaviours.
-tools_sun_shadow_size 8192 sets the Global Light Shadow res to 8192 instead of 1024 (on High) or 2048 (on Ultra). This is AFAIK the maximum.
And don’t forget that “EXIT” on a new line! It will make sure the batch file automatically closes itself after executing, so it’ll work like a real shortcut.
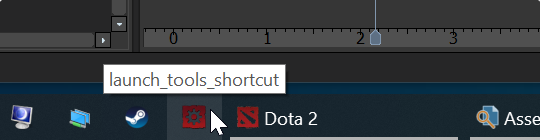
Speaking of, how about we make it even nicer, and like an actual shortcut? Right-click on your .bat and select Create Shortcut. Unfortunately, it won’t work as-is. We need to make a few changes in its properties.
Make sure that Target is set to:
C:\Windows\System32\cmd.exe /C "D:\Path\To\Your\BatchFile\Goes\Here\launch_tools.bat"
And for bonus points, you can click Change Icon and browse to dota2cfg.exe (in \SteamApps\common\dota 2 beta\game\bin\win64) to steal its nice icon! And now you’ve got a shortcut that will launch the tools in just one click, and that you can pin directly to your task bar!
Enjoy! 🙂
8 notes
·
View notes
Text
A Vagrant Story
Like everyone else I wish I had more time in the day. In reality, I want to spend more time on fun projects. Blogging and content creation has been a bit on a hiatus but it doesn't mean I have less things to write and talk about. In relation to this rambling I want to evangelize a tool I've been using over the years that saves an enormous amount of time if you're working in diverse sandbox development environments, Vagrant from HashiCorp.
Elevator pitch
Vagrant introduces a declarative model for virtual machines running in a development environment on your desktop. Vagrant supports many common type 2 hypervisors such as KVM, VirtualBox, Hyper-V and the VMware desktop products. The virtual machines are packaged in a format referred to as "boxes" and can be found on vagrantup.com. It's also quite easy to build your own boxes from scratch with another tool from HashiCorp called Packer. Trust me, if containers had not reached the mainstream adoption it has today, Packer would be a household tool. It's a blog post in itself for another day.
Real world use case
I got roped into a support case with a customer recently. They were using the HPE Nimble Storage Volume Plugin for Docker with a particular version of NimbleOS, Docker and docker-compose. The toolchain exhibited a weird behavior that would require two docker hosts and a few iterations to reproduce the issue. I had this environment stood up, diagnosed and replied to the support team with a customer facing response in less than an hour, thanks to Vagrant.
vagrant init
Let's elaborate on how to get a similar environment set up that I used in my support engagement off the ground. Let's assume vagrant and a supported type 2 hypervisor is installed. This example will work on Windows, Linux and Mac.
Create a new project folder and instantiate a new Vagrantfile. I use a collection of boxes built from these sources. Bento boxes provide broad coverage of providers and a variety of Linux flavors.
mkdir myproj && cd myproj vagrant init bento/ubuntu-20.04 A `Vagrantfile` has been placed in this directory. You are now ready to `vagrant up` your first virtual environment! Please read the comments in the Vagrantfile as well as documentation on `vagrantup.com` for more information on using Vagrant.
There's now a Vagrantfile in the current directory. There's a lot of commentary in the file to allow customization of the environment. It's possible to declare multiple machines in one Vagrantfile, but for the sake of an introduction, we'll explore setting up a single VM.
One of the more useful features is that Vagrant support "provisioners" that runs at first boot. It makes it easy to control the initial state and reproduce initialization with a few keystrokes. I usually write Ansible playbooks for more elaborate projects. For this exercise we'll use the inline shell provisioner to install and start docker.
Vagrant.configure("2") do |config| config.vm.box = "bento/ubuntu-20.04" config.vm.provision "shell", inline: <<-SHELL apt-get update apt-get install -y docker.io python3-pip pip3 install docker-compose usermod -a -G docker vagrant systemctl enable --now docker SHELL end
Prepare for very verbose output as we bring up the VM.
Note: The vagrant command always assumes working on the Vagrantfile in the current directory.
vagrant up
After the provisioning steps, a new VM is up and running from a thinly cloned disk of the source box. Initial download may take a while but the instance should be up in a minute or so.
Post-declaration tricks
There are some must-know Vagrant environment tricks that differentiate Vagrant from right-clicking in vCenter or fumbling in the VirtualBox UI.
SSH access
Accessing the shell of the VM can be done in two ways, most commonly is to simply do vagrant ssh and that will drop you at the prompt of the VM with the predefined user "vagrant". This method is not very practical if using other SSH-based tools like scp or doing advanced tunneling. Vagrant keeps track of the SSH connection information and have the capability to spit it out in a SSH config file and then the SSH tooling may reference the file. Example:
vagrant ssh-config > ssh-config ssh -F ssh-config default
Host shared directory
Inside the VM, /vagrant is shared with the host. This is immensely helpful as any apps your developing for the particular environment can be stored on the host and worked on from the convenience of your desktop. As an example, if I were to use the customer supplied docker-compose.yml and Dockerfile, I'd store those in /vagrant/app which in turn would correspond to my <current working directory for the project>/app.
Pushing and popping
Vagrant supports using the hypervisor snapshot capabilities. However, it does come with a very intuitive twist. Assume we want to store the initial boot state, let's push!
vagrant snapshot push ==> default: Snapshotting the machine as 'push_1590949049_3804'... ==> default: Snapshot saved! You can restore the snapshot at any time by ==> default: using `vagrant snapshot restore`. You can delete it using ==> default: `vagrant snapshot delete`.
There's now a VM snapshot of this environment (if it was a multi-machine setup, a snapshot would be created on all the VMs). The snapshot we took is now on top of the stack. Reverting to the top of the stack, simply pop back:
vagrant snapshot pop --no-delete ==> default: Forcing shutdown of VM... ==> default: Restoring the snapshot 'push_1590949049_3804'... ==> default: Checking if box 'bento/ubuntu-20.04' version '202004.27.0' is up to date... ==> default: Resuming suspended VM... ==> default: Booting VM... ==> default: Waiting for machine to boot. This may take a few minutes... default: SSH address: 127.0.0.1:2222 default: SSH username: vagrant default: SSH auth method: private key ==> default: Machine booted and ready! ==> default: Machine already provisioned. Run `vagrant provision` or use the `--provision` ==> default: flag to force provisioning. Provisioners marked to run always will still run.
You're now back to the previous state. The snapshot sub-command allows restoring to a particular snapshot and it's possible to have multiple states with sensible names too, if stepping through debugging scenarios or experimenting with named states.
Summary
These days there's a lot of compute and memory available on modern laptops and desktops. Why run development in the cloud or a remote DC when all you need is available right under your finger tips? Sure, you can't run a full blown OpenShift or HPE Container Platform but you can certainly run a representable Kubernetes clusters where minishift, microk8s and the likes won't work if you need access to the host OS (yes, I'm in the storage biz). In a recent personal project I've used this tool to simply make Kubernetes clusters with Vagrant. It works surprisingly well and allow a ton of customization.
Bonus trivia
Vagrant Story is a 20 year old videogame for PlayStation (one) from SquareSoft (now SquareEnix). It features a unique battle system I've never seen anywhere else to this day and it was one of those games I played back-to-back three times over. It's awesome. Check it out on Wikipedia.
1 note
·
View note