#uv mapping
Text


Returning to hominid facial anatomy once again, I was able to adapt my A. sediba muscle model onto the OH5 skull (P. boisei) too! I'm happy enough with it that I went ahead and rendered some skins for them as well. Selected all the right vertices and generated UV maps and everything. Hopefully the colors look as legible on your screens as they do on mine, these are still very much in progress.
My restoration of this individual was partly based on an earlier attempt at rendering Paranthropus, from back in 2019. There were a lot of elements that got tweaked or entirely changed up in the update, but the mouth got to stay the same between renderings. Having even a little understanding of the face muscles makes a visible difference from one model to another, and I'm sure there's still some parts I could improve on as I keep working in this vein. If anyone has more technical knowledge about this sort of thing than I do, feel entirely free to get at me : )


#hominids#human evolution#Australopithecines#Australopithecus sediba#Paranthropus boisei#hominid facial reconstruction#digital sculpture#Blender#paleoart#South African prehistory#Tanzanian prehistory#anatomical model#UV mapping#comparing old art and new art#Christopher Maida Artwork
17 notes
·
View notes
Text
blender trenches invite link
feel free to join!
#blender3d#3d modeling#3d art#3d sculpting#game dev#indie dev#animation#uv mapping#geometry nodes#grease pencil#signal boosts appreciated#not a whole lot of traffic in there so we'd love some more members
7 notes
·
View notes
Text
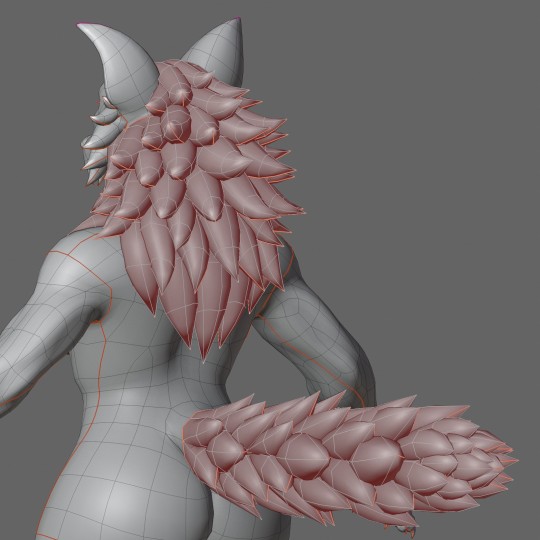
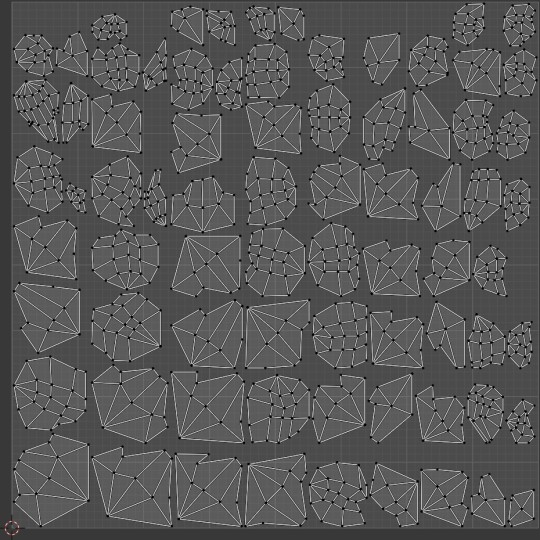
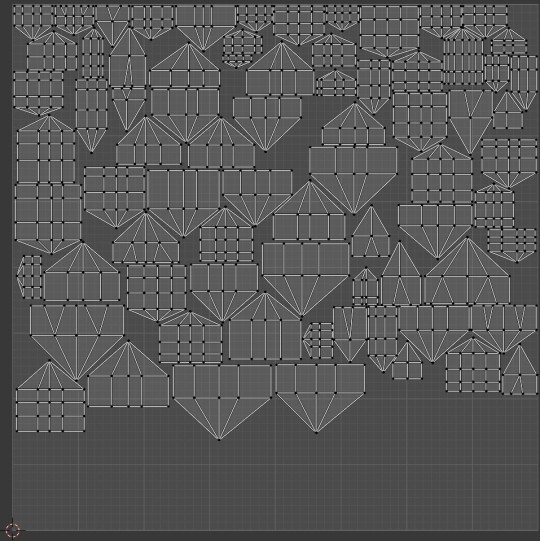
Fur floccule UV mapping, before and after.
Looking at it now, I probably could have made the islands a bit shapelier, but at least it's better than what Blender does automatically. It's like a geometry puzzle. XD
8 notes
·
View notes
Text
Creating material and shading for my animation
#3d blender#blender#eevee render#3d render#blender eevee#blender render#my renders#3d model#3d modelling#uv#uv mapping#procedurally generated#texture#textures#3d texturing#blue#underwater#animators on tumblr#3d animation#animation#caustics#water caustics#diver#neoprene#diving suit#character design#original character#original charater art#art process#my artwork
2 notes
·
View notes
Text

Started working on a new character this weekend!
Name TBD, let's call him Kenny for now.
Some small texture details to add later but pretty happy with how he's developing so far.

Took some extra time to figure out how to approach face expressions and animation, I at one point considered modeling the face fully but ultimately I determined that was a huge time sink for rigging and animation. So what I decided on is a texture sheet of many different expressions. some tutorials I looked up would say it's a sprite sheet.
Despite it being a straightforward method and pretty simple to setup in Blender(and certainly an old method, especially in video games if I'm not wrong) I couldn't quite find a good resource on this method, I bet there is one but not easy to google.
Anyway - eventually I will have to figure out how to swap character faces in Unity whenever I get around to importing them. and make a workflow for marking face swaps, because I don't believe the material data I animate in Blender won't import into Unity.
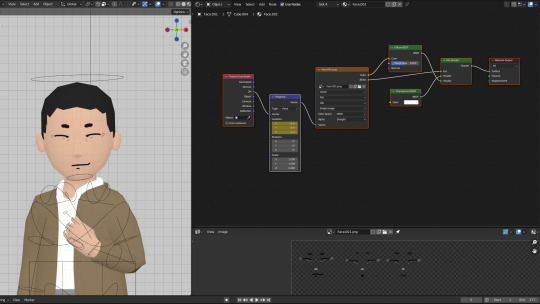
here's the node setup for anyone curious :)
(This of course could be setup a little better for animation in blender but for my needs I just key-framed the X Location.)

Lastly here's a little test animation!
I made this Japanese style classroom a while ago, so it was nice to just have it ready to go!
Tho it definitely needs some more props and things on the walls! Also students!
Unsure if I want him to have glasses or not. What do you think?

Excited to show more later :)
Until then peace out,
MKO~
#blender3d#animation#3d animation#lowpoly#b3d#blender#unity3d#gamedev#UV mapping#sensei#rigging#stylized 3d#3d art#gif#material nodes#indie dev#indie animation
10 notes
·
View notes
Text

i animooted plane
3 notes
·
View notes
Text
youtube
Made a VR game called Bhavishyakaal for my senior capstone project that gives an environmental conservation message
0 notes
Text

I unfortunately forgot to screenshot the horror show that was my UV map before I textured
To describe it, it started off as a box with an amalgamation of lines everywhere inside it, which is obviously bad. I attempted to cut and unfold the joints and the UV completely freaked out when I tried to do that, so I just used the automatic method that separates the ploy's for me, and no it didn't look like the image you see now but it was less of an eyesore to look at because it had a bunch of shapes aligned next to each other. The UV guide on it wasn't perfect but it was less distorted, enough to start texturing
the UV map you see now is how it looked when substance painter reworked the UV further for me when I textured my model
the next big scare when it came to texturing my model was if maya decided it couldn't read it, the reason I had to do my camera pan-around in the modelling view for my room model last semester
0 notes
Text
Printing out the UV map so I can color in the texture with crayons
0 notes
Text
Look, my UV mapping skills aren't the best either as a VRC creator, but can we please not have UVs that turn back and wrap around on their own mesh, creating an unholy ouroboros of texturing madness?
Not asking for much, I don't care if your UV packing isn't the most 'optimal', I just don't want to have to sacrifice my first born son to be able to navigate a labyrinthian maze of polygons.
1 note
·
View note
Text
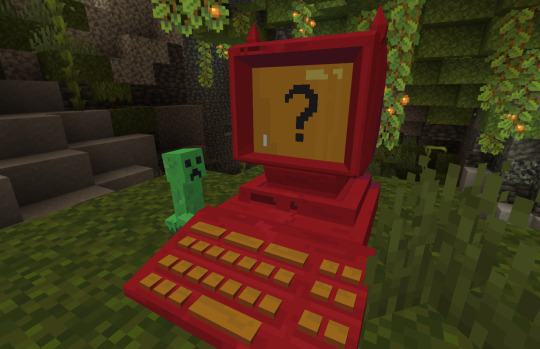
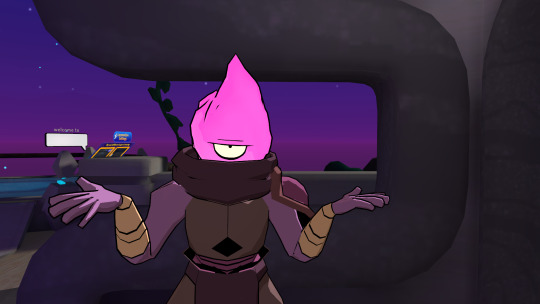
he is like a spore creature to me
#electric dreams#electric dreams 1984#edgar electric dreams#god i havent posted art on this account since foreverrrrr#the second gif looks a little bit strange because gay ass blockbench doesnt have a way to 2d animate#so i had to make do with what i had#im not using blender im just not#those uv maps got hands!!!!!#my art#3d animation#3d art#3d render
1K notes
·
View notes
Text
Arcade Machine | Maya UV


This is my first proper UV Mapping that I have done correctly and it was done using Maya. After I had created my arcade machine I change my workspace view from General to UV Editing, once I had done that I hovered over create -> automatic so it would create my arcade machine UV layout. Subsequently, I would export my UV layout and open it in photoshop so I could draw my textures, because it was my first proper UV editing I decided to go with a more simplistic but cartoony design.
All I had to do after everything was done was to just get the texture I had created in Maya, the way I did this was by holding right click to assign new material, click lambert, click the highlighted yellow part, click file, and finally you choose the image that is your UV texture that can be found in the details panel. Once all of that is done there is one final step which is just to click the textured icon at the top of your screen so you can see the texture.
0 notes
Text


trying to make my OC on Vroid because im crazy
bonus ponytail view

#he's so cute i am going to die#im not finished paiting the uv mapping but i just wanted to make smth rudimentary so i can put it in 7d2d LMAO#there's so many stock cutesy anime poses in the photobooth i can make him do and it's kinda making me insane (positive)#jishen heyang
55 notes
·
View notes
Text


HE'S IN!!!!!! BOBBY DEADCELLS VRCHAT REAL
this is the first time i've ever made an avatar from scratch so i can definitely see i have to improve on some things (the hands looked decent in blender i swear T_T i think it's mostly a rigging issue but the mesh could use some work too) but i'm just happy to have him in a usable state!!!!! and i'm really happy with how the expressions turned out!!
i'll probably fix the hands eventually though, but i've been working on this basically non stop for the past 4 days so i need a BREAK lmao.
also collector is next >:) get over here, you're going in the blender
#placeholder art tag while i think of something fun to use#dead cells#YIPPEEEEE I LOVE ACTUALLY FINISHING SOMETHING FOR ONCE#i've learned a lot with this but i still have a lot more to learn lmao#you should see the uv map. it's not good!
217 notes
·
View notes
Last Seen Blogs

jameglanson420-blog
Untitled

nowneversaynever
never say never

sweetelis
Sweet Elis

marmorafarms
hijabi? more like ho-jabi

chromonausea
C H R O M O N A U S E A