
install here: https://linktr.ee/atlas_db A Notion-Based Database for Writers and Artists To Organise and Develop Information Regarding Their Original Characters Atlas was my final project for my ba in graphic design, and therefore will not receive any updates.
Don't wanna be here? Send us removal request.
Statistics
We looked inside some of the posts by atlas-database and here's what we found interesting.
Average Info
Notes Per Post
101
Likes Per Post
92
Reblog Per Post
9
Reply Per Post
0
Time Between Posts
12 days
Number of Posts By Type
Text
8
Last Seen Tumblr Blogs


Fun Fact
Kazakhstan’s Minister of Communications and Informatics has blocked the Tumblr site because it contained 60 sites of terrorism, extremism, and pornography in 2015.
Text
Hi all! I really am grateful for the attention my work is getting! If you didn't already know, I made Atlas as my final project of my Graphic Design degree, therefore it will receive no updates.
Personally I feel that (and I can say this now I've graduated) was probably not the best project to do as it was hard to sort of 'graphically design' the database enough to get a good grade. So the database might seem sort of over-engineered with images, feel free to delete all of these and just do whatever you want, rearrange things, delete the homepage, delete databases that don't apply to you, do whatever!
I do actually use an older version (I made for my own ocs before I decided to improve it as this project), so
Please feel free to DM me or send me any asks if you need any help!
2 notes
·
View notes
Text

~ Atlas Character Chart ~
( plain version under the cut )

22 notes
·
View notes
Text
Getting Started with Atlas' Writing Tracker & To-Do List

The to-do list and writing trackers are a great way to keep all your ideas organised and under control!
This post will explain how to use every aspect of both tools, so you can use Atlas to its full potential!
Writing Tracker

The writing tracker is a versatile way to keep track of your work!
To add a new work/idea, just click the "new" button under any of the three categories, and give it a name.
Once you've added it in, you can click on the work to open it as a page, and this can be used to store notes or ideas, or even the work itself.
Once you've finished writing a piece, you can drag it over to the "done section," how satisfying!
To-Do List

Here you can add in tasks and ideas you wish to complete, and categorise them with the tags provided (or add your own)
Like all our other databases, these tasks can be opened as their own page to store notes and ideas!
Once you've completed a task, you can check the box on the left-hand side, and it will be hidden, (but not deleted, so you can still check your notes later!)
1 note
·
View note
Text
Getting Started with Atlas' Relationship Database

Want to keep track of all the ships in your story/universe? With the Relationships Database, you can do just that!
This post will explain how to use every aspect of the database, so you can use Atlas to its full potential!

The database comes with 9 columns, for all your data storing needs:
Type
Click to tag relationships by F/F M/F M/M or Other
Shipname
Here you will enter the ship name for the relationship, (don't worry if you don't have one, feel free to put PersonA & PersonB if you wish)
By hovering the mouse over this section, you will see a button that reads "open", after clicking on this a page will open where you can keep notes, images or anything you wish about the ship!
Person 1 & 2

These columns are for entering the names of each person in the ship, (if you have ships with more than two people, feel free to duplicate these columns to add more!)
To link back to your character pages, double-click on the text you have entered and press the link button (or ctrl + k), then type in the name of your character, and click on their page in the search box below. This will open their page in a new tab when the name is clicked.
Relationship Status
By clicking on the column, you can add the relationship status of your ship. We provided a list of choices, but feel free to add your own by typing into the box!
Start Date
Click on the column to open a calendar menu where you can type in or use the calendar to keep note of the when the character's relationship started.
Date of Legal Partnership
Are your characters married? Use this column's calendar to input the date of their wedding (or other legal partnership)
Children (Biological)
This column is for quickly taking note of the number of children your characters have had together, (if you would like this to include adopted children, you can remove edit the title by right-clicking on the column header.)
End Date
Did your characters break up, if so, use this column to record the date when their relationship ended. (You can leave this blank for continued relationships.)
5 notes
·
View notes
Text
Getting Started with Atlas' Timeline

The timeline is one of the main aspects of Atlas. Here you add important plot information, so you can keep track of what happens, where, when, and to whom.
This post will explain how to use every aspect of the timeline, so you can use Atlas to its full potential!
The timeline is fully functional from the home page, but should you want to make it full screen, just hover your mouse over it and click the two outwardly facing arrows next to the blue "new" button.
Adding a New Entry

At the bottom of the timeline, click "+ New" to add a new row, then click inside this row and begin typing!
When hovering your mouse over the event column, a box will appear that allows you to open a page for each event, which can be used to write notes or store other related information.
The leftmost column is where you will add the date of the event (you can even add the time if you wish), clicking on the box will open a calendar, from which you can select the date, or type it in at the top.
The two columns on the right side are for tagging your entries, so you can easily find them later!
These work by using the select properties, so once you have added a location or character once, you only have to click to select it the following times.
(Tip: If you have a group of characters participating in the same events, you can create a tag for that group to save you from having to enter multiple names each time!)
Sorting and Filtering


Like the character database, the timeline can be sorted and filtered by its different properties.
To add a sort or filter, click the upside-down pyramid icon for filters, and the opposite arrows icon for sorting.
Once you have done this, a menu will open on the left-hand side, where you can choose what to filter or sort by.
2 notes
·
View notes
Text


Which Template Style Should I Choose?
Atlas comes with two Character Page templates, the Wiki Style (left), and Timeline Style (right).
Wiki Style
As the name suggests, the Wiki Style is formatted like a page on Wikipedia, with written descriptions and a sidebar for small pieces of information.
This template includes sections for;
Appearance
Personality
Trivia
Likes & Dislikes
Filtered Timeline View
Timeline Style
The Timeline Style is a straightforward template that is quick and easy to set up.
All you have to do is to filter the timeline to the character's tag, and that's it! (Having a timeline filtered for each character on their own page saves you from having to keep filtering and un-filtering the main timeline!)
This template is great for people with many characters, and those who would not benefit from writing character biographies.
As the character properties are shown above each page, you can easily reference necessary facts (such as date of birth, height, etc.) without manually copying it to the wiki-style side column.
3 notes
·
View notes
Text
Getting Started with Atlas' Character Database

The character database is one of the main aspects of Atlas, here you add pages for each of your characters, which can be filled in with important facts and information to keep track of.
This post will explain how to use every aspect of the database, so you can use Atlas to its full potential!

The character pages are fully operational from the main Atlas page, however, if you would like a full-screen view, click on the two outward-pointing arrows on the top right-hand side.
The database comes with 6 different views:

These allow you to easily view and edit character data in bulk!

The gallery view gives a quick overview of each character with an image and customisable additional information below the image.
Adding an Image
To add an image to a character page, click on the page, and hover your mouse over the page name, this will reveal the "add cover button" where you can add your image.
Adding Information to the Gallery View
If you want to include additional information on the gallery view, such as nicknames or alternative name spellings (such as those in different languages), click the ... button next to the blue "New" button, then "Properties" (by default it should say "3 Shown"), once on this tab, you can click the eye icon to add or remove properties from the gallery view icons.
Changing the Default Page

(more info on the page templates here!)
Atlas comes with two page templates, and the Wiki Style is set by default, if you would like to change to the Timeline Style or edit the templates, click the down arrow on the blue button labelled "new", then the three dots next to the page template, and click "set as default."
Filling in Character Properties

The next four page views are organised views of the different character properties
To fill these in, simply click on the empty box, and type or select the appropriate information.
If you are filling in the information of multiple characters at once, you can drag the small blue dot in the bottom right-hand corner downwards to fill in the same information for multiple characters simultaneously.
The Name Details Tab

This tab stores information about different names your character may have, such as nicknames, or names in different alphabets.
For example, if you had a character named Ivan Petrovich Sidorov, you may want to keep hold of the native spelling of his name Иван Петрович Сидоров, and so you would enter it into one of the name tabs!
The Age Calculator

The age calculator allows you to easily reference character's ages during certain time periods.
To change the dates, go to unixtimestamp.com , enter your chosen date, and copy the converted results.
Back on Atlas, right-click on the header of the column you want to change, and press edit. This will open a window on the right hand side, where you need to press edit again.

This then opens another window. Here you will need to replace all the numbers except for the last three zeroes (000) at the end.
Once this is completed, this column will automatically calculate the characters' ages at the given date, using their date of birth!
(note that dates before 1970 will include a minus (-) at the start, make sure to copy this over.)
7 notes
·
View notes
Text
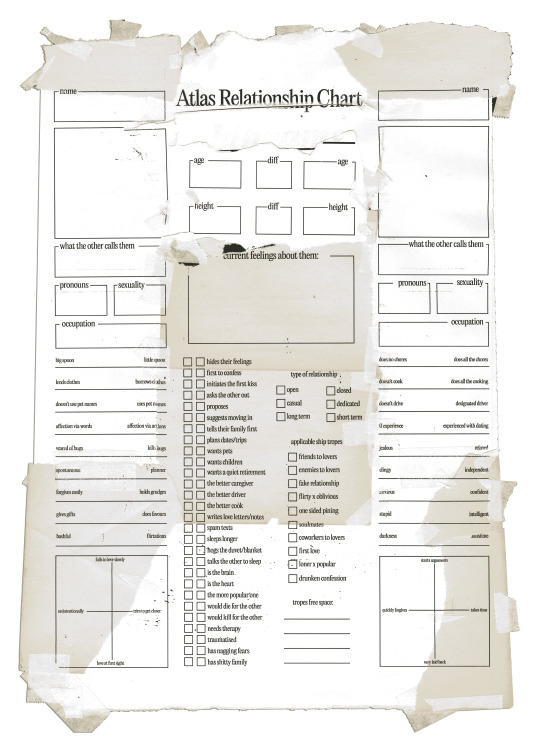
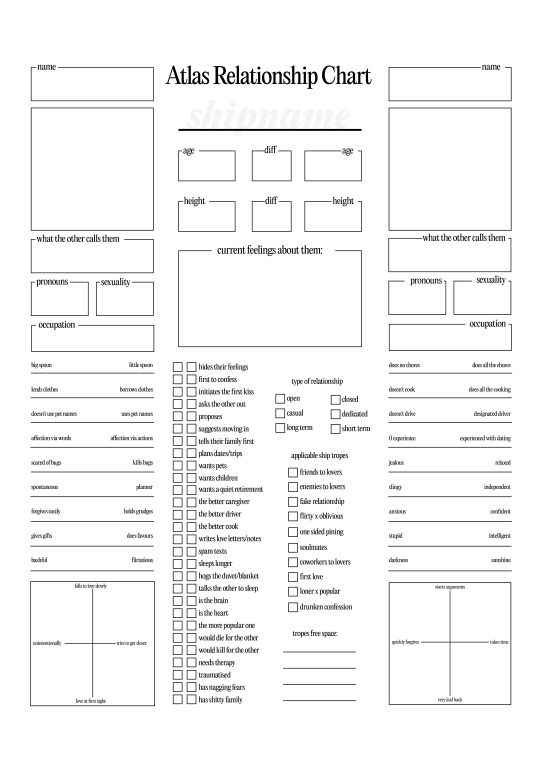
~ Atlas Relationship Chart ~
( plain version under the cut )
heavily inspired by gibslythe, shycustis, and voiddemon, thank you!
59 notes
·
View notes