
resources / commission blog by cinna (they / them, 21+ )
Don't wanna be here? Send us removal request.
Statistics
We looked inside some of the posts by cinnasgfx and here's what we found interesting.
Average Info
Notes Per Post
3K
Likes Per Post
2K
Reblog Per Post
872
Reply Per Post
15
Time Between Posts
6 hours
Number of Posts By Type
Text
15
Note
2
Last Seen Tumblr Blogs


Fun Fact
In 2020, 27% of US Tumblr users had an annual household income of over $100,000.
Text

moondew potion psd
🌕 available on GUMROAD and DEVIANTART
🌕 a sharp desaturated coloring psd with shades of light greys. 🌕 not poc friendly. a lot of adjustment layers included. 🌕 for personal and noncommercial use only. 🌕 please give credit, and please don't share it or claim as your own, edit and reupload or resell or redistribute. 🌕 like and/or reblog this post if you are using this psd. reblogs help me get the word out for this blog. 🌕 if you get this, thank you so much ❤️ you are an angel!
19 notes
·
View notes
Text

A Slice Of Summer
#e9c76e | #eea755 | #ec9b70 | #f3e4f9 | #dab8f4
167 notes
·
View notes
Text

* 06. [ 𝑝𝑜𝑙𝑦ℎ𝑦𝑚𝑛𝑖𝑎 ] - psd coloring ( free )
POLYHYMNIA. A psd coloring focused on orange and blue colors. All purple and pink colors get turned into blue, while green colors turn yellow with this psd coloring. Should be poc friendly and working with all, if not most skintones. Adjust layers where needed.

credit: credit @cinnasgfx if using this resource
don'ts: don't claim as your own, resell, copy, redistribute, etc.
usage: for personal use only; do not use in commissions
share: like / reblog this post if sharing, using or saving for future use
price: free. ( pay what you want )
☀︎ available on: ko-fi ✩ payhip
#rph#rp resources#roleplay psd#psd coloring#rp psd coloring#free rp psd#roleplay resources#free resources#free rp resources#poc psd#⭒⊱✿⋅⋆ 𝔪𝔦𝔫𝔢 ⋮ freebies#⭒⊱✿⋅⋆ 𝔪𝔦𝔫𝔢 ⋮ psd coloring#fcsources#hisources
5 notes
·
View notes
Text

* 🍁 ⋆ modern names for your latino muses : a masterlist !

i’ve seen a lot of people use very old , kind of expired names for their latino muses around the rpc , so i’ve collected some of my favorite modern names that are actually used in latin america for all of you . ergo , under de cut you’ll find 320 names organized by gender & in alphabetical order . i’d like to clarify that not all names used by latinos have spanish roots , we often use names of a variety of origins , so if you see english , german , italian names on this list , that’s because we use them , we name our babies like that ! if you find this helpful , please consider giving me a like [ ♡ ] or reblog [ ↻ ] . thank you !

FEMININE.
a. ainhoa. alana. alejandra. alelí. alicia. aline. almendra. alondra. agostina. agustina. antonella. antonia. aurora. b. bárbara. belén. bianca. bruna. c. camila. candela. carla. carolina. catalina. constanza. consuelo. d. daniela. dominga. e. elisa. elizabeth. eloisa. emma. esmeralda. esperanza. f. fernanda. fiorella. florencia. francisca. g. gabriela. gala. giovanna. gisella. i. ignacia. irina. isabel. isabella. isidora. j. javiera. jazmín. jennifer. jessica. jimena. johanna. josefa. josefina. juliana. julieta. k. karen. karin. karol. katherine. l. lea. lía. lucía. ludmila. luisa. lorena. loreto. lourdes. luján. lizbeth. m. macarena. maira. maite. manuela. mara. marcela. maría josé. martina. magdalena. melissa. micaela. michelle. mila. milagros. maya. n. nadia. naya. nerea. nicole. nina. noelia. o. olivia. oriana. ornella. p. pamela. paloma. paola. paula. paulina. paz. pía. priscila. r. rafaela. rebeca. regina. renata. rocío. rosario. s. sabina. samanta. sarai. selena. silvina. sofía. sol. soledad. t. tamar. tamara. tania. thaís. trinidad. u. úrsula. v. valencia. valentina. valeria. vanessa. vera. victoria. violeta. viviana. x. ximena. xiomara. y. yunuen. yvonne. z. zoe.
GENDER NEUTRAL.
a. alex. angel. andrea. antonie. ariel. arlo. b. belu. c. celes. clau. cam. cami. cris. d. dani. darcy. demi. e. eden. ellie. emi. f. fénix. g. gabriel. gabrielle. geo. gio. h. haro. i. indigo. iris. izan. j. jaime. k. kat. kris. l. leo. levi. luar. m. manu. mar. mati. max. mel. n. nico. noa. noel. o. orion. p. pam. pascal. pol. r. rafa. rami. remi. rio. s. sam. santana. santiel. t. tai. tami. tomi. v. val. valen. vega. vico. x. xio. y. yael.
* note : most gender neutral names ( used by non binary people in latin america ) are nicknames or the short version of names that have a feminine and a masculine version . for example : dani , comes from daniel and daniela , and that’s why they are mostly short . please , keep that in mind when using any of these .
MASCULINE.
a. agustín. aitor. alan. alejandro. alexis. alfonso. alonso. amaro. andrés. antonio. arturo. augusto. b. bautista. benjamín. borja. brian. bruno. c. camilo. carlos. christopher. clemente. cristian. cristóbal. d. damián. daniel. danilo. dante. darío. daryl. david. diego. dylan. e. eduardo. elías. emiliano. emilio. enrique. esteban. f. fabián. facundo. faustino. federico. felipe. félix. fernando. fidel. francisco. franco. g. gabriel. gael. gaspar. gastón. germán. gonzalo. gustavo. i. ian. ignacio. iker. íñigo. ismael. iván. j. jair. javier. jeremías. joaquín. jonathan. jorge. josé. juan ignacio. juan josé. juan pablo. julián. l. lautaro. leandro. león. leonel. lionel. lisandro. lorenzo. lucas. luciano. luis. m. manuel. marcos. mateo. martín. matías. mauricio. maximiliano. máximo. michael. n. nahuel. nataniel. newen. nicanor. nicolás. o. octavio. oliver. óscar. osvaldo. p. pablo. paul. pedro. r. rafael. ramiro. renato. ricardo. rodrigo. s. salvador. samuel. santiago. santino. sebastián. simón. t. thiago. tomás. tristán. v. valentín. vicente. víctor. w. william. x. xander. xavier. z. zacarías.
117 notes
·
View notes
Text
ㅤㅤㅤ✧ᅠ—ᅠ⋆ ᅠGOOGLE DOCS: SUNSET VALLEY PART ONE.
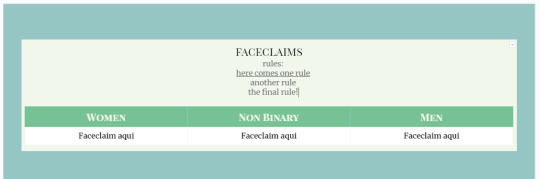
by clicking THE SOURCE LINK you’ll be redirected to a google doc template for faceclaims list. this is a free resource for personal use only. to edit, go to file > make a copy. please like or reblog if you use them or find them helpful!
36 notes
·
View notes
Text

HAPPY FOOLS … a monochrome psd coloring, muting all colors except for teals and cyans. will whitewash. adjustment layers are included. as always, credit is mandatory. do not use in paid commissions. price is free.
6 notes
·
View notes
Text
A Roleplayer's Guide To Disabling Reblogs
So something I've noticed again and again is people complaining about people reblogging posts that are not meant to be reblogged, such as individual headcanon posts about their muses, even when they explicitly ask people not to do so, or personal blogs reblogging threads they're not part of.
Luckily, tumblr's Beta Editor actually has a feature/option for this that's hard-baked in to the website! Its just that many people seem to be completely unaware this is even an option, but its very quick and easy to do.
You can do this with any post, a new/fresh one or a post you've already made in the past, but for simplicity's sake, I'm going to show how to do it with a fresh post.
Whether you're making a fresh post or editing an old one, you'll want to click on the gear icon in the top corner.

Once inside the post settings, you'll get a whole bunch of hidden settings/options, including the ability to turn off reblogs.

At first glance, our options are limited to "Anyone on Tumblr" or "No one".
However, you can also make a post only rebloggable for certain people as well.
So for instance, let's say that you have a roleplay thread with someone, and Personals keep coming in and reblogging your replies. In order to prevent this from happening, you would go into the post settings and change the reblog settings to "No One", and then @ tag your roleplay partner. This will allow the person you've tagged to reblog the post, but no one else will be able to reblog it!
You'll know its worked because your post's "Reblog" button will now be faded out and will prevent anyone (including you, the original poster) from reblogging the post unless they are directly tagged (and yes, you can tag yourself).
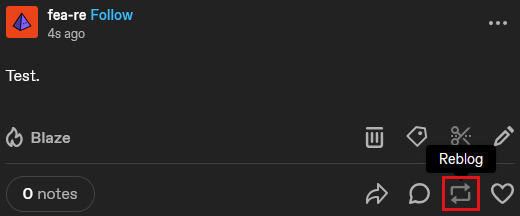
Now, you won't have to beg people to not reblog or delete reblogs for your headcanons, roleplay threads, and other writings!
Happy posting!
15 notes
·
View notes
Text

* 05. [ 𝑚𝑒𝑙𝑝𝑜𝑚𝑒𝑛𝑒 ] - psd coloring ( paid )
MELPOMENE. A psd coloring focused on light purple and hot pink colors. All blue and green colors get turned into light purple, while light blue and green colors turn gray with this psd coloring. Made to be used on light skintones as it will pinkwash any other skintone darker than that. Adjust layers where needed.

credit: credit @cinnasgfx if using this resource
don'ts: don't claim as your own, resell, copy, redistribute, etc.
usage: for personal use only; do not use in commissions
share: like / reblog this post if sharing, using or saving for future use
price: €2. ( pay what you want )
☀︎ available on: ko-fi ✩ payhip
#rph#rp resources#roleplay psd#roleplay resources#psd coloring#rp psd coloring#poc psd#fcsources#hisources#⭒⊱✿⋅⋆ 𝔪𝔦𝔫𝔢 ⋮ psd coloring
1 note
·
View note
Note
Hello. 🥺I hope you can still remember me! 😂 would you mind provide me the specific tutorial on how to make these HQ gifs especially this post: https://www.tumblr.com/sinnersmovie/781373995991826432/the-pitt-2025-created-by-r-scott?source=share ? 🥺 the quality is really nice! I have the problem of gif making, the thing is that I have followed many tutorials on how to make HQ gifs but it always turn out differently even tho I follow every step.. I am too confused. Literally, so desperate to fix the problem 😭 not sure what did I do wrong..
yes, hi!!! so, for this gifset from the pitt, i can walk you through my process on capturing footage and coloring, but if what you're struggling with is quality, the most important part is the file and definition of the footage you're working with.
i personally almost exclusively use 1080p footage with a decent file size. a file can be HD and still vary in size from a couple hundred megabytes to several gigabytes. this will also depend on the length of the episodes (half-hour episodes vs. an hour-plus). since we're talking specifically about my gifs of the pitt, my DLs of the episodes are all in the 2-3.5gb range, give or take.
i know there are gifmakers that swear by 4k footage and i certainly won't deny that gifs made from 4k files are stunning, but i've already spent a lot of money on external hard drives and don't have the space to spare for the frankly massive sizes of 4k movies and tv. besides, most 1080p quality gifs turn out perfectly well!
below the cut, i'll show you how i capture, gif, and color scenes from the pitt like this:

note: this tutorial is beginner-oriented!
step 1a: once you obtain your file (this is not a piracy tutorial lmao, but if you google "piracy reddit" you can find a lot of reputable suggestions for sites to peruse), it's time to screencap or clip the scene(s) you want to gif. i would say that, from what i've seen, most gifmakers use screencaps, but i highly prefer taking short video clips (which i keep and usually label for future use/reference), so i'll be showing you that version. if you would prefer to screencap, please check the "beginner tutorials" tag on my resource blog @gifmakerresource
step 1b. i only use windows pcs, so i can't give any specialized info regarding macs, just as a disclaimer. i use the program VLC Media Player, both for clipping scenes and as my regular media player on both my laptop and my desktop. to initially set up vlc's recording capabilities, i used this website (please just ignore all their annoying advertising for movavi).
step 1c. now that vlc is set up to record footage played through it, i open my video clip (ctrl+o) and navigate to the scene i ultimately want to gif. i typically recommend recording an extra 5-10 seconds before and after the clip, especially if you need to convert the clip afterwards.
step 1d (optional). depending on the file format of your episode, you may need to convert the clips you take before photoshop will accept them. for example, a vast majority of the files i download are mkv files, but photoshop works best with mp4 files. for this, i use another program called HandBrake. once downloaded, i add whatever file(s) i need to convert, select the appropriate preset (which is almost always "Super HQ 1080p30 Surround" to maintain as much of the original quality as possible). you can select where the converted files automatically save for organization purposes, just like with vlc.
step 2. now that we have the clip we want to turn into a gif, it's time to bring it into photoshop. to do so, select file -> import video frames to layers. once you select your video clip, photoshop will pop up with a little media player with a few controls. here's what that looks like:

the box on the left that i've highlighted is what you'll adjust depending on whether you want to load in the entire clip or a specific range of the clip. with the way i clip scenes, i have quite literally NEVER used "from beginning to end." instead, i use the toggles on either side of the progress bar (circled in red) to select a specific range. you don't have to be overly precise with this as you can always delete extra frames, so i'll navigate using those little arrows until i roughly have the shot i want to turn into one gif and click okay. i would not recommend checking "limit to every x frames" because while this can help with file size, it will make your gif appear choppy. make sure "make frame animation" is checked.
this is what photoshop looks like after clicking OK:

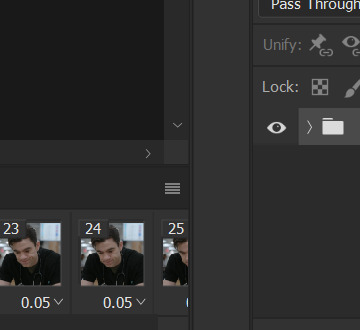
across the bottom are the frames. make sure that "forever" is selected at the bottom left rather than once or three times. this makes sure that wherever you post your gif, it will play continuously. the 0.04 below each frame is the frame rate -- at this setting, each frame plays for four tenths of a second. this might vary depending on your source material, but i HIGHLY recommend using 0.05-0.06. we're not going to worry about that yet, though, so don't bother changing it right now.
over on the right under "layers" are, you guessed it, each frame's corresponding layer. now, i could go more in-depth on this, but i don't gif using frame animation. i used to a very long time ago (over ten years ago), but i use a series of actions to convert to timeline animation. before doing that, however, i execute a couple more steps first.
step 3 (optional). i may be a slob irl, but i'm extremely organized and neat on my computers, so the first thing i do is use an action i created to select all the layers and put them into a group. to manually do this, you can either click on the first (or last) layer and then click on the last (or first) while holding down shift OR you can go to select -> all layers OR you can use the keyboard shortcut alt+ctrl+a. i just turned this process into an action to save time.
step 4 (optional). delete any excess frames. because i don't bother with being extremely precise with photoshop's media player, i usually have to trim off extra frames at the beginning and/or end of my gif. to delete frames, select the first frame and either hold down control and click each one or hold down shift and click the last one to select everything in between. once the frames you want to delete are selected, click the little trashcan below the frames (near the left side just before the horizontal scrollbar).
note: to watch your gif at any time, simply press the spacebar. press it again to pause.
step 5. while everyone's process is different, i prefer to crop my gif to its final proportions here. there's nothing wrong with doing it later, but sharpening and coloring can take longer at larger dimensions. the width of a single gif in a row on tumblr needs to be 540px. two gifs in a row are both 268px wide. three gifs in a row are 177px, thus making tumblr's gutters (the small transparent spaces separating gifs) 4px.
step 6. this is when i sharpen my gif and convert it to timeline animation. when it comes to sharpening, i think everyone probably does it a little differently. here's how i sharpen my gifs (which i turned into an action to save time) and here's the sharpening tutorials tag on my resource blog. as with most things gifmaking-related, i recommend trial and error. try different things until you find what you like! once again, to save time, i turned that sharpening tutorial (and its base sharpening) and the timeline conversion into a single action.
to convert your gif from frame animation to timeline, you need to select all your layers and all your frames and select "convert to video timeline" from the menu after clicking these three lines:
this is what i have once i've run my action to sharpen and convert:

you can adjust how zoomed in your timeline is with the slider at the bottom and if you're having issues with playback (though especially with larger/longer gifs, it always takes a while to load before playing smoothly) click the gear icon near the top of this screenshot and make sure it's set to 100% and to loop playback.

(group 2 is my vivid sharpening per the tutorial i linked, so if you don't use that, yours won't look exactly like this.)
step 7. time for my favorite part: coloring! now, i'd recommend taking a look at coloring tutorials as every show and every movie is going to be different. even separate scenes in the same episode can have totally different lighting. i have a bad good habit of saving just about every psd (photoshop file that contains all coloring adjustment layers), so there are times where i can just reuse a coloring i've already made rather than having to color each gifset from scratch, but you might be surprised just how much i DO color from scratch.
in several of my other gif tutorials, i explain and go step-by-step through my entire coloring process and why i use the adjustment layers i use, but as i said, what works for one scene may not work for another, so the best thing i can recommend is to familiarize yourself with commonly-utilized adjustment layers. play around with them, see what each one does, and over time, you'll be able to recognize which ones to use and when to use them. the adjustment layers i use are brightness/contrast, curves, selective color, channel mixer, gradient map, vibrance, hue/saturation, photo filter, levels, and exposure. the bolded ones are the ones i use on almost every single coloring.
on the navigation page on my resource blog, you can find a lot of tutorials that are specific to one or more types of adjustment layers and i encourage you to check those out as well as explore the navigation page itself.
here's an overview of my coloring for the pitt:

and here's a visualization for you of what each layer does:


(top to bottom, left to right) no coloring, brightness/contrast, adding curves, adding selective color 1 (black, neutrals, and white), adding selective color 2 (blue and cyan), adding gradient map (b&w set to 25%), fully colored, without vivid sharpening, and a comparison of the original to the full-coloring.
step 8. it's time to save! i HIGHLY recommend using this save action from @anyataylorjoy as it's a total lifesaver. if you save your gif right from here, photoshop will automatically set your frame rate to 0.07. while i used to gif at 0.07, i cannot believe how slow and choppy that looks now. all of my gifs are now 0.05, which is what this action does in part. without this action, you'd have to save your gif here and then open that file, change your frame rate, and re-save.
once this action has finished running, you go to file -> export -> save for web (legacy). here are my save settings, which do make a difference:

just remember, to be uploaded to tumblr, a single gif must be below 10mb in size. # of frames, #of colors, and dimensions all play a big part in the size of your gif. here's the finished gif at 540px:
to sum up, what's most important when trying to make high-quality gifs is the quality of your footage. generally, the larger the file size the better, but you do not have to use 4k instead of 1080p. and a 3gb 1080p file will likely look higher quality than a 300mb 1080p file. sharpening and coloring go into it, yes, but they're probably not going to make or break your gif.
as always, if you have additional questions or need clarification on any part of this tutorial, please let me know! i don't believe in gatekeeping and will always help to the best of my ability (it just might take me a few days).
29 notes
·
View notes
Text
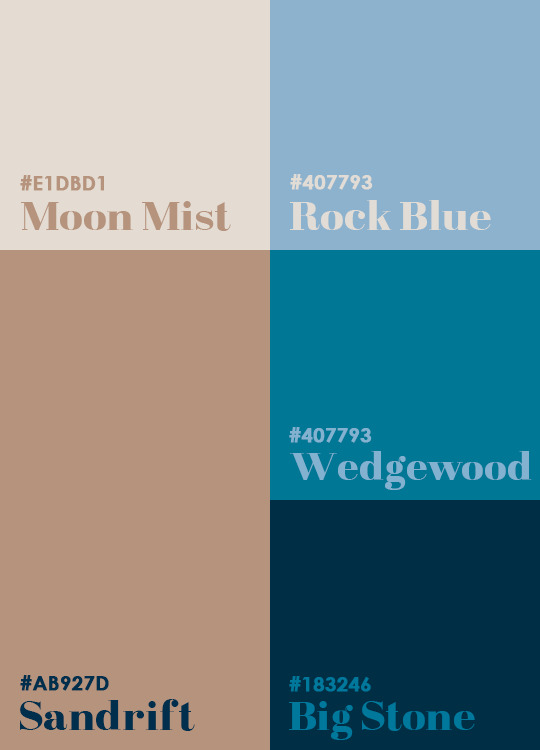
e1dbd1 - 407793 - ab927d - 407793 - 183246
162 notes
·
View notes
Text

feede3 - feafa8 - ff726e - 030e20 - 814048
141 notes
·
View notes
Text
Intimacy goes beyond kisses, cuddles, and sex. It's when you're feeling low, and your partner gently comforts you, listens to you, and helps you unpack your insecurities through deep conversations. It's about calling to check in, making sure they've eaten or taken their medicine.
it's more than sex.
2K notes
·
View notes
Text

1c050f - 412833 - 4f2033 - d383b8 - 8e5577
97 notes
·
View notes
Text
˚ ₊ · ͟͟͞͞ ➳ ❥ KENTARO SAKAGUCHI GIF PACK


hi friends! in the source link you’ll find #307 gifs in the size of 268 x 150 of KENTARO SAKAGUCHI as hideki murooka in hell dogs (2022). please cast accordingly — he's japanese and born in 1991. all the gifs were made from scratch by us. feel free to edit them for personal use, but do not redistribute/repost. REBLOG if you plan on using them or leave a like if this helped you! contains : kissing, partial nudity, alcohol / drinking, food, blood, violence, guns, weapons
161 notes
·
View notes
Text
in the source link, you will find #124 ( 268x151 ) gifs of SERENA MOTOLA (1998) in the japanese drama 'tokyo design story (episodes 4 & 5),' serena is of japanese and italian descent and was twenty-one at the time of filming, so please name and age her accordingly.
tw: flashing lights


all of these gifs were made by me, from scratch, so please do not edit or redistribute them without my consent. read my rules before using & please leave a like or reblog if you found these useful.
153 notes
·
View notes
Note
i just saw your ask, that you don’t use t*rrents to download things from can i ask where do you download off of you don’t mind me asking?
yes! i will put my commonly used sites under read more :)
kdramas - dramaday japan / thai / chinese dramas - mkvdrama older chinese dramas - minidrama (only in 720p for most shows)
thai / turkish shows - i download from youtube using jdownloader
for western movies / bollywood stuff - bollyflix, uhdmovies, moviesmod
for popular shows theres also a database full of shows and movies with over 500TB of stuff on it, but i try not to share the link to it publicly since it sometimes gets taken down. if you'd like the link tho pls dm me and ill send it :)
+ hdsources on tumblr also has downloads for popular shows/movies!
27 notes
·
View notes
Text

0e0d0c - 3f4542 - 9dacab - dcdedf - c3cccc
120 notes
·
View notes