
Don't wanna be here? Send us removal request.
Statistics
We looked inside some of the posts by coilsofclay and here's what we found interesting.
Average Info
Notes Per Post
6
Likes Per Post
5
Reblog Per Post
1
Reply Per Post
0
Time Between Posts
29 days
Number of Posts By Type
Text
11
Last Seen Tumblr Blogs


Fun Fact
Tumblr posted its first advertisements in May 2012 and subsequently earned $13M in revenue.
Text
creating my pattern

I started the process of creating my pattern the same way that I did when I created my trial tile. I used the modeling tool to press a scale like shape into a thin piece of clay. After, I attached the small shapes on the pot by using the scratch and slip method.

After I while I started to become frustrated because it was taking a long time to attach each shape individually. I overcame the frustration by finding a quicker method of attaching the shapes. Instead of scratching where just one shape was going to go, I scratched where a whole strip of the pattern was going to go. Although it looked a bit messy I knew the opaque black glaze that i would use in future would cover the scratches. This made the process a lot easier.

Eventually the uneven shape of the pot caused a problem - the pattern wouldn't match my design. I decided to change my design because of this. Where there was empty patch, I attached longer shapes to imitate the underbelly of a snake.

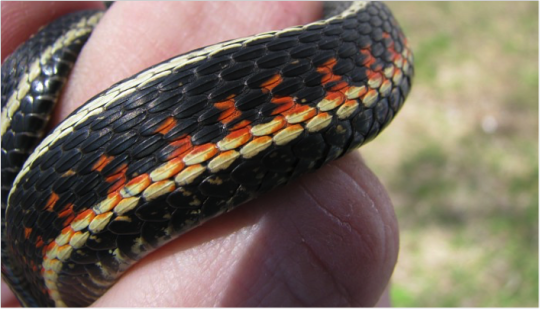
I used small templates to help me make each shape the same size. Firstly i placed two shapes of the same size next to each other. After checking my reference photo of the underbelly of a snake, I realised that this didn’t look right so I connected the two shapes to create longer shapes.


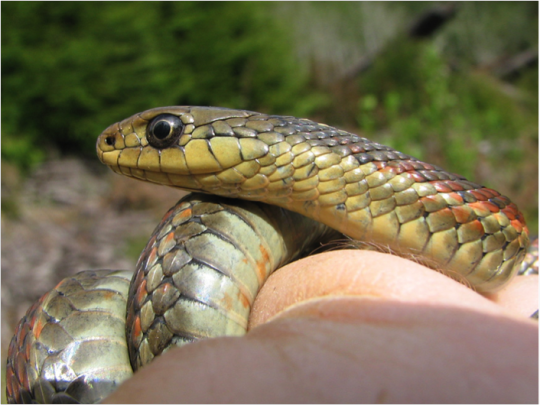
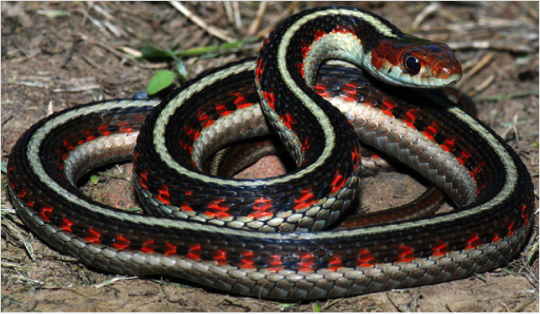
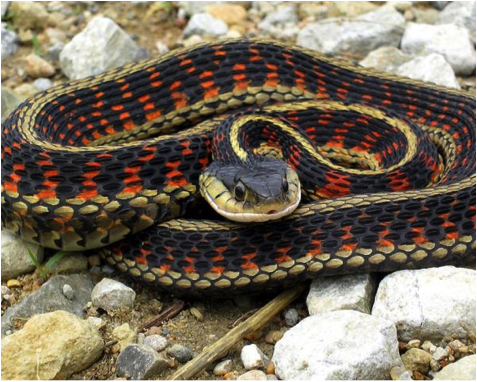
This is the reference photo i used to help me create my pattern successfully.
0 notes
Text
pattern designs
I based my designs on my trial tile that I had made earlier. I am intending to use the same colours that i used for the trial tile because I know that those colours work well together to create the effect of snake scales. I decided to use design 1 for my pot because it would cover the whole of the pot, which would look more visually interesting than my other two designs.

0 notes
Text
creating my pattern: preview
vine
1 note
·
View note
Text
creating my pot

I started out with a simple pinch pot and built it up using the coiling technique.

Although I kept referring to my design, I found it difficult to create an exact cylinder shape. I think this might be because the taller I built my pot, the more clay I used in my coils. This might cause a problem for me when adding on the pattern.

I then used a serrated kidney tool and a smooth kidney tool to smooth out the outside and inside of my pot. I know that the pattern I am going to add will cover up most of my pot so I haven't smoothed the outside of my pot perfectly.
1 note
·
View note
Text
pot shape designs
I have made 5 pot shape designs, inspired by my pot shape research.
For my pot I will be using trial trial design 2. This means that my pot designs have to be simple so that the pattern and colours added are the main features.
I have decided to create my pot using pot shape design 2 because it has a very minimal shape meaning that it won't distract the viewer from the patterns and colours. I also chose it because the simple cylinder could be seen as a section of a snake. I think that if I chose an abstract design such as pot design 4 the viewer would find it difficult to understand that it is meant to represent a snake. Additionally I think that the interesting shape would take away the effect of how striking the pattern and colours are.

0 notes
Text
pot shape research

Rupert Spira ‘pair of cylinders’ www.Oxfordceramics.com

Clyde Burt ‘Ceramic Vessel’ www.Veniceclayartists.com


Mette Maya Gregersen ‘Back on track’ 1 & 2 www.Veniceclayartists.com

Eva Zeisel ‘Vase’ www.Veniceclayartists.com

Mitchell Grafton ‘Brown Snake jug’ http://graftonfacejugs.blogspot.co.uk
1 note
·
View note
Text
trial tiles
I designed three different scale patterns, based on my secondary sources, using modelling tools to engrave into the clay and to attach separate pieces of clay.

The colours I chose were green, black, red, and yellow. I chose these because they were the colours of the garter snakes in the secondary sources.

The black and yellow glaze was thicker than I anticipated so after it had been fired it looked quite opaque, which means that some of the scale pattern was concealed by the glaze. I will keep this in mind when glazing my pot.

3 notes
·
View notes

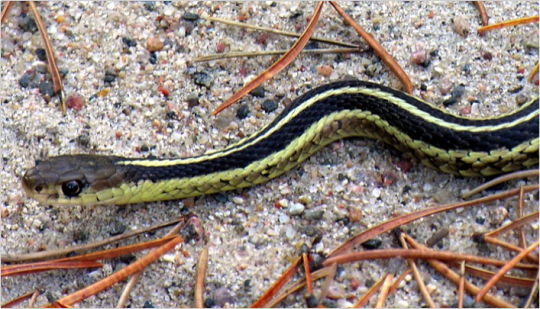
Text
first animal
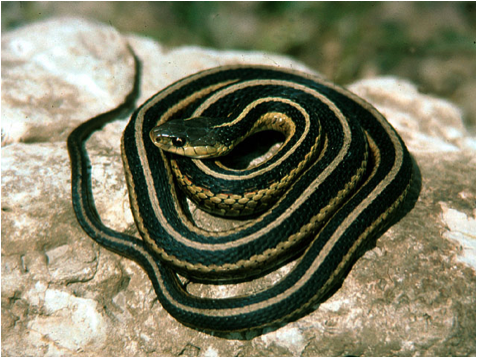
The first animal I have chosen to represent is a Garter Snake because I like the simple pattern and colours on their scales. I will use trial slabs to test out ways of modelling scales and glazes I could use. I will research shapes of pots to help me with designing my pot.
0 notes
Text
goals and how I will achieve them
goals
I chose to make ceramics based on animals after being inspired by the artist Keiko Masumoto. I came across Masumoto’s work when researching Japanese ceramics for my art class. The method she uses that I find interesting is intersecting two forms (animals and pots), which is what I want to do.
I thought that recreating the texture of feathers, scales, fur, etc would be a challenge. I want to become accurate at representing the natural state of the animal as documented in a photograph. I want to gain new skills in modelling clay because I want to develop how I explore my ideas in 3D.
I chose coil pots to be my main approach to ceramics because I already have some skills in making coil pots but I want to expand upon them. I want to develop my skills in creating coil pots. One of the things I need to improve on is making the side profile of the pot more accurate to the initial design.
how to achieve
I could do trial slabs to test which method of modelling and colours I could use to recreate the texture of the animal I have chosen. I will also refer back to pictures of the animals in order to get the texture as precise as I can.
I will constantly refer back to my original design so I can get the right shape of my pot. I can also have a constant size in coils so that the thickness of my pot is the same throughout.
I can choose the design of the side profile of my pot by researching other pot designs.
0 notes