
Statistics
We looked inside some of the posts by computingondemand and here's what we found interesting.
Average Info
Notes Per Post
0
Likes Per Post
0
Reblog Per Post
0
Reply Per Post
0
Time Between Posts
5 months
Number of Posts By Type
Text
17
Last Seen Tumblr Blogs


Fun Fact
Tumblr was attacked by a cross-site scripting worm deployed by the Internet troll group GNAA on Dec 3, 2012.
Text
Install Tailscale on PiKVM
I’m a big fan of the PiKVM and use it with most of the “servers” I build from consumer-grade hardware in my homelab. Recently, I had to relocate one of these servers to a remote site and opted for Tailscale over traditional VPN solutions for secure access and management. While the server still had a PiKVM attached, I hadn’t found an effective way to connect to it remotely without introducing…
0 notes
Text
Simplifying LAN Only Access for Nginx Proxy Manager
I’ve been leveraging Nginx Proxy Manager for a while now in the lab here and had most of my services exposed to the internet. This, however, raises some security concerns for me as many applications leverage authentication, but aren’t necessarily hardened for public internet exposure. I had been hunting around for a solution that provides domain name services, but LAN access only without the need…
0 notes
Text
How To: Install Peloton to Garmin on Portainer
One of the biggest complaints I have for Peloton is that lack of integration with Garmin, as I like to see all my fitness data in one place. Having everything syncing makes things like tracking calories and macros easier in apps like MyFitnessPall. For years now, I have been leveraging an application called Peloton to Garmin to sync the data between the two platforms, but having it live on my NAS…
0 notes
Text
TrueNAS: nginx Container Startup Probe Failed
For those of us that are fans of TrueNAS Scale and look to leverage the platform for its capabilities beyond file storage, there is built-in functionality to run VMs and Containers. If you are here reading this, my assumption is that you already know this and experienced the same issue I did when installing the Nginx reverse proxy “Container Startup Probe Failed”. Continue reading TrueNAS: nginx…
0 notes
Text
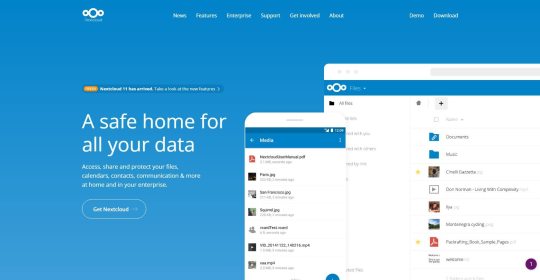
Truenas Scale Fix Nextcloud Database Missing Indices
I have been running Nextcloud for years and absolutely love it. Recently, I decided to ditch my standalone instance in favor of the IX app for TrueNAS Scale. After having run it for some time I finally got annoyed enough with some of the warnings that were showing up in “Security & setup warnings.” One of these issues is that Nextcloud constantly told me that the database was missing…
View On WordPress
0 notes
Text
Don't Like Legion Space? Install Playnite
I am not going to give you an in-depth complaint article on the challenges with Legion Space on the Legion Go, but I will offer you this: it would be much better if they presented you with your library before they presented you with the game store. I understand there is a huge “Library” button right in the middle of the application, but not presenting me with my library right off the bat is a…

View On WordPress
0 notes
Text
The Best OctoPrint Plugins for 2021
New Article has been published on https://computingondemand.com/the-best-octoprint-plugins-for-2021/
The Best OctoPrint Plugins for 2021
OctoPrint is an excellent piece of software. Out of the box it provides users with a ton of functionality. However, due to its open source nature and its flexibility, many have extended its functionality by creating plugins. With that in mind, let’s cover some of the plugins that I feel are the best plugins for the platform.
This list is not in any order. Be sure to tell us your thoughts in the comments below.
Table of Contents
Bed Visualizer
Cost Estimation
Dashboard
DisplayLayerProgress
Filament Manager
FileManager
Floating Navbar
Navbar Temperature Plugin
OctoPrint-Widescreen
Octoprint-Display-ETA
Preheat Button
PrusaSlicer Thumbnails
Simple Emergency Stop
Themeify
TouchUI
Bed Visualizer
This plugin utilizes Plotly js library to render a 3D surface of the bed’s reported mesh on a tab within OctoPrint. It converts this
Cost Estimation
This OctoPrint plugin displays the estimated print cost for the loaded model. The print cost includes the price for the used filament the maintenance and operating cost for the printer as well as the depreciation of the printer.
Calculation based on the provided filament length
Customizable currency symbol
Hide cost if not logged in (optional)
Support for multiple extruders
Support for filament profiles with Filament Manager Plugin
Dashboard
This plugin adds a dashboard tab in Octoprint that displays the most relevant info regarding the state of the printer and any on-going print job.
Adds a new tab first in the list and becomes the default tab when opening OctoPrint
Widgets for current:RPi host CPU Load, CPU Temp, CPU frequency, Mem Utilization, Storage Utilization.
Printer profile, Connection status, Printer Status
Hotend temp(s), Bed Temp, Chamber Temp, Fan speed
Temperature/Humidity sensors.
Shell command output
Printed file, Job Progress, Layer Progress
Layer Duration Graph
Estimated total time, ETA, Time left, Time since print started
Current layer, Total layers
Current height, Total height
Average layer time
WebCam view
Settings to configure what widgets and info to include in the Dashboard
Supports multiple hotends as configured in the printer profile
Supports chamber temperature if configured in the printer profile
Configurable progress gauge type (Circle, Bar)
Fullscreen mode including job control buttons (Start, Cancel, Pause/Resume)
Full page mode by adding ?dashboard=full parameter at the end of the octoprint url
Uses Estimates from PrintTimeGenius when installed
Uses GCode analysis provided by DisplayLayerProgress to get more accurate layer and fan data
Theme friendly
DisplayLayerProgress
A OctoPrint-Plugin that sends the current Layer-Informations, the Progress and other data of a print via M117 command to the printer-display and also to the top navigation bar. A new feature is the “Desktop Printer-Display”, which shows all M117 messages in a Desktop PopUp.
It shows the progress, estimatedEndTime, printTimeLeft, currentLayer, totalLayerCount, last/average layerDuration, currentHeight, totalHeight, feedrate and fanspeed:
Printer Display: 50% L=60/120 H=23mm/47mm
NavBar: Layer: 60 / 120 Height: 23mm of 47mm
Browser TabTitle: 12% end: 19:32
Filament Manager
This OctoPrint plugin helps to manage your filament spools.
Replacing filament volume with weight in sidebar
Software odometer to measure used filament
Warn if print exceeds remaining filament on spool
Assign temperature offset to spools
Automatically pause print if filament runs out
Import & export of spool inventory
Support for PostgreSQL as database for multiple instances
FileManager
A simple file manager.
Floating Navbar
This plugin simply makes the navbar float/stick to the top of the page while scrolling.
Navbar Temperature Plugin
Display temperatures on navbar
OctoPrint-Widescreen
Plugin that adds a right sidebar panel and moves configured panels from left sidebar to the right sidebar.
Octoprint-Display-ETA
Display estimated time of finish for current print (Estimated Time of Arrival). Day of finish is displayed only when current print will not finish today.
Preheat Button
This plugin adds a preheat button to preheat the nozzle and bed to the printing temperature of the selected gcode file. This can be done manually but this plugin makes it more convenient. If the target temperature is not zero, the button will instead turn off nozzle heating (cooldown).
PrusaSlicer Thumbnails
This plugin will extract the embedded thumbnails from PrusaSlicer gcode files where the printer’s profile ini file has the thumbnail option configured. This is default behavior for the Prusa Mini printer profile.
The thumbnail image extracted will always be the last resolution provided in the thumbnail setting. So for example the Prusa Mini setting is thumbnails = 16×16,220×124 so the thumbnail that will be extracted will be 220×124 pixels as seen in the screenshots below. See the Configuration section below for additional details.
The preview thumbnail can be shown in OctoPrint from the files list by clicking the newly added image button.
Simple Emergency Stop
A simple plugin that adds an emergency stop button on NavBar.
Themeify
A small OctoPrint plugin to change the looks of OctoPrint! Features a beautiful Dark Theme inspired by Discord’s color palette, along with a handful of others thanks to the awesome contributors.
Also features customization of individual elements. With the advanced-customization scheme you can modify the appearance to your heart’s desire directly from the settings-dialog!
TouchUI
This plugin will transform the OctoPrint layout into a Mobile/TFT friendly layout. With larger buttons and a responsive layout down to the smallest resolution possible. It will mimic pointer events as touch, so you can hook up those touchscreens. It also supports a virtual keyboard.
All these settings are set client-side, so we won’t interfere with other clients. All settings are stored in your localstorage or as a delicious cookie. You can find the TouchUI settings in a dedicated modal. Remember they’re stored on your device, so if you login with your desktop computer you won’t get the touch interface.
0 notes
Text
Setup OctoPrint, OctoScreen & HyperPixel4 Easily
New Article has been published on https://computingondemand.com/setup-octoprint-octoscreen-hyperpixel4-easily/
Setup OctoPrint, OctoScreen & HyperPixel4 Easily
For those of you looking to up your 3D Printer game, there aren’t many upgrades better than adding an OctoPrint to your setup. It really does open you up to a new level of control and management. To make the experience even better, you can upgrade your OctoPrint with a Hyperpixel4 and subsequently run OctoScreen for the ultimate 3D printing Experience.
OctoPrint
If you don’t already know what OctoPrint is, it is a web interface for your 3D printer that runs on simple hardware, like a Raspberry Pi. It provides you with Full remote control & monitoring, it’s expandable with a large selection of plugins, and the best part? It’s Open Source!
Control and monitor every aspect of your 3D printer and your printing jobs right from within your browser:
Access the embedded webcam feed and watch remotely how your printer is creating your newest thing.
Get constant feedback regarding the current progress of your print job.
Take a look at the integrated GCODE visualizer to see a rendition of the GCODE you are currently printing.
Keep an eye on the temperatures of your hotends and print bed and adapt them on the fly.
Move the print head along all axes, extrude, retract or just define your own custom controls.
Start, stop or just pause your current print job, you are in full control at any time.
OctoScreen
OctoScreen is a LCD touch interface for your OctoPrint server. It is based on GTK+3 and allows you to control your 3D Printer using a LCD touch screen, a Raspberry Pi, and OctoPrint. It’s an X application that’s executed directly in the X Server without a window manager or browser, and opreates as a frontend for OctoPrint.
Things you need to buy:
Raspberry Pi
I like the CanaKit Raspberry Pi 4 Start Pro Kit.
HyperPixel4
3D Printer
I’ve used Octoprint on
Creality Ender 3 V2
Monoprice Voxel
Prusa MK3S+
Right Angle USB Cable
Step 1 – Installing OctoPrint
OctoPrint makes everything a little easier right out of the gates. They provide a Raspberry Pi image (OctoPi) right on their site. This means no messing around with install dependencies or command line knowledge, just flash and go.
Download the OctoPi Image here and BelenaEtcher here
Unzip the image and flash .img file to a MicroSD card using BelenaEtcher.
Connect your Pi via ethernet
Boot the Pi from the card.
Log into your Pi via SSH (it is located at octopi.local or the IP address assigned by your router), default username is “pi”, default password is “raspberry”.
Run sudo raspi-config.
Setup Wifi if you want to run your OctoPrint over wireless connection. Capital Letters matter in both the SSID and Password.
Change the password via “Change User Password”
Change the timezone via “Localization Options” > “Timezone”.
Optional: Change the hostname via “Network Options” > “Hostname”.
Access OctoPrint through http://octopi.local or http://<your pi's ip address>.
Follow the onscreen instructions to configure your OctoPrint Instance for the first time.
Go to settings (picture of a wrench at the top of the screen)
Under “Features” Click API
Copy your API key or leave the screen open for later
2. Setup HyperPixel4
Setting up your HyperPixel4 is actually pretty easy. You do have to spend a little time in the command line, so getting used to utilities like Nano is a must.
Install HyperPixel4 Drivers
curl https://get.pimoroni.com/hyperpixel4 | bash
Rotate the Screen so it is landscape
sudo nano /boot/config.txt
[pi4] # Enable DRM VC4 V3D driver on top of the dispmanx display stack #dtoverlay=vc4-fkms-v3d max_framebuffers=2 display_lcd_rotate=3
Exit Nano by holding CTRL and pressing X. It will prompt you to save, press Y
Reboot your Pi
sudo reboot
3. Install OctoScreen
Octoscreen is the front end that will display on your Pi with HyperPixel4. To get things setup, there are a few command line actions you need to perform.
Install dependencies
sudo apt-get install libgtk-3-0 xserver-xorg xinit x11-xserver-utils
Download OctoScreen
wget https://github.com/Z-Bolt/OctoScreen/releases/download/2.6.1/octoscreen_2.6.1_armhf.deb
Install OctoScreen
sudo dpkg -i octoscreen_2.6.1_armhf.deb
Edit the touchscreen matrix to recognize the rotation of the display
sudo nano /usr/share/X11/xorg.conf.d/40-libinput.conf
find the section with
Section "InputClass" Identifier "libinput touchscreen catchall" MatchIsTouchscreen "on" MatchDevicePath "/dev/input/event*" Driver "libinput" EndSection
Add a line to the end (yellow text) so it looks like this
Section "InputClass" Identifier "libinput touchscreen catchall" MatchIsTouchscreen "on" MatchDevicePath "/dev/input/event*" Driver "libinput" Option "TransformationMatrix" "0 -1 1 1 0 0 0 0 1" EndSection
Exit and save. CTRL-X, then Y to confirm
Reboot
sudo reboot
Add your OctoPrint API key to the configuration file
sudo nano /etc/octoscreen/config
paste your API key where it says OCTOPRINT_APIKEY=
Enjoy!
0 notes
Text
Export Putty Session List
New Article has been published on https://computingondemand.com/export-putty-session-list/
Export Putty Session List

I don’t know about you, but I tend to work from a number of different computers, most of them Windows based devices. Having to remember everything for all my Linux servers can become a bit overwhelming, and when the time comes that I have to either migrate system settings or configure a new device, Putty settings is always something that seems to get lost in transition. With a little search and destroy, I found a way to easily migrate your Putty Session list for import on another device.
First, you need to open a command prompt with escalated privileges. Simply Right Click and Choose Run as Administrator
at the command prompt, type the following:
For only sessions: regedit /e "%USERPROFILE%\Desktop\putty-sessions.reg" HKEY_CURRENT_USER\Software\SimonTatham\PuTTY\Sessions
For all settings: regedit /e "%USERPROFILE%\Desktop\putty.reg" HKEY_CURRENT_USER\Software\SimonTatham
To import, simply copy it to the new machine and double click the .reg file.
That’s All, Enjoy!
0 notes
Text
Fix Windows Recognizing SSD as Hard Disk Drive
New Article has been published on https://computingondemand.com/fix-windows-recognizing-ssd-as-hard-disk-drive/
Fix Windows Recognizing SSD as Hard Disk Drive

It seems that the weird and strange issues always find their way into my system builds. Recently, a Windows Server build was recognizing my SSD drive as a standard hard disk drive. For some, this may not be an issue as the read/write performance is still there. However, for those that dig a little deeper, Windows will try to use the standard “Optimize” for the drive on a regular basis, something you should not do to an SSD.
After trying all the standard remedies, drivers, reboots, updates, etc, the problem simply would not correct itself. It had become so frustrating that I had even considered wiping the system and starting fresh. This, unfortunately, would result in the destruction of TONS of work and effort. Well, it turns out that the fix was an easy one; a simple command in powershell (or command prompt).
Open Windows Powershell (or command prompt)
type: winsat diskformal
Winsat is Windows System Assessment tool, and it is used to benchmark various components. Some of you may remember the Windows Vista and Windows 7 Windows Experience Index, this is the tool (or a version of it).
Further Winsat commands
COMMAND LINE USAGE : WINSAT <assessment_name> [switches]
It’s necessary to supply an assessment name. In contrast, switches are optional. Valid assessment names already seen in Vista include:
formal run the full set of assessments
dwm Run the Desktop Windows Manager assessment – Re-assess the systems graphics capabilities and restart the Desktop Window Manager.
cpu Run the CPU assessment.
mem Run the system memory assessment.
d3d Run the d3d assessment (Note that the d3d assessment no longer runs the workload.
For backward compatibility, pre-determined scores and metrics are reported.)
disk Run the storage assessment
media Run the media assessment
mfmedia Run the Media Foundation based assessment features Run just the features assessment
– Enumerates the system’s features.
– It’s best used with the -xml <filename> switch to save the data.
– The ‘eef’switch can be used to enumerate extra features such as optical disks, memory modules, and other items.
PRE-POPULATION: The new command-line options for pre-populating WinSAT assessment results are :
Winsat prepop [-datastore ] [ -graphics | -cpu | -mem | -disk | -dwm ]
This generates WinSAT xml files whose filenames contain “prepop”. For example : 0008-09-26 14.48.28.542 Cpu.Assessment (Prepop).WinSAT.xml
The filename pattern is : %IdentifierDerivedFromDate% %Component%.Assessment(Prepop).WinSAT.xml
The datastore directory option specifies an alternative target location for generated xml files. If no location is specified, everything is pre-populated to %WINDIR%\performance\winsat\datastore.
To generate a full set of result xml files, use “winsat prepop“.
It is also possible to pre-populate results for a subsystem, such as CPU, subject to the following dependencies:
The CPU assessment has a secondary dependency on the Memory assessment
The Memory assessment has a secondary dependency on the CPU assessment
The Graphics assessment has a secondary dependency on both CPU and Memory assessments
The DWM assessment can run standalone
The Disk assessment can run standalone
If the assessment for a secondary dependency is not present, WinSAT will run the secondary assessment along with the requested primary assessment.
For example, “winsat prepop -cpu” will run both the CPU and the Memory test, if the xml file for the Memory test is not present.
OTHER NEW Win7 ASSESSMENT OPTIONS :
dwmformal Run Desktop Windows Manager assessment to generate the WinSAT Graphics score
cpuformal Run CPU assessment to generate the WinSAT Processor score
memformal Run Memory assessment to generate the WinSAT Memory (RAM) score
graphicsformal Run Graphics assessment to generate the WinSAT Gaming Graphics score
diskformal Run Disk assessment to generate the WinSAT Primary Hard Disk score
All formal assessments will save the data (xml files) in %WINDIR%\performance\winsat\datastore.
If a system has been prepopulated (using files generated by the “winsat prepop” option), it is not necessary to run formal assessments.
SUB-ASSESSMENTS:
While investigating results, it may be convenient to look at individual assessments. Options for running Gaming Graphics sub-assessments include:
Winsat graphicsformal3d
Winsat graphicsformalmedia
DX9 Variations:
winsat d3d -dx9
winsat d3d -batch
winsat d3d -alpha
winsat d3d -tex
winsat d3d -alu
DWM/DX10 variations:
winsat d3d -dx10
winsat d3d -dx10 -alpha
winsat d3d -dx10 -tex
winsat d3d -dx10 -alu
winsat d3d -dx10 -batch
winsat d3d -dx10 -geomf4
winsat d3d -dx10 -geomf27
winsat d3d -dx10 -geomv8
winsat d3d -dx10 -gemov32
winsat d3d -dx10 -cbuffer
OPTIONS FOR FORMAL ASSESSMENTS FOR SUBSEQUENT RUNS ON THE SAME MACHINE:
The default behavior for “WinSAT formal” when a complete set of winsat formal files is present and a second “winsat formal” run is requested is to
Run incrementally if component change implies that an assessment needs to be re-run, e.g. if a video card were updated
If no component updates were detected, re-run all assessments.
The restart option enables behavior other than the default. The syntax is :
Winsat formal -restart [clean|never]
Winsat formal -restart Reruns all assessments.
Winsat formal -restart never Attempts to run incrementally.
Winsat formal -restart clean Reruns all assessments and provides the same functionality as “forgethistory”.
Winsat forgethistory Choosing to forgethistory will rate a machine as if for the first time.
OTHER COMMAND LINE OPTIONS :
-v Enables verbose output
-xml Saves the XML output to ‘filename’
<command> -log <fn> Generates a log file associated with the specified command, such as disk The -log switch can be used with any WinSAT command.
viewlog -i Dumps the results of a log file .
viewevents Used to view relevant winsat events in the event log. (This launches the event log)
query Can be used to query the current datastore.
0 notes
Text
Building a Kick Ass Mining Rig
New Article has been published on https://computingondemand.com/building-a-kick-ass-mining-rig/
Building a Kick Ass Mining Rig

We all know it’s true… cryptocurrency mining isn’t going anywhere, it is here for the foreseeable future. Just as with servers, I like to build instead of buy. Over the years, I have done my share of research when it comes to hardware and components. I have made plenty of mistakes along the way and I have learned quite a bit about what works and what doesn’t work. With that in mind, I am going provide you with the list of components that I choose, at computingondemand.com, when building my mining rigs.
Since we are on the subject of hardware, let me make one thing crystal clear, my way may not be the best way, and it is definitely not the cheapest way… it is just my way. I like things neat, organized, and accessible. I also approach things somewhat differently than many of my peers. Many try to choose the cheapest parts and some try to build elaborate 12+ card rigs. I like to use quality components that can be resold or repurposed if the market suddenly changes and/or mining is no longer profitable.
Also, mining isn’t my sole source of income, it is a hobby and I approach it as such. I do things from the perspective of an enthusiast and pick my hardware the same way. I am sure there are plenty of ways to shave some capital off of my investments, but it wouldn’t be as much fun that way.
You will not see a GPU recommendation here… get whatever you can get your hands on!
So, without further ado, my recommended list of components:
Chassis: RSV-L4000C
For me, the Rosewill RSV-L4000C wins EVERY time. I am a big fan of Rosewill products and this one doesn’t disappoint. Its price tag is a bit on the high side ($299 USD), but the ability to rackmount my system while looking good, it’s a no-brainer. Read our Review of the RSV-L4000C. If this is a bit too rich for you, the RSV-L4500 can be easily modified to fit your needs.
While cases are in focus, we might as well mention cooling. The Rosewill comes with NO FANS. Yep, none at all. There is room for four 80mm fans at the rear, five 80mm fans in the middle, and three 120mm fans up front.
120mm fans, I find myself installing CoolerMaster JetFlo 120s. They aren’t the highest volume fans out there (Delta usually is), but they move plenty of air and look good doing it. It also helps that they are affordable; coming in at around $18.09 USD.
Amazon
Newegg
For 80mm fans, Noctua gets my nod. Their NF-A8 FLX pushes up to 85.6 CFM and is rated for up to 150,000 hours of continuous use. Although they are a bit on the pricey side at $15.95 USD, I don’t feel bad about dropping my money on them.
Motherboard: Biostar TB250-BTC
I have tested, installed, played with, and scrapped my share of motherboards in my efforts to find the best suited for my needs. Without question, my motherboard has to be inexpensive, support at least six GPUs, and sport an M.2 slot for storage. While ASRock populates one of my rigs, the others are all built on the solid, yet inexpensive, Biostar TB250-BTC. This board has everything I need at the price point I am looking for, $89.99 USD.
Amazon
Newegg
CPU: Celeron G3930
With what I mine, a hefty CPU is not needed. For me, the cheaper the better, include graphics and I am all over it. What covers all this at $39.99 USD? The Intel Celeron 3930 does. This chip supports onboard graphics and just enough processing power to keep things moving along.
Amazon
Newegg
Power Supply: Corsair HX1200
This is probably the hardest decision to make. There are a TON of options out there for power supplies. However, there is one brand that has never done me dirty. Their power supplies have been rock solid for as long as I can remember and their reputation for quality is clear. For me, the Corsair HX1200 PSU is the one that finds a home in all my rigs. At $229.99 USD it isn’t cheap, but I haven’t had one fail yet. Note: You can get them for 199 refurbished direct from Corsair.
Amazon
Newegg
Memory: Corsair Vengeance LPX 8GB
Memory isn’t something that makes or breaks my rigs. Again, it is one of those things that keep the lights on, like the CPU. It serves its purpose and I go on my merry way. However, there are some brands out there that offer the affordability and the reputation to get my money. Typically, I find myself looking for Corsair, but will settle on just about anything that works. Lately, Corsair Vengeance has been priced pretty well ($89.99 USD) making it an easy choice.
Amazon
Newegg
Storage: Intel 545s 256GB M.2 SATA
My rigs only run Windows. No office, no Photoshop, nothing special. I don’t run wallets or any unneeded software on my systems. However, when (if) crypto dies, I don’t want to be left with a hard drive that I cannot use. You can save yourself some money when you build your rig by getting a 60GB, 120GB, or some variant drive, but I will not purchase anything less than 250GB. Also, I try to eliminate as much cabling as possible so m.2 drives are my go to. As I have said before, the highest performer isn’t my sweet spot, neither is the lowest (resale reasons), so for me, the middle is my home. The Intel 545s usually hits the mark. They can be found for $89.99 USD on sale. If they aren’t on sale, I start dropping my money on Samsung EVOs.
Amazon
Newegg
RISERS: VER 009S
Risers are another one of those things, most of them work just fine most of the time; no brand preference. You can expect to get a bad one here and there, but for the most part they do the job. Ideally, look for something that has multiple power options. SATA to 6-pin adapters have had some problems (caused me a small fire), so options are good. Personally, I use the 6-Pin PCI-E cable from my PSU to power the riser, then the extension to power the GPU. I have run 007 and 009s… get whatever you are comfortable with. Most of the time, the cables provided with them are crap, so look for some replacements.
Amazon
Newegg
Miscellaneous Items
There are always some things you want that you will not always need. This isn’t a long list, but it includes things like:
Cable Matters (2-Pack) 8-Pin PCIe to 2x Molex Power Cable – 4 Inches
Silverstone Tek Sleeved Extension Power Supply Cable with 1 x 8-Pin to PCI-E 8-Pin Connector (PP07-PCIBG)
SilverStone PWM Fan Hub System, Black (CPF04)
Cable Matters 2-Pack, SuperSpeed USB 3.0 Type A Cable in Black 3 Feet
FREEGENE DVI Graphics Card Display GPU Detection Monitor DVI-D Dummy Plug
FREEGENE HDMI Dummy Plug Virtual Screen Display Emulator for Headless PC
0 notes
Text
Monitor Your Ethereum Mining with Claymore's Miner Manager
New Article has been published on https://computingondemand.com/monitor-your-ethereum-mining-with-claymores-miner-manager/
Monitor Your Ethereum Mining with Claymore's Miner Manager

When I finally made the switch to Ethereum, I started off by using one of the most popular mining programs out there, Claymore’s Ethereum Miner. The miner works well, but keeping an eye on things got to be a pain: the pools I use only report every 10 minutes or so and having 3-4 remote desktop instances was a bit overwhelming. Enter the Claymore Ethereum Dual Miner Manager.
Even though my operation is small, managing and monitoring is still important. When looking for a way to monitor the hashrate on multiple rigs, I searched high and low; I even looked at some paid for applications. However, in my world, the less I spend, the better I feel. While digging around, I found a “remote manager” folder packed in the Claymore Ethereum Miner. As usual, I opened the readme.txt file and realized it is all I need.
Features
Remote monitoring: hashrates, GPUs temperature, fan speeds, current pool names, etc.
Remote management: restart miners, apply “epools.txt”, “dpools.txt” and “config.txt” files.
Simple webserver.
Although the application is simple, it provides me with everything I need, for now. I get a quick look at my individual machine’s hashrate, each card’s performance, the temperature, which pool the application is mining too, I can deploy epools.txt files, restart miners, and even remotely reboot machines.
Configuration
Configuring the application is easy. All you have to do is hit the “Add Miner” button on the bottom left, input some information, and press OK. There is one consideration to make before you begin though. The application does not rely on the machine’s hostname. Instead, you must input the IP address of your mining machine. If you have DHCP configured on your network or your router, it will be in your best interest to create a reservation or simply use a static IP address on your mining machines. Personally, I go the route of reservations, but your mileage may vary.
Usage
Once configured, there isn’t much to it. You have your information front and center. Right clicking on a machine brings up a contextual menu that allows you to perform configuration elements and management tasks.
Additionally, an added bonus is that the PhoenixMiner works with the Monitor.
If you are looking for a quick download, you can find the Monitor in our Forums as its own download
0 notes
Text
Cryptocurrency
New Article has been published on https://computingondemand.com/cryptocurrency/
Cryptocurrency

Monero (XMR)
AEON (AEON)
Burstcoin (BURST)
Add content here
Add content here
0 notes
Text
Rosewill RSV-L4000C 4U Mining Case
New Article has been published on https://computingondemand.com/rosewill-rsv-l4000c-4u-mining-case/
Rosewill RSV-L4000C 4U Mining Case

When trying to figure out how you want to build a mining machine, there aren’t many options to choose from concerning its skeleton. One option is to build or buy an open rig frame, another is to mockup some metal shelving and hang some gear from it with zip ties, and the last option is to purchase a professionally made, well-manufactured mining case. While Rosewill may not be that well known in the cryptocurrency space, they have made a name for themselves in the server market by manufacturing and designing quality components at a price point that most people can afford. With that kind of pedigree, Rosewill introduced the RSV-L4000B and, subsequently, the RSV-L4000BC; a 4U 6/8 GPU Rack-mountable Mining chassis.
This case is built on the same platform as the rest of their 4U server chassis lineup. It is similar to the RSV-L4000, L4500, etc. Although it shares many features, there are some significant differences. Immediately you will notice Rosewill incorporated a similar three fan design found at the front of the RSV-L4500 and a 15 bay E-ATX case designed for storage solutions…however, this one is missing some of the further refinements of the series; namely, the smooth black finish that their other server chassis in the series feature.
The details? The RSV-L4000C measures in at 7″x 16.80″ x 25″ and weighs about 30 lbs. The case sports exactly ZERO expansion slots in the back and is manufactured from 1.mm SGCC steel. It’s a 4U rack-mountable chassis and has a front bezel that sports a key and a filter.
Model Number RSV-L4000C SKU 11-147-277 Weight – Gross (lbs) 30.1500 Features RSV-L4000C is special version for Bitcoin Mining Machine Suitable with 8 x 13-inch graphics cards Special design of fixing PCI card in the system seven pieces max Front door foam filter design for minimizing dust inflow Front door with key lock for better security Dual USB 2.0 connector in front panel Dimension (H x W x D: inch/cm) 7.00″ x 16.80″ x 25.00″
The front of the chassis has extremely strong and unusually large handles. They are sturdy, providing you with an almost ergonomic design. However, they are again large. So large, in fact, that to rack mount this chassis in my Norco server cabinet I have to remove them.
Additionally, the front bezel sports a keylock and an air filter. When opened, you will find your three 120mm fan mounting plates as well as restart and power buttons, a few LEDs, and two USB ports.
Each of the fan mounting plates are removable, three screws each, to allow simple installation of your primary cooling components. Having the fans sit behind a filter is typically a great idea, but with this case’s intent, perhaps less restricted airflow would be more appealing. I remove the bezel altogether. Although the plates have plenty of cutouts for significant airflow, some have a slight bend which causes the fan to brush up against them. Personally, I will be cutting these out altogether and using traditional fan guards instead. Not only will this provide the case with plenty of free air, but it will significantly improve aesthetics.
As soon as you remove the top panel, you see how simple the design is. Up front, there is a bar that spans the width of the chassis. In its native position, it can accommodate 8 GPUs; flip it around for 6. This bar can also be moved further back to flip the cards, depending on what kind of airflow you want. It is always advisable to have cool air enter through the front and exit through the back, especially if you are going to rack this case with other servers. Thus, the additional position allows this airflow configuration to be maintained while providing certain GPUs with the proper flow of air.
Sitting back a bit, about midway, is a removable fan setup built to home five 80mm fans, each of which is powered by a 3-pin adapter and the entire board is powered by a single 4-pin Molex connector. With most servers, fans in this configuration would be standard. However, with wiring up and mounting 6 or 8 GPUs, it can become a bit tricky and this fan mounting system just gets in the way. With a full system installed, it is easier just to remove it.
The motherboard tray is large enough to accommodate an E-ATX motherboard, as well as the rest of the standard sizes.
You will instantly notice that there are no expansion slots provided. Instead, you find the back of the case is designed for four 80mm exhaust fans, perfect to have the cool air drawn in by the front 120’s and pushed out the back. Had the case made room for expansion cards, leaving just two 80mm fans for exhaust, the middle row of fans would be required.
The PSU mount isn’t interchangeable (server vs consumer PSU), but it does allow a PSU to be installed in either direction, depending on where its cooling fan is.
To the side of the motherboard is a tray for a 2.5″ hard drive.
When installing a complete system, you are quickly impressed with how roomy this case is. The Motherboard, PSU (and cables), Risers, Video cards, all have plenty of room to breathe.
While this case is practical, it does leave me yearning for more. If I had a wish list for this case, it would be to include the same black finish the other cases from Rosewill sport. In addition to the paint, I would like to see the option for dual power supplies as having one beefy power supply is possible… but expensive. You can get more power and spend less money by going with two smaller PSUs.
With the current price for this chassis being inflated (costing nearly double that of others in the lineup), I would have liked to see Rosewill include pre-installed fans. I understand most of us would discard those quickly and replace them with better options, but I would rather have them and not need them. At USD 299 (at the time of writing this review), this case is on the higher end of the spectrum, so not including items like that is a downer.
When racked, the case looks right at home. If looks are your thing, which they are for me, it looks fantastic with some Blue LED 95CFM Cooler Master fans installed and illuminated. The unfinished, naked, steel does the job, but the black-front bezel would have looked better. Unfortunately, my server rack was originally configured to provide room for the SilverStone RM420 case, which moves everything else forward a bit.
Overall, I can say that there isn’t much wrong with this case other than the price, at least significant enough to keep me from buying it. Rosewill, among others, have slapped a premium price tag on this because of its intent – crypto mining. However, given today’s climate, I can’t blame them. The case is well thought out and well made… Kudos Rosewill, this is much better for my needs than an open-air frame…I have cats.
Bottom line, would I buy one? With high-end open-air mining frames outfitted with premium pricetags and having already built a wooden frame and scrapped it…it is much better for me to have my system “racked and stacked.” So yes, I would buy one, and I wouldn’t look back.
Quality - 8
Value - 6.5
Features - 8
Appearance - 9
7.9
Shop Now
User Rating: Be the first one !
0 notes
Text
Kaseya Discovers Vulnerability that Allows Monero Mining
New Article has been published on https://computingondemand.com/kaseya-discovers-vulnerability-allows-monero-mining/
Kaseya Discovers Vulnerability that Allows Monero Mining

It has long been speculated that the recent increase in network hashrate was due to botnets and the increase in GPU sales, with the focus on botnet activity. It was recently discovered that there may be some bad actors at work taking advantage of a vulnerability in the popular workstation management application, Kaseya.
Here is the January 2018 VSA Security Update posted on their Announcements Page:
In the course of our continuous security monitoring of our products, we have uncovered a security vulnerability in our VSA product.
Consistent with our commitment to providing secure solutions for our partners, we have issued a set of patches that removes this vulnerability. We strongly recommend that every on-premises VSA customer download and install this patch immediately. The patch to address this vulnerability has already been deployed to our SaaS and hosted servers.
We have seen no evidence to suggest that this vulnerability was used to harvest personal, financial, or other sensitive information. However, we are aware of a small subset of our partners where Monero cryptocurrency mining software was deployed to endpoints. Our initial estimates indicate that less than 0.1% of our customers have been affected by this issue.
Kaseya Support is available to assist customers and can be reached by submitting a request at https://helpdesk.kaseya.com/hc/en-gb/requests/new and selecting “VSA Security” under Module to ensure your question is properly routed.
Patch Information
On-Premise VSA Customers – Kaseya strongly recommends that on-premises customers immediately apply a patch by running the Kinstall (Kinstall.exe) that is included on the VSA server: (that matches the version of VSA that you are running):
Version R9.5: Patch 9.5.0.3
Version R9.4: Patch 9.4.0.35
Version R9.3: Patch 9.3.0.34
For customers running Version R9.2 or earlier, it is recommended to upgrade to 9.3 or higher. If needed, Kaseya support can assist you with this. Please reach out to Kaseya Support by submitting a request at https://helpdesk.kaseya.com/hc/en-gb/requests/new and selecting “VSA Security” under Module to ensure your question is properly routed.
SaaS or Hosted Customers – The updates have been applied by Kaseya, no action is required.
Assessment & Remediation
To provide further assurances, Kaseya has created Agent Procedures which customers can run across their environment to determine if they were affected by this vulnerability and remediate endpoints in the event they were impacted. The procedure and detailed technical instructions are located at the following link: https://helpdesk.kaseya.com/hc/en-gb/articles/360000346651
Kaseya is committed to quality and security in our products and maintaining transparency in our communications with our customer base.
0 notes
Text
Configure Windows 10 For Mining
New Article has been published on http://computingondemand.com/configure-windows-10-mining/
Configure Windows 10 For Mining
Getting your rig up and running may not be that difficult to start, but you may soon realize that there are are a lot of things running in Windows 10 that do not need to be a part of your mining experience or may cause unexpected results. For instance, things like Cortana and OneDrive serve no purpose. Additionally, Windows Update may reboot your system in the middle of the night without warning. Getting Windows setup properly for mining is not difficult and here are some of the more common things you should consider.
Table of Contents:
Disable Windows Update
Disable User Account Control
Configure Virtual Memory
Disable Visual Effects
Disable Windows Hibernation
Enable Remote Desktop
Configure Automatic Login
Configure Power Options
Disable Cortana and Bing Search
Remove Windows 10 Built-in Apps
Disable Windows Update
Open a run dialogue box (WIN+R)
Type Services.msc
Find Windows Update – Right Click and choose Properties
Change Startup Type to Disable
Disable User Account Control
In the Window Search Bar type Change User Account Control Settings
Move the Slider to the bottom Never Notify and it displays Never notify me when:
Configure Virtual Memory
From what I have learned, the rule of thumb is the sum of all GPU memory per card (minimum of 16GB) and at least the sum of all GPUMEM+1
For example:
System with 4 x 4GB GPU = Min 16GB, Max 20GB
System with 1 x 8GB GPU + 3 x 4GB GPU = Min 20GB, Max 24GB
Open File Explorer
Right Click This PC and Choose Properties
Click Advanced System Settings
Advanced Tab under Performance, Click Settings
Click the Advanced Tab
Click Change to configure Virtual Memory
Uncheck Automatically manage paging file size for all drives
Select the Radio button for Custom Size
Enter your settings
Click Set
Reboot if necessary
Disable Visual Effects
Open File Explorer
Right Click This PC and Choose Properties
Click Advanced System Settings
Advanced Tab under Performance, Click Settings
Click the Visual Effects Tab
Choose the Radio button for Adjust for best performance
Click Ok
Disable Windows Hibernation
Right Click on the Start button
Click Command Prompt (Admin)
Type powercfg.exe /hibernate off
Press Enter
If you want to re-enable at some time
powercfg.exe /hibernate on
Enable Remote Desktop
Managing your mining machine is much easier when you can do this remotely. There are a number of ways to do this with 3rd party software (TeamViewer), but if you are going to manage your machine from your local network, Remote Desktop is hard to beat.
Open File Explorer
Right Click This PC and Choose Properties
Click Advanced System Settings
Remote tab
Choose the radio button for Allow remote connections to this computer
Click Ok
Configure Automatic Login
There are plenty of ways to enable automatic login, some of them more complicated than others. Personally, I like to use a utility from SystInternals called Autologon for Windows
Download: http://forums.computingondemand.com/files/file/60-autologon-for-windows/
Right Click on the .zip file and choose Extract
Execute Autologon.exe
Agree to the licensing
Enter Your Username and Password, Domain should be prepopulated
Click Enable
Configure Power Options
Out of the box, Windows 10 configures itself for a Balanced power plan. Balanced automatically balances performance with energy consumption on capable hardware. In other words, it will sleep, hibernate, etc.
For our purposes, we want High Performance, with some minor changes
In the search bar, type Choose a Power Plan
Click the Radio button for High Performance
Click Change Plan Settings
On each dropdown presented, change the value to Never
Click Change advanced power settings
Validate that Link State Power Management is Off
Expand PCI Express
Expand Link State Power Management
Change the setting to off
Disable Cortana and Bing Search
There is simply no reason to have Cortana running on your mining rig.
Open a run dialogue box (WIN+R)
Type regedit.msc
Navigate through to HKEY_LOCAL_MACHINE\SOFTWARE\Policies\Microsoft\Windows\Windows Search
If Windows Search isn’t there, you must create it.
Right Click on Windows
Click New > Key
Type Windows Search
Right Click Windows Search
Click New > DWORD (32-bit) Value
Type AllowCortana and set its Value to 0 (zero)
If Windows Search is present, change it’s DWORD value to 0 (zero)
Navigate through to HKEY_LOCAL_MACHINE\SOFTWARE\Policies\Microsoft\Windows\Windows Search
Right Click Search
Click New > DWORD (32-bit) Value
Type BingSearchEnabled and set its Value to 0 (zero)
Remove Windows 10 Built-in Apps
Windows 10 comes with a slew of applications that makes typical computing a better experience, but on a mining machine, much of it is waste.
Open PowerShell with administrator privileges
in the search bar type PowerShell, when the result presents itself, right click and choose Run as Administrator
Choose from the following list of command to remove apps
3D Builder: Get-AppxPackage *3dbuilder* | Remove-AppxPackage
Alarms and Clock: Get-AppxPackage *windowsalarms* | Remove-AppxPackage
Calculator: Get-AppxPackage *windowscalculator* | Remove-AppxPackage
Calendar and Mail: Get-AppxPackage *windowscommunicationsapps* | Remove-AppxPackage
Camera: Get-AppxPackage *windowscamera* | Remove-AppxPackage
Get Office: Get-AppxPackage *officehub* | Remove-AppxPackage
Get Skype: Get-AppxPackage *skypeapp* | Remove-AppxPackage
Get Started: Get-AppxPackage *getstarted* | Remove-AppxPackage
Groove Music: Get-AppxPackage *zunemusic* | Remove-AppxPackage
Maps: Get-AppxPackage *windowsmaps* | Remove-AppxPackage
Microsoft Solitaire Collection: Get-AppxPackage *solitairecollection* | Remove-AppxPackage
Money: Get-AppxPackage *bingfinance* | Remove-AppxPackage
Movies & TV: Get-AppxPackage *zunevideo* | Remove-AppxPackage
News: Get-AppxPackage *bingnews* | Remove-AppxPackage
OneNote: Get-AppxPackage *onenote* | Remove-AppxPackage
People: Get-AppxPackage *people* | Remove-AppxPackage
Phone Companion: Get-AppxPackage *windowsphone* | Remove-AppxPackage
Photos: Get-AppxPackage *photos* | Remove-AppxPackage
Store: Get-AppxPackage *windowsstore* | Remove-AppxPackage
Sports: Get-AppxPackage *bingsports* | Remove-AppxPackage
Voice Recorder: Get-AppxPackage *soundrecorder* | Remove-AppxPackage
Weather: Get-AppxPackage *bingweather* | Remove-AppxPackage
Xbox: Get-AppxPackage *xboxapp* | Remove-AppxPackage
To restore them for some reason
Get-AppxPackage -AllUsers| Foreach Add-AppxPackage -DisableDevelopmentMode -Register “$($_.InstallLocation)\AppXManifest.xml”
0 notes