
Don't wanna be here? Send us removal request.
Statistics
We looked inside some of the posts by daisycactus20-blog and here's what we found interesting.
Average Info
Notes Per Post
1
Likes Per Post
1
Reblog Per Post
0
Reply Per Post
0
Time Between Posts
3 days
Number of Posts By Type
Text
17
Last Seen Tumblr Blogs


Fun Fact
Tumblr was created by web developers David Karp and Marco Arment.
Text
Slow Cooker Mojo Pork
I have heard the slow cooker sometimes referred to as magical. Well this slow cooker recipe truly is magical. The word mojo can mean magical charm or spell. I know that’s not what the name means, but I think it fits for this delicious pork recipe.
Mojo is sauce in Portuguese and it has said to originate in the Canary Islands but has moved on to northern South America, Mexico, and the Caribbean.
Ingredients in mojo sauce can include olive oil, garlic, citrus juice (sour orange, lemon, lime), paprika, chili powder, oregano, and cumin. This recipe doesn’t include paprika, chili powder or lemon. I used the meat in tacos but it would also be great in a rice bowl.
1 (3 to 4 lb) boneless pork shoulder/pork butt
1 Tbsp vegetable oil
4 garlic cloves, minced
1 Tbsp cumin
1½ tsp salt
1 tsp dried oregano
1 cup orange juice
4 limes, juiced
In a large skillet over medium, heat oil. Add pork and brown on all sides.
Place pork to 6 qt slow cooker along with all remaining ingredients.
Cover and cook on low for 8 hours.
Remove pork from slow cooker and shred. Return shredded meat to slow cooker. Cover and cook for 15 minutes.
Serve with tortillas with favorite taco toppings.
Recipe adapted from Plain Chicken. Source: https://www.realmomkitchen.com/slow-cooker-mojo-pork/
0 notes
Text
3 Year Anniversary LIVE Episode: Clearing Through the Wellness Clutter
Welcome to the first episode of Season 6 of the Food Heaven Podcast! Today ALSO marks our 3 year podcast anniversary!!! To celebrate, our friends at Quaker Oats partnered with us to put together our very first LIVE episode.
Today, we will reminisce on lessons learned these past three years. With so much information out there about food, fitness, and wellness, we know it can get a bit confusing. So we will also discuss how to clear through the wellness clutter in order to ease confusion and feel a bit more confident as we all strive for wellness in every aspect of our lives!
In this episode, we’ll talk about:
The biggest lessons we have learned in the last 3 years!
Our favorite episodes and guests
What wellness means to us
The importance of acknowledging that wellness is unique to everyone
Wellness confusion and the need for evidence-based information
What the health industry can do to clear up all the confusion!
Can you do us a huge favor?
If you enjoyed this episode, please do us a huge favor and leave us a review on iTunes ….right now. The more reviews we get, the higher we are ranked in iTunes, which means we reach more people!
Become a podcast sponsor:
Our podcast reaches thousands of engaged listeners each week. If you are a brand interested in becoming a sponsor, contact us to learn more about our affordable rates.
Connect with us online:
Our podcast is released every week. In each episode, we cover tips and tricks for making lifelong sustainable healthy living changes to upgrade your diet and health. We also interview leading experts in the field of health and nutrition. We hope you enjoyed this episode, and we’ll catch you next time!
Source: https://foodheavenmadeeasy.com/3-year-anniversary-live-episode-clearing-through-the-wellness-clutter/
0 notes
Text
Korean grocery store directory: American Asian Food Market in United States posted by dlswans
Posted on Thursday, September 6th, 2018 at 11:50 pm. Tagged: 한국식품점 American Asian Food Market in Virginia Beach Virginia, Korean grocery store American Asian Food Market in Virginia Beach Virginia
This listing was created by readers just like you submitting info on their local stores. If something is wrong please explain what it is in a comment below and we'll update the listing. Thank you for your help.
Source: https://www.maangchi.com/shopping/american-asian-food-market

0 notes
Text
Receita de Tartes de Morango com Natas.
Receita de Tartes de Morango com Natas.
Corações Vermelhos.
Os corações vermelhos são os mais feitos para peixes. Se os mergulhares, repara nas pequenas barbatanas dorsais à superfície. Como se levantam as chamas na água irrequieta e as pupilas te ardem para que pulses.
Tartes de Morango com Natas.
Para cerca de 22 unidades com o tamanho das formas de pastéis de nata (um base com cerca de 4 cm de diâmetro e uma abertura com cerca de 7 cm de diâmetro) :
Massa 100 g de açúcar amarelo 100 g de manteiga amolecida 1 ovo 200 g de farinha de Trigo T55
Recheio 200 g de natas para bater (com cerca de 35% M.G.) 180 g de açúcar 10 g de extracto de baunilha 4 ovos
400 g de morangos lavados e sem pé.
Para a massa, numa taça bater a manteiga com o açúcar até que esteja cremosa. Juntar o ovo e misturar bem. Por fim juntar a farinha e misturar apenas até que esteja uma massa homogénea. Formar uma bola com a massa e embrulhar em película aderente. Refrigerar durante cerca de 30 minutos. Retirar a massa do frigorífico e retirar porções de massa com cerca de 20 g cada. Com os dedos enfarinhados, forrar as formas espalhando a massa uniformemente. Refrigerar a massa durante cerca de 30 minutos.
Pré-aquecer o forno a 180º C. Preparar um tabuleiro de forno para colocar as formas.
Para o recheio, numa taça bater as natas com o açúcar, a baunilha e os ovos.
Cortar os morangos em quartos e distribuir pelas formas, sobre a massa. Encher as formas com o recheio. Cozer durante cerca de 12 a 15 minutos ou até que estejam cozidas e douradas. Retirar do forno e deixar arrefecer ligeiramente antes de desenformar.
Relacionado
20 Junho, 2018 | Em bolos, queques e madalenas, sobremesas e doces de fruta | 1 Comentário
Comentários
Nome (obrigatório)
Email(obrigatório - não será publicado)
URL
Quero ser notificado de comentários adicionais por email.
Quero ser notificado de novos artigos por email.
Últimos posts
Receita de Muffins de Aveia e Mel
Receita de Figos com Caramelo de Vinho do Porto e Framboesa, Crumble de Cacau e Cremoso de Chocolate e Caramelo.
Receita de Tarte de Limão.
Receita de Pudim da Avó Leonor.
Receita de Sericaia de Maracujá com Gelado de Chocolate e Avelã.
Receita de Bolo de Courgette, Especiarias e Lima com Nozes.
Receita de Bolo de Pêras Dona Joaquina, Amêndoas e Amoras Brancas Secas.
Receita de Tarte de Ameixa com Creme de Queijo Cremoso e Limão.
Receita de Gelado de Iogurte Grego com Toffee de Framboesa.
Bolo de Chocolate sem Farinha com Creme de Mascarpone.
Receitas por categoria
Arquivos
Source: http://www.flagrantedelicia.com/receita-de-tartes-de-morango-com-natas/
0 notes
Text
Berry Buttermilk Scones
We all blasted through the front door a few hours ago, feet dirty and a bit exhausted from a full day of blueberry picking — something that’s become a bit of a family tradition in late July ever since Oliver was born. We have photos out in the field with O in the baby carrier, chubby legs swaying in the breeze while I obsessively applied sunscreen every ten minutes. Last year found Oliver and his friend Lewis traipsing through the rows of berries together in the late morning hours, eating more than we ended up taking home. This year’s photos tell a different story: Oliver and I in a big open field used for overflow parking, he sitting on his little potty, me singing songs and chatting away, the sun beating down on the two of us. We’re deep in the thick of potty training, so as it turned out, Sam and Oliver’s Aunt Christa did the brunt of the picking today. But Oliver and I had some good talks while staying hydrated, people watching, and eating Sour Cream and Onion Kettle chips. Not a bad way to spend a morning. And really, it’s never about how many berries we bring home because neither of these years have proven to be particularly bountiful, but it just never feels like high summer until we get out there and start filling our buckets, however slowly.
I’d promised you a savory baking recipe today but I’m still testing it, so instead I bring you mixed berry scones! And no, I didn’t just whip these up using the berries we picked this afternoon because, well, I’m just not that much of a sorceress. But I love this scone recipe for a few reasons, most importantly: their simplicity. I flirted with the idea of calling them Vacation Scones — you know those recipes you kind of keep memorized or you kind of roughly pull together when you’re traveling and they manage to somehow always taste great? For me, I can make an impromptu fruit crisp wherever I may be without a recipe and can make pretty respectable pancakes. These scones are simple enough to start to add to that list: they don’t have any fussy ingredients (I’m looking at you, lemon zest), they don’t require any rolling or turning or cutting butter into the dough (I use a food processor for ease and speed), and they’re easily adaptable. I dig them.
And I did promise I’d share a few other things I’ve been into lately as the summer ticks on. I have a pretty decent commute now with my new job, so I’ve been listening to more podcasts, have been forcing myself to read more in the evenings, and have bookmarked some new recipes. So here’s a quick and loose list of a few of those things:
An American Marriage by Tayari Jones: I’m ashamed to say I have a few pages left of this novel and there’s no good reason (other than I can’t keep my eyes open at night) because it’s such a rich, beautifully-written story and I can’t recommend it enough. On the surface it’s about a marriage, but it speaks so much to the different kinds of love, how time changes people, and the different versions of ourselves that we discover along the way.
Like a Mother by Angela Garbes: I haven’t read this book! So why recommend it? I have MANY friends who have and it’s on my ‘next to read’ list. I love the recent handful of books coming out that speak to a bit of a different experience of pregnancy, labor and motherhood than is portrayed in What to Expect When You’re Expecting. From the description, “With the curiosity of a journalist, the perspective of a feminist, and the intimacy and urgency of a mother, she explores the emerging science behind the pressing questions women have about everything from miscarriage to complicated labors to postpartum changes.” Let’s read this, shall we?!
Momrage Podcast: My online homie Amelia Morris has come out with a really interesting podcast along with her friend Edan Lepucki. They delve into questions about motherhood that are often unpopular or skirted around. And I love that they’re doing it; it’s about time.
Tully: Ok, so at first I didn’t like this movie. I even texted my friend Julie and commiserated with her about our mutual dislike for it. The day after though, after thinking about it in the shower for quite some time, I decided it actually resonated more than I gave it credit for. I love Charlize Theron and, without giving too much away, this film offers a unique and important glimpse into postpartum mental health.
Girls Night In: While I think I’m not necessarily the target age here (I’m guessing it’s more like early 30’s), I’ve been surprised with how much I enjoy this newsletter. It’s really well done, smartly written and always has a few links that interest me.
Green Chile Chicken Verde (in the Instant Pot!): As I mentioned, I (very) reluctantly gave into the craze: I’m the (reluctant) owner of a new Instant Pot and this recipe is calling my name. What else should I make?!
Instant Pot Tomato White Beans: It’s been really too hot to do major cooking this week, so when I stumbled across this recipe, it was immediately bookmarked. I’ve heard that making beans in the Instant Pot is a real game changer, and I’m looking forward to keying up this recipe to find out what all the hype’s about.
Our Favorite Vegan Ice Cream: More often than not we have a pint of Frankie and Jo’s in the freezer. It’s not cheap, but it’s hands down the best vegan ice cream I’ve ever had and just so happens to be a few blocks from our house (but they also ship!). I love the Berries and Cultured Cream flavor this month. So good.
Pin recipe Print recipe
These whole grain scones aren’t too sweet and are a great way to use up a glut of summer berries. Strawberries, raspberries, blackberries or blueberries all work great here (I used a mixture of raspberries and blackberries). As you’re making the dough, remember that flour is your friend: if your dough feels too wet or you’re sticking to your work surface, just add a bit more! These are best the day you bake them, but are still great the second day if stored in an airtight container. Beyond that, freeze them for future weekday breakfasts.
Ingredients
2 cups plus 2 tablespoons (280g) Bob's Red Mill organic whole wheat flour, plus more for work surface
1/3 cup (75g) turbinado sugar, plus more for the tops
1 tablespoon baking powder
1 teaspoon baking soda
1 teaspoon kosher salt
1/2 cup unsalted butter
1 cup buttermilk, plus more for the tops
1 heaping cup (160g/5.5oz) berries
Instructions
Preheat the oven to 400 F. Line a large baking sheet with parchment paper or a silicone baking mat.
In the bowl of a food processor, pulse together the flour, sugar, baking powder, baking soda and salt.
Add the butter and pulse until it’s incorporated into tiny pebble-size pieces. Slowly add the buttermilk through the feed tube, stopping right when the dough starts to come together.
Turn the dough out onto a well-floured work surface. Place your berries on top and fold the dough over a few times until the berries have been incorporated (they’ll likely be kind of hiding in the center layer there, which is great; you can’t mess this step up … just get those berries in there as messy as it may seem). Add a little more flour to the dough if it’s sticking to the surface.
Form the dough into a rectangle shape (do the best you can here; it’s totally acceptable to have different shaped scones, so it really doesn’t matter). Slice into 9 large scones or 16 small scones.
Quickly transfer to prepared baking sheet. Brush the scones with a little buttermilk and sprinkle with extra sugar. Bake for 20-24 minutes, or until golden brown around the edges. Best if enjoyed within two days of baking.
Source: http://asweetspoonful.com/2018/07/berry-buttermilk-scones.html
0 notes
Text
Damson Cake with Caramelised Almond Topping (Tosca cake)
Last month on one of the many sweltering days I jumped on the overground to go to Rachel Khoo’s gorgeous Khoolect Studio to celebrate the launch of her new cookbook, The Little Swedish Kitchen*. She made butternut squash waffles and chocolate-raspeberry bullar and we all sat around in the garden having breakfast before being sent off with a copy of the book and a waffle iron (best goodie bag gift ever tbh).
When I later flicked through the book, making notes of which recipes I wanted to make, the plum tosca cake caught my eye. I’d eaten a mini one before (minus the fruit) at my friend Sarah’s bakery/coffee shop in Leeds (an excellent brunch spot if you’re ever in need!!). It’s a fluffy cake topped with a crispy, chewy, caramelised almond crust. Incredible. The addition of the plums in the book was a great idea as it adds a sharpness which also cuts through the sweet almond layer.
My parents have a damson tree in the garden which last year produced so many that we have a few bags of damsons in the freezer. Unfortunately because of the weird weather this year, it’s not producing any fresh fruit so I just used up some of the freezer supplies. The only annoying part is that damsons have pits in the centre which are annoying to remove unless you cook them down first. I followed my boyfriend’s advice of a method that surgeons use, ‘count them in and count them out’ (apparently the LEGIT method used to prevent them leaving sponges etc inside people during operations), to make sure I got all the damson pits out of the compote.
I slightly adapted the recipe, lowering the baking time as the use of cooked damsons requires less time than using fresh plums due to lower moisture. I also opted for an almond extract in the batter in place of vanilla. Rachel’s tips say that you can swap in other fresh fruit like apricots or cherries in too. I think it would be cool to experiment with different nuts/seeds in the topping (sesame seeds could be incred) or adding chopped chocolate to the fruity later! Endless possibilities, really. Happy baking!
(*Affiliate link)
Ingredients
40 damsons
100 g unsalted butter, softened
150 g granulated sugar
1 tsp almond extract
3 medium eggs
2 tsp baking powder
250 g plain (all-purpose) flour
a pinch salt
For the topping:
50 g unsalted butter
2 tbsp double cream
50 g (1/4 cup) granulated sugar
100 g (1 cup) flaked almonds
2 tbsp plain (all-purpose) flour
Instructions
Place all the damsons in a medium pot with 50ml (1/4 cup) of water over a medium heat. Once the water in the pot starts to bubble, turn the heat down to low, cover with a lid and leave for 20 minutes. Check on them occasionally to give it a stir and make sure it's not catching on the bottom.
Preheat the oven to 180oC (350oF)/ 160oC (320oF) fan. Grease and line a 21cm (9-inch) springform pan with baking paper.
In a large bowl, beat together the softened butter, granulated sugar and almond extract. Add in the eggs one at a time, beating between each addition. Add the baking powder, flour and salt. Mix together until just combined. Pour into the prepared cake.
Once cooked, leave to cool with the lid off. When cool enough to handle, pick out all the pits from the damson compote - count them out so you don't miss any!!!
Spoon the cooked damsons onto the cake batter and spread out into an even layer. Bake for 20 minutes - it'll be a bit undercooked in the centre still.
MAKE THE TOPPING:
Melt the butter in a small pot over a medium heat. Once melted, take off the heat and stir in the rest of the topping ingredients.
FINISH THE CAKE:
Spread the flaked almond topping over the partially baked cake. Turn the oven up to 200oC (400oF) /180oC (350oF) fan. Bake for a further 15-20 minutes until golden on top.
Recipe Notes
The original recipe uses 9-10 plums, halved and de-stoned. The initial bake is for 30-35 minutes then, once topped, baked for a further 20-25 minutes until golden.

Related

Source: https://topwithcinnamon.com/2018/08/damson-cake-with-caramelised-almond-topping-tosca-cake.html
0 notes
Text
Motherhood: A Complicated Order
Women, you can have it all, they say. And you can. Well, everything you can carry in two arms, a piggyback ride, a Mary Poppins bag, and a frazzled mom-brain, sandwiched between the sun’s coming and going, between breakfast and dinner time, between deadlines and surprise sick days. Motherhood and working through it (having it all) is a complicated order.
This post is sponsored by American Express. Thank you for supporting the companies that support me.
You can work from home with a four-year-old on your back (me). You’ll save on childcare, but it’ll take 6 times as long to get your work done. Though, can you call anything done anymore? And since you work from home, you can work, play with your tiny human, and cook dinner all at the same time. You can have it all, all at once. Heh.
You can work outside the home. You’ll spend a little (a lot) more on childcare, but you’ll get your work done in a reasonable amount of time. But because you work outside the home, you miss play time, breakfast time, and dinner barely makes it on the table. You spend your life torn between wanting to be home with your tiny humans and getting lost in that project at work that makes you come alive.
You can quit work to stay home with your tiny humans. It’ll be easier, less stressful. But because you’re home all day, the messes are bigger, the showers are longer apart, and dinnertime is still dinnertime. You’re the mother, the maid, the referee, and the cook, spending your days making sure everyone knows you’re something more too. They’re 3 and 6, so of course they don’t get it and probably won’t until they’re 36.
Motherhood is both/and. It’s both impossible and beautiful. It’s the most complicated order that you just keep on ordering. This is why I love simplicity. Because some things will always be complex, like motherhood. It’s in the DNA. So, simplify the things you can control—like your pantry and credit card.
Oh, and of course you’re more than a mother, maid, referee, and cook. But those are pretty worthwhile things.
Here’s what’s not complicated—the new American Express Cash Magnet™ Card. I’ve been using it for the last two months. As promised, my experience so far has been so straightforward. First of all, I’ve been loving the American Express app, which is super easy to use. And even more than that, the Cash Magnet Card keeps it simple. Unlimited 1.5% Cash Back with no caps, no categories, and no annual fees. I’ve been looking for a Card that makes spending and saving intuitive. Terms apply, learn more here.
The Details:
Unlimited 1.5% Cash Back on your purchases, earned in Reward Dollars that can be easily redeemed for statement credits, gift cards, and merchandise. No more point system.
Heaven forbid the dishwasher going out in the same month you get new tires. Enter the Pay It Plan It feature, which helps give you more control over how and when you pay for your purchases.
Terms apply, learn more here.
Head this way to find more about the Card.
(Visited 830 times, 82 visits today)
Source: https://www.thefauxmartha.com/2018/09/06/motherhood-a-complicated-order/

0 notes
Text
PUMPKINUNDATION 2018 – 9/27/2018
Here are some new pumpkin products found on store shelves by your fellow readers. If you’ve tried any of them, share your thoughts in the comments.
(Spotted by Rachel C at Whole Foods.)
So just Pumpkin Spice Krispy Juniors without the Krispy Juniors name. (Spotted by Bob K at Walmart.)
(Spotted by Robbie at Target.)
(Spotted by Robbie at H-E-B.)
(Spotted by Laurie at H-E-B.)
(Spotted by Sylvia at Dollar Tree.)
(Spotted by Laurie K at Walmart.)
Thank you to all the photo contributors! If you’re out shopping and see an interesting new product on the shelf, snap a picture of it, and send us an email ([email protected]) with where you found it and “Spotted” in the subject line. Or reply to us (@theimpulsivebuy) on Twitter with the photo, where you spotted it, and the hashtag #spotted. If you do so, you might see your picture in our next Spotted on Shelves post.
Also, if you want to send in photos and are wondering if we’ve already covered something, don’t worry about it. Let us worry about it.
Source: https://www.theimpulsivebuy.com/wordpress/2018/09/27/pumpkinundation-2018-9-27-2018/
0 notes
Text
Xoconostle Salsa
Photo by Hank Shaw
Xoconostle has to be one of the coolest words out there: Pronounced show-co-NOST-lee, it comes from an Aztec word meaning “sour prickly pear fruit.” Which, well, it what it is.
Most of us know that prickly pear is a spiky yet fantastic fruit. (I normally make a syrup out of the fruits, which is great in margaritas.) No matter what the variety, they’re called, oddly, tunas in Spanish. Someday I plan on making tuna with a tuna sauce…
Xoconostle is a cousin of the normal prickly pear; same genus, different species. Officially it’s Opuntia matudae. It is native to Central Mexico, but I’ve seen it here in Northern California as well as Arizona. So far as I know, however, these would have been planted by someone. Xoconostle does not occur naturally in the United States.
For the most part, xoconostle fruits, also called tuna agria, are green. Sometimes they have a pretty peachy glow to them, though. Nothing like the electric magenta of a good prickly pear.
Photo by Hank Shaw
Salsa de xoconostle is the most common way to eat this fruit, which is increasingly available in Mexican markets in the US. I found these at La Esperanza Market in Sacramento.
I commonly see two kinds of xoconostle salsa: A variant on pico de gallo, and this smooth salsa, which I like better.
Other than the xoconostles, which can be hard to find, this salsa is super easy: dried chiles, onion, garlic, salt.
Photo by Hank Shaw
What makes the salsa great is how you deal with all these ingredients. You roast them on a comal or in a cast iron or other heavy pan. Yep, you put the fruits right on the hot iron to char and heat up, then you let them steam in a plastic bag the same way you do when you char chiles to peel them.
Same goes for the chiles, onion and garlic. What chiles to use? I prefer chile morita, which are a smaller, fruitier, slightly less smoky kind of chipotle. Like a chipotle, they are ripe, red jalapenos smoke-dried.
Photo by Hank Shaw
You can, of course, use any of a variety of chiles. Some good alternatives, in order of preference, would be: chipotles; chile mixe, the smoky-spicy Oaxacan pasilla; toasted arbols; cascabels; chile puya; or, barring all else, plain ole’ guajillos. All of these chiles are dried. In a pinch you can use canned chipotles in adobo.
There is no substitute for the xoconostle, however. It’s its own thing.
The resulting salsa de xoconostle is smoky, spicy, smooth, luscious and tart. It is fantastic for tortilla chips, and I loved it spread on a plate alongside seared fish. I like it pourable but thick, but if you want a thinner salsa, just add water.
You can also see xoconostle in Central Mexican mole de olla, as well as sometimes in sorbet and in salads. I like it pureed into a vinaigrette for Mexican salads.
Xoconostle Salsa
This salsa highlights the tart xoconostle fruit, and alas, there is no substitute. Look for them in Mexican markets.
Course: Condiment
Cuisine: Mexican
Serves: 2 cups
Author: Hank Shaw
Ingredients
6 to 8 xoconostles
6 to 10 chiles morita, or 4 to 6 chipotles in adobo
1 small white or yellow onion, quartered
4 to 6 cloves garlic, unpeeled and whole
Salt
Instructions
Heat a comal or skillet or heavy frying pan over medium-high heat for a few minutes. When it's hot, set the xoconostles on the comal to char a bit. Set the onions down so flat sides are touching the comal. Put the garlic cloves around the edges of the pan.
If there is any space left on the comal or pan, toast the dried chiles for about 90 seconds, turning them every 15 seconds or so so they do not burn. When the chiles are toasted, set them in a bowl and pour boiling water over them just to cover, about 2 cups. Cover the bowl and set aside.
Keep turning and charring the xoconostles, onions and garlic until you get some nice blackening. Remove from the heat. Put the xoconostles in a plastic bag to steam for 15 minutes.
Roughly chop the onion and put in a blender. Peel the garlic, roughly chop it and put that in the blender. Remove the chiles from the water, chop and add to the blender. Save the soaking water.
Slice the xoconostles in half. Scoop out the seeds. Ideally, you set all the seeds in a strainer set over a small bowl to catch any juices. Use a spoon to scoop out the fruit. It helps to slice off the flat top of the xoconostle first. Discard the skin. Add all this to the blender.
Puree the salsa and add salt to taste. This salsa will keep for at least a week in the fridge.
Wild Game Sauces
You can find all sorts of salsas and other sauces for fish and game here on Hunter Angler Gardener Cook!
Read More

Source: https://honest-food.net/xoconostle-salsa-receta/
0 notes
Text
Avocado Egg Salad Recipe
Avocado egg salad uses creamy avocado in place of mayonnaise to put a delicious and nutritious twist on your classic egg salad.
This avocado egg salad recipe uses just a few simple ingredients; hardboiled eggs, avocado, finely diced veggies, fresh dill, lemon and some salt and pepper to taste.
It’s very similar to my classic egg salad, but instead of the mayonnaise, I use rich and creamy avocado.
Scoop the flesh of one large avocado into a bowl along with a squish of lemon and pinch of salt.
Mash the avocado along the side of the bowl, using a fork, until creamy.
Add hard boiled eggs and hardboiled egg whites into the bowl.
Toss in diced vegetables, fresh dill, salt and pepper.
Stir everything together until well combined.
Serve in a lettuce cup, on your favorite bread or on top of a big fat salad.
Place eggs in the bottom of a stainless steel pot, add enough water to come one inch above the eggs.
Bring eggs to a boil, shut off the heat, pop on the lid and set your timer for 10 minutes*.
In the mean while, set up an ice bath by filling a large bowl with ice cubes and cold water.
After the timer goes off, use a slotted spoon to remove the eggs from the pot and place into the ice bath.
Once the eggs are cool enough to handle, peel off the shells.
*Note: if you prefer a creamier yolk, set your timer for 8 minutes instead of 10
How To Meal Prep Avocado Egg Salad
Avocado Egg salad is a healthy, delicious meal to add to your weekend meal prep, but because avocados will oxidize and turn brown, so it’s best to enjoy this salad within two days of making it.
Once it’s prepped, transfer into an airtight container and store it in the fridge.
If you wanted to make it last longer, prep all of the ingredients except the avocado. Then when it’s time to eat your salad, you can prep the avocado on the spot. This will allow the salad to last up to 5 days in the fridge.
Piled on your favorite bread with lettuce and pickles
Layer baby spinach on a rice thin and top with avocado egg salad
Scooped onto your favorite green salad
Sprinkled on top of crunchy tortilla chips
Enjoyed straight from the bowl
Yield: Serves 2
Prep Time:15 minutes
Cook Time:15 minutes
Total Time:30 minutes
Using creamy avocado in place of mayonnaise, creates an egg salad that is healthy, creamy, and delicious.
Ingredients:
8 eggs
1 large, ripe avocado
1 tablespoon lemon juice
2 tablespoons finely diced red onion
2 tablespoons finely diced celery
2 tablespoons finely diced radish
1 tablespoon fresh chopped dill
salt and pepper to taste
Directions:
Place eggs in the bottom of a stainless steel pot, add enough water to come one inch above the eggs.
Bring to a boil, shut off the heat, pop on the lid and set your timer for 10 minutes.
In the mean while, set up an ice bath by filling a large bowl with ice cubes and cold water.
Once the timer goes off, use a slotted spoon to remove the eggs from the pot and place into the bath.
Once the eggs are cool enough to handle, peel off the shells.
Slice four of the eggs in half, pop out the yolks (you can save them for another time) then chop.
Slice the remaining eggs in half, and chop up with the yolks.
Scoop avocado into a large bowl and add lemon juice and a pinch of salt. Using the back of a fork, mash the avocado against the side of the bowl until it’s smooth and creamy.
Add the chopped eggs and egg whites into the bowl, along with the onions, celery, radish, dill, salt and pepper. Gently stir everything together.
Transfer to an air tight container or enjoy on top of your favorite sandwich bread, lettuce wrap to green salad.
NUTRIENTS PER SERVING: Calories 273 | Total Fat 18.5g | Saturated Fat 4.4g | Cholesterol 330mg | Sodium: 243mg | Carbohydrate 8.9g | Dietary Fiber 4.8g | Sugars 1g | Protein 20.5g
Source: https://cleananddelicious.com/avocado-egg-salad-recipe/
0 notes
Text
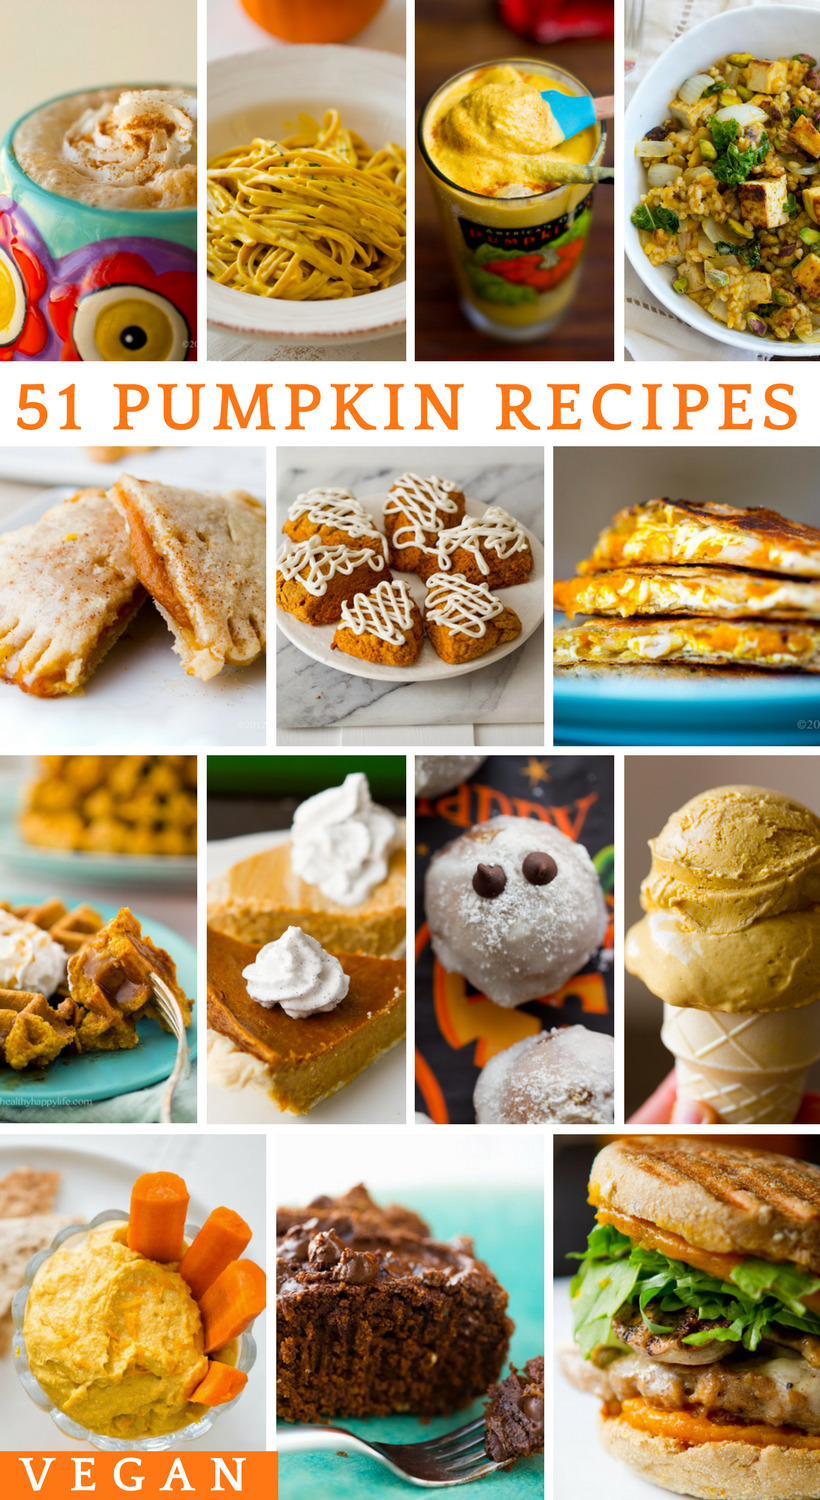
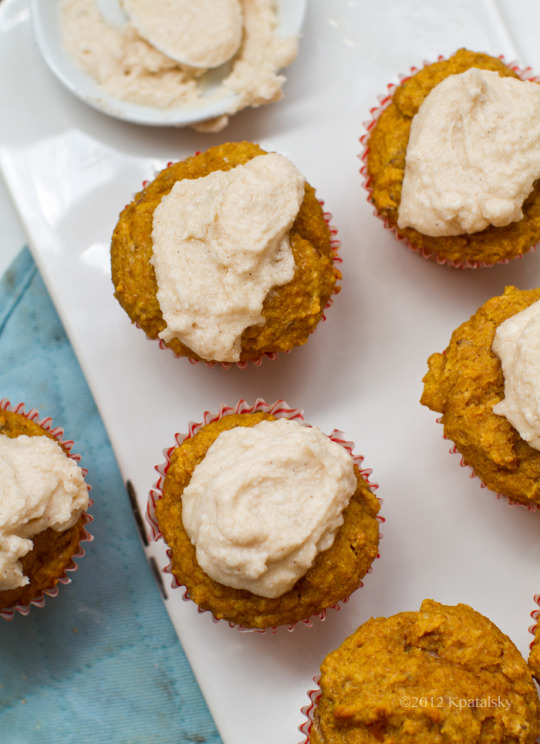
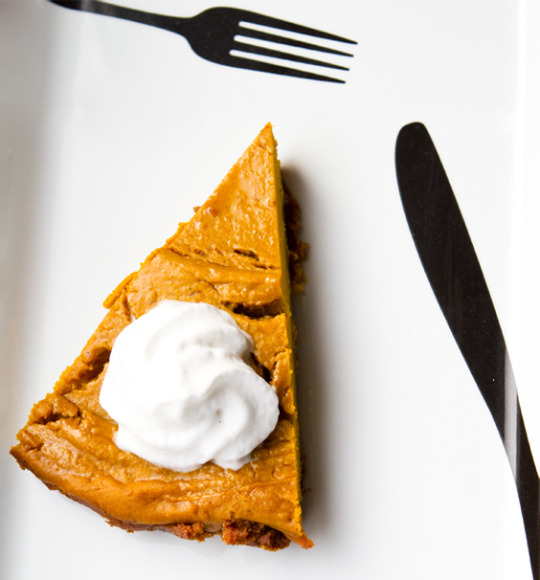
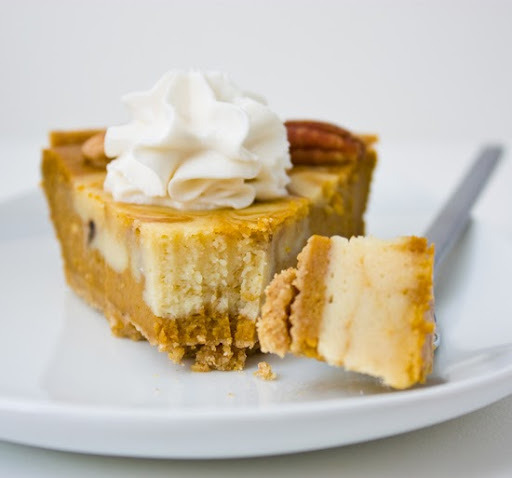
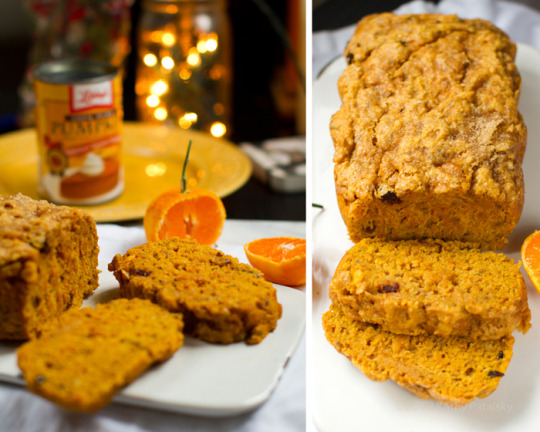
57 Vegan Pumpkin Recipes (Updated)
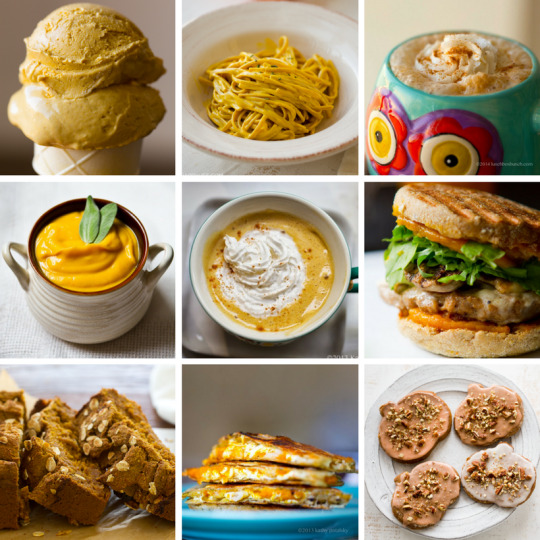
This is one of my favorite round-up posts.. all things pumpkin!
Vegan Pumpkin Recipes. From pumpkin cinnamon buns, pumpkin fritters, cozy soups, rice dishes, ice cream, donuts, quesadillas and multiple versions of vegan pumpkin pie - these are all my pumpkin-y recipes.
These recipe posts are both recent and vintage. Savory and sweet. A few that are super healthy - and plenty that are quite decadent and sweet. There is something for everyone on this list - so if you have a can of pumpkin sitting in your kitchen pantry, give this list a look and hopefully find some inspiration!
Last updated: 2018
My 57 Vegan Pumpkin Recipes
1. Pumpkin Cinnamon Rolls with Frosting

2. 5-Ingredient Pumpkin Pie (Cheesecake too!)
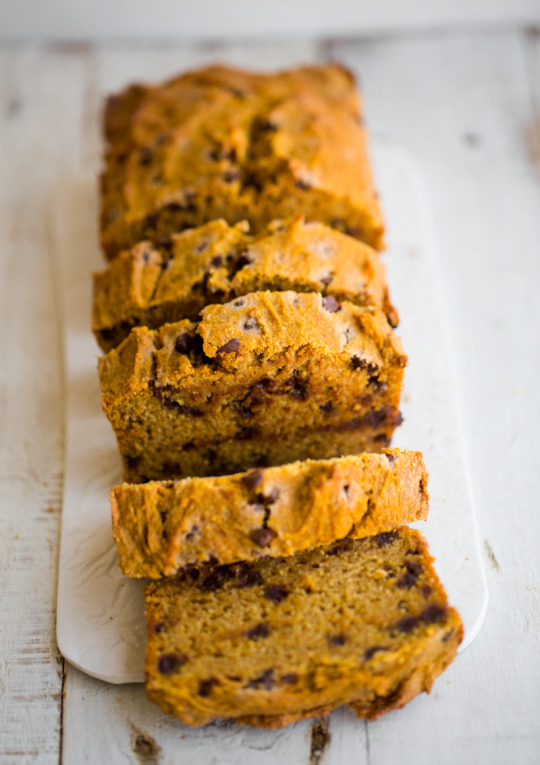
3. Chocolate Chip Pumpkin Loaf
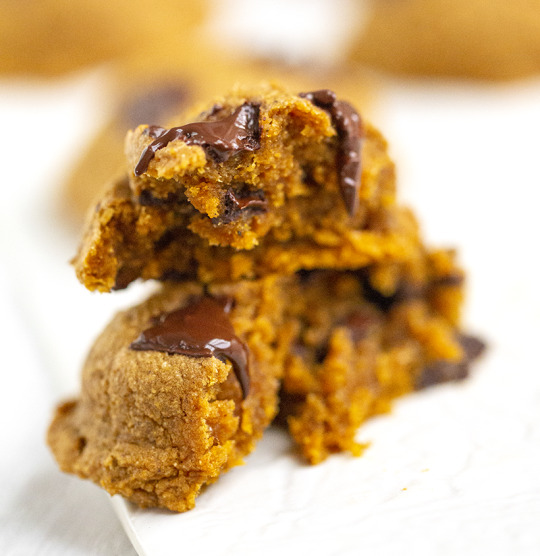
4. Peanut Butter Pumpkin Seed Chocolate Chip Cookies

5. Pumpkin Spice Latte with tips! - beverage + how-to Here is my PSL how-to. Plus video!

6. Soft Pumpkin Cookies with chocolate
7. Pumpkin Nog - beverage This festive nog uses the creamy flavor of pumpkin to make it extra special.

8. Pumpkin Ghost Donut Holes - dessert or breakfast These cute little ghosts are a delicious and fun way to celebrate pumpkin around the Halloween season. Pumpkin donut holes are coated in vanilla glaze.

9. Maple-Pumpkin Quesadilla - appetizer or entree These are so savory-sweet and amazing with pumpkin butter and white beans and a hint of maple. Crispy 'dilla tortillas to swaddle it all!

10. Pumpkin Cookies - dessert These fun frosted pumpkin cookies are fun to make with kids. You can frost them simply or decorate their faces into jack-o-lantern styles! Top with chopped pecans or whatever you'd like!

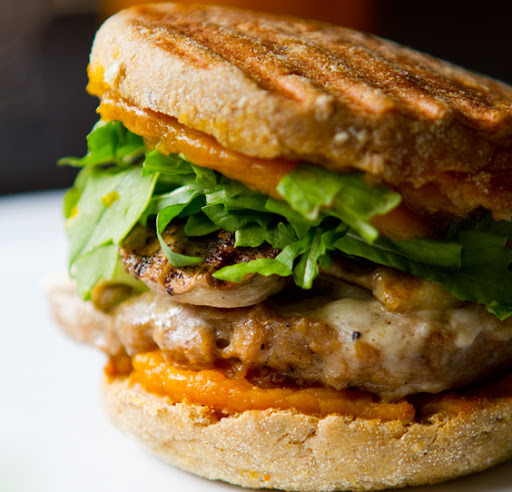
11. Jack-o-Pumpkin Breakfast Sandwich - breakfast Oh my goodness I LOVE this recipe. And even better, so does my husband! Warm vegan breakfast sausage combines with a hint of vegan cheese, homemade pumpkin butter, greens and some savory mushrooms. This is a breakfast bite to CRAVE!
12. Pumpkin Pie Tarts with Vanilla Glaze - breakfast pastry These homemade pastry bites are like the mini, toaster-tart-looking pumpkin pies. Warm pumpkin butter inside, flaky vegan crust on the outside. And these sweet morning treats are easier to make than you may think!

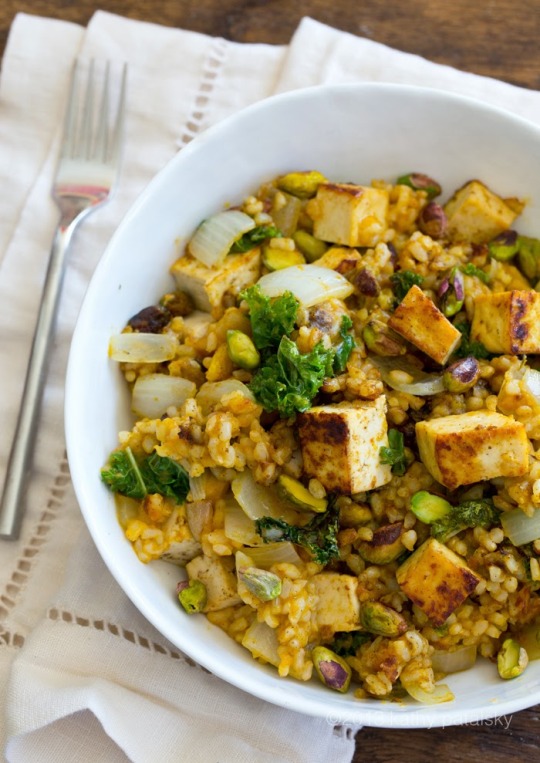
13. Pumpkin Kale 'Fried Rice' Bowl with Tofu - entree This one-bowl meal is a favorite fall dish of mine! It has it all. Cozy rice, protein-rich tofu cubes, kale and more.
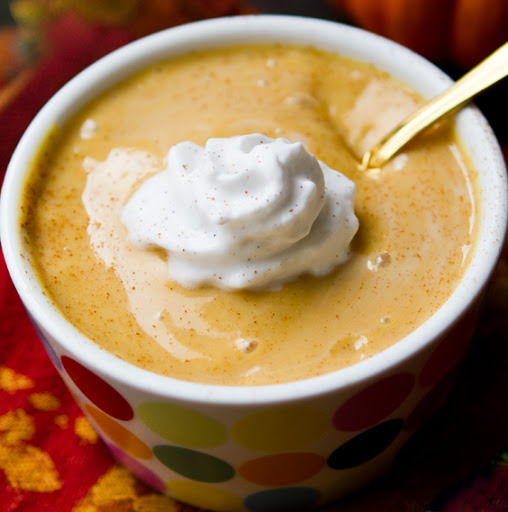
14. Pumpkin Pudding in 5 Ingredients - healthy dessert If you have five minutes and five ingredients you can whip up this healthy treat bowl of pumpkin pudding - cinnamon speckled, creamy, packed with protein and super delish!
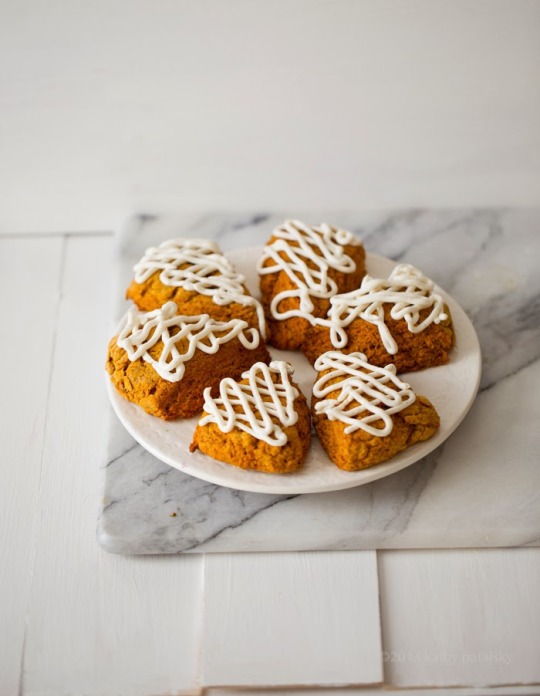
15. Pumpkin Spice Scones with vanilla bean frosting - breakfast These easy to make scones bake up with pumpkin pie flavors, vanilla bean on top! Warm and fluffy for a cozy morning. Pair with your fave latte, cocoa or tea.
16. "Run Amok!" Pumpkin Cookies - dessert These Halloween perfect cookies are like classic chocolate chip, only with a few added goodies and a pumpkin-infused spin. Watch Hocus Pocus and bake up these!

17. Pumpkin Waffles - breakfast These fluffy spice and maple pumpkin waffles are lovely for a fall or winter brunch. They are gluten free and have the welcoming aroma or citrus and cinnamon. Maple syrup on top.

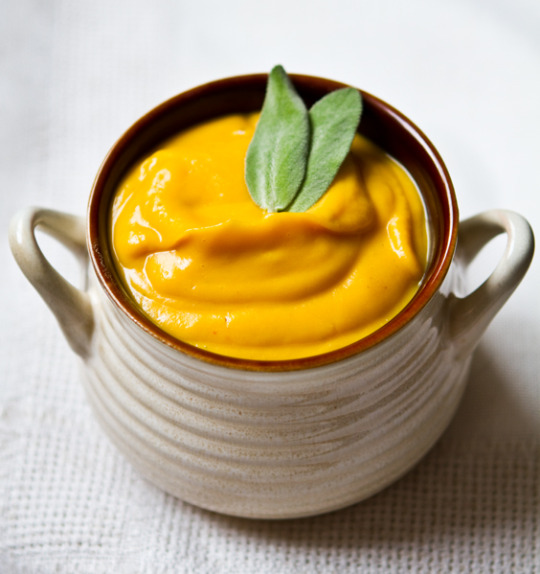
18. Ginger Sage Butternut Pumpkin Soup - soup I love this soup on a chilly fall night when I am craving something ultra-cozy, calming, comfy and delicious. The recipe is simple and the flavors of sage and pumpkin are outstanding. This is a must-try for creamy soup fans.
19. Pumpkin Pecan Cinnamon Rolls with Ginger Glaze - sweet breakfast treat Hm, these amazing cinnamon rolls really need no introduction. Pumpkin. Cinnamon. Creamy ginger glaze. If you want a fall-infused pumpkin cinnamon roll - give this recipe a try!

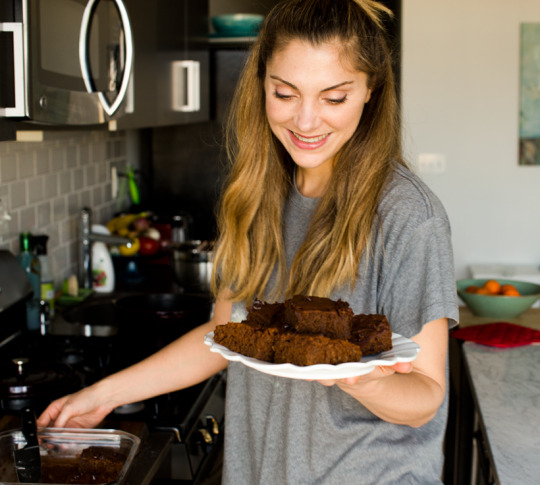
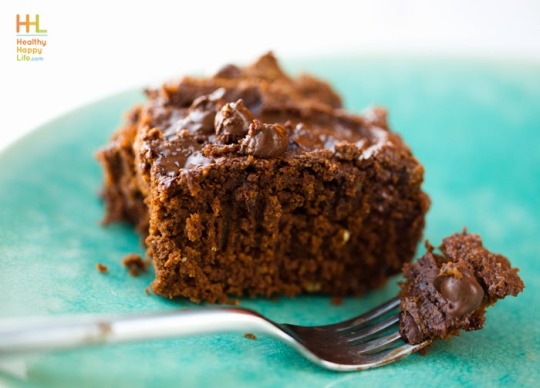
20. Pumpkin Brownies - dessert These sturdy pumpkin brownies are rich in chocolate flavor and super satisfying. They bake up dense and amazing. Perfect for a fall chocolate craving.
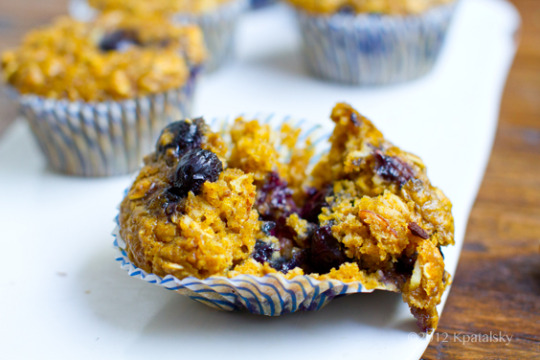
21. Pumpkin Chai Oat Blueberry Muffins - muffin Blueberry muffins with a healthy, spiced, pumpkin-y, fall spin! Warm and fluffy. Pair with a steamy latte for a perfect fall morning.
22. Pumpkin Muffins - Cinnamon Frosted - muffins These fluffy, dense pumpkin muffins are simply wonderful! The pure smooth flavor of pumpkin shines through in each golden bite.
23. Roasted Cauliflower Pumpkin Swirl Dip - Appetizer This is another seasonal recipe that I CRAVE! The flavors of roasted cauliflower and rustic fall pumpkin combine in a swirled bowl of warm baked dip. Spread on warmed crusty bread, crackers - or eat by the spoonful! This stuff is amazing at fall gatherings.

24. Hubbard Pumpkin Pie - healthy dessert This recipe is truly for the pumpkin pie experts out there. Those who want to try a rustic, authentic, dense, creamy-velvet version of homemade pumpkin pie. This pie was really delicious and so healthy that it makes a great afternoon bite or even breakfast!
25. Toasty Pumpkin Chickpea Fritters - side dish or patty I LOVE these! Love them. Toasty little golden gems of pumpkin goodness. Crispy coated and very lightly pan-fried. You could bake them too. They are delicious on their own or use them as a burger patty. Savory with a hint of sweet.

26. Crispy Tofu Pumpkin Spread Sandwich - lunch sandwich This lovely hearty sandwich has a pumpkin-sweet potato spread on top. Crispy golden tofu too. A favorite combo of mine for a lunch or dinner sandwich.

27. Pumpkin Spice Orange Banana Bread Bars - bakery snack cake These fluffy bars combine pumpkin and banana bread - what is not to love?! Enjoy for breakfast or as a snack. Pair with a hot beverage for a cozy fall moment.

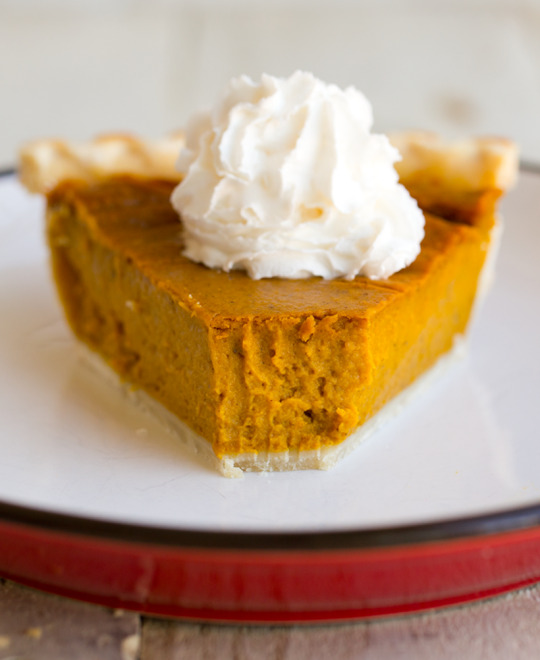
28. Pumpkin Pie - from scratch - dessert Homemade pumpkin pie from scratch with a homemade gingersnap crust. And yes, I even made the gingersnaps. This amazing pie is one of my favorites for special fall gatherings. (Or you can try my 4 and 5 ingredient tweaks to pumpkin pie below!)

29. Pumpkin Pie (in 4 ingredients) (in 5 ingredients) - dessert I was dying to really make the easiest pie recipes ever. And with these two recipes I think I succeeded! Both pies turn out delicious. And with only 4 or 5 ingredients you won't have to sweat much in the kitchen.

30. Golden Trio Soup - entree soup This golden trio soup has butternut squash, sweet potato and pumpkin - chipotle flavors - warm, creamy and spiced. Crispy tofu cubes on top.

31. Cheesecake Pumpkin Pie - dessert Cheesecake meets pumpkin pie in a rich and creamy swirled slice.
32. Pumpkin Pie Parfait - dessert or snack These easy parfaits have layers of pumpkin pudding, coconut whip and grahams. So good and such a crowd pleaser! Make ahead approved. Pumpkin pie bliss. No holiday required.

33. Hot Pumpkin Mug - beverage This is like the pumpkin version of hot cocoa. And it is kinda like a pumpkin spice latte, without the espresso and with more pumpkin! So creamy and delicious for fall!

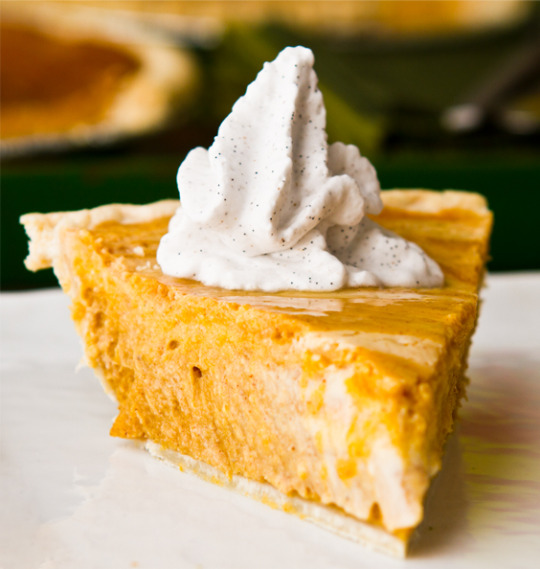
34. Walnut Pumpkin Pie - This no-bake pie is so rich and creamy and loaded with healthy walnuts! I love this as my holiday pie. ps. You could bake this if you like a firmer pie!

35. Pumpkin Spice Loaf - breakfast or snack This fluffy cranberry pumpkin spice loaf pairs perfectly with tea. Sugar Plum Fairy Loaf for the holidays!
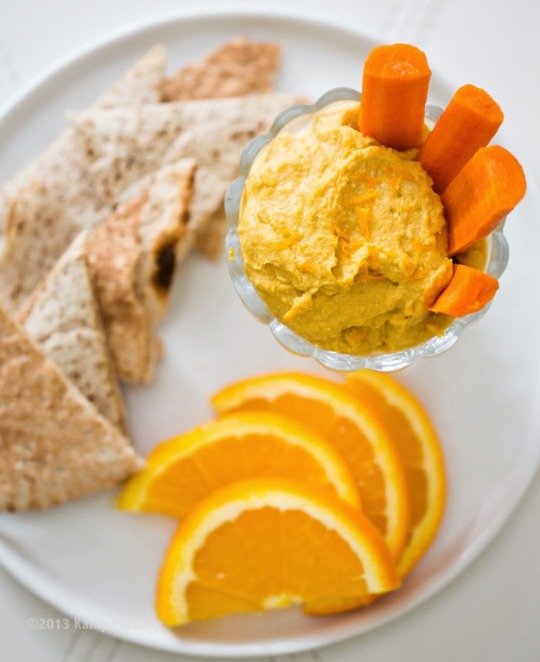
36. Orange Pumpkin Hummus. - appetizer or snack This is a yummy fall hummus infused with pumpkin and spice and citrus.
37. Maple Bliss Vegan Pumpkin Pie - dessert This is a maple sweetened pumpkin pie. So luxurious and dreamy!
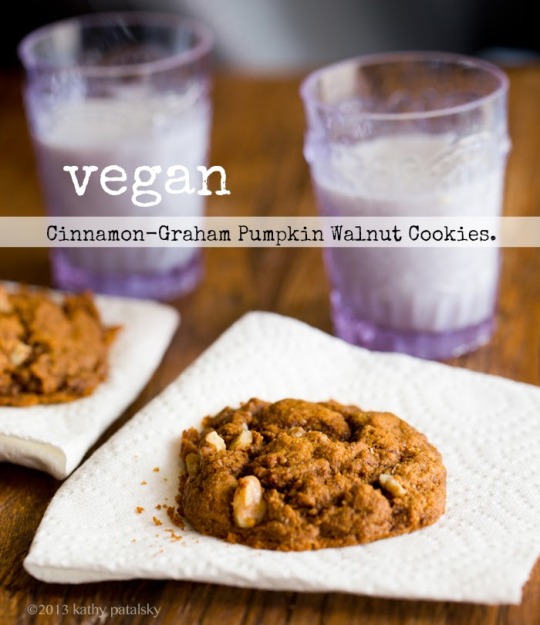
38. Cinnamon Pumpkin Graham Cookies or Crackers - dessert These are cozy pumpkin chocolate chip cookies made using graham flour.
39. Vegan Pumpkin Spice Latte - beverage Ditch Starbucks and make your pumpkin spice beverage in house - sip in your slippers :)

40. 2-Minute Pumpkin Pie Pudding. This super fast pudding has walnuts and pumpkin and pie spices galore. Sweet, creamy and perfect for a dessert or snack!

41. Pumpkin Pie Pillows Cookies - dessert or snack These little nuggets of yum are perfect with tea.

42. Sour-Cream Swirled Pumpkin Pie - dessert Another version of pie - with a creamy white swirl!
43. Oatmeal Pumpkin Bread - side or snack or breakfast This fluffy and hearty bread has goodness of pumpkin and oatmeal combined in one.

44. Two Pumpkin Muffins - one cream cheese topped - muffins Two pumpkin muffin recipes to try. One with a moist vegan cream cheese top.

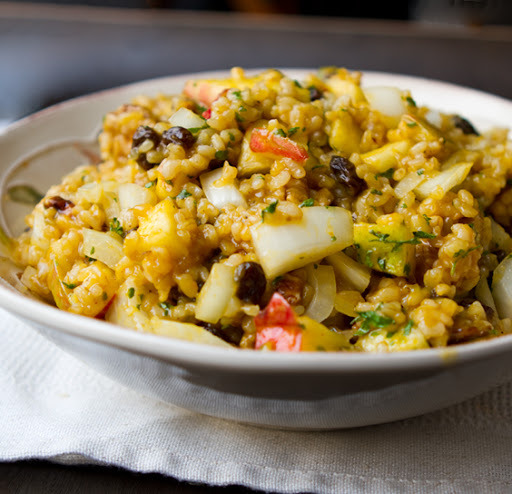
45. Pumpkin Apple Harvest Rice - savory entree or side dish This cozy bowl of pumpkin rice with sweet crunchy apples and veggies is one of my favorite easy bowls to whip up for lunch or dinner. Pumpkin flavor in each savory, nutty bite.
46. Frosty Pumpkin Shake - dessert smoothie This cool, creamy shake is swirled with frosty flavors of creamy coconut and smooth spiced pumpkin. Eat it with a spoon!

47. Pumpkin Oat Chocolate Cookies - goodness-infused dessert These tender round gems are a new sweet fall treat of mine. Pumpkin combines with chocolate and rustic oats for a flavor that is naughty-meets-nice.

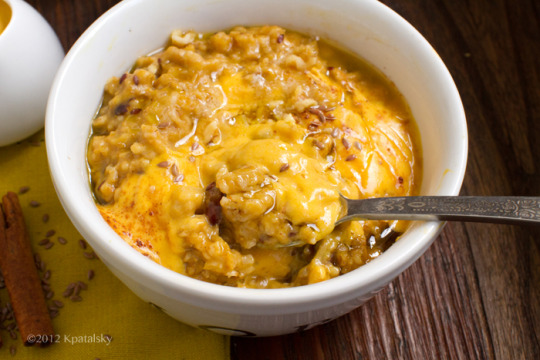
48. Pumpkin Pie Oatmeal - breakfast This unique pumpkin oatmeal uses pumpkin cream to drizzle over top and fold in the cereal to make creamy, rich oats. Spice and maple flavors.
49. Pumpkin Spice Cashew Cheese Dip - appetizer I created this recipe when I was on a cashew cheese kick a few years ago. And it is quite warm and cozy! It starts out with some soaked cashews and ends up with a warm-from-the-oven dip of pumpkin spice deliciousness. This dip can be served warm or chilled. Party-approved. Savory-meets-sweet.

50. Pumpkin Cinnamon Bun Layer Cake - dessert This rich and fluffy dessert is pretty much food porn on a plate. It looks like a fluffy layer cake with melty, creamy vegan frosting - but it tastes like a pumpkin-infused cinnamon bun with swirls of cinnamon throughout. So decadent. So good. So splurge-worthy.

51. Pumpkin Pretzels - snack or breakfast or dessert These soft pretzels are filled with holiday flavor and appeal. They bake up fluffy and rich in cinnamon spice. They remind me of cinnamon rolls, only in a pumpkin-y pretzel form!

52. Pumpkin Loaf with Chocolate Chips! - snack or dessert This fluffy loaf is studded with melty chocolate chips.

53. Date-sweetened Pumpkin Loaf - breakfast or snack This is a super fluffy and yummy pumpkin loaf. Perfect with tea or a latte. Rich pumpkin color and flavor.

54. Pumpkin Ice Cream - dessert This summer meets fall recipe is incredibly luxurious and delicious. Creamy and rich with pumpkin pie flavor.

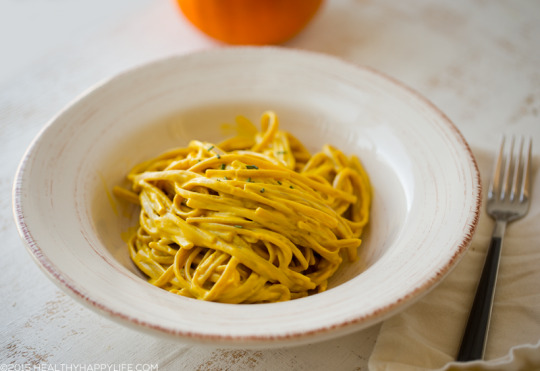
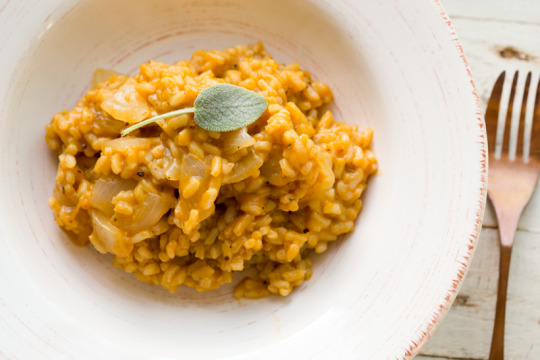
55. Pumpkin Risotto with sage and spices - entree This cozy entree or side dish is loaded with fall flavor. It can be served as fancy or casual as you want it! I love risotto tacos with white beans, skillet mushrooms and heat!
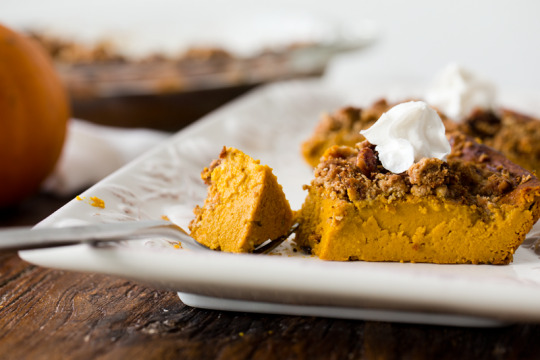
56. Crustless Pie with Pecan Streusel - healthy dessert This crust-free pumpkin pie is so good! You seriously won't miss the crust.
57. Pumpkin Brownies - dessert These are so good and perfect for pumpkin season! Pumpkin makes these brownies extra fudgy delicious.
Hope you can try one or a few of these cozy-delicious pumpkin recipes this fall :)

Source: http://kblog.lunchboxbunch.com/2012/10/my-25-best-vegan-pumpkin-recipes.html
1 note
·
View note
Text
Pomidorowa z pieczonych pomidorów i czosnku
Co tu dużo mówić, zupa z pieczonych pomidorów jest wyjątkowa. Ma niesamowicie głęboki smak, świdrujący zapach oraz słodki, dymny aromat, który długo pozostaje na języku. Na całe szczęście jest to też jedna z tych zup, która nie wymaga specjalnych przypraw, technik ani umiejętności. Robi się sama – potrzeba jedynie godziny cierpliwości.
Zupa z pieczonych pomidorów, chociaż brzmi i smakuje dość wykwintnie, nie wymaga dużego nakładu pracy. Potrzebna jest jedynie wolna godzina, podczas której możemy poczekać, aż piekarnik wykona całą pracę za nas. Pod wpływem ciepła piekarnika pomidory miękną, karmelizują się oraz lekko odparowują, koncentrując w sobie esencję pomidorowego smaku. A dzięki dodatkowi oliwy oraz kilku ząbków czosnku na dnie blachy pozostaje wyjątkowo aromatyczny tłuszcz, o słodkim zapachu skarmelizowanego czosnku i skórek pomidora. To wszystko po upieczeniu ma tak intensywny smak, że wystarczy na zrobienie bardzo dużego garnka bardzo aromatycznej zupy – bo upieczone warzywa wystarczy zmiksować z dodatkiem bulionu oraz kromką czerstwego chleba (lub łyżką ugotowanej kaszy). Dzięki temu zupa jest gęsta, zawiesista i smakuje jak esencja pomidorów.
wersja do druku
Czas przygotowania: 15 minut pracy + 60 minut pieczenia 15M
Składniki na 4 - 6 porcji:
2 kg pomidorów malinowych i bawole serce 4 – 6 ząbków czosnku 4 łyżki oliwy sól
1 kromka chleba, najlepiej suchego* 1 łyżka octu balsamicznego lub jabłkowego czarny pieprz szczypta cynamonu
1 – 1 1/2 szklanki bulionu lub wody do podania: oregano lub bazylia, oliwa i czarny pieprz
Przygotowanie:
Piekarnik rozgrzać do 180 stopni. Pomidory przykroić na pół, wykroić co większe szypułki i ciasno ułożyć w blasze do pieczenia. Pomiędzy nie wrzucić ząbki czosnku w łupinie, całość oprószyć solą, oblać oliwą i wsunąć do piekarnika. Piec przez przynajmniej 60 minut, a najlepiej przez 75 minut.
Po upływie tego czasu wyjąć blachę z warzywami. Ząbki czosnku wyjąć spomiędzy pomidorów, a wszystkie pomidory oraz oliwę zgromadzoną w blasze wlać do dużego garnka.
Ząbki czosnku wycisnąć z łupiny. Dodać do pomidorów razem z pokruszonym chlebem, octem, sporą ilością czarnego pieprzu i szczyptą cynamonu. Wymieszać i dokładnie zblendować ręcznym blenderem.
Kiedy krem będzie w miarę gładki, stopniowo wlewać bulion wciąż blendując. Na koniec spróbować, w razie potrzeby doprawić większą ilością soli lub pieprzu. Podawać z oliwą, świeżymi ziołami i czarnym pieprzem.
Porady:
W wersji bezglutenowej należy użyć bezglutenowego pieczywa albo chleb zastąpić 2 łyżkami ugotowanej kaszy jaglanej lub 2 łyżkami migdałów.
Spróbuj innych potraw z tymi składnikami:
Przepis z bloga Jadłonomia: http://www.jadlonomia.com/przepisy/pomidorowa-z-pieczonych-pomidorow-i-czosnku/

Source: http://www.jadlonomia.com/przepisy/pomidorowa-z-pieczonych-pomidorow-i-czosnku/
0 notes
Text
The Professor by The Pioneer Woman
I was going to give this post the title “The Dog Without a Name.” But I decided that would sound sad. This is Josh’s cattle dog. He is a cute, amazing dog, and most of the time, he thinks he lives at our place. Henry loves him and wrestles with him daily, and the other dogs like to frolic with him in the tall grass. And he is lightning fast; when I leave the house, he likes to race me to the first cattle guard, and sometimes he almost beats me.
I have never known the name of this dog. I know that might sound strange. But he’s only been on the ranch about 18 months, and in that time there have been mixed messages about his moniker.
Ladd thinks his name is Chalk. He insists that’s what he has heard Josh call him.
I think his name is Top. I insist that’s what I have heard Josh’s boy call him.
For the purposes of research, I just texted Paige and asked her what the dog’s name is. “Chock,�� she replied. Not helpful.
To further my research, I just texted Bryce and asked him what the dog’s name is. You know what he said? You won’t believe it. “Rope.”
ROPE?
To make things really interesting, the crew of my TV show has always called him The Professor. When they are at the Lodge when we are filming, Chalk/Top/Chock/Rope/The Professor likes to hang around them and take selfies. And they call him The Professor in their posts!
And to make things even more interesting, Ladd called him Dingleberry a couple of times this summer. I’ll just leave that one there.
And a curve ball: Bryce just texted me back and said “It’s Top.”
Maybe I’ll just call him Shirley.
______________
UPDATE: I texted Josh and he finally answered me. See below.
(The previous text exchange between us—in July—should give you some indication of how often Josh and I text each other…and how monumentally thrilling our text conversations are. Ha.)
Off to deliver the news to Ladd! This is turning out to be a really great day.
I still might call the dog Shirley.

Source: https://thepioneerwoman.com/confessions/the-professor/
0 notes
Text
Instant Pot Taco Orzo
I have never been one to really like a Mexican pasta dish. I just have a hard time thinking that the combination works well. That was up until now.
Orzo is a pasta that is similar in size to rice. However, it cook must faster than rice. The actually cooking that occurs with this recipe only takes 1 minute in the pressure cooker!
This is just like a taco bowl but made with orzo. You can top it with anything you would put on a taco. For the recipe, I included what we like to top this with.
1 lb ground beef
½ cup diced onion
3 cloves minced garlic
4 cups chicken broth
2⅓ cup uncooked orzo
½ cup green taco sauce or green enchilada sauce
1 (14.5 oz) can black beans, rinsed and drained
1 pkg taco seasoning
2 cups grated sharp cheddar
pico de gallo or salsa
cilantro for garnish
sour cream
Preheat instant pot to saute. Add in beef and onion and cook until beef iis fully cooked. Drain off any excess grease. Turn off saute.
Add in the garlic and saute until fragrant. Mix in the broth.
Sprinkle in the orzo and add in the taco sauce, beans, and taco seasoning. DO NOT STIR.
Cover and seal. Set to manual for 1 minute.Allow pressure to release naturally for 5 minutes. The manually release any remaining pressure.
Remove lid and mix in cheese until melted.
Serve and top with cilantro, pico de gallo, and sour cream. Serves 6-8.
Recipe adapted from 365 Days of Slow Cooking.

Source: https://www.realmomkitchen.com/26485/instant-pot-taco-orzo/
0 notes
Text
Korean food photo: Traditional kimchi made by baejinhae!

This kimchi is not made with nappa cabbage like in the recipe of maangchi but “chinese cabbage” which is smaller in size.
The recipe for traditional pogi kimchi is here!
Posted on Thursday, September 6th, 2018 at 11:44 pm. Tagged: baechu kimchi, baejinhae, 김치, kimchi, pogi kimchi
Source: https://www.maangchi.com/photo/kimchi-by-baejinhae

0 notes
Text
Root Beer Float Popsicles – Keto Recipe
Easy keto root beer float popsicles make a kid-friendly sugar free treat. These are so easy to make, take 4 ingredients, and the whole family loves them. And these fun popsicles have less than 1g carbs per serving.
I won’t lie – these root beer float popsicles are, admittedly, my desperate attempt to hang on to summer just a little bit! Here we are, into September, and I just don’t know where all the time went. I say that every year, though. I bet you do too.
I made this easy keto pops recipe back in mid-July, when it was hot hot hot here and we needed a sugar-free way to cool off. They were so ridiculously easy to make and so fun, and the kids went wild for them and began asking for them everyday. With good keto ingredients like these, how could I say no?
I have said it before and I will say it again right now: you must go invest in some popsicle molds as soon as you can. They are quite inexpensive and low carb popsicles are an easy way to enjoy a sweet treat now and again, without blowing your macros. You want to know how many carbs each of these root beer float popsicles has? Less than 1. Yup, you read that right. Less than 1g total carbs per serving. And how long did they take me to make? Less than 15 minutes. Practically effortless!
One thing you need for these is a good sugar free root beer. And while there are plenty of them, I would say not all are created equal. Isn’t that always the case, when it comes to low carb and keto products?
I went with Virgil’s Zero root beer, which is tasty stuff and sweetened with stevia. It would be my ultimate choice for this recipe. But it’s not always easy to find. My local Whole Foods carries it…sometimes. I have to grab it when I can see it!
Blue Sky also makes a sugar free root beer, sweetened with erythritol and stevia. Don’t be alarmed when you see the carb count on the back, as they don’t list the sugar alcohols separately. It also does contain a little maltodextrin so use at your discretion. Zevia makes a ginger root beer but it’s colourless and clear so it doesn’t give you quite the same fun layered affect.
Almost all other brands use sucralose or aspartame as a sweetener, so I don’t use those. But that’s up to you.
You don’t absolutely need root beer extract for this recipe either. I added a wee bit to amp up the root beer flavor for my kids, but it could easily be left out and they would still be delicious.
Using whipped cream in place of ice cream makes these so extra simple and helps keep the carbs down.
That’s really it! 4 or 5 simple ingredients, 15 minutes to make, and less than 1g of carbs per serving. Let’s hang on to summer as long as we can!
Check out all my best Keto Dessert Recipes here.
Keto Root Beer Float Pops
Easy keto root beer float popsicles make a kid-friendly sugar free treat. These are so easy to make, take 4 ingredients, and the whole family loves them.
Course: Dessert
Cuisine: American
Keyword: root beer float popsicles
Servings: 10 popsicles
Calories: 63 kcal
Instructions
In a large bowl, combine the whipping cream, sweetener, and vanilla extract. Beat until it hold stiff peaks.
Remove about 1/3 of the whipped cream to another bowl and reserve. Whisk in the flat root beer and the root beer extract, if using.
Dollop whipped cream into the bottom of each of the popsicle molds. It doesn't need to be perfect, streaks make it fun. Gently tap the molds on the counter to get the whipped cream to the bottom.
Pour the root beer mixture into the molds. Freeze one hour, then push wooden popsicle sticks 3/4 the way into each popsicle. Continue to freeze until firm, at least another 3 hours.
To release the popsicles, heat up water in a kettle. Stand over the sink and pour hot water on the outside of the mold for about 5 seconds (for each popsicle that you want to remove). Gently tug the wooden stick to release.
Nutrition Facts
Keto Root Beer Float Pops
Amount Per Serving (1 popsicle)
Calories 63 Calories from Fat 57
% Daily Value*
Total Fat 6.3g 10%
Total Carbohydrates 0.5g 0%
* Percent Daily Values are based on a 2000 calorie diet.
Source: https://alldayidreamaboutfood.com/root-beer-float-popsicles/

0 notes
Text
eggplant + tomatoes
I don’t cook eggplants as often as I should. I think I was traumatized by eggplants earlier in my cooking life. Whenever a recipe called for them, they just seemed like too much trouble. Salting them first which didn’t seem to make much sense because I never quite understood what happened to all that salt. Blotting it away with too many paper towels just seemed wasteful.
Then there was the whole frying thing. Eggplants always seemed to absorb WAY too much expensive olive oil. And for what? The result was always kind of greasy, limp, mushy disks or cubes of grayish vegetable.
There was a brief period when I discovered frozen eggplant, one of the few things in the frozen food aisle at the Italian supermarket that was both useful and tasted good. I’d use them to make a quick eggplant parmigiana or even through them into tomato sauce to sneak vegetables into Sophie and Emma’s otherwise pasta-centric meals.
But for the most part eggplants haven’t been part of my go-to repertoire until this summer. Because this is the summer of our magnificent vegetable garden. While we usually have a so-so to good harvest all summer long (heavy on tomatoes and zucchini) this is the year when EVERYTHING is on overdrive. Including eggplants. Because of the wet winter and even damper spring, followed by a coolish June our entire orto is like an enchanted garden. We’re finally coming out from under the zuchini tsunami and are currently experiencing a flash flood of tomatoes.
And even our usually meager and sad patch of eggplants are getting into the act. While in past years I’ve usually harvested 3 to 4 miserable, dry, and bitter purple orbs, this year they are plump, sweet and just keep coming. And they have definitely cured me of my eggplant-phobia.
A few things I’ve come to realize this summer when it comes to me and my eggplants:
Fresher is better: when they eggplants are this fresh you don’t really have to salt them.
Baked is better: I’ve given up on frying eggplant. It’s just too much trouble and even if, when done correctly (which I’ve long since learned how to do) they still use a ton of oil. Also? Who wants to be standing over hot oil on an August afternoon?
Eggplants and tomatoes are the perfect pairing: I know this may seem obvious, but rather than go the eggplant parmigiana route, which pairs cooked down tomatoes and cheese, I’ve lightened things up, and have been pairing copious amounts of chopped fresh tomatoes with any eggplant that will stay still
The following recipe has been on lunch rotation for the last few weeks and is extremely easy. I’ve used any kind and size of eggplant, including small white ones that Domenico planted. They get cut in half, stuffed with garlic, brushed with olive oil and then baked till soft and silky. Once out of the oven they get topped with chopped tomatoes which you can season any way you’d like. Salt and olive oil are givens, but I’ve also been using all sorts of fresh herbs including basil and parsley. I’d use fresh coriander if I had some. A few times I’ve also added a chopped red onion or shallot.
We’ve been eating this all summer long, for lunch, with some crusty bread and either mozzarella or goat cheese. I said the recipe serves six, and you can figure on either one small eggplant per person, or a half of a larger one. And while we’ve been eating them as a main course, I think they would also make a nice antipasto for a bigger meal.
Yield 6
Ingredients
Six small or 3 medium eggplants
3 cloves garlic, peeled and thinly sliceds
Extra virgin olive oil
1 pound / 1/2 kilo of tomatoes
fresh herbs (basil, parsley or coriander
Instructions
Preheat the oven to 350F/ 180C
Line a baking sheet with parchment paper.
Slice the eggplants in half, lengthwise. If the eggplant still have their stem end attached, leave them, just slicing through them.
Using a sharp knife, cut into each eggplant, on the cut side, in a cross hatch pattern, being very careful not to cut all the way through to the skin. You are making slits to stick the garlic into.
Gently insert the garlic slices into the slits of the eggplant. How much garlic you use is up to you. I like it pretty garlicky!
Lay the eggplant on the baking sheet, cut side up. Drizzle with olive oil, rubbing it around with your hands. Season the eggplant liberally with salt, and place in oven. Cook until eggplant is very tender and golden. This can take up to one hour. ( a bit less for smaller eggplant.) A fork inserted into the eggplant should go in very easily.
Remove and let cool to room temperature.
In the meantime chop the tomatoes into bite sized pieces and place in a medium sized bowl. Add 1 teaspoon salt and 2 to 3 tablespoons of extra virgin olive oil. Add the chopped herb and stir. Let sit for at least 20 minutes.
When ready to serve place the eggplant on a serving platter and cover each one with heaping spoonfuls of tomato, drizzling the accumulated juices as well.
If preparing ahead of time you can roast the eggplant and store, covered, in the refrigerator. Bring to room temperature before serving and don't perpare the tomatoes until 20 minutes before serving.
Source: http://www.elizabethminchilli.com/2018/08/eggplant-tomatoes/
0 notes