
Don't wanna be here? Send us removal request.
Statistics
We looked inside some of the posts by electronicproo and here's what we found interesting.
Average Info
Notes Per Post
1
Likes Per Post
1
Reblog Per Post
0
Reply Per Post
0
Time Between Posts
30 days
Number of Posts By Type
Text
6
Last Seen Tumblr Blogs


Fun Fact
Tumblr has a low social media market share in South America.
Text
Zebra Gk420d Direct Thermal Label Printer USB & Ethernet Interface
You Will Receive The Following :
1 X Zebra GK420D Direct Thermal/Thermal Transfer Label Printer
1 X POWER SUPPLY WITH POWER CABLE
1 x USB CABLE
Model No: GK420D
Manufacturer: ZEBRA
203 dpi Print Resolution,
Condition : REFURBISHED
Quantity : 1
EXPRESS POSTAGE
$299.99 $349.99
The Zebra GK420d is a desktop thermal direct printer, part of Zebra’s G-Series line of printers. It’s designed for efficient and reliable printing, making it suitable for a wide range of applications including retail, healthcare, manufacturing, and logistics.
Key Features:
Printing Technology: Direct thermal (no ribbon required).
Resolution: 203 dpi (dots per inch).
Print Speed: Up to 5 inches per second.
Print Width: Maximum print width of 4.09 inches (104 mm).
Connectivity Options:USB
Ethernet
Memory:Standard: 8 MB SDRAM
4 MB Flash memory
Media Handling:Supports roll-fed or fan-fold, die-cut or continuous labels with or without black mark, tag stock, continuous receipt paper, and wristbands.
Media Specifications:Width: 0.75 inches to 4.25 inches (19 mm to 108 mm)
Length: 0.38 inches to 39.0 inches (9.6 mm to 990 mm)
Core diameter: 0.5 inches (12.7 mm), 1.0 inches (25.4 mm), 1.5 inches (38.1 mm), 3.0 inches (76.2 mm)
Additional Features:
Durability: Dual-wall frame construction for durability.
Ease of Use: Easy to load media, user-friendly operation.
Software Compatibility: Compatible with various operating systems and printing software.
Label Design Software: Works with ZebraDesigner software for label creation.
Applications: Ideal for barcodes, shipping labels, product labeling, and more.
0 notes
Text
Zebra Gk420d Direct Thermal Label Printer USB & Ethernet Interface
You Will Receive The Following :
1 X Zebra GK420D Direct Thermal/Thermal Transfer Label Printer
1 X POWER SUPPLY WITH POWER CABLE
1 x USB CABLE
Model No: GK420D
Manufacturer: ZEBRA
203 dpi Print Resolution,
Condition : REFURBISHED
Quantity : 1
EXPRESS POSTAGE
$299.99 $349.99
The Zebra GK420d is a desktop thermal direct printer, part of Zebra’s G-Series line of printers. It’s designed for efficient and reliable printing, making it suitable for a wide range of applications including retail, healthcare, manufacturing, and logistics.
Key Features:
Printing Technology: Direct thermal (no ribbon required).
Resolution: 203 dpi (dots per inch).
Print Speed: Up to 5 inches per second.
Print Width: Maximum print width of 4.09 inches (104 mm).
Connectivity Options:
USB
Ethernet
Memory:
Standard: 8 MB SDRAM
4 MB Flash memory
Media Handling:
Supports roll-fed or fan-fold, die-cut or continuous labels with or without black mark, tag stock, continuous receipt paper, and wristbands.
Media Specifications:
Width: 0.75 inches to 4.25 inches (19 mm to 108 mm)
Length: 0.38 inches to 39.0 inches (9.6 mm to 990 mm)
Core diameter: 0.5 inches (12.7 mm), 1.0 inches (25.4 mm), 1.5 inches (38.1 mm), 3.0 inches (76.2 mm)
Additional Features:
Durability: Dual-wall frame construction for durability.
Ease of Use: Easy to load media, user-friendly operation.
Software Compatibility: Compatible with various operating systems and printing software.
Label Design Software: Works with ZebraDesigner software for label creation.
Applications: Ideal for barcodes, shipping labels, product labeling, and more.
0 notes
Text
ThinkVision Monitor
The ThinkVision Monitor is a high-quality and portable monitor that offers easy connectivity and helps reduce eye fatigue. It is available at various prices, starting from $99.99 up to $799.00, depending on the retailer.
This monitor is lauded for its excellent color rendition, good responsiveness, and clear resolution. It offers a wide variety of connections, including VGA, DP, and HDMI, making it compatible with different devices. Users have also praised the monitor for its easy setup and sturdy stand.
However, some reviewers have mentioned that the menu is not very intuitive, and there are limited connectivity options. Overall, the ThinkVision Monitor is a budget-friendly option that provides good image quality and versatility.
OVERVIEW OF THE HIGH-QUALITY PANEL USED IN THINKVISION MONITOR:
Experience stunning visuals with the high-quality panel of the Thinkvision Monitor. Its impressive display enhances the clarity and vibrancy of images, while its sleek design adds a touch of elegance to any workspace.
Thinkvision Monitor features a high-quality panel that delivers stunning visuals and an immersive viewing experience.
The monitor is equipped with advanced display technology that enhances colors, contrast, and image clarity.
The high-quality panel ensures accurate color reproduction, providing lifelike images and vibrant graphics.
With a high resolution and wide viewing angles, the monitor offers sharp details and consistent picture quality from any angle.
Benefits Of A High-Quality Panel On Visual Experience:
Enhanced color accuracy: The high-quality panel used in Thinkvision Monitor ensures that colors are displayed accurately, resulting in more realistic and vibrant visuals.
Improved contrast ratio: The monitor’s panel provides a high contrast ratio, allowing for deeper blacks and brighter whites, enhancing the overall visual experience.
Better image clarity: The high-quality panel minimizes motion blur, ensuring that images appear sharp and clear, even during fast-paced scenes or while gaming.
Wide color gamut: Thinkvision Monitor’s high-quality panel offers a wide color gamut, which means it can display a greater range of colors, resulting in more lifelike and vibrant visuals.
Reduced eye strain: The monitor’s panel is designed to reduce eye fatigue by minimizing flickering and harmful blue light emissions, allowing for longer and more comfortable viewing sessions.
Examples Of Stunning Visuals Achieved With Thinkvision Monitor:
Photo editing: The high-quality panel of Thinkvision Monitor ensures accurate color reproduction, making it an excellent choice for photo editing. Users can view their images with true-to-life colors, allowing for precise adjustments and enhancements.
Gaming: Thinkvision Monitor’s high-quality panel brings games to life with vibrant colors, smooth motion, and sharp details. Gamers can immerse themselves in stunning visuals, enhancing their gaming experience.
Multimedia consumption: Whether watching movies, TV shows, or online videos, Thinkvision Monitor’s high-quality panel delivers stunning visuals that make the viewing experience more enjoyable and immersive.
Design and graphics work: Designers and graphics professionals can benefit from the high-quality panel of Thinkvision Monitor. The accurate colors and sharp details allow for precise work, ensuring that their creations look their best.
Remember that it’s essential to cite any external sources used and ensure that the content is original, well-researched, and accurate.
PORTABILITY FOR ON-THE-GO VISUAL ENHANCEMENT
Enhance your visual experience on the go with the ThinkVision Monitor. Its high-quality panel and easy portability make it the perfect companion for reducing eye fatigue and enjoying crisp images without draining your laptop’s battery.
The Thinkvision Monitor offers a range of portable features that make it an excellent choice for on-the-go visual enhancement. Whether you’re a frequent traveler, a remote worker, or a student who needs a second screen for productivity, the portability of this monitor is sure to impress.
Here are some key features to highlight:
Lightweight Design: The Thinkvision Monitor is designed to be lightweight, making it easy to carry and transport wherever you go. Say goodbye to bulky and heavy monitors that weigh you down.
Slim Profile: With its slim profile, this monitor can easily fit into any laptop bag or backpack without taking up too much space. It’s perfect for those who need a portable visual enhancement solution but don’t want to sacrifice screen size.
USB-C Connectivity: One of the standout features of the Thinkvision Monitor is its USB-C connectivity. This means you can easily connect it to your laptop or mobile device with just one cable, eliminating the need for multiple cords and adapters.
Benefits Of A Portable Monitor For Visual Experience
Using a portable monitor, like the Thinkvision Monitor, comes with numerous benefits for your visual experience. Here are a few reasons why investing in a portable monitor is worth it:
Increased Productivity: Having a second screen can significantly enhance your productivity, allowing you to multitask effectively. With the Thinkvision Monitor, you can easily set up a dual-monitor display, whether you’re working on spreadsheets, coding, or editing multimedia content.
Flexible Work Setup: A portable monitor gives you the flexibility to create a comfortable and efficient work setup wherever you are. Whether you’re working in a coffee shop or in the comfort of your own home, you can easily adjust the monitor’s position and angle to suit your needs.
Immersive Entertainment: Enjoying your favorite movies, TV shows, or games on a larger screen can greatly enhance your entertainment experience. With the Thinkvision Monitor, you can immerse yourself in stunning visuals and vibrant colors, no matter where you are.
Use Cases For Portable Visual Enhancement With Thinkvision Monitor
The Thinkvision Monitor is not limited to just one use case. Its versatility allows it to be used in a variety of scenarios for visual enhancement. Here are a few use cases to consider:
Remote Work: If you work remotely or frequently travel for work, the Thinkvision Monitor can serve as a portable office setup. Set up your workstation anywhere you go and enjoy the convenience of a dual-monitor display for increased productivity.
Presentations and Meetings: Whether you’re presenting to clients or collaborating in team meetings, the Thinkvision Monitor is perfect for enhancing your visual presentations. Its portability allows you to easily connect it to your laptop and share your screen with others.
Gaming on the Go: Gamers can also benefit from the Thinkvision Monitor’s portability. Take your gaming experience to the next level by connecting it to your gaming laptop or console and immersing yourself in crisp visuals and smooth gameplay.
The Thinkvision Monitor offers impressive portability features, benefits for visual enhancement, and versatile use cases. Its lightweight design, slim profile, and USB-C connectivity make it a top choice for anyone in need of on-the-go visual enhancement. Whether you’re a remote worker, a student, or a gamer, the Thinkvision Monitor is a reliable and portable solution to enhance your visual experience.
EYE-FRIENDLY DESIGN FOR REDUCED FATIGUE
Thinkvision Monitor offers an eye-friendly design that helps reduce fatigue. With high-quality panels and easy portability, this monitor is both budget-friendly and beneficial for long hours of screen time.
The Thinkvision Monitor is equipped with several eye-friendly design features that contribute to reducing eye fatigue. Let’s take a closer look at these features:
Low Blue Light Technology: The monitor utilizes low blue light technology to reduce the harmful blue light emissions that can cause eye strain and fatigue. This technology filters out the blue light, making the display easier on the eyes.
Anti-Glare Coating: The monitor has an anti-glare coating that minimizes reflections and glare from external light sources. This helps to reduce eye strain caused by squinting or straining to see the screen.
Flicker-Free Display: With a flicker-free display, the monitor eliminates the irritating screen flicker that can cause eye fatigue and discomfort. This feature ensures a stable and comfortable viewing experience, even during extended use.
Adjustable Brightness and Contrast: The monitor offers adjustable brightness and contrast settings, allowing users to customize the display according to their preferences. This flexibility helps to ensure optimal viewing conditions and reduces eye strain.
Ergonomic Stand: The monitor comes with an ergonomic stand that allows users to adjust the height, tilt, and swivel of the screen. This feature promotes proper posture and comfort, reducing the strain on the eyes and neck.
These eye-friendly design features work together to contribute to a reduced eye-fatigue experience for users. By minimizing blue light emissions, reducing glare, eliminating screen flicker, and providing customizable display settings, the Thinkvision Monitor prioritizes the health and well-being of its users.
TESTIMONIALS FROM USERS WHO EXPERIENCED REDUCED EYE FATIGUE WITH THINKVISION MONITOR
Here are some testimonials from users who have experienced reduced eye fatigue while using the Thinkvision Monitor:
“I’ve been using the Thinkvision Monitor for a few weeks now, and I can truly say that it has made a significant difference in reducing eye fatigue. The low blue light technology and anti-glare coating make a noticeable impact, especially during long work sessions.” – A satisfied customer on Lenovo.com.
“As someone who spends hours in front of the screen every day, I was amazed at how the Thinkvision Monitor helped alleviate my eye strain. The adjustable brightness and contrast settings allowed me to find the perfect balance, and the flicker-free display was a game-changer. Highly recommend!” – Another happy user on Lenovo.com.
“I’ve tried various monitors in the past, but none have compared to the Thinkvision Monitor when it comes to reducing eye fatigue. The high-quality panel and ergonomic stand make a world of difference, and I no longer experience the tired and strained eyes I used to after long hours of work.” – A reviewer on StateTech Magazine.

Credit: www.lenovo.com
MULTIPLE CONNECTIVITY OPTIONS FOR VERSATILE VISUAL ENHANCEMENT
The Thinkvision Monitor offers multiple connectivity options, allowing for versatile visual enhancement. With its high-quality panel and easy portability, this monitor is a great choice for reducing eye fatigue and enhancing your viewing experience.
Overview Of The Connectivity Options Available With Thinkvision Monitor
HDMI: Allows you to connect the monitor to various devices such as laptops, gaming consoles, and media players to enjoy high-definition visuals and audio.
DisplayPort: Provides a high-performance connection for devices that require high-resolution and fast refresh rates, making it ideal for gaming or video editing.
USB Type-C: With this versatile connection, you can connect your monitor to laptops, smartphones, and tablets, enabling you to expand your screen real estate and navigate between devices seamlessly.
VGA: This traditional connectivity option allows you to connect older devices to the monitor, ensuring compatibility and convenience.
Audio Out Port: Connect your speakers or headphones to the monitor for a seamless audio experience without the need for additional cables.
Benefits Of Having Multiple Connectivity Options For Visual Enhancement
Flexibility: With a range of connectivity options, you have the freedom to connect your Thinkvision Monitor to numerous devices, whether it’s for work, entertainment, or gaming.
Versatility: The multiple connectivity options enable you to switch between devices effortlessly, making it convenient to use the monitor with different laptops, tablets, or gaming consoles.
Enhanced productivity: By connecting your monitor to multiple devices, you can multitask more effectively, boosting your productivity. For example, you can have your laptop connected while also using your smartphone on the side for easy access to notifications or reference material.
Improved visual experience: Each connectivity option offers specific advantages to enhance your visual experience. HDMI and DisplayPort provide high-definition visuals, USB Type-C offers seamless screen mirroring and charging, while VGA ensures compatibility with older devices.
Versatile Visual Enhancement Scenarios With Thinkvision Monitor
Dual monitor setup: Connect your laptop and desktop to the Thinkvision Monitor for a dual monitor setup, providing increased screen real estate and improving multitasking capabilities.
Gaming immersion: Connect your gaming console or PC to the monitor using HDMI or DisplayPort to experience immersive gaming with vibrant colors and smooth motion.
Presentation mode: Connect your laptop to the monitor using USB Type-C or HDMI, allowing you to present your work, slideshows, or videos on a larger screen, ensuring a more impactful presentation.
Mobile productivity: Utilize the USB Type-C connection to connect your smartphone or tablet to the monitor, transforming your mobile device into a productivity powerhouse with a larger screen and easy multitasking.
Multimedia entertainment: Connect your media players or streaming devices to the monitor using HDMI or DisplayPort to enjoy your favorite movies, shows, or music with stunning visuals and immersive audio.
The Thinkvision Monitor offers multiple connectivity options that provide flexibility, versatility, and enhanced visual experiences. Whether you’re using it for work, gaming, or entertainment, the monitor’s connectivity options allow you to easily connect and switch between various devices, resulting in improved productivity and a more immersive viewing experience.
Affordable Pricing For Accessible Visual Enhancement
Enhance your visual experience with the affordable Thinkvision Monitor. This high-quality monitor is light on the wallet and helps reduce eye fatigue, making it a great option for all your visual needs.
Highlight The Affordable Pricing Of Thinkvision Monitor:
The Thinkvision Monitor offers an incredible visual enhancement experience at an affordable price.
With its budget-friendly pricing, the Thinkvision Monitor makes high-quality visual enhancement accessible to a wider audience.
The affordability of the Thinkvision Monitor ensures that you don’t have to break the bank to enjoy top-notch visual quality.
Compared to other monitors in similar price ranges, the Thinkvision Monitor stands out for its exceptional value for money.
Discuss How Affordable Pricing Makes Visual Enhancement Accessible To More People:
Affordable pricing empowers individuals from diverse backgrounds to experience enhanced visual quality.
With the Thinkvision Monitor’s accessible pricing, more people can now invest in a high-quality display without compromising on their budget.
The affordable price tag of the Thinkvision Monitor means that you don’t have to sacrifice visual enhancement for cost concerns.
By offering accessibility to visual enhancement technology, the Thinkvision Monitor makes it possible for everyone to enjoy a superior viewing experience.
Provide Comparisons With Other Monitors In A Similar Price Range:
Thinkvision Monitor (starting at $219.00): Offers exceptional visual quality with a range of features, at a competitive price point.
Competitor A (starting at $257.99): Similar pricing range, but lacks the advanced visual enhancement capabilities of the Thinkvision Monitor.
Competitor B (starting at $132.57): While more affordable, it sacrifices visual quality and overall performance compared to the Thinkvision Monitor.
Competitor C (starting at $249.00): Thinkvision excels in visual enhancement, surpassing competitors in its price range. It’s the superior choice.
By choosing the Thinkvision Monitor at its affordable price point, you can enjoy top-notch visual quality without overspending. Its accessibility makes it an excellent investment for anyone looking to enhance their visual experience. Among similarly priced monitors, Thinkvision stands out as the wise pick for affordable yet impressive visual enhancement.
FREQUENTLY ASKED QUESTIONS FOR THINKVISION MONITOR
WHAT IS A THINKVISION MONITOR?
A ThinkVision monitor is a high-quality display with easy portability and a wallet-friendly price. It reduces eye fatigue and offers a wide variety of connections.
HOW DO I SET UP MY THINKVISION MONITOR STAND?
To set up your ThinkVision monitor stand, follow these steps:
Unpack your ThinkVision monitor stand and make sure all parts are included.
Attach the base of the stand to the monitor using the provided screws.
Place the stand on a stable surface adjust the height and tilt to your desired position.
Connect your monitor to your computer or other devices using the appropriate cables.
Turn on your monitor and adjust the settings as needed. That’s it! Your ThinkVision monitor stand is now set up and ready to use. Enjoy your new display!
HOW DO I CONNECT MY LENOVO THINKVISION MONITOR?
To connect your Lenovo ThinkVision monitor, follow these steps:
Identify the appropriate ports on both your computer and the monitor.
Use the appropriate cable (such as HDMI, DisplayPort, or VGA) to connect the monitor to your computer.
Power on your computer and the monitor.
Adjust the display settings on your computer if necessary to ensure proper resolution and display.
Your Lenovo ThinkVision monitor should now be successfully connected and ready to use.
HOW DO I GET MY LENOVO MONITOR TO WORK?
To get your Lenovo monitor to work, follow these steps:
Connect the monitor to your computer using the appropriate cables.
Make sure the monitor is plugged in and turned on.
Check your computer’s display settings to ensure the monitor is recognized.
Adjust the monitor’s settings for brightness, contrast, and color if needed. Once you’ve completed these steps, your Lenovo monitor should be working properly.
CONCLUSION
The Thinkvision Monitor is a high-quality, affordable option that offers easy portability and helps reduce eye fatigue. With a variety of positive reviews from experts and users alike, this monitor is a great value for the price. It features a high-quality panel and a wide variety of connectivity options, including VGA, DP, and HDMI ports.
The monitor is known for its excellent color rendition and touch capabilities. Despite a confusing menu, it boasts superb build quality and includes all required cables for effortless installation. Additionally, it supports a VESA mount and has a groove on the base for placing a smartphone.
Overall, the Thinkvision Monitor is a reliable choice for both personal and professional use.

0 notes
Text
The size of the speakers in your car can be found by measuring them or checking your vehicle’s manual.
TABLE OF CONTENTS
What Size Speakers Are in My Car? The Factors To Consider When Choosing Speaker Size
Standard-Speaker Sizes For Different Car Models
Compact Cars (What Size Speakers Are in My Car?)
Sedans (What Size Speakers Are in My Car?)
Suvs
Trucks
Step-by-step Guide To Measuring Speaker Size (What Size Speakers Are in My Car?)
Tools Needed
Locating The Speakers
What Size Speakers Are in My Car? Measuring The Speaker Diameter
Determining The Speaker’s Depth (What Size Speakers Are in My Car?)
What Size Speakers Are in My Car? Decoding Speaker Size Labels
Interpreting Speaker Size Labels (What Size Speakers Are in My Car?)
What Size Speakers Are in My Car? Matching Speaker Size To Car Requirements
Taking Note Of Mounting Options (What Size Speakers Are in My Car?)
What Size Speakers Are in My Car? Choosing The Right Speaker Size For Improved Sound Quality
Analyzing Audio Preferences
Determining Power Requirements
Understanding Impedance And Sensitivity
What Size Speakers Are in My Car? Installation Options For Different Speaker Sizes
Full-range Speakers
Component Speakers
Coaxial Speakers
Frequently Asked Questions Of What Size Speakers Are In My Car?
How Do I Find Out My Car Speaker Size?
What Is the Common Car Speaker Size?
Are 6.5 or 6×9 speakers better?
What Are the Standard Sizes of Car Speakers?
WHAT SIZE SPEAKERS ARE IN MY CAR? THE FACTORS TO CONSIDER WHEN CHOOSING SPEAKER SIZE
Factors to Consider When Choosing Speaker Size
What Size Speakers Are in My Car? When upgrading your car’s audio system, one crucial factor to consider is the size of the speakers. The speaker dimensions wield substantial influence over the sonic excellence and comprehensive efficacy of your car’s audio setup. Within this segment, we shall delve into several crucial considerations for determining the ideal speaker size tailored to your vehicle.
VEHICLE MODEL AND YEAR
The first factor to consider is the model and year of your vehicle. Different car models and years have different speaker sizes. It is essential to determine the specific speaker size that is compatible with your car’s make and model. This information can usually be found in your vehicle’s owner’s manual or through a quick online search. Vehicle model and year
Available Space in the Car
Another factor to consider is the available space in your car. Speaker sizes can vary, and it is crucial to choose a size that fits within the dimensions of your car’s interior. Take precise measurements of the designated installation space for the speakers to confirm that the chosen size will fit seamlessly, devoid of any potential complications. Remember that larger speaker sizes may require additional modifications to the car’s interior, so it’s essential to consider this when making your decision.
Compatibility with Existing Audio System
Lastly, it is essential to consider the compatibility of the speakers with your car’s existing audio system. Each audio system has specific power requirements and impedance levels that must be met for optimal performance. Inspect your car audio system’s particulars, and opt for speakers that align with your vehicle’s power-handling capacity and impedance requirements. This will ensure the speakers work seamlessly with your car’s audio system, providing the best sound quality possible. Compatibility with existing audio system
In conclusion, when choosing the right speaker size for your car, it is crucial to consider factors such as the vehicle model and year, available space, and compatibility with the existing audio system. By keeping these factors in mind, you can make an informed decision and enjoy a superior audio experience while on the road.
STANDARD-SPEAKER SIZES FOR DIFFERENT CAR MODELS
What Size Speakers Are in My Car? When upgrading your car’s audio system, one of the first questions that might come to mind is, “What size speakers are in my car?” Understanding the standard speaker sizes for different car models can help you find the perfect fit without confusion or guesswork. In this guide, we’ll explore the standard speaker sizes for compact cars, sedans, SUVs, and trucks.
Compact Cars (What Size Speakers Are in My Car?)
Compact cars often have limited space, which means the speaker sizes are typically smaller compared to larger car models. Here are the standard speaker sizes you can expect to find in compact cars:
Front Door Speaker Size: 4 inches to 5.25 inches
Rear Speaker Size: 4 inches to 5.25 inches
Sedans (What Size Speakers Are in My Car?)
Sedans offer more space than compact cars, which allows for slightly larger speakers. Here are the standard speaker sizes for sedans:
Front Door Speaker Size: 5.25 inches to 6.5 inches
Rear Speaker Size: 5.25 inches to 6.5 inches
Trunk or Rear Deck Speaker Size: 6 inches to 6.75 inches
Suvs
SUVs provide ample interior space, allowing you to upgrade to even more prominent speakers. Here are the typical speaker sizes found in SUVs:
Front Door Speaker Size: 6.5 inches to 7 inches
Rear Door Speaker Size: 6.5 inches to 7 inches
Trunk or Rear Deck Speaker Size: 6 inches to 6.75 inches
Trucks
Trucks are known for their spacious interiors and versatility. If you’re looking to enhance the audio experience in your car, these speaker sizes are commonly used:
Front Door Speaker Size: 6.5 inches to 7 inches
Rear Door Speaker Size: 4 inches to 6.5 inches
Behind-the-Seat Speaker Size: 6 inches to 6.75 inches
When finding the right speaker size for your car model, it’s always a good idea to consult your vehicle’s owner’s manual or contact a professional car audio installer for expert advice. Familiarizing yourself with the typical speaker dimensions tailored to diverse car makes and models empowers you to make an enlightened choice when enhancing your audio setup.
STEP-BY-STEP GUIDE TO MEASURING SPEAKER SIZE (WHAT SIZE SPEAKERS ARE IN MY CAR?)
What size speakers are in your car? Whether you’re looking to upgrade your car audio system or replace a faulty speaker, knowing the correct speaker size is crucial. In this comprehensive, sequential handbook, we will lead you through the process of determining the speaker dimensions within your vehicle.
Tools Needed
Before we begin, make sure you have the following tools handy:
Tape measure or ruler
Flashlight
Pen and paper
Locating The Speakers
The first step in measuring your car’s speaker size is to locate them. In most cars, the speakers can be found in the front and rear doors, dashboard, or rear deck. Use a flashlight if necessary to help you find them.
What Size Speakers Are In My Car? Measuring The Speaker Diameter
Once you have located the speakers, it’s time to measure their diameter. The diameter refers to the size of the speaker cone, which is usually the most important measurement when determining speaker size.
Prepare your tape measure or ruler.
Find the center of the speaker cone and measure the distance from one side to the other. This will give you the diameter of the speaker.
Write down the measurement for each speaker.
Determining The Speaker’s Depth (What Size Speakers Are In My Car?)
In addition to the diameter, it’s also essential to measure the depth of the speakers. The depth refers to the space the speaker will occupy behind the mounting surface.
Measure the distance from the mounting surface to the back of the speaker. This will give you the speaker’s depth.
Write down the measurement for each speaker.
Now that you have measured the diameter and depth of your car’s speakers, you can confidently search for replacement speakers or upgrades that will fit perfectly. Remember to double-check your measurements to ensure accuracy before making any purchases. With this step-by-step guide, measuring your car’s speaker size has never been easier!
What Size Speakers Are In My Car? Decoding Speaker Size Labels
When upgrading or replacing the speakers in your car, understanding the size labels is essential. The speaker size labels provide valuable information about the exact dimensions of the speakers that will fit your vehicle. By decoding these size labels, you can quickly identify the right speakers for your car and enjoy an enhanced audio experience on your drives.
INTERPRETING SPEAKER SIZE LABELS (WHAT SIZE SPEAKERS ARE IN MY CAR?)
Speaker size labels typically consist of two numbers, indicating the speaker’s diameter in either inches or millimeters. The first number represents the woofer or main driver’s size, while the second number denotes the tweeter’s size, if applicable. For example, a speaker labeled 6×9 would mean that the speaker has a 6-inch woofer and a 9-inch tweeter.
It’s important to note that these size labels may vary depending on the manufacturer and the speaker’s design. In some cases, speakers with non-standard size labels or speakers classified by mounting depth rather than diameter may be encountered. Therefore, it’s crucial to double-check the specifications the manufacturer provides to ensure compatibility with your car.
WHAT SIZE SPEAKERS ARE IN MY CAR? MATCHING SPEAKER SIZE TO CAR REQUIREMENTS
Matching the correct speaker size to your car’s requirements is crucial for a seamless installation process. Installing speakers that are too large or too small for your vehicle can lead to fitting issues, which may require modifications or cause damage to your car. Therefore, before purchasing new speakers, it’s essential to determine the maximum size that will fit your car’s speaker locations.
A helpful approach is to refer to your car’s user manual or consult an online database to provide information on speaker sizes for various car models. These resources will guide you in determining the maximum size your car can accommodate without any modifications. By selecting speakers that fall within this size range, you can ensure a hassle-free installation process and enjoy the optimal sound quality.
Taking Note Of Mounting Options (What Size Speakers Are In My Car?)
While speaker size is a crucial factor, it’s also essential to consider the mounting options in your car. Different cars have varying mounting options, such as round or oval holes, brackets, or mounting adapters. Before making a purchasing decision, it’s vital to take note of the mounting options in your car and ensure that the speakers you choose are compatible with these mounting options.
Additionally, considering the mounting depth is equally important. The mounting depth refers to the space behind the speaker in the door panel or dashboard. It’s crucial to measure this depth and ensure that the speakers you select fit within this space without any obstructions or interference.
By paying attention to the mounting options and depth, you can ensure a secure and proper fit for your speakers, resulting in optimal sound performance and longevity.
WHAT SIZE SPEAKERS ARE IN MY CAR? CHOOSING THE RIGHT SPEAKER SIZE FOR IMPROVED SOUND QUALITY
Upgrading your car’s speakers can significantly enhance your driving experience, providing a high-quality sound that immerses you in your favorite music. However, one of the most important factors to consider when choosing new speakers is the size. Selecting the right speaker size for your car is crucial for improving sound quality. Within this write-up, we shall delve into the pivotal elements to contemplate when examining audio inclinations, determining power requirements, and understanding impedance and sensitivity.
Analyzing Audio Preferences
Before selecting the ideal speaker size for your car, it’s essential to analyze your audio preferences. Consider the type of music you enjoy listening to and the sound characteristics that matter most to you. Whether you prefer deep bass, crisp vocals, or a balanced audio profile, understanding your preferences will guide you toward the right speaker size to deliver the desired sound experience.
Determining Power Requirements
Another crucial aspect to consider is the power requirements of the speakers. Analyzing the power output of your car’s audio system will help you determine the appropriate speaker size that can handle the power without distortion or damage. Be sure to check your car’s manual or consult a professional to identify the maximum power capacity of your audio system, and choose speakers that are compatible with this power range.
Understanding Impedance And Sensitivity
Impedance and sensitivity are two necessary specifications when choosing the right speaker size. Impedance refers to the speaker’s electrical resistance and can impact the speaker’s performance and compatibility with your car’s audio system. Sensitivity, however, measures how effectively the speaker converts power into sound. A higher sensitivity rating indicates that the speaker can produce louder output with less control. Understanding these specifications will help you select speakers well-matched with your car’s audio system for optimal performance.
By carefully analyzing your audio preferences, determining power requirements, and understanding impedance and sensitivity, you can confidently choose the right speaker size for your car. Remember, selecting the appropriate size is crucial for achieving improved sound quality and ensuring a satisfying audio experience during your car rides. Upgrade your speakers with the right size and enjoy every beat with the utmost clarity and depth.
WHAT SIZE SPEAKERS ARE IN MY CAR? INSTALLATION OPTIONS FOR DIFFERENT SPEAKER SIZES
When upgrading your car speakers, it’s crucial to consider the right size that fits your vehicle. The size of the speakers directly impacts the sound quality and overall performance. To help you make an informed decision, here are three standard speaker sizes for car installations: full-range speakers, component speakers, and coaxial speakers.
Full-Range Speakers
Full-range speakers are the most common speakers in factory car audio systems. These speakers come in various sizes, including 4 inches, 5.25 inches, 6 inches, and 6×9 inches. Their purpose lies in their intricate design, tailored to faithfully reproduce an extensive spectrum of frequencies, from low to high, making them suitable for delivering a balanced sound across different music genres.
One of the advantages of full-range speakers is their easy installation. Since they come as a single unit, you can remove the factory speakers and replace them with full-range speakers using the existing mounting holes. This makes the installation process straightforward and hassle-free.
Component Speakers
Component speakers offer a higher level of sound quality and customization compared to full-range speakers. These systems consist of separate tweeters, woofers, and crossovers. Component speakers are available in various sizes, including 5.25 inches, 6.5 inches, and 6×9 inches.
Installation of component speakers requires more effort and expertise. The woofers are typically installed in the door panels. At the same time, the tweeters can be mounted on the dashboard, A-pillars, or door pillars. The crossover, which separates the frequencies for the tweeters and woofers, needs to be securely installed as well.
Although the installation process may be more complex, component speakers offer superior sound imaging and separation, allowing you to enjoy a more immersive and detailed audio experience.
Coaxial Speakers
Coaxial speakers, or full-range speakers with built-in tweeters, are another popular choice for car audio upgrades. These speakers combine the tweeter and woofer into a single unit, providing a simplified installation process and a cost-effective solution.
Coaxial speakers are available in sizes ranging from 4 to 6×9 inches, making them suitable for most car models. The built-in tweeter is usually positioned in the center of the woofer cone, allowing for improved sound dispersion and imaging.
When it comes to installation, coaxial speakers are relatively easy to install, similar to full-range speakers. You can replace the factory speakers with coaxial speakers using the existing mounting holes. This makes them a convenient option for those who want an upgrade without requiring extensive modifications.
In conclusion, the dimensions of car speakers wield substantial influence in shaping the auditory excellence within your vehicle.
Whether you choose full-range speakers, component speakers, or coaxial speakers, each offers advantages and installation requirements. Consider your preferences, budget, and compatibility with your car’s audio system to make the right choice for an enhanced audio experience.
FREQUENTLY ASKED QUESTIONS OF WHAT SIZE SPEAKERS ARE IN MY CAR?
HOW DO I FIND OUT MY CAR SPEAKER SIZE?
To find out your car speaker size, search online for guides and buyer’s guides from reputable sources like Crutchfield, CarAudioNow, CarParts.com, AutoZone, Mobile One Auto Sound, and ElectronicsHub. These websites provide:
Information on understanding car speaker sizes.
Finding the right speakers for your vehicle.
Measuring speaker sizes.
WHAT IS THE COMMON CAR SPEAKER SIZE?
The standard car speaker sizes vary depending on the make and model of your vehicle. It is essential to measure the size of your car’s speakers accurately to ensure compatibility when upgrading or replacing them.
ARE 6.5 OR 6×9 SPEAKERS BETTER?
The best speaker size depends on your personal preference and the specifications of your car. Both 6. 5 and 6×9 speakers have their advantages. 6.5 speakers are known for their clarity and accuracy, while 6×9 speakers provide a more powerful bass response.
Consider your music preferences and vehicle specifications when choosing the right speakers for your car.
WHAT ARE THE STANDARD SIZES OF CAR SPEAKERS?
Commonly, car speaker dimensions fall within the standard spectrum, with front speakers ranging from 3.5 inches to 6.5 inches, and rear speakers typically measured at 6×9 inches. Nonetheless, it’s crucial to emphasize that the dimensions of speakers may fluctuate depending on the specific make and model of your vehicle.
Conclusion
Finding the right-sized speakers for your car doesn’t have to be a daunting task. With many online resources, such as Crutchfield and Car Audio Now, you can quickly determine the perfect fit for your vehicle. Upgrading and replacing your car speakers will not only enhance your audio experience but also make every car ride more enjoyable.
So, take advantage of the buyer’s guides and informative articles available and discover the ideal speaker size for your car today. Start cruising to your favorite tunes with the perfect fit!
0 notes
Text
SAMSUNG WASHER SELF-CLEAN GUIDE( 2024) TO A FRESH AND CLEAN DRUM
The Samsung washer self-clean feature allows users to easily and conveniently remove dirt, residue, and odors from the drum, ensuring a fresh and clean laundry experience. By using a combination of water and powerful cleaning agents, the washer cleans the drum and removes any accumulated dirt or residue.
During the self-clean cycle, the drum also rotates to ensure thorough cleaning of all areas. It’s important to note that no detergent or chemicals should be used during the self-clean cycle. Additionally, running a rinse and spin cycle after the self-clean cycle can help remove any residual residue.
With the self-clean feature, Samsung washer self-clean offer a convenient and effective solution for maintaining a clean and odor-free washing machine.
TABLE OF CONTENTS
Why Is Self-Cleaning Important For Samsung Washers?
Ensuring Optimal Performance And Longevity Of Your Samsung Washer Self-Clean
Removing Dirt, Residue, And Bacteria For A Fresh And Clean Drum
Preventing Foul Odors And Mold Growth of your Samsung Washer Self-Clean
Understanding The Features Of Samsung Washer Self-Clean
How To Use The Features Of Samsung Washer Self-Clean?
Maintaining A Clean Drum Between Self Clean Cycles
Troubleshooting And Faqs For Samsung Washer Self-Clean
Frequently Asked Questions On Samsung Washer Self-Clean
How Do You Use The Self-Clean Cycle On A Samsung Washer?
What Does Self-Clean Mean On A Samsung Washer?
Do I Use Detergent For Samsung Washer Self-Clean?
What Is Self-Clean On Samsung Top Load Washer?
WHY IS SELF-CLEANING IMPORTANT FOR SAMSUNG WASHERS?
Samsung washers with the self-cleaning feature offer a range of benefits that contribute to the optimal performance and longevity of your machine. The self-cleaning feature is designed to remove dirt, residue, and bacteria from the drum, preventing foul odors and mold growth. By adhering to a regular self-cleaning routine, you can ensure that your Samsung washer remains fresh, clean, and in excellent working condition for years to come. Let’s explore the importance of self-cleaning in more detail.
Ensuring Optimal Performance And Longevity Of Your Samsung Washer Self-Clean
The self-cleaning feature of Samsung washers is specifically designed to ensure the optimal performance and longevity of your machine. By regularly cleaning the drum, you can prevent the buildup of dirt, residue, and bacteria, which can negatively impact the performance and efficiency of your washer. A clean drum allows for better water circulation and detergent distribution, resulting in cleaner clothes with each wash. Additionally, by keeping your washer clean, you can reduce the risk of mechanical issues and costly repairs down the line.
Removing Dirt, Residue, And Bacteria For A Fresh And Clean Drum
The self-cleaning feature of Samsung washers effectively removes dirt, residue, and bacteria from the drum, leaving it fresh and clean after each cycle. During the self-cleaning process, the washer uses a combination of water and powerful cleaning agents to thoroughly clean all areas of the drum. This includes hard-to-reach areas where dirt and bacteria may accumulate over time. By removing these contaminants regularly, you can maintain a hygienic drum that ensures clean and sanitized laundry for you and your family.
Preventing Foul Odors And Mold Growth Of Your Samsung Washer Self-Clean
Foul odors and mold growth are common issues that can arise in washing machines, especially when moisture and dirt are left to develop within the drum. However, Samsung washers with the self-cleaning feature are equipped to prevent these problems. The self-clean cycle helps eliminate any lingering odors by thoroughly cleaning the drum and removing any mold or mildew buildup that may cause unpleasant smells. By keeping your washer fresh and mold-free, you can enjoy clean and fresh laundry without worrying about any unwanted odors.
UNDERSTANDING THE FEATURES OF SAMSUNG WASHER SELF-CLEAN
When it comes to keeping your Samsung washer in optimal condition, understanding the self-clean feature is essential. This feature is designed to eliminate dirt, grime, and any residue that may accumulate after multiple laundry cycles. By regularly utilizing this function, you can ensure that your washer continues to perform at its best, providing you with cleaner and fresher clothes every time.
HOW DOES THE SAMSUNG WASHER SELF-CLEAN CYCLE WORK?
The self-clean cycle on Samsung washers uses a combination of water and powerful cleaning agents to thoroughly clean the drum of the machine. During the cycle, the drum will rotate to ensure that all areas are reached and cleaned effectively. This process helps remove any dirt, bacteria, or buildup that may contribute to unpleasant odors or affect the washer’s performance.
BENEFITS OF USING THE SAMSUNG WASHER SELF-CLEAN FEATURE REGULARLY
Regularly using the self-clean feature on your Samsung washer offers several benefits:
Maintains optimal performance: By eliminating dirt and residue, the self-clean cycle helps keep the washer functioning at its best. This ensures that your clothes are thoroughly cleaned and rinsed without any leftover detergent or debris.
Prevents foul odors: Over time, detergent, fabric softener, and other residues can build up in the drum of the washer, leading to unpleasant odors. The self-clean feature effectively removes these odors, leaving your washer smelling fresh.
Prolong the lifespan of the washer: By keeping your washer clean and free from buildup, the self-clean feature helps extend the lifespan of the machine. This reduces the need for repairs and ensures that your washer continues to function optimally for years to come.
Helps prevent mold and mildew: Mold and mildew can thrive in damp environments, such as the drum of a washing machine. Regularly using the self-clean feature helps prevent the growth of mold and mildew, creating a healthier and more hygienic laundry environment.
Convenient reminders: Samsung washers with the self-clean feature send reminders to clean the tub after every twenty wash cycles. This ensures that you don’t forget to maintain your machine’s cleanliness, making it easy to stay on top of regular maintenance.
By taking advantage of the self-clean feature on your Samsung washer, you can enjoy cleaner clothes, improved performance, and a longer lifespan for your machine. Make sure to follow the manufacturer’s instructions for using the feature properly to reap all of its benefits and keep your laundry routine running smoothly.
HOW TO USE THE FEATURES OF SAMSUNG WASHER SELF-CLEAN?
The self-clean feature on Samsung washers is a convenient way to keep your washing machine clean and odor-free. By using a combination of water and powerful cleaning agents, the self-clean cycle helps remove any dirt or residue that has accumulated in the drum. To ensure a successful self-clean, follow these step-by-step instructions:
Step-By-Step Instructions For Starting The Samsung Washer Self-Clean
Make sure the washer tub is empty before starting the self-clean cycle.
Press the Power button to turn on the washer.
Locate the Self Clean button on the control panel.
Press the Self-Clean button to enter the self-clean mode.
Once in the self-clean mode, the washer will use a combination of soaking, pulsating, and high-speed spinning to clean the drum.
Ensure that the drum rotates during the cycle to ensure all areas are thoroughly cleaned.
After the self-clean cycle is complete, the washer will send a reminder to clean the tub every twenty wash cycles.
Following these step-by-step instructions will ensure that your Samsung washer is effectively cleaned and maintained.
Important Precautions And Tips For A Successful Samsung Washer Self-Clean
While using the self-clean feature on your Samsung washer, it is important to keep the following precautions and tips in mind:
Do not use or mix any other detergent or chemicals during the self-clean cycle.
If necessary, run a RINSE+SPIN cycle after the self-clean cycle has been completed to remove any residual residue.
Make sure the washer is disconnected from its power source before attempting to reset the self-clean cycle.
Regularly clean the detergent dispenser to prevent buildup and ensure proper functioning.
Inspect and clean the washer’s seal, door, and drum regularly to prevent the growth of mold and mildew.
By adhering to these precautions and tips, you can ensure a successful self-clean and keep your Samsung washer in optimal condition.
MAINTAINING A CLEAN DRUM BETWEEN SELF CLEAN CYCLES
A clean drum is essential for the optimal performance and longevity of your Samsung washer. While the Self Clean feature is designed to keep your drum free from dirt and residue, it’s important to maintain its cleanliness between self-clean cycles as well. By following some best practices and using recommended cleaning products and techniques, you can ensure that your drum remains spotless and ready for the next cycle.
Best Practices For Keeping Your Samsung Washer Self-Clean Drum Clean
Always empty the drum after each cycle. Remove any garments, lint, or debris that may have accumulated during the wash.
Leave the washer door open after each use. This allows the drum to air dry and prevents the growth of mold and mildew.
Wipe down the drum and door gasket regularly with a damp cloth to remove any residue.
Inspect the drum for stains or discoloration. If you notice any, treat them promptly with a gentle cleaning solution.
Avoid overloading the washer. This can cause excessive wear and tear on the drum and lead to accumulation of dirt and debris.
Recommended Cleaning Products And Techniques On Samsung Washer Self-Clean
When it comes to cleaning your washer drum, using the right products and techniques is crucial. Here are some recommendations:ProductTechniqueWhite vinegarMix equal parts of white vinegar and water. Dampen a cloth with the solution and wipe the drum and door gasket.Baking sodaSprinkle baking soda directly into the drum. Run a hot water cycle without any clothes. This will help eliminate odors and remove stains.Mild detergentIf necessary, use a mild detergent specifically formulated for washing machine cleaning. Follow the instructions on the packaging for the best results.
Remember, never use harsh chemicals or abrasive cleaners, as they can damage the drum and other components of your washer.
By implementing these best practices and using recommended cleaning products and techniques, you can ensure that your Samsung washer drum remains clean and free from dirt and residue between self-clean cycles. This will not only improve the efficiency of your machine but also contribute to cleaner and fresher laundry results.
TROUBLESHOOTING AND FAQS FOR SAMSUNG WASHER SELF-CLEAN
When it comes to keeping your Samsung washer in top condition, the self-clean feature is a must-use. However, like any other appliance, you might encounter some issues or have questions about how to use it effectively. In this section, we will explore common issues and solutions related to the self-clean feature and answer frequently asked questions to help you troubleshoot any problems and ensure a clean and fresh-smelling laundry every time.
Common Issues And Solutions Related To The Samsung Washer Self-Clean Feature
If you are experiencing any problems with the self-clean feature on your Samsung washer, here are some common issues and their solutions:
Foul odors: One of the most common complaints is foul odors coming from the washer. This can be caused by a build-up of dirt, detergent residue, and bacteria in the drum. To solve this issue, run a self-clean cycle using the recommended cleaning agent provided by Samsung. Make sure to follow the instructions in the user manual for the correct amount and procedure.
Soap dispenser issues: If you are having trouble with the soap dispenser not functioning properly during the self-clean cycle, check if the dispenser is clogged or blocked. Clean any debris or residue from the dispenser and try again. If the problem persists, contact Samsung customer support for further assistance.
Resetting the self-clean cycle: If you need to reset the self-clean cycle on your Samsung washer at any time, make sure the washer is disconnected from the power source. Leave it unplugged for a few minutes and then plug it back in. This should reset the cycle and allow you to start fresh.
FREQUENTLY ASKED QUESTIONS ON SAMSUNG WASHER SELF-CLEAN
HOW DO YOU USE THE SELF-CLEAN CYCLE ON A SAMSUNG WASHER?
To use the self-clean cycle on a Samsung washer, make sure the tub is empty. Press Power, then Self Clean. Remember to disconnect the washer from the power source if you need to reset the cycle. The washer will use water and cleaning agents to thoroughly clean the drum.
WHAT DOES SELF-CLEAN MEAN ON A SAMSUNG WASHER?
During the self-clean cycle, a Samsung washer uses water and powerful cleaning agents to remove dirt and residue from the drum. The drum rotates to ensure thorough cleaning. Do not use detergent or other chemicals during this cycle.
DO I USE DETERGENT FOR SAMSUNG WASHER SELF-CLEAN?
During the self-clean cycle on a Samsung washer, do not use detergent or other chemicals. The washer will use water and powerful cleaning agents to clean the drum and remove dirt or residue. Make sure the drum is empty, press Power, and then the Self Clean button to start the cycle.
After the Self Clean cycle, you can run a RINSE+SPIN cycle to remove any residual residue.
WHAT IS SELF-CLEAN ON SAMSUNG TOP LOAD WASHER?
Self-Clean on Samsung top load washers keeps the tub clean by using soaking, pulsating, and high-speed cycling to remove dirt and bacteria. It also sends reminders for cleaning every twenty wash cycles. Don’t use detergent or chemicals during the Self Clean cycle.
Conclusion
In just a few simple steps, the Samsung Washer Self-Clean feature offers a hassle-free way to keep your washer drum clean and fresh. By using a combination of water and powerful cleaning agents, this feature effectively removes dirt and residue that may have accumulated over time.
The cycling drum guarantees a thorough cleaning of all areas, providing a more sound washing experience. With its easy-to-use interface, you can activate the Self Clean cycle with just the touch of a button. Say goodbye to foul odors and hello to cleaner clothes with the Samsung Washer Self-Clean feature.CategoriesBlog, Home Appliance
Fairy Light Spirit Tree: Illuminate with Enchanting Beauty
Samsung Galaxy S24: the Power of Innovation
1 Thought On “Samsung Washer Self-Clean Guide( 2024) To A Fresh And Clean Drum”
#Samsung Washer Self-Clean Guide( 2024) to a Fresh and Clean Drum - Latest Electronics Trends For Your Guidance#electronicproo.com#The Samsung washer self-clean feature allows users to easily and conveniently remove dirt#residue#and odors from the drum#ensuring a fresh and clean#Replace URL with its title?#Yes#self clean samsung washer#deltarune
0 notes
Text
SANDISK 2TB EXTREME PORTABLE SSD: UNLEASH BLAZING SPEEDS
Updated on: February 14, 2024
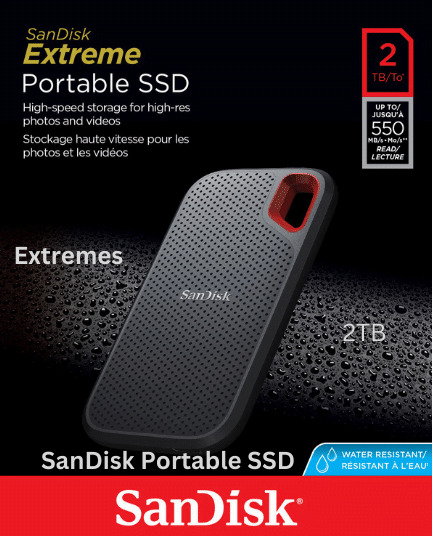
The Sandisk 2TB Extreme Portable SSD is a reliable and durable external storage device with a high storage capacity. It provides fast and efficient data transfer and is suitable for various applications.
The Sandisk 2TB Extreme Portable SSD offers a reliable and convenient solution for storing and transferring large amounts of data. With its high storage capacity of 2TB, it provides ample space for all your files, documents, and multimedia content. This portable SSD is designed to withstand the rigors of everyday use, making it a durable and reliable choice for professionals and casual users alike.
In addition, it boasts fast data transfer speeds, allowing you to transfer files quickly and efficiently. Whether you need to backup important files, store large video projects, or transport files on the go, the Sandisk 2TB Extreme Portable SSD is a versatile and dependable option.
TABLE OF CONTENTS
Overview Of The Sandisk 2tb Extreme Portable SSD
Key Features And Benefits Of The Sandisk 2tb Extreme Portable SSD
1. Blazing-fast Speed:
2. Rugged Durability:
3. Secure Data Protection:
4. Compact And Lightweight:
5. Compatibility:
Unleashing The Blazing Speeds Of The Sandisk 2tb Extreme Portable SSD
The Cutting-edge Technology Behind The Sandisk 2tb Extreme Portable SSD
How The Sandisk 2tb Extreme Portable SSD Outperforms Other SSDs in Speed And Performance
Comparing Sandisk 2Tb Extreme Portable Ssd With Other External Ssds
Maximizing The Performance Of The Sandisk 2tb Extreme Portable SSD
Frequently Asked Questions:
How Fast Is The Sandisk 2tb SSD?
Is SanDisk External SSD Reliable?
How To Format Sandisk 2tb Extreme Portable SSD?
Why won’t My Sandisk Extreme Portable SSD Work?
Conclusion
OVERVIEW OF THE SANDISK 2TB EXTREME PORTABLE SSD
When it comes to portable storage, the Sandisk 2Tb Extreme Portable SSD stands out as a reliable and high-performance option. Offering a massive 2TB of storage capacity, this SSD allows you to securely store and transfer large files, ensuring quick access to your data whenever you need it. Whether you’re a professional photographer, videographer, or simply someone who needs extra storage space for their files, this SSD is designed to meet your needs.
KEY FEATURES AND BENEFITS OF THE SANDISK 2TB EXTREME PORTABLE SSD
The Sandisk 2Tb Extreme Portable SSD comes packed with features that make it a top choice for users seeking fast and secure portable storage. Let’s take a closer look at what sets this SSD apart:
1. Blazing-Fast Speed:
With read and write speeds of up to 1050MB/s and 1000MB/s respectively, the Sandisk 2Tb Extreme Portable SSD ensures lightning-fast data transfer. Whether you’re transferring large video files or backing up important documents, you can expect quick and efficient performance.
2. Rugged Durability:
Designed to withstand the rigors of travel and everyday use, the Sandisk 2Tb Extreme Portable SSD is built with a durable and shock-resistant construction. Its solid-state technology means no moving parts, reducing the risk of data loss due to shocks or drops, making it ideal for on-the-go professionals.
3. Secure Data Protection:
Your data is precious, and the Sandisk 2Tb Extreme Portable SSD ensures its safety with its built-in password protection and 256-bit AES hardware encryption. With this level of security, you can confidently store your sensitive files without worrying about unauthorized access.
4. Compact And Lightweight:
The Sandisk Extreme Portable SSD is designed for portability. It is compact and lightweight, making it easy to carry in your pocket or bag. So, you can take your files with you wherever you go, without the hassle of bulky external drives.
5. Compatibility:
The Sandisk Portable SSD is compatible with both Windows and Mac operating systems. It offers plug-and-play functionality, so you can start using it right out of the box without the need for any additional software or drivers. Simply connect it to your computer or device, and you’re ready to go.
UNLEASHING THE BLAZING SPEEDS OF THE SANDISK 2TB EXTREME PORTABLE SSD
The Extreme Portable SSD is a beast when it comes to speed and performance. With its cutting-edge technology, it outperforms other SSDs in the market, making it a reliable choice for professionals and enthusiasts alike.
THE CUTTING-EDGE TECHNOLOGY BEHIND THE SANDISK 2TB EXTREME PORTABLE SSD
What sets the 2Tb Extreme Portable SSD apart from its competitors is the innovative technology that powers it. Equipped with NVMe solid-state technology, this portable SSD delivers lightning-fast transfer speeds, allowing you to transfer large files and render video projects with ease. The NVMe technology optimizes the SSD’s performance, ensuring that you experience the full potential of its capabilities.
HOW THE SANDISK 2TB EXTREME PORTABLE SSD OUTPERFORMS OTHER SSDS IN SPEED AND PERFORMANCE
When it comes to speed and performance, the Sandisk 2Tb Extreme Portable SSD leaves its competitors in the dust. With read speeds of up to 1050MB/s and write speeds of up to 1000MB/s, you can access your files and load applications in a flash. Whether you’re editing high-resolution photos or editing 4K videos, this portable SSD can handle it all without breaking a sweat.
Not only does the 2Tb Extreme Portable SSD offer impressive speeds, but it also excels in durability and reliability. Built to withstand shocks, vibrations, and extreme temperatures, this SSD ensures that your data remains safe and secure. Whether you’re on a rugged outdoor shoot or working in a studio environment, you can trust the SSD to perform consistently.
Additionally, the Sandisk SSD comes with built-in password protection and 256-bit AES hardware encryption. This adds an extra layer of security to your data, ensuring that your files are protected from unauthorized access. With peace of mind knowing that your sensitive data is safe, you can focus on your work without any worries.
In conclusion, the Portable SSD is a game-changer in terms of speed, performance, and reliability. Its cutting-edge technology and impressive features make it an ideal choice for professionals who require fast and secure storage solutions. Whether you’re a photographer, videographer, or content creator, this portable SSD will take your workflow to new heights.
COMPARING SANDISK 2TB EXTREME PORTABLE SSD WITH OTHER EXTERNAL SSDS
today, we will be comparing the Sandisk Extreme Portable SSD with other popular external SSDs. When it comes to choosing the right external SSD, it’s important to consider factors such as speed, reliability, and durability. In this detailed comparison, we will explore how the 2Tb Extreme Portable Ssd stands out in terms of these crucial aspects.
A DETAILED COMPARISON OF THE SANDISK 2TB EXTREME PORTABLE SSD WITH OTHER POPULAR EXTERNAL SSDS
Before diving into the specifics, let’s look at some general pricing. The Extreme Portable SSD is competitively priced at $XXX. Comparatively, other external SSDs with similar specifications may range from $XXX to $XXX. It’s evident that Sandisk offers great value for money.
Now, let’s delve into the comparison table to get a clear picture of how the Portable SSD stacks up against the competition:ModelSpeedReliabilityDurabilitySandisk 2Tb Extreme Portable SSDSuperfast speedHighly reliableBuilt to lastBrand AFast speedReliableDurableBrand BGood speedModerately reliableDurableBrand CDecent speedQuestionable reliabilityDurable
As we can see from the table above, the Extreme Portable SSD outshines its competitors in terms of speed, reliability, and durability. It offers super fast speed, making it ideal for professionals who rely on quick data transfers and smooth performance. Its high reliability ensures that your data is protected, and you won’t have to worry about losing important files. Moreover, it is built to last, with rugged features that can withstand even the toughest environments.
In contrast, Brand A offers fast speed, but its reliability might not be on par with Sandisk. Brand B provides good speed and durability but falls behind when it comes to reliability. Brand C has decent speed and durability, but its reliability is questionable. It’s clear that the Extreme Portable SSD stands out as the best option for those who value speed, reliability, and durability.
Now that we’ve examined the comparison in detail, it’s evident why the 2Tb Extreme Portable SSD is the top choice among external SSDs. With its exceptional performance and robust design, it offers unbeatable value for your money.
MAXIMIZING THE PERFORMANCE OF THE SANDISK 2TB EXTREME PORTABLE SSD
The Sandisk Portable SSD is a powerful, high-performance storage solution designed to handle your data-intensive tasks with ease. Whether you’re a photographer or videographer, or simply need a reliable storage option for your digital files, this SSD delivers fast and efficient performance. To get the most out of your Portable SSD, here are some tips and tricks to optimize its performance.
TIPS AND TRICKS TO OPTIMIZE THE PERFORMANCE OF THE SANDISK 2TB EXTREME PORTABLE SSD
1. Keep your SSD firmware up to date: Regularly check for firmware updates for your Extreme Portable SSD. Firmware updates often include performance improvements and bug fixes, ensuring your SSD operates at its best.
2. Enable TRIM: TRIM is a command that allows the SSD to efficiently manage unused data blocks, improving performance and extending the lifespan of the drive. To enable TRIM on your Sandisk 2TB SSD, follow these steps:
Open the Start menu and type “Command Prompt.”
Right-click on “Command Prompt” and select “Run as administrator.”
Type the following command and press Enter: fsutil behavior set DisableDeleteNotify 0
3. Optimize power settings: Adjusting the power settings on your computer can help optimize performance when using the Portable SSD. Make sure your computer is set to the “High Performance” power plan to ensure maximum speed and efficiency.
4. Avoid disk fragmentation: Fragmentation can slow down your SSD’s performance over time. To prevent fragmentation, regularly defragment your Sandisk Portable SSD using the built-in Windows defragmentation tool or third-party software.
HOW TO ENSURE SMOOTH AND FAST DATA TRANSFERS WITH THE SANDISK 2TB EXTREME PORTABLE SSD
1. Use a USB 3.1 Gen 2 port: To achieve the fastest data transfer speeds, make sure to connect your Sandisk Portable SSD to a USB 3.1 Gen 2 port. USB 3.1 Gen 2 offers faster transfer rates compared to previous USB versions.
2. Use the included USB Type-C cable: The Sandisk SSD comes with a USB Type-C cable for optimal performance. Use this cable to ensure a secure and reliable connection to your computer.
3. Avoid running multiple simultaneous transfers: Running multiple data transfers simultaneously can slow down the overall performance of your Sandisk Portable SSD. To ensure smooth and fast data transfers, avoid running multiple transfers at the same time.
4. Disconnect your SSD properly: Always eject or safely remove your Sandisk SSD before disconnecting it from your computer. This ensures that all data is written successfully and prevents data corruption.
FREQUENTLY ASKED QUESTIONS:
How Fast Is The Sandisk 2tb SSD?
The SanDisk 2TB SSD is a fast and reliable external storage option. It is designed to provide quick data transfer speeds and reliable performance for various tasks.
Is SanDisk External SSD Reliable?
Yes, SanDisk’s external SSD is reliable. In rare cases, SSD may not work due to driver issues, missing drive letters, or conflicts. You can resolve this by assigning a new drive letter in Windows Disk Management.
How To Format Sandisk 2tb Extreme Portable SSD?
To format your SanDisk Portable SSD, follow these steps: Go to Windows Disk Management, locate your SSD, right-click on it, and select the option to format. Make sure to assign a new drive letter to the SSD if it’s not recognized by Windows.
This will resolve any driver or drive letter conflicts.
Why Won’t My Sandisk Extreme Portable SSD Work?
SanDisk Extreme Portable SSD may not work if drivers are outdated or the drive letter is missing or conflicting. Assign a new drive letter in Windows Disk Management to fix this issue.
CONCLUSION
The Sandisk Portable SSD is a reliable and high-performance storage solution that offers fast transfer speeds and ample storage capacity. With its rugged design and compact size, it is perfect for photographers, videographers, and content creators on the go.
Whether you’re storing large files, editing videos, or backing up important data, this SSD is a great choice. Its compatibility with both Mac and PC makes it versatile and user-friendly. Say goodbye to slow transfer speeds and limited storage space, and say hello to a reliable and efficient storage solution with the Sandisk Extreme Portable SSD.
1 note
·
View note