
Don't wanna be here? Send us removal request.
Statistics
We looked inside some of the posts by feitgemel and here's what we found interesting.
Average Info
Notes Per Post
5
Likes Per Post
5
Reblog Per Post
0
Reply Per Post
0
Time Between Posts
19 days
Number of Posts By Type
Text
17
Last Seen Tumblr Blogs


Fun Fact
The KCSC sent more than 20K requests to delete posts related to prostitution and porn to Tumblr from January to June 2017.
Text

This is a transfer learning tutorial for image classification using TensorFlow involves leveraging pre-trained model MobileNet-V3 to enhance the accuracy of image classification tasks.
By employing transfer learning with MobileNet-V3 in TensorFlow, image classification models can achieve improved performance with reduced training time and computational resources.
We'll go step-by-step through:
Splitting a fish dataset for training & validation
Applying transfer learning with MobileNetV3-Large
Training a custom image classifier using TensorFlow
Predicting new fish images using OpenCV
Visualizing results with confidence scores
You can find link for the code in the blog : https://eranfeit.net/how-to-actually-use-mobilenetv3-for-fish-classifier/
You can find more tutorials, and join my newsletter here : https://eranfeit.net/
Full code for Medium users : https://medium.com/@feitgemel/how-to-actually-use-mobilenetv3-for-fish-classifier-bc5abe83541b
Watch the full tutorial here: https://youtu.be/12GvOHNc5DI
Enjoy
Eran
#Python #ImageClassification #MobileNetV3 #tensorflow #transferlearning
0 notes
Text
🎣 Classify Fish Images Using MobileNetV2 & TensorFlow 🧠
In this hands-on video, I’ll show you how I built a deep learning model that can classify 9 different species of fish using MobileNetV2 and TensorFlow 2.10 — all trained on a real Kaggle dataset! From dataset splitting to live predictions with OpenCV, this tutorial covers the entire image classification pipeline step-by-step.
🚀 What you’ll learn:
How to preprocess & split image datasets
How to use ImageDataGenerator for clean input pipelines
How to customize MobileNetV2 for your own dataset
How to freeze layers, fine-tune, and save your model
How to run predictions with OpenCV overlays!
You can find link for the code in the blog: https://eranfeit.net/how-to-actually-fine-tune-mobilenetv2-classify-9-fish-species/
You can find more tutorials, and join my newsletter here : https://eranfeit.net/
👉 Watch the full tutorial here: https://youtu.be/9FMVlhOGDoo
Enjoy
Eran
#Python #ImageClassification #MobileNetV2
#artificial intelligence#convolutional neural network#deep learning#tensorflow#python#machine learning
0 notes
Text
How to Improve Image and Video Quality | Super Resolution
Welcome to our tutorial on super-resolution CodeFormer for images and videos, In this step-by-step guide,
You'll learn how to improve and enhance images and videos using super resolution models. We will also add a bonus feature of coloring a B&W images
What You’ll Learn:
The tutorial is divided into four parts:
Part 1: Setting up the Environment.
Part 2: Image Super-Resolution
Part 3: Video Super-Resolution
Part 4: Bonus - Colorizing Old and Gray Images
You can find more tutorials, and join my newsletter here : https://eranfeit.net/blog
More info : https://eranfeit.net/upscale-your-images-and-videos-using-super-resolution/
Check out our tutorial here : https://youtu.be/sjhZjsvfN_o&list=UULFTiWJJhaH6BviSWKLJUM9sg
Enjoy
Eran
#OpenCV #computervision #superresolution #SColorizingSGrayImages #ColorizingOldImages
0 notes
Text
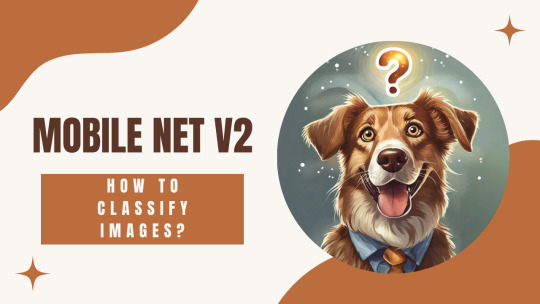
Super-Quick Image Classification with MobileNetV2
How to classify images using MobileNet V2 ? Want to turn any JPG into a set of top-5 predictions in under 5 minutes?
In this hands-on tutorial I’ll walk you line-by-line through loading MobileNetV2, prepping an image with OpenCV, and decoding the results—all in pure Python.
Perfect for beginners who need a lightweight model or anyone looking to add instant AI super-powers to an app.
What You’ll Learn 🔍:
Loading MobileNetV2 pretrained on ImageNet (1000 classes)
Reading images with OpenCV and converting BGR → RGB
Resizing to 224×224 & batching with np.expand_dims
Using preprocess_input (scales pixels to -1…1)
Running inference on CPU/GPU (model.predict)
Grabbing the single highest class with np.argmax
Getting human-readable labels & probabilities via decode_predictions
You can find link for the code in the blog : https://eranfeit.net/super-quick-image-classification-with-mobilenetv2/
You can find more tutorials, and join my newsletter here : https://eranfeit.net/
Check out our tutorial : https://youtu.be/Nhe7WrkXnpM&list=UULFTiWJJhaH6BviSWKLJUM9sg
Enjoy
Eran
#Python #ImageClassification #MobileNetV2
#artificial intelligence#convolutional neural network#deep learning#youtube#tensorflow#python#machine learning
0 notes
Text
Self-Supervised Learning Made Easy with LightlyTrain | Image Classification tutorial
In this tutorial, we will show you how to use LightlyTrain to train a model on your own dataset for image classification.
Self-Supervised Learning (SSL) is reshaping computer vision, just like LLMs reshaped text. The newly launched LightlyTrain framework empowers AI teams—no PhD required—to easily train robust, unbiased foundation models on their own datasets.
Let’s dive into how SSL with LightlyTrain beats traditional methods Imagine training better computer vision models—without labeling a single image.
That’s exactly what LightlyTrain offers. It brings self-supervised pretraining to your real-world pipelines, using your unlabeled image or video data to kickstart model training.
We will walk through how to load the model, modify it for your dataset, preprocess the images, load the trained weights, and run predictions��including drawing labels on the image using OpenCV.
LightlyTrain page: https://www.lightly.ai/lightlytrain?utm_source=youtube&utm_medium=description&utm_campaign=eran
LightlyTrain Github : https://github.com/lightly-ai/lightly-train
LightlyTrain Docs: https://docs.lightly.ai/train/stable/index.html
What You’ll Learn :
Part 1: Download and prepare the dataset
Part 2: How to Pre-train your custom dataset
Part 3: How to fine-tune your model with a new dataset / categories
Part 4: Test the model
You can find link for the code in the blog : https://eranfeit.net/self-supervised-learning-made-easy-with-lightlytrain-image-classification-tutorial/
Full code description for Medium users : https://medium.com/@feitgemel/self-supervised-learning-made-easy-with-lightlytrain-image-classification-tutorial-3b4a82b92d68
You can find more tutorials, and join my newsletter here : https://eranfeit.net/
Check out our tutorial here : https://youtu.be/MHXx2HY29uc&list=UULFTiWJJhaH6BviSWKLJUM9sg
Enjoy
Eran
#Python #ImageClassification #LightlyTrain

0 notes
Text
youtube
Welcome to our tutorial : Image animation brings life to the static face in the source image according to the driving video, using the Thin-Plate Spline Motion Model!
In this tutorial, we'll take you through the entire process, from setting up the required environment to running your very own animations.
What You’ll Learn :
Part 1: Setting up the Environment: We'll walk you through creating a Conda environment with the right Python libraries to ensure a smooth animation process
Part 2: Clone the GitHub Repository
Part 3: Download the Model Weights
Part 4: Demo 1: Run a Demo
Part 5: Demo 2: Use Your Own Images and Video
You can find more tutorials, and join my newsletter here : https://eranfeit.net/
Check out our tutorial here : https://youtu.be/oXDm6JB9xak&list=UULFTiWJJhaH6BviSWKLJUM9sg
Enjoy
Eran
1 note
·
View note
Text
youtube
Object Classification using XGBoost and VGG16 | Classify vehicles using Tensorflow
In this tutorial, we build a vehicle classification model using VGG16 for feature extraction and XGBoost for classification! 🚗🚛🏍️
It will based on Tensorflow and Keras
What You’ll Learn :
Part 1: We kick off by preparing our dataset, which consists of thousands of vehicle images across five categories. We demonstrate how to load and organize the training and validation data efficiently.
Part 2: With our data in order, we delve into the feature extraction process using VGG16, a pre-trained convolutional neural network. We explain how to load the model, freeze its layers, and extract essential features from our images. These features will serve as the foundation for our classification model.
Part 3: The heart of our classification system lies in XGBoost, a powerful gradient boosting algorithm. We walk you through the training process, from loading the extracted features to fitting our model to the data. By the end of this part, you’ll have a finely-tuned XGBoost classifier ready for predictions.
Part 4: The moment of truth arrives as we put our classifier to the test. We load a test image, pass it through the VGG16 model to extract features, and then use our trained XGBoost model to predict the vehicle’s category. You’ll witness the prediction live on screen as we map the result back to a human-readable label.
You can find link for the code in the blog : https://ko-fi.com/s/9bc3ded198
Full code description for Medium users : https://medium.com/@feitgemel/object-classification-using-xgboost-and-vgg16-classify-vehicles-using-tensorflow-76f866f50c84
You can find more tutorials, and join my newsletter here : https://eranfeit.net/
Check out our tutorial here : https://youtu.be/taJOpKa63RU&list=UULFTiWJJhaH6BviSWKLJUM9sg
Enjoy
Eran
#Python #CNN #ImageClassification #VGG16FeatureExtraction #XGBoostClassifier #DeepLearningForImages #ImageClassificationPython #TransferLearningVGG16 #FeatureExtractionWithCNN #XGBoostImageRecognition #ComputerVisionPython
#artificial intelligence#convolutional neural network#tensorflow#deep learning#python#machine learning#Youtube
0 notes
Text
youtube
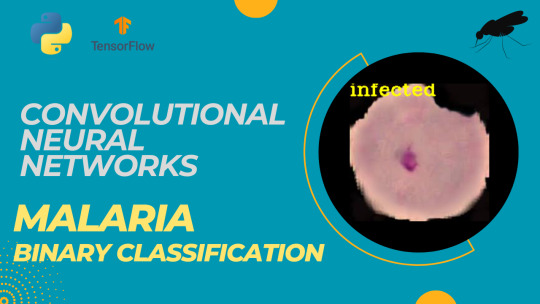
How to classify Malaria Cells using Convolutional neural network
This tutorial provides a step-by-step easy guide on how to implement and train a CNN model for Malaria cell classification using TensorFlow and Keras.
🔍 What You’ll Learn 🔍:
Data Preparation — In this part, you’ll download the dataset and prepare the data for training. This involves tasks like preparing the data , splitting into training and testing sets, and data augmentation if necessary.
CNN Model Building and Training — In part two, you’ll focus on building a Convolutional Neural Network (CNN) model for the binary classification of malaria cells. This includes model customization, defining layers, and training the model using the prepared data.
Model Testing and Prediction — The final part involves testing the trained model using a fresh image that it has never seen before. You’ll load the saved model and use it to make predictions on this new image to determine whether it’s infected or not.
You can find link for the code in the blog : https://eranfeit.net/how-to-classify-malaria-cells-using-convolutional-neural-network/
Full code description for Medium users : https://medium.com/@feitgemel/how-to-classify-malaria-cells-using-convolutional-neural-network-c00859bc6b46
You can find more tutorials, and join my newsletter here : https://eranfeit.net/
Check out our tutorial here : https://youtu.be/WlPuW3GGpQo&list=UULFTiWJJhaH6BviSWKLJUM9sg
Enjoy
Eran
#Python #Cnn #TensorFlow #deeplearning #neuralnetworks #imageclassification #convolutionalneuralnetworks #computervision #transferlearning
1 note
·
View note
Text
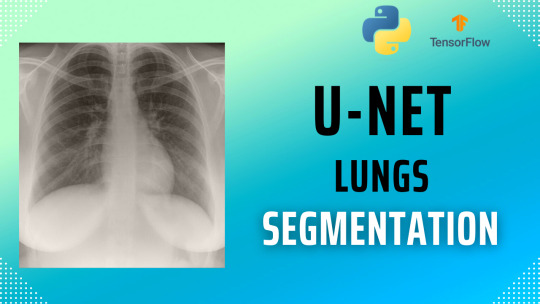
How to segment X-Ray lungs using U-Net and Tensorflow
This tutorial provides a step-by-step guide on how to implement and train a U-Net model for X-Ray lungs segmentation using TensorFlow/Keras.
🔍 What You’ll Learn 🔍:
Building Unet model : Learn how to construct the model using TensorFlow and Keras.
Model Training: We'll guide you through the training process, optimizing your model to generate masks in the lungs position
Testing and Evaluation: Run the pre-trained model on a new fresh images , and visual the test image next to the predicted mask .
You can find link for the code in the blog : https://eranfeit.net/how-to-segment-x-ray-lungs-using-u-net-and-tensorflow/
Full code description for Medium users : https://medium.com/@feitgemel/how-to-segment-x-ray-lungs-using-u-net-and-tensorflow-59b5a99a893f
You can find more tutorials, and join my newsletter here : https://eranfeit.net/
Check out our tutorial here : https://youtu.be/-AejMcdeOOM&list=UULFTiWJJhaH6BviSWKLJUM9sg
Enjoy
Eran
#Python #openCV #TensorFlow #Deeplearning #ImageSegmentation #Unet #Resunet #MachineLearningProject #Segmentation
#artificial intelligence#convolutional neural network#deep learning#tensorflow#python#machine learning
0 notes
Text
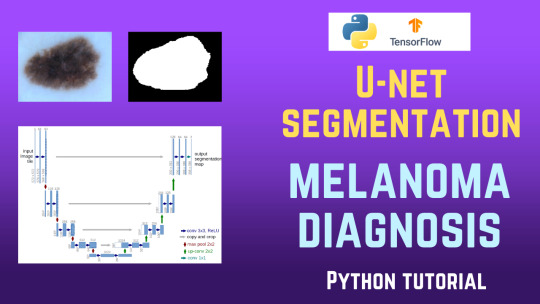
Medical Melanoma Detection | TensorFlow U-Net Tutorial using Unet
This tutorial provides a step-by-step guide on how to implement and train a U-Net model for Melanoma detection using TensorFlow/Keras.
🔍 What You’ll Learn 🔍:
Data Preparation: We’ll begin by showing you how to access and preprocess a substantial dataset of Melanoma images and corresponding masks.
Data Augmentation: Discover the techniques to augment your dataset. It will increase and improve your model’s results Model Building: Build a U-Net, and learn how to construct the model using TensorFlow and Keras.
Model Training: We’ll guide you through the training process, optimizing your model to distinguish Melanoma from non-Melanoma skin lesions.
Testing and Evaluation: Run the pre-trained model on a new fresh images . Explore how to generate masks that highlight Melanoma regions within the images.
Visualizing Results: See the results in real-time as we compare predicted masks with actual ground truth masks.
You can find link for the code in the blog : https://eranfeit.net/medical-melanoma-detection-tensorflow-u-net-tutorial-using-unet/
Full code description for Medium users : https://medium.com/@feitgemel/medical-melanoma-detection-tensorflow-u-net-tutorial-using-unet-c89e926e1339
You can find more tutorials, and join my newsletter here : https://eranfeit.net/
Check out our tutorial here : https://youtu.be/P7DnY0Prb2U&list=UULFTiWJJhaH6BviSWKLJUM9sg
Enjoy
Eran
#Python #openCV #TensorFlow #Deeplearning #ImageSegmentation #Unet #Resunet #MachineLearningProject #Segmentation
#artificial intelligence#convolutional neural network#deep learning#youtube#tensorflow#python#programming#machine learning#code
0 notes
Text

This tutorial provides a step-by-step guide on how to implement and train a U-Net model for persons segmentation using TensorFlow/Keras.
The tutorial is divided into four parts:
Part 1: Data Preprocessing and Preparation
In this part, you load and preprocess the persons dataset, including resizing images and masks, converting masks to binary format, and splitting the data into training, validation, and testing sets.
Part 2: U-Net Model Architecture
This part defines the U-Net model architecture using Keras. It includes building blocks for convolutional layers, constructing the encoder and decoder parts of the U-Net, and defining the final output layer.
Part 3: Model Training
Here, you load the preprocessed data and train the U-Net model. You compile the model, define training parameters like learning rate and batch size, and use callbacks for model checkpointing, learning rate reduction, and early stopping.
Part 4: Model Evaluation and Inference
The final part demonstrates how to load the trained model, perform inference on test data, and visualize the predicted segmentation masks.
You can find link for the code in the blog : https://eranfeit.net/u-net-image-segmentation-how-to-segment-persons-in-images/
Full code description for Medium users : https://medium.com/@feitgemel/u-net-image-segmentation-how-to-segment-persons-in-images-2fd282d1005a
You can find more tutorials, and join my newsletter here : https://eranfeit.net/
Check out our tutorial here : https://youtu.be/ZiGMTFle7bw&list=UULFTiWJJhaH6BviSWKLJUM9sg
Enjoy
Eran
#Python #openCV #TensorFlow #Deeplearning #ImageSegmentation #Unet #Resunet #MachineLearningProject #Segmentation
0 notes
Text
youtube
U-net Medical Segmentation with TensorFlow and Keras (Polyp segmentation)
This tutorial provides a step-by-step guide on how to implement and train a U-Net model for polyp segmentation using TensorFlow/Keras.
The tutorial is divided into four parts:
🔹 Data Preprocessing and Preparation In this part, you load and preprocess the polyp dataset, including resizing images and masks, converting masks to binary format, and splitting the data into training, validation, and testing sets.
🔹 U-Net Model Architecture This part defines the U-Net model architecture using Keras. It includes building blocks for convolutional layers, constructing the encoder and decoder parts of the U-Net, and defining the final output layer.
🔹 Model Training Here, you load the preprocessed data and train the U-Net model. You compile the model, define training parameters like learning rate and batch size, and use callbacks for model checkpointing, learning rate reduction, and early stopping. The training history is also visualized.
🔹 Evaluation and Inference The final part demonstrates how to load the trained model, perform inference on test data, and visualize the predicted segmentation masks.
You can find link for the code in the blog : https://eranfeit.net/u-net-medical-segmentation-with-tensorflow-and-keras-polyp-segmentation/
Full code description for Medium users : https://medium.com/@feitgemel/u-net-medical-segmentation-with-tensorflow-and-keras-polyp-segmentation-ddf66a6279f4
You can find more tutorials, and join my newsletter here : https://eranfeit.net/
Check out our tutorial here : https://youtu.be/YmWHTuefiws&list=UULFTiWJJhaH6BviSWKLJUM9sg
Enjoy
Eran
#Python #openCV #TensorFlow #Deeplearning #ImageSegmentation #U-net #Resunet #MachineLearningProject #Segmentation
0 notes
Text
youtube
👁️ CNN Image Classification for Retinal Health Diagnosis with TensorFlow and Keras! 👁️
How to gather and preprocess a dataset of over 80,000 retinal images, design a CNN deep learning model , and train it that can accurately distinguish between these health categories.
What You'll Learn:
🔹 Data Collection and Preprocessing: Discover how to acquire and prepare retinal images for optimal model training.
🔹 CNN Architecture Design: Create a customized architecture tailored to retinal image classification.
🔹 Training Process: Explore the intricacies of model training, including parameter tuning and validation techniques.
🔹 Model Evaluation: Learn how to assess the performance of your trained CNN on a separate test dataset.
You can find link for the code in the blog : https://eranfeit.net/build-a-cnn-model-for-retinal-image-diagnosis/
You can find more tutorials, and join my newsletter here : https://eranfeit.net/
Check out our tutorial here : https://youtu.be/PVKI_fXNS1E&list=UULFTiWJJhaH6BviSWKLJUM9sg
Enjoy
Eran
#Python #Cnn #TensorFlow #deeplearning #neuralnetworks #imageclassification #convolutionalneuralnetworks #computervision #transferlearning
#artificial intelligence#convolutional neural network#deep learning#tensorflow#youtube#python#machine learning#programming#code#Youtube
1 note
·
View note
Text
📽️ In our latest video tutorial, we will create a dog breed recognition model using the NasLarge pre-trained model 🚀 and a massive dataset featuring over 10,000 images of 120 unique dog breeds 📸.
What You'll Learn:
🔹 Data Preparation: We'll begin by downloading a dataset of of more than 20K Dogs images, neatly categorized into 120 classes. You'll learn how to load and preprocess the data using Python, OpenCV, and Numpy, ensuring it's perfectly ready for training.
🔹 CNN Architecture and the NAS model : We will use the Nas Large model , and customize it to our own needs.
🔹 Model Training: Harness the power of Tensorflow and Keras to define and train our custom CNN model based on Nas Large model . We'll configure the loss function, optimizer, and evaluation metrics to achieve optimal performance during training.
🔹 Predicting New Images: Watch as we put our pre-trained model to the test! We'll showcase how to use the model to make predictions on fresh, unseen dinosaur images, and witness the magic of AI in action.
Check out our tutorial here : https://youtu.be/vH1UVKwIhLo&list=UULFTiWJJhaH6BviSWKLJUM9sg
You can find link for the code in the blog : https://eranfeit.net/120-dog-breeds-more-than-10000-images-deep-learning-tutorial-for-dogs-classification/
You can find more tutorials, and join my newsletter here : https://eranfeit.net/
Enjoy
Eran
#Python #Cnn #TensorFlow #deeplearning #neuralnetworks #imageclassification #convolutionalneuralnetworks #computervision #transferlearning
0 notes
Text
youtube
Welcome to our comprehensive Dinosaur Image Classification Tutorial!
We’ll learn how use Convolutional Neural Network (CNN) to classify 5 dinosaur categories , based on 200 images :
- Data Preparation: We'll begin by downloading a curated dataset of dinosaur images, neatly categorized into five distinct classes. You'll learn how to load and preprocess the data using Python, OpenCV, and Numpy, ensuring it's perfectly ready for training.
- CNN Architecture: Unravel the secrets of Convolutional Neural Networks (CNNs) as we dive into their structure and discuss the different layers—convolutional, pooling, and fully connected. Learn how these layers work together to extract meaningful features from images.
- Model Training : Using Tensorflow and Keras , we will define and train our custom CNN model. We'll configure the loss function, optimizer, and evaluation metrics to achieve optimal performance during training.
- Evaluation Metrics: We'll evaluate our trained model using various metrics like accuracy and confusion matrix to measure its efficiency and robustness.
- Predicting New Images: Finally , We put our pre-trained model to the test! We'll showcase how to use the model to make predictions on fresh, unseen dinosaur images, and witness the magic of AI in action.
You can find more tutorials, and join my newsletter here : https://eranfeit.net/
Check out our tutorial here : https://youtu.be/ZhTGcw0C3Dk&list=UULFTiWJJhaH6BviSWKLJUM9sg
Enjoy
Eran
#Python #openCV #TensorFlow #Deeplearning #DeepLearningTutorial #Cnn #neuralnetworks #ConvolutionalNeuralNetworks
#artificial intelligence#convolutional neural network#deep learning#python#tensorflow#machine learning#Youtube
1 note
·
View note
Text
youtube
This tutorial provides a step-by-step guide on how to implement and train a Res-UNet model for skin Melanoma detection and segmentation using TensorFlow and Keras.
What You'll Learn :
- Building Res-Unet model : Learn how to construct the model using TensorFlow and Keras.
- Model Training: We'll guide you through the training process, optimizing your model to distinguish Melanoma from non-Melanoma skin lesions.
- Testing and Evaluation: Run the pre-trained model on a new fresh images .
Explore how to generate masks that highlight Melanoma regions within the images.
Visualizing Results: See the results in real-time as we compare predicted masks with actual ground truth masks.
You can find more tutorials, and join my newsletter here : https://eranfeit.net/
Check out our tutorial here : https://youtu.be/5inxPSZz7no&list=UULFTiWJJhaH6BviSWKLJUM9sg
Enjoy
Eran
#Python #openCV #TensorFlow #Deeplearning #DeepLearningTutorial #Unet #Resunet #MachineLearningProject #Segmentation
#artificial intelligence#convolutional neural network#deep learning#python#tensorflow#machine learning#Youtube
0 notes
Text
youtube
In this tutorial in Python and OpenCV, we'll explore how to find differences in similar images.
Using OpenCV functions, we'll extract two similar images out of an original image, and then Using HSV, masking and more OpenCV functions, we'll create a new image with the differences.
Finally, we will extract and mark theses differences over the two original similar images .
You can find more similar tutorials in my blog posts page here : https://eranfeit.net/blog/
check out our video here : https://youtu.be/03tY_OF0_Jg&list=UULFTiWJJhaH6BviSWKLJUM9sg
Enjoy,
Eran
#Python #OpenCV #ObjectDetection #ComputerVision #findcontours
#artificial intelligence#convolutional neural network#deep learning#python#tensorflow#youtube#machine learning#programming#Youtube
1 note
·
View note